How to Make a Cardboard Sign: A Complete DIY Guide with Pro Tips
Knowing how to make a cardboard sign lets you create custom, eye-catching displays without spending much money. You can design, cut, and decorate signs that fit any occasion using simple materials and basic tools. Start by gathering your cardboard, cutting tools, paints, and mounting supplies for a smooth workflow.
Key Takeaways
- Use 2×3 foot cardboard sheets from craft stores for an affordable, manageable sign base.
- Cut ½ centimeter slits spaced 2 inches apart to create clean, detailed letter edges.
- Leave a 2-inch gap at the bottom of your cutout shapes to slide in mounting sticks easily.
- Choose acrylic paint and a basic brush set for bright, quick-drying colors that bond well to cardboard.
- Add weather resistance by sealing your painted sign with clear acrylic spray to extend outdoor life.
- Attach wooden sticks between 3 to 8 feet long to customize your sign’s height and visibility.
What Materials and Tools Do You Need for Cardboard Signs?

Cardboard signs work best when you pick sturdy, flat cardboard such as corrugated cardboard, which has a fluted middle layer that adds strength. Single-wall cardboard around 1/8 inch thick is usually enough for basic signs, while double-wall offers extra durability for outdoor or larger signs. Lightweight cardboard like pizza boxes can work for small indoor signs but might bend easily. Avoid thin and flimsy cardboard that tears or warps quickly.
Cutting cardboard requires sharp, reliable tools. A utility knife with a fresh blade paired with a cutting mat provides clean, straight edges. Heavy-duty scissors can work for smaller cuts and simple shapes but won’t be as precise. If children or beginners are involved, safety scissors designed for craft use are a safer option, although they may not cut thick cardboard easily.
Paints and markers should be chosen for their ability to stick well and resist smearing on cardboard. Acrylic paint is ideal because it dries fast and remains vibrant. Latex house paint can be a budget-friendly alternative, usually costing around $10 to $15 per gallon and lasting for several projects. Avoid tempera paints since they are water-soluble and run when wet. For detailed lettering or outlines, paint pens or permanent markers like Sharpies offer good control and clean lines.
Sourcing materials cost-effectively helps keep your project affordable. Use cardboard scraps from shipping boxes, food packaging inserts, or local grocery stores willing to give away clean boxes. Paints can often be found at discount stores, or leftover house paint can be repurposed. Construction paper and craft supplies to decorate can be purchased in bulk from dollar stores, sometimes costing as little as $1 to $3 per pack. When buying adhesives, stick glue or craft glue usually costs under $5 and works well for lightweight materials; for heavier or outdoor signs, stronger glues or double-sided tape might be necessary. Here is a checklist of essential and optional materials for making cardboard signs:
- Corrugated cardboard sheet (around 12″ x 18″), free from packaging or $1, $3 per sheet at craft stores
- Utility knife with extra blades and a cutting mat for precise edges
- Acrylic paint or latex house paint, starting at about $10 per gallon
- Paint pens or permanent markers like Sharpies for crisp details
- Glue stick or craft glue under $5 for attaching letters or decorations
- Colorful construction paper for cut-out lettering or accents, $1, $3 per pack
- Safety scissors or child-friendly scissors for beginners
You can improve safety and ease by pre-cutting cardboard shapes and supervising children when using sharp tools or paint. Mark the cardboard with a pencil to plan cuts and paste areas. Lightweight signs may only need glue and markers, while more complex designs benefit from layering construction paper or painting. Clean edges and bold, contrasting colours create signs that stand out and hold up to casual handling.
How to Design Your Cardboard Sign for Maximum Impact

Designing a cardboard sign starts with clear planning of the message, layout, lettering, colors, and any graphics. The goal is to make your sign easy to read and visually appealing from a distance while reflecting your individual style. Thoughtful choices in these areas help your sign stand out and communicate effectively.
Planning Your Message and Layout
Decide exactly what you want your sign to say and how to arrange the text and images. Keep the message brief to maintain clarity; signs work best when they can be read quickly, often from a distance. Think about the size of your sign and how each element will fit within it to maintain balance.
Arrange the text so the most important words are larger or more prominent. Allow enough white space around words and images so the design doesn’t look crowded. Sketch your layout on scrap paper first, testing different word orders and placements until it feels balanced and readable.
Use a word processing program to type out your message in different fonts and sizes. Print these drafts and temporarily tape them to your cardboard to preview the final look before committing.
- Write your full message clearly on scrap paper.
- Decide on the size of your cardboard and mark margins for spacing.
- Arrange words and images roughly on paper to test layout.
- Choose which words should be emphasized with larger size or bold styles.
- Use a computer program to format your message for precise sizing.
- Print and cut out sample letters to place on cardboard for approval.
- Adjust layout as needed to improve balance and flow.
Keep your message concise; too many words make a sign hard to read from afar.
Choosing Fonts and Styles
Bold, simple fonts work best on cardboard signs since they deliver a message clearly. Sans-serif fonts like Arial or Helvetica produce clean shapes that are easier to paint or trace. Avoid thin or overly decorative fonts that might blur or look cluttered once painted.
For a personal touch, hand-lettering in block capitals ensures readability and allows for creative flair. Use thick markers or a paintbrush with broad strokes to keep letters uniform and visible. Decorative cursive or script fonts can be used sparingly for accents but don’t rely on them for main text.
Painting letters generally delivers more vibrant, lasting color than markers but takes longer and requires drying time. Markers offer speed and ease, ideal for quick signs but might fade outdoors faster.
| Lettering Style | Pros | Cons |
|---|---|---|
| Stencil Letters | Uniform size, neat edges | Requires extra materials, less personal |
| Freehand Block | Quick, personal style | Requires steady hand, less uniform |
| Painted Letters | Vibrant, weather-resistant | Needs drying time, more effort |
| Marker Letters | Fast, easy for beginners | Less durable, can smudge |
Test your lettering style on a scrap piece of cardboard to see if the size and style stay readable at a glance.
Selecting Colors and Contrast
Choose colors that sharply contrast between the background and the letters to boost visibility, such as black letters on white or light brown cardboard. Bright colors like red, orange, or yellow for letters can grab attention against darker backgrounds.
Paint offers stronger, more consistent color coverage than markers, especially for larger areas or graphic elements. Use glossy or satin finishes to add brightness, but matte paints reduce reflection that can make a sign hard to read in direct sunlight.
Consider your sign’s environment and lighting. Outdoors in daylight calls for high contrast and bold colors, while indoor signs can use subtler palettes. Keep the number of colors limited, two to three, to avoid clutter and focus attention.
Avoid low-contrast combinations like red letters on brown cardboard; they become difficult to read quickly.
Using Stencils and Templates
Stencils help create neat, uniform letters and graphics, especially if you plan to make several signs with the same design. You can buy pre-made stencils for $5 to $15 or make your own by printing letters or shapes on thick paper, cutting them out, and tracing onto cardboard.
Templates allow easy transfer of complex graphics or precise fonts onto your cardboard. Place the printed template on the cardboard, then use a pencil to shade the back of the paper heavily. Tape it in place and trace over the front; the pencil shading transfers a faint outline for you to paint or color over.
Use painter’s tape or masking tape carefully to secure stencils while painting, preventing paint bleed under edges. Remove stencils while the paint is still tacky to get crisp lines, then touch up with a fine brush if needed.
- Decide if you want to use purchased stencils or create your own.
- Print letters or graphics at the desired size.
- Cut out stencil shapes neatly with a craft knife.
- Place and tape the stencil securely on cardboard.
- Paint or marker color inside the stencil carefully.
- Remove stencil while paint is slightly wet for sharp edges.
- Touch up any smudges or gaps with a fine brush.
Using stencils speeds up repeated designs but requires patience and steady hand for best results.
What Steps to Follow When Cutting and Assembling Your Sign
Cutting and assembling a cardboard sign requires careful steps to keep clean edges, secure layers, and proper mounting options. Following these steps helps produce a sign that looks professional, lasts longer, and is safer to handle and display.
Marking and Safely Cutting Cardboard
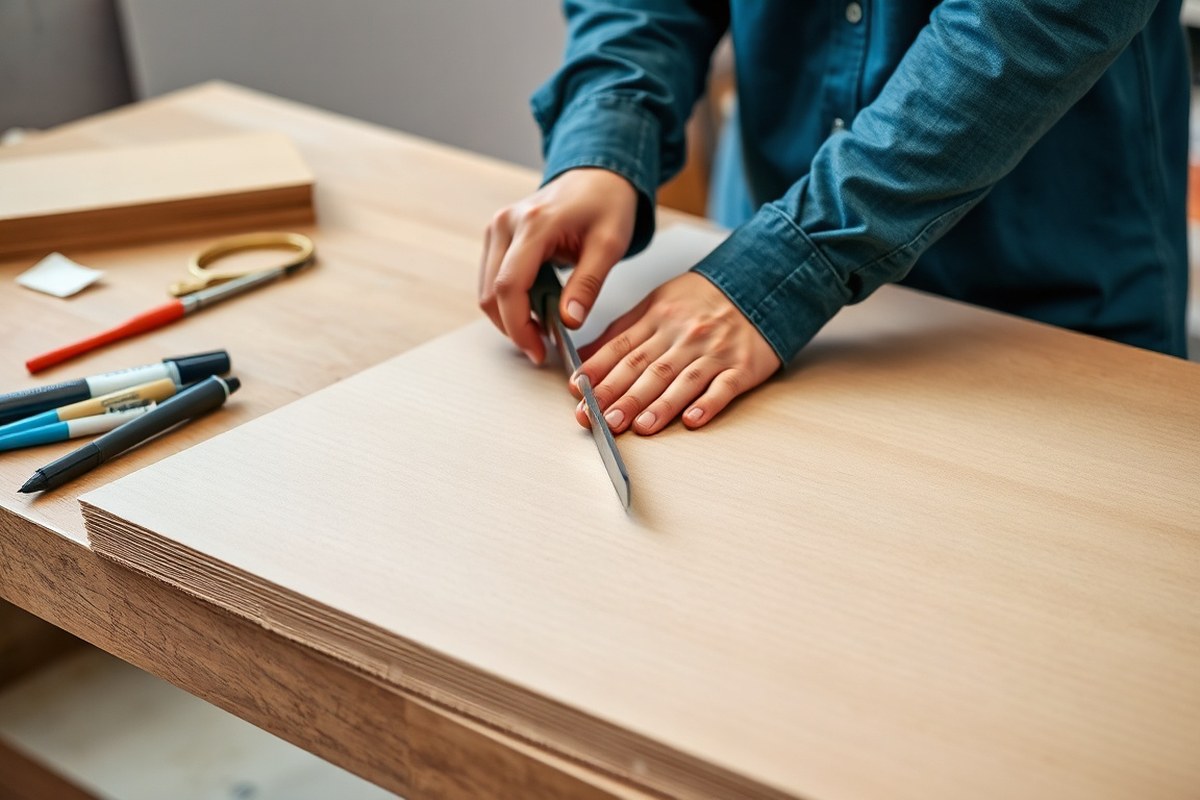
Start by drawing your design with a pencil on the cardboard; this gives a clear guide for cutting. Use a sharp utility knife or craft blade rather than scissors for cleaner, straighter cuts. Place the cardboard on a cutting mat or a flat, firm surface to protect your work area and keep the blade from slipping. Cutting slowly and with moderate pressure reduces the chance of tearing the cardboard fibers.
Keep your fingers clear of the blade path and cut away from your body to avoid accidents. Replace blades as soon as they dull, since a dull blade causes jagged cuts and requires more force. To get smooth edges, snip off any uneven spots after the initial cut or use fine sandpaper lightly on the corners and edges.
Gluing and Layering Pieces
Gluing two or more layers of cardboard improves durability and prevents bending. White glue or wood glue work well for this because they dry clear and hold firmly. Apply a thin, even layer of glue near the edges of the cardboard pieces to avoid warping.
Before gluing shapes or letters, arrange them to see how they fit and overlap if needed. Leave about 2 inches (5 cm) at the bottom edge of letters or shapes unglued if you want to slide a pole or stick in later. Press glued pieces firmly together and place a heavy object on top to keep them from curling while drying, which takes about 30 minutes.
Creating Mounts and Slots
Prepare openings for poles or hangers by making small, neat slots in the cardboard. Cut two parallel slits about the width of the pole, spacing them so the pole fits snugly without tearing the cardboard. Insert the pole gently by prying open the bottom unglued layers and sliding the stick inside all the way to the top for good support.
Reinforce edges around these openings by adding extra layers of glued cardboard or small strips of tape over stress points. Using masking tape cut with scissors (instead of ripping) keeps these reinforcements looking clean and helps prevent fraying. To hang your sign instead of using a pole, drill small holes near the top corners and attach hooks, nails, or wire.
- Draw your design lightly on cardboard with a pencil.
- Place cardboard on a cutting mat to protect surfaces.
- Use a sharp utility knife to cut along the pencil lines steadily.
- Arrange cut pieces to check fit and positioning.
- Spread a thin layer of white or wood glue near edges on one piece.
- Press the glued piece to another and hold under weight to dry for 30 minutes.
- Cut parallel slits near the bottom unglued edge for inserting a mounting pole.
- Slide the pole inside the opened layers, pushing it to the top edge for stability.
Which Paints and Decorating Techniques Work Best on Cardboard?
The best paints for cardboard signs are water-based acrylic paints because they dry quickly, are easy to clean up, and apply smoothly without warping the cardboard. Markers and pens can also work, especially for smaller or detailed areas, but preparing the surface and sealing it afterwards helps prevent bleeding and makes the design last longer. Let each painted layer dry fully, usually about 20 to 30 minutes, before adding more paint or details. Applying a clear sealer keeps your sign protected from moisture and wear.
Choosing the Right Paint for Cardboard
Acrylic paint is ideal for cardboard because it adheres well and dries within 20 to 30 minutes, avoiding the long wait times and strong odors of oil-based paints. Acrylics cost around $5 to $10 per small can, making them affordable for DIY projects. Craft paint can be a cheaper alternative, but acrylics generally provide better coverage and durability. Avoid oil-based paints as they can cause the cardboard to warp, take days to dry, and require harsh solvents for cleanup.
Preparing Cardboard for Painting
Start by applying a white base coat of acrylic paint to the cardboard. This seals the surface, blocks the brown color from showing through, and provides a smooth background for your design. Use a broad, flat brush and cover the surface evenly. Let the base coat fully dry, usually 20 to 30 minutes in a room with moderate temperature and low humidity. Preparing your work area with a drop cloth protects surfaces from spills and dust.
To avoid warping, keep the cardboard flat during painting by placing it on a sturdy, flat surface. Use thin, even layers of paint rather than thick coats that soak into and soften the cardboard. Let each layer dry completely before adding another to prevent bleeding, smudging, or peeling.
Using Markers and Pens Instead of Paint
Permanent markers and paint pens offer a simpler way to add text and details on cardboard. They work best on the white base coat because the color shows up clearly and doesn’t soak into the cardboard fibers. Before using markers, lightly draw your design with a pencil to avoid mistakes.
Markers dry almost instantly, which speeds up the process but can bleed through thin cardboard if you press too hard or color multiple layers. Testing on scrap cardboard lets you control how much pressure and layering to use.
Drying Times and Layering Techniques
Plan about 20 to 30 minutes drying time between paint layers, depending on your environment’s temperature and humidity. Cooler and more humid conditions extend drying times. Patience ensures paint doesn’t blend unintentionally or cause the cardboard to warp from excess moisture.
Start with the background and let it dry fully before painting text or smaller details. Use thin coats to keep the cardboard stiff and flat. For intricate designs, wait for each painted section to dry to the touch to avoid smearing your work.
Sealing and Protecting Your Cardboard Sign
After painting, apply a clear sealer or varnish to protect your sign. Water-based acrylic sealers are best because they dry quickly, don’t smell strongly, and won’t warp the cardboard. Clear spray sealants cost around $5 to $10 for a small can and provide a smooth finish that resists moisture and fading.
Spray sealers are easiest to apply evenly; hold the can 6 to 12 inches from the surface and use light, sweeping motions. Let the first coat dry completely, about 15 minutes, before applying a second coat for better protection. Avoid oil-based or thick polyurethane sealers that can soak into and deform the cardboard.
How to Make Cardboard Signs Weather-Resistant and Durable
Cardboard signs are prone to deterioration outdoors if exposed to rain, wind, and sun. Moisture can cause warping or disintegration, while sunlight fades colors and weakens the material. Wind can bend or tear unreinforced signs. To improve your sign’s lifespan outdoors, several protective coatings and reinforcement methods are essential.
Waterproofing is key for rain resistance. Use a clear acrylic spray sealer designed for outdoor use, applying 2-3 thin coats in a well-ventilated area. Each coat should dry for about 30 minutes before the next application. Another option is a brush-on exterior-grade polyurethane; apply it evenly and let it cure for 24 hours to form a solid protective layer. Avoid heavy layers that cause soggy surfaces or bubbling.
Reinforcing the cardboard structure helps it endure wind and handling. Affix duct tape or packing tape along all edges and corners to prevent peeling and tearing. Adding a backing of thin plywood or foam board glued securely to the back gives the sign more rigidity and resistance to bending. For small signs, layering two pieces of cardboard glued together can also increase strength.
- Spray exterior acrylic sealer, 2-3 coats, 30 minutes drying each
- Brush-on outdoor polyurethane, dry 24 hours before use
- Seal edges and corners with duct or packing tape
- Attach a rigid backing like thin plywood or foam board for strength
- Use exterior-grade paint under sealers to maintain vibrancy
- Store signs in a flat, dry place to avoid warping between uses
Sunlight causes fading and brittleness. Applying UV-protectant sprays after paint and sealer can help maintain colour longer. These sprays usually cost $10 to $20 and require similar drying times as sealers. Avoid leaving signs exposed during extreme heat or rainstorms to keep damage minimal.
For long-term outdoor use, cardboard is not ideal despite these precautions. Materials like treated wood, metal, or plastic signage resist weather far better and often cost more upfront but save replacement time. Cardboard signs work best for short-term outdoor events or sheltered areas.
Do not skip sealing your sign completely, moisture that seeps in on unsealed edges will quickly ruin the cardboard.
When not displaying your sign, store it flat in a dry space away from sunlight to maintain shape and colour. Check for peeling tape or cracked sealers and reapply coatings if necessary before reuse. Proper maintenance can extend the life of your cardboard sign outdoors by weeks or months, depending on weather conditions.
What Are Easy Mounting and Hanging Options for Cardboard Signs?
Attaching or hanging your cardboard sign properly affects its visibility and durability, so picking the right method matters. You can mount signs using poles, strings, hooks, or adhesives depending on where and how you want to display it.
To attach a pole, select a flat or round pole tall enough to hold your sign above eye level, especially useful for outdoor events or crowded places. First, place the sign against the pole, then apply glue to the pole side of the cardboard. Wrap 2-inch (5cm) masking tape around the glued edges to secure the attachment while leaving the middle part un-taped to avoid wrinkles or bubbles. Let the glue dry fully before holding or moving the sign, this prevents slipping or damage.
Hanging your sign on walls or fences works well with strings, hooks, or adhesive strips. To hang with string, punch two holes near the top corners of the sign, reinforce the holes with extra tape or cardboard patches to prevent tearing, then tie a sturdy rope through them. Removable hooks on smooth surfaces offer damage-free hanging but bear in mind they best support lightweight signs around a few pounds.
Adhesives like command strips or double-sided tape are quick, easy options ideal for indoor lightweight signs. Avoid heavy or outdoor signs for these unless you use weatherproof tape. Make sure surfaces are clean and dry before applying adhesive to ensure better grip. Below is a comparison of different mounting options, showing advantages and drawbacks to help you decide what fits your project best.
| Mounting Option | Pros | Cons |
|---|---|---|
| Poles (flat or round) | Raises sign above crowd, sturdy if glued & taped well | Needs drying time, bulkier to carry |
| Strings/rope | Rustic look, adjustable hanging height, easy on fences | Requires hole reinforcement, can tear without support |
| Removable hooks | Leaves no marks, good for smooth walls | Limited weight support, less reliable on textured surfaces |
| Command strips/double-sided tape | Simple installation, good for lightweight indoor signs | Not weatherproof, may damage delicate surfaces |
| Metal brackets | Strong and durable, professional appearance | More complex installation, requires hardware |
To reinforce strap holes, cut wide enough holes (about 3/8 inch or 1cm) to fit the string or hooks, then tape over the hole edges with masking tape from both sides. This keeps the cardboard from tearing under weight or wind. Always check the sign’s weight and the mounting environment before choosing your method. For heavier signs, poles or metal brackets usually hold up better than adhesives.
Secure hanging also depends on the surface. On rough or porous surfaces, hooks may not stick well, so drilling or tied mounts work better. On smooth indoor walls, command strips can hold up for weeks but remove them slowly at a 180-degree angle to avoid surface damage. Planning these mounting details helps you display your sign safely and effectively.
What Creative Personalization Ideas improve Cardboard Signs?
Adding creative touches to your cardboard sign can make it stand out and better suit its purpose. Building texture is one way to do this. You can glue raised letters made from extra cardboard pieces, foam, or fabric to create a 3D effect. Embossed designs work well too; press shapes or patterns into the cardboard with blunt tools before decorating. These techniques give your sign visual interest and tactile appeal.
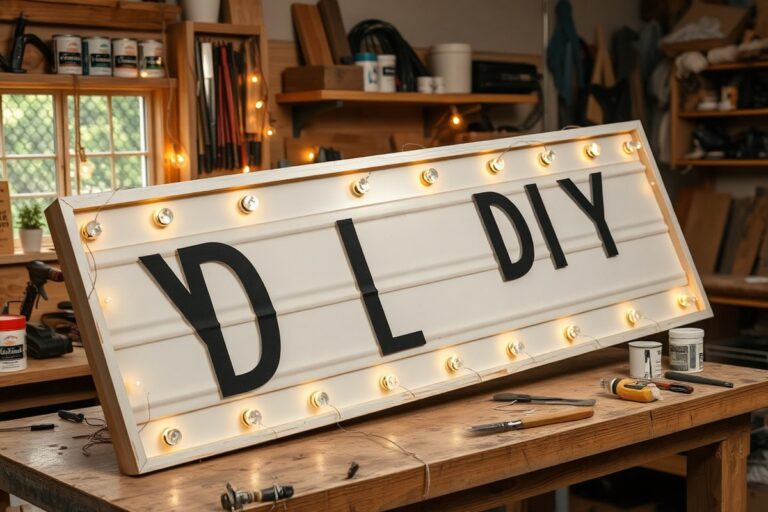
Lights bring attention to signs, especially in dim environments or at night. Small LED or fairy lights are great since they produce little heat and use minimal power. Cut small slits around your letters and insert LEDs to illuminate them from within. Secure light strings with tape wrapped halfway over them onto the back of the sign to keep everything neat and prevent lights from shining where you don’t want. You can hide excess cord with black tape for a clean look.
Decorative items such as glitter, reflective tape, or natural elements add flair and thematic touches. Reflective tape reflects ambient light, which is helpful outdoors or in low light. Natural items like twigs or leaves work perfectly for eco-friendly and rustic signs. Combining these with paints and sealants that are environmentally safe allows you to craft a sustainable, attractive sign.
For holiday or event themes, choose decorations that match the vibe, red and green glitter for Christmas, pastel cutouts for birthdays, or elegant ribbons for weddings. Personalizing with names, dates, or quotes improve the sign’s connection to the occasion.
- Attach 3D elements using hot glue or strong craft glue for durability.
- Wrap fairy lights around letters or insert LEDs through paper slits for internal lighting.
- Use double-sided tape to secure lightweight decorations like ribbons or small ornaments.
- Apply reflective tape behind lettering for visibility at night.
- Incorporate natural items glued down for a textured, eco-friendly look.
- Choose paints and sealants labeled as eco-friendly to avoid harmful chemicals.
- Match colors and decorations to the specific theme or holiday for relevance and impact.
These personalization steps usually take an extra one to two hours depending on complexity and material dryness times. A budget of about $10 to $20 covers lights, tapes, and natural decorations in small quantities. Quality results have neat attachments without loose ends, even light diffusion, and decorations that complement but don’t overpower the sign’s message. Watch out for overuse of glue which can warp the cardboard, and avoid heavy or wet items that may weigh it down or cause damage.
Common Mistakes and How to Fix Them in Cardboard Sign Making
Cardboard signs often face issues like tearing, warping, and paint smudges that can ruin your project. Tears usually happen when cutting tools are dull or too much pressure is used. Fix tears by applying clear tape over the back side of the cardboard to reinforce the area, then trim ragged edges carefully. Warping is caused by moisture or applying thick paint layers too quickly. To prevent it, use thin coats of paint and let each dry completely before adding more, typically 30 minutes to an hour per layer depending on humidity.
Uneven painting or smudges usually occur when the paint is too thick or the brush strokes are heavy. Correct these by gently sanding rough spots with fine sandpaper once the paint is dry, then repaint with lighter coats. Color bleeding often comes from using wet paint on unsealed cardboard. Seal the surface first with a spray primer to keep colors crisp and stop the material from soaking in too much paint, which also reduces fading over time.
Signs that won’t stand or hang properly often lack a stable base or strong mounting points. For freestanding signs, attach a cardboard or lightweight wood stand at the back with hot glue or double-sided tape. If hanging, reinforce holes with grommets or extra tape to prevent tearing. Design or sizing mistakes can be fixed by carefully trimming excess edges or adding border frames that cover uneven parts.
- Use a sharp utility knife and a metal ruler for clean cuts.
- Apply thin paint layers and allow full drying time between coats.
- Seal cardboard with spray primer before painting.
- Reinforce tears and holes with clear tape or grommets.
- Create strong mounts using glue, tape, or lightweight supports.
- Sand rough paint spots lightly before repainting.
- Check design size against cardboard before cutting.
Always allow your paint to dry fully and avoid rushing the process to prevent smudges and warping.
Repairing cardboard damage takes minimal cost and tools: clear tape or hot glue are inexpensive and readily available. The key to durable, professional-looking signs is patience during drying and precise cutting. Keeping a test piece of cardboard handy lets you experiment with paints and sealers before working on your main sign, saving time and frustration.
Step-by-Step Action Plan
Follow these steps to create a cardboard sign that looks great and lasts. Each phase guides you through making your sign effective and durable.
- Before you start: Gather all your materials and tools, including cardboard, paint, brushes, and mounting supplies. Knowing you have everything ready means the project will move smoothly.
- Day 1: Design your sign on paper or digitally, focusing on clear, bold text and simple graphics. Your design works if it’s easy to read from a distance.
- Day 2: Carefully cut out your cardboard pieces using a sharp utility knife and ruler for straight lines. Smooth edges indicate clean cuts and good preparation for painting.
- Day 3: Apply base paint and let it dry completely before adding text or decorations. The base coat should cover all visible cardboard surfaces evenly.
- Day 4: Add lettering and details using acrylic paint or permanent markers. Sharp, legible letters mean your message will stand out.
- Day 5: Seal your sign with a weather-resistant spray or varnish to protect it from moisture. Test by lightly touching the surface; it should feel dry and slightly slick.
- Day 6: Attach mounting or hanging hardware such as string, hooks, or stakes. Your sign should hold securely without bending.
- After 1 week: Check your sign outdoors to see how it holds up against weather and adjust the protective coating if needed.
Frequently Asked Questions
Can You Reuse Cardboard from Packaging for Making Signs?
Yes, cardboard from boxes like Sun Basket inserts works well for signs. It’s sturdy and often has handy holes for hanging, saving you time and money on materials.
How Long Does It Usually Take to Complete a Cardboard Sign Project?
Making a cardboard sign can take 30 minutes to 2 hours, depending on design complexity. Simple signs are quicker, while detailed marquee styles require more time.
Is It Better to Use Markers or Paint for Lettering on Cardboard Signs?
Paint tends to give a more vibrant, lasting look on cardboard, but markers are faster and less messy. Choose based on how polished you want your sign to appear and how much detail your design needs.
Can You Make Cardboard Signs Safe for Outdoor Use Without Special Sealants?
You can improve outdoor durability by using waterproof paints and clear spray sealers. These protect the cardboard from moisture but won’t make it completely weatherproof for long periods outdoors.
What’s a Simple Way to Hang a Cardboard Sign Without Hardware?
Use the holes in the cardboard and tie string through them to hang your sign easily. This method avoids needing extra tools and keeps your setup quick and flexible.
How Can Construction Paper Letters Help with Sign Layout?
Construction paper letters let you arrange your message before gluing, ensuring proper fit and spacing. This step helps avoid mistakes and gives a preview of the final look.
Key Points to Remember
Making a cardboard sign that looks good and lasts takes careful steps, from design to protection. Taking time to apply paint and seal your work makes a big difference in durability. Start by sketching your design clearly and gathering all materials. This will set you up for a smooth and successful project.