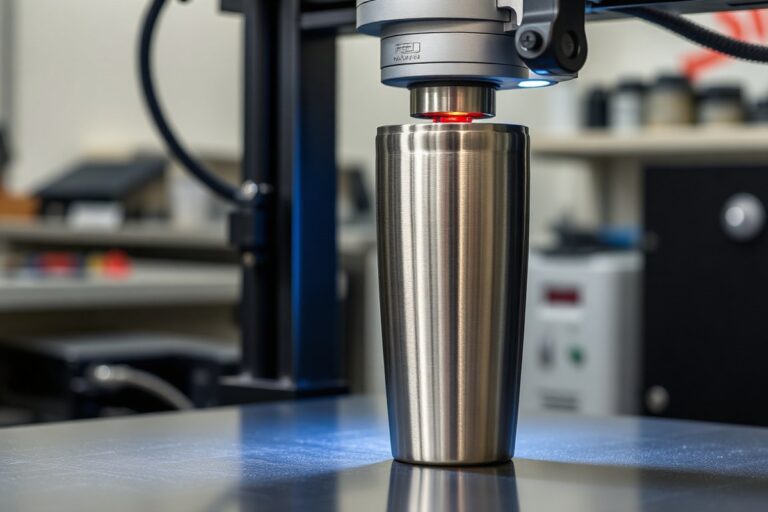
How to Use a Rotary Attachment for Laser Engraving: Complete Setup & Tips
Using a rotary attachment with your laser engraver lets you precisely engrave cylindrical or rounded items by rotating the workpiece during the process. Connect the rotary securely, align it properly, and set the diameter and placement of your object for accurate results. Starting with a centered setup helps ensure even engraving without distortion.
Key Takeaways
- Securely connect the rotary attachment to your laser engraver via the 4-pin port before starting the setup.
- Center the rotary attachment in the work area with the motor facing the machine’s rear to maintain stability.
- Measure your workpiece’s diameter accurately to set rotation parameters and avoid sizing errors in your design.
- Check that rollers or jaw chuck can rotate 360 degrees freely to allow continuous engraving around the object.
- Choose the rotary attachment type, roller, chuck, or 4-wheel, based on your workpiece’s diameter and length.
- Limit engraving circumference on items like mugs with handles to prevent interference with the laser head or enclosure.
How to Use a Rotary Attachment with Your Laser Engraver

Using a rotary attachment with your laser engraver lets you engrave curved objects by replacing the standard Y-axis movement with rotary motion. This change means your laser head remains fixed along the X-axis, while the rotary attachment spins the object so the laser can engrave around its surface. Getting started involves physically connecting the rotary attachment, securing your workpiece, and calibrating your machine before engraving. Proper setup ensures the laser rotates the object precisely, matching the diameter you set in your software for accurate, smooth designs. Follow these steps to begin engraving with a rotary attachment:
- Turn off and unplug your laser engraver. This prevents accidents while installing the rotary attachment.
- Insert the rotary attachment into the machine’s rotary-axis slot. Use clamps or magnets on the engraving table to secure it firmly without movement.
- Connect the rotary attachment to the laser engraver via the designated 4-pin rotary port. The cable link is important since it controls the rotary motor and reads position data.
- Place your cylindrical workpiece, such as a tumbler or bottle, onto the rotary attachment securely. Make sure the object fits within the height constraints under the laser head and is centered to avoid engraving errors.
- Power on the laser and start the homing process. The rotary will automatically rotate to the 0° starting position, aligning the system for accurate engraving.
- Set the correct diameter and length of your workpiece in the laser software. Accurate measurements ensure the rotary axis spins the object with the right circumference for your design.
- Position the laser head over the middle of the object and focus the laser normally. This step ensures your engraving is sharp across the curved surface.
- Configure your engraving settings, replacing the Y-axis coordinates with rotary settings before starting the job. The software will then use the rotary axis to move your workpiece instead of the usual Y-axis movement.
These steps apply to most rotary attachments, including versatile models like the xTool RA2 Pro or Thunder Laser rotary add-ons. Taking the time to secure your attachments and measure the workpiece diameter properly helps avoid uneven engravings or skipped areas. Inadequate setup might cause the laser to engrave off-center or distort curved designs. Once the rotary axis and software match correctly, you’re ready to engrave objects like cups, bottles, or rings smoothly and accurately.
Types of Rotary Attachments and Their Best Uses

Rotary attachments come mainly in three types: chuck, roller, and sphere. Each suits different shapes and sizes of objects and offers varying levels of control and convenience. Choosing the right type depends on your project’s material shape, size, and detail requirement.
Chuck Rotary Attachment Features
The chuck rotary attachment clamps irregularly shaped or complex objects such as wine glasses, bottles, rings, and wristbands. It can securely hold items up to about 8.6 inches long and 3.1 inches in diameter, making it ideal for larger or uniquely shaped workpieces. The adjustability of the jaws allows precise gripping to prevent slipping during engraving.
This type often requires setting the exact object diameter or circumference in your laser software for accurate laser movement and layout. Adjusting steps per rotation and aligning the rotary axis with the machine’s axis are important to avoid distorted or tilted engraving results. The chuck rotary excels in detailed, full-wrap engraving on cylindrical, tapered, or oddly shaped pieces.
Roller Rotary Attachment Advantages
Roller rotary attachments use wheels or rollers that rotate the object as it sits horizontally on them, supporting a wide range of tapered or angled cylindrical items. While less precise than chuck attachments, rollers accommodate uneven or conical shapes more easily. This flexibility makes them suitable for engraving on mugs, glasses, or uneven bottles where clamping is impractical or might damage the object.
Roller attachments generally handle smaller diameters, depending on the number and position of rollers, and require careful leveling to avoid image distortion. The setup process involves measuring the object’s diameter or circumference and setting this value accurately in your control software. The roller system does not physically clamp, so ensuring the object stays steady during engraving is important to prevent slipping or blurring.
Sphere and Specialty Rotary Modules
Sphere rotary modules are specialized tools designed for perfectly round objects like balls or spheres, where traditional chuck or roller systems cannot maintain proper rotation. These attachments use custom molds or cradles matching the sphere’s diameter for stable positioning and smooth rotation.
Specialty modules may also include tailored holders for flanged or oddly shaped parts hard to fix with standard rotary devices. They require custom measurement and calibration for the object diameter and laser steps per rotation to achieve accurate results. Such modules are less common and might cost more due to their niche applications. Below is a comparison table to clarify primary features and suitable uses for each rotary attachment type:
| Rotary Type | Best For | Max Object Size | Grip Method | Advantages | Drawbacks |
|---|---|---|---|---|---|
| Chuck | Wine glasses, bottles, rings, wristbands | Up to 8.6″ length, 3.1″ diameter | Adjustable jaw clamps | Precise control; full-wrap engraving; clamps uneven shapes | Setup more complex; requires alignment and diameter measurement |
| Roller | Tapered items, mugs, uneven bottles | Varies by roller size; generally smaller diameters | Rotating rollers support object | Handles angled shapes; easy setup | Less precise; risk of slipping; requires leveling |
| Sphere | Round balls and specialty shapes | Depends on custom cradle size | Custom molds or cradles | Stable rotation for spheres; precise position | Specialty use; higher cost; needs custom calibration |
Like with all rotary attachments, accurately measuring the object’s diameter or circumference and inputting this data in your laser control program is essential to avoid stretching or compressing your design.
Practical tip: Always recheck the rotary’s alignment with the laser’s axis and the actual object diameter before engraving to avoid distorted or tilted artwork.
Installing and Aligning Your Rotary Attachment Properly
Securely installing and properly aligning your rotary attachment is essential for accurate engraving on cylindrical or round objects. The rotary axis must be parallel to the laser’s main movement axis, usually the X-axis, and firmly fixed to prevent wobbling. Following these steps ensures smooth rotation and precise engraving results.
Disconnecting and Removing Existing Components
Start by powering off your laser engraver and unplugging it from the outlet to avoid electrical hazards. Remove any existing attachments or fixtures from the machine’s bed, including the standard flat engraving surface or any prior rotary setups. For machines like the xTool M1, detach the rotary attachment’s connection cable before removing the baseplate or rotary device. Clearing the working area makes space for the rotary unit and avoids interference during installation.
Wear protective gloves if needed while handling hardware components to prevent cuts or pinching. Also, check your laser engraver’s manual for any model-specific disassembly instructions to avoid damage to components.
Mounting the Rotary Attachment and Securing It
Before mounting, confirm the rotary attachment is compatible with your laser model and controller. Compatibility affects connection pins, software recognition, and mechanical fitting. After verification, position the rotary attachment in the designated slot or on the machine’s bed, matching mounting holes precisely.
Use the supplied screws or clamps to fix the rotary firmly. Avoid overtightening, which can damage threads, or under-tightening, leaving the rotary loose. A secure mount prevents vibration and maintains engraving accuracy. Gently mount your workpiece on the rotary’s jaws or rollers and clamp it firmly to stop movement during engraving.
- Confirm your laser machine is powered off and unplugged.
- Remove any existing attachments or plates from the machine’s bed.
- Detach rotary connection cables, if present (for models like xTool M1).
- Position the rotary attachment on the machine baseplate or designated mount area.
- Align mounting holes and secure the rotary using manufacturer-supplied hardware.
- Attach the workpiece to the rotary and firmly clamp it.
- Carefully connect rotary attachment cables to the machine controller.
Aligning and Leveling for Accurate Rotary Movement
Proper alignment ensures the rotary axis runs parallel to the laser’s movement axis, commonly the X-axis, minimizing distortion during engraving. Place the laser head directly above the rotary’s centerline and use a square or alignment tool to check parallelism between the rotary shaft and the machine’s horizontal axis.
Adjust mounting positions or shim the rotary attachment baseplate if the axis deviates. The rotary must also be level to prevent uneven engraving depth; use a small carpenter’s level on the rotary housing to check. Make incremental adjustments until the level bubble centers within tolerance.
Good alignment eliminates workpiece wobble and improves engraving precision, while misalignment creates blurred or skewed images. Always double-check alignment before starting a job, especially after changing or re-installing the rotary unit. Follow recommended safety steps like powering off the machine and securing loose cables to avoid injury during adjustments.
Measuring and Setting Up Workpiece Diameter and Placement
Measure the diameter of your cylindrical workpiece exactly at the point where you plan to engrave. Position the object so its highest point aligns with the laser’s focus area, then enter this diameter and placement info into your rotary software. This ensures the engraving design wraps correctly without distortion or misalignment.
How to Measure Diameter Accurately
Use a caliper or measuring tape to find the diameter at the exact engraving spot, not just the widest or narrowest part of the object. For example, if engraving a bottle neck that tapers, measure about where your design will sit. Measure in millimeters or inches, depending on your software’s preference. Avoid guessing or using a general size since even slight errors affect rotary rotation calculations and engraving size.
For workpieces with handles or uneven shapes, measure only the smooth cylindrical section to be engraved. Ensure the object can rotate freely without hitting handles by repositioning it or avoiding those areas. Accurate diameter measurement directly translates to precise rotary steps, so double-check your numbers before entering them in the software.
Setting Up Placement and Position
Place the object securely inside the rotary attachment to avoid slipping or wobbling. Align the highest point of the material under the laser’s red positioning light; this is where the focus will be sharpest. Close the machine lid gently to keep the setup stable. The engraving should start at the designed seam position, which you can set inside the software, to avoid engraving over uneven or awkward transition areas.
Confirm the object’s height and diameter in the software’s rotary setup screen. This lets you preview the design orientation and size relative to the actual rotary path before starting. Adjust the artwork’s start and end points if necessary to fit the usable circumference. For tapered cylinders, match the engraving width with the diameter measured at that point rather than the body’s full circumference.
Dealing with Tapered or Irregular Shapes
When your object’s diameter changes along its length, such as a tapered bottle or vase, measure where your engraving will actually run. For a bottle neck narrower than the body, measure diameter and position at the neck if that’s where you intend to engrave. This ensures the software calculates correct wrap-around distances and rotary steps-per-rotation values.
Focus settings matter more with tapered shapes because the laser’s depth of field is narrow. Position the piece so the highest point within the engraving zone aligns perfectly with the laser focus spot. This avoids blurred details caused by uneven surfaces. Uneven shapes or handles outside the engraving area should be excluded from diameter calculations, and the piece must be secured to prevent wobbling.
Checklist for Accurate Diameter and Placement Setup
First, use precise tools like calipers to measure the diameter at the engraving zone. Second, position the object so its highest point is under the laser’s focus indicator. Third, input that exact diameter and height into your rotary engraving software. Fourth, confirm the design length fits within the measured circumference, adjusting seam start/end as needed. Finally, secure the workpiece to prevent movement during engraving.
For example, engraving a 3-inch-diameter aluminum can requires measuring the diameter at the can’s center body where the artwork sits, aligning the can so its highest point lines up with the red laser spot, then entering 3 inches in the software diameter field along with the design height. Preview and adjust the engraving placement before starting the job to avoid gaps or overlaps.
Adjusting Laser Speed, Power, and Steps per Rotation Settings
Adjust laser power, speed, and rotary-specific settings carefully to get the best engraving quality on curved objects. Start by setting the laser power very low, around 15% or less for a 10W laser, to test the engraving direction without damaging the material. This helps confirm the mirroring and orientation settings in your software are correct before running a full job. Gradually increase power after direction tests, depending on the material and how deep or dark you want the engraving. For delicate materials like thin glass or soft wood, slower speeds around 200 to 500 millimeters per minute improve precision, while tougher materials like coated metals or thicker acrylic may require faster speeds near 800 to 1000 millimeters per minute.
Setting the steps per rotation accurately matters a lot for tidy rotary engraving. This setting tells the laser’s software how many motor steps it takes for the rotary attachment to complete one full turn of your workpiece. Begin at about 3,000 steps per rotation as a baseline, a common recommended value. To calculate or adjust this in your software, measure your object’s circumference by multiplying its diameter by π (pi, about 3.1416). Next, check or enter this number so the rotary motor turns precisely with the laser movement. Incorrect values cause distorted or stretched designs. In software like LightBurn, you can find a rotary setup section where you input your steps per rotation number manually. If your design looks compressed or warped horizontally, try slightly increasing or decreasing this number, then test again.
Running a test engrave is important to avoid mistakes. Cover your material, for example a tumbler or glass bottle, with masking tape or paper to protect the surface. Use the lowest power setting to perform the full engraving move as a dry run. After this, examine the path for proper direction, wrapping, and clearance from the laser head or accessories. Tools like Frame or Border preview modes let you see the engraving borders on your cylindrical object in the software without firing the laser. This preview safeguards against collisions and confirms your design fits within the rotary’s range. Make sure the rotary handle and object don’t collide with any parts of your laser’s enclosure or table, which could limit full 360-degree engraving.
Always run a low-power test engrave with a protective covering on your workpiece to verify engraving direction and settings before starting the final job.
Handling Different Materials and Shapes with the Rotary Attachment
Rotary attachments work well with many materials, including wood, plastic, metal, glass, and ceramics. Their versatility comes from adjustable speed and compact design, allowing you to try engraving delicate materials like glass or thin wood by setting the speed low, around 10,000 RPM. Higher speeds suit harder surfaces like metal. Exactly how you handle each material affects your results. For instance, glass and ceramics require lower speeds and gentle pressure to avoid cracking or shattering. Wood and plastic can handle faster rotation and higher laser power for deeper engravings.
Engraving uneven or tapered shapes such as bottles, glasses, or mugs needs careful preparation. First, stabilize the object by leveling it horizontally to prevent wobbling during rotation. If the shape tapers, adjust the rotary attachment’s jaws or supports to hold the object firmly without flexing. Avoid placing handles into the engraving path on cups or glasses, as they can cause uneven rotation and misaligned engraving. When working with tapered bottles, position the narrow end lower so the taper aligns with the rotary axis, maintaining consistent laser focus.
Some limitations come from material thickness and shape complexity. Very thick or oddly shaped objects may not hold securely or rotate evenly, causing skipping or blurry engraving. For example, the roller-style rotary can handle items up to about 2.87 inches in diameter and 10.39 inches in length. Objects beyond these measurements might require custom supports or a different rotary model. Another constraint is laser focus distance, which varies with the object’s curvature; moving the laser too far from the ideal focal point causes blur or shallow engraving. Testing each new item with a small pattern helps identify the right speed, power, and positioning.
For wood, using medium laser power and moderate speed with the rotary attachment creates deep, clear engravings without burning. For glass, set the speed low and power carefully, you can create frosted effects or shallow marks, but applying too much heat risks cracks. Metal engraving with rotary tools often requires a thin cutting wheel rather than just the laser, to achieve precise cuts or textures. Plastic typically engraves cleanly but can melt if power is too high, so start with gentle settings and adjust.
The key to success is experimenting with small test pieces to fine-tune speed, power, and focus before engraving the final product. Most rotary attachments allow you to adjust speed and grip quickly, so you can match workflow to material and shape requirements. The added precision from rotary setups is especially valuable for businesses creating custom glasses or bottles, where consistent detail and neat alignment make a strong impression. Keep the rotary centered in your laser’s working area with the motor facing a consistent direction to ensure smooth rotation and optimal engraving results.
Common Problems and How to Fix Rotary Engraving Issues
Engraving that appears stretched or compressed usually results from using an incorrect workpiece diameter or rotary calibration setting. The laser software calculates how far the piece rotates based on the diameter you input; if this number is off, the design won’t wrap correctly. Make sure you measure the diameter precisely with calipers and enter that number into your rotary settings. Recalibrate if needed by engraving a test pattern and adjusting motor steps per rotation until the design matches the expected dimensions.
Slippage, uneven engraving, or wobbling often happen when the workpiece is not secured firmly or rotates irregularly. The piece must turn around a stable axis without drifting or pulling the rotary attachment out of alignment. Check that the chuck or clamps hold the piece tightly but not so tight that they cause damage. Also, inspect the rotary for smooth rotation and no loose parts.
- Measure the workpiece diameter accurately before setup.
- Tighten chuck or clamps to prevent slippage, ensuring even pressure.
- Confirm the rotary attachment is installed square to the laser’s axis.
- Use a test engraving pattern to check for distortion or misalignment.
- Adjust motor steps per rotation based on test pattern results.
- Ensure no sideways movement of the rotary or workpiece during engraving.
- Check for any wobble in the rotary mechanism and tighten or replace parts if needed.
Tilted or blurry patterns typically indicate the rotary attachment is installed at an angle relative to the laser’s axis, or the workpiece shifts during engraving. The rotary should be perfectly perpendicular to the laser beam to render straight, clean lines. To correct this, loosen the rotary mounting, adjust its position to align squarely, then retighten securely. If patterns remain blurry, reduce laser speed and power, and verify the focus is set precisely on the curved surface of the workpiece.
Maintaining and Caring for Your Rotary Attachment
Keeping your rotary attachment clean and well-lubricated is essential for smooth operation and longevity. After each engraving session, wipe off dust, debris, and leftover material using a soft cloth or a small brush. Avoid using water or harsh chemicals, which could damage the components. If your rotary attachment has moving parts like bearings or gears, apply a small drop of light machine oil or lubricant specified in your user manual. This prevents wear and reduces friction during use.
Check the attachment regularly for signs of wear or damage. Focus on the connection ports, rotating mechanisms, and any rubber grips or inserts. These parts may need replacement after extended use to maintain stable engraving accuracy. Using a hex key, tighten any loose screws or bolts to prevent wobbling during operation. A loose rotary attachment can cause poor quality engraving and possible damage to the laser or workpiece.
- Clean the rotary attachment with a soft cloth or brush after every use
- Apply manufacturer-recommended lubricant to moving parts every 5 to 10 hours of operation
- Inspect rubber grips and inserts for wear and replace yearly or as needed
- Tighten screws with a hex key before each engraving session
- Keep the connection cable and ports free from dust to ensure stable electrical contact
- Store the attachment in a dry, dust-free environment away from direct sunlight
- Use the user guide card for specific maintenance intervals and troubleshooting
Proper storage protects the rotary attachment from dust accumulation and moisture that can cause corrosion or electrical issues. Wrap the connection cable loosely to avoid bending or fraying, and keep all parts in a designated case or box. Avoid placing heavy objects on the attachment to prevent mechanical damage. Periodic maintenance reduces the risk of sudden malfunctions and maintains engraving consistency.
Never apply excessive lubricant; too much oil can attract dust and grit, leading to premature wear of the rotary parts.
Step-by-Step Action Plan for Your First Rotary Engraving Project
Follow these steps to successfully complete your first project using a rotary attachment on your laser engraver. Each phase ensures your setup is accurate and the engraving quality meets your expectations.
- Before you start: Choose the correct type of rotary attachment based on the shape and size of your workpiece. Confirm it fits securely on your engraver and matches the object’s diameter.
- Day 1: Install and align the rotary attachment carefully, using the provided adjustment tools or screws. Test alignment by rotating the workpiece manually and checking for wobble or uneven gaps.
- Day 2: Measure your workpiece diameter precisely with calipers and enter this measurement into your laser software to set the correct steps per rotation. Verify the software recognizes the rotary device and diameter settings.
- Day 3: Set laser parameters like speed, power, and frequency specific to your material and rotary engraving. Start with recommended settings from your laser’s manual and perform a small test engraving.
- Day 4: Inspect the test engraving for sharpness and consistency. Adjust speed or power as needed if the engraving is too light, burnt, or uneven around the circumference.
- Week 1: Try engraving on irregular shapes only after mastering cylinders. Adjust and secure the workpiece firmly to prevent movement and repeat tests until satisfied with the results.
- After 2 weeks: Perform maintenance on the rotary attachment by cleaning the rollers and checking for any loose parts. This will maintain consistent engraving quality over time.
Frequently Asked Questions
What Is a Rotary Tool and How Does It Differ from a Rotary Attachment?
A rotary tool is a handheld power device with interchangeable bits for cutting, grinding, or carving. A rotary attachment connects to a laser engraver, enabling it to engrave cylindrical or round objects by rotating them during the engraving process.
How Do I Properly Operate a Rotary Tool for Detailed Engraving Work?
Operate a rotary tool by securely attaching the correct bit, setting it to the right speed, and holding it steadily while guiding it across the workpiece. Maintain consistent pressure and avoid overheating the material for the best results.
Can I Use a Rotary Brush with My Laser Rotary Attachment, and How?
A rotary brush is mainly for cleaning or polishing, not engraving; it should not be used directly with a laser rotary attachment. Use it separately on your engraved pieces to clean residue without damaging the laser engravings.
Is a Rotary Shaver Suitable for Use with a Laser Rotary Attachment?
No, a rotary shaver is a grooming device unrelated to laser engraving or rotary attachments. They serve completely different functions and should not be combined.
What Safety Precautions Should I Take When Using a Rotary Attachment with My Laser Engraver?
Always wear safety goggles and ensure proper ventilation. Secure the workpiece tightly, avoid loose clothing, and never leave the laser unattended while running to prevent accidents or damage.
How Do I Know If My Workpiece Fits the Rotary Attachment’s Size Limits?
Measure the diameter of your cylindrical object and check it against your rotary attachment’s range, usually up to 3 to 4 inches. Oversized or oddly shaped items may not fit or rotate properly.
Key Points to Remember
Using a rotary attachment extends your laser engraver’s capabilities to cylindrical and irregular objects with precision. Start with careful measurement and alignment to avoid common problems. Begin your next project by selecting the right material and rotary type to build your confidence and skill with rotary engraving.