
How to Make a Christmas Sign by Hand: A Complete Guide with Pro Tips
How to make a Christmas sign by hand starts with choosing the right wood base, gathering basic tools, and applying simple painting and stenciling techniques. Using materials like a 1-by-6-inch piece of wood cut to 18 inches provides a sturdy, manageable surface for your design. Begin by sanding the wood smoothly to ensure paint adheres well and stencils stay crisp.
Key Takeaways
- Use a 1×6-inch wood piece cut to 18 inches as the ideal size for a hand-painted Christmas sign.
- Sand wooden surfaces before painting to prevent paint from peeling and to create an even base.
- Choose paint like Fusion Mineral Paint for good coverage and durability on wood signs.
- Wait 24 hours between each coat of paint to allow proper drying and a smooth finish.
- Frame the sign with 1×2-inch wood pieces cut slightly longer than the base for added structure.
- Stencils or vinyl cutouts created with a Cricut machine help achieve clean, professional lettering.
What Materials and Tools Are Needed for a Handmade Christmas Sign

To start a handmade Christmas sign, select a sturdy base material such as pine, cedar, or reclaimed pallet wood. These woods provide a rustic, festive look and are easy to paint on. Choose wood that’s smooth enough for stenciling but maintains some character, like chippy barn wood, if you want a farmhouse style. The size depends on your display area, but common dimensions range from 12 by 24 inches to larger signs around 18 by 36 inches.
Pick high-quality acrylic craft paints for vibrant, durable colors that dry quickly. Red, white, green, gold, and black are classic choices for Christmas. Use flat or angled brushes for filling in stencils and finer detail brushes for accents or lettering. Mylar stencils designed for DIY Christmas signs make it easier to achieve clean edges with holiday-themed fonts and shapes. Funky Junk’s Old Sign Stencils, for example, offer a variety of seasonal designs updated each year. Here’s a checklist of essential materials and tools:
- Wood base (pine, cedar, pallet wood, or reclaimed barn wood)
- Acrylic paints in Christmas colors
- Various paintbrushes (flat, angled, detail brushes)
- Mylar holiday stencils or printable vinyl stencils
- Sandpaper for smoothing wood surfaces
- Pencil and ruler for measuring and marking
- Masking tape or painter’s tape to hold stencils in place
Safety gear should not be overlooked. Wear a dust mask when sanding wood to avoid inhaling sawdust. Gloves can protect your hands from paint and splinters. Ensure you work in a well-ventilated area to avoid fumes from the paint. If using power tools to cut or sand your wood base, safety glasses and ear protection are necessary.
Having the right supplies promotes a polished final product. Using smooth, clean wood prevents paint bleeding and rough spots. Choosing appropriate stencil materials and securing them well prevents smudges. Proper brushes and paint types give you control over detail and coverage. Also, observing safety precautions keeps your work area clean and injury-free, letting you focus on crafting your festive decoration.
How to Select and Prepare Wood and Other Bases for Your Sign
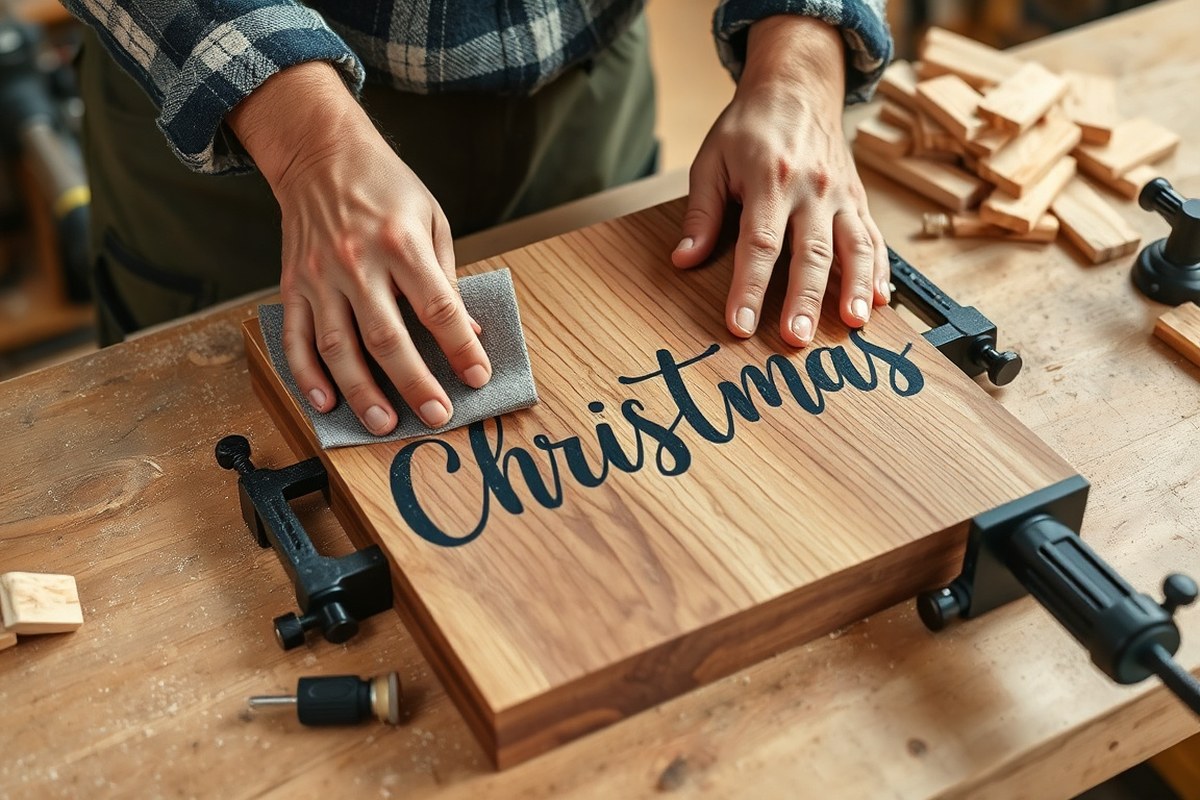
Choosing the right base for your Christmas sign starts with considering the look you want and where you’ll display it. Wood is the most common choice for its warmth and rustic charm, but canvas and metal offer good alternatives if you prefer lighter weight or different textures. Wood gives a traditional feel and takes paint well, while canvas is easier to handle and metal adds durability for outdoor use.
| Material | Texture | Best Uses | Estimated Cost (per 12×18 inch piece) |
|---|---|---|---|
| Wood (e.g., pine, cedar) | Natural grain, can be smooth or rough | Indoor and outdoor signs, rustic or farmhouse style | $5, $15 |
| Canvas | Textured but soft | Indoor signs, light or modern designs | $10, $20 |
| Metal (thin sheet or recycled) | Smooth or slightly textured, cold to touch | Outdoor signs, modern or industrial look | $15, $25 |
For wood, pick pieces that are unfinished and free from major cracks. A 1×6 inch board cut to 18 inches works well for most small to medium signs. If you need to cut the wood yourself, use a handsaw or power saw, measuring twice before cutting to keep lines straight. Always cut on a stable surface and clamp the wood if possible for safety.
Before painting, prepare the wood by sanding it thoroughly. Start with medium grit sandpaper (P100, 150) to smooth rough surfaces and remove any splinters. Move to fine grit (P180, 220) to create a smooth base perfect for painting. Use a sanding block to keep even pressure and avoid gouges. After sanding, wipe off dust with a damp cloth and let dry completely.
Wear a dust mask while sanding to avoid inhaling wood particles and work in a well-ventilated space.
Metal and canvas require different prep. Metal should be cleaned with soap and water, dried, and possibly lightly sanded with ultra-fine grit (P320) to help paint adhesion. Canvas usually needs no sanding but should be stretched tight on a frame and primed with gesso if you want your paint to last longer.
Proper prep impacts the final look and durability of your sign. Rough or poorly sanded wood often leads to blotchy paint finish and splinters. Canvas without priming can soak up paint unevenly. Metal without cleaning may cause paint to peel. Taking the time to select and prepare your base carefully sets you up for a successful project that looks and feels professional. Prices vary, but basic wood boards are usually the most wallet-friendly starting point.
Step-By-Step Painting and Stenciling Techniques for Christmas Signs
Painting and stenciling a Christmas sign involves layering your base colors carefully, then applying stencils or vinyl lettering to add crisp designs and text. Clean stencil edges and vibrant colors come from using the right paint types, proper application methods, and good prep work. Following step-by-step instructions ensures a polished, professional look for your festive decor.
Choosing the Right Paint Types and Colors
Acrylic paint is the go-to for Christmas signs because it provides vibrant colors, dries quickly, and sticks well to wood and other surfaces. Matte or satin acrylic finishes work best to avoid glare. For a rustic or vintage look, chalk paint offers a soft, muted finish and can be distressed easily by sanding after drying. Glossy paints or glitter paint add sparkle if you want bright, eye-catching effects.
Stick to classic Christmas colors like red, green, white, gold, and silver. Use a base color that contrasts with your stencil design to make the lettering or shapes stand out clearly. Primer your wood first, using a white or light-toned primer to make colors pop and help paint adhere evenly.
Applying and Securing Stencils Correctly
Stencils keep your paint lines sharp and even, especially if hand lettering isn’t your strength. Vinyl lettering is another option, offering clean edges and easy application with transfer tape. You can buy Christmas-themed stencils online, at craft stores, or make your own using a stencil cutter or by cutting designs into sturdy cardboard or mylar sheets. Follow these steps for smooth, crisp stenciling:
- Prime and paint your base color; wait until it dries fully before stenciling (usually 1, 2 hours).
- Secure the stencil on your sign with painter’s tape or repositionable spray adhesive for a tight hold that prevents paint bleeding.
- Use a stencil brush or a small foam roller with a small amount of paint; dab off excess paint onto a paper towel first to avoid drips.
- Apply paint in light, even layers by dabbing or rolling gently over the stencil openings.
- Remove the stencil carefully before the paint fully dries to avoid peeling or smudging.
- Let the paint dry completely, then add additional layers or details if needed for color depth.
Vinyl lettering requires cleaning the surface and applying the vinyl slowly, smoothing out air bubbles with a squeegee or credit card. Peel the transfer tape slowly once the vinyl is secure.
Cleaning and Reusing Stencils
Cleaning your stencils right after use keeps them reusable and prevents paint buildup that can blur your designs. Soak plastic or mylar stencils in warm, soapy water for a few minutes, then gently scrub with a soft brush or cloth. Avoid harsh scrubbing to prevent warping or ripping.
Paper or cardboard stencils don’t clean well but can be reused for simple designs by carefully peeling off excess paint or taping damaged edges. Dry stencils flat to avoid warping. For vinyl stencils, wipe off paint with mild solvent or store them for next time.
How Long Does Making a Wooden Christmas Sign Take and Why Timing Matters
Making a wooden Christmas sign by hand typically takes anywhere from several hours to a few days, depending on the complexity and drying times involved. Key phases like cutting, painting multiple coats, stencil application, and sealing all require adequate drying and curing to ensure durability. Rushing any step can cause smudging, peeling, or fading, which affects the finished look and longevity of your sign.
Cutting and Initial Wood Preparation Timing
Starting with evenly cut wood pieces usually takes about 15 to 30 minutes for a standard 2×4 or similarly sized board. Quick sanding to smooth rough edges and prepare the surface for painting adds another 10 to 20 minutes. Cutting holes or slots for hanging, if needed, might add 5 to 10 minutes depending on your tools and experience. It’s important to do all cutting and sanding upfront so the wood surface is ready for paint adhesion. Wood dust should be wiped or brushed off before painting to avoid imperfections.
Drying Times for Base Coats and Paint Layers
Applying the first coat of paint or primer on your raw wood usually requires 1 to 2 hours of drying at room temperature before the surface can be recoated or stenciled. Some acrylic or latex paints can dry to the touch in 30 minutes under warm, low-humidity conditions but still need longer to fully cure. Additional coats, especially if you want solid coverage with no brush marks showing, should be applied after each coat dries for 1 to 2 hours. Expect total painting time, including multiple coats, to stretch over at least 4 to 6 hours.
Stencil Application and Layer Drying
Stenciling involves taping or holding the stencil firmly on the painted base and applying paint carefully through the cutouts. To prevent paint seeping or bleeding under the stencil edges, let the base coat dry completely, ideally 2 hours or more depending on paint type, before stencil painting. After applying the stencil paint, allow at least 30 to 45 minutes for the stencil layer to dry before removing the stencil. If adding multiple stencil layers or colors, dry each separately for best results. Be patient; removing the stencil too soon can cause smearing or smudges.
Finishing Seals and Protective Coating Cure Times
Protective finishes like clear polyurethane or outdoor sealants add durability against moisture and wear. These finishes must be applied only after all paint and stencil layers are completely dry, which often means waiting 24 hours or more. A thin first coat of sealant dries typically within 2 to 4 hours, but full curing takes up to 24 to 48 hours. Applying multiple sealant coats can extend the timeline but improves water resistance, especially for outdoor signs.
Adjusting Timelines Based on Environment and Complexity
Temperature and humidity play a major role in drying and curing times. Cooler, more humid conditions can double drying times, so planned breaks should accommodate those changes. Simpler signs with fewer paint layers might finish in under a day, while detailed stenciling and layered finishes often demand two or more days for the paint and sealants to cure fully. Taking time to space out each step ensures a strong, vibrant, and long-lasting Christmas sign that will hold up through the holiday season and beyond.
Creative Styles and Themes for Your DIY Christmas Sign
Rustic and vintage effects add warmth and character to your Christmas sign, making it a charming addition to any holiday decor. Creating these styles begins with the choice of materials and finishes. Using pallet wood or reclaimed wood works well for rustic or farmhouse styles because of its natural, worn texture. For a vintage look, choose smooth wood pieces and apply distressing techniques such as sanding edges, lightly scraping the surface, or using crackle medium to mimic aged paint.
Simple designs are perfect for beginners and often align with farmhouse or pallet wood themes. Start with easy phrases like “Merry Christmas” or “Joy,” painted in basic block or script fonts. Use stencils to keep lettering neat and consistent. For pallet signs, assemble several wood slats to create a wider base, then sand lightly to remove splinters. Paint the background with white or soft neutral tones before adding lettering in contrasting colors like red or green. These steps typically take a few hours, including drying times, and the cost usually ranges from $10 to $20 depending on the wood source and paint.
To create a true farm-style Christmas sign, focus on simple imagery like evergreen trees, stars, or a red pickup truck carrying a Christmas tree, which is a popular motif that echoes vintage farmhouse charm. Use leftover fence pickets or pallet slats to form the base. Paint the background in a subdued color such as cream or light gray, then add stenciled or freehand lettering in darker shades. Finish by lightly sanding edges or spots on the painting to improve the weathered feel. Adding twine or a jute hanger strengthens the rustic look and keeps the piece easy to hang.
Chalkboard signs offer another fun way to express holiday themes. Using chalkboard paint as the base allows you to change messages year after year. For beginners, this style is forgiving since you can erase mistakes. Use white or colored chalk markers to write classic Christmas greetings or countdowns. Chalkboard signs cost about $15 to $25 to make, factoring in the paint and wood base. They fit well in casual, cozy kitchen or entryway displays.
Choosing the right theme depends on your home’s existing decor and how much time you want to spend. Farmhouse and pallet wood signs suit those aiming for a cozy, country vibe, while vintage and chalkboard styles blend well with traditional and casual settings. Rustic signs often have a tactile, imperfect quality with chipped paint and rough edges, perfect for adding homey charm. Clean lines and minimalistic designs better fit modern decor but can work in farmhouse settings with slight tweaking.
Test your distressing techniques on a scrap wood piece first to avoid over-sanding or damaging your main sign.
Adding 3D Elements and Lights to improve Your Christmas Sign
Adding 3D elements and string lights to your Christmas sign not only brings depth and texture but also catches the eye with festive charm. You can safely attach wooden cutouts, pompoms, greenery, and lights by planning their placement and securing each piece properly to keep your sign looking neat and sturdy throughout the holiday season.
Start by selecting lightweight 3D accents like small wooden cutouts or chipboard shapes that match your sign’s theme. Pre-paint or stain these pieces to coordinate with your base colors before gluing them onto the sign. Use a strong craft glue such as E6000 or a hot glue gun for quick drying. Secure each piece firmly for at least 30 minutes and avoid overloading one side of the sign to maintain balance.
For natural touches, add pinecones, faux berries, or sprigs of evergreen. Attach these using floral wire wrapped around thin wooden skewers or craft sticks, then insert them into small holes drilled in the sign or glue them directly. This method keeps the greenery secure and avoids damage to your base. Pompoms in holiday colors provide a soft 3D effect and can be glued in clusters or borders for a playful look.
String lights add warmth and sparkle, improving visual appeal. Battery-operated LED micro lights are a safe choice because they emit minimal heat and don’t require cords that may clutter your display. Attach the light string along edges or weave it lightly around 3D accents using small clear hooks or strong double-sided tape designed for outdoor use if your sign will be outdoors.
- Plan the layout before gluing or wiring to avoid repositioning that can damage your sign
- Use lightweight materials to prevent sagging or tipping
- Secure pinecones or greenery with floral wire and glue, not just tape
- Choose battery-operated lights to keep cords hidden and eliminate outlet risks
- Test lights before attaching to save time and batteries
- Add a waterproof sealant over delicate elements if your sign goes outside
- Keep a small container of glue and scissors nearby for quick fixes
Once all elements are attached, add ribbons or bows for extra holiday spirit. Red and white striped ribbons complement pompoms in matching colors, creating cohesive appeal. Attach hanging hardware on the back for door mounting or prop your sign on a small easel to display on a countertop. Well-secured 3D accents and lights make your Christmas sign a festive focal point that welcomes guests with holiday cheer throughout the season.
Protecting and Finishing Your Christmas Sign for Indoor or Outdoor Use
Protecting your handmade Christmas sign depends on where you’ll display it. Indoor signs mainly need a clear finish to protect the paint from dust, moisture, and fingerprints. Outdoor signs require more strong weatherproofing to withstand rain, sun, and temperature changes. You should choose paints and sealants designed for the environment your sign will face.
Use acrylic paints made for outdoor use if your sign will go outside. These paints resist fading and cracking better than indoor acrylic or craft paints. They dry quickly, usually within an hour, and provide a durable base for sealing. For indoor signs, standard acrylic paints are sufficient, but still protect the surface to maintain the finish.
After painting, seal your sign with a clear protective coat. For indoor signs, a polyurethane or polycrylic spray works well and is easy to apply. Spray in thin, even layers, holding the can about 12 inches away. Usually, two to three coats with 30 minutes drying time between coats offer good protection.
Outdoor signs need a clear, waterproof sealant. Look for products labeled “exterior” or “outdoor” like spar urethane or marine varnish. These sealants contain UV blockers to prevent paint fade and are flexible to handle wood expansion in different weather. Apply the sealant in multiple thin coats, allowing at least 24 hours to dry between layers. This layering builds a tough shield against moisture and sun damage.
For best results, do your sealing in a dust-free, well-ventilated area between 50°F and 85°F. Lower temperatures can slow drying and cause cloudiness, while higher temperatures may lead to bubbling. The cost for these sealants varies but expect to pay approximately $10 to $20 for a small can, which is enough for several signs. Sealants typically cover about 100 to 150 square feet per can.
Signs left unsealed outdoors risk peeling paint, warping wood, and quick fading. Even indoor signs benefit from sealing to keep colors crisp and surfaces from wearing quickly, especially if handled often or placed where humidity fluctuates.
A simple script to seal an outdoor Christmas sign looks like this: After your paint is completely dry (usually 24 hours), lightly sand with 220-grit sandpaper to remove bumps. Wipe away dust with a tack cloth. Apply your first thin coat of outdoor sealant using a synthetic brush or spray can. Let it dry for 24 hours, then lightly sand again. Apply a second and third coat, repeating sanding in between. Wait a few days before hanging to ensure full cure.
This approach will protect your sign through the festive season and for years to come, whether displayed indoors by the fireplace or outdoors on your porch. Proper paint and sealant choices guard your work and keep your handmade Christmas sign looking great no matter where you place it.
Troubleshooting Common Mistakes and How to Fix Them
Paint bleeding under your stencil can ruin the clean look of your Christmas sign. This usually happens when you apply too much paint at once or use a brush that holds too much paint. Use a dry brush technique: dip your brush lightly in paint, then dab most of it off on a paper towel before applying. Multiple thin coats work better than one thick coat. Let each layer dry completely before adding the next.
Uneven stencil placement leads to crooked or overlapping letters, spoiling the sign’s overall appearance. Secure your stencil with painter’s tape on all edges to keep it from shifting. Carefully align the stencil before taping, and check from different angles to ensure it’s straight. Avoid repositioning once paint is applied, as this can cause smudging.
Another common mistake is not letting the base wood dry and cure fully before adding your stencil or paint. Moisture trapped in the wood can cause paint to bubble or peel. A well-prepped, dry surface allows paint and vinyl stencils to stick correctly without lifting or bleeding. A dry time of at least 24 hours is a good rule, depending on temperature and humidity.
- Apply paint in thin layers using a dry brush technique to prevent bleed
- Use painter’s tape to firmly hold stencils in place before painting
- Ensure wood base is completely dry and clean before starting
- Let each paint coat dry fully before applying another
- Use high-quality vinyl stencils like Oracal 631 for better adhesion
- Check stencil alignment from multiple angles before taping down
- Remove stencil while paint is still slightly tacky to avoid peeling
Fixing paint bleed involves carefully scraping off the excess with a craft knife or fine sandpaper once dry. For small uneven spots, a small detail brush can touch up the edges with the base coat color. Avoid aggressive sanding as it can damage the wood or surrounding paint.
Dealing with a misplaced stencil after painting is tricky. Gently lifting it off immediately after painting helps prevent smudges, but if paint already dried, you might need to sand and repaint the affected area. Keeping your workspace prepared and your tools organized will reduce the risk of these mistakes.
Let paint cure for at least 24 hours before applying vinyl stencils to avoid lifting and bleeding.
Quick Projects and Personalization Ideas for Festive Signs
Quick projects can help you get festive decorations up fast, even if you only have an hour or two. Simple signs made with basic shapes, ready-made stencils, and easy-to-use paint let you create something charming without a big time commitment. Adding personal touches like names or messages makes each sign special and meaningful, turning it into a unique part of your holiday decor.
Simple Sign Designs for Beginners
Start with basic shapes such as rectangles, circles, or even repurposed wood pieces to make your Christmas sign. Paint a solid background color like red, white, or green to keep it festive and easy to decorate. Use stencils or freehand simple words like “Joy,” “Noel,” or “Merry” in large, clear letters. You can also add quick designs like stars, snowflakes, or Christmas trees with craft paint or markers. Here are a few quick project ideas to try:
- Paint a small wooden plaque with a holiday greeting using a stencil kit you can find at most craft stores ($5, 10).
- Use a repurposed cutting board or wood slice, apply a base coat, then stencil “Believe” and add glitter or small ornaments glued on the edges.
- Create a chalkboard sign with festive borders and change the message every year or event with chalk markers.
- Attach pre-cut wooden letters to a painted board to spell out holiday phrases.
- Use a canvas panel painted with simple symbols like candy canes or wreaths for a fast, no-carving project.
These projects typically take 30 minutes to 2 hours and use affordable materials. Keep the designs simple and the palette limited to reduce drying time and complexity.
Personalizing Signs with Names and Messages
Adding names or special messages to your sign makes it one-of-a-kind. Choose a short phrase or family name to keep things readable. You can use vinyl lettering, stickers, or freehand paint for personalization. For clean-looking letters, print your message in your favorite font on paper, cut out the shapes, and trace them lightly on the sign before painting. Here’s a basic script you can use to write your personalized message:
“The [Family Name] Home – Est. [Year]” or “Welcome to [Name]’s Christmas Corner”
Use contrasting colors for the text and background to ensure your message stands out. To save time, try adhesive stencils or letter stamps, which reduce mistakes. A clear protective finish over the paint will help prevent smudging during handling or storage.
Safe Hanging and Seasonal Storage Tips
Attaching a festive ribbon, twine, or sturdy rope to the top of your sign creates an easy way to hang it on door knobs, cabinet handles, or hooks. Make sure to use hardware rated for the weight of your sign to avoid falls. Signs that lean against shelves or mantels also look inviting and don’t require wall anchors.
For storage after the season, wrap your signs in bubble wrap or tissue paper to protect the paint and embellishments. Store signs flat in a dry spot inside a closet or under a bed to avoid warping or damage. If your sign has lighter materials like paper or glue-ons, keep it in a plastic container rather than cardboard, as moisture can cause deterioration.
Step-by-Step Action Plan
Follow this plan to create your handmade Christmas sign efficiently and beautifully. Each step builds on the last, so take your time and enjoy the process.
- Day 1: Gather all materials and tools listed, including wood, paint, brushes, stencils, and protective finish. Confirm you have everything ready before starting.
- Day 2: Select and prepare your wood base by sanding and cleaning it to ensure smooth paint application. The surface should feel even and dust-free.
- Day 3: Apply your base coat of paint and let it dry fully, usually at least 4 hours. Check that it is matte or satin with no wet spots.
- Day 4: Stencil or hand-paint your Christmas design carefully, using light coats for crisp lines. Allow each layer to dry before continuing.
- Day 5: Attach any 3D elements or lights securely. Test that lights work and decorations stay firmly in place.
- Day 6: Apply the protective finish suitable for indoor or outdoor use. Let it cure at least 24 hours to ensure durability.
- Day 7: Inspect your sign for any touch-ups or corrections. Fix mistakes with small brushes and additional paint or finish.
Frequently Asked Questions
What’s the Easiest Way to Transfer Designs Onto a Christmas Sign?
Using stencils or printable templates helps you trace designs neatly, even without drawing skills. This ensures your lettering or images come out crisp and professional-looking.
Can I Reuse My Christmas Sign Materials for Other Holidays?
Yes, choosing neutral bases like plain wood or chalkboard paint allows you to change decorations or text seasonally. This saves money and storage space by creating multipurpose signs.
How Do I Fix Paint Smudges or Mistakes on My Sign?
Lightly sanding the area once dry and repainting corrects smudges without ruining the wood. Be sure to apply thin coats next time to avoid drips or smears.
What’s the Best Way to Store Handmade Christmas Signs?
Store signs in a dry, flat spot wrapped in bubble wrap or cloth to protect paint and 3D elements. Proper storage keeps them safe from damage and dust between uses.
How Can I Add a Personal Touch Without Hand Lettering?
Use pre-cut vinyl letters or decals to add names or dates easily. This method looks clean and professional for those who prefer not to freehand text.
Are Certain Woods Better for Outdoor Christmas Signs?
Cedar and reclaimed wood resist weather well and provide a rustic look perfect for outdoor signs. Applying a sealant after decorating helps protect from moisture and fading.
Key Points to Remember
Creating a handmade Christmas sign lets you add a personal touch to your holiday decor. Start with small, manageable steps and take your time to perfect each stage. Pick one simple design and make it your own today by selecting your base and sketching your idea on paper before painting. This hands-on approach will make your sign truly unique and festive.