DIY Marquee Sign: Complete Guide with Materials, Steps, and Lighting Tips
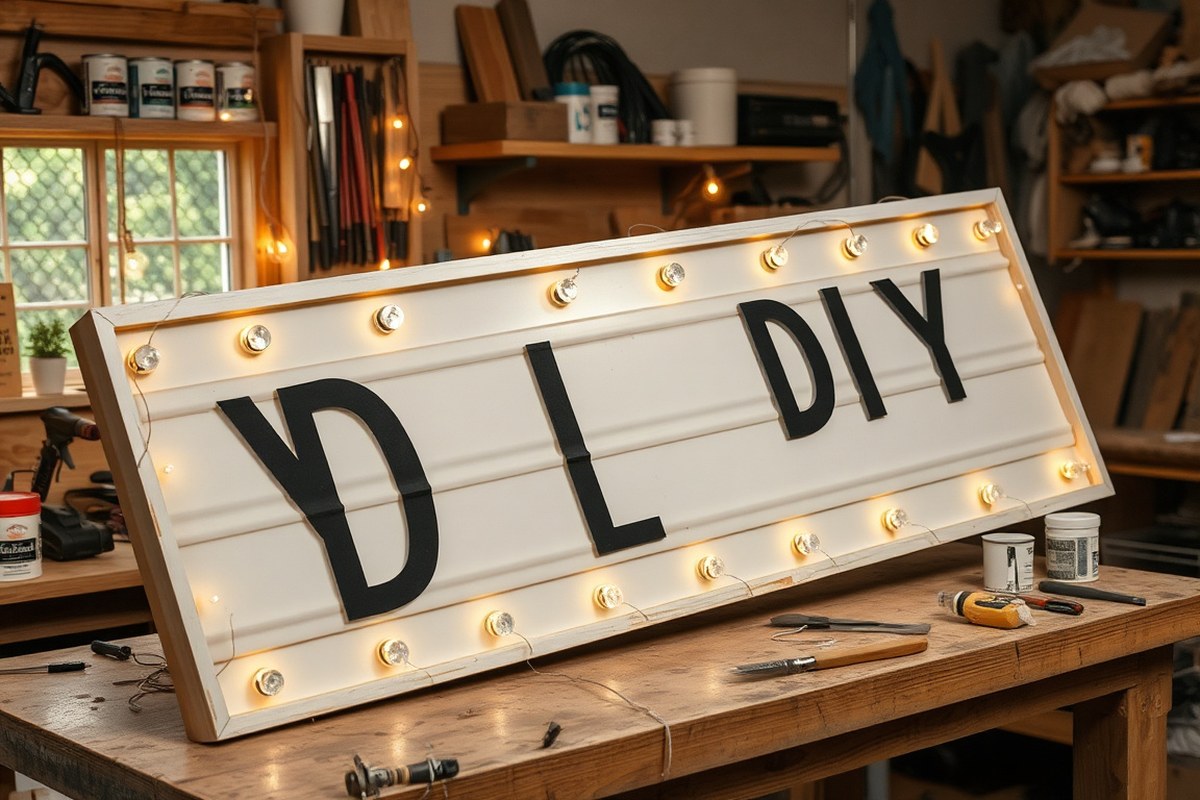
A DIY marquee sign adds a bold light-up statement with your choice of words or shapes. You can build one using wood, foam, or poster board, and illuminate it with bulbs spaced to highlight your design. Start by selecting your size and layout to fit the space where you want it displayed.
Key Takeaways
- Use a 2’x4′ half-inch board as the base for a sturdy marquee sign.
- Space 1.5-inch diameter bulbs about two inches apart for an even glow.
- Leave a 2-inch poster board flange on both sides of foam core for clean edges.
- Attach 8-foot 2″x4″ boards on sides and a 4-foot board along the bottom for stability.
- Plan about 45 minutes to an hour per letter for cutting and assembling.
- Cut 2-inch strips from foam core to support bulb placement and lighting.
What Is a DIY Marquee Sign and How Does It Work?

A DIY marquee sign is a decorative lighted sign often used to spell out names, words, or simple shapes that illuminate from within. These signs bring a warm, glowing effect to any room or event by combining a physical structure with a series of small lights. Typically designed for indoor use, they create an inviting atmosphere, making them popular for home decor, special occasions, or as personalized gifts.
The core components of a DIY marquee sign include a sturdy base, letter or shape cutouts, sidewalls to add depth, and small bulbs or LED lights to provide illumination. Common materials for the base are foam core board or thin plywood, roughly sized around 2 feet by 4 feet if creating a large sign. This serves as the flat backing on which you attach the design. Around the edges, 1 to 2 inches of poster board or craft board can be glued to create the sides, giving the sign a three-dimensional look and space to nest the lighting.
For the lighting, small bulbs or LED string lights are positioned through holes punched or drilled in the sign’s surface. These holes are spaced evenly according to the design, about 1.5 to 2 inches apart, to balance brightness and aesthetics. The lights attach by pushing the bulbs through the holes from the front side, which allows the bulb to protrude and glow. Behind the sign, the wiring is usually secured and hidden using hot glue or tape, keeping the setup neat. Many DIY projects use low-voltage LED bulbs as they stay cool and consume less power, reducing safety concerns indoors.
You can build the frame by sketching your desired letter or shape on the base material, then cutting it out carefully. Attaching sidewalls by gluing poster board strips about 2 inches wide around the base adds the necessary depth. Spray painting the sign before adding bulbs helps achieve a clean finish. The lighting wiring is inserted next, and extra bulbs on the string can be removed or tucked out of sight as needed. Power for the lights typically comes from a small plug-in adapter or battery pack, depending on your choice of bulbs and intended placement.
DIY marquee signs vary in complexity and cost. For example, low-cost foam board and basic LED bulbs might total under $20, while using wood and high-end bulbs could increase costs and require specialized tools. Signs without power tools are ideal for beginners and can still produce a bright, attractive light display. It’s important to ensure the bulbs are spaced to avoid overcrowding or dark spots. Properly assembled, your marquee sign will evenly light up and stand out as a charming accent in your home.
Choosing Materials and Tools for Your Marquee Project
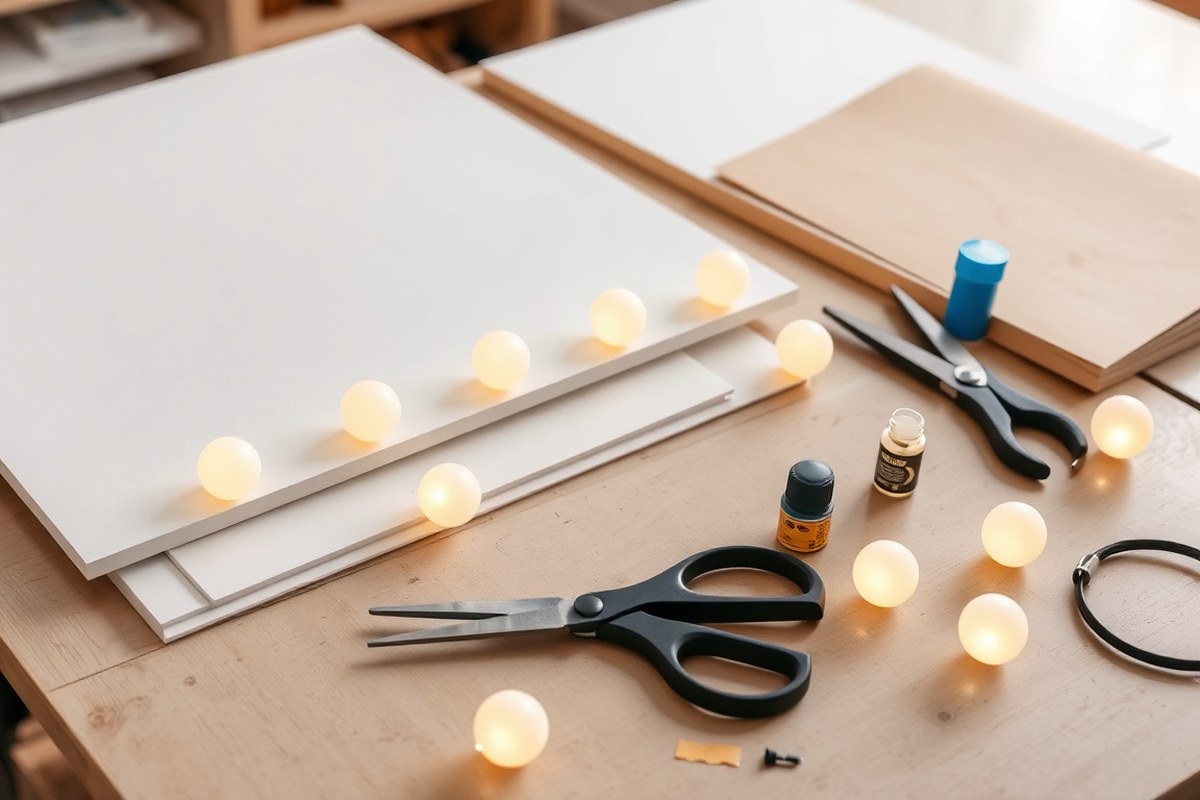
Choosing the right materials and tools makes all the difference in building a sturdy and visually pleasing marquee sign. Foam core board is a popular choice because it is lightweight and easy to cut with simple tools like a box cutter or X-Acto knife. At about 1/8 inch thick, it provides enough rigidity for most indoor signs and costs around $5 to $10 per sheet. For more durability, especially for larger signs, MDF panels or plywood can be used, but these require more advanced cutting tools like a jigsaw and take longer to paint and prepare.
Lighting is a key element. LED lights are your best bet for bright, energy-efficient illumination that runs cool and lasts a long time, typically over 25,000 hours. LED strips or individual LED bulbs can fit neatly into your cut-out circles. Incandescent bulbs offer a warm glow but generate heat and use more power, so they’re better suited for short-term or decorative use. The type of lights you choose affects the power supply, installation method, and overall safety, so plan accordingly.
For cutting your sign, a sharp box cutter or X-Acto knife works well on foam core and poster board, which are beginner-friendly materials. You’ll also want a ruler for straight, precise lines and a pencil for marking your design. When working with wood or MDF, choose a jigsaw or bandsaw for clean cuts. Painting your sign usually involves spray paint or acrylic paint, costing $5 to $10 per color. Spray paint provides an even finish with less effort, while brushing acrylics allows more detailed work but takes longer to dry.
- 1/8″ foam core board or alternative MDF/plywood panel
- Box cutter or X-Acto knife (for foam core), jigsaw (for wood)
- Ruler and pencil for measuring and marking
- String of LED lights or incandescent bulbs
- Spray paint or acrylic paint for coloring
- Scotch tape and packing tape for assembling layers
- Optional: scrap butcher paper for creating templates
Handle cutting tools carefully and always cut away from your body to avoid injury.
For those on a budget, foam core with LED string lights and basic craft paints can produce an attractive sign costing under $30 total. More advanced crafters willing to invest time and effort might prefer MDF, screw frames for stability, and professional-grade lighting for a long-lasting piece. Keep in mind that thicker materials and heavier lighting options will require sturdier supports and possibly power supplies certified for home use according to local electrical codes.
Designing Your DIY Marquee Sign: Size, Shape, and Templates
Planning your marquee sign starts with choosing the right size and shape to fit your space and materials. Selecting fonts and shapes complements your design style while templates and projectors ensure accuracy and ease. Proper planning saves time, cuts material waste, and results in a polished final product.
Measuring and Scaling Your Sign
The size of your marquee sign usually depends on the wooden base you choose. A common starting size is a 2-foot by 4-foot project panel, which fits many home improvement store options and provides enough space for large letters or shapes.
Letter height and width should balance visibility and space. For a 2’x4′ panel, letters around 10 to 12 inches tall work well. This size leaves enough room between letters and the panel edges for wiring and lights. Larger letters look bold but use more materials; smaller letters save material but may lose impact. Follow these steps to measure and scale your sign precisely:
- Measure your project panel’s exact dimensions with a tape measure.
- Decide the number of letters or shapes to fit across the width comfortably, leaving at least 1 inch between each.
- Divide the panel width by the number of letters plus spacing to get individual letter width.
- Set letter height based on panel height minus 2 to 3 inches for top and bottom margins.
- Sketch your letters on paper to confirm spacing and size before transferring to the panel.
- Adjust measurements if using additional elements like borders or background shapes.
Using Printable Templates or Projectors
Templates help maintain uniform letter sizes and accurate shapes. You can find free printable marquee letter templates online or create your own using software like Microsoft Word or Canva by typing in your chosen font and sizing it to your measurements.
Projectors offer an efficient way to trace designs directly onto your project panel, especially helpful for larger signs or intricate shapes. Using a digital projector connects to your computer or phone, displaying your design on the panel to trace with a pencil. To use templates or projectors:
- Search and download letter templates sized near your desired dimensions or create custom ones.
- Print templates on sturdy paper or cardboard for easier tracing or cutting around.
- For projectors, upload your design file and adjust the projector size to match your panel.
- Secure the template on the panel or position the projector exactly over the work surface.
- Trace outlines carefully with a pencil, checking for alignment and size.
- Remove the template or turn off the projector, then proceed with cutting or sanding.
Customizing Shapes Beyond Letters
Marquee signs don’t have to be limited to letters. Common shaping options include stars, hearts, arrows, or simple geometric shapes that add artistic flair. Consider your intended message or decor style when choosing shapes.
Creating custom shapes follows similar measuring and tracing steps but may require sturdier materials or different cutting tools depending on complexity. Simple shapes like circles or triangles can fit with standard letter sizes for a coordinated look. Steps to add custom shapes to your sign:
- Choose shapes that complement your letters or overall theme.
- Draw or find printable templates for these shapes sized proportionally to your letters.
- Arrange shapes on paper or digitally to test spacing and balance.
- Trace shapes onto your panel using a projector or printed template.
- Cut and finish shapes using jigsaws or craft knives, depending on material thickness.
- Light shapes similarly to letters using bulbs, making sure wiring fits safely within outline edges.
Step-by-Step Instructions to Build and Light Your Marquee Sign
Building and lighting your marquee sign involves careful cutting, precise hole placement, and thoughtful assembly to make it both attractive and functional. Following a clear step-by-step process helps avoid mistakes like uneven holes or weak structures. Focusing on cutting, hole drilling, and bulb installation ensures your sign glows evenly and looks polished.
Cutting and Shaping the Base Letter or Sign
Begin with selecting durable material such as 1/4-inch MDF for your base letters or shapes. A smooth surface and stable thickness provide a solid foundation. Using a template attached lightly with repositionable adhesive helps keep your design accurate while cutting. For cutting, tools like a scroll saw or jigsaw give clean edges and let you shape letters precisely.
Proper safety gear must be worn when cutting, including goggles and a dust mask. Clamp the material securely to avoid movement, reducing the risk of slips. Smooth the edges after cutting with sandpaper to remove any rough spots or splinters.
Marking and Drilling Holes for Bulbs
Accurate hole placement is key to spacing bulbs evenly and creating a balanced light effect. Measure your bulb size, 1.5-inch diameter bulbs require slightly larger hole diameters for fitting, commonly about 1/2 inch to 3/4 inch wide. Space holes roughly two inches apart to accommodate bulb size and visual spacing. Templates with holes can be traced directly onto the base for consistent marking.
Using a hand drill with a 1/2-inch paddle drill bit works best for drilling holes. Drill slowly at first to avoid splintering or cracking the material. Test the fit of a bulb base in each hole; the hole should be just large enough to hold the bulb base snugly without forcing it.
Installing Lights and Assembling the Sign
Install bulbs one at a time to ensure secure placement and easy wiring. Push the bulb base of the string of lights from behind the sign into each hole, then screw the bulb into place from the front. This method keeps bulbs firmly attached and prevents accidental falls. Leave a few bulb placements open at the edges of letters and in-between letters for better spacing and aesthetic balance.
After all bulbs are in place, connect the string lights to a power source to test lighting and spot any bulbs that don’t fit or light properly. Finally, assemble any additional parts of the sign such as a backplate or frame, using screws or glue as appropriate for stability.
- Attach the letter template to 1/4-inch MDF using repositionable adhesive spray.
- Cut out letters with a scroll saw for precise edges and smooth shapes.
- Sand edges to remove rough spots and ensure a clean finish.
- Trace bulb hole positions using a bulb base or hole template spaced about two inches apart.
- Drill holes with a 1/2-inch paddle drill bit, checking fit after each hole.
- Insert string light bulb bases from behind and screw bulbs into place from the front.
- Connect the light string to test functionality and adjust any misfitting bulbs.
- Secure assembled letters to a backplate or frame to complete the marquee sign.
Lighting Options: Bulbs Types, Wiring, and Safety Tips
Choosing the right bulbs for your DIY marquee sign affects both its look and safety. LED bulbs use much less energy and stay cooler than incandescent bulbs, making them a better choice for enclosed or small spaces. Incandescent bulbs provide a warm glow but convert most energy to heat, often reaching 250°F or more, which raises fire risk and demands careful heat management. LEDs typically cost more upfront, around $1 to $3 per bulb compared to $0.50 to $1 for incandescent, but they last 10 to 25 times longer and save on electricity, often using under 5 watts per bulb versus 25 watts or more for incandescent. The long-term benefits generally outweigh the higher initial investment.
Wiring your lights safely is essential to avoid shorts or fire hazards. Start by planning your power source, ideally plugging into a grounded outlet with a GFCI (ground-fault circuit interrupter) to reduce shock risk. Series wiring makes bulbs connect end-to-end but if one bulb fails, the whole string may go out. Parallel wiring keeps each bulb independent so others stay lit if one goes out and maintains voltage across all bulbs evenly, which is safer and more reliable for marquee signs with varying bulb counts. For a 20-bulb LED globe strand, confirm the wiring type by checking the bulb packet or manufacturer’s instructions. Secure all connections by soldering or using quality waterproof connectors, then insulate exposed wires with heat-shrink tubing or electrical tape.
Power management matters for both heat and electrical safety. Avoid overloading your circuit by calculating total wattage; for example, 20 LED bulbs at 2 watts each draws 40 watts total, well under a standard 15-amp household circuit limit (around 1800 watts). Incandescent bulbs require more careful budgeting since 20 bulbs at 25 watts each use 500 watts, which can be borderline for some receptacles if combined with other devices. Using a timer or a dimmer switch rated for your bulb type can reduce power consumption and extend bulb life. Ensure your marquee sign’s backing material is heat-resistant and leave space behind bulbs for air circulation to prevent overheating. Never cover bulbs with fabric or paper that can ignite from heat.
Always test your marquee sign’s wiring with a multimeter before plugging it in to check for shorts, and never use damaged cords or brittle insulation to avoid electrical hazards.
Estimated Time, Budget, and Difficulty Level for the Project
| Project Aspect | Details | Notes |
|---|---|---|
| Estimated Time | 3 to 5 hours | Includes shopping trips and assembly |
| Budget for Materials | $30 to $70 | Wood, bulbs, wiring, and paint |
| Skill Level | Beginner to Intermediate | Basic cutting and wiring skills helpful |
It usually takes about 3 to 5 hours to complete a DIY marquee sign. This timeframe covers shopping for materials, cutting and assembling the sign, and wiring the lights. Two to three trips to your local hardware or craft stores often fit into this period. Budgeting your time is important because rushing can lead to mistakes or safety issues, especially when handling electrical parts.
The budget for materials mostly depends on the size and lighting you choose. Simple designs with LED string lights or basic bulbs can cost between $30 and $70. More expensive options, like professional LED strips or specialty bulbs, will push costs higher. Shopping at large home centers or craft stores can keep costs lower if you compare prices and use coupons.
DIY marquee signs suit beginners but involve some hands-on skills. Cutting wood with a jigsaw or drill, measuring precisely, and safely wiring lights are key steps. If you’re new to power tools or electrical projects, practicing on scraps or asking for help from someone experienced is wise. Here’s what you should be ready for:
- Measuring and cutting wood cleanly and accurately
- Drilling holes for light bulbs evenly spaced
- Handling low-voltage wiring safely and correctly
- Painting or finishing the sign surface
- Choosing appropriate bulbs to avoid overheating
Planning your project with those points in mind makes the process smoother. A simple marquee can be a comfortable weekend project if you set aside sufficient time and gather all materials before starting. Using LED bulbs is recommended if you expect to keep your sign lit for long periods since they stay cool and reduce fire risk. Ask a licensed electrician if you have doubts wiring your sign to household current.
Common Mistakes and Troubleshooting Marquee Sign Problems
Bulbs may fail to light up in your marquee sign due to loose connections, burnt-out bulbs, or faulty wiring. Start by checking each bulb for tightness; gently twist bulbs to ensure they’re fully seated. Replace any bulbs that appear blackened or damaged. Next, inspect the string’s wiring for any visible breaks, pinches, or exposed wires. Use a multimeter to test for continuity in the string; a break anywhere means the current won’t flow. Should wiring problems appear, cut out the damaged section and reconnect wires using wire nuts or solder with heat shrink tubing to restore safe function.
Poor hole alignment often happens when drilling or cutting before laying out your design properly. Using a printed template taped securely to the foam board helps maintain correct spacing. Mark each bulb location with a pencil before drilling. A 1/2-inch drill bit works well for typical light bulb sockets, but double-check the bulb size you plan to use. Slow, steady drilling prevents jagged or oversized holes. When holes come out uneven, fill gaps with clear-drying silicone caulk or carefully paint the edges using matching spray paint. When painting, white painter’s tape helps protect bulb holes and creates clean edges. Remove tape before paint fully dries to avoid peeling.
Electrical problems carry risk, so prioritize safety. Always unplug lights before working on wiring or bulbs. Work in a well-lit, dry area with insulated tools. Avoid overloading circuits by checking total wattage against the outlet’s rating. Spotting melted insulation or sparks means you should stop using the device immediately and call a licensed electrician. For DIY repairs, label wires before disconnecting, use connectors approved for low-voltage lighting, and never mix different bulb types in one string. Test all wiring and bulbs on a safe surface before final assembly to make troubleshooting easier.
A good troubleshooting checklist before finishing your marquee includes: verifying all bulbs fit snugly and light; confirming holes line up with each bulb socket; inspecting wires for breaks and insulation damage; ensuring paint or tape does not block bulb contact points; and powering the sign on in sections to isolate issues. Taking 30 to 60 minutes for this check can save time and frustration later. Using a plastic ceiling lighting lens behind bulbs can diffuse light and improve appearance, but ensure it’s cut precisely to avoid interference with bulb sockets. Proper preparation helps your marquee sign glow evenly and last through many uses.
Creative Customization and Display Ideas for Your Marquee Sign
Customizing your DIY marquee sign makes it more personal and fits your décor style. You can choose paint finishes and light diffusers to set the mood. Mounting and power options also matter if you want to move your sign around or use it outdoors.
Custom Paint and Finishing Techniques
Start by sanding the surface to create a smooth base for paint. Choose between matte, satin, or glossy finishes depending on your design. Matte hides imperfections, satin offers a soft sheen, and glossy makes colors pop. Use primer first to help the paint adhere and last longer, especially if you pick spray paint for a fine finish.
Light diffusing adds a soft glow and reduces harsh spots. Frosted spray or translucent white acrylic sheets over the bulb openings work well. You can also paint frosted glass paint in thin layers for a controlled effect. Experiment on scrap pieces to make sure you get the light diffusion you want without dimming the bulbs too much.
- Use painter’s tape to create sharp edges or patterns before painting
- Apply 2 to 3 coats of paint, allowing 20-30 minutes drying time between coats
- Seal with a clear acrylic spray for outdoor signs to protect paint from moisture
- Try metallic paints for a retro, festive look
- Use a sponge for dabbing paint to create texture or ombre effects
- Add stencils for lettering or graphic accents
Test your paint and diffuser finish in the lighting conditions where the sign will stay to avoid surprises.
Custom touches like these help your marquee sign stand out and fit the theme, whether it’s a party centerpiece or a cozy room accent.
Indoor vs Outdoor Mounting Options
Mounting depends on where you want to display your marquee sign. Indoor signs can be light and use adhesive hooks or picture hangers. Outdoor mounting needs heavy-duty anchors to handle wind and weather. Avoid placing fresh paint in direct sun for extended periods to keep colors vibrant.
Wall mounting is the most straightforward for indoor use, use screws with wall plugs or removable adhesive strips rated for your sign’s weight. For freestanding signs, build or buy a small easel or stand. Hanging outdoors requires corrosion-resistant hardware and possibly a cover to shield bulbs.
- Use command strips or 3M hooks for lightweight indoor signs
- Drill holes with anchors for brick, stone, or drywall installation
- Install a metal bracket or brackets if the sign is heavy or large
- Choose waterproof mounting hardware for outdoor signs
- Place signs under cover or away from direct rain for longevity
- Consider stakes or garden hooks for yard display
Match the mounting option to your sign’s size, weight, location, and how permanent you want the display.
Power Source Choices: Plug-In or Battery
Battery power is ideal if you want to place your marquee sign where there’s no outlet or if you move it often. Choose LED bulbs for low energy use, which can run 20-40 hours on standard AA or AAA packs. Rechargeable batteries add convenience since you can recharge and reuse them, but expect an upfront cost of $10 to $25 per set.
Plug-in options eliminate battery replacement and provide steady illumination for long events or decorations. Use extension cords rated for outdoor use if placing the sign outside. Cable management helps prevent trips or tangles.
- Use LED bulbs for extended battery life and low heat
- Choose battery holders with on/off switches for ease of use
- Select battery boxes with waterproof covers for outdoor signs
- Test battery life before committing to a setup for an event
- Plan cords to minimize visible wires and keep neat
- Consider solar-powered LED options for outdoor use to save batteries
Never mix old and new batteries or different types to avoid leaks or power issues.
Balance convenience and runtime when choosing your power source, thinking about where and how long you’ll display your marquee sign.
Step-by-Step Action Plan to Build Your DIY Marquee Sign
Follow this plan to create your own light-up marquee sign with confidence. Each step helps you stay on track and check your progress.
- Day 1: Gather all your materials and tools listed for your chosen design. Confirm you have bulbs, wiring, wood or cardboard, and basic hand tools ready.
- Day 2: Cut out your sign shape and letters using your templates. Lay them on a flat surface to check if all pieces fit the design perfectly.
- Day 3: Drill evenly spaced holes for bulb placement on each letter or shape. Hold the pieces up to a light source to ensure the holes will shine through well.
- Day 4: Assemble the sign parts using glue or screws and paint if desired. Let everything dry completely before proceeding.
- Day 5: Insert your bulbs and wire the lighting according to safety tips provided. Test the bulbs as you go to make sure each works properly.
- Day 6: Secure any loose wiring and confirm all electrical connections are insulated. Turn on your sign to check for even lighting and fix any dark spots.
- Day 7: Mount or display your marquee sign in your chosen spot. Step back and admire your finished work while ensuring the sign stays stable and cool when on.
Frequently Asked Questions
Can I Make a DIY Marquee Sign Without Power Tools?
Yes, a DIY marquee sign can be created without power tools. This approach keeps the project accessible and safe, especially for beginners working indoors.
What Materials Work Best for Indoor DIY Marquee Signs?
Foam core board and poster board are ideal for indoor marquee signs. They’re lightweight, easy to cut, and perfect for mantels or dressers as centerpieces.
How Can I Customize My DIY Marquee Sign to Fit My Room’s Theme?
Customize your marquee sign by choosing shapes, colors, and fonts that match your room decor. Adding personal templates or themed designs makes it unique and fitting for your space.
Is It Safe to Use Household Bulbs in a DIY Marquee Sign?
Using low-heat bulbs like LED mini string lights is safer for indoor marquee signs. They reduce fire risk and avoid overheating the foam or poster materials.
What Size Board Should I Buy to Start a Marquee Sign?
A 2’x4′ half-inch thick board is a common starting size for marquee signs. It offers enough space to create large letters or shapes that stand out.
Where Can I Find Templates for My DIY Marquee Sign Project?
You can download templates, like the 2017 New Year design, or create your own. Templates help with precise cutting and consistent designs.
Before You Go
Your DIY marquee sign can brighten any space with personalized style. Start with your materials today so you’re ready for cutting and assembling. This project offers a rewarding mix of craft and simple wiring that will add a custom glow to your home or event.