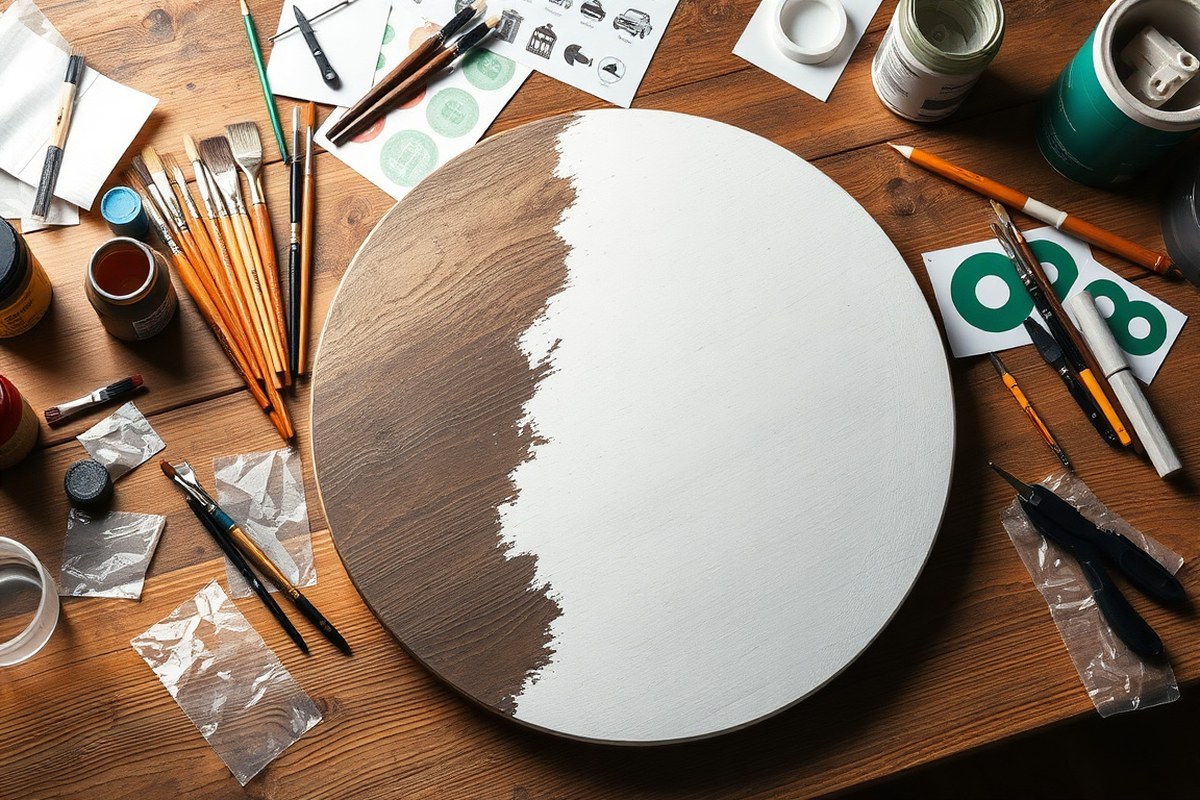
DIY Round Wood Sign Ideas: Complete Guide with Proven Steps & Tips
Creating a diy round wood sign offers a unique way to personalize your home décor or gift an original handmade item. Start with a smooth round wood blank as your canvas, then choose a design that suits your space or occasion. This approach combines simple materials with easy techniques for a satisfying project you can complete in a few hours.
Key Takeaways
- Select a wood round sized 18-24 inches for door hangings or outdoor projects to ensure visibility and durability.
- Prepare your wood by sanding it smooth before applying paint or stain to avoid rough textures in your finish.
- Use transfer methods like heat transfer vinyl or stencils to accurately place your design on the curved wood surface.
- Allow stained or painted wood to dry completely, usually a minimum of 2 hours, before adding additional layers or decorations.
- Apply a clear waterproof sealant over your finished sign to protect it from moisture and extend its lifespan outdoors.
- Attach sturdy hanging hardware or ribbon firmly to the back of your sign to ensure safe display without damage.
What Is a DIY Round Wood Sign and Why Make One?

A DIY round wood sign is a handcrafted decorative piece made from a circular wood blank, typically around 12 inches in diameter, although sizes can vary. It involves personalizing the wood by painting, staining, or adding vinyl designs to create a unique sign. These signs often display welcoming messages, family names, seasonal greetings, or simple artwork. The round shape offers a softer, rustic look compared to traditional rectangular signs and fits well in many home decor styles.
Round wood signs are popular because they combine simplicity with versatility. The circular form complements different types of spaces, whether hung on a front door, displayed on walls, or set on shelves. Their appeal lies in offering a handmade touch that can reflect your personal style or seasonal themes. Creating one yourself lets you choose colors, fonts, and designs that match your home’s aesthetic or make thoughtful gifts for friends and family. Costs for materials typically include a wood round blank, which can range from $5 to $15 depending on size and quality, plus paint, brushes, or vinyl, keeping it affordable for most budgets.
You can use a round wood sign in many ways. Door hangers are a popular application, welcoming guests with personalized messages like “Welcome” or themed greetings for holidays. On walls, these signs add charm to living rooms, kitchens, or entryways, often featuring family names or meaningful quotes. You also can make smaller signs to decorate desks, shelves, or mantels, changing them seasonally to keep your decor fresh. Gifts made from round wood signs are especially appreciated because they show effort and customization not found in store-bought items.
The design flexibility is one of the biggest reasons to make a DIY round wood sign. You can paint freehand, use stencils, or apply heat transfer vinyl for clean, professional-looking text and images. For example, using vinyl allows precise fonts like “Avenida Com” or custom graphics from popular design bundles, which you can transfer with a low-heat iron or craft press suitable for wood. Acrylic paints take about 20 minutes to dry between layers, so planning your work in stages ensures a smooth finish without smudges. The round shape invites circular or radial designs, wreath motifs, or simple center-aligned statements that are visually appealing.
Good results involve preparing your wood surface properly by sanding to remove rough spots and applying a base coat for even paint absorption. Some common issues include uneven paint coverage or paint chipping if the sign isn’t sealed after painting. Using a clear sealer or varnish prolongs the sign’s life, especially if it will be placed outdoors where weather can affect the wood and paint. By following these steps and choosing designs that fit your skill level, you can end up with a charming, durable sign that improve your home’s atmosphere or creates a memorable gift.
Essential Supplies and Tools for Round Wood Sign Projects

To create a successful round wood sign, start with basic supplies including a smooth wood blank that fits your desired size and style. You can find wood rounds at craft stores or lumber yards, with sizes typically ranging from 8 to 18 inches in diameter. Opt for a pre-sanded wood plaque for easier preparation, or use a raw wood slice that may require light sanding to achieve a smooth surface.
Paint choices matter. Acrylic craft paints are ideal due to their quick drying time and vibrant colors, costing roughly $1 to $3 per small bottle. For a rustic or stained look, use wood stain instead, which needs a minimum of 2 hours to dry properly. Sealants like clear matte or gloss polyurethane protect your design and extend the sign’s life, especially for outdoor use. Apply sealants with a foam brush for the smoothest finish, allowing each coat to dry for at least 4 hours.
You don’t need power tools or machines like a Cricut to make an attractive round wood sign. Hand tools such as sandpaper (medium and fine grit), paintbrushes in various sizes, foam brushes, a pencil for sketching, and adhesive stencils or vinyl letters are sufficient. These tools are affordable and widely available at craft or hardware stores, with costs ranging from $5 to $15 per item.
- Wood blank (pre-sanded plaque or natural wood slice, 8-18 inches diameter)
- Acrylic craft paints or wood stain
- Various sizes of paintbrushes and foam brushes
- Sandpaper (120 and 220 grit)
- Adhesive vinyl or pre-cut stencils (optional, for precise designs)
- Clear polyurethane sealant (matte or gloss)
- Pencil and paper for sketching designs
Substitutions can save money and still deliver good results. Scrap pallet wood can replace store-bought plaques but will need more sanding and sealing. If you don’t have stencil letters or a cutting machine, you can freehand designs with a pencil and paintbrush. You might find stickers or print your own on cardstock, then trace the outlines. Keep in mind that precise edges usually require vinyl or stencils, but a steady hand works well for simpler projects.
Make sure to let your paint or stain dry completely before applying sealant; rushing this step can cause smudges or peeling over time.
Choosing between power and hand tools depends on your comfort and budget. Power sanders speed up surface prep but aren’t necessary for small rounds. A Cricut or ScanNCut machine helps create detailed vinyl stencils but is optional. Using hand tools keeps costs low and maintains control on small projects, making it perfect for beginners or those working with reclaimed wood. Affordable supplies can be found at big-box craft stores, local hardware stores, or online marketplaces where prices vary but often start under $10 for basic materials.
Preparing Your Round Wood for a Smooth Crafting Surface
Preparing your round wood properly is key to a smooth surface for painting or applying vinyl. It involves cleaning, sanding, optionally staining, and allowing enough drying time between steps. This ensures paint or vinyl adheres well and your sign looks professional.
Cleaning and Sanding the Wood Surface
First, remove dust, dirt, and oils that can block paint or vinyl from sticking. Use a damp cloth to wipe the wood, then let it dry completely. Sanding creates a smooth surface and opens the wood pores, improving adhesion.
Use 120-grit sandpaper for the initial sanding to smooth rough spots. Finish with 220-grit for a fine, smooth surface. Light sanding after staining is also beneficial before painting or applying vinyl. Avoid over-sanding which can round edges excessively or thin the wood.
Applying Stain or Base Coat
Staining or applying a base coat helps improve the wood grain or create a uniform color base. It’s optional unless you want a specific look or need to seal porous wood types like pine. Use an oil-based or water-based stain depending on the desired finish and drying time.
Apply the stain with a brush or clean cloth in thin, even coats. Wipe away excess stain immediately to avoid blotches. Let the stain dry for at least 24 hours before the next step. If you plan to paint over the stain, wait for it to fully cure for best results.
Drying and Final Surface Prep
Proper drying time prevents warping and ensures a steady base for your design. A minimum of 24 hours is typical after staining or painting base coats. Keep wood flat in a dry, well-ventilated area to avoid moisture buildup, which can cause warping or bubbles under vinyl.
Before decorating, lightly sand with 220-grit sandpaper to remove raised grain or unevenness created by stain drying. Wipe the surface with a dry microfiber cloth to eliminate dust. This final prep makes your wood sign ready for paint or vinyl application.
- Clean the wood surface with a damp cloth; let it dry fully.
- Sand the wood starting with 120-grit, then finish with 220-grit sandpaper.
- Apply a thin, even coat of stain or base coat using a brush or cloth.
- Wipe off excess stain immediately to prevent blotches.
- Allow the wood to dry for at least 24 hours in a flat, ventilated area.
- Lightly sand the dried wood with 220-grit sandpaper to smooth raised grain.
- Remove sanding dust with a dry microfiber cloth before decorating.
Comparing Methods to Transfer Your Design Onto Round Wood
Choosing the right method to transfer your design onto a round wood sign depends on your tools, skill level, and the look you want. Vinyl decals offer a clean, precise finish with minimal paint mess, ideal if you have a cutting machine like a Cricut. Hand painting gives you a personal touch but requires steady hands and some practice. Stencils combine some control with painting, a good middle ground without needing special equipment. Heat transfer vinyl (HTV) can also add crisp designs but its use on wood needs care to avoid damage.
Using a Cricut or other cutting machine with vinyl decals involves selecting your design file (like an SVG), cutting the permanent adhesive vinyl, and using transfer tape to place it onto the wood. After cleaning your wood surface, position the vinyl, press down firmly, then slowly peel away the backing. This method costs roughly $15, $20 for vinyl sheets and transfer tape, plus your machine if you don’t own one.
For those without machines, stenciling is a great choice. You can buy or print stencils and attach them to the sign surface using painter’s tape. Use a foam brush or sponge to dab acrylic paint inside the stencil edges. Remove the stencil carefully before the paint dries to avoid smudging. Acrylic paint is affordable, about $3, $5 per tube, and dries quickly, making this approach beginner-friendly.
Heat transfer vinyl works best on fabric but can be used on wood with low heat settings. Follow your Cricut Heat Guide to set the iron or heat press correctly. Place the HTV design face down onto your sealed wood, apply heat for 10, 15 seconds using a pressing cloth to protect the wood, then peel off the carrier sheet when cool. This method requires a well-sealed wood surface and skill in temperature control to prevent warping or scorching.
| Method | Effort | Cost | Skill Required | Finish Quality |
|---|---|---|---|---|
| Vinyl Decals (with cutting machine) | Low | $$ (approx. $15, $20 for materials) | Moderate (learning machine use) | High (clean edges, professional look) |
| Hand Painting | High | $ (about $3, $5 for paint) | High (steady hand and patience) | Medium (can be personal but imperfect) |
| Stencils (without machine) | Medium | $ (stencil cost varies) | Low to Moderate | Good (depends on paint application) |
| Heat Transfer Vinyl | Medium | $$ (similar to vinyl decals) | High (needs wood sealing and heat control) | Good (sharp but risk of heat damage) |
Beginner crafters without a cutting machine might start with stencils and hand painting to build skills. Those with a Cricut will find vinyl decals offer the fastest, most polished results. Applying heat transfer vinyl to wood signs needs sealed surfaces and precise temperature management to avoid any damage. Each method’s quality depends on your preparation and care when applying the design.
Techniques for Painting and Decorating Round Wood Signs
To paint and decorate a round wood sign effectively, focus on layering your paints for depth, shading letters to improve readability, and finishing with clean details using the right tools. Use brushes and markers strategically to avoid bleeding and smudging, and consider adding 3D decorations like ribbons or small flowers for extra charm. These techniques help your sign look polished and personalized.
Choosing the Right Paint and Brushes
Use acrylic paint for round wood signs because it dries quickly and works well on wood surfaces. For lettering, a small, fine-tip brush around 1/8 to 1/4 inch wide offers control for clear, sharp edges. Flat brushes 1/2 to 1 inch wide are best for filling in larger background areas or layering colors smoothly. Paint markers with fine tips provide precision and are especially helpful for small letters or intricate details. Before you start, test your paint on a scrap wood round to see the coverage and drying time.
Layering colors adds dimension. Begin with a base coat, wait at least 30 minutes for it to dry, then add a second coat or shading by mixing a tiny amount of darker paint on the edges of letters. This subtle gradient helps letters pop without making them hard to read. Let layers dry fully to avoid smudging and blending unintentionally.
Adding Embellishments and Details
You can easily add 3D elements such as ribbons, small faux flowers, or twine to your round wood sign to make it stand out. Secure these with a strong craft glue like hot glue or a clear-drying tacky glue. Ribbons look especially good wrapped around the edge or tied in a bow at the top of the sign. Small floral accents placed near the lettering can create a charming, farmhouse-style look that adds warmth and personality.
Using metallic or glitter paint markers for final details draws attention to specific areas without overwhelming the design. Adding small dots or highlights alongside painted letters can mimic light and texture. Be sure to seal your embellishments with a clear spray sealer to prevent damage, especially if the sign will be outdoors.
Correcting and Avoiding Painting Errors
To avoid paint bleeding or smudging, use painter’s tape or stencil guides for letters, pressing them firmly onto the wood surface before applying paint. Avoid overloading your brush or marker; thin, even coats reduce unwanted drips. Work in a dust-free space and allow each coat to dry completely before moving on.
If a mistake occurs, let the paint fully dry, then gently sand the area with fine-grit sandpaper (220 grit works well). Wipe away dust with a dry cloth and repaint that section. For small smudges, a damp cotton swab can sometimes lift the paint before it fully sets, but be careful not to spread the paint further. Practice patience during drying periods and use water-based paints, which are easier to clean up and adjust than oil-based.
For crisp, clear letters, let each paint layer dry fully before applying the next and avoid pressing too hard with the brush to prevent bleeding under stencils or tape.
Sealing, Protecting, and Finishing Your Wood Sign
Applying a protective finish to your round wood sign is essential for preserving its beauty and durability. For indoor signs, a clear polyurethane or water-based urethane works well. These finishes protect the wood and painted designs from dust, moisture, and minor scratches without yellowing over time. For outdoor signs, choose exterior-grade polyurethane or a spar urethane specifically formulated to resist UV rays and moisture. These provide a tougher barrier against weather elements like rain and sun exposure, helping your sign last longer outside.
Start by making sure your painted design is fully dry, usually at least 24 hours. Use a high-quality synthetic bristle brush for polyurethanes or urethanes, and apply thin, even coats in the direction of the wood grain. Avoid heavy layers that can drip or cloud. Spray sealers offer a quick and easy option, especially on intricate designs. Hold the can about 8 to 12 inches away and spray in light, sweeping motions, overlapping slightly to ensure coverage. Allow at least 2 to 4 hours of drying time between coats depending on temperature and humidity, and let the final coat cure for 24 to 48 hours before handling.
Two to three coats usually provide ample protection. For outdoor signs, three coats of spar urethane are recommended due to harsher conditions. Indoor signs can get by with two coats of water-based polyurethane since they face less wear. Applying extra coats won’t hurt but will add drying time and cost. Expect a quart of finish to cost between $10 and $20 and cover 100 to 150 square feet depending on product instructions, so a small round sign project uses only a modest amount.
Maintenance is key for outdoor wood signs to keep them looking good over the years. You should clean your sign annually with a soft cloth and mild soap to remove dirt and debris. Re-apply a fresh coat of exterior polyurethane or spar urethane every 1 to 2 years to renew the protective layer, especially if you notice fading, peeling, or wood dryness. Light sanding with fine-grit sandpaper will help the new coat adhere better. Indoor signs rarely require resealing unless exposed to spills or humid conditions.
A good finish will look smooth and even with no cloudy patches or bubble marks. Avoid applying finish in direct sunlight or very humid conditions as that can cause uneven drying or tackiness. Proper sealing prevents the wood from warping, paint from chipping, and helps resist stains. The extra care ensures your round wood sign remains a beautiful addition to your home or event for considerable time. Follow label instructions closely and use protective gear like gloves and masks if recommended to stay safe while applying finishes.
How to Hang and Display Your Round Wood Sign Safely
Hanging and displaying your round wood sign properly ensures it stays secure and looks great. Choosing the correct size, attaching ribbons or hooks firmly, and using suitable mounting hardware for the sign’s weight helps prevent damage and keeps your project safe.
Selecting the Right Size for Your Door
Round wood signs measuring 18 to 24 inches in diameter fit well on most doors, balancing visibility and weight. A sign smaller than 18 inches might get lost visually, while a larger one could be heavy and awkward. This range also leaves space for decorative vinyl or painted designs without overcrowding the surface.
When selecting the size, consider the weight wood thickness adds. Thicker pieces above 1 inch may weigh several pounds, requiring sturdier hanging methods. For door hangers, staying closer to the 18 to 24-inch size keeps the project manageable and the hanging secure.
Attaching Hanging Materials
Ribbons, twine, or sturdy cords offer an attractive and functional way to hang lightweight to medium-weight wood rounds. To attach ribbons safely, you’ll need a staple gun, scissors, and tape or glue to help position the ribbon before stapling. Here is a simple step-by-step guide to attaching a ribbon hanger for a door sign:
- Cut a piece of ribbon or twine at least twice the desired hanging length plus 2 inches for securing ends.
- Flip your wood sign so the back side is facing up on a flat surface.
- Position the ribbon ends on opposite sides of the sign’s back, creating a loop the correct height.
- Use a staple gun to attach the ribbon ends firmly, placing 3 to 4 staples on each side for a strong hold.
- Optionally, reinforce the staples by applying a small dab of strong craft glue over each staple for more security.
- Check that the ribbon is secure by gently pulling on both ends before hanging the sign.
- Trim excess ribbon from the staple area for a neat finish.
Using multiple staples per side and choosing a ribbon width between 1 to 2 inches helps distribute the wood’s weight and prevents tearing. For heavier or larger rounds, metal D-ring hangers attached with screws make a durable alternative.
Mounting Options and Weight Safety
Wall mounts and hooks must support the combined weight of the wood and any decorations. Typical round wood signs around 1 inch thick and 18-24 inches wide can weigh from 3 to 7 pounds. For these, a standard picture hook rated for at least 10 pounds or a screw-in wall hook works well. To mount your sign:
- Use a wall anchor with hooks for drywall installation to ensure strength.
- For exterior doors, use heavy-duty hooks designed for outdoor use to resist weather.
- Choose screw-in hooks for the heaviest signs or metal hangers screwed into the back of the sign.
Knowing the approximate weight of your sign helps you pick hardware that won’t fail. Overestimating a bit by selecting hooks rated for 10 to 15 pounds gives extra safety, especially if you add embellishments or heavier paint layers later. Avoid hanging over fragile surfaces without reinforcement.
Avoiding Mistakes and Troubleshooting Common Problems
Paint bleeding and vinyl peeling are common problems that can ruin the look of your round wood sign. Both usually result from surface preparation issues or applying paint too thickly. Avoid paint bleeding by sanding your wood surface smooth and cleaning off dust before painting. Use painter’s tape for clean edges and apply thin paint layers, letting each dry fully, about 20 to 30 minutes, before adding another. For vinyl peeling, press your vinyl firmly with a squeegee tool and use a sealant spray designed for vinyl to lock it in place.
Uneven staining or surface imperfections often occur when stain goes on unevenly or the wood isn’t sanded well. You can fix early-stage uneven staining by wiping the surface with a clean, lint-free cloth dampened with stain thinner or mineral spirits. When the stain is dry and blotchy, lightly sand the sign with fine-grit sandpaper (220 grit) before applying a thin, even coat of stain again. Be sure to sand along the wood grain, not against it.
Beginners frequently make avoidable mistakes like rushing through prep, overloading paintbrushes, or skipping drying times. Careful preparation and allowing paint or stain to dry fully between coats yield the best results. When an element like a painted letter or design looks off, decide whether it needs touch-up or repainting. Touch-up small mistakes by carefully applying matching paint with a fine brush. For larger errors, sanding off the area and repainting is better to avoid noticeable patchiness.
- Not sanding properly before painting or staining can cause poor adhesion; always sand smooth with 180-220 grit paper and clean dust off.
- Applying thick paint layers leads to drips and uneven finish; use thin coats and wait 20-30 minutes to dry before recoating.
- Skipping primer or sealant can cause paint to bleed or vinyl to peel; seal wood first to create a sealed surface.
- Failing to press vinyl firmly causes edges to lift; use a burnishing tool to smooth down vinyl thoroughly.
- Staining unevenly without wiping off excess causes blotchy spots; always wipe off extra stain within 5 minutes.
- Ignoring drying times results in smudging or paint damage; plan for at least 1 hour drying in dry conditions.
Always test paint and stain on a scrap piece of your wood before applying to the final sign to identify surface issues early.
Take your time and pay close attention during preparation. Carefully sanding, cleaning, and sealing your wood surface prevents many problems. Do not rush painting; slow, steady brush strokes with thin layers reduce mess and yield a smoother finish. When vinyl doesn’t stick or paint bleeds, wait for the paint to fully dry before carefully sanding and reapplying the affected area instead of painting over it immediately. Spending extra time upfront saves effort and produces a sign that looks clean and professional.
Step-by-Step Action Plan for Your DIY Round Wood Sign
Follow these simple steps to create your own round wood sign efficiently and with confidence.
- Day 1: Gather all essential supplies and tools, such as a round wood slice, sandpaper, paint, brushes, and sealant. Confirm you have everything before starting.
- Day 2: Prepare the wood surface by sanding it smooth until no rough spots remain and the surface feels even to the touch.
- Day 3: Choose your design and transfer it onto the wood using a stencil or carbon transfer paper. Check that the design is clear and well positioned.
- Day 4: Paint or decorate the sign using acrylic paints or markers, applying thin layers and letting each dry fully before continuing.
- Day 5: Apply a protective sealant evenly over the entire surface to protect your artwork from wear and the elements.
- Day 6: Attach hanging hardware securely to the back of the sign, making sure it supports the weight safely.
- Day 7: Display your round wood sign in your chosen location and check that it hangs straight and steady.
Frequently Asked Questions
What Size Round Wood Blanks Are Best for Beginners?
Beginners usually start with 12-inch round wood blanks for easier handling and design space. This size fits well on most doors or walls and is widely available at stores like Hobby Lobby.
Can I Use a Regular Printer to Transfer Designs Onto Round Wood Signs?
Regular printers can’t print directly on wood, but you can print designs on transfer paper instead. This method helps keep the design intact while you apply it onto the curved surface of the wood.
How Do I Avoid Cracking When Painting on Round Wood Signs?
Apply a primer and use acrylic paints in thin layers to prevent cracking. Let each layer dry completely before adding more paint or sealer for a smooth finish that lasts.
What Types of Wood Are Best for Outdoor Round Wood Signs?
Durable, weather-resistant woods like cedar or redwood work best outside. They resist moisture and decay better than softwoods, helping your sign last longer outdoors with less maintenance.
How Can I Make a Double-Sided Round Wood Sign?
Use two round blanks glued or screwed back-to-back with designs on each side. Choose lightweight wood and seal well to protect both sides evenly from wear and weather.
Are Vinyl Decals Suitable for Curved Wood Surfaces?
Heat transfer vinyl can work well if applied carefully to match the wood’s curve. Watching tutorials like TeckWrap Craft’s video helps ensure smooth application without wrinkles or bubbles.
The Bottom Line
Creating your own round wood sign lets you add a personal touch to your home decor. Start by preparing your materials today and practice brushing on paint smoothly. The more you work on small projects like this, the better your skills and final results will become.