Christmas Sign Ideas: 12 Creative Ways to Decorate Your Home This Holiday
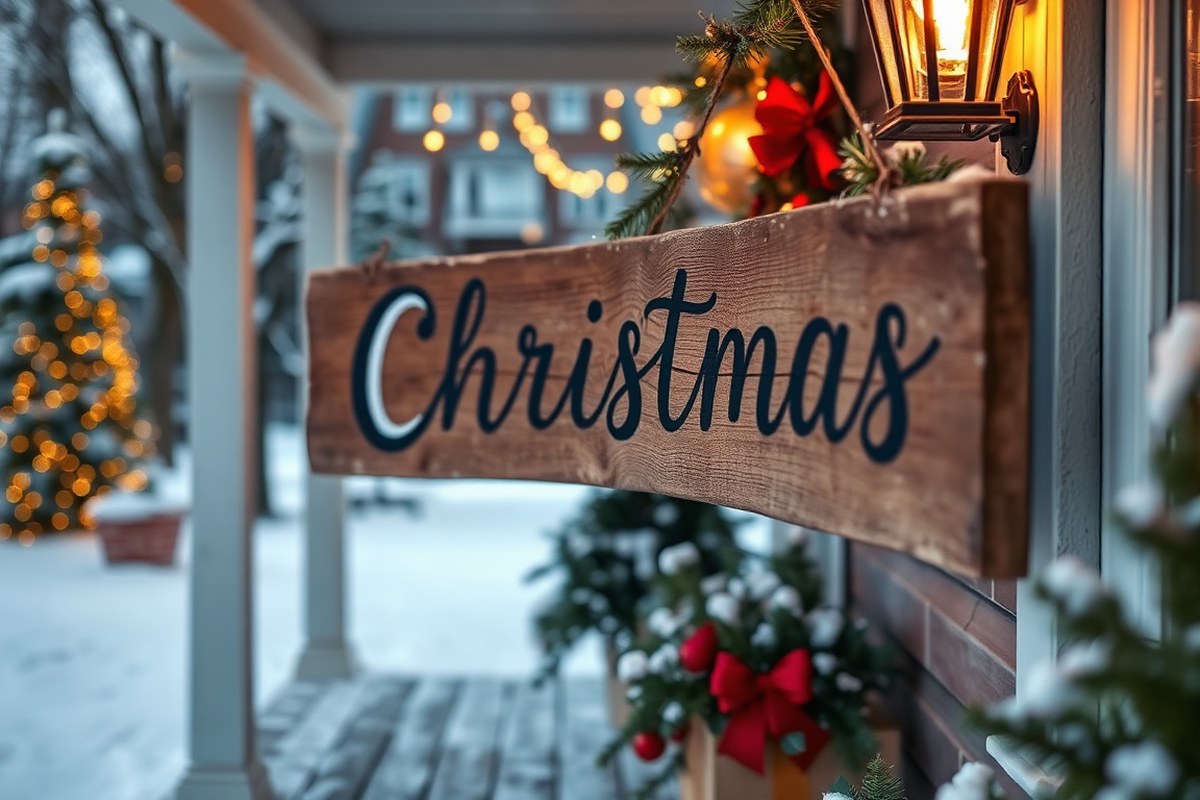
Christmas sign ideas can instantly add festive charm to your home without overwhelming your décor. Simple, creative signs bring warmth and personality to every space, making holiday decorating both fun and affordable. Start with a theme that fits your style, like rustic wood or farmhouse, to keep your signs cohesive and eye-catching.
Key Takeaways
- Choose sign sizes that fit each space, such as small door signs or large wall hangings for living rooms.
- Use durable materials like wood or metal for long-lasting Christmas signs, especially for outdoor displays.
- Gather basic supplies: paint, brushes, stencils, vinyl letters, and twine or wire for easy hanging options.
- Stencils help achieve clean, professional lettering without needing advanced painting skills.
- Rustic wood signs add warmth and pair well with farmhouse colors like white, green, and red.
- Create budget-friendly signs using supplies from dollar stores combined with inexpensive craft paint.
1. Best Christmas Sign Ideas for Every Space
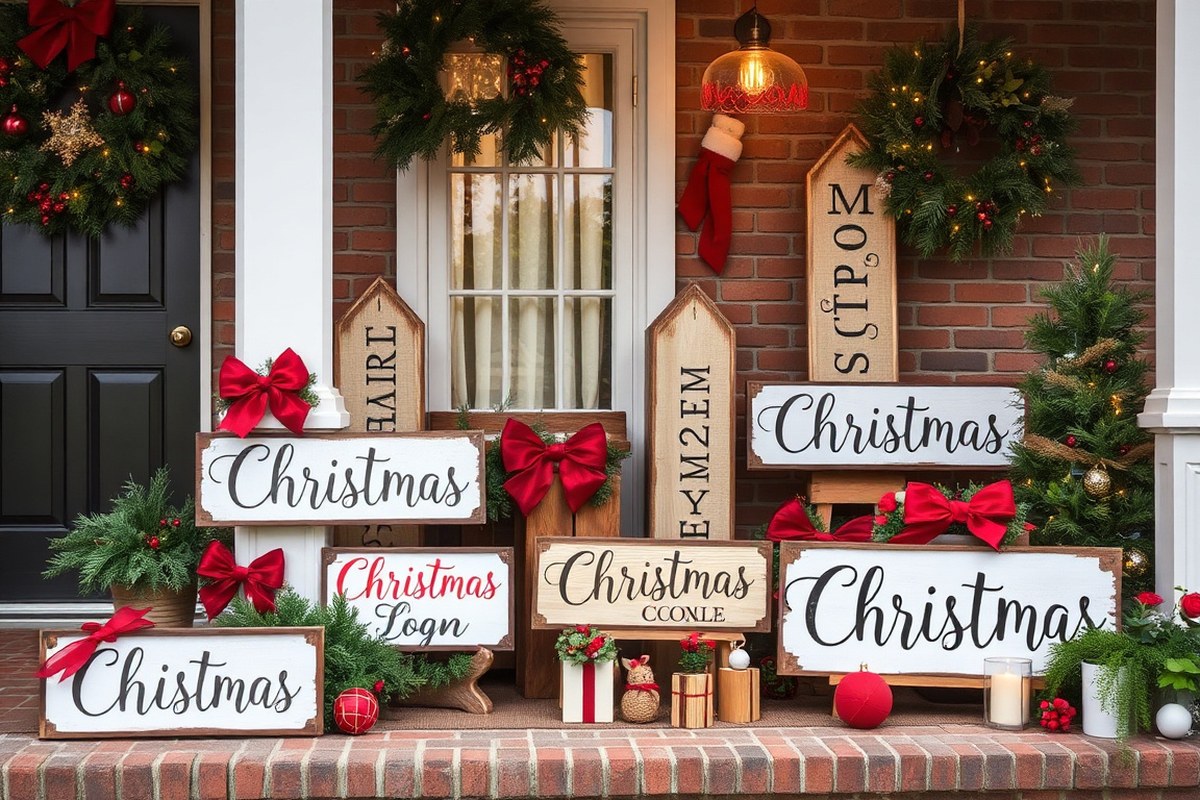
Choosing the right Christmas sign theme sets the tone for your holiday décor and makes each space feel festive and inviting. Popular themes range from rustic and farmhouse styles to shabby chic and modern minimalist. A classic white sign with red lettering and a burlap bow creates a stylish rustic look, perfect for your porch or outdoor space. These materials resist winter wear when treated properly, ensuring the sign lasts through the season. For a shabby chic vibe, black, white, and red signs featuring religious themes or holiday blessings create warmth and elegance suitable for entryways or mantels.
When decorating a front door, focus on signs that welcome guests with festive sayings or holiday cheer. Some effective phrases include “Merry Christmas,” “Joy to the World,” or something playful like “Santa Stops Here.” A red sign with hooks for stockings and a favorite holiday quote offers both decoration and function, especially for homes with children. These door signs should be weather-resistant, use acrylic paint on wood or metal backing, and sized to fit without overwhelming your entrance. Around 18 to 24 inches wide typically works well.
For indoor spaces such as mantels, smaller Christmas signs add a cozy charm. A red sign featuring a popular Christmas song lyric, surrounded by evergreen and berry garland, fits perfectly here. Chalkboard signs topped with greenery offer a farmhouse feel and let you write personalized festive messages each year. Keep indoor signs lightweight for easy placement, and choose styles that complement your existing holiday décor like warm reds, greens, and natural textures.
Porches and outdoor areas benefit from larger, eye-catching signs. Tall red and white signs with bold lettering bring vintage charm to your porch and help your home stand out. Modern designs in green and red with simple shapes and clear fonts work well for both indoor and outdoor use, as you can seal them against moisture. Using reclaimed wood or leftover materials can keep costs down while supporting a rustic appearance. A typical outdoor sign might measure 24 to 36 inches high to create a statement but still fit comfortably on your porch.
Versatility in Christmas sign ideas matters because you can adapt themes to fit different spaces by changing size, color, or wording. For example, a simple evergreen wreath paired with a small chalkboard sign is a subtle outdoor decoration that complements a bigger, colorful doormat. The signs do not have to be complicated or expensive; natural touches like evergreen accents or a burlap bow can add style without extra cost. Thoughtfully placed Christmas signs transform various spaces by delivering festive messages, improving holiday spirit, and inviting warmth into your home.
2. Materials and Tools You Need for DIY Christmas Signs
Wood is one of the best materials for creating Christmas signs, especially for beginners. It offers a sturdy surface and a charming rustic look. Pallet wood or reclaimed wood planks are often affordable options, costing around $5 to $15 per board at local hardware stores or lumber yards. For faster projects, smooth, pre-cut wood panels reduce prep time. Chalkboard signs offer another easy option, great for customizing messages with chalk markers that you can change throughout the season. Chalkboard paint costs about $6 to $10 per small can and can be applied to wood or other flat surfaces for a reusable sign.
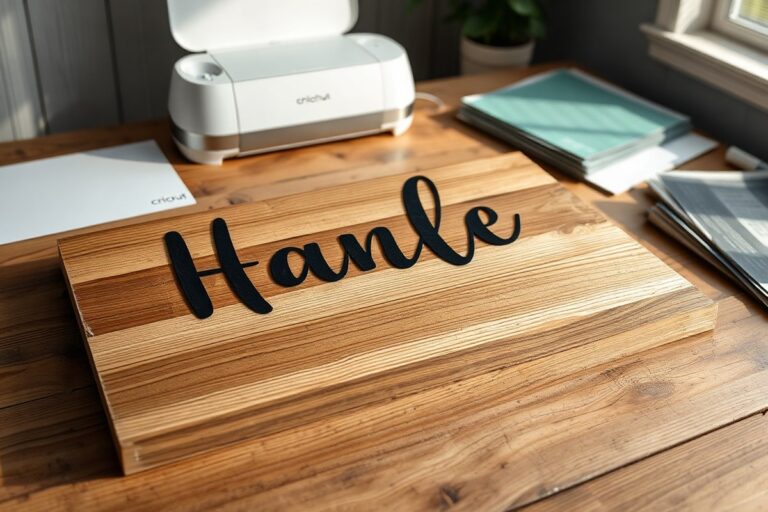
Vinyl is perfect for detailed lettering and designs. You can use vinyl sheets or rolls with a cutting machine like a Cricut or Silhouette to create precise, professional-quality decals. A single roll of vinyl might cost $10 to $20, and these machines range from $150 to $300 if you want to invest. Vinyl works best on smooth surfaces like painted wood or even metal signs. It’s also weather-resistant, which makes it suitable for outdoor decorations.
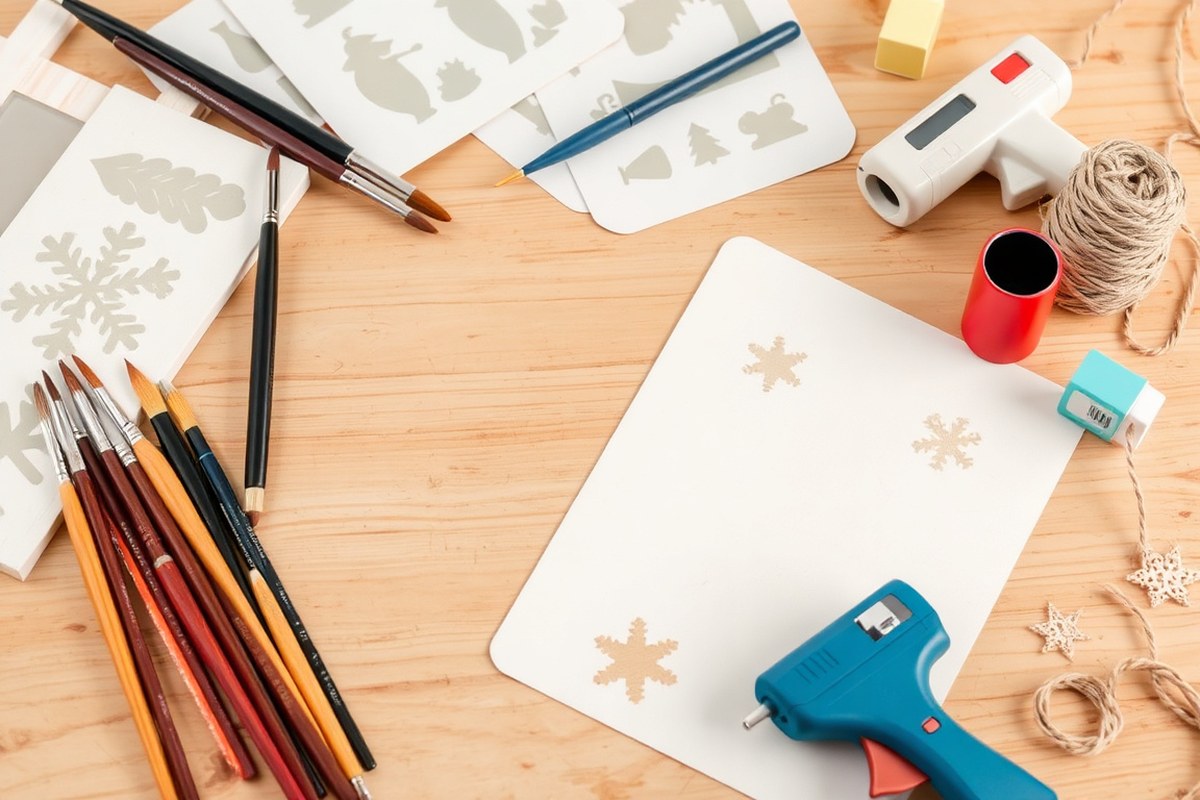
Essential tools speed up the sign-making process and improve results. A quality brush set with angled and flat brushes costing around $10 helps apply paint neatly. For stencils, adhesive spray keeps them flat and prevents paint bleeding. Sandpaper (around $5 for a pack) smooths wood surfaces for better paint adhesion. For cutting wood, a miter saw or jigsaw is ideal but a hand saw can work for simple shapes. For those focused on vinyl, a cutting machine saves hours compared to hand cutting. Finally, a heat gun or craft iron is necessary to adhere vinyl to wood securely.
- Wood planks or pallet wood (pre-cut to desired sizes)
- Chalkboard paint and chalk markers
- Vinyl rolls and a cutting machine (optional but time-saving)
- Paint brushes (angled and flat)
- Adhesive spray for stencils
- Sandpaper or electric sander
- Cutting tools: hand saw, jigsaw, or miter saw
Working on a clean, flat surface and prepping wood by sanding helps paint and vinyl stick better and last longer.
Buying supplies from big-box craft stores often comes with discounts or coupons, but local hardware stores might offer better prices on wood. Online retailers can have good deals on vinyl and cutting machines, especially during holiday sales. Starting with scrap or reclaimed wood saves money and adds character to your sign. For beginners, sticking with wood and chalkboard options that use few tools reduces complexity and still produces attractive Christmas signs.
3. How to Use Stencils for Flawless Christmas Signs
Using stencils for Christmas signs helps you achieve clean, crisp designs without needing advanced painting skills. They save time and reduce errors compared to freehand painting, making it easier to create professional-looking holiday decor. The key lies in choosing the right stencil and applying it carefully to ensure precise lettering and festive images.
Choosing the Right Stencils
Pick stencils made of durable material like mylar, especially for wooden signs, because they clean easily and hold up to repeated use. Mylar stencils provide sharp edges and don’t tear like paper. For intricate designs or fine lettering, look for stencils with narrow cutouts to maintain detail.
Select stencil designs that match your sign’s theme, whether classic Christmas phrases or iconic symbols like trees and snowflakes. Prices for reusable stencils vary but expect to pay around $5 to $15 for high-quality ones at craft stores. Vinyl stencils also work well for smooth surfaces but may be less flexible on textured wood.
Step-by-Step Stencil Application
Follow these steps to apply stencils perfectly and avoid smudges or paint bleed:
- Prepare the surface: Sand your sign lightly and wipe off dust to ensure paint adheres smoothly.
- Position the stencil: Secure it firmly with painter’s tape or adhesive spray to prevent shifting.
- Use the right paint and tool: Acrylic paint works best on wood and dries quickly. Use a stencil brush or foam roller for controlled application.
- Apply paint sparingly: Dip your brush or roller lightly and dab excess paint on a paper towel to avoid bleeding under the stencil.
- Paint with light, even strokes: Dab or roll over the stencil instead of brushing side to side.
- Remove the stencil carefully: Lift it while the paint is slightly wet to avoid peeling paint off the sign.
- Touch up if needed: Use a small detail brush for any missed spots or edges.
Working in a well-lit space helps you see edges clearly during application. Drying times vary but expect acrylic paint to dry to the touch in about 15 to 30 minutes at room temperature.
Avoiding and Fixing Common Mistakes
Common problems include paint bleeding under the stencil and smudged edges, often caused by too much paint or stencil movement. To prevent this, apply paint in thin layers and secure the stencil firmly before starting.
If bleeding happens, wait for the paint to dry and use a fine brush with the background color to clean up edges. Another mistake is removing the stencil too late, which can peel off fresh paint. Lift the stencil gently as soon as the paint feels tacky.
Using the wrong paint, such as oil-based paint on unfinished wood without sealing, can cause uneven drying or fading. Stick to acrylic paints for best results and seal the finished sign if it will be outdoors to protect your work.
4. Creative Lettering Styles and Sayings for Signs
Choosing the right lettering style makes a big difference in how your Christmas sign looks and fits your home decor. For DIY Christmas signs, simple fonts like block letters, serif fonts, or casual script styles are easiest to paint or stencil. For example, a classic serif font such as Times New Roman or Georgia works well when you want a timeless, elegant look. On the other hand, playful handwritten scripts or calligraphy fonts add a personal, festive touch, especially for modern or farmhouse styles. Calligraphy in white paint on stained plywood creates a striking contrast that fits rustic or farmhouse themes nicely. When selecting fonts, pick one or two styles maximum to keep the design clear and avoid clutter.
Popular phrases for Christmas signs aim to evoke warmth, joy, and holiday spirit. Simple sayings like “Merry Christmas,” “Joy to the World,” or “Let It Snow” work well and are easy to paint or stencil. For a rustic vibe, try “Home for the Holidays” or “Joy & Peace” in a bold serif font on a whitewashed wooden plaque. If your decor is modern or colorful, festive phrases like “Believe in the Magic” or “Fa La La La La” paired with playful calligraphy in red or green add cheer. Seasonal greetings like “Welcome Winter” or “Season’s Greetings” feel versatile for either indoor or outdoor signs. Using templates or stencils of these sayings saves time and improves accuracy, especially with cursive or decorative fonts.
To create a sign with clear lettering, start by lightly sketching the font on your chosen material, then trace over it with a fine brush or paint pen. The cost of materials depends on your base, wood panels or chalkboards usually range from $5 to $20, and paint, which may cost around $3 to $8 per color. Stencils or printable templates cost about $5 to $15 if you don’t want to freehand. When painting freehand script or calligraphy, practice on paper first to avoid uneven lines or smudging. For signs exposed to weather, use acrylic or outdoor paint to prevent fading. Good results include smooth, even strokes, consistent letter spacing, and a color scheme that complements the rest of your holiday decor.
Mixing lettering styles can work if balanced, such as pairing a bold uppercase font for the main message with a delicate script for smaller words. This approach fits farmhouse or vintage decor, where contrasts between rustic and elegant details add character. However, avoid overly intricate fonts for large signs, as they can be hard to read from a distance and challenging for beginners. Creating your own templates by printing and tracing fonts from your computer lets you customize sizes and layouts to your space, making the sign suit your entryway, mantel, or outdoor porch perfectly.
5. Step-by-Step Guide to Rustic Wood Christmas Signs
Making a rustic wood Christmas sign combines simple woodworking with creative painting and finishing to give your decor a handmade, cozy feel. Preparing the wood well ensures your paint and texture apply smoothly and last. Then you create weathered charm through layering paint, sanding, and natural touches like twine or green accents.
Preparing and Cutting the Wood
Start with unfinished wood pieces, such as pine or pallet wood, which cost around $5 to $15 for a board suitable for a sign. Choose boards about 1/2 inch thick and 6 to 8 inches wide for durability and easy handling. Cut the wood to your desired sign size, commonly 12 by 18 inches or a size that fits your display space. Sand the edges and surface smooth with medium-grit (120) sandpaper, followed by fine-grit (220), to remove splinters and allow paint to adhere evenly. Pay attention to any knots or wood grain patterns, they add character but may need extra sanding or filling if they cause uneven surfaces.
Painting and Distressing Techniques
Apply a base coat in a light, neutral color like white or cream using acrylic or chalk paint. Chalk paint is especially popular for its matte finish and easy distressing. Let the paint dry completely, about 1 to 2 hours depending on humidity. Using a sanding block or fine-grit sandpaper, gently sand edges and random spots to reveal wood or previous paint layers beneath. This creates a weathered look that hints the sign has aged naturally.
To add texture, mix a bit of chalk paint powder into your base coat for a slightly rough surface. For lettering, use stencils or freehand with black craft paint, painting gently so brush strokes don’t fill in stencil edges or blur fine details. Seal the finished sign with a matte clear spray or wax to preserve the distressed look while protecting from moisture.
Adding 3D Elements and Finishing Touches
Improve rustic charm by gluing on natural elements such as small pine branches, twine bows, or wooden cutouts like stars or trees painted green. Use a hot glue gun or wood glue to attach these securely. A simple wooden frame stained darker than the sign can also contribute rustic style, making the piece stand out on your wall or porch.
You can hang your sign with jute rope threaded through drilled holes or attach sawtooth hangers on the back. Consider adding small, warm white LED string lights around the edges for subtle seasonal sparkle.
- Choose and cut your wood to the preferred size, then sand smooth.
- Apply a light base coat of chalk or acrylic paint; let dry fully.
- Use fine sandpaper to distress edges and surfaces to create weathered texture.
- Paint your chosen Christmas phrase or design using stencils or a steady hand.
- Seal the paint with a matte clear spray or wax to protect your work.
- Add 3D touches like pine sprigs, twine accents, or wooden shapes using glue.
- Attach hanging hardware such as jute rope or sawtooth hooks.
Wear a mask when sanding to avoid inhaling fine wood and paint dust, especially when distressing multiple signs.
6. Farmhouse-Style Christmas Signs: Colors and Decor Tips
Farmhouse-style Christmas signs often feature a simple and cozy color palette that brings warmth to your holiday decor. Classic colors include red and white, black and white, and natural wood tones with stained frames. For example, a red sign with white letters creates a bold and rustic vibe perfect for both indoor and outdoor decorating. Black printing on a stained wooden frame adds a chic, vintage flair that blends well with farmhouse interiors. Including touches of blue snowflakes or muted greens can complement the traditional colors while keeping the aesthetic fresh and inviting.
Patterns commonly used in farmhouse signs are straightforward and nostalgic. Stripes, checkers, or distressed paint effects work best when you want to keep that old-fashioned yet modern farmhouse look. Avoid overly bright or complex patterns, which contrast with the style’s simplicity. For instance, a sign painted with calligraphy or simple block letters can achieve a stylish contrast to rough wood textures. Using a subtle whitewashed or shabby chic finish on wood signs softens the overall look and improve the cozy farmhouse feel.
To improve the natural and welcoming vibe, incorporating wreaths and other natural elements is key. Wreaths made of fir branches, pinecones, and berries can frame your sign or hang nearby. Attaching a small wreath to one corner of the sign using thin wire or hot glue adds dimension without overwhelming the design. Including small bells, yarn accents, or mini stockings attached to the bottom or sides of the sign can inject more personality and holiday cheer. These elements also contribute texture and a handmade touch, encouraging a warm, inviting atmosphere in your home or porch.
Placement of these decorations should reflect balance and harmony with the sign’s color and style. Place fir branches either loosely draped along the top edge or gathered tightly in a small swag on one side. Pinecones and bells often work best clustered rather than spread out, so secure them in groups of three or five to keep the look intentional but not cluttered. For example, attach a trio of pinecones near a corner wreath or tie a yarn bow with bell accents below the lettering to highlight the farmhouse style’s natural charm.
Costs for farmhouse-style decor can vary depending on your approach. Natural materials like pinecones, fir branches, and yarn are easily found outdoors or at craft stores, often ranging from $3 to $10 per bundle. Basic wooden sign blanks or reclaimed wood can cost $10 to $25, while simple paint supplies might add another $5 to $15 if you don’t already own them. Creating your decorations in four or five steps, from preparing your wood to painting, attaching wreaths, and adding accents, typically takes just a few hours but results in a seasonal decoration that embodies the farmhouse spirit.
Good results show as a sign that balances rustic charm with thoughtful accents. The wood should have visible grain or a light weathered look, making the sign feel natural and lived-in. Letters need to be clear and centered, often in calligraphy or simple block style, with wreaths or greenery that complement rather than hide the message. Signs that appear too polished or overdecorated lose their farmhouse appeal, while too little embellishment can leave the sign feeling plain. Finding the right middle ground by layering natural textures and classic colors creates a welcoming holiday piece perfect for farmhouse-inspired decor.
7. How to Make Budget-Friendly Christmas Signs from Dollar Store Supplies
You can create attractive Christmas signs on a tight budget by using items from dollar stores like Dollar Tree. Their craft and seasonal aisles offer a variety of inexpensive supplies perfect for festive projects. Start with a basic wood plaque or an inexpensive picture frame as your sign’s base. These cost about $1 to $3 each and provide a sturdy surface to work on. Adding paint, festive ribbon, or even decoupaged napkins from the dollar store can instantly upgrade a plain sign, giving it a higher-end look without overspending.
Plastic trays from dollar stores are versatile and can be transformed into eye-catching tier tray signs with some paint and lettering. For example, a silver plastic tray can become a fun Christmas ornament sign, perfect for a holiday vignette. Cheap metal bells combined with some inexpensive paint and ribbon also allow you to add texture and holiday charm to your pieces. Using stencils or freehand lettering in white, red, or gold paint helps create crisp, festive messages like “Merry Christmas” or “Joy to the World.” Here’s a list of recommended dollar store supplies that work well for budget Christmas signs:
- Wood plaques or small wooden boards for a strong base
- Picture frames or old window frames for framing signs
- Plastic trays for unique tier tray or wall signs
- Seasonal ribbons and bows for added color and texture
- Craft paint in traditional Christmas colors (red, white, green, gold)
- Metal bells or small holiday ornaments for embellishment
- Decoupage napkins or seasonal patterned paper for surface design
To get a stylish effect, start by lightly sanding wood plaques for better paint adhesion. Use a homemade stencil or print lettering on paper to trace your message before painting. Cover your base with two thin coats of paint, allowing 30 minutes drying time between coats. Adding a layer of mod podge over decoupaged napkins protects the design and gives a smooth finish. Finishing touches like tying ribbon through the frame or gluing bells to corners can improve the sign without costing more than a couple of dollars extra.
While these projects cost from $5 to $10 in materials, taking time to carefully paint and layer decorations can make your signs look custom-made rather than dollar store cheap. Avoid heavy-handed paint application, which can cause smudging. Also, use hot glue sparingly on delicate surfaces to prevent warping or damage. This approach lets you proudly display your budget-friendly signs both indoors and outdoors as part of your Christmas decor.
8. Adding Lights and 3D Effects to improve Christmas Signs
Using lights and 3D decorations on your Christmas signs can bring depth and sparkle that catch the eye. For safety and ease, opt for LED string lights designed for indoor use if your sign stays inside, or outdoor-rated lights if displayed outside. LEDs run cooler, use less energy, and last longer than traditional bulbs, reducing fire risk and frequent replacements. Choose battery-operated LED lights to avoid visible wiring and allow more placement flexibility without needing nearby outlets or extension cords.
Start by measuring the length of your sign’s border or the area you want to light. Attach the string lights with small clear adhesive hooks or tape that won’t damage the sign’s surface. Space the hooks or tape pieces every 4 to 6 inches to keep the lights secure and evenly placed. Avoid stapling or using nails on thin wood or fragile materials to prevent cracks or holes. If you plan to use wired lights on wood, gently wrap the wire around small finishing nails placed along the sign’s edge, being careful not to puncture the wiring.
Adding 3D effects involves attaching ornaments, bows, or natural elements like pinecones and berries to the sign for texture and dimension. Use hot glue for lightweight decorations on smooth or wood surfaces. For heavier items like wooden crates or clusters of ornaments, secure them with small finishing nails or screws. Drill pilot holes first to avoid splitting wood. Wire hooks or twist ties work well for tying on wreath elements or garlands, allowing you to adjust or remove them without damage.
Consider layering your 3D elements thoughtfully. Start with a sturdy base like a wooden crate shape, then add medium-sized decorations like pinecones or bows, finishing with small sparkle pieces like berries or mini ornaments. This builds visual interest without overloading the sign. Keep the weight manageable, under 5 pounds total, so your sign hangs securely and doesn’t warp or lean.
Your lighting and 3D decorations will look best if placed to highlight key features such as lettering or silhouette outlines. For example, wrapping lights around the edges or inside letter cutouts creates glowing shapes that stand out. Mini LED bulbs spaced about 1 inch apart inside cutouts give a marquee feel, while string lights outlining the entire sign emphasize its shape. Test your light placement in a dim room before final attachment to ensure even coverage and desired sparkle.
Always unplug lights before attaching or adjusting decorations to avoid electrical shock or damaging the bulbs.
Take time to check your sign’s surface compatibility before attaching ornaments. Smooth painted or sealed wood often bonds well with hot glue, while rough or porous surfaces may need nails or wire for secure hold. Prepare wood by cleaning dust and dirt; sanding very rough areas helps glue stick better. Use weatherproof glue or fasteners if the sign will be outdoors to prevent decorations from falling off in moisture or cold.
Costs vary depending on materials. A 33-foot battery-operated LED string light set averages $15 to $25 online or at craft stores. Hot glue sticks cost about $5 for a 36-pack. Small finishing nails or screws come in packs for under $10. Investing in reusable lights and durable attachment methods saves money over using temporary adhesives or fragile decorations that require replacement each season.
9. Weatherproofing and Displaying Outdoor Christmas Signs
Protecting outdoor Christmas signs from weather boosts their lifespan and keeps them looking fresh throughout the holiday season. Using the right paints and sealants is essential to handle rain, snow, and sunlight. Acrylic latex exterior paint works well because it resists fading and cracking. After painting, apply a clear waterproof sealer like marine varnish or an outdoor polyurethane spray to block moisture. These sealants cost around $10 to $20 per can and dry within a few hours, with full curing in about 24 hours. Reapply sealant every year for best results and check your signs for peeling or fading.
Choosing the right spot also matters. Place signs under a covered porch or awning whenever possible to reduce direct exposure to rain and snow. Position signs where they catch some sunlight for visibility but avoid spots with strong afternoon sun to limit fading. Mounting signs securely prevents wind damage. Use heavy-duty outdoor hooks, bracket mounts, or anchors rated for at least 20 pounds. For wood signs, drill pilot holes to prevent splitting, then use galvanized screws or outdoor staples for attachment. For lighter signs like chalkboards, consider using strong adhesive strips labeled for outdoor use.
- Paint with acrylic latex exterior paint, apply two coats.
- Seal with marine varnish or outdoor polyurethane spray; reapply yearly.
- Mount under porch or awning if possible for weather protection.
- Attach with galvanized screws or heavy-duty hooks suited for outdoor use.
- Drill pilot holes before screwing into wood to avoid splitting.
- Use outdoor-rated adhesive strips for lightweight signs on smooth surfaces.
- Check signs monthly for damage or wear during winter months.
Weatherproofing takes about one to two days, including drying times, and adds minimal material cost. Good sealing results in signs that remain vibrant without peeling or water damage through the season. Without proper protection, signs can warp, fade, or lose lettering details, reducing their festive charm. Securing signs firmly also prevents loss or damage during windy winter storms, preserving your holiday decoration investment.
10. Interactive Christmas Countdown and Holiday Message Signs
Interactive Christmas countdown and holiday message signs bring a hands-on and welcoming touch to your seasonal decor. These signs invite family and guests to participate in the countdown to Christmas or share festive cheer through changing messages. Creating a reusable countdown sign keeps the excitement alive every year while holiday messages inspire warmth and joy in your home.
Designing Your Countdown Layout
A successful reusable Christmas countdown sign features clear numbering and room for changing messages. Choose a layout that fits your available space, such as a hanging wooden plaque or a framed chalkboard. Incorporate sections for the numbers 1 through 25 to represent the days leading to Christmas. Consider adding small slots or hooks to hang mini ornaments or tags marked with each date, making it interactive and tactile.
Position the numbers in a grid or circular pattern to keep the design visually engaging. Leave a space to write or display a short phrase or fun fact about the holiday each day. This approach lets family and guests easily follow the countdown and feel more connected to the holiday spirit.
Materials for Reusable Components
A reusable countdown sign typically requires durable materials such as wood, metal, or sturdy chalkboard surfaces. Chalkboard paint applied over wood is a popular choice because it allows you to write and erase daily numbers and messages with chalk or liquid chalk markers. Modge Podge can seal and protect painted surfaces to prolong sign life.
Additional materials include small hooks, clothespins, or magnetic strips to display date markers or ornaments. Choose weatherproof finishes if the sign will be outdoors. Expect to spend $15, $30 on supplies like chalkboard paint, Modge Podge, and mounting hardware, depending on size and materials.
Creative Holiday Message Ideas
Messages that encourage holiday spirit often combine warmth, humor, and tradition. Phrases like “Joy to the World,” “Let It Snow,” or “Merry & Bright” create a festive mood. You can also include daily thoughts such as, “Time to hang the stockings!” or “Baking day: cookies and cocoa,” inviting family participation.
For variety, rotate messages weekly or daily using interchangeable cards or chalk notes. Include funny sayings like, “Dear Santa, I can explain,” or heartfelt ones like, “Home is where the Christmas tree is.” The goal is to spark smiles and encourage conversations among guests.
- Choose a base for your countdown sign, such as a wooden plaque or framed chalkboard.
- Apply chalkboard paint evenly if using a wooden surface; allow to dry and cure as per paint instructions (typically 24 hours).
- Seal the surface with a layer of Modge Podge to protect paint and make it easy to clean.
- Paint or attach numbers 1 to 25 in your chosen pattern, ensuring they are spaced and visible.
- Add hooks, clips, or magnets to attach daily markers, ornaments, or message cards.
- Create or print interchangeable holiday messages on cardstock or chalk-friendly material.
- Write or change countdown numbers daily using chalk or markers, engaging family members in the process.
- Display the sign prominently on the front porch or inside where guests can see and interact with it.
11. Common Mistakes in DIY Christmas Signs and How to Fix Them
One common error that lessens the quality of DIY Christmas signs is paint drips or smudges. These happen when paint is applied too thickly or when you rush without letting layers dry completely. To fix paint drips, immediately blot excess paint with a clean cloth before it dries. For dried drips, lightly sand the area with fine-grit sandpaper, then repaint carefully in thin, even coats. Using a high-quality, angled brush and holding it at a steady angle helps control the paint flow and avoid drips in the first place.
Uneven lettering is another frequent problem, especially if freehand painting or stenciling is done without preparation. Uneven spacing or letters of varying sizes can make your sign look amateurish.
- Use painter’s tape to create straight margins and consistent lettering zones.
- Draw light pencil guidelines on your sign surface to align each letter.
- Choose stencils that fit the sign size and trace with a pencil before painting.
- Consider using transfer paper to copy a printed design rather than freehanding.
- Practice lettering on scrap material until you’re comfortable.
- Apply thin coats of paint to avoid bleeding under stencils or brush strokes.
Placement issues, such as off-center text or decorations, can throw off the balance visually. Before gluing or painting, place all elements loosely on the surface to check spacing. Measure distances from edges and between components with a ruler or tape measure. Mark center points with a small pencil dot as a guide.
Improving overall technique involves patience and proper preparation. Use a sanding block to smooth wood or canvas surfaces before painting for better paint adhesion. Thin paint with a little water or medium to improve flow and avoid clumping. Allow each coat to dry fully, usually 1 to 2 hours for acrylic paint at room temperature, before applying the next.
Costs generally remain low if reusing wood scraps or dollar-store materials. A small pack of fine-grit sandpaper or painter’s tape usually costs around $3 to $5 and can be used on multiple projects. Good paintbrushes in the $5 to $10 range offer better control than cheaper options.
Always test your painting technique on a scrap piece first to catch possible errors before working on your final sign.
12. Creative Shapes and Upcycling Ideas for Unique Signs
Using unconventional shapes and recycled materials can make your Christmas signs stand out with personality and charm. Think beyond traditional wood or metal panels: old shutters, baking trays, or even broken sleds offer unique bases that instantly catch the eye. These kinds of found items bring a nostalgic, rustic feel and add depth to your seasonal decor without costing much.
Old wooden crates or pallets work great because they already have a structure that supports paint and embellishments. Repaint them in classic holiday colors like red, green, or white, and use stencils or freehand your message. Consider using vintage metal items like washing machine lids or tin trays, they’re sturdy and weather-resistant if you plan outdoor use. Sand off rusted spots lightly to avoid uneven paint application and seal the surface with clear spray paint when dry.
Safety is key when upcycling. Check for sharp edges, rust, or splinters before starting. Use gloves and protective eyewear when sanding or cutting materials. Wash or wipe down surfaces thoroughly to remove dirt and grease that can prevent paint adhesion. For porous wood, apply a primer to block stains and help paint last longer. Choose water-based acrylic paints for easy cleanup and quick drying, generally about 30 minutes to touch dry and 24 hours to cure fully.
Once your base is prepped, you can decorate with string lights, ribbons, or natural accents like pinecones and evergreen sprigs. Use waterproof glue or outdoor-rated staples to secure embellishments safely. For festive variation, cut large shapes from cardboard covered in foil or wrapping paper for lightweight, disposable signs. Despite their impermanence, these cost under $5 and brighten up spaces with minimal effort.
Repurposing old kitchenware can create charming motifs. For example, paint holiday phrases on a round cutting board or attach hooks for hanging ornaments. An old sled can be turned into a winter-themed sign by sanding, painting, and fixing wooden letters or vinyl decals. These cost nothing if you already have them, and projects typically take a couple of hours, including drying time.
Keep in mind, painted recycled items may need occasional touch-ups during the season, especially if they’re outside. However, their unusual shapes and personalized touches will grab attention and add creativity to your holiday setting. Exploring what you have around the house or in thrift stores lets you customize your Christmas signs in ways mass-produced signs cannot match, all while being eco-friendly and budget-conscious.
Step-by-Step Action Plan for Your Christmas Signs
Follow these steps to create Christmas signs that reflect your style and brighten your home or outdoor space this holiday season.
- Day 1: Choose your sign location and measure the space to decide the sign size. Confirm it fits well and is visible.
- Day 2: Gather materials and tools based on your desired style, wood, stencils, lights, or dollar store supplies, and check you have all needed items.
- Day 3: Sketch your design and pick lettering style or sayings. Make sure it matches your theme and space.
- Day 4: Prepare your base (wood, canvas, or upcycled material). Verify it’s smooth and clean for paint or decorations.
- Day 5: Use stencils or freehand paint your design. Wait until paint fully dries with no smudges.
- Day 6: Add lights or 3D effects if desired. Check they attach securely and light up evenly.
- Day 7: Apply weatherproofing for outdoor signs. Confirm the seal is even to protect from elements.
- Day 8: Hang or place your sign. Step back and make sure it looks balanced and complements the surroundings.
Frequently Asked Questions
What Are Some Unique Christmas Sign Ideas for Front Doors?
Unique Christmas door signs include personalized nameplates, wood cutouts shaped like Christmas trees, and signs featuring festive sayings with 3D lights. These signs add personality and warmth to your entrance, making your home inviting for guests.
Can I Make Outdoor Christmas Signs Weatherproof Without Professional Tools?
Yes, seal your outdoor signs with clear waterproof spray or polyurethane to protect against rain and snow. Reapplying every season helps maintain durability without needing professional-grade tools.
How Do I Choose the Best Wood for Rustic Christmas Signs?
Cedar and pallet wood work well due to their durability and natural texture. They offer a charming rustic look and hold paint and stencils nicely, especially for 3D effects.
What Are Some Budget-Friendly Ways to Decorate Christmas Signs?
Use dollar store supplies like wood plaques, paint, and stencils to create charming signs without spending much. Combining simple materials with personal touches keeps costs low and creativity high.
Can I Use Vinyl Letters Instead of Paint on Christmas Signs?
Yes, vinyl letters make lettering quick and neat, especially for detailed designs. They stick well on smooth surfaces and can be combined with painted or stained backgrounds for a polished look.
How Do I Safely Add Lights to My Christmas Signs?
Use battery-operated LED string lights to avoid electrical hazards. Secure lights with small clips or clear tape, and keep battery packs hidden but accessible for easy replacement.
Before You Go
Creating your own Christmas signs lets you personalize holiday decor and save money while expressing creativity. Start with a clear plan and simple materials, then build up your skills from there. Pick one idea that fits your style and space today, and enjoy crafting a sign that brings festive cheer into your home or yard.