How to Make Marquee Signs with Lights: A Complete Step-by-Step Guide
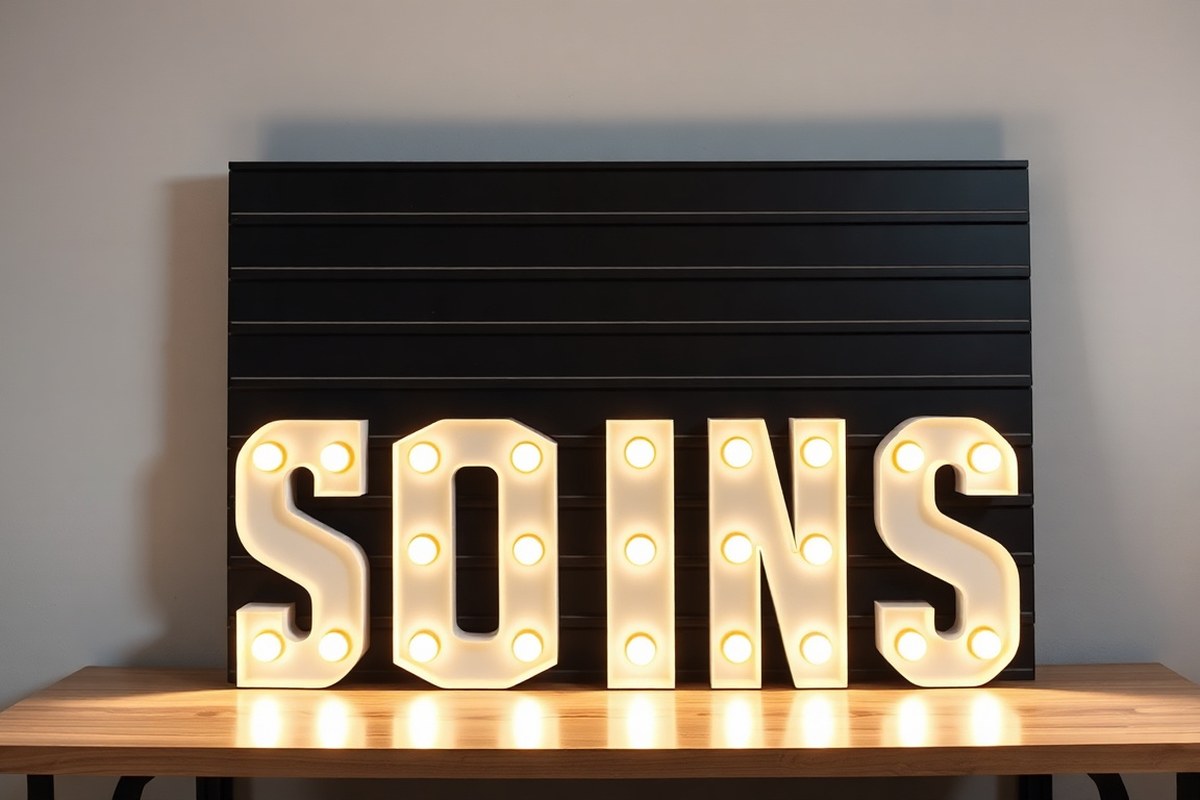
Knowing how to make marquee signs lets you create eye-catching, custom designs that brighten any space or event. Start by selecting sturdy materials like 3/4-inch wood and foam board, then cut and assemble your letters or shapes carefully. Properly spacing and wiring the lights ensures a professional look with even illumination.
Key Takeaways
- Choose 3/4″ wood for frames to ensure strong, durable marquee signs.
- Use foam board templates to shape your letters or figures accurately.
- Cut holes with a 3/16″ spade bit or hole saw sized for your bulbs.
- Sand edges smooth after assembling layers for a polished finish.
- Space your bulbs evenly and pick quantities divisible by four for light movement effects.
- Apply multiple coats of satin spray paint for a durable and attractive surface.
How to Make Marquee Signs: A Step-by-Step Process
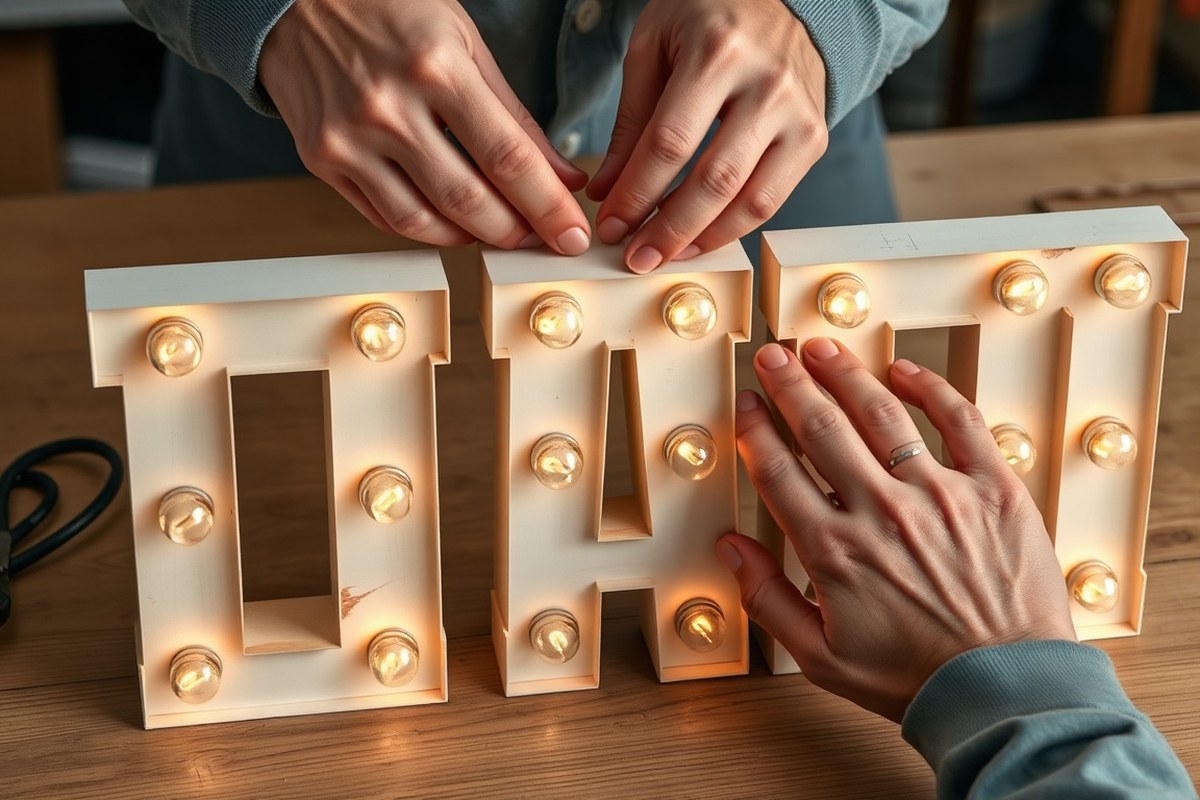
Making a marquee sign involves planning your design, cutting out shapes or letters, drilling holes for lights, painting, wiring, and assembling everything carefully. Start by drawing or taping your letters on paper in the desired layout, ideally in two lines for easier handling. Use these outlines as a template to transfer your design onto foam board or wood. Precise cuts create clean edges and a polished look you’ll want for your project.
After cutting, measure and mark where the lights will go, usually spacing holes evenly across each letter. A 3/4-inch paddle drill bit works well for making holes large enough to fit most standard marquee light sockets. Drilling systematically from the center out helps keep the spacing balanced. Painting your cut pieces before wiring the lights makes the sign look professional and helps prevent touching up later.
For assembly, insert lights from the back through the holes and secure them with clips or tape to keep them from falling out. Adding scrap foam blocks between layers can provide depth and help hold the bulbs in place. Wiring the lights carefully ensures they remain safe and functional. The entire process typically costs under $50 if you select affordable materials and reuse some supplies, making marquee signs an accessible option for DIYers.
- Trace and cut your letters: Arrange your printed or drawn letters on paper in your planned layout. Tape or draw your letters on foam board, then cut them out carefully using an X-Acto knife or jigsaw.
- Mark and drill holes: Begin at the center of each letter, marking even spots for the lights, spaced about 3 to 4 inches apart. Drill holes using a 3/4-inch paddle bit to fit your marquee bulbs.
- Paint your letters: Apply 2 coats of your chosen paint on all letter surfaces and edges. Allow each coat to dry completely to avoid smudges or uneven finishes.
- Prepare for wiring: Attach scrap foam blocks on the back of letters where needed to create buffers. This supports the bulbs and prevents damage to the sign.
- Insert lights: Push your marquee lights through the holes from the back. Secure bulbs with clips, tape, or foam to keep them firmly in place.
- Wire and test your sign: Connect your bulbs to a power source using the wiring method covered in specialized guides. Test lights before final assembly to avoid troubleshooting later.
- Assemble layers if applicable: Mount the front letter panel to a backing board or frame, securing with screws or strong adhesive. This adds stability and improve the overall look.
Choosing the Best Materials for Durability and Look
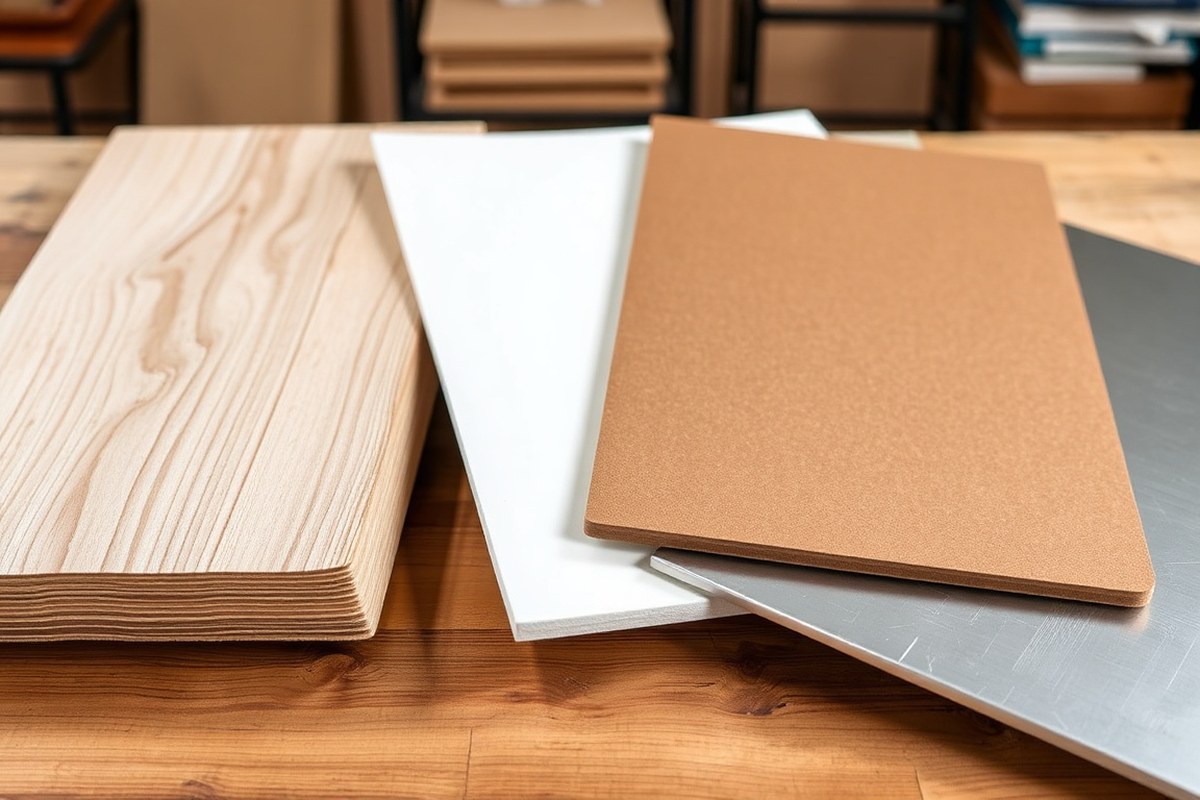
Choosing the right materials for your marquee sign affects how easy it is to craft, how much it costs, and how long the sign lasts. Wood and foam board are popular choices, but alternatives like poster board and metal edges can also work depending on your needs. Wood provides durability and a solid feel but is heavier and often more expensive. Foam board is lightweight, easier to cut, and budget-friendly, but less durable for outdoor use. Poster board is ideal for detailing but needs a base material for strength. Metal edges add a polished, long-lasting finish but require more tools and skill.
| Material | Ease of Use | Cost | Weight | Durability | Finish Quality |
|---|---|---|---|---|---|
| Wood (3/4″ plywood) | Moderate (requires cutting and sanding) | $$ (around $20-$40 for 4×8 sheets) | Heavy (good for stability) | High (lasts long indoors and outdoors) | High (smooth finished when sanded and painted) |
| Foam Board | Easy (cut with a knife or screwdriver for holes) | $ (under $10 for large sheets) | Light (easy to move and hang) | Low to moderate (mainly for indoor use) | Moderate (paint adheres well with spray paint) |
| Poster Board | Easy (good for gluing detail strips) | $ (cheap and widely available) | Light | Low (needs a sturdier base) | Moderate (works well for layered effects) |
| Metal Edges | Moderate to Difficult (needs skill and tools to cut and attach) | $$$ (higher cost for materials and tools) | Medium to Heavy | Very High (excellent weather resistance) | Very High (gives a clean, professional look) |
Choosing a material depends on your project’s purpose and location. For lightweight and simple designs, foam board is best for beginners, especially for indoor signs like photo booths. If you want your marquee to last longer, especially outdoors or in busy areas, plywood cut at 3/4″ thickness provides the strength and durability needed. Using poster board as an accent glued to foam can add dimension without adding much weight.
Use foam board glue or hot glue to secure poster board strips to foam core numbers for a clean finish that holds well.
Combining materials is common. For example, cut wood into your base frame and main panel, then glue foam board numbers to that frame for a mix of durability and lightweight design. Clamping pieces together and sanding edges smooth before painting improves the look and makes assembly easier. Avoid very large foam boards if you must carry them alone, as even lightweight pieces can be unwieldy.
Tools You’ll Need and Important Safety Tips
Making marquee signs requires a few key tools for cutting, wiring, and finishing, along with strict safety steps. Using the right tools makes your project easier and more accurate, while following safety tips helps you avoid accidents during drilling and wiring. Beginners should focus on tools that offer control and safety features to reduce risks.
Essential Cutting Tools
Cutting precise shapes for a marquee sign is a critical step. An exacto knife is the most common tool for detailed cutting, especially on thinner materials like foam board or plastic. It provides control for clean edges but requires a steady hand. For thicker materials like wood or PVC, a jigsaw or small handheld saw works better.
Using a cutting mat underneath prevents damage to your work surface and helps guide your cuts. Some beginners prefer stencils or templates to trace numbers or letters first, so the cutting is accurate. Working in pairs can speed up the process and improve results, with one person holding the material steady.
- Exacto knife or craft knife for detailed cuts
- Cutting mat to protect surfaces
- Jigsaw or handheld saw for thicker materials
- Ruler or straight edge for straight cuts
- Stencil or templates for tracing designs
- Clamps or weights to secure materials during cutting
Good cutting tools are sharp and comfortable to hold, which helps avoid slips that can ruin your work or cause injury. Dull blades require more force and increase the chance of mistakes or cuts to yourself.
Lighting and Wiring Tools
Marquee signs often use low-voltage LED lights or miniature bulbs, which require basic wiring tools. Wire strippers are essential for removing insulation cleanly without damaging the wire. A small electric drill with a fine bit helps make holes for the light sockets. For connecting wires, needle-nose pliers and electrical tape or heat-shrink tubing keep connections secure and neat.
The wiring setup depends on the type of lights you use. LED string lights or battery-powered kits reduce wiring complexity and are safer for beginners. Leave only the needed length of cord to plug in the sign, preventing excess wiring that can get tangled.
- Wire strippers to prepare electrical wires
- Small electric drill with thin drill bits for holes
- Needle-nose pliers for twisting and positioning wires
- Electrical tape or heat-shrink tubing to insulate connections
- Soldering iron (optional) for stronger connections
- Multimeter to test voltage and continuity (recommended)
Using lighting tools suited for low-voltage kits protects beginners from electrical hazards. Never splice wires without proper insulation, and double-check all connections before plugging in your sign.
Safety Equipment and Practices
Personal protective equipment (PPE) is important for safe cutting and wiring. Safety glasses shield your eyes from flying debris when drilling or sawing. Gloves guard your hands from cuts and insulation damage, but choose thinner ones that allow good control. Work in a well-lit area and keep your workspace clean and free of clutter.
Before drilling holes, mark your placement clearly to avoid mistakes. Always unplug any lighting components before working on wiring to prevent electric shock. If you’re unsure about wiring, consult a licensed electrician. Take breaks if you feel tired to maintain focus and reduce accidents.
- Safety glasses to protect eyes from debris
- Protective gloves that balance safety and dexterity
- Dust mask when sanding or working with spray paint
- Clear markings for drill hole placement
- Work in a well-ventilated, well-lit area
- Unplug electrical components before wiring
- Follow manufacturer’s instructions for power tools
Following these safety practices helps avoid common injuries like cuts, splinters, and electrical shocks. Beginners should start with low-speed tools and take their time to get comfortable with each step.
How to Wire Marquee Lights for a Professional Effect
Marquee lights work by connecting a string of bulbs in series or parallel circuits to a power source, often controlled by a chasing light box to produce a moving effect. You can wire your sign using globe bulbs or LED string lights, but keep in mind that LEDs draw less power and may require different wiring adjustments. To create a moving light effect, use a chasing light box and arrange bulbs in multiples of four for smooth lighting sequences.
Basic Wiring Components
Your marquee sign wiring relies on a few key components: the light bulbs, the wiring strands, a power source, and optionally a chasing light box for animation. Globe bulbs from stores like Target are common and fit standard wiring setups. LEDs can work as well, but confirm they operate at the same voltage as your power supply. The string of lights passes through holes drilled in the sign, with each bulb threaded from the back.
A typical chasing light box, used for moving effects, includes four leads and a ground wire. It controls which set of lights blink in sequence. The bulbs are divided evenly into four groups, all connected to different leads. One lead connects every fourth bulb, while the ground ensures safety and proper function.
Creating a Moving Light Effect
To achieve the illusion that lights move around your marquee, your total bulb count should be divisible by four. Each quarter of bulbs connects to one lead on the chasing box. The box then cycles power through these leads in order, creating a chasing or moving pattern. You can use incandescent globe bulbs or LED string lights, but LEDs must be compatible with your chasing box for the effect to work properly. Follow these steps for wiring your moving light effect:
- Thread each bulb from your string of lights through the holes in the sign, pushing from the back.
- Group the bulbs so the total number is divisible by four, removing extra bulbs if needed.
- Connect every fourth bulb to one of the four leads on the chasing light box.
- Attach the ground wire from the chasing box to a grounded point on your sign or frame.
- Connect the power input from the chasing box to your power source, following voltage and current ratings.
- Tuck any excess wiring or unused bulbs behind the sign to keep the front clean.
- Test the lights to ensure the chasing effect cycles smoothly without flickering or outages.
Troubleshooting Common Wiring Issues
Lighting problems often stem from poor connections, incorrect bulb counts, or incompatible components. When your lights don’t move or fail to light consistently, check that you have the right number of bulbs in multiples of four for the chasing box wiring. Loose bulbs or wires can cause flickering or dead spots; make sure each bulb is fully screwed in and securely wired.
When using LED lights instead of globe bulbs, ensure the chasing box supports LED loads since LEDs draw less current and can behave differently than incandescent bulbs. Notice some bulbs not lighting? Unscrew and set aside bulbs not connected to the leads, as extra bulbs in the string may cause circuit issues. Always unplug the sign before making wiring adjustments and verify your power source matches the voltage requirements to prevent damage.
Painting and Finishing Techniques for a Polished Look
Use satin spray paint designed for wood or foam to achieve a durable and vibrant finish on your marquee sign. Satin finishes strike a balance between matte and gloss, preventing glare while offering easy cleaning. For wood signs, especially medium-density fiberboard (MDF) or chipboard, apply a primer suitable for wood first to help paint adhere better and avoid blotchiness. Foam signs benefit from flexible spray paints that won’t crack as the material moves. Choose a color that contrasts well with your bulbs or LEDs to make the lights stand out effectively.
Begin by sanding your wood or foam surfaces lightly using fine-grit sandpaper to create a smooth base. Wipe away dust before priming. For MDF or chipboard, apply a thin, even coat of wood primer with a foam roller, which gives a smooth finish without brush marks. Let it dry for at least an hour before lightly sanding again. Your foam sign needs a flexible primer or a very thin spray primer coat made especially for foam. Cover your work area to catch overspray and spray paint in even, sweeping motions about 8, 12 inches from the surface, avoiding drips by applying multiple thin coats. Let each coat dry 15 to 30 minutes as recommended by the manufacturer.
After the base coats dry, use a small paintbrush or a paint marker to add your custom message or fine details. Choose paint designed for crafts to ensure crisp lines and avoid bleed. For a clean professional look, steady your hand on a surface near the sign and apply slow, deliberate strokes. Avoid adding a glossy top layer on paper or poster board signs as it can cause peeling or uneven finishes. On wood and solid surfaces, a light coat of clear satin or matte polyurethane spray seals and protects the paint from scratches and moisture.
For outdoor marquee signs, weatherproofing adds longevity. Start with exterior-grade primer and paint because they contain UV blockers and resist fading. After painting, apply a clear waterproof sealer like spar urethane, which flexes with the wood during temperature changes. Plan to reapply the sealer every 1 to 2 years for best results. Marquee lights that create heat require the sealer to fully cure before you install bulbs to avoid tackiness. Use weatherproof LED bulbs and seal all wiring connections with silicone to keep moisture out.
Always test your paint and finish on a scrap piece of your sign’s material before working on the entire project to avoid unexpected reactions or warping.
Mounting and Displaying Your Marquee Sign Safely
Mounting your marquee sign correctly is key to keeping it secure and looking great. Safety matters because a loose or heavy sign can fall, causing damage or injury. The best mounting method depends on the sign’s size, weight, and whether you’re displaying it indoors or outdoors.
For smaller signs, using eyehooks screwed into the back of the letters works well. Make sure the eyehooks don’t penetrate all the way through to the front. Attach picture wire between the eyehooks to hang the sign on nails or hooks in your wall. This method is simple and allows for easy adjustment or removal. Keep in mind that picture wire should be rated to hold at least twice the sign’s weight to prevent accidents.
Larger or heavier signs might need more support. Consider mounting a wooden or metal backing frame first, then securing the sign to this frame with screws or brackets. Use wall anchors rated for your wall type, drywall anchors for drywall, masonry anchors for brick or concrete, for example. For outdoor signs, choose stainless steel or rust-resistant screws and anchors to withstand weather conditions.
Magnetic mounting can be a good choice for small lightweight signs if you want to display them temporarily on metal surfaces like a fridge or locker. Magnets make it easy to move the sign without damaging walls, but they do not work for larger or heavier signs. To display your marquee sign safely, check these essentials:
- Confirm the sign’s weight and pick hardware rated for at least double that weight
- Use eyehooks and picture wire for small, light signs
- Install wall anchors matching your wall material for heavier signs
- Choose rust-resistant hardware for outdoor displays
- Place the sign away from direct sunlight and moisture when possible
- Test stability by gently shaking the sign before letting go
- Double-check that all screws and brackets are tight before finalizing
Outdoor marquee signs often need professional installation if they are large, heavy, or involve electrical wiring for lights. Calling a licensed electrician or experienced installer helps ensure the sign is safely secured and wired according to local codes. Professionals can also offer advice about appropriate weatherproofing and placement to avoid wind damage or water exposure.
For an indoor display in your room or craft area, mounting a lightweight sign with eyehooks and picture wire usually takes under 30 minutes and requires just a drill, screwdriver, and the right hardware. Outdoor installations may need additional tools like a stud finder, level, and weatherproof sealant. Planning ahead on hardware size and correct placement will save time and reduce risks.
How to Make Marquee Signs Faster Without Sacrificing Quality
Speeding up the process of making marquee signs requires a clear plan and smart use of your tools and workspace. Focus on organizing all your materials before beginning and setting up your work area to allow easy access to everything you need. Preparing your sign base, drilling holes, and wiring lights can overlap if you manage your steps carefully. For example, while paint or primer dries on the wooden base, you can pre-cut letter templates or wire the bulbs on a separate piece.
A well-structured workflow saves time and reduces frustration. Before getting started, create a checklist of all your actions, noting which can be done at the same time and which must wait. This approach also helps avoid common pitfalls like stopping midway to search for misplaced tools or waiting for paint to dry without anything else to do. Using time-saving tools such as a drill with multiple bits ready or a light socket strip designed for easy wiring speeds up assembly significantly.
- Lay out all materials and tools before starting to avoid interruptions.
- Apply primer or paint first, then work on wiring or cutting letters during drying time.
- Use a drill with a bit holder to quickly swap bits without searching.
- Pre-cut letter templates in bulk to save setup time for each sign.
- Organize bulbs and wiring by length and size before installation.
- Mark drill points on a removable template to speed accurate hole placement.
- Set a timer for drying phases to keep your project moving efficiently.
Investing in a few tools designed for repetitive tasks can make a big difference. A cordless drill reduces cord tangles and increases mobility around your workspace, which keeps you moving without unnecessary breaks. Consider lightweight clip-on lamps to better illuminate your working area and reduce mistakes from poor lighting. Keep your workspace clean and well-lit to see what you’re doing and avoid common errors like misaligned holes or uneven paint. These simple setups help maintain high quality even when speeding up your work.
Common Marquee Sign Mistakes and How to Fix Them
Common mistakes in making marquee signs often involve hole placement, wiring errors, and paint application. Correcting these issues early will save time and improve your sign’s appearance and function. Knowing what to watch for helps you avoid redoing parts of the project.
Incorrect Hole Drilling
Drilling holes too close to the sign’s edge or without uniform spacing can weaken the structure and lead to uneven lighting. Ensuring even hole spacing and the correct hole diameter keeps bulbs secure and aligned. Choose a 3/16″ spade bit, Forstner bit, or hole saw that corresponds to your bulb size. Accurately mark where each hole goes using a ruler or template before you drill.
To fix poorly drilled holes, enlarge undersized ones carefully with a slightly larger bit. Holes close to the edge can be strengthened by attaching a small wood patch on the back with glue and screws. For uneven holes, sand or chisel edges for a cleaner shape, then repaint if needed.
Wiring and Lighting Problems
Wiring issues like loose connections, crossed wires, or faulty bulbs are common. They cause flickering lights or no illumination at all. Avoid these by using connectors recommended for marquee signs and testing each bulb before installation. Keep wires organized using clips or staples to prevent accidental tugs.
- Double-check bulb type and voltage compatibility before wiring
- Secure wire joints with electrical tape or heat shrink tubing
- Test each section of the wiring before fully assembling
- Replace any dim or dead bulbs immediately
- Avoid overloading circuits by limiting the total wattage
Fix wiring faults by disconnecting power first, then inspecting connections. Replace damaged wires and bulbs, re-strip wire ends if needed, and retape or reseal joints. Use a multimeter to test for continuity if lights won’t turn on.
Always cut power and use insulated tools when checking or fixing electrical connections to avoid shocks.
Painting and Finishing Errors
Rough, uneven paint or peeling finishes detract from your sign’s style. Paint on clean, dry surfaces and apply thin, even coats. Using a primer helps the paint stick and last longer. Allow adequate drying time, usually 24 hours, between coats to prevent runs and bubbles.
Paint that peels or looks uneven should be sanded lightly with 220-grit sandpaper before applying a new coat. For a smooth finish, use a foam brush or high-quality roller. Clear acrylic sealer sprays can protect paint and add a polished look. Common painting mistakes and their fixes include:
- Painting over dust: wipe surface with tack cloth before painting
- Using wrong paint type: switch to enamel or outdoor-grade paint for durability
- Ignoring humidity: paint in dry conditions to avoid drying defects
- Applying thick coats: thin and multiple passes reduce drips
Step-by-Step Action Plan for Making Your Marquee Sign
Follow this plan to create your marquee sign smoothly and confidently, checking each step to make sure you’re on track.
- Before you start: Gather all materials and tools listed in the article. Confirm everything is in good condition so your work goes without interruptions.
- Day 1: Cut and assemble the sign’s base frame according to your design. Make sure all joints fit tightly and the frame is sturdy to support lights and mounting.
- Day 2: Drill holes for the bulbs evenly spaced. Test fit a few bulbs to ensure the holes are the right size and alignment matches the design.
- Day 3: Wire your marquee lights carefully following the wiring instructions. Check that all connections are secure by powering the lights briefly before final assembly.
- Day 4: Paint and finish the sign using your chosen colors and techniques. Allow full drying time to avoid smudges or stickiness.
- Day 5: Attach the bulbs and mount the sign safely on your wall or stand. Test the full lighting effect to see your marquee sign come alive.
- After 1 week: Inspect the sign for any loose parts or wiring issues and perform maintenance if needed to keep it looking polished and working well.
Frequently Asked Questions
How Do You Choose the Best Font for Marquee Signs?
Pick a bold, simple font so your sign is easy to read from a distance. Clear shapes help the lights shine through and make your letters stand out.
Can You Reuse Marquee Signs for Different Events?
Yes, using interchangeable letters or paint that can be covered allows you to update your marquee sign easily for various occasions.
How to Make Marquee Signs?
Make marquee signs by cutting out letters, painting them, adding light sockets, wiring carefully, then mounting for display.
What Is the Best Material to Use for Making Signs?
Wood and foam board work well because they’re sturdy and easy to cut and paint for clear, durable signs.
How to Make Marquee Fast?
Pre-cut your letters and use battery-operated LED lights to speed up assembly without sacrificing the look.
What Do You Put on the Floor of a Marquee?
Lay down a durable ground cover like a carpet or mat to protect the floor and create a tidy space.
Wrapping Up
Your marquee sign can become a standout feature, giving your space a personal touch with light and style. Take your first step by setting up your materials today and start building with confidence. Each small effort brings your unique creation closer to shining bright.