How to Make LED Signs: A Complete Guide with Pro Tips and Power Calculations
How to make LED signs starts with choosing quality LED strips and the right power supply. The process mainly involves designing your sign, cutting materials safely, assembling LED strips, and doing simple power calculations to avoid voltage drop. Starting with a clear design helps ensure clean bends and smooth wiring throughout the project.
Key Takeaways
- Use waterproof LED strips rated IP65 or higher to protect your sign from moisture and dust.
- Calculate total power by multiplying the LED strip’s watt-per-meter rating by total length, then add a 20% buffer.
- Maintain a minimum 2 to 3 inch bending radius when making 180-degree U-bends with LED neon flex.
- Choose letter heights of at least 3-4 inches for simple fonts and 4-5 inches for cursive styles.
- Use 12V or 24V power supplies; 24V reduces voltage drop for longer LED runs.
- Design segments to be at least 3 cm long to include soldering pads for easier wiring.
What Are LED Signs and How Do They Work?
LED signs commonly use a flexible plastic tube called LED neon flex that houses tiny LED chips inside a strip. These LED chips emit light when connected to a low-voltage power source, typically 12 to 24 volts. The plastic tubing, usually made of acrylic or silicone, diffuses the LED light to create a smooth, neon-like glow. This design makes LED signs lightweight, durable, and safe, even allowing you to touch the tubing without risk of electric shock. Their thickness ranges from about 8 to 10 millimeters, ideal for creating clear and bright letterforms.
Traditional neon signs differ because they use glass tubes filled with inert gases like neon, argon, or mercury. When electrified, these gases ionize and produce light. This process requires shaping expensive glass tubes and high-voltage electricity, which poses safety and maintenance challenges. LED neon signs, in contrast, are easier for hobbyists to make since the flexible tubing can be bent into intricate patterns without fragile glass or hazardous gases. For a DIY project, expect about 3 to 4 hours to complete a sign using LED neon materials.
LED signs last significantly longer than traditional neon signs. The lifespan can reach 50,000 to 100,000 hours depending on quality and usage conditions. Proper soldering of LED strips and careful handling extend the sign’s life. Traditional neon signs may require frequent maintenance due to glass breakage or gas leaks. LED signs also excel in energy efficiency, drawing less power while providing brighter light. The low-voltage operation and durable materials make LED signs a safer and more practical choice for indoor use, including home décor, events, and commercial signage.
Using LED neon signs offers many color options, from pastels to bold hues, achievable through RGB chips or colored tubing. This flexibility supports customization for weddings, festivals, or shop signs. Because these signs use bendable, lightweight materials, they are easier to hang and transport compared to heavy glass neon. Good design practice suggests keeping letter strokes thick enough, about 6 to 12 millimeters, to fit the LED neon flex and ensure even light diffusion. Care in shaping and soldering the LED strip within the tubing helps avoid dim spots or breakage.
When creating your own LED sign, you work with a power supply that converts standard household voltage to a safe 12 or 24 volts. This setup limits electric shock risk, unlike traditional neon’s dangerous high voltages. Although home projects are attainable, commercial use often requires professional sign makers who handle complex designs and regulations. For clearer, longer-lasting light and safer operation, LED neon signs are generally the better option for most DIY enthusiasts and small businesses alike.
Materials and Tools Needed for DIY LED Signs
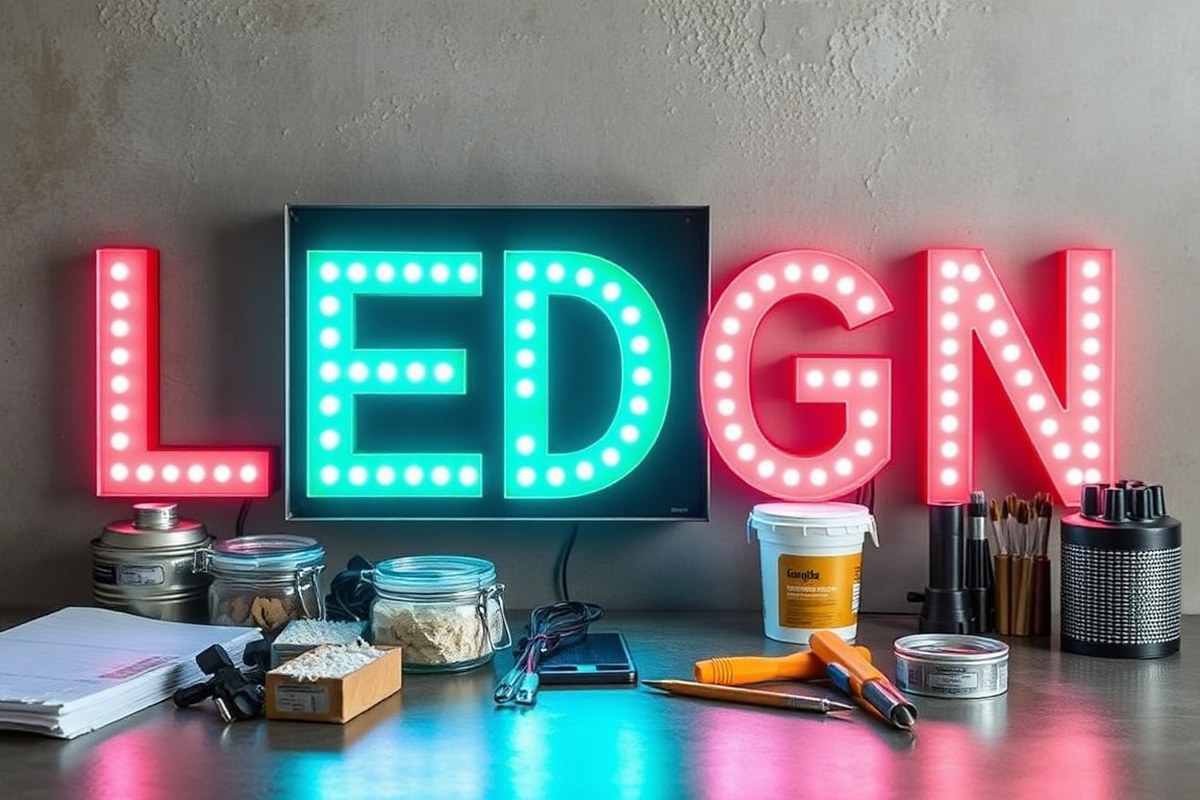
Choosing the right materials and tools guarantees your DIY LED sign works well and lasts. Acrylic sheets between 1/8 inch (about 3 mm) and 1/4 inch (6 mm) thick provide strength and the right balance of light diffusion and clarity. Thinner sheets may crack easily, while thicker ones add weight and cost. Clear or frosted acrylic both work; clear acrylic amplifies brightness but may show LED hotspots more. Frosted acrylic softens the light for an even glow, ideal for indoor signs.
LED strip types vary for indoor and outdoor use. For indoor signs, 12V LED strips with IP20 or IP33 ratings are common and affordable. Outdoor projects need IP65 or higher-rated strips that resist water and dust, typically coated with silicone. Outdoor strips cost more but prevent damage from moisture. Both versions use matched DC power supplies, often 12V or 5V, calculated to provide enough current for the strip length. Underpowering strips causes dimming; overloading can damage the power supply.
Essential tools for making your LED sign include a laser cutter or fine saw suited for acrylic, wire cutters, a soldering iron or wire connectors, and a rotary tool to carve grooves. Carefully cut grooves that fit the acrylic thickness exactly to hold the mounting securely. For channel letters, use sidewalls made from 30 or 50 mm wide MDF, foam board, or acrylic, based on the style and where the sign will be installed.
Power supplies should match your voltage and current needs. For example, a 12V LED strip that draws 0.4 amps per foot and runs 5 feet would need a power supply capable of at least 2 amps at 12 volts. Choosing a power supply with 20, 30% more capacity than calculated offers extra security against voltage drop and heat. Proper wire gauge must be used to avoid dimming and flickering; 18 to 20-gauge wire usually suits most home projects.
Adhesives like double-sided tape or hot glue help secure LED strips in grooves, but mounting hardware such as screws or brackets is required for heavier signs or outdoor installations. Using mounting hardware prevents movement and damage during weather changes. It also makes maintenance easier.
- 1/8 to 1/4 inch clear or frosted acrylic sheets for light diffusion and strength
- Indoor LED strips with IP20 rating; outdoor strips rated IP65 or higher
- Laser cutter or fine saw for acrylic; rotary tool for grooves
- 12V or 5V power supply with 20, 30% extra current capacity
- 18, 20 gauge wire for power connections
- Adhesives for indoor use; mounting hardware needed outdoors or for heavy signs
Practical tip: Always measure the LED strip length based on your engraved grooves before wiring to avoid cutting strips too short or long, which wastes materials or impacts lighting quality.
How to Design a Custom LED Sign for Best Results
Designing a custom LED sign begins with selecting the proper software, choosing fonts and sizes that ensure easy readability, planning LED strip placement to avoid dark spots, and using color strategically to attract attention. Paying attention to these details improves the sign’s clarity and lighting consistency, making sure it stands out effectively in any setting.
Choosing the Right Design Software
Strong design software lets you create precise layouts that match your vision and technical needs. Vector-based programs like Adobe Illustrator or free alternatives such as Inkscape are excellent because they produce scalable designs, which is critical when you’re laser-cutting acrylic sheets for your sign. Using a program that supports layers helps you separate the engraving details from the lighting plan, making changes easier. For beginners, using simple design tools or even LED sign-specific apps can also work well, especially if you want templates or presets to save time.
Choosing software that exports in common file formats like SVG or DXF avoids compatibility issues with laser cutters and CNC machines. Look for features that allow you to preview the design in 3D or simulate lighting effects, as these will guide you in positioning LEDs efficiently.
Selecting Font Styles and Sizes
Fonts greatly influence your sign’s visibility from a distance. Use clear, sans-serif fonts like Arial, Helvetica, or Futura for maximum legibility, especially for small or medium-sized signs. Avoid ornate or script fonts that can make letters blend when illuminated by LEDs. For size, 1 inch letter height is the minimum recommended for close viewing (around 3, 5 feet), but for signs viewed from 10 feet or more, letters should be at least 4 inches tall. Larger fonts reduce precision demands and improve lighting consistency.
Step up letter height by roughly 1 inch per every 10 feet of viewing distance. For example, if your sign will be seen from 30 feet, use 3-inch letters or larger. Bold or semi-bold weights also increase visibility since thinner strokes can appear dim under LED illumination.
Planning LED Placement and Bends
Proper LED strip placement ensures consistent brightness and reduces dark spots or hot areas. Plan to mount LED strips along the edges of your acrylic letters or shapes, where light can travel inside the panel effectively. Longer sign sections need denser LED spacing, typically about 60 LEDs per meter, to maintain even lighting. Flexible LED strips make bending easier, but sharp 90-degree bends can damage circuits or cause uneven brightness.
Use gentle curves for bends or cut short strip segments connected by wires around corners to maintain smooth light distribution. Layout your LED routes on paper or in your design software before assembly to visualize placement and calculate strip length accurately. Include a 20 percent length buffer for wiring mistakes or trimming, helping avoid runs that fall short.
- Sketch your sign’s outline including all letters and shapes.
- Mark where each LED strip segment will run, avoiding sharp bends.
- Measure total strip length needed and add a 20% buffer.
- Choose flexible RGB or single-color strips depending on desired color effects.
- Plan wiring paths to hide cables and allow easy connection to the power source.
- Check strip voltage and wattage for correct power supply sizing.
- Revise your layout for optimal spacing to balance brightness and power consumption.
Using Color for Maximum Visual Impact
Color choices affect both the mood and visibility of your LED sign. Warm white LEDs (2700K, 3000K) create a cozy, nostalgic feel suitable for home décor. Cool white (4000K, 5000K) delivers a clean, modern appearance perfect for offices or shops. Daylight white (5000K, 6500K) offers crisp brightness, great for retail displays needing sharp clarity. Multicolor RGB strips give you flexibility but require more complex wiring and control devices like remotes or dimmers.
Use contrasting colors between the background and the letters to increase readability. For example, white or yellow letters on a dark background produce strong visual impact. If using RGB LEDs, pick colors that stand out well in your space’s lighting conditions, adjusting hue and brightness for the best effect. Avoid using too many colors at once, as it can reduce legibility and make the sign look cluttered.
Designing for Uniform LED Lighting
Lighting consistency depends on how well your LEDs distribute light across acrylic surfaces. Using thicker acrylic sheets (at least 1/4 inch) helps with light diffusion but requires stronger LEDs or closer spacing. Etching or engraving patterns on acrylic improve light dispersion and accentuate your design features. Avoid large gaps between LEDs where light may not reach fully, which causes uneven glow.
Consider adding diffusers like frosted vinyl wraps or sandblasting parts of the acrylic to soften harsh LED spots. Test a small section of your sign with LEDs before full assembly to check for dark patches or hot spots. Including optional dimmers lets you adjust brightness to suit the ambient lighting and avoid issues such as glare or color distortion.
How to Cut and Prepare Base Materials Safely
Cutting and preparing the base material for your LED sign requires precise tool selection, careful measurement, and strict safety measures to ensure clean edges and a stable foundation. Using the right tools for acrylic and wood, setting your laser cutter correctly, accurately marking your base, and wearing proper safety gear will help you achieve professional results without accidents or damage.
Tools for Cutting Acrylic and Wood Bases
Acrylic and wood are the most common base materials for LED signs. For acrylic sheets up to 1/4 inch thick, a laser cutter produces the cleanest cuts and edges. For thicker acrylic or wood bases, a fine-toothed circular saw or jigsaw with the appropriate blade is effective. The protective film on acrylic should stay on until all cuts are finished to prevent scratches and chips.
When cutting wood, use a blade designed for fine woodworking or plywood to avoid splintering. An oscillating multi-tool can also cut small details in wood and acrylic but is less precise. Acrylic thickness between 3/16 inch (about 5 mm) and 1/4 inch (6 mm) is ideal for LED sign bases, balancing durability and ease of cutting.
Optimal Laser Cutter Settings and Techniques
Laser cutters require specific settings based on acrylic thickness and type. For example, cutting 1/8 inch (3 mm) cast acrylic typically requires a laser power between 20 and 30 watts, with a speed around 15-20 mm/s. These settings vary with the machine model, so consult the user manual or test small pieces first. Setting the right focus and adjusting air assist help create smooth edges and reduce melting.
Clean edges are important for light diffusion. Use multiple passes at lower power instead of a single high-power cut to avoid charring. Keep the protective film on the acrylic during cutting to support the edge. For multi-letter signs, cut individual letters separately, ensuring the spacing is accurate from the start.
Measuring and Marking Your Base Material
Accurate measurements are essential for a professional LED sign. Use a steel ruler or measuring tape with clear millimeter or 1/16 inch markings. Sketch your design scaled to size on graph paper or use design software to create a template.
Before cutting, mark the base material clearly with a fine-tipped permanent marker or a grease pencil, especially on opaque acrylic or wood. For multi-letter signs, measure and mark consistent spacing and letter placement to keep everything symmetrical. Double-check all dimensions to avoid costly errors.
- Measure the overall size needed for your LED sign base.
- Create a paper or digital template of your design at exact scale.
- Transfer measurements to your base using a ruler and pencil or marker.
- Mark cut lines and letter placement on the back of acrylic or on wood.
- Verify all marks and spacing before you start cutting.
Safety Precautions During Cutting
Safety gear is essential when cutting acrylic or wood to protect against dust, fumes, and sharp edges. Wear safety glasses or goggles to prevent eye injury from chips and debris. Use a dust mask or respirator rated for fine particles, especially when cutting wood, because sawdust can irritate the lungs.
Work in a well-ventilated area. Laser cutting acrylic releases fumes; operating the cutter with proper exhaust extraction prevents inhalation of harmful vapors. Avoid touching edges immediately after cutting, they can be sharp or hot. Always unplug and lock the power source when changing blades or adjusting cutter settings.
Keep a fire extinguisher nearby during laser cutting, as acrylic aglow edges can catch fire. Follow all manufacturer safety guidelines for your tools and never bypass safety guards.
- Wear eye protection and dust mask.
- Keep work area ventilated and clear of clutter.
- Leave the protective film on acrylic during cutting.
- Handle freshly cut edges carefully to avoid cuts.
- Use proper tool guards and never force blades.
- Have a fire extinguisher accessible.
Step-by-Step Assembly and Wiring of LED Signs
Securely attaching LED strips, wiring them properly to a matched power supply, and mounting the sign firmly are essential for a reliable, bright LED sign. Following precise steps for soldering and connecting power will reduce flicker and voltage drop, while proper mounting protects your investment.
Attaching and Securing LED Strips
Start by laying out the LED strips on your prepared sign base to confirm fit and direction. Use adhesive backing on quality strips for a clean attachment. Press firmly on smooth surfaces like acrylic or wood and supplement with clear mounting clips or small screws if needed to prevent peeling over time.
For flexible LED neon, first attach and solder individual LED beads, test their function, then place the strip over them for a neat finish. Avoid bending the strips sharply; keep bends gentle to maintain the circuitry integrity.
Straight sections should be at least 3cm long to allow soldering pads for wiring connections, especially if you plan to join or extend strips. Keeping segments aligned and flat maximizes light quality and ease of wiring.
Soldering and Wiring Techniques
Good wiring practices directly affect stable power and consistent brightness. Use a clean, well-heated soldering iron to attach wires, usually red for positive (+) and black for negative (-), to the designated solder pads on the LED strip.
Strip minimal insulation to prevent shorts, tin the wire ends before soldering, and avoid heavy mechanical strain on joints. Test each soldered connection with a multimeter to confirm continuity and correct polarity before powering up.
Use appropriately rated connectors or junction boxes for multi-segment signs. Proper cable gauge sized to your load (typically 18, 22 AWG for most LED strips) ensures voltage drop reduction. Keep wire runs as short as practical to preserve voltage.
Choosing and Connecting Power Supplies
Check your LED neon flex or strip voltage carefully; most consumer products run on 12V DC, but 24V variants are better for longer runs (>3 meters) due to lower voltage drop. Match your transformer voltage exactly to your LED product to avoid damage or flicker.
The power supply should have at least 20% more wattage capacity than your total LED strip load. For example, if your LEDs draw 50 watts, select a 60-watt supply. Undersized power supplies cause dimming and premature LED failure. Follow these steps to connect power properly:
- Confirm LED strip voltage (12V or 24V).
- Select a transformer with matching output voltage and sufficient wattage.
- Turn off power before connections.
- Strip and tin the transformer wires.
- Solder red (+) wire from LED strip to transformer positive terminal and black (-) wire to negative terminal.
- Use heat shrink or electrical tape to insulate connections.
- Double-check polarity and secure wiring to prevent movement.
- Power on and verify even illumination across the sign.
Flickering often signals poor wiring or a failing power supply; always test your solder joints and power source before final assembly.
Mounting the Finished Sign
Mount your sign on a clean, level, and sturdy surface suited for indoor or outdoor use depending on your materials. Acrylic bases work well mounted with stand-offs or brackets that hold the sign slightly away from the wall, improving ventilation and appearance.
For heavier signs or those exposed to vibration or wind, use multiple mounting points and weather-resistant fasteners. Secure cables neatly with clips to prevent strain or damage over time.
Check your mounting system for stability and ease of servicing your LED sign’s electronics. Proper mounting reduces physical stress on wiring and keeps the sign looking professional and lasting longer.
Calculating Power Requirements and Managing Voltage Drop
Calculating total power consumption starts with adding the wattage of all LED strips in your sign. Check each strip’s specification for watts per foot or meter, then multiply by the strip length in your design. For example, if you use a 12V LED strip rated at 4.8 watts per foot and your sign includes 10 feet, the total load is 48 watts. Add a 20 percent buffer to cover surges or extra load from effects, which means you should select a power supply rated for at least 57.6 watts (48 × 1.2 = 57.6).
Voltage drop can cause dimming or inconsistent colors, especially with longer chains of LEDs. The difference between 12V and 24V strips matters here. At 24V, current is halved for the same power, which reduces voltage drop across the wires and allows longer runs without brightness loss. Practically, a 12V system requires thicker cable or power injection points more frequently than 24V, increasing complexity and cost.
Power injection means feeding additional power along the LED strip’s length to maintain voltage levels. Without it, the far end of a long strip may appear dim or flicker. You can inject power every 5 to 10 feet depending on your wire gauge and strip amperage. This method improves voltage consistency but requires additional wiring and connectors.
Matching the power supply voltage exactly to your LED strip rating is important. Using a 24V supply on a 12V strip will permanently damage the LEDs due to overvoltage. Conversely, using a 12V supply on 24V strips results in dim and unstable lighting since they won’t get full power. Always check manufacturer specs before buying a power supply.
| Feature | 12V LED Strips | 24V LED Strips |
|---|---|---|
| Voltage | 12 volts | 24 volts |
| Current for same wattage | Higher | Lower |
| Voltage drop sensitivity | More pronounced, shorter max runs | Less pronounced, longer max runs |
| Recommended power injection spacing | Every 5-6 feet | Every 10 feet or more |
| Cost of wiring and connectors | Higher due to thicker wires and more injection points | Lower |
| Risk of damage from incorrect voltage supply | High if 24V supply used | Low if 12V supply used but dim |
For a clear example, say your sign uses 15 feet of a 12V LED strip rated at 5 watts per foot. Total wattage is 75 watts. Add 20 percent buffer, so your power supply should handle at least 90 watts (75 × 1.2). Because it’s a 12V system, plan to inject power around every 5 feet to avoid voltage drop, so you will inject power at the start, 5 feet, 10 feet, and 15 feet if possible. Wire thickness should be sized to minimize resistance, use 16-14 AWG for runs over 10 feet.
Troubleshooting Common LED Sign Problems
LED flickering, dim sections, and dead spots often happen due to poor wiring, bad connections, or incorrect power supply. Testing each electrical connection with a multimeter before final assembly helps spot these issues early when fixes take less time and effort. Polarity mistakes are common; switching the positive and negative wires can prevent LEDs from lighting at all.
Uneven lighting or hot spots occur when the LED density isn’t consistent or if the light diffusion doesn’t match the engraving depth on acrylic or plexiglass. Using LED strips with more LEDs per meter can create a smoother glow. Thin acrylic sheets tend to produce bright hot spots, so matching engraving depth with light diffusion levels keeps the glow uniform.
Wiring shorts cause dead sections by interrupting current flow or damaging LEDs. These happen if wires cross or insulation is stripped too far. Soldering connections carefully and sealing them, especially for outdoor signs, reduces shorts and moisture damage. Use wire strippers and a soldering iron for neat connections. Run wires cleanly through backing holes drilled with a small bit.
Check electrical connections safely by turning off power before probing circuits with a multimeter set to continuity mode. This confirms if circuits complete without risk of shock or component damage. When nothing lights, verify power supply voltage and polarity, then look for broken wires or loose connections. The table below matches common problems to their causes and fixes you can apply when building or troubleshooting your LED sign.
| Problem | Common Cause | How to Fix |
|---|---|---|
| LED flickers or dims | Loose wiring or poor solder joints | Resolder connections with a clean tip and add heat shrink tubing |
| Uneven lighting or hot spots | Low LED density or thin acrylic with shallow engraving | Use LED strips with more LEDs/meter and adjust engraving depth for better diffusion |
| Dead sections or no light | Wiring shorts, reversed polarity, or broken LEDs | Check polarity, test continuity, replace damaged LEDs, seal connections |
| Sign doesn’t light at all | Power supply off, wrong voltage, or disconnected wire | Verify power source, measure voltage output, reconnect or replace wires |
Here’s a safety checklist to follow while troubleshooting LED signs:
- Always switch off power before handling wires or testing connections.
- Use a multimeter with insulated probes designed for low-voltage circuits.
- Wear safety glasses while soldering to protect against splatter.
- Avoid working on wet surfaces or with wet hands to prevent shocks.
- Double-check wiring diagrams to confirm polarity before powering on.
- Seal outdoor electrical joints with weatherproof materials to prevent moisture shorts.
Following these steps helps you correct wiring and lighting faults safely and efficiently. Expect bright, steady illumination and consistent color once connections pass continuity tests and the power supply matches voltage needs. Problems usually show during initial test lighting; don’t seal or fully glue your sign before checking everything works correctly.
When to Hire a Professional for LED Sign Projects
Choosing to hire a professional for your LED sign project depends on the complexity of the design, your experience with electrical systems, and the intended use of the sign. Projects that require intricate wiring, power management, or involve custom programming for dimming and remote control often exceed the comfort level of beginners. Such tasks demand a solid understanding of electrical safety, voltage requirements, and code compliance that professional electricians and sign makers possess.
Electrical expertise becomes essential when your LED sign must meet commercial standards or connect directly to building wiring. For instance, ensuring proper insulation, securing connections to avoid shorts, and installing weatherproof components are necessary steps that prevent hazards and costly failures. When the sign powers larger arrays of LEDs or complex LED neon kits, the risk of voltage drop or overheating increases, making professional input valuable for safety and longevity.
Using DIY LED signs for commercial purposes without proper certification or adherence to local electrical codes can expose you to liability and make insurance claims difficult in case of accidents. Hiring a licensed professional reduces these risks by ensuring the sign meets warranty conditions, fire codes, and safety inspections, which are important if the sign attracts customers or publicly advertises a business.
Cost comparison between DIY and professional builds varies based on the sign size and features. DIY projects can save hundreds by using basic kits and recycled materials, with most hobbyists spending between $50 and $200 for a moderately sized sign. However, professional fabrication, including design, electrical installation, and weatherproofing for outdoor signs, commonly ranges from $500 to $2,000 or more. The higher upfront cost reflects durable construction, compliance testing, and often a warranty. Your decision rule could start by listing your budget, expected sign complexity, and usage: if your project requires custom electrical integration beyond basic kits or involves outdoor commercial use, a professional is likely the safer choice.
Professionals bring several advantages beyond electrical knowledge. They typically offer precise laser-cutting for smooth edges and perfect alignment, which improve sign brightness and uniformity. Their experience helps avoid common pitfalls like unbalanced power loads or improper heat dissipation. Plus, they can integrate advanced features such as remote dimming or programmable sequences that are challenging to achieve with DIY setups. These benefits lead to a more reliable, visually appealing, and code-compliant sign.
Never connect your DIY LED sign directly to building circuits without verifying voltage specs and using proper fuses or breakers to avoid electrical hazards.
Step-by-Step Action Plan for Your LED Sign Project
Follow these steps to move confidently from idea to finished LED sign, checking each phase before moving on.
- Before You Start: Gather all materials and tools according to your design specs. Confirm all parts match your list to avoid delays.
- Day 1: Design your LED layout on paper or software, then double-check measurements against the base material. This ensures a good fit and even lighting.
- Day 2: Cut and prepare the base material safely using recommended tools and protective gear. Check edges for smoothness to prevent wiring damage.
- Day 3: Assemble your LED components onto the base, securing each piece properly. Test LEDs individually to confirm they light up before wiring.
- Day 4: Wire the LEDs following your power calculations. After wiring, test the complete circuit with your power source to ensure all LEDs light evenly.
- Day 5: Install any diffusers or covers and finalize mounting or framing. Inspect your sign for any loose wires or dim lights and fix as needed.
- After 1 Week: Use the sign under normal conditions and observe for flickering or overheating. Address any new issues promptly.
Frequently Asked Questions
How Long Does It Usually Take to Make a DIY LED Neon Sign?
Making a DIY LED neon sign typically takes about 3 to 4 hours for an amateur. This estimate depends on the design complexity and your familiarity with tools and wiring.
Can LED Neon Signs Be Safely Touched During and After Installation?
Yes, LED neon signs use low-voltage power and flexible tubing like acrylic or silicone, making them safe to touch. This safety feature also makes them a good choice for indoor use.
Are LED Neon Signs Suitable for Outdoor Use in DIY Projects?
LED neon signs are primarily designed for indoor use due to their materials and power requirements. For outdoor projects, weatherproofing and additional protection are necessary to prevent damage.
Do You Need Special Tools to Bend LED Neon Flex Tubing Without Damage?
Basic tools like pliers and heat guns can help you bend LED neon flex tubing carefully. Avoid sharp bends and apply gentle heat for smoother shaping without damaging the lights.
What Is the Typical Thickness of LED Neon Signs Made with DIY Methods?
LED neon signs are usually 8 to 10mm thick when made with flexible LED tubes and acrylic or silicone. This thickness helps keep signs lightweight and easy to mount.
Can LED Neon Signs Be Repaired Easily If a Section Stops Working?
Minor repairs can be done by replacing damaged LED strips or fixing loose wiring. Maintaining spare parts and testing connections helps extend sign longevity.
Final Thoughts
Creating your own LED sign lets you customize lighting exactly how you want it, with total control over design and operation. Start by designing a simple pattern to practice assembly and wiring skills. This hands-on step builds confidence before you tackle more complex projects or full-scale signs.