How to Make a Scrolling LED Sign: A Complete Guide for Beginners
Learning how to make a scrolling LED sign starts with choosing the right LED strips and a simple controller like an Arduino Pro Mini. Connect the LED strips to the controller’s 5-volt pins, and you can have your sign up and running in seconds after uploading your code. Start by picking LED strips that match your desired brightness and length for your sign’s space.
Key Takeaways
- Use 60 LED/meter RGB strips for clear, bright graphics at about $5 per meter.
- Connect LED strips directly to the Arduino Pro Mini’s 5V pins for uncomplicated power distribution.
- Program messages quickly by downloading Arduino sketches, typically taking just a couple of seconds.
- Rotate the LED sign or phone display 90° to create tall or wide layouts for reading flexibility.
- Mix colors and text modes in playlists to keep signs dynamic and engaging.
- One Arduino Pro Mini controls one sign; prices range from $3 to $15 depending on shipping speed.
What Is a Scrolling LED Sign and How Does It Work?

A scrolling LED sign is a type of digital display that shows text, symbols, or simple graphics by illuminating tiny lights in a matrix pattern. The most common setup arranges LEDs in rows and columns, creating a grid where each point lights up as a single “dot.” This dot-matrix design is essential because it allows characters and messages to appear as patterns of lit dots, which can then move horizontally across your sign.
The scrolling effect happens through a controlled sequence of lighting these dots one column (or dot) at a time. The sign’s controller shifts the entire message gradually from right to left, updating the LEDs to produce a smooth movement of text. This stepping-by-one-dot movement mimics classic marquee signs you might see at stores or transit stations. It means your message looks like it’s continuously flowing, grabbing attention without overwhelming viewers with fast flashing or static displays.
You typically use RGB or single-color LED strips arranged on a rigid or flexible circuit board. RGB LEDs are popular as they can produce millions of colors, but single-color LEDs consume less power and might suffice for simpler signs. The LED density, how many LEDs per inch or per row and column, determines the resolution and clarity of your message. Common grid sizes for hobbyist projects range from 8×8 LEDs up to 32 rows high and dozens to hundreds of columns long, depending on your design goals and space.
A microcontroller like an Arduino Pro Mini often acts as the brain of a scrolling LED sign. This microcontroller stores the scrolling text and controls which LEDs light up based on the programmed pattern and timing. For instance, you can connect LED strips directly to the 5-volt pins with an Arduino that costs around $5, and start running basic scrolling messages within seconds after uploading the right code. Controllers handle timing details to update the display rapidly, up to 80 frames per second in some cases, ensuring a smooth visual flow without flickering.
Inside the controller’s programming, your text message is converted into a binary grid representing which LEDs are on or off for every frame of the scroll. The controller sends electrical signals to light the LEDs column by column, shifting the message’s position across the grid. Good results mean clear, legible text that moves at a pace easy for viewers to read, usually adjustable between about 1 to 20 speed steps based on personal preference or display needs.
Power consumption varies widely. Simple single-color scrolling signs with dim red LEDs could run long signs of 10 feet or more off a standard USB port. Adding full color increases energy demand, sometimes tripling power needs. This impacts your choice of power supply, wiring, and heat management but also gives flexibility depending on your project scale and available resources.
Failing to sync the controller’s timing or using insufficient wiring can cause flickering or incomplete lighting of dots, which ruins the scrolling effect. Similarly, poor LED quality or an inadequate number of LEDs can make messages hard to read or grainy. Keeping a balanced design of LED density, controller speed, and power ensures your scrolling LED sign looks professional and grabs attention effectively.
Essential Parts Needed to Build a Scrolling LED Sign
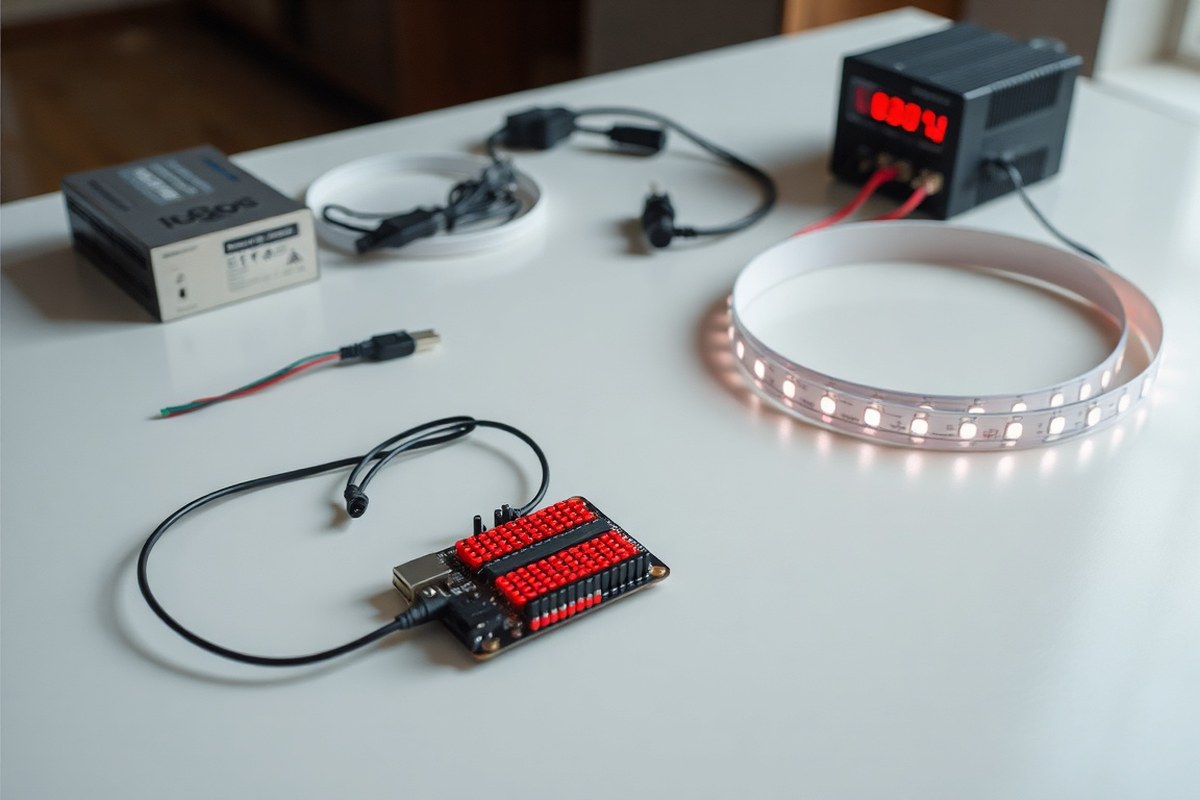
Building a scrolling LED sign requires several specific parts that fit together to create a clear, bright display that scrolls text or images smoothly. Start with LED strips designed for individual pixel control, such as WS2812B or SK6812 RGB LED strips. These strips usually come with 60 LEDs per meter and cost about $5 per meter. For a sign 14 pixels high, you’ll need strips long enough to match your desired width and pixel density, keeping in mind that longer strips demand consistent voltage supply to avoid dimming pixels at the far end.
The choice of controller matters for ease of programming and compatibility with your LED strips. The Arduino Pro Mini offers a good balance of price (around $3 to $15) and features. Beginners benefit from widely available libraries and tutorials, making it easier to program scrolling effects. For larger or more complex signs, a more powerful controller like a Teensy 3.1 might be necessary but adds complexity and cost.
Your power supply must deliver enough current for all LEDs, especially since each pixel can draw up to 60 milliamps at full brightness white, although normal scrolling text typically lights about 20% of pixels at half brightness. For example, a 12-foot sign with 2,688 RGB pixels requires a strong power source; something around 5V at 60 amps, or 300 watts, is typical for signs of this size. Aim for a power supply with a few amps of headroom above your calculated need to ensure stable operation and longer component life. Besides LEDs, controller, and power supply, these tools and materials are essential:
- Microcontroller board (Arduino Pro Mini recommended for beginners)
- Power supply rated for total LED current and voltage (e.g., 5V, 10-20A for small to medium signs)
- Wires and connectors for power and data lines, with sufficient gauge to minimize voltage drop
- Resistors (~330 ohms) on data lines to protect LEDs
- Capacitor (1000µF, 6.3V or higher) across power input to avoid voltage spikes
- Soldering iron and solder for secure connections
- Heat shrink tubing or electrical tape to insulate and protect wiring
Ensure your wiring delivers power at multiple points along long LED strips to avoid dimming and flickering caused by voltage drop.
Choosing the right LED strips, controller, and power supply based on your sign’s size directly affects performance. Inadequate power or insufficient data connections lead to flickering, inconsistent brightness, or dead pixels. Budget about $15 per linear foot for LED strips and factor in extra for controllers and power supplies. Planning your parts carefully saves time and prevents common electrical issues in your scrolling LED sign project.
How to Wire and Assemble the LED Strips and Controller
Wiring and assembling your scrolling LED sign involves carefully connecting the LED strips to the Arduino controller and power supply, arranging the strips so the display works smoothly, and securing everything safely. Attention to wiring order and mounting ensures good performance and a neat appearance.
Connecting LED Strips to the Arduino
Begin by establishing a solid electrical connection between your LED strips and the Arduino. The strips have three main wires: data, power (usually red), and ground (usually white). The Arduino sends signals via the data wire to control the LEDs. Follow these key connections to get started:
- Connect the LED strip’s data input wire to the Arduino’s designated data output pin.
- Attach the strip’s ground (white) wire to the Arduino’s GND pin to create a common reference point.
- Link the power supply’s positive output (red wire) to the Arduino’s VIN pin to power the Arduino and strips.
- Connect the power supply’s negative output (white wire) to the Arduino GND pin, ensuring all grounds are connected together.
These connections allow the Arduino to send data signals, while the power supply handles the current the strips need. If using a smaller Arduino like the Pro Mini, soldering data wires directly and twisting power wires with a wire nut can make connections more secure.
Wiring Multiple LED Strips Together
Scrolling signs often require multiple LED strips to be wired in sequence. Proper wiring order keeps the data flowing through each strip correctly for a smooth scrolling effect. The standard wiring sequence goes like this:
- Connect the Arduino data output to the first LED strip’s data input.
- From the first strip’s data output, run a wire to the second strip’s data input.
- Repeat this daisy chain pattern for each additional strip, always linking output to input.
- Connect each strip’s power and ground wires directly back to the power supply, not one strip to another, to maintain stable voltage.
Using separate power wires for each strip helps avoid voltage drop and dim LEDs further down the line. The longest available strips are about 5 meters (16 feet), so splicing is necessary to reach longer lengths.
Mounting Tips for a Clean Display
Properly mounting LED strips helps keep your scrolling sign looking professional and functioning well. The strips usually come with adhesive backing that sticks to a flat surface, but the choice of mounting surface affects durability and appearance. These mounting tips make assembly simpler:
- Clean the mounting surface thoroughly to ensure the adhesive sticks firmly.
- Stick the LED strips straight and evenly spaced, especially if your design is several strips high.
- Frame or box the display using lightweight materials like wood or plastic to protect strips and hide wires.
- Secure wires with cable ties or clips to keep them neat and prevent damage.
For longer signs, ensure the surface is strong enough to support the weight and is as flat as possible to prevent strip bending. Avoid mounting where moisture or extreme temperatures could harm electronics.
Safety Tips for Wiring and Power
Wiring a scrolling LED sign involves electricity, so safety precautions reduce risks of damage and injury. Using the correct power supply and grounding everything properly is important. These safety considerations matter:
- Double-check your power supply matches the voltage rating of your LED strips, usually 5V or 12V.
- Always connect all grounds (Arduino, power supply, LED strips) to form a common ground reference.
- Use insulated wires and avoid loose connections to prevent shorts or sparks.
- Install a fuse or circuit breaker appropriate for the total current draw of your display.
- Unplug power before modifying wiring or soldering connections.
Remember that multi-strip setups can draw significant current, so choose wires and connectors rated for the load to avoid overheating. Proper ventilation near your sign also keeps components within safe temperature ranges.
Programming Your Scrolling LED Sign with Arduino
To program a scrolling LED sign with Arduino, you need the Arduino IDE and a suitable LED library to create and control scrolling text. Writing a sketch involves coding the text message, setting scrolling parameters, and uploading the program to your Arduino board. You can customize the scrolling speed, colors, and font size within your code to match your display preferences.
Setting Up Arduino IDE and Libraries
Start by downloading the free Arduino IDE from the official Arduino website compatible with your operating system. Open the IDE and go to the Library Manager to install LED display libraries such as the Adafruit_NeoPixel or FastLED, which provide functions to control individual LEDs for effects like scrolling text.
After installing the library, include it in your sketch by adding the appropriate include statements. This step ensures you access built-in functions to manage LED colors, brightness, and animations smoothly. Make sure to select your specific Arduino board and the correct COM port under the IDE’s Tools menu before uploading.
Writing a Scrolling Text Sketch
Write a sketch that defines the LED matrix size, the text you want to scroll, and the scrolling speed. Use the library functions to send character data to each LED, creating movement across the display. For example, this simple sketch scrolls the text “HELLO” horizontally with a red color:
#include
This script initializes an 8×8 LED matrix and scrolls the word “HELLO” from right to left. The loop controls pixel updates and timing. You need to add character-to-pixel mapping functions for letters tailored to your LED matrix resolution.
Customizing Message Speed and Color
Adjust scrolling speed by changing the delay duration between frame updates in the sketch. A lower delay value speeds up scrolling, while a higher one slows it down, allowing for readable text at different viewing distances. Change the color by modifying the RGB values in library functions such as Pixels.setPixelColor().
Fonts can vary by creating your own pixel maps or using font libraries compatible with your display. Modify letter spacing by adding blank columns between characters. Customization ensures your message stands out, whether on a small 8×8 matrix or a larger display with more LEDs.
Uploading Code to the Arduino
After writing and customizing your sketch, upload it to your Arduino board using the Arduino IDE. The steps below outline the full upload process:
- Connect your Arduino to your computer via USB.
- Open the Arduino IDE and load your sketch (.ino file).
- Select your Arduino board model from the Tools > Board menu.
- Choose the correct COM port under Tools > Port.
- Click the Upload button (right arrow icon) to compile and send the code.
- Watch the output console for success messages or errors.
- Once uploaded, the Arduino starts running the sketch and displays the scrolling text.
This process takes under a minute on most computers and requires no external software beyond Arduino IDE and the LED library. If the LED sign does not display correctly, verify wiring and adjust your sketch parameters accordingly.
Customizing and Controlling the Scrolling Messages
Changing messages on your scrolling LED sign doesn’t require rewiring once it’s set up. Many LED displays come with controllers that support dynamic message updates through USB, SD card, or over Wi-Fi. For a beginner-friendly approach, use an app like LED Scroller: LED Banner Maker, available for free on Google Play and the Apple App Store. This app lets you create and change messages on your Android or iPhone without touching the hardware. You simply connect the device to the same network as your LED controller and update your message in real time.
Controlling your sign remotely is possible with certain controllers that offer Wi-Fi or Bluetooth capability. With these, you can use your smartphone or computer to access a web interface or dedicated app designed for managing messages and effects. The app often generates a QR code or temporary link you open on another device, allowing remote control without interrupting the main display. This means you can update your sign from anywhere within network range, which is handy for time-sensitive messages or promotions.
To add visual interest, customize fonts, blinking, colors, or multiple messages that cycle in a playlist. Start by checking the user manual that came with your LED sign for supported fonts and effects, since not all signs handle the same styles. The LED Scroller app allows you to add blinking effects, text shadows, and color changes smoothly. For multiple messages, create a playlist by entering each message line with its desired effects and timings. For example, you might input a welcome message that scrolls for 15 seconds, then switch to a promotion that blinks slowly, then a third message that uses rainbow colors, all repeated in a loop.
Here’s a simple template for a playlist you might create in the app: “Welcome to Our Store” (scrolling, 20 seconds), “Sale Today: 20% Off” (blinking, 15 seconds), “Follow Us on Social Media” (rainbow effect, 10 seconds). The app automatically cycles through these messages on your sign without needing additional commands.
Don’t expect all fonts or effects to display perfectly on every scrolling LED sign. Resolution and color options vary by model. Basic RGB signs might only support a limited palette and fonts, while more advanced panels accept a broader range. Testing your design before going live helps avoid blurry or unreadable text. Also, flashing or rapidly blinking text can strain viewers’ eyes, so use these effects sparingly especially in public spaces.
Always confirm your LED sign’s compatibility with remote control apps and supported effects before purchase to avoid frustration with limited features.
Choosing the Right Power Supply and Managing Electrical Needs
Calculating the power requirements for a scrolling LED sign starts with understanding how many LEDs you have and their individual power needs. Each LED typically consumes around 20 milliamps (mA) at about 3 volts (V). For example, a single LED uses 0.02 A × 3 V = 0.06 watts (W). Multiply this by the total number of lit LEDs to estimate maximum wattage. Knowing this helps you pick a power supply that can handle the load without strain or safety hazards. Here’s a basic power calculation for common LED counts in a scrolling sign. The calculations use typical values for 5×7 pixel characters where every lit pixel is an LED:
| Number of LEDs | Current (A) at 20mA/LED | Voltage (V) | Power (W) = Current × Voltage |
|---|---|---|---|
| 35 (one 5×7 character) | 0.7 | 3 | 2.1 |
| 140 (four characters) | 2.8 | 3 | 8.4 |
| 350 (ten characters) | 7.0 | 3 | 21.0 |
| 700 (twenty characters) | 14.0 | 3 | 42.0 |
Since LED strips often run at 5 V or 12 V, adjust power supply voltage accordingly. Use a power supply rated at least 20% higher in current than your calculated need to prevent overload, ensure longevity, and accommodate brief surges. For example, if your sign needs 2.8 A, aim for a 3.5 A or 4 A supply at the right voltage. Choosing a slightly bigger power supply doesn’t cause extra power draw and provides a safety margin.
Electrical safety is critical to avoid risks like overheating or shorts. Avoid power supplies without short circuit protection or thermal shutdown features. Keep wires neat and secure, and use adequate gauge wire based on current. Typically, 18 AWG wire works for runs under 10 feet at currents up to about 10 A. For higher currents, thicker wire is safer to reduce voltage drop and heat.
- Check power supply certifications (UL, CE) to ensure quality and safety.
- Use fuses or circuit breakers to protect from short circuits.
- Ensure all solder joints are solid and insulated to prevent shorts.
- Provide ventilation around the power supply to prevent overheating, especially in enclosed signs.
- Connect the power supply’s ground securely to your circuit to avoid electrical noise and hazards.
One power supply can run multiple LED strips provided its total current rating meets or exceeds the sum of all LED currents. If using multiple power supplies, connect their grounds together to avoid ground loops. Avoid exceeding the power supply rating, as this can cause voltage drops, flickering LEDs, or damage.
Deciding Sign Size and Design Based on Space and Usage
Choosing the right size for your scrolling LED sign depends mainly on the space where you plan to mount it and how far viewers will be. Start by measuring the maximum length and height available on your wall or display area. For example, if you have a narrow corridor or stairwell, your sign might need to stay under 12 feet long, like one builder who kept their sign at 12′ so it could fit down the stairs without trouble. Height depends on how many lines of text or graphics you want and the letter size needed for readability.
Wiring and power needs influence the sign size as well. Longer signs with more LEDs require more power and heavier wiring, which can increase complexity and cost. Make sure your power supply can handle the total LED load, and plan wiring routes that minimize voltage drops. The choice of controller limits the number of LEDs or pixels you can control. A basic Arduino board typically supports fewer LEDs than dedicated LED controllers, so your sign size and complexity must match the controller’s capacity.
Vertical and multi-line displays are possible with scrolling LED signs. Taller signs can show multiple lines of text simultaneously, increasing message clarity but also requiring a wider or more powerful controller. Vertical scrolling can work, but it demands specific programming and might reduce readability from a distance. Prioritize horizontal scrolling for longer messages if you expect viewers to be farther away.
Readability depends on letter size, color contrast, viewing distance, and scrolling speed. Letters should fill the panel height to maximize legibility, so adjust text height until letters nearly fill the physical LED matrix. Color choice affects impact; bright, contrasting colors like red or green are easier to read against dark backgrounds. Mount the sign at eye level where possible for better visibility, and avoid glare or direct sunlight on the LEDs to maintain clarity. Use the table below as a guideline for sign size relative to controller capabilities and power supply requirements:
| Sign Length | Max LED Count | Recommended Controller | Power Supply Size (Watts) |
|---|---|---|---|
| Up to 4 feet | Up to 300 LEDs | Arduino Uno or Nano | 5-10 W |
| 4 to 8 feet | 300 to 600 LEDs | ESP32 or similar | 10-20 W |
| 8 to 12 feet | 600 to 900 LEDs | Dedicated LED controller | 20-30 W |
| Over 12 feet | 900+ LEDs | Advanced controllers with external drivers | 30+ W |
Before finalising the size, test sample text with your LED matrix to check letter visibility at typical viewing distances. Adjust letter height and scrolling speed accordingly. Also, verify the environmental conditions where the sign will be mounted. Protect wiring and power supplies from weather and build mounts sturdy enough for the sign’s weight and size. Choosing the size and design carefully ensures your LED sign delivers clear messages effectively within your space limitations.
Common Mistakes and Troubleshooting Tips for Scrolling LED Signs
Problems with your scrolling LED sign often stem from wiring errors, faulty LEDs, or programming glitches. Fixing these issues quickly keeps your sign running smoothly and extends its life. Focus on simple checks and adjustments to identify the exact problem and apply the right fix.
LEDs Not Lighting or Stuck
LEDs that do not light up or remain stuck in one state usually indicate wiring or component issues. Start by checking connections; a loose or reversed wire can prevent LEDs from receiving power or signals. Inspect the LED strips for visible damage or burnt spots.
Use a multimeter to test continuity along the wiring and verify power is reaching the LED strips at consistent voltage, typically 5V or 12V depending on your setup. For stuck LEDs, a faulty driver chip or improper data signal may cause problems. Sometimes swapping the LED strip with a working one or testing single LED pixels can isolate defective segments.
Flickering or Inconsistent Scrolling
Flickering or uneven scrolling often results from unstable power supply or poor signal timing in the code. Check if your power source can deliver enough current, low amperage leads to dim or flickering LEDs. Noise or voltage drops in wiring also cause display inconsistencies.
Review the data and clock line connections between the controller and LEDs to ensure they are secure and use the shortest cables possible to minimize signal losses. Adjusting the refresh rate or timing parameters in your code often fixes timing mismatches causing jitter or flicker.
- Confirm your power supply amperage matches the LED count (e.g., 60 LEDs at 60mA each require about 3.6A)
- Use thicker gauge wires for longer distances to reduce voltage drop
- Shorten data cables or add a logic level converter if voltage mismatch occurs
- Adjust `delay()` or timing variables in your Arduino sketch
- Check for grounding issues or shared ground between power and controller
Careful power and signal management prevent most flicker issues and ensure consistent scrolling speed and brightness.
Code Bugs and Upload Errors
Programming errors can cause your sign to freeze, display incorrect characters, or fail to scroll. Syntax mistakes, missing libraries, or incorrect pin assignments are typical culprits. Check that your Arduino IDE shows no compile errors before uploading.
If uploads don’t finalize or the sign behaves erratically, try resetting the board manually and reconnecting the USB cable. Use serial monitor debug messages to track code execution and identify where it stops or loops incorrectly. Double-check the variable names, especially for pins controlling the LED strip, and confirm the libraries like Adafruit NeoPixel or FastLED are installed and compatible with your board.
Electrical Safety and Common Wiring Errors
Protection of your components and yourself matters. Avoid powering LED strips directly from an unregulated supply. Always use a well-rated, regulated power source with a matching voltage and sufficient current capacity to prevent overheating or damage.
Incorrect wiring habits cause short circuits, component failure, or fire hazards. Never mix power wires with data cables without keeping them separated or shielded. Use fuses or circuit breakers sized appropriately to cut off power in case of faults.
- Double-check polarity on LED strips and power connections before applying power
- Use insulated connectors and secure solder joints to avoid accidental shorts
- Keep power and data wiring neat and organized to prevent contact and interference
- Include a fuse rated slightly higher than your total current draw (e.g., 5A fuse for a 4A load)
- Work in a dry area and disconnect power when adjusting wiring
Always test your circuit with the power off and power it up gradually after confirming correct wiring to avoid component damage or electrical hazards.
Step-by-Step Action Plan for Building Your Scrolling LED Sign
Follow these steps to build, program, and start using your scrolling LED sign efficiently.
- Day 1: Gather all essential parts including LED strips, Arduino controller, power supply, and wiring; confirm you have compatible components by checking their voltage and data requirements.
- Day 2: Assemble the LED strips and connect them to the Arduino following wiring guides; confirm connections with a simple light test to ensure LEDs respond correctly.
- Day 3: Upload basic scroll text code to the Arduino using Arduino IDE; verify the message scrolls smoothly across the sign.
- Day 4: Customize your messages by modifying the code for different speeds or fonts; check that changes display as expected on the sign.
- Day 5: Install your scrolling LED sign at the intended location; test power supply and brightness in that environment for visibility and stability.
- Week 2: Troubleshoot any flickering or programming issues using online forums and reset directions; success means stable and continuous scrolling with no errors.
- Week 3: Program advanced features like remote control or scheduled messages if your controller supports it; confirm features operate without crashes.
Frequently Asked Questions
Can I Use a Tablet or Phone Screen as a Scrolling LED Sign?
Yes, apps like LED Scroller turn any screen into a scrolling LED sign by simulating dot matrix text. It’s a simple way to create a digital sign without extra hardware.
Are There Online Tools to Design Scrolling LED Messages Without Hardware?
Yes, LED Sign Generator lets you create realistic scrolling LED signs online, right in your browser. It’s a quick way to visualize LED message ideas before building hardware.
How Do I Make My Scrolling LED Sign Visible in Daylight?
Use high-brightness LED strips rated for outdoor visibility. Also, choose a darker background and higher contrast for text. Outdoor-rated cases can help reduce glare and protect the sign.
What Programming Skills Do I Need to Control a Scrolling LED Sign?
Basic Arduino programming is enough to get started. Familiarity with Arduino IDE and simple coding lets you customize messages and effects easily. Tutorials often include ready-made code sketches.
Can I Sync My Scrolling LED Sign with Music or Sound?
Yes, with extra components like microphones or sound sensors and code adjustments, you can sync LED patterns to audio input. This adds dynamic effects but needs moderate programming knowledge.
How Do I Extend the Message Length on a Small LED Matrix Display?
Use scrolling text functions in your code to move messages across the matrix. This displays longer messages within a limited physical space by shifting characters smoothly.
Final Thoughts
Your scrolling LED sign is ready to make your messages stand out with clear, moving text you can update anytime. Next, try experimenting with different message lengths and effects to match your specific display needs. Continually test under your actual lighting conditions to ensure the best visibility and performance.