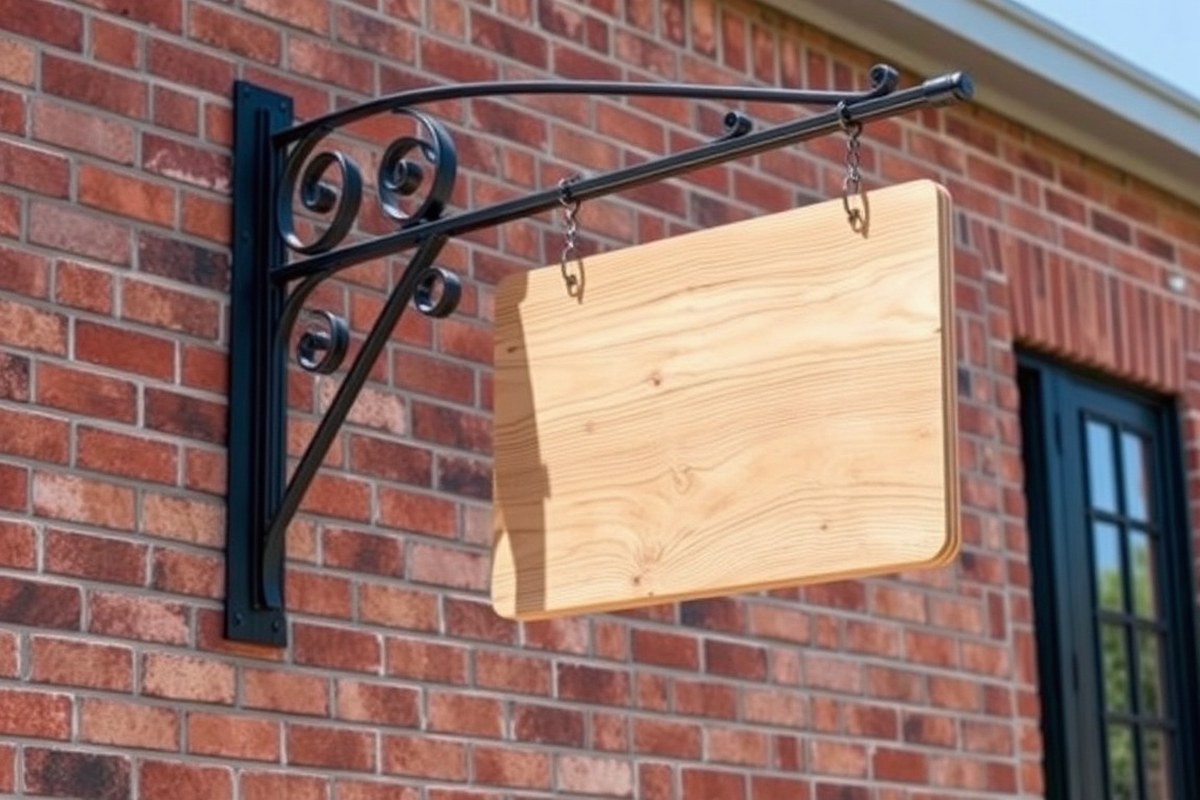
How to Make a Hanging Sign Bracket: A Complete Guide for Beginners
How to make a hanging sign bracket starts with choosing durable materials like metal or treated wood and designing for the sign’s size and weight. Secure hardware such as eye bolts placed 4, 6 inches from the corners ensures stable hanging, especially for signs around 24 inches wide. Begin by measuring the intended hanging height to suit visibility needs, typically 4 to 5 feet for easy viewing.
Key Takeaways
- Use strong materials like metal or Tricoya board for long-lasting hanging sign brackets.
- Design the bracket arm length to match the width of the sign for balanced support.
- Place eye bolts about 4 to 6 inches from each corner on a 24-inch-wide sign for secure attachment.
- Set the hanging height at 4 to 5 feet for retail eye-level visibility, or 7 to 8 feet for wayfinding signs.
- Account for sign weight: wood signs can be over 15 pounds, lighter materials like 3 mm Dibond weigh under 5 pounds.
- Measure posts at 8 or 9 feet tall to provide proper clearance and support for hanging signs.
How to Design and Plan Your Hanging Sign Bracket

Choosing the right material for your hanging sign bracket depends largely on your sign’s size, weight, and where you plan to mount it. Metal, such as steel or wrought iron, offers strong durability and suits heavy or outdoor signs, while wood fits well with lighter signs and can add a rustic or traditional look. Aluminum provides a lightweight, rust-resistant option but may not support very heavy signs safely. Select bracket materials rated to hold at least 1.5 to 2 times your sign’s weight to ensure safety and durability.
Measure your sign’s width, height, and depth to plan the bracket’s dimensions precisely. The bracket should extend far enough to allow the sign to hang freely without touching the wall or post, generally, the bracket arm should be about 1 to 1.5 times the sign’s width. Include extra space (at least 4 to 6 inches) for hanging hardware like chains or hooks. Weigh your sign on a reliable scale to determine the load your bracket and mounting hardware must support. This weight guides your choice of materials and hardware ratings.
Decide where to mount your bracket by considering the sign’s purpose and placement. Wall-mounted brackets work well for smaller signs near doors or entryways, while posts are better for larger signs needing visibility from multiple angles. If you use a post, ensure it’s sturdy and securely anchored in concrete to handle the bracket and sign weight combined with environmental forces like wind.
Set the hanging height thoughtfully to catch attention without obstructing passage. For retail signs indoors, eye-level placement between 4 and 5 feet from the ground tends to be most effective. Outdoor signs may need to be higher to clear pedestrian traffic, commonly around 7 feet off the ground. Always double-check local codes or store guidelines for minimum clearance requirements to avoid hazards.
When designing your bracket, factor in the mounting surface’s condition and type. Hard masonry walls need anchors rated for heavy loads and possibly longer screws, while wood surfaces require sturdy lag bolts and reinforcement if the wall material is soft. The bracket should include one or two support arms depending on the sign’s weight and wind exposure to prevent sagging or twisting.
Before building, review a checklist that includes sign dimensions and weight, bracket arm length exceeding the sign width by a safe margin, hardware load ratings with a safety margin, mounting surface suitability, and planned hanging height. Matching all these elements ensures the bracket performs safely and functions well while complimenting your sign’s appearance and purpose. Poor planning risks bracket failure, sign damage, and safety hazards, especially if hardware is under-rated or mounting is insecure.
Essential Tools and Safety Gear for Making a Bracket
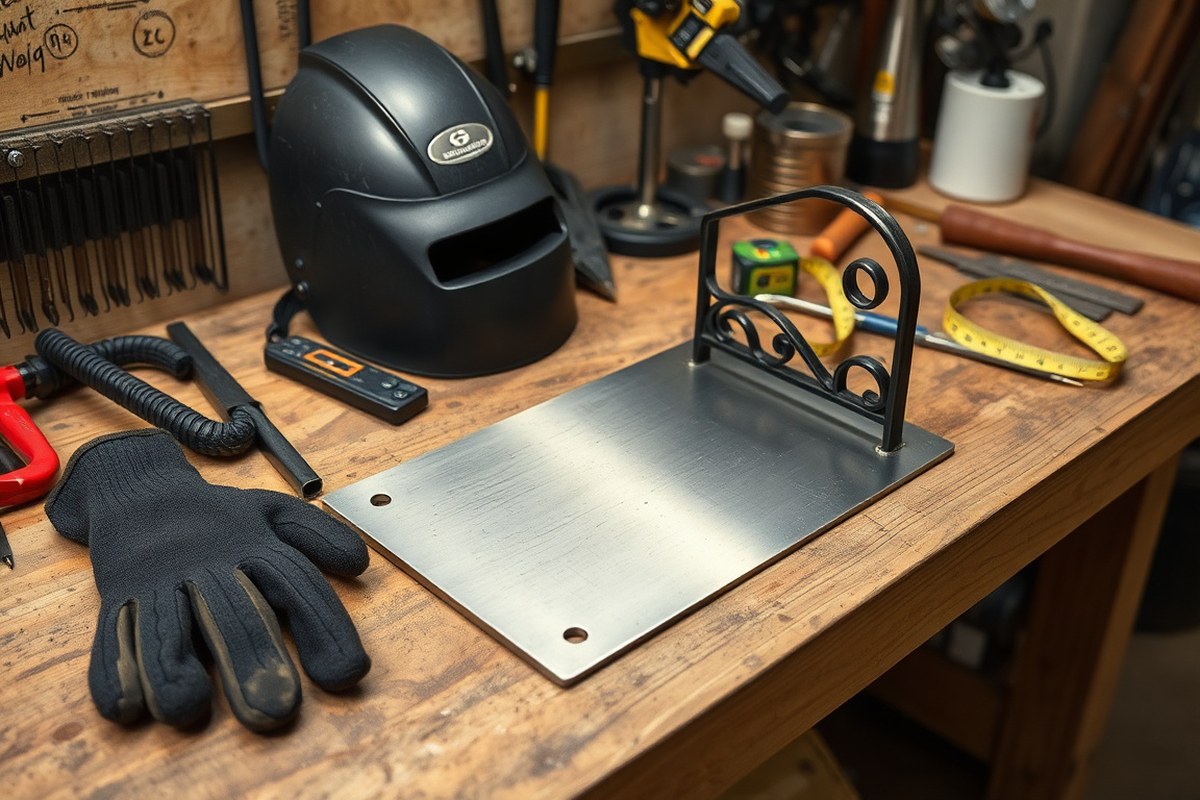
Making a hanging sign bracket requires different tools and safety gear depending on whether you work with metal or wood. Metal brackets need cutting, welding, or bending tools, while wooden ones rely on saws and drills. You also need proper personal protective equipment to stay safe throughout the fabrication process, no matter the material.
Tools for Metal Fabrication
Metal brackets usually require cutting metal stock, bending it, and joining parts, often by welding. Essential tools include an angle grinder with cutoff wheels for shaping metal pieces and a welder to assemble them securely. You’ll also need a metal file or deburring tool to smooth sharp edges after cutting. A measuring tape and permanent marker help you mark precise cuts and bends.
Optional but helpful tools include a metal bending brake for clean bends without warping and clamps to hold parts while welding. For beginners without welding skills, using metal brackets that can be bolted or screwed together offers a safer alternative. Drills with metal bits will let you add holes for fasteners instead of welding.
- Angle grinder with cutoff discs
- Welder or bolt/screw hardware
- Metal file or deburring tool
- Measuring tape and permanent marker
- Clamps for holding parts
- Optional bending brake
- Drill with metal bits (for bolting option)
Always check the metal thickness before cutting; too thin metal can warp with heat, while too thick requires more powerful tools.
Tools for Woodworking Brackets
Wooden brackets require cutting, sanding, and drilling tools. The main tools include a saw, either a circular saw or handsaw, to cut wood to shape. A power drill with various bits helps create holes for screws, and sandpaper or a power sander smooths edges to avoid splinters. A square and pencil are necessary for accurate markings on your wood.
Depending on the design, you might want clamps to hold pieces firmly while securing or gluing. Wood glue and screws are typical fasteners. For beginners, pre-cut wooden components or kits speed up the process and reduce tool needs. Using a workbench or sawhorses will keep your wood stable as you work.
- Circular saw or handsaw
- Power drill with wood bits
- Sandpaper or power sander
- Clamps for piece stabilization
- Wood glue and screws
- Carpenter’s square and pencil
- Workbench or sawhorses
Make sure the wood is dry and free from cracks before cutting; wet or damaged wood can split during work.
Safety Equipment Essentials
Personal protective equipment (PPE) is critical to prevent injuries. Safety glasses or goggles protect your eyes from metal sparks or wood splinters. For metal work, a welding helmet and flame-resistant gloves keep you safe from heat and sparks. Hearing protection guards against loud power tool noises in both metal and woodworking.
A dust mask or respirator stops you from inhaling sawdust or metal dust, which can harm your lungs over time. Wear long sleeves and sturdy closed-toe shoes to shield skin and feet. Ensure your work area has good ventilation and keep a fire extinguisher nearby, especially for welding or cutting metal.
- Safety glasses or goggles
- Welding helmet and flame-resistant gloves (for metal work)
- Hearing protection (ear plugs or earmuffs)
- Dust mask or respirator
- Long sleeves and sturdy shoes
- Good workspace ventilation
- Fire extinguisher accessible in work area
Never substitute steel-toed boots with regular sneakers when working with heavy metal pieces to avoid serious foot injuries.
Fabricating a Metal Hanging Sign Bracket Step-By-Step
Fabricating a metal hanging sign bracket involves careful cutting, bending, welding, and finishing of steel or wrought iron to ensure strength and durability. Accurate measurements and proper techniques are key to creating a bracket that holds your sign securely and stands up to weather. Follow a step-by-step approach to prepare, assemble, and protect your metal bracket effectively.
Cutting and Preparing Metal Pieces
Start by selecting heavy-duty steel or wrought iron, typically 3/16 to 1/4 inch thick, to support the weight of your sign. Accurately measure and mark your metal components, including the main arm, mounting plate, braces, and decorative elements. Use a metal cutting saw, angle grinder with a cutoff wheel, or a plasma cutter for clean, precise cuts. Always wear safety gear such as gloves and eye protection during cutting.
After cutting, file or grind the edges to remove burrs and sharp projections. Clean the metal pieces with a degreaser or acetone to remove oils and dirt. This step ensures good weld penetration and helps coatings adhere better later.
Welding and Assembling the Bracket
Welding fuses your bracket parts into a strong, unified tool capable of holding your sign steadily. MIG welding is recommended for beginners and professionals alike due to its control and clean finish. TIG welding provides a refined look but requires more skill. Ensure your welding area is well-ventilated and wear a welding helmet and gloves for protection.
Bending metal arms and decorative scrolls requires a hydraulic bender, pipe bender, or a heat source followed by manual shaping with a hammer and anvil. Heat steel to a dull red (around 1,600°F) before bending to avoid cracks. Clamp the metal securely to avoid slipping and measure bends frequently for accuracy.
Assemble your bracket by first welding the mounting plate to the main arm. Add any braces or supports next, welding all joints fully to prevent wobbling. Pay attention to right angles and alignment during assembly. Let the welds cool slowly to prevent warping.
- Measure and mark metal pieces to specified lengths and shapes.
- Cut metal with appropriate tools, then grind edges smooth.
- Heat metal parts if bending is required, then bend using clamps and formers.
- Fit parts together and tack-weld to check alignment.
- Complete welding on all joints, ensuring full penetration.
- Allow welded assembly to cool gradually, then inspect and clean weld beads.
Finishing and Protective Coatings
Prepare your metal bracket for outdoor conditions by removing slag and grinding welds for a smooth finish. Sandblast or wire brush the entire piece to remove rust, scale, and mill markings. Applying a zinc-rich primer or hot-dip galvanizing will give superior rust protection, especially in humid or coastal environments.
After priming, powder coating or painting with high-quality outdoor metal paint improve corrosion resistance and visual appeal. Powder coating is durable but requires professional equipment, while spray painting is DIY-friendly. Allow each coating layer to dry fully between applications, following product instructions carefully.
Check your finished bracket for sharp edges and apply touch-ups where necessary. Installing rubber or plastic washers where the sign attaches can prevent metal-on-metal wear and extend the bracket’s life.
Building a Wooden Hanging Sign Bracket with Durability
To build a wooden hanging sign bracket that lasts outdoors, choose durable wood species, create strong joints, and apply weatherproof finishes. Reinforce connections to handle the weight and movement of the sign. Attach hardware carefully to ensure safe hanging.
Choosing the Right Wood
Select wood species known for weather resistance and longevity, such as cedar, redwood, and cypress. These woods naturally resist rot, insects, and moisture, making them ideal for outdoor use. Pressure-treated pine is a more affordable option but requires proper sealing to prevent decay. Avoid wood types prone to warping or rotting when exposed to outdoor conditions, like untreated fir or spruce.
Look for straight-grained, knot-free lumber to improve strength and ease of cutting. Wood with a thickness of at least 1 inch (25 mm) works well for brackets to support the load of the hanging sign and hardware.
Cutting and Joining the Parts
Precision in cutting and sturdy joints are essential for a bracket that resists wind and weight stress. Design joints that provide mechanical strength, such as mortise and tenon or half-lap joints. Use exterior-grade wood glue combined with stainless steel or galvanized wood screws for reinforcement. Avoid nails alone, as they can loosen over time.
Reinforce corners with metal braces or wooden gussets for added stability. Predrill screw holes to prevent wood splitting, especially near edges. When attaching hardware like eye bolts for hanging chains, use bolts with washers and lock nuts to prevent loosening from vibration or movement. Steps to assemble and reinforce your bracket:
- Measure and mark each wood piece for accurate cuts.
- Cut wood parts using a miter saw or circular saw for clean edges.
- Dry-fit joints to ensure snug connections.
- Apply exterior wood glue to joint surfaces.
- Join parts together and clamp firmly until glue sets.
- Drill pilot holes and insert exterior-grade screws at joints.
- Attach metal braces or gussets at corners for extra strength.
- Install eye bolts for hanging hardware using washers and lock nuts.
Sealing and Finishing the Wood Bracket
Weatherproof finishes protect the wood from moisture, UV rays, and temperature changes. Apply a high-quality exterior wood sealer or spar varnish with UV inhibitors to penetrate and shield the wood. Use at least two coats, allowing proper drying time between applications (usually 24 hours). Pay special attention to end grain and cut edges, as they absorb moisture more readily.
Regular maintenance is key; reapply finish every 1 to 3 years depending on exposure. For added protection, you can paint the bracket with outdoor-grade paint after sealing, but keep in mind this can require more upkeep over time.
Selecting and Installing Hardware for Hanging Your Sign
Select hardware rated for at least 1.5 to 2 times your sign’s weight to ensure safety and durability. For example, if your sign weighs 10 pounds, choose chains, eye bolts, and hooks rated for 15 to 20 pounds. This buffer prevents stress on the hardware from wind or movement. Eye bolts should be placed about 4 to 6 inches from each top corner of a 24-inch wide sign. Space them evenly to balance the sign when hung and avoid twisting or sagging.
| Sign Weight (lbs) | Recommended Hardware Rating (lbs) |
|---|---|
| 5 | 7.5, 10 |
| 10 | 15, 20 |
| 20 | 30, 40 |
Chain and hook selection depends mainly on load and support type. Use galvanized or stainless-steel chains to resist rust. Connect chains to eye bolts with S-hooks or quick links rated for your sign’s weight. For stability, anchor hanging hardware into a solid structure, the bracket or mounting wall. Use toggle bolts, threaded drywall anchors, or masonry anchors according to wall type and weight.
- Anchor eye bolts or mounting plates symmetrically along the sign’s top edge, 4, 6 inches from corners for 24″ wide signs.
- Transfer eye bolt spacing to mounting surface to mark anchor points on ceiling or wall.
- For drywall, use toggle or threaded anchors rated above your sign’s weight to prevent pull-out.
- For masonry or brick walls, use sleeve anchors or expansion bolts suited for the weight.
- Use a level when marking locations to ensure the sign will hang straight.
- After mounting, clean chains and connectors with a damp cloth for better grip and appearance.
- Balance the sign on a rod through the eye bolts before final hang to check stability and tweak if needed.
Begin installation by marking the wall or ceiling where the eye bolts will hang. Drill pilot holes for the anchors appropriate to your wall type. Insert your anchors firmly, then screw in hooks or eye bolts. Attach your rated chains to the sign’s eye bolts using S-hooks or quick links, then hook the chains to the mounting hardware. Test the sign’s swing and weight distribution by gently pulling down on it. Adjust spacing or hardware as needed to prevent tilting or overloading any single anchor point.
Tip: Always reassess your hardware ratings if you change signs, heavier replacements can overload your current setup and cause failure.
Decorative Touches and Design Ideas for Attractive Brackets
Adding style to your hanging sign bracket can be done with simple decorative bends and scrolls that accentuate the metal while preserving its strength. Start by planning gentle curves or classic scroll shapes using a pipe bender or metal forming tools. These shapes distribute stress evenly, helping the bracket hold up over time. Avoid tight or sharp bends that create weak points and risk metal fatigue.
Popular decorative techniques include scrollwork, twists, and flared ends. Scrolls are made by bending flat or round metal into spiral shapes, which adds visual appeal without sacrificing load capacity. Twisting a metal rod before attaching it to the bracket imparts an artisanal look, especially in wrought iron or mild steel. Flared or upturned ends cap the bracket with subtle detail, while keeping the structure sturdy.
Balancing design with durability means keeping the metal thickness adequate, generally 1/4 inch (6 mm) steel suffices for most small to medium signs. Any decorative elements should be securely welded or bolted to the main support arm. Testing the working load limit of ornamental chains or attachments prevents overloading. For example, a common decorative chain might have a WLL of around 50 to 75 pounds, adequate for light signs, but not heavier panels.
Choosing the right paint or finish improves both appearance and protection against weather damage. Powder coating is highly recommended because it bonds tightly, resists chipping, and provides a smooth, colourful surface lasting several years. Expect to spend about $50 to $150 for powder coating a bracket at a local shop depending on size. Alternatively, use a high-quality outdoor enamel spray paint designed for metal. Clean the surface thoroughly with a degreaser, then apply a rust-inhibiting primer before painting to prevent corrosion.
Black, bronze, or wrought iron finishes remain popular for their classic look and durability. For signage needing visibility, select colours that contrast well with the sign panel, such as deep reds or navy blues. Glossy or satin finishes improve the aesthetic without hiding the metal’s texture. Avoid overly thick paint layers that can hide fine details or lead to cracking.
Finishing touches like decorative finials on the ends or small metal leaves welded onto the arm offer subtle style without much added weight or complexity. When using these embellishments outdoors, apply a clear sealant over the paint to extend the lifespan and maintain the colour vibrancy under sun exposure.
Common Mistakes and Troubleshooting Hanging Sign Brackets
Wobbling or tilting signs usually happen when the bracket isn’t level or the mounting surface is uneven. Ensuring the bracket is securely anchored to a flat wall or post is key. Use a level during installation and tighten all bolts properly. If the mounting surface is uneven, add a shim behind the bracket to straighten it.
Hardware failure or rust weakens bracket support and risks the sign falling. Use stainless steel or galvanized bolts and screws in outdoor environments to resist corrosion. Check all hardware every 6 to 12 months, especially in wet or humid climates. Replace any bolts, nuts, or screws showing rust or stripped threads with new corrosion-resistant pieces. Applying a rust inhibitor spray also helps extend hardware life.
Insufficient bracket strength often results from using thin or weak materials or undersized hardware. Metal brackets made of at least 1/8-inch thick steel or aluminum provide good strength for most signs. Wooden brackets require strong hardwood like oak or maple, sealed to resist weather damage. For heavier signs over 30 pounds, increase bracket thickness or add a brace arm. Avoid attaching the bracket to drywall alone; mount it into studs or solid masonry. Listen for creaks or see noticeable bending, these signs suggest your bracket can’t hold the load.
- Bracket not level: use a carpenter’s level and adjust mounting surface or add shims
- Worn or rusted bolts: replace with stainless steel or galvanized hardware, check biannually
- Bracket too thin or weak: upgrade material thickness or add a support brace
- Uneven hanging: ensure even bolt tightening and check sign hang points for alignment
- Mounting into drywall only: always anchor into studs or masonry for secure hold
- Sign swinging excessively: add rubber washers or chain tensioners to reduce movement
Uneven hanging often comes from one side of the bracket or sign being tighter or looser than the other. Loosen all fasteners, adjust the sign so it hangs straight with a level, then retighten evenly. Slight adjustments in chain length or hook positions can fix tilt issues. Also, confirm the sign’s hanging points are symmetrical. Using locking washers or nuts prevent bolts loosening over time.
Regular inspection prevents issues. Check mounting points, hardware, and bracket integrity every year or after strong wind storms. Look for rust, cracks in metal or wood, or loose bolts. Performing simple maintenance like tightening, cleaning, and replacing worn parts keeps your sign bracket stable and secure for years.
When to Consult Professionals for Bracket Installation
Hire a professional for your hanging sign bracket if the sign weighs more than 50 pounds or the mounting system involves complex materials like masonry or steel studs. Heavy signs increase the risk of bracket failure, which can cause property damage or injury. Professionals have the tools and experience to fabricate and install brackets that handle heavier loads safely, following local building codes and safety standards.
Use a simple decision checklist to decide if you need expert help: Does the sign exceed 50 pounds? Will it be mounted on brick, concrete, or metal framing? Does the design require custom metalwork or welding? Is the mounting location hard to access or improve? If you answered yes to any of these, a qualified metalworker or installer is recommended.
Look for professionals specializing in exterior sign hardware or metal fabrication. Check for licensing, insurance, and positive customer reviews. Ask if they have experience with the specific materials you need, such as aluminum or steel. Local trade associations or sign supply stores can provide referrals. Before hiring, request detailed quotes and confirm they follow local regulations for signage installation.
Professional installation offers several benefits: it ensures the bracket is securely anchored and correctly aligned, reducing the chance of damage over time. Experts can verify the bracket’s load rating and certify its safety, which is sometimes required by local ordinances or insurance policies. They also provide warranties covering workmanship and materials, giving you peace of mind and protecting your investment.
Certification from a licensed installer or engineer means your bracket installation meets recognized safety standards. This certification may be necessary for commercial properties or in areas with strict building codes. Professionals can provide documentation showing compliance, which can help with liability concerns or inspections.
Always verify the installer’s credentials and ask for proof of insurance to avoid liability if accidents occur during or after installation.
Costs for professional fabrication and installation vary widely depending on the project’s complexity and materials, typically ranging from $200 to over $1000. Budget accordingly, especially for custom metal brackets or challenging mounting situations. In return, you gain structural safety, aesthetic precision, and compliance assurance that DIY attempts may lack.
Step-by-Step Action Plan for Making Your Hanging Sign Bracket
Follow these steps to create a hanging sign bracket that fits your sign and mounting spot securely and looks great.
- Before you start: Measure your sign and mounting area carefully. Confirm the dimensions and weight of your sign so you can choose the right materials and hardware.
- Day 1: Gather all tools and safety gear listed for metalworking or woodworking, depending on your bracket type. Check your tools work properly and your workspace is safe.
- Day 2: Cut and shape your bracket material (metal or wood) following your design plan. Make sure the bracket matches your sign size and wall clearance.
- Day 3: Drill or prepare holes for mounting hardware in the bracket. Test fit the hardware to ensure everything aligns and fits solidly.
- Day 4: Apply any decorative finishes or protective coatings to your bracket. Let everything dry thoroughly and inspect for smoothness or flaws.
- Day 5: Install the mounting hardware securely into your wall or post, using anchors or bolts suitable for the surface. Confirm the anchors hold tight under pressure.
- Day 6: Hang your sign on the bracket using chains, hooks, or hardware you selected. Check that the sign hangs evenly without wobbling.
- Day 7: Make a final safety inspection. Shake the sign gently and inspect the bracket and hardware for any movement or weaknesses. Adjust or reinforce as needed.
Frequently Asked Questions
What Materials Are Best for Outdoor Hanging Sign Brackets?
Metal like steel or aluminum works best outdoors due to weather resistance. Wood can be used if sealed and maintained regularly to prevent rot and damage.
Can I Make a Hanging Sign Bracket Without Welding Skills?
Yes, you can use pre-cut metal parts and bolts instead of welding. Wood brackets are easier for beginners and don’t require welding tools.
How Do I Prevent a Hanging Sign from Swinging Too Much?
Install rubber washers or bushings at mounting points to reduce movement. Adding a stabilizing arm on the bracket also limits swinging caused by wind.
What Weight Limits Should I Consider for a DIY Hanging Sign Bracket?
Keep the sign and bracket load under 50 pounds for typical DIY setups. Heavier signs need reinforced brackets and stronger wall anchors to hold safely.
How Do I Protect Wooden Hanging Sign Brackets from Weather Damage?
Apply outdoor-grade sealant or paint to all surfaces, including edges. Reapply coatings yearly and inspect for cracks or wear that lets moisture in.
Can Hanging Sign Brackets Damage the Wall They’re Mounted On?
Yes, improper mounting can cause wall damage or loosening over time. Use appropriate anchors for your wall type and make sure the bracket is securely fastened.
The Bottom Line
Building your own hanging sign bracket lets you tailor it to the exact needs of your sign and mounting surface. Taking time on accurate measurements and secure hardware choices pays off with a durable, stable bracket that holds your sign safely. Start by measuring your sign and planning your materials so you’re ready to create a bracket that fits perfectly and lasts through all weather changes.


