How to Make a Kitchen Sign by Hand: A Complete Step-by-Step Guide
Knowing how to make a kitchen sign by hand lets you personalize your space with unique decor that fits your style perfectly. Start by selecting a smooth wood board the right size for your kitchen wall or counter. Using basic tools and materials, you can create a charming, durable sign that welcomes guests and brightens your space.
Key Takeaways
- Choose wood like pine or cedar for easy cutting and smooth painting surfaces.
- Plan your sign size based on where it will hang or sit in your kitchen.
- Sketch your design on paper before transferring it to wood to avoid mistakes.
- Use paint rollers for quick and even coverage when stenciling letters on the sign.
- Cut wood boards safely using clamps, sharp blades, and protective gear.
- Seal your finished sign with polyurethane or wax to protect it from kitchen humidity.
How to Make a Kitchen Sign by Hand Step-by-Step

Creating a kitchen sign by hand involves a series of clear, manageable steps that turn raw materials into charming, personalized decor. The process typically takes about an hour or less, depending on your design complexity and drying times. A basic supply list includes a wooden board, sandpaper, paint or stain, brushes, stencils or lettering tools, and a clear matte spray paint if you want to seal your work.
Start with a wooden board that fits your kitchen space. From there, prepare the wood surface, mark your design, apply paint or stain, and finish with a protective coat. The steps below provide a practical approach that balances effort, materials, and time for a pleasing, durable kitchen sign.
- Gather Supplies. Collect your wooden board, sandpaper (120 and 220 grit), paint or wood stain, brushes or foam applicators, stencils or lettering tools, painter’s tape, and clear matte spray paint. Expect to spend around $15, 30 for supplies if buying new. Having all supplies ready before you start streamlines the process.
- Prepare the Wood Surface. Sand the board thoroughly starting with 120 grit, then finish with 220 grit sandpaper to smooth out rough edges and surfaces. This step typically takes 10, 15 minutes and is important for paint adherence and a professional look.
- Mark and Tape Your Design. Use stencils, transfer paper, or freehand your lettering and graphic layouts. Secure stencils with painter’s tape to avoid shifting. This can take 10, 20 minutes depending on your design. Planning your spacing carefully prevents mistakes during painting.
- Apply Paint or Stain. Paint inside the stencils or brush on stain evenly, depending on your design vision. Allow each coat to dry, usually 15, 30 minutes. Two coats often provide better coverage and color depth. Keep a damp cloth nearby to quickly clean any paint smudges.
- Remove Stencils and Touch Up. Carefully peel off stencils after paint dries. Use a small brush to touch up edges or fill in any spots you missed. This detail work can take 5, 10 minutes.
- Apply Protective Finish. Spray a clear matte finish to seal the paint and protect against kitchen moisture and heat. Use light, even sprays outdoors or in a well-ventilated area. Let dry for 1, 2 hours to ensure durability.
- Attach Hardware (Optional). If you plan to hang the sign, attach picture hangers or hooks securely on the back. This usually takes 5 minutes and requires a screwdriver or drill.
- Clean Up. Wash brushes and store leftover materials for future projects. Dispose of any waste responsibly. Clean-up generally takes 10 minutes or less.
Choosing the Best Wood for Kitchen Signs
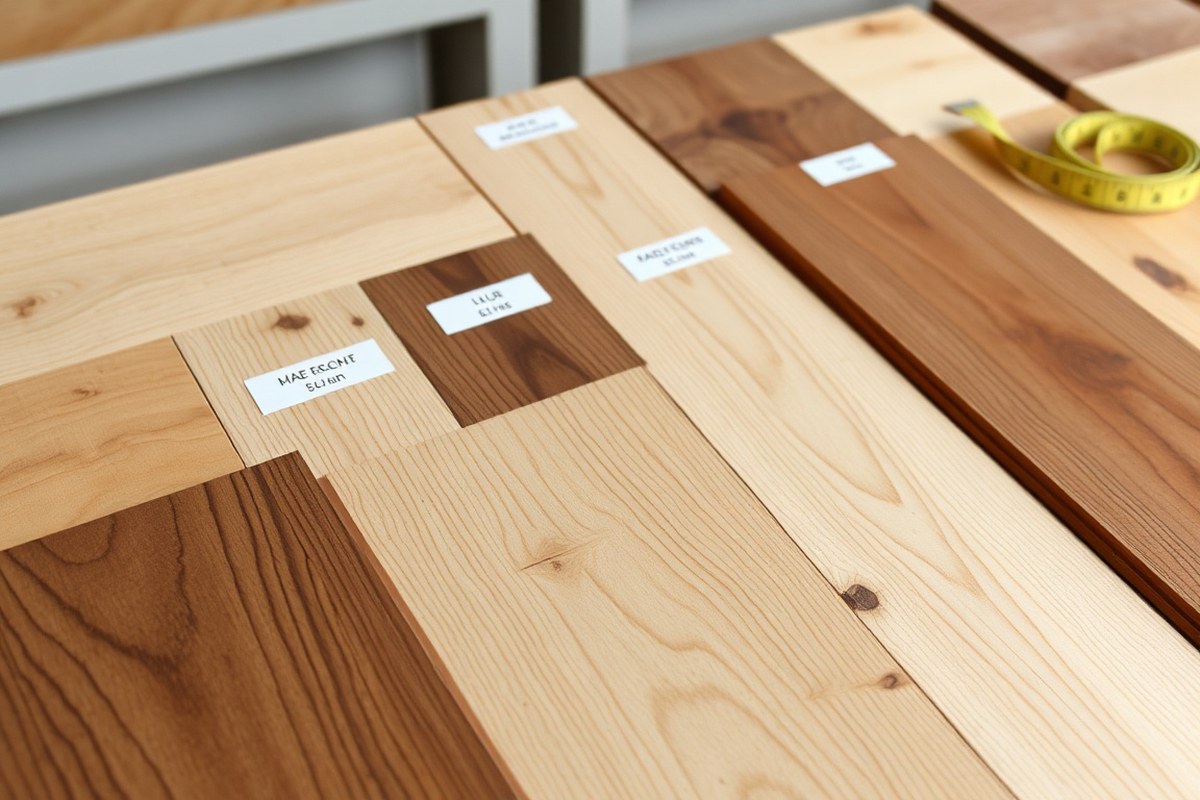
Picking the right wood for your kitchen sign affects both the look and your project’s ease. Smooth wood surfaces make it easier to apply vinyl or paint, giving crisp, clean lines on your lettering. Some woods are more affordable and simpler for beginners, while others add a rustic or polished appearance suited to your kitchen’s style.
| Wood Type | Cost (per 12″x24″ board) | Appearance | Suitability for Kitchen Signs | Notes |
|---|---|---|---|---|
| Pine | $5 – $10 | Light color, visible grain, smooth when sanded | Great for painting and vinyl; sands well for crisp lines | Best for beginners; affordable and widely available |
| Plywood | $7 – $15 | Layered edges, variable surface smoothness | Good with vinyl if top layer is smooth; may need priming for paint | Watch for rough edges; seal or sand before use |
| Reclaimed Pallet Wood | Free to $10 | Rustic, weathered look with knots and imperfections | Works well for rustic or farmhouse signs; paint may soak unevenly | Requires cleaning and sanding; nails must be removed safely |
| MDF (Medium-Density Fiberboard) | $8 – $12 | Uniform smooth surface, no grain | Excellent for paint; does not support vinyl well due to smoothness | Edges can swell if exposed to moisture; prime before painting |
Most DIY crafters go for pine because it balances cost, availability, and workability. You can find a 12″x24″ pine board at hardware stores for about $5 to $10, making it ideal if you want to keep costs low. Plywood, a versatile option, can also serve you well if you take the time to sand and seal the surface. Reclaimed pallet wood offers charm but needs more prep work like cleaning, de-nailing, and sanding before painting or applying vinyl.
MDF shines when you want a perfectly smooth, primed canvas for chalk paint or other opaque finishes. Its uniform surface helps paint cover evenly without grain pattern, which vinyl might struggle to adhere to because it tends to stick better to natural wood grain. Expect to spend $8 to $12 on an MDF board sized for a kitchen sign, plus primer and paint to protect it from kitchen moisture.
Always sand your wood boards gently to achieve a smooth surface before adding paint or vinyl; rough or splintered wood can cause uneven paint coverage and vinyl peeling.
Designing Your Kitchen Sign: Size, Font, and Layout Tips
Choosing the right size for your kitchen sign depends on where you plan to display it and how much detail you want to include. A good rule of thumb for farmhouse style signs is to start with a board around 12 to 18 inches wide and 6 to 10 inches tall. This size strikes a balance, offering enough space for clear lettering without overwhelming smaller kitchen walls. You can find premade pallet boards at craft stores around this size, making your project easier and often more economical.
Font selection plays a big role in the sign’s style and readability. Fonts like Georgia or fonts that mimic vintage hand-painted signs work well for a farmhouse look because they blend traditional charm with rustic appeal. When using your computer for layout, set the font size large, around 450 points if your software allows, to visualize the actual scale of your letters. This helps you confirm the letters fill the space well without crowding. Script fonts or those with flourishes can fit a shabby chic farmhouse aesthetic but avoid overly intricate fonts that are hard to read from a distance.
Layout matters for visual impact and balance. To size and align your lettering evenly, start with a simple template: measure the width and height of your board, then divide the space into margins and text area. Leave about an inch of empty space on all sides to prevent the letters from feeling cramped. Write the text on paper first, cutting each word or letter to use as physical spacing guides. Use a ruler or a straight edge to lightly pencil in a horizontal line for your baseline. Place each letter along this line, spaced evenly by eye or by measuring with a ruler, space between letters generally ranges from 0.25 to 0.5 inches for signs this size.
Farmhouse kitchen signs typically use simple phrasing like “Welcome,” “Gather,” or “Fresh Baked” combined with natural colors. White or black lettering on stained or whitewashed wood boards creates contrast while fitting the vintage farmhouse style. For layouts, center your text horizontally and vertically for a classic look, or stagger the lines for a more casual, handmade feel. Keeping the design balanced prevents the sign from looking cluttered or lopsided once hung. Placing hardware evenly on the back also supports this balance.
Good results mean your sign is easy to read from across the kitchen and visually complements other décor. Avoid cramming too many words or mixing multiple fonts, which reduces impact and can confuse the eye. When you set your design on paper or in digital format first, you save materials by avoiding errors. With a simple, clear layout and farmhouse-friendly fonts, your handmade kitchen sign will add charm and personality to your space without the need for professional design tools.
Methods for Adding Lettering to Your Kitchen Sign
Adding lettering to your kitchen sign can be done in several ways, including stenciling, vinyl transfer, and freehand painting. Each method offers different levels of precision, effort, and cost, so choosing the right one depends on your skill, the tools you have, and the look you want. These options also vary in how easily you can handle larger designs or make changes later.
Using Paint Stencils
Paint stencils are cutouts that let you apply paint neatly inside the shapes of your letters. You can buy pre-made stencils or create your own using a cutting machine like a Cricut Maker. For designs larger than 12 inches by 12 inches, you’ll need to slice the image into sections to fit the cutting mat, typically 12 inches by 12 or up to 12 by 48 inches with larger mats. The Design Space software assists by guiding you through cutting multiple panels.
To stencil your sign, position the stencil on the wood and secure it with tape. Use a stencil brush or a small foam roller with light paint, adding very little paint helps prevent bleeding under the edges. Dab or roll the paint gently, then lift the stencil carefully before the paint dries to avoid smudging. A key benefit of stencils is consistent and crisp shapes, especially for repeat letters or complex fonts. Stenciling works well on lightly finished wood or surfaces with some texture. A downside is the need for patience and care to avoid paint bleed and to align multi-part stencils correctly.
Applying Vinyl Lettering
Vinyl lettering is a popular, clean, and quick way to add text to your kitchen sign. You cut your design from adhesive vinyl sheets using a machine like a Cricut Maker. Vinyl sheets come mainly in 12-inch by 12-inch sizes, but mats up to 12-by-48 inches can accommodate larger projects. For signs bigger than the mat size, you’ll divide the image into panels and cut each separately, then assemble them on the wood.
Once cut, place transfer tape over the vinyl and peel the backing off to expose the sticky side. Carefully position the vinyl on your sign and press down firmly with a scraper tool to avoid bubbles. Slowly remove the transfer tape, leaving the vinyl letters behind. This method is fast and gives sharp, professional-looking results. Vinyl lettering is also removable, so you can replace or update signs with a wipe if needed. However, vinyl may not stick well to rough or unfinished wood and could peel off over time if the environment is humid or oily.
Freehand Painting Techniques
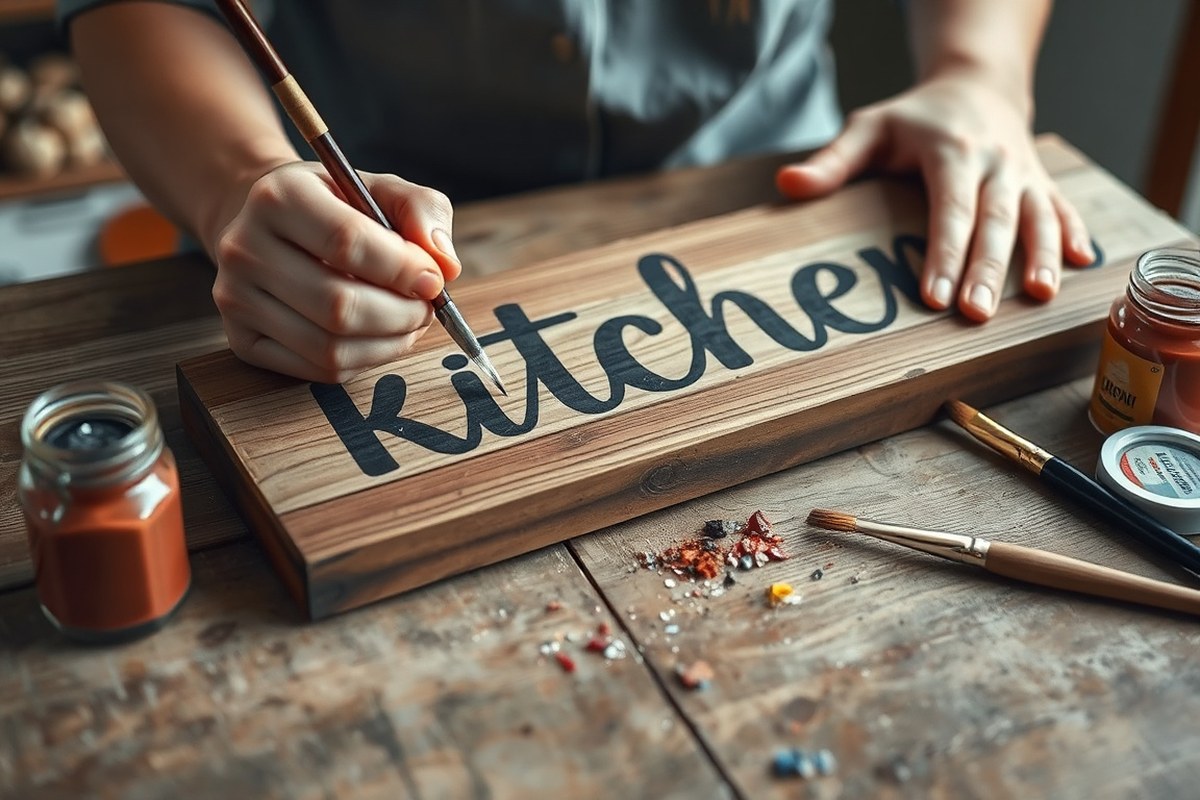
Freehand painting lets you personalize your kitchen sign with your own brushwork and creativity. You just need good-quality brushes, acrylic paint, and a steady hand. Start by sketching your design lightly with pencil or chalk, then paint inside the lines. This method suits simpler fonts or artistic styles like script or brush lettering.
For best results, use small paintbrushes with firm bristles for detail, and apply thin layers of paint, letting each dry before adding more. This prevents drips and gives clean edges. You can find helpful scripts or lettering templates to trace directly onto the wood before painting if freehand drawing is challenging. Freehand offers the most flexibility but demands time and some practice to achieve neat letters. Common issues include uneven lines, inconsistent letter size, or paint bleeding, which you can fix with touch-ups once the paint dries.
Cutting and Preparing Wood Boards Safely
Cutting and preparing wood boards involves careful measuring, cutting, and sanding to create a smooth, safe base for your kitchen sign. Following safety precautions helps prevent injuries and ensures your project turns out neat and strong. Proper assembly techniques hold the sign securely while keeping the edges safe to handle.
Measuring and Marking Your Wood
Accurate measuring and marking are essential to cutting your wood boards to the right size and shape. Use a tape measure or ruler to decide the dimensions of your sign base, typically measured in inches for home projects. Mark straight lines clearly with a pencil or chalk, checking twice to reduce mistakes.
Keep in mind that your measurements should fit your design and any backer boards or frames you plan to attach. Even spacing on backer boards helps balance the sign visually and structurally. Mark the wood where you’ll make cuts, and make sure your marks are easy to see from all angles during cutting.
Safe Cutting Techniques
Using the correct tools and safety gear reduces the risk of accidents when cutting wood boards. A circular saw is common for cutting the boards to length, but many home improvement stores offer free cutting services, which can save time and reduce tool-related hazards. Always check that the work area is clean and stable before cutting.
Before starting, wear eye protection, ear plugs, and a dust mask to guard against flying dust and debris. Secure the wood firmly to a workbench or sawhorse using clamps. Cut slowly and steadily along your marked lines, letting the saw do the work without forcing it. Keep hands clear of the blade and follow the saw’s safety instructions.
Always unplug or remove the battery from power saws before adjusting the blade or changing settings to avoid accidental starts.
- Measure and mark the wood boards with a pencil according to your design.
- Fix eye protection, ear plugs, and a dust mask before cutting.
- Secure the wood on a stable surface with clamps.
- Set the depth of the saw blade just slightly deeper than the wood thickness.
- Slowly guide the saw along the marked line, maintaining a firm grip.
- Turn off the saw and wait for the blade to stop before moving the wood.
Sanding and Smoothing Edges
Sanding removes rough spots, splinters, and sharp edges, making your sign easier and safer to handle. Start with medium-grit sandpaper around 80-120 grit to smooth cut edges and surfaces. Then, finish with a finer grit like 220 to create a soft, even texture suitable for painting or staining.
Use a sanding block or electric sander for flat surfaces. For curves and corners, hand sanding helps you control pressure and avoid rounding edges too much. Clean off dust with a dry cloth before assembling or painting. Proper sanding prevents paint from bleeding under stencils by creating a smoother surface.
Finishing and Sealing Your Kitchen Sign for Durability
Protecting your kitchen sign with a proper finish ensures the paint and wood last through daily kitchen use, which often involves moisture, heat, and frequent cleaning. Applying a sealant preserves your handiwork from fading, chipping, and water damage, keeping the sign looking fresh over time. You have several sealant options depending on the look and level of protection you want.
Clear acrylic spray sealants are a popular choice because they are easy to apply, dry quickly within 15 to 30 minutes, and cost between $5 and $15 per can. Apply the spray in thin, even coats outdoors or in a well-ventilated area. Hold the can about 8 to 12 inches from the surface and move it steadily to avoid drips or buildup. Two to three coats usually provide a good protective layer. These sprays leave a matte or glossy finish depending on the product selected.
For a more durable finish, especially if the sign will hang near steam or grease, water-based polyurethane varnish offers excellent resistance to heat, moisture, and scratches. This type of varnish comes in satin, semi-gloss, or gloss sheens and dries to touch in about two hours. Use a synthetic bristle brush and apply thin, even coats with long, smooth strokes following the wood grain. Wait at least four hours between coats and lightly sand with fine (220-grit) sandpaper between layers to ensure adhesion and a smooth surface. Varnishes generally cost around $10 to $20 per quart, which can cover multiple signs.
Wax finishes add a subtle sheen and slightly soft feel but are less protective against moisture. They’re suitable if you want a vintage or chalky look like with chalk paints such as Deco Art Americana Chalky Finish Paint. Rub a thin coat of clear paste wax on with a lint-free cloth. Buff gently after 20 minutes for a uniform finish. Reapply wax every six to twelve months for maintenance.
Before sealing, make sure the paint is fully dry, usually 24 hours for chalk paint, and free of dust or debris. Clean the sign gently with a dry cloth, avoiding any water that might smudge the paint. Smooth application is key for even coverage without cloudy spots or streaks, so take your time applying each coat and avoid heavy layering. Good results show no visible brush strokes or patchy areas. If you notice unevenness or dust, lightly sanding and recoating helps.
Choosing a finish depends on how much wear the sign will face and your desired finish style. Acrylic spray is fast and easy for moderate use. Polyurethane varnish gives stronger protection for busy kitchens. Wax suits low-traffic areas and softer aesthetics. Protecting your kitchen sign properly helps ensure it stays a charming feature for years to come.
Attaching Hardware and Displaying Your Kitchen Sign
Attaching the right hanging hardware and choosing a good display method are essential to making sure your kitchen sign looks great and stays secure. Select hardware that matches the sign’s weight and your kitchen’s wall type. Proper measuring and installation keep your sign centered and stable for years to come.
Choosing Hanging Hardware
Select hardware based on your sign’s size, weight, and where you want to hang it. Lightweight signs (under 5 pounds) can use simple options like sawtooth hangers or adhesive strips. Medium to heavy signs need sturdier hardware such as D-ring hangers, keyhole hangers, or wire for extra support. Common hardware options include:
- Sawtooth hangers: Easy to install with small nails, best for lightweight wood signs.
- D-ring hangers: Attach with screws, good for medium-weight signs up to 20 pounds.
- Keyhole hangers: Provide a flush look, but require precise wall anchor placement.
- Picture hanging wire: Paired with D-rings, allows adjustment and works for heavier signs.
- Adhesive strips: Suitable only for very light signs and smooth walls, not recommended for textured surfaces or signs over 2 pounds.
Hardware sets cost around $5, $15 at craft or hardware stores. Choose corrosion-resistant materials like brass or stainless steel for kitchen environments with humidity.
Measuring Placement
Measure your intended wall space before installing to avoid awkward placement. A sign that’s too large or small can look unbalanced or interfere with kitchen cabinets and appliances. Use a tape measure to find the center point of the wall or space above countertops or windows.
Mark where the top of your sign will hang, considering the height of counters or appliances below it. Leave about 3 to 6 inches of clearance above countertops for easy cleaning and visual balance. Use painter’s tape to temporarily place your sign at different heights and positions to decide what looks best.
Confirm that the hardware lines up with your wall marks. For signs with wire or D-rings, measure the distance between the two hanging points and mark the wall accordingly. Double-check your measurements before installing.
Installing Your Sign Safely
Secure installation prevents your kitchen sign from falling and causing damage. Follow these steps to attach hangers properly:
- Gather your tools: drill or screwdriver, level, pencil, tape measure, anchors, and screws based on wall type.
- Attach the hanging hardware to the back of the sign at equal distances from each side for balance.
- Measure and mark the corresponding spots on the wall at the determined height and spacing.
- Install wall anchors if hanging on drywall without studs, following the anchor package instructions for drill size and insertion depth.
- Insert screws or hooks into the anchors, leaving a small gap for the hardware to catch securely.
- Hang the sign gently and use a level to check alignment. Adjust screws slightly if needed.
- Test the sign’s stability by applying slight pressure. It should not shift or tilt.
Using the right anchors and screws depends on your wall type: drywall, plaster, brick, or tile. For heavy signs over 20 pounds, locate studs with a stud finder and screw directly into them for best support. Avoid over-tightening screws on wood hangers, which might strip or split the wood.
Common Mistakes to Avoid When Making Kitchen Signs
One common mistake is applying too much paint when stenciling the letters. Excess paint often seeps under the stencil edges, creating blurred or messy lettering. To avoid this, use a dry brush or foam roller with light dabs of paint, building up coverage gradually. If paint does bleed, gently scrape off excess with a fine blade or use a small brush to carefully touch up the edges once dry.
Another pitfall lies in not sanding the wood surface well before painting. Rough or uneven wood causes uneven paint coverage and can make the sign feel cheap. Sand the wood starting with 120-grit and finish smooth with 220-grit sandpaper. This prepares the surface for cleaner paint application and better adhesion.
Choosing the wrong font size or layout can make your sign hard to read or visually unbalanced. Plan your design by measuring the wood and sketching the lettering in pencil first. Keep your font sizes proportional to the board size, typically around 3 to 4 inches tall for a 12 to 18-inch sign, ensuring good visibility.
- Too much paint bleeding under stencil, fix by light dabbing and edge touch-ups
- Insufficient sanding, prevents smooth paint finish
- Ignoring pencil layout, results in off-center or cramped text
- Using inappropriate font sizes, leads to readability issues
- Skipping sealant, reduces durability against kitchen heat and moisture
Fixing mistakes on painted signs usually involves careful sanding, repainting, and resealing small areas rather than starting over. Spot sanding with 220-grit paper removes paint mistakes gently without damaging the wood. After smoothing, repaint with thin coats, then reseal with a clear water-based polyurethane for kitchen-safe durability.
Deciding whether to make your kitchen sign by hand or buy a premade sign or stencil depends on your timeframe, budget, and skill level. Handcrafting costs about $10 to $30 for wood, paint, and supplies, plus several hours of work. Premade signs or stencils typically start around $15 to $25 and save time but limit customization. Choose DIY if you want a personalized look or enjoy crafting. Opt for premade if you need a quick, clean result without investing much time.
When painting over mistakes, let the paint dry fully before sanding or touching up to avoid smudging or peeling layers underneath.
Step-by-Step Action Plan for Your Kitchen Sign
This plan helps you create your personalized kitchen sign quickly and confidently.
- Day 1: Choose and prepare your wood by sanding smooth and ensuring it’s clean. Check that the surface is even and ready for design.
- Day 2: Design your sign layout on paper or software. Confirm the font size and spacing fit your chosen wood dimensions.
- Day 3: Transfer your design onto the wood using your preferred lettering method. Verify the outlines are clear and complete.
- Day 4: Paint or carve your lettering carefully. Let paint dry fully or sanding debris clear before moving on.
- Day 5: Apply a protective finish like polyurethane or wax. Make sure it dries without streaks or bubbles.
- Day 6: Attach your hanging hardware securely. Test the sign on your chosen wall or space for stability.
- Day 7: Step back and enjoy your new handmade kitchen sign. Consider photographing it to share or plan your next project.
Frequently Asked Questions
How Do I Make a Kitchen Sign by Hand?
To make a kitchen sign by hand, choose your wood, design your layout, add lettering, and finish it with a sealant. Personalized signs add a warm touch to any kitchen, especially as gifts for cooks and bakers.
How Can I Create a DIY Sign Easily?
Start by selecting your wood, sketch your message, and apply paint or vinyl letters. The key is a clean design and using durable finishes for lasting results.
What Is a Kitchen Sign Typically Called?
A kitchen sign usually features words like “kitchen,” “eat,” or cooking-related phrases. These signs serve as decorative reminders of the kitchen’s purpose and add character to the space.
Which Wood Works Best for Making Kitchen Signs?
Pine and cedar are popular for wooden kitchen signs due to their smooth grain and ease of painting. These woods hold paint well and create a charming, rustic look.
How Much Does It Cost to Make a Wooden Kitchen Sign?
Making a wooden kitchen sign can cost as little as $10 to $30 for materials like wood, paint, and hardware if you already own basic tools. More elaborate designs or specialty wood types may raise costs.
Can I Use Reclaimed Wood for My Kitchen Sign?
Yes, reclaimed wood adds character and is eco-friendly, but check for nails or damage before use. It suits rustic kitchen decor well but may need extra prep before lettering.
Wrapping Up
Making your own kitchen sign adds a personal touch to your home decor and lets you practice useful woodworking skills. Start with simple steps, and don’t hesitate to adjust your design as you go. Pick a spot in your kitchen where your new sign will shine and show off your craftsmanship to family and friends. Taking that first step today will bring your creative vision to life.