How to Make a Layered Wood Sign by Hand: A Complete Guide with Tips & Tools
Knowing how to make a layered wood sign by hand lets you create custom, textured designs without expensive tools. Start with simple plywood and 1×2 boards, then cut each layer by hand and assemble them with craft glue. Prepping your wood well ensures smooth cuts and strong layers that last.
Key Takeaways
- Buy plywood and pine boards from hardware stores for better price and quality than craft stores.
- Cut sign pieces slightly larger than your final dimensions to allow sanding and fitting adjustments.
- Layer your pieces carefully, using Mod Podge or wood glue to bond each layer firmly.
- Allow glue to dry at least 24 hours before painting to avoid smudges and weak adhesion.
- Use plain 3/4″ birch plywood as a stable, smooth base for your layered sign.
- A four-layer sign typically takes 45 to 90 minutes from cutting to finishing by hand.
What Is a Layered Wood Sign and How to Make It by Hand
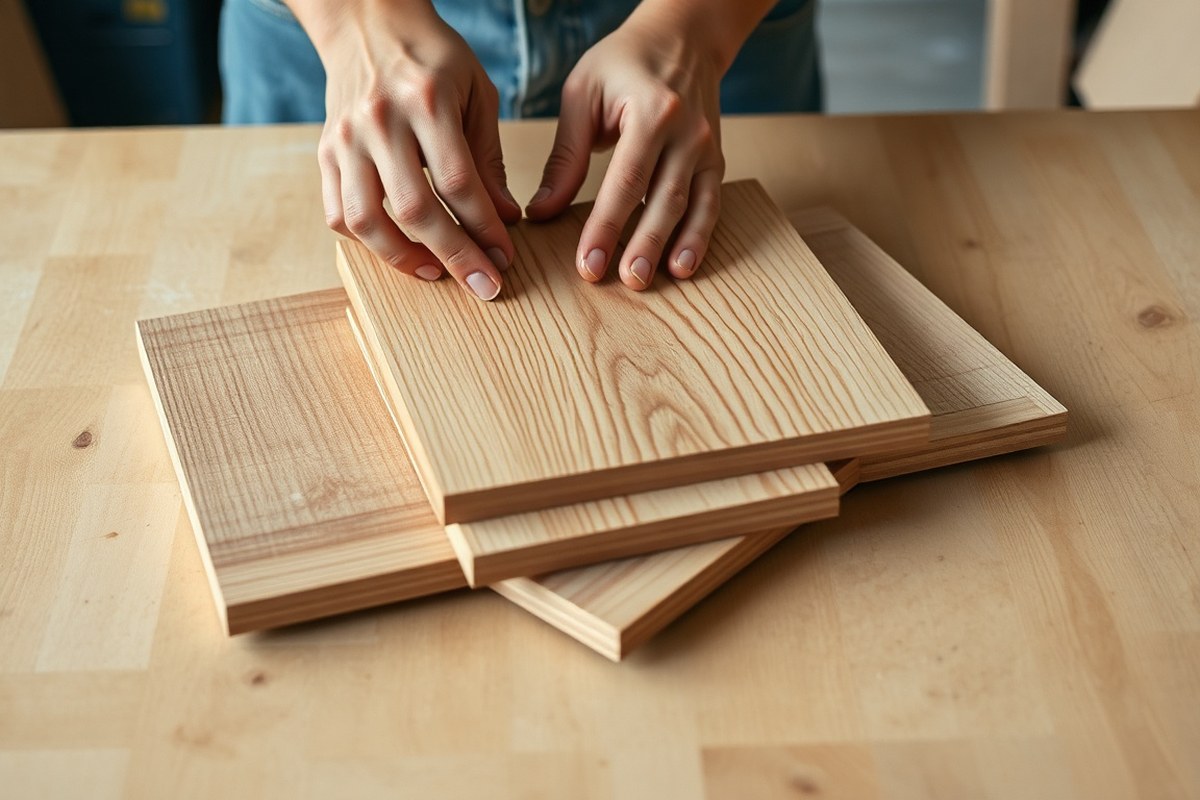
A layered wood sign is a handcrafted decorative piece made by stacking multiple cut wood shapes or letters on top of a solid wood base. Unlike a flat sign where the design is painted or stenciled directly onto a single wooden surface, layered signs use separate pieces of wood arranged to create a sense of depth and dimensionality. This approach makes the artwork visually more dynamic and eye-catching, as shadows from the overlapping layers emphasize texture and contrast.
Layering adds visual interest because each piece of wood stands apart from the base and surrounding elements, producing natural relief and shadow lines. This effect improve image detail and sharpens contrast without relying solely on paint or stain. It also allows for cleaner edges and a more professional finish, even when crafted by hand. The result is usually a sign that looks more complex and polished than a typical flat-painted design, making it a popular choice for personalized home décor or special gifts.
The process of making a layered wood sign by hand involves several key stages. First, you select a sturdy base, often using 3/4-inch birch plywood for its smoothness and durability. Next, you prepare thinner wood pieces for the layers, these can be plywood or 1×2 boards cut into the shapes or letters that form your design. After drawing or tracing your pattern onto the wood, you carefully cut each piece by hand using tools like a coping saw or jigsaw, aiming for clean edges and accurate shapes.
Once all layers are cut, the assembly phase begins. You arrange the pieces on the base to test spacing and alignment before securing them with wood glue or small finishing nails. At this point, you can decide whether to leave the natural wood look or apply stain and paint to highlight certain parts. The manual process gives you control to customize every detail, from rough, rustic cuts to smooth, precise shapes, depending on your style and skill level.
One benefit of crafting a layered wood sign by hand is that it only requires basic materials and tools, keeping the project affordable and accessible. Typical expenses for one sign hover around $4, making it a cost-effective way to create a personalized decoration. The handmade method also invites relaxation and mindfulness, turning crafting into a rewarding experience beyond just the final product. On the other hand, hand cutting requires patience and practice to avoid rough edges or uneven layers, which can reduce the sign’s visual quality.
Variations on this process can depend on your project goals. For simpler designs, fewer layers or basic cutouts might suffice, while detailed or multi-color signs can include more layers with different textures and finishes. Whether you prefer a modern look or a charming farmhouse style, layering your wood adds versatility that flat signs lack. This technique also works well for garden markers, inspirational quotes, or customized gifts, allowing you to adapt the method to different themes and occasions.
Essential Materials and Tools for Handcrafted Layered Wood Signs
Creating a layered wood sign by hand requires selecting the right materials and gathering a few essential hand tools. Your choice of wood impacts the sign’s look and durability. Basic tools like a coping saw, sandpaper, and adhesives work well without expensive machines. Budget-friendly options and premium supplies both have roles depending on your goals and experience.
Best Wood Types for Layered Signs
Softwoods like pine or poplar are popular for beginners because they are easier to cut and shape by hand. Pine boards can be found at hardware stores for about $3 per board. If you want a smoother finish or more durability, consider mid-range options like pre-sanded birch or maple craft blanks, typically $8 to $10. These reduce sanding time and allow finer detail.
Reclaimed wood or wood shims also add character with visible grain and texture. Always check wood for warping or cracks before starting. Thickness between 1/4 inch and 3/4 inch works best for layering without making the sign too bulky or fragile.
Hand Tools Required for Cutting and Shaping Layers
For cutting layered wood designs without power tools, a quality coping saw or a small back saw is essential. These saws let you hand-cut curves and small details with control. Pair this with a set of sanding blocks or sheets ranging from 80 to 220 grit to smooth edges and surfaces after cutting.
A few other basic tools include a utility knife for scoring stencils or vinyl, a ruler or measuring tape for precision, and a pencil for marking cut lines. For layering alignment, clamps or masking tape can hold pieces steady while gluing. These tools are generally available at craft stores or hardware stores with prices starting as low as $5 for a coping saw and $3 for sandpaper packs.
Adhesives, Paints, and Finishes That Work Best
Use wood glue or strong PVA glue to bond layers. Elmer’s wood glue is a budget-friendly option, typically costing around $4 per bottle. For a more water-resistant or outdoor-friendly finish, try a polyurethane wood adhesive or carpenter’s glue costing $7 to $12. Avoid weaker craft glues that might fail during drying.
When painting, acrylic craft paint is effective for vibrant colors and adheres well to wood. Layered signs often benefit from two or more colors for contrast. Seal your finished sign with a clear spray sealer like Mod Podge spray for indoor display, which costs around $6 per can and covers several signs. For outdoor use, exterior polyurethane spray helps protect against moisture and sunlight but runs about $10 to $15.
Budget Versus Premium Materials Breakdown
Here is a checklist comparing budget and premium options for your layered wood sign supplies:
- Wood: Pine board ($3) vs. Pre-sanded birch craft blank ($8, $10)
- Cutting tools: Basic coping saw (~$5) vs. Fine-toothed specialty saws ($15+)
- Sandpaper: Generic pack ($3) vs. Finer grit sanding kits ($10+)
- Adhesive: Elmer’s wood glue ($4) vs. Water-resistant carpenter’s glue ($7, $12)
- Paint: Acrylic craft paint sets ($5, $10) vs. Artist-grade acrylics ($15+)
- Sealer: Mod Podge spray (~$6) vs. Exterior polyurethane spray ($10, $15)
- Additional tools: Masking tape and clamps (budget options under $10 total)
Select budget supplies to practice your technique without a large investment. Upgrade to premium materials as your skills and projects become more complex.
Use clamps or masking tape to align layers precisely before the glue sets; rushing this step can cause uneven edges and a sloppy finish.
How to Select and Prepare Wood for Layered Signs
Selecting the right wood and preparing its surface properly sets the foundation for a successful layered wood sign. You want wood that’s easy to cut, durable, and accepts paint or stain well. Proper sanding and cleaning ensure smooth layers and strong glue and paint adhesion, which prevents peeling or bubbling later on.
Best Wood Types for Layered Signs
Softwoods such as pine and cedar are popular choices, especially for beginners, because they are easier to cut and shape by hand. These woods are also forgiving if your tools aren’t perfectly sharp or if you make minor mistakes. Hardwoods like birch or poplar offer a smoother finish and greater durability but are tougher to cut manually.
Durability matters more for outdoor signs, where moisture and sun exposure can cause warping and fading. Cedar has natural resistance to decay and is ideal outdoors if you seal your sign well afterward. Pine is affordable and widely available but needs sealing for outdoor use. Birch and poplar work well indoors or in covered locations.
| Wood Type | Thickness Range (inches) | Ease of Cutting | Finish Quality | Durability (Indoor/Outdoor) |
|---|---|---|---|---|
| Pine | 1/4 to 3/4 | Easy | Good | Indoor only, sealed for outdoor |
| Cedar | 1/4 to 3/4 | Moderate | Good | Indoor and Outdoor (natural decay resistance) |
| Birch | 1/4 to 3/4 | Moderate to Hard | Very Good | Indoor |
| Poplar | 1/4 to 3/4 | Moderate | Very Good | Indoor |
Choosing the right wood thickness depends on your sign’s detail and weight. Thinner layers are lighter and easier to cut, but thicker layers add depth for more impact. You can mix thicknesses for visual interest, using thicker wood for the base and thinner layers on top.
Recommended Layer Thicknesses
Most layered wood signs use wood panels in the range of 1/4 inch to 3/4 inch thick. The base layer can be 3/4 inch for stability, while the decorative layers typically range from 1/4 inch to 1/2 inch. Thinner layers reduce weight but might be fragile if cut into intricate designs.
For hand cutting, 1/4 inch to 1/2 inch thickness is ideal. This thickness is manageable with hand tools and reduces the risk of breaking during cutting and assembling. If you plan to stack multiple layers, keep total thickness in mind to avoid a bulky sign.
Sanding and Surface Preparation Tips
Surface prep is one of the most overlooked but essential steps for a clean, long-lasting finish. Start by sanding your wood starting with a 120-grit sandpaper to smooth out rough areas and edges. Follow this by sanding with 220-grit paper to create a fine, even surface that paint or stain can grip.
- Sand the entire surface evenly, paying close attention to any knotty or rough spots.
- After sanding, wipe the surface with a damp cloth to remove dust and let it dry completely.
- Apply a water-based sanding sealer or a light coat of water-based topcoat before painting or gluing to improve adhesion and prevent peeling.
- Allow the sealer or topcoat to dry fully, typically a few hours, before proceeding with assembly or painting.
Cleaning the surface prior to paint or glue application is critical. Dust, dirt, or oils can cause adhesion failures. Using a tack cloth or slightly damp rag removes any remaining particles. For outdoor signs, sealing the final edges and layers prevents moisture damage and keeps the sign looking fresh longer.
Step-by-Step Hand Cutting and Layer Assembly Process
Hand cutting and assembling a layered wood sign requires careful transferring of your design, precise cutting to maintain clean edges, and accurate gluing to keep layers aligned. Doing these steps by hand means paying close attention to detail and using simple tools effectively. This method ensures your sign looks polished and professional without expensive equipment.
Transferring Your Design Onto Wood
Start by getting your design onto the wood surface clearly. A straightforward way is to print your design on regular paper. Then, shade the back of the paper with pencil graphite to create a transfer layer. Place it graphite-side down on the wood and trace over the design lines with firm pressure using a pencil or ballpoint pen. This transfers the design outline onto the wood accurately.
Alternatively, you can use stencil tape if your design has bold shapes. Secure the stencil to the wood and trace around it carefully with a pencil or fine brush. This works well for repeated lettering or simple shapes. Using graphite transfer paper under the design printout is another common method, where you place the graphite paper between the printout and wood and trace over the design lines to get a clear impression on the wood.
Hand Cutting Techniques and Tools
Clean edges matter for a layered sign to look neat and professional. Use a sharp coping saw or a small fine-tooth handsaw for cutting your wood pieces along the traced lines. Slow and steady sawing with consistent strokes prevents splintering. For curves or intricate shapes, a coping saw offers better control.
A small file or sandpaper (120 to 220 grit) can smooth edges after cutting, removing roughness without changing the shape much. Working on thin wood pieces, about 1/4 to 1/2 inch thick, makes cutting easier by hand.
Layer Alignment and Gluing Tips
Accurate layering and gluing keep your sign’s pieces aligned and stable. Before gluing, lay out all cut layers to check the fit. Use small pins or nails temporarily if needed to hold pieces in place while you work. Use wood glue sparingly to avoid excess squeeze-out, which can stain or interfere with painting later.
Press the pieces firmly together and wipe off any glue spills immediately with a damp cloth. Weight the assembly with heavy books or clamps, applying even pressure during at least 30 minutes of drying. Avoid shifting the pieces after positioning to keep the layers flush and straight.
- Print your design at actual size on paper.
- Shade the back of the printout with pencil graphite or position graphite transfer paper beneath it on the wood.
- Trace the design firmly with a pencil or pen to transfer the outline to the wood surface.
- Secure your wood piece and cut along the traced lines using a coping saw or handsaw.
- Smooth edges carefully with sandpaper or a small file to remove splinters.
- Arrange all layers in place and test for alignment before gluing.
- Apply a thin layer of wood glue to the back of the upper piece and press it onto the layer below.
- Clamp or weight the pieces evenly and let dry for at least 30 minutes to ensure a strong bond.
Finishing Techniques: Painting, Staining, and Sealing Your Wood Sign
Choosing the right paint or stain depends on where you plan to display your layered wood sign and the look you want. For indoor signs, small craft paints, acrylics, and chalk paints work well and offer plenty of color options. Choose exterior-grade paint made to handle weather exposure for signs that will be used outdoors. Solid pine or smooth plywood, common woods for signs, accept paint and stain evenly, so expect a consistent finish. When staining, use a wood stain with a brush or cloth, applying an even coat that highlights the wood grain. Stains add color while preserving natural texture, while paint offers solid, vibrant coverage.
For layered signs, applying paint cleanly can be tricky because each layer must be distinct. Using a 9-inch foam paint roller helps spread paint evenly and smoothly, especially on larger backgrounds, reducing brush marks. Paint each layer fully and let it dry before assembling to avoid smudging. Medium-tack transfer tape can assist with layering by transferring vinyl stencils or masks without pulling up paint underneath. Carefully burnish the tape onto the wood, then lift off slowly to avoid damaging edges. Painting around stencil edges with a small detail brush after removing the tape refines the look, helping you achieve sharp lines and neat color separations between layers.
Test your paint or stain on a scrap piece of the same wood before applying it to your sign to check color and absorption.
Sealing your wood sign adds a protective layer that guards against weather, UV damage, and wear, essential for outdoor displays. Use a clear, exterior-grade sealer made for wood, such as a polyurethane or spar varnish. Apply it in thin, even coats with a clean brush, allowing 4 to 6 hours of drying time between applications. Two to three coats are usually enough for good protection. Seal both the front and back sides of the sign to prevent moisture absorption that warps the wood. Be cautious not to apply sealers over indoor-grade vinyl layers on layered signs if you plan outdoor use; instead, make sure every vinyl layer is rated for outdoor use to avoid peeling caused by differential weathering.
Pay attention to temperature and humidity during painting and sealing. Ideal conditions are around 65 to 75°F with low humidity to ensure even drying. Rushing drying times or applying thick coats can cause bubbles or uneven finishes. Proper finishing typically adds a few hours to the total project time but greatly increases durability and appearance. Well-painted and sealed layered signs can maintain their look for several years, even when placed outdoors, providing lasting enjoyment from your handiwork.
How Long Does It Take to Make a Layered Wood Sign by Hand?
Making a layered wood sign by hand typically takes between 6 to 10 hours, depending on the complexity of the design and your skill level. Preparing the wood, including sanding and cutting boards to size, usually consumes 1 to 2 hours. This step matters for a smooth surface and proper fit, which directly affects the final look. Hand cutting the layers, especially with detailed shapes or letters, can take 3 to 5 hours because it requires steady, careful work to avoid mistakes or uneven edges. Assembly of the layers with glue and nails takes around 1 hour, allowing enough time for precise alignment and some drying. Finishing steps like painting, staining, and sealing can add another 2 hours, including drying time between coats.
The cutting stage often requires the most time. Intricate designs with thin lines or tiny inner cutouts take longer to execute precisely. To speed this up without losing quality, plan your cuts in batches. Arrange all your pieces on the wood to minimize waste and cut several signs’ worth of parts at once. Keeping a collection of pre-cut or pre-sized wood boards handy also saves prep time. Using sharp, well-maintained hand tools reduces the effort needed and improves the cleanliness of cuts.
Careful planning is important when making multiple signs. Grouping similar designs together lets you standardize stages such as sanding and cutting, so you don’t repeat setup tasks more than necessary. For example, you might spend the first day cutting all parts for several signs, then dedicate separate sessions for assembly and finishing. This assembly-line approach increases efficiency while maintaining quality. Also, use scrap wood for smaller details or trial cuts to conserve materials and avoid costly mistakes.
Drying time during painting and sealing can vary based on the products used and ambient conditions like temperature and humidity. Allow around 30 minutes between coats for water-based paints in normal room temperature. Lower temperatures or higher humidity increase drying time, so plan accordingly to avoid smudging or tacky finishes. Always verify the instructions on your paint or sealant for optimal drying and recoat intervals.
Reinforcing your layered sign’s frame with nails or small wood lath boards adds durability but requires extra minutes during assembly and some care to avoid splitting the wood. This is worth the time if you expect your sign to last outdoors or be moved frequently. Lastly, keeping your workspace organized, with all materials and tools within reach, helps reduce time spent searching for items and keeps your focus on crafting top-quality signs by hand.
Common Mistakes and Troubleshooting for Handmade Layered Wood Signs
Layers on a handmade wood sign may misalign or peel apart mainly because of poor surface preparation or using the wrong adhesive. You want to make sure each wood piece is clean, dry, and sanded smooth before gluing. Use a strong wood glue designed for fine woodworking, applying a thin, even layer. Clamp or press each layer firmly for 30 minutes to an hour. Avoid rushing this step since insufficient curing time causes layers to separate later.
Paint bleeding or an uneven finish often happens when paint is too runny or applied over a rough or oily surface. Lightly sanding between paint coats helps by creating a better surface for the next layer to stick to. Use painters’ tape carefully around layered edges, pressing it down tightly to prevent seepage. Thin your paint just enough for smooth coverage without drips, too thick causes brush marks, while too thin bleeds under tape. Typically, water-based acrylics work well and dry in about 30 minutes to an hour.
Wood warping and cracking are usually caused by moisture changes or using wood that isn’t properly dried. To avoid this, select kiln-dried lumber and store it indoors to acclimate for a few days before starting. Keep your work area at stable humidity and temperature to reduce wood movement. Warping after assembly can be fixed by gently clamping the sign against a flat surface or placing it under weight for several days until it flattens. For small cracks, wood filler or sawdust mixed with glue can fix gaps before finishing.
- Misalignment: Sand and dry surfaces before gluing; clamp layers firmly for at least 30 minutes.
- Peeling: Use quality wood glue and allow full curing time, avoid excess glue.
- Paint Bleed: Seal edges with painter’s tape pressed tightly; thin paint for smooth layers.
- Uneven Finish: Sand between paint coats; ensure wood is clean and dust-free.
- Warping: Choose kiln-dried wood; keep workshop humidity stable around 40-60%.
- Cracks: Fill small cracks with wood filler or glue mixed with sawdust before painting.
- Sealer Problems: Apply sealer evenly and avoid over-thick coats to prevent bubbles or peeling.
Checking your workspace and wood before starting can avoid many issues. Small problems with layer adhesion or finish usually show up within the first 24 hours after assembly or painting. Spotting a problem early lets you carefully separate the layers, then reapply glue or sand off any bleeding paint. Keeping materials dry and handling each step carefully are the keys to a sturdy, visually clean sign. Allow your finished piece to cure fully, usually 24 to 48 hours, before hanging or handling to prevent damage.
Safety and Practical Tips for Working with Wood and Hand Tools
Protecting your hands, eyes, and lungs is essential when working with wood and hand tools. Start by wearing personal protective equipment (PPE) to avoid injuries and irritation. Safety glasses or goggles shield your eyes from flying wood chips and dust. A dust mask or respirator helps prevent inhaling fine wood particles, especially when sanding or working with older wood that might contain contaminants. Gloves protect hands from splinters but should fit well and not interfere with tool handling.
Handling sharp tools like chisels, knives, and saws requires attention and care. Always cut away from your body and keep fingers clear of cutting paths. Store blades safely when not in use and sharpen tools regularly; dull blades force you to apply more pressure, increasing injury risk. Use a stable, clean work surface to keep materials steady and minimize slipping. Applying slow, steady pressure rather than rushing reduces mistakes and accidents.
- Wear snug-fitting safety glasses or goggles at all times
- Use a N95-rated dust mask when sanding or cutting wood
- Wear cut-resistant gloves if handling rough or splinter-prone wood
- Keep blades sharp and inspect tools before each use
- Secure wood pieces firmly to prevent movement during cutting
- Maintain a tidy workspace free of clutter to avoid tripping hazards
- Ensure good ventilation to reduce dust buildup and improve comfort
An organized and well-ventilated workspace greatly improves both safety and the quality of your project. Working outdoors or near a window offers natural airflow to clear dust quickly. Bright, even lighting helps you see cutting lines and details clearly, preventing mistakes. If working indoors, consider using a portable dust extractor or air purifier to keep the air clean.
Always cut away from your body and never rush your work to avoid slips and injuries.
When using older wood, such as reclaimed pallets, inspect carefully for nails, staples, or signs of rot. Remove metal fasteners with pliers or a nail puller before cutting. This prevents tool damage and reduces hazards. Costs for basic PPE can range from $10 for safety glasses to $20 for a dust mask, which is a small investment for long-term health and safety. Good results show as clean cuts, minimal splinters, and smooth finishes without accidents or injuries.
Step-by-Step Action Plan to Make Your Layered Wood Sign by Hand
This plan breaks down the key steps to create your layered wood sign using hand tools. Follow the order and check each step outcome before moving on.
- Day 1: Gather all materials and tools. Collect your wood pieces, hand saws, carving knives, sandpaper, paint or stain, and sealant. Confirm you have the right types and amounts for your design.
- Day 2: Select and prepare your wood. Choose wood with a smooth grain and cut it to your desired base and layer sizes. Sand all surfaces evenly until smooth to avoid splinters.
- Day 3: Transfer your design onto the wood layers. Use carbon paper or a pencil to trace your design clearly on each wood piece. Check for complete and accurate outlines before cutting.
- Day 4: Hand cut each wood layer carefully. Cut along the outlines slowly and steadily with hand saws or carving knives. Ensure clean edges with minimal gaps.
- Day 5: Assemble the layers using wood glue or small nails. Align all pieces precisely and clamp or press them until dry. The sign should hold firmly without wobbling.
- Day 6: Paint or stain each layer as desired. Apply paint or stain evenly and allow it to dry fully between coats. Check for consistent coverage and no drips.
- Day 7: Seal your sign. Apply a clear sealant to protect the wood and paint from wear and weather. Let the sealant cure as per product instructions.
- Day 8: Display or gift your finished layered wood sign. Test that all parts are secured, the finish is smooth, and the sign is ready for hanging or presentation.
Frequently Asked Questions
Can I Use Scrap Wood for Making a Layered Wood Sign by Hand?
Yes, scrap wood works well if it’s flat and sturdy. It saves money and reduces waste but make sure to sand it smooth before painting or staining.
Do I Need Special Paint for Layered Wood Signs?
No, regular acrylic or craft paint works fine. These paints dry quickly and provide good coverage, making them great choices for layering colors on wood signs.
What Is the Best Glue for Attaching Wood Layers?
Wood glue or strong craft glue are ideal for layered signs. They dry clear and create a durable bond that holds the layers firmly without warping the wood.
Can I Add Vinyl Decals to a Hand-Made Layered Wood Sign?
Yes, vinyl decals can add detail to your sign. Apply them after sealing the wood to help protect the decal and improve its adhesion.
Should I Sand Between Paint or Stain Layers?
Lightly sanding between layers helps smooth the surface and improve paint or stain adhesion. Use fine-grit sandpaper and wipe away dust before applying the next coat.
How Can I Prevent Wood from Warping on My Sign?
Choose well-seasoned, stable wood and avoid excess moisture. Sealing all sides of the wood helps keep it balanced and reduces warping over time.
The Bottom Line
Making a layered wood sign by hand takes patience and attention, but you can create a finished piece that shows your craftsmanship. Focus on accurate cutting, neat assembly, and careful finishing. Start with a small design today to build your skills and confidence with this rewarding craft.