How to Make a Layered Wood Sign: Simple Steps and Expert Tips for Perfect Results
How to make a layered wood sign starts with selecting several wood layers and cutting each one precisely to create depth and detail. Using tools like laser cutters or CNC machines lets you achieve clean edges and consistent shapes for each layer. First, design your components digitally with spacing in mind to ensure the layers fit together properly and produce a clear dimensional effect.
Key Takeaways
- Choose woods like birch plywood or basswood for smooth cutting and consistent layers.
- Space layers between 0.5 and 1.5 inches to create noticeable depth without bulkiness.
- Design your sign file in vector format for precise cuts and easier adjustments.
- Laser cutting gives clean, sharp edges and works well for intricate designs on 3mm wood.
- Sand each wood layer starting with 120-grit, finishing at 220-grit for a smooth surface.
- Align layers carefully during assembly using spacers to maintain consistent depth and avoid shifting.
What Is a Layered Wood Sign and How Is It Made?
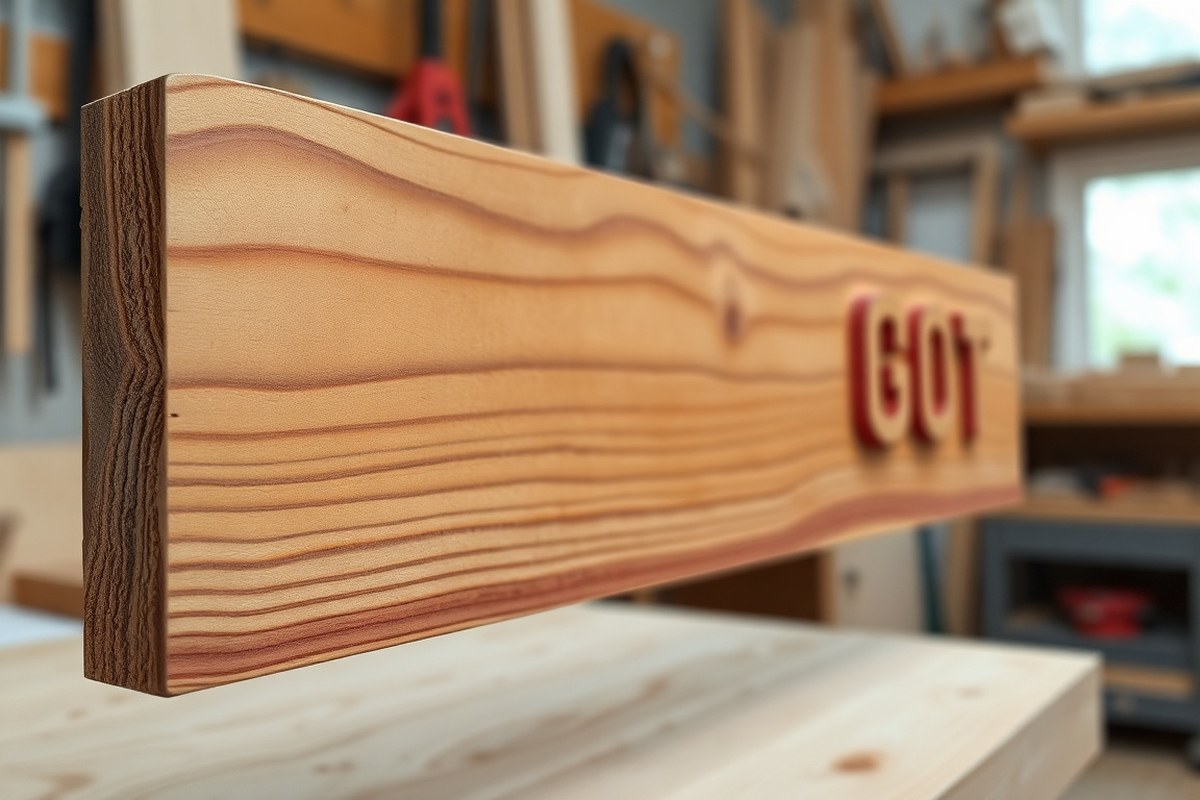
A layered wood sign features multiple cuts or pieces of wood stacked together to build up a design, creating a three-dimensional effect that stands apart from flat signs. Unlike flat signs, which use a single surface with painted or engraved details, layered signs use thickness and depth by arranging wood elements in separate tiers. These layers might include background shapes, lettering, and decorative accents, each cut from wood sheets and separated by spacers typically between 0.5 and 1.5 inches. This spacing adds noticeable depth without making the sign cumbersome, giving the artwork a tactile quality and strong visual interest.
The 3D effect comes from stacking several precisely cut layers so that each piece casts shadows and highlights the contours of the design. For example, a layered wood sign might combine two or three layers of Baltic birch wood, popular for its smooth texture and consistent thickness, to achieve a rich dimensional look. In some designs, additional materials like thin acrylic sheets or painted wood can be included to add color or contrast between the layers. Spacing these layers with wood or plastic risers also improve the perception of depth, making the sign look like a unique art piece rather than just a printed surface.
Making a layered wood sign starts with selecting wood that suits your design size and style. Baltic birch plywood is popular for layered projects because of its strength and smooth surface. Common thicknesses range from 1/8 inch to 1/4 inch for each layer, allowing you to build up the final height as needed. After preparation, each layer is cut using tools like laser cutters or CNC routers for sharp, consistent edges. Precise cutting ensures that all components will align correctly when stacked.
Lay out your layered parts with a focus on registration marks or guides to maintain proper alignment during assembly. Adding spacers between layers can be done with small blocks or specialized glue dots, keeping the design sturdy and proving dimensional separation. Painting or staining individual layers before stacking allows better control of the finished look, including multi-color effects. Costs vary depending on wood type and cutting method but expect each layer to add to material and production time; two to three layers are typical for balance between depth and complexity. Thickness beyond 1.5 inches may appear bulky and less refined.
Layering wood materials like Baltic birch, maple, or MDF can also improve durability and weather resistance, especially if sealed properly. For outdoor signs, choosing weather-resistant coatings and materials is essential to prevent warping or fading. While three layers often offer a pleasing depth, simpler designs with two layers or more complex ones with four layers can work depending on your project’s goal. Designing with this in mind ensures the final sign stands out as dimensional art rather than a flat graphical panel.
Best Woods and Materials for Layered Signs
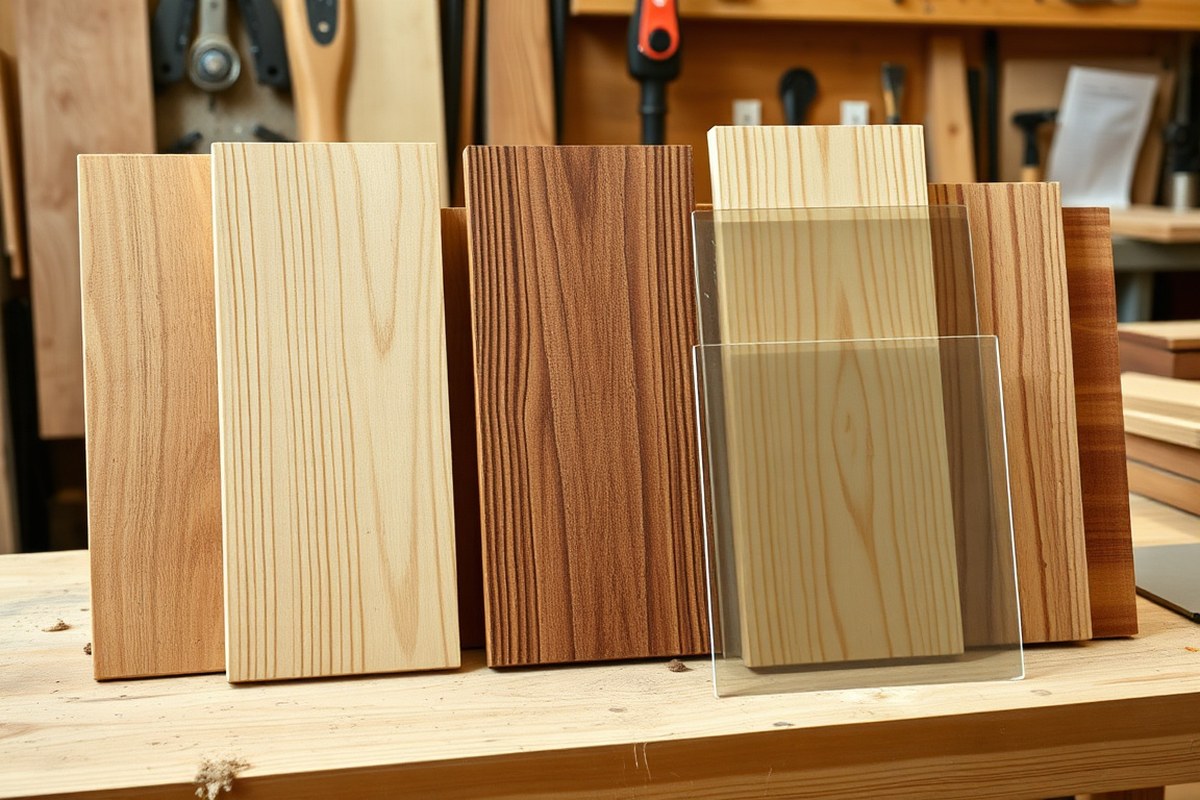
Choosing the right wood and materials greatly impacts the appearance, durability, and ease of cutting for layered wood signs. Woods like pine and birch are popular because they balance affordability and workability. Maple offers a smooth finish and durability for finer detail work, while cedar adds natural weather resistance, making it ideal for outdoor signs. Thickness should generally be between 1/8 inch (3 mm) and 1/4 inch (6 mm) depending on the type of machine used and the desired layering effect. Thinner sheets cut more easily but may be less durable, while thicker pieces require more powerful laser cutters or CNC machines.
Mixing wood with materials like acrylic or medium-density fiberboard (MDF) can add visual contrast and structural variety. Matte black acrylic works well as an accent layer and pairs nicely with printable MDF for colorful designs. Acrylic cuts smoothly with lasers and provides sharp edges, while MDF offers a solid, paint-ready surface. When combining these materials, be sure to select matching thicknesses to keep layers flush and simplify assembly.
| Material | Typical Thickness | Cutting Ease | Durability | Appearance | Cost (Approx.) | Best Use |
|---|---|---|---|---|---|---|
| Pine | 3, 6 mm | Easy | Moderate | Light color, visible grain | Low ($5, $10/sheet) | Indoor signs, base layers |
| Birch | 3, 6 mm | Easy | Moderate-high | Smooth, pale with subtle grain | Moderate ($10, $15/sheet) | Detailed engraving, fine layers |
| Cedar | 3, 6 mm | Moderate | High (weather resistant) | Reddish tone, natural knots | Moderate ($12, $18/sheet) | Outdoor signs, rustic look |
| Maple | 3, 6 mm | Moderate | High | Light, very smooth grain | Higher ($15, $20/sheet) | Premium indoor signs, fine detail |
| Acrylic (matte black or clear) | 3, 6 mm | Very easy | High | Glossy or matte finish | Moderate ($10, $20/sheet) | Accent layers, modern look |
Make sure to verify your cutter’s power limits; for example, laser modules from 20W to 60W can handle plywood, MDF, and acrylic sheets up to 6 mm thick effectively. If using thinner wood, expect cleaner cuts with less burn or charring. For engraving, birch and maple produce crisp details due to their smooth grain, while cedar’s knots may interfere with fine lines. MDF is especially suitable if you plan to print full-color designs before layering, accommodating detailed visual elements.
Always use wood or super glue on the back of the second-lowest piece when assembling layers to avoid shifting and ensure a strong bond.
Choosing materials that match your design’s environment and style helps maintain both beauty and longevity. Mixing a weather-resistant wood base like cedar with acrylic or printable MDF top layers can withstand outdoor exposure while offering visual depth. For indoor projects, softer pine or birch keeps costs low and cutting straightforward. Layer thickness and quality influence how well components fit together and the finish quality, so selecting flat, defect-free sheets will reduce sanding and finishing time. Consider the cost tradeoff: higher-grade woods and acrylic will raise material expenses but deliver sharper details and overall better presentation in your layered signs.
How to Design Files for Layered Wood Signs
Designing files for layered wood signs means preparing vector or raster images that clearly specify which parts to cut and which to engrave. You must organize your design into separate layers for each wood piece, add registration marks to help line up the layers during assembly, and save files in formats compatible with your cutting machine. Proper file setup ensures clean cuts, accurate alignment, and a polished final product.
Choosing the Right Software for Your Design
Popular software for layered wood sign design includes Adobe Illustrator, Inkscape (free), and CorelDRAW. These programs let you work with vector graphics, important for defining precise cut lines and engrave areas. If you prefer a software integrated with your cutting tool, check if it supports importing SVG or DXF files, as these are common in laser and CNC cutting.
Raster images like JPEG or PNG aren’t ideal for cut lines but can work well for engraving details that require shading or complex textures. Using software that can convert raster images to vectors or trace them helps create clean paths for cutting.
Creating and Organizing Cut and Engrave Layers
Organizing your design into layers lets you assign different operations to each part. For example, separate layers can indicate which wood pieces are cut out and which areas are engraved. This organization prevents confusion during cutting. Follow these steps to set up your layered file properly:
- Create separate layers named clearly, such as “Cut Layer 1,” “Cut Layer 2,” and “Engrave.”
- Draw or import your artwork placing each wood layer’s shape on its corresponding cut layer.
- Use vector paths with a stroke weight of 0.001 inch or hairline for cut lines to ensure the machine interprets them correctly.
- Fill areas that require engraving with solid colors or grayscale, depending on your machine’s requirements.
- Set the stroke color of cut lines to red or another color your cutter recognizes for cutting, and use black or gray for engraving layers.
- Keep text converted to paths/outlines to avoid font issues during cutting.
- Save your design in SVG or DXF format for vector compatibility; use at least 300 DPI resolution if including raster images.
These steps help the cutter separate tasks like cutting around shapes versus engraving details on the wood’s surface.
Adding Alignment Marks and Templates
Adding alignment or registration marks to each layer greatly simplifies assembly. These marks are small shapes, such as circles or crosses, placed at consistent positions on all layers to line them up precisely when glued together.
Place at least three marks evenly spaced around the design’s edges or corners. Make the marks large enough to be easy to find, usually about 1/8 to 1/4 inch diameter. Avoid placing marks inside detailed areas where they might interfere with the main design.
Include a separate layer for these marks or integrate them into the cut layers with a different colour code for clarity during cutting. You can also create a template layer that shows the entire assembled shape to verify your alignment before cutting.
Cutting Techniques: Laser, CNC, and Hand Tools Compared
Choosing the right cutting method for your layered wood sign depends on your skill level, budget, and desired outcome. Laser cutting offers unmatched precision, speed, and repeatability, making it ideal for detailed designs and batch production. CNC routers provide sculpted or raised lettering and are suited for those with access to router equipment and some experience in carving. Hand tools require no expensive equipment but are best for simple, one-off projects or for craftspeople who enjoy hands-on work despite a slower pace.
| Method | Typical Result | Best For | Speed & Repeatability | Equipment Needed | Skill Level |
|---|---|---|---|---|---|
| Laser Cutting | Precise, clean edges; can cut fully through wood or engrave surface | Detailed designs, batch production, hobbyists, small businesses | Fast; high repeatability | Laser cutter (for example, xTool M1 or S1 20W) | Beginner to intermediate, with some learning curve |
| CNC Router | Raised or carved lettering; sculpted surfaces | 3D effect signs; users comfortable with router operation | Moderate speed; good repeatability | CNC router machine | Intermediate to advanced |
| Hand Tools | Artisanal, textured cuts; less precise edges | One-off custom or artistic signs | Slow; low repeatability | Chisels, saws, knives, files | Beginner to expert depending on tool and method |
Laser cutting is the easiest for beginners who want consistent precision without investing in complex setup. Machines like the xTool S1 20W allow cutting 3mm basswood or similar materials quickly, with clean edges, making them perfect for intricate layered signs. Laser cutters connect to your computer and use digital files, so once your design is ready, you send it to the machine, set the material, and start cutting or engraving. The equipment cost ranges from several hundred to a few thousand dollars, but affordable beginner models exist.
CNC routers need more space and a higher starting skill level to program and operate properly. They work well when you want depth or 3D effects in your signs but take longer to master and maintain. Hand tools require minimal investment but slow speed and lower precision limit the number of signs you can create. Choose hand tools if you enjoy crafting every piece personally or work on large, simple shapes.
Budget-conscious crafters or those just starting often find laser cutting the best balance of cost, learning curve, and finish quality. For very simple, one-off signs or when power tools aren’t available, hand cutting lets you start without delay. CNC routers fit creators ready to scale complexity and production volume but who can invest time in training.
Preparing and Finishing Wood Layers for the Best Look
Preparing and finishing each wood layer is key to achieving a professional look and long-lasting durability on your layered wood sign. Sanding smooths rough surfaces for better paint or stain adhesion. Choosing the right staining or painting method helps bring out wood grain or color vibrancy. Finally, sealing the wood protects your sign from wear, moisture, and UV damage, especially outdoors.
Sanding Tips for Smooth Surfaces
Start by sanding each wood layer carefully to avoid splinters and ensure an even finish. Use 120-grit sandpaper to smooth out rough spots and edges. Follow up with 220-grit sandpaper for a fine, polished surface that paint or stain can stick to well. Here’s a simple sanding process to prepare your layers:
- Smooth the edges and flat surfaces of each wood piece with 120-grit sandpaper to remove roughness.
- Switch to 220-grit sandpaper and gently sand all surfaces again for a finer finish.
- Wipe layers with a tack cloth or damp rag to remove sanding dust before finishing.
- Inspect the surfaces for any missed spots and lightly sand as needed.
Always sand along the grain to prevent scratches that show through paint or stain.
Staining and Painting Options
Decide whether you want a natural wood look or vivid color when choosing between stain or paint. Stains improve the wood texture and grain with translucent color, while paint covers grain for solid colors or multi-color designs.
Test stain on a scrap piece of wood before applying it to your sign to check the color. For painting, acrylic paints or paint pens work well, especially for detailed or layered designs. Printable MDF can give a smooth, light surface for direct printing or painting, making photo-detail signs easier.
Use thin, even coats when applying stains or paint, and allow at least 4 hours between coats for drying. For a rustic look, lightly sand painted surfaces once dry to distress edges and add character.
Sealing and Protecting the Wood
Sealing is essential for durability and protection against moisture, dirt, and UV rays. Polyurethane provides a hard, lasting finish suitable for both indoor and outdoor signs. Wax finishes offer a softer, matte look but are less protective outdoors.
Apply a clear sealer with a foam brush or sprayer after your final stain or paint coat is dry. Use 2 to 3 coats, letting each dry completely before applying the next. Outdoor signs especially benefit from a UV-resistant sealer, reapplied annually to maintain protection. Keep sealed signs clean by wiping them gently with a damp cloth, avoiding harsh chemicals that can break down the finish.
How to Assemble and Align Layered Wood Components
Assembling and aligning layered wood components requires careful gluing and precise placement to avoid gaps and misalignment. Using the right wood glue, preparing alignment marks or jigs, and applying appropriate clamping pressure make the process reliable and clean. Following specific steps ensures your layered sign looks professional and stays durable.
Choosing the Right Adhesive
For layering wood pieces, a quality wood glue formulated for interior use is ideal because it dries clear and creates a strong bond without expanding or shrinking. PVA wood glues, such as Titebond Original or Elmer’s Wood Glue, are commonly preferred due to their ease of use, quick drying time of about 20 to 30 minutes, and strong hold when fully cured (24 hours recommended). Avoid construction adhesives or super glues that can cause uneven layers or brittle bonds products.
Apply the glue evenly across the entire mating surface to prevent gaps, but don’t overapply. Excess glue can squeeze out and make a mess or cause layers to slide during assembly.
Using Registration Marks for Perfect Alignment
Registration marks are simple guide lines or notches in each layer that help align parts without guesswork. Before gluing, lightly mark edges or use a jig or template to hold pieces in the correct position. For example, you can place a small pencil dot or a shallow notch at the corners of each layer. When stacking, match these marks so layers line up perfectly.
Jigs made from scrap wood or flat templates can hold multiple layers steady while you apply glue and assemble. This keeps the layers from slipping out of place and helps maintain consistent spacing, especially if you use spacer pieces under some layers for depth. Without these guides, small shifts during assembly can cause noticeable gaps or misaligned visuals.
Tips for Clamping and Drying Time
Use clamps or weights to hold the layered wood signs firmly while the glue dries. Clamps apply even pressure that ensures tight contact between layers, preventing gaps. Bar clamps, flat panel clamps, or spring clamps work well depending on your sign size and shape. If clamps aren’t available, heavy flat weights like books can substitute but may not apply even force across irregular shapes.
Apply clamp pressure gently but firmly. Too much force can cause glue squeeze-out or damage thin or intricate layers. Let the glue dry for at least 20 minutes before removing clamps, but wait a full 24 hours for complete curing before sanding or finishing to avoid weakening the bond. Check layers after clamping to ensure they didn’t shift and realign if needed before the glue sets.
- Prepare all wood layers by sanding smooth and dry-fitting them to check alignment.
- Add registration marks or use your jig to position each layer accurately.
- Apply a thin, even coat of wood glue to the contact surface of one layer.
- Place the next layer carefully, matching registration marks or jig placement.
- Clamp or weight the assembled layers evenly without over-tightening.
- Allow the glue to dry for at least 20 minutes before handling.
- Remove clamps and check the bond; let the sign cure for 24 hours before further finishing.
Common Mistakes to Avoid When Making Layered Wood Signs
Misalignment in layered wood signs often happens when the design lacks precise measurements or the files used for cutting are not double-checked. Ensuring your design files match the exact size and position of each layer is important. Before cutting, verify that every element lines up correctly by overlaying the files digitally or printing templates at scale. This step helps catch errors that cause parts to not fit together during assembly.
Damage to wood during cutting typically arises from using dull blades, incorrect feed rates, or improper tool settings. Thin layers are especially vulnerable to tearing and splintering. To prevent this, sharpen blades frequently or replace them before each project. Adjust the cutting speed based on the wood type: harder woods need slower feed rates to avoid chipping, while softer woods can handle faster passes. Always clamp wood securely to prevent vibrations that produce rough edges.
Certain finishing errors can shorten your sign’s lifespan. Applying finish too thickly or skipping surface prep like sanding will weaken adhesion and lead to peeling or uneven color. Use fine-grit sandpaper (around 220 grit) to smooth each layer thoroughly before sealing. Apply finish in thin, even coats, letting each dry fully following manufacturer instructions, usually 2 to 4 hours between coats. This method increases durability and protects against moisture and UV damage.
- Double-check design files for exact layer alignment before cutting
- Print or trace templates to verify size and fit on actual wood pieces
- Use sharp blades and replace them regularly for clean cuts
- Adjust tool settings and feed rates according to wood hardness
- Clamp materials firmly to reduce vibration and prevent splintering
- Sand wood surfaces with 220-grit sandpaper before finishing
- Apply multiple thin finish coats, allowing proper drying time between
Before starting, review your material thickness and confirm that it matches your design file dimensions exactly. Variations, even as small as 1/16 inch, can cause problems when stacking layers. Taking the time to prepare each piece properly and following these steps helps your layered wood sign come together cleanly and last longer.
Safety Tips and Maintenance for Layered Wood Signs
Using cutting machines like lasers or CNC routers requires proper protective gear to avoid injury. Always wear safety glasses to protect your eyes from debris and bright light. A dust mask or respirator is essential to prevent inhalation of fine wood particles. Gloves can protect your hands, but avoid loose-fitting ones that might catch in moving parts. Make sure your work area has good ventilation, especially when cutting or finishing wood, since fumes from some adhesives and finishes can be harmful.
During assembly, handle glues and finishes carefully. Use them in a well-ventilated space and follow the product instructions exactly. Avoid skin contact with strong adhesives like cyanoacrylate or epoxy by wearing nitrile gloves. Clean up spills immediately with a damp cloth and dispose of used rags safely, as some finishes can be flammable.
- Wear safety glasses and a dust mask during cutting and sanding.
- Use nitrile gloves when applying glues and finishes.
- Keep your work area well ventilated at all times.
- Turn off and unplug machines before changing blades or bits.
- Secure your wood pieces firmly before cutting or engraving.
- Avoid loose clothing and tie back long hair around tools.
- Store adhesives and finishes in sealed containers away from heat sources.
Always let finishes dry completely in a dust-free area to avoid surface blemishes and ensure proper curing.
To keep your layered wood sign looking its best over time, dust it regularly with a soft, dry cloth. Avoid harsh chemicals or abrasive cleaners, which can damage finishes. For signs finished with oil-based stains or polyurethane, use a slightly damp cloth and mild soap if needed, then dry immediately. Water-based finishes are less sensitive but clean gently as well. Do not soak the wood or expose the sign to prolonged direct sunlight, which can cause fading or warping. For outdoor signs, consider applying a fresh coat of outdoor-rated clear finish every 1 to 2 years to maintain protection.
Step-by-Step Action Plan for Your First Layered Wood Sign
Follow these steps to design, cut, and assemble your layered wood sign successfully.
- Before you start: Select your wood types based on durability and contrast; choose at least two layers with clear grain differences to improve the look.
- Day 1: Create or download vector files for each layer, ensuring clean lines and proper spacing; test print on paper to confirm alignment.
- Day 2: Prepare your wood by sanding and applying a base finish or primer to prevent warping and improve paint adhesion; check for a smooth, even surface.
- Day 3: Cut the layers using your chosen tool (laser, CNC, or hand tools); verify cuts are clean and accurate with tight-fitting edges.
- Day 4: Paint or stain each layer separately, allowing sufficient drying time; layers should have uniform color without drips or uneven spots.
- Day 5: Assemble the layers with appropriate glue and use clamps or weights to keep them in place; check alignment before drying.
- Day 6: Apply a clear protective finish to the entire sign; look for full coverage without pooling or streaks.
- After one week: Inspect the sign; ensure all layers are bonded securely and the finish is smooth before hanging or displaying.
Frequently Asked Questions
What Type of Paint Works Best for Layered Wood Signs?
Acrylic paint pens like Tooli-Art offer vibrant colors and great control for detailed layering. They dry quickly and are easy to apply on laser-cut wood surfaces.
Can I Use Photo Images on a Layered Wood Sign?
Yes, UV printing or direct printing can add photo detail for personalization. This method captures photo realism better than hand-painting multi-color graphics.
Why Are Registration Marks Important for Larger Signs?
Registration marks help align multiple wood layers precisely. Using a ruler and marks prevents shifting and keeps the design consistent when assembling.
How Do I Avoid Wood Warping During the Layering Process?
Choose stable, properly dried wood like Baltic birch plywood. Keep wood sealed or painted on all sides to balance moisture and prevent warping.
Is It Possible to Combine Laser Cutting with Hand Painting?
Yes, laser cutting defines precise shapes, and you can hand paint details for a custom look. Use acrylic paints that adhere well to wood.
How Many Layers Typically Create a Striking Wood Sign?
Signs with four to six layers offer depth and dimension without overwhelming the design. More layers add complexity but require careful alignment.
Wrapping Up
Making a layered wood sign gives you a creative way to showcase woodworking skills and craft unique décor. Start by gathering your materials and designing your layers with care. Your next step should be practicing clean cutting and careful assembly to achieve the best final look.