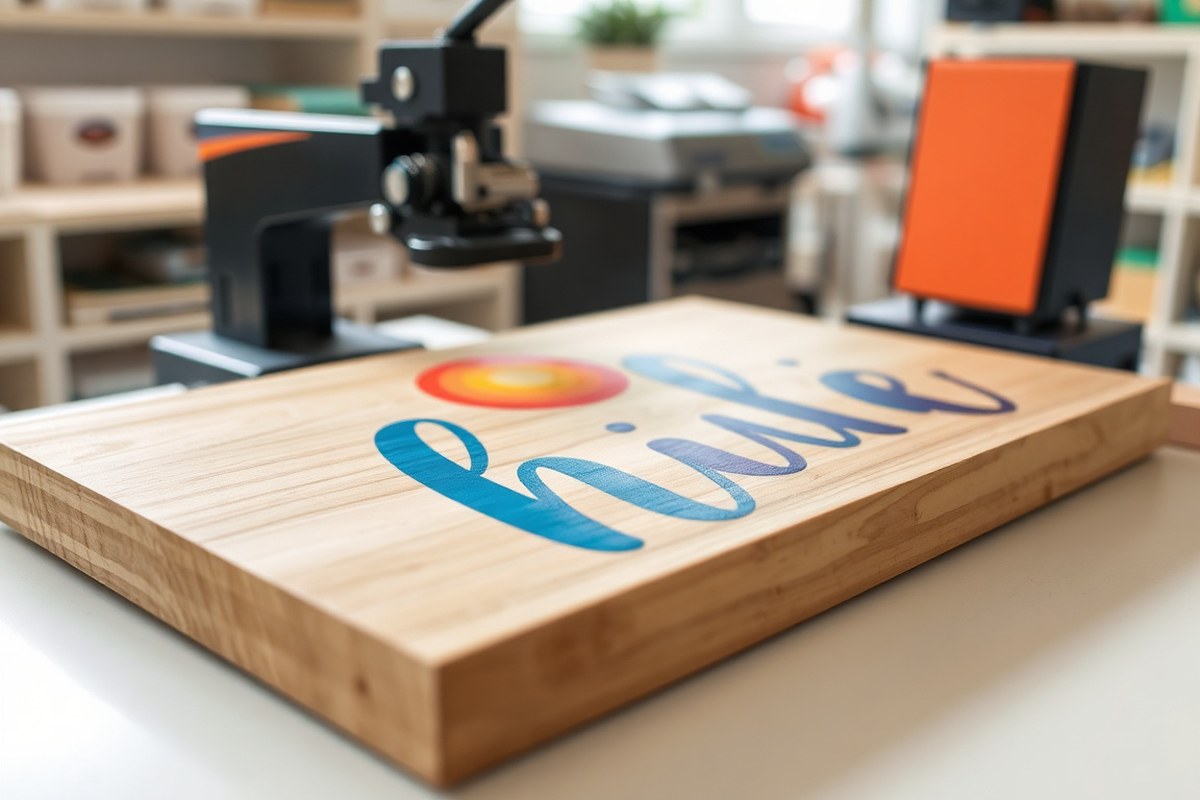
Can You Use HTV on Wood? A Complete Guide for Perfect Crafting Results
Can you use HTV on wood? Yes, heat transfer vinyl sticks well to wood when you prepare the surface properly and apply heat at the right temperature. Painted or stained wood surfaces, cured for at least 24 to 72 hours, provide the best results since the paint prevents heat damage during pressing.
Start by ensuring the wood surface is clean, smooth, and preheated to about 300°F before applying HTV with firm pressure. This technique helps the vinyl bond effectively without damaging the wood.
Key Takeaways
- Paint wood with acrylic or chalk paint and let it cure 24-72 hours before applying HTV for optimal adhesion.
- Preheat the wood surface to around 300°F for 5-10 seconds before pressing HTV.
- Apply HTV with firm, even pressure at 300°F for 15 to 40 seconds to ensure a good bond.
- Use a Teflon or parchment cover sheet to protect the wood and HTV during heat pressing.
- Choose HTV types designed for lower temperature pressing, ideally between 265°F and 320°F for wood.
- Let the finished HTV project cure fully for up to 24 hours before cleaning or using it.
Can You Use Heat Transfer Vinyl on Wood Successfully?
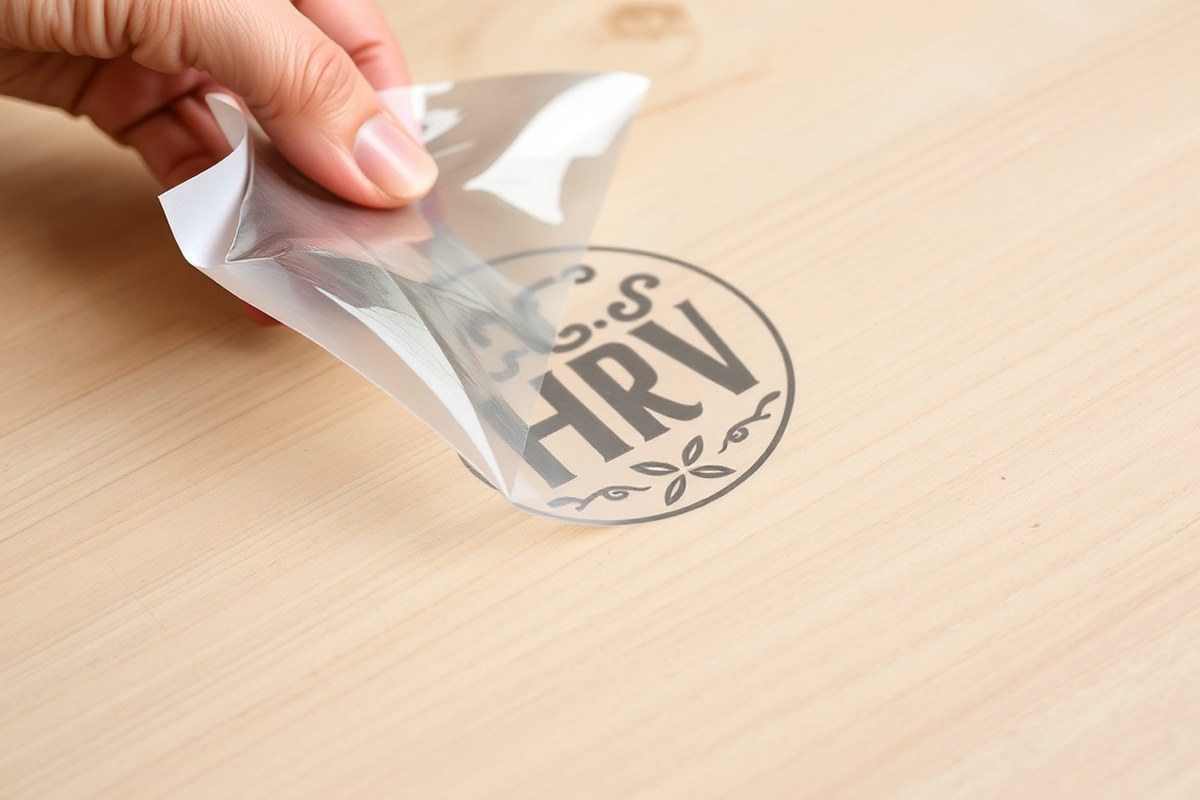
Heat transfer vinyl (HTV) can be successfully applied to wood surfaces, but it requires careful preparation and the right application conditions. HTV bonds to wood using a heat-activated adhesive layer, which melts and sticks to the surface when exposed to the correct temperature and pressure. This bonding process differs from fabric because wood is a rigid, porous material without the natural flexibility and texture of textiles. The heat and pressure cause the adhesive to adhere directly to the wood fibers or the paint layer, rather than embedding into fibers like it does on fabric.
To achieve a strong bond, the wood surface must be clean, smooth, and dry. Preheating the wood for 5 to 10 seconds at approximately 300°F removes moisture and improve adhesion. Applying the HTV requires maintaining this temperature range (typically 300°F to 320°F) with firm pressure for 15 to 40 seconds. The exact timing and pressure might need slight adjustments depending on the HTV type and wood finish. The key is uniform heat distribution to activate the adhesive without overheating the wood or HTV.
Adhesion works best on painted wood surfaces, especially if the paint is acrylic or chalk-based and fully cured. Allowing the paint to cure for at least 24 to 72 hours before applying HTV prevents the heat from reactivating the paint and causing issues. On raw wood, the natural grain and texture can create bonding challenges because roughness reduces even contact needed for the heat-activated adhesive. Some crafters prefer to lightly sand raw wood to create a smoother surface, but it’s possible to apply HTV directly if you accept some texture in the finished look.
In summary, using HTV on wood is feasible but hinges on proper surface prep and heat application. A smooth, clean wooden base heated to around 300°F for a brief preheat, followed by 15 to 40 seconds of firm pressure, activates the adhesive for a durable bond. Painted wood usually offers a more reliable and consistent surface for HTV than raw wood. Without this care, the vinyl may peel or bubble prematurely, resulting in uneven or short-lived designs. Understanding this bonding mechanism helps you avoid common problems and get solid results when crafting with HTV on wood.
Which Wood Types and Finishes Work Best with HTV?
Hardwoods and softwoods both accept heat transfer vinyl (HTV), but your results depend largely on the wood’s surface texture and finish. Raw sanded wood is a popular choice for a rustic look. Its porous surface lets the HTV bond, but adhesion tends to be slightly weaker compared to finished wood because moisture and grain irregularities affect the bond. Smooth wood surfaces provide better HTV grip, which is why preparing the surface is essential before pressing.
Painted and stained wood are often preferred because they offer a smooth, sealed surface that improves HTV adherence. For painted or stained wood, allowing 24 to 48 hours to fully cure the finish is critical. Sealed wood surfaces, especially those finished with clear coats like spray lacquer or polyurethane, can be ideal if the finish isn’t too glossy. A light scuff sanding can help create a toothy surface that reduces slipperiness and promotes adhesion.
| Wood Surface Type | Adhesion Quality | Preparation Needed | Notes on Finish & Texture |
|---|---|---|---|
| Raw Sanded Wood | Good, but weakest due to porosity | Sanding for smoothness; clean dust | Rustic look; porous surface holds HTV less tightly |
| Stained Wood | Very Good | Allow 24, 48 hours cure; light scuff sanding optional | Smooth surface; color affects aesthetics |
| Painted Wood | Very Good | Allow 24, 48 hours cure; clean surface | Best with smooth, matte or satin paint finishes |
| Sealed Wood (Polyurethane, Lacquer, Shellac) | Good to Very Good | Light sanding to reduce gloss; clean surface | Glossy finishes are slippery; spray sealants preferred over brush-on |
Wood texture matters because rough or uneven grain can interfere with consistent heat and pressure during pressing. Fine-grain woods like maple or birch provide a flatter surface, making HTV adhesion more reliable. Coarse-grain woods like oak or pine may need extra surface prep such as sanding to smooth out edges and pores that trap moisture, which can cause HTV to lift. Preheating the wood briefly to about 300°F before pressing helps to stabilize moisture and allows the HTV adhesive to activate evenly.
Always let painted or stained wood fully dry for at least 24 hours before applying HTV to avoid poor adhesion or bubbling.
Choosing the right finish also affects durability. Spray sealers reduce the risk of lifting because they apply evenly without disturbing the HTV edges, unlike brush-on finishes that can lift vinyl if applied after pressing. Avoid very glossy or thick polyurethane finishes without sanding them lightly first, since their slick surface resists vinyl bonding. The wood’s porosity and texture combine with these finishes to determine how well HTV sticks and how durable the final project is.
How to Prepare Your Wood Surface for HTV Application
Preparing the wood surface correctly is key to getting HTV to stick well. Smooth, clean, and slightly warmed wood helps the adhesive bond better and produces a cleaner result. Follow these clear steps to prepare your wood for HTV application.
Sanding for a Smooth Surface
Sanding makes the wood surface flat and even, removing rough patches, splinters, or knots that can interfere with the vinyl’s grip. Aim to create a smooth base that allows the HTV to lay evenly without gaps or bubbles.
Use medium-grit sandpaper such as 120 to 150 grit for initial smoothing, then finish with fine-grit sandpaper around 220 grit to get a sleek, soft surface. Avoid sanding too aggressively to prevent gouging the wood, which can create uneven spots or damage delicate finishes.
Sanding also reduces the natural roughness of porous woods, making heat transfer more consistent. This step costs very little: typical sandpaper sheets are around $5 each at craft stores. Investing the time here will save frustration during application and improve your project’s final look.
Cleaning and Removing Contaminants
Removing dust and oils from the wood surface is important to prevent HTV from lifting later. Even tiny particles or residues can stop the adhesive from fully bonding with the wood.
Use a clean cloth soaked in rubbing alcohol (isopropyl alcohol) or a mild degreaser to wipe the entire sanding dust off the wood. Avoid water, which can raise the wood grain or cause swelling. Let the wood dry completely before moving on. Drying usually takes just a few minutes at room temperature.
After cleaning, the surface should feel dry and free of grease or dust. Skipping this can cause uneven adhesion or peeling after heat pressing. Alcohol is inexpensive and effective, with a typical bottle costing around $3 to $6 at most pharmacies or supermarkets.
Preheating the Wood to Improve Adhesion
Warming the wood surface slightly before applying HTV improves the activation of the vinyl’s adhesive layer. This step helps the HTV bond deeper into the wood grain, reducing lifting or peeling.
Set your heat press, iron, or heat tool to the temperature you plan for your final press, then preheat the wood surface for 5 to 10 seconds. Don’t press for longer, as wood can scorch or warp under sustained heat. Use gentle but firm pressure to warm the area where you’ll place HTV.
Preheating also helps evaporate any remaining moisture and flattens small wood fibers to create a better contact surface. A temperature around 300°F is suitable and safe for most woods used in crafting.
- Sand the wood surface first with 120-150 grit sandpaper to remove roughness.
- Finish sanding with 220 grit for a smooth final texture.
- Wipe the sanded surface with a cloth soaked in rubbing alcohol or degreaser.
- Allow the wood to dry completely to avoid moisture interference.
- Preheat the wood surface with your heat press or iron for 5 to 10 seconds at about 300°F.
- Apply firm, even pressure during preheating without overexposing to heat.
- Place your HTV on the warm, dry wood ready for pressing.
By carefully sanding, cleaning, drying, and preheating, you’ll set up your wood for the best HTV adhesion possible. Consistent preparation reduces the chances of peeling or bubbling and ensures a smooth, professional-looking application.
Choosing the Right HTV Types and Heat Settings for Wood
When choosing HTV for wood projects, standard PU HTV generally works best for strong adhesion and durability. Specialty vinyls like glitter, foil, and flock add decorative effects but require adjusted temperatures and times. Pressing at slightly lower temperatures with longer dwell times prevents damage to the wood and ensures a smooth bond.
Standard PU HTV
Standard polyurethane (PU) HTV offers reliable adhesion to wood, especially when the wood is sanded and primed. Brands like Siser Easyweed are popular for wood crafts due to their flexibility and durability. Using a medium to firm pressure along with a parchment or Teflon cover sheet protects the wood surface and the vinyl during pressing.
Pressing temperature should be a bit lower than for fabrics, usually around 265, 290°F (130, 143°C), to prevent scorching the wood finish. A dwell time of 10 to 15 seconds gives a solid transfer without overheating. Pressure that is firm but even works best to accommodate slight texture in wood surfaces. Preheating the wood surface briefly for 5 to 10 seconds helps reduce moisture, preventing bubbles under the vinyl.
Glitter, Foil, and Flock Variants
Glitter, foil, and flock HTV each add unique visual and tactile effects. Glitter vinyl provides sparkle and is excellent for seasonal signs and ornaments, but its thicker film requires a longer pressing time. Foil HTV offers a metallic shine but is heat sensitive, so it needs lighter pressure and a cover sheet to avoid damage. Flock vinyl creates a soft, raised, velvety texture, which demands the highest temperature range to set properly.
The textural differences, such as the thickness of glitter and flock films, affect how heat and pressure transfer through the vinyl to the wood. Thicker and raised HTV types may require multiple light presses rather than one prolonged press to prevent melting the vinyl or scorching the wood. Testing on scrap wood helps dial in the optimal conditions that balance heat and pressure without ruining your project.
Ideal Temperature Ranges and Dwell Times
Matching the right temperature, pressing time, pressure, and cover sheet to each HTV type is essential for wood projects. The table below summarizes key temperature ranges, dwell times, pressure levels, and cover sheet recommendations for each HTV type when applied to wood:
| Vinyl Type | Ideal Temp (°F/°C) | Press Time (seconds) | Pressure | Cover Sheet Recommendation |
|---|---|---|---|---|
| Standard PU HTV | 265, 290 / 130, 143 | 10, 15 | Medium, firm, even | Parchment or Teflon sheet |
| Glitter HTV | 290, 305 / 143, 152 | 15, 20 | Medium-firm | Parchment or Teflon sheet |
| Foil HTV | 265, 285 / 130, 141 | 10, 15 | Light-medium | Cover sheet; avoid over-pressing |
| Flock HTV | 290, 320 / 143, 160 | 15, 20+ | Medium-firm | Cover sheet recommended |
Using a heat press is preferable for consistent temperature and pressure, especially on wood that might have varied texture. An iron can work but requires careful adjustment of pressure and timing. Start with manufacturer recommendations and increase pressing time incrementally for textured wood. Avoid overheating by using a cover sheet and monitoring the wood finish closely. Thick or dimensional vinyls need gentler pressure to avoid damage.
Step-by-Step Guide to Applying HTV on Wood Surfaces
You can apply HTV to wood by carefully cutting and weeding your design, placing it on the wood, pressing at the right temperature and pressure, then peeling the carrier sheet at the proper time. This process requires accuracy and attention to detail to ensure the vinyl adheres well and the design looks clean. Using the right steps helps avoid lifting or bubbling issues common in HTV wood projects.
Cutting and Weeding Your HTV Design
Start by preparing your design in your cutting machine software and make sure to mirror it before cutting. This step is essential because the shiny carrier side of the HTV faces down on the cutting mat, and cutting it backward will ruin your design when transferred. After cutting, carefully weed the unwanted vinyl using weeding tools, focusing on removing negative space to expose the design clearly.
Take your time to weed thoroughly, especially for intricate designs, since leftover bits can cause peeling issues during transfer. Use a gentle light source behind the vinyl to see the cut lines better if needed.
- Mirror your design in the software before cutting.
- Place the HTV shiny side down on the cutting mat.
- Load the mat into your cutting machine and cut the design.
- Remove the mat and carefully weed the negative vinyl.
- Use a weeding tool for small or detailed areas.
- Double-check your design to make sure all extra vinyl is removed.
Cutting the HTV with the carrier side down and mirroring the design prevents backwards or unusable cuts.
Positioning and Heat Pressing
Position your weeded HTV design firmly on the prepared wood, aligning it where you want the image to sit. Set your heat press to about 300°F (149°C) and apply even pressure for 40 seconds to ensure strong bonding, especially on rough or porous wood surfaces. Protect the HTV and wood by covering with a Teflon sheet or parchment paper to avoid scorching or sticking to the press.
When the wood surface has gaps or uneven areas, apply pressure gradually and carefully, focusing first on the raised parts to achieve consistent adhesion. You might need to repress some sections to ensure full contact with the HTV. Using a heat press rather than an iron provides more consistent temperature and pressure during application.
- Position the weeded HTV design on the wood’s surface.
- Cover the design and wood with a Teflon sheet or parchment paper.
- Set the heat press to 300°F (149°C).
- Apply even pressure for 40 seconds.
- Lift the press carefully after the time elapses.
- Inspect the design for good contact on uneven surfaces; repress if needed.
Applying even pressure at 300°F for about 40 seconds works best to activate the adhesive, especially on textured or gap-ridden wood.
Peeling Techniques and Timing
Allow the HTV to cool slightly before peeling off the carrier sheet to avoid lifting the edges. Wood retains heat longer than fabric does, so a cold peel is often safer for protecting the design’s integrity. Start peeling the carrier sheet slowly and evenly. Spotting any part of the design lifting calls for immediately placing the carrier sheet back and pressing that section again for an additional 5 to 10 seconds.
Peeling back gradually and using your fingers to press down parts that try to lift helps keep the design secure. The peel should be smooth and clean with no vinyl pulling up, this signals proper adhesion. Follow the manufacturer’s peeling instructions precisely when working with hot peel HTV to avoid damaging the design.
- Let the HTV cool slightly after removing the heat press.
- Begin to peel the carrier sheet back slowly at a shallow angle.
- Press down any area lifting off the wood immediately.
- Lifting during pressing requires placing the carrier sheet back on and reheating the area for 5 to 10 seconds to reinforce the bond.
- Continue peeling slowly and evenly until fully removed.
- Inspect your design for any imperfections.
A cold peel reduces the risk of vinyl lifting on wood, since the rigid surface holds heat longer than fabric.
Troubleshooting Common HTV Problems on Wood
One common problem when using HTV on wood is that the vinyl lifts or peels after pressing. This often happens because the wood surface wasn’t smooth or clean enough for proper adhesion, or the pressing time and temperature were off. Textured or rough wood can cause uneven contact, leading to weak spots where the HTV separates. Another reason is pressing too hot or too long, which can damage the vinyl or scorch the wood.
Bubbles and scorching happen when excessive or uneven heat is used. Moisture trapped beneath the HTV or not preheating the wood can also cause bubbles. To prevent this, lower the heat to the suggested setting and apply the HTV in brief intervals lasting 15 to 30 seconds, letting it adhere gradually. Warm the wood for 5 to 10 seconds before pressing to eliminate moisture and establish an even temperature.
When HTV won’t stick at all, double-check that the wood is clean, dry, and properly sanded to a smooth finish. Rough or unfinished surfaces make it hard for HTV adhesive to bond. Using layered pieces or transferring HTV on a painted or sealed wood surface can improve adhesion because the smoothness helps the vinyl stick better. Also, ensure you are using the right type of HTV designed for wood, as some types are more flexible and adhesive than others.
- Preheat the wood for 5-10 seconds before pressing HTV
- Press HTV in 15-30 second intervals at the recommended temperature
- Ensure wood is smooth and free from dust or oils before applying
- Use a firm, even pressure during pressing to avoid bubbling
- For wood with textured surfaces, carefully peel the HTV and press it back several times to ensure even adhesion.
- Layer designs slowly to prevent melting the vinyl
Following these steps reduces errors and improves how well HTV adheres to wood. Give the HTV time to cool completely before peeling off the carrier sheet to help the vinyl set. Scorch marks call for lowering the heat setting at your next attempt or using a protective heat press cover sheet over the wood. Bubbling can often be fixed by reheating carefully and pressing out the bubbles. For wood with gaps or splits, consider layering HTV over a painted or sealed base to avoid gaps affecting the design.
How to Seal and Finish Your HTV Wood Project for Longevity
Sealing HTV applied on wood is recommended to extend the life of your design and protect it from wear. While the HTV itself adheres well to properly prepared wood, a clear sealant adds a protective layer that can prevent lifting, scratching, or fading over time. To avoid damaging or lifting the HTV, wait at least 24 hours after heat pressing before applying any sealant. This curing period allows the vinyl to set firmly on the wood surface.
Spray sealants and brush-on options each offer different advantages and drawbacks depending on your project. Spray lacquer is often used for wood projects and tends to work well over tightly adhered HTV, but experiences with it vary. Polyurethane provides durable protection but can have a glossy finish that may change the matte look of HTV. Shellac dries quickly and gives a warm tone but is less water-resistant. Polycrylic offers a water-based option with less odor and easier cleanup, suitable for interiors. Mod Podge serves as both an adhesive and sealant, is easy to apply, but can sometimes cause the HTV to lift if applied too soon.
| Sealant | Type | Pros | Cons | Cost Range | Best Uses |
|---|---|---|---|---|---|
| Spray Lacquer | Spray | Quick drying; smooth finish; compatible with wood | Mixed results on HTV adhesion; can cause lifting if applied too soon | $10, 20 per can | Finished wood pieces with well-adhered HTV |
| Polyurethane | Brush-on or Spray | Durable; protects against scratches and moisture | Glossy finish may alter HTV’s matte look; longer drying time | $8, 25 per quart | High-traffic or outdoor wood items |
| Shellac | Brush-on | Fast drying; adds warm tone; natural finish | Less water-resistant; may yellow over time | $10, 18 per pint | Decorative indoor wood pieces |
| Polycrylic | Brush-on or Spray | Water-based; low odor; easy cleanup; maintains matte finish | Less durable outdoors; multiple coats needed | $10, 20 per quart | Indoor projects with matte HTV finish |
| Mod Podge | Brush-on | Easy to apply; seals and adheres; versatile craft use | Applying too soon can lift HTV; less durable than varnishes | $6, 12 per quart | Indoor crafts and low-traffic items |
For best results, apply the sealant in thin, even coats using light brush strokes or controlled spray taps. Avoid heavy application that could cause pooling or uneven drying. Let each coat dry fully according to the product’s instructions before applying additional coats, usually at least one to two hours for water-based sealants and longer for oil-based. Applying the sealant after at least 24 hours of HTV curing helps prevent lifting. Keep the sealed project in a dust-free, ventilated space until the sealant fully hardens to avoid imperfections.
Choosing the best sealant depends on your project’s use, look you want, and whether the wood will be indoors or outdoors. For example, polycrylic is a good choice for indoor wood pieces where you want to keep the HTV’s matte finish intact, while polyurethane shines in durability for pieces subject to moisture or abrasion. Mod Podge works well on casual indoor crafts but might not protect the design as well long term. Spray lacquer can work if the HTV is firmly bonded and the finish matches your aesthetic, but it can sometimes cause lifting if applied too early or in thick coats.
Tips and Safety for Heat Pressing HTV on Wood
Heat pressing HTV onto wood requires careful attention to avoid scorching the surface. Wood can char if exposed to high temperatures for too long, so keep your heat press set around 305°F (150°C) and limit pressing times to 10 to 15 seconds. Always follow the HTV manufacturer’s recommended temperature and time settings for wood material, adjusting slightly if needed. Using a heat press with adjustable pressure is key; too much pressure can damage both the wood and the HTV.
Protective gear is essential for safety and consistent results. Wearing heat-resistant gloves prevents burns when handling hot materials. Use a heat-resistant silicone or Teflon sheet over your HTV design before pressing to keep the heat even and protect the wood surface. Avoid direct contact between the heat platen and wood, which can cause uneven heating and damage. Also, work in a well-ventilated space to avoid fumes from heated adhesives or finishes on the wood.
Uneven or thick wooden pieces demand extra care. Wood thickness affects how heat and pressure transfer; thicker pieces need slightly longer heat application but at moderate pressure to avoid indenting or cracking the wood. Place a firm, even base below your wood piece during pressing to maintain flat contact. For uneven textures, add a thin, heat-resistant padding like a folded Teflon sheet beneath the wood to distribute pressure evenly without crushing raised grain or knots.
- Set heat press to around 305°F (150°C) for 10, 15 seconds
- Wear heat-resistant gloves to prevent burns
- Use a Teflon or silicone sheet over HTV while pressing
- Adjust pressure to medium or light depending on wood thickness
- Place wood on a firm, flat base to ensure even heat and pressure
- Add heat-resistant padding under uneven wood surfaces
- Work in a ventilated area to reduce fumes
Never leave the heat press on the wood for longer than the recommended time to avoid burning and warping the material.
Following these practices helps the HTV conform smoothly to the wood’s surface, creating a painted-on look without scorching. Be patient and test heat and time settings on scrap wood similar to your project before pressing the final piece. This cautious approach saves you from common issues like adhesive failure, wood discoloration, or surface damage, making your HTV wood projects both safer and more professional-looking.
Step-by-Step Action Plan for Applying HTV on Wood
Follow these steps to apply heat transfer vinyl to wood successfully and ensure a durable finish.
- Before you start: Select a smooth, unfinished or lightly finished wood surface and clean it thoroughly. The absence of dust and dirt means it’s ready for HTV.
- Day 1: Gather your supplies, including appropriate HTV (preferably a softer vinyl), a heat press or iron, and protective parchment paper. Confirm your heat source reaches about 315°F to 320°F with moderate pressure.
- Day 1: Preheat the wood with your heat source for 5 to 10 seconds to remove moisture. The surface should feel warm but not smoky.
- Day 1: Position the HTV design on the wood, cover it with parchment paper, then press for 10 to 15 seconds. Check the vinyl’s adhesive is tacky but not melted.
- Day 1: Peel the carrier sheet slowly while the vinyl is warm. If the vinyl lifts, repress briefly under parchment.
- Day 2: Allow the wood and HTV to cool completely. Verify adhesion by lightly flexing the wood or rubbing over the edges; there should be no lifting.
- After 2 days: Apply a clear acrylic sealer or polyurethane to protect the HTV. Let it dry according to the product instructions to ensure longevity.
Frequently Asked Questions
Can You Use Heat Transfer Vinyl on Curved Wood Surfaces?
Yes, you can use HTV on curved wood but the surface must be smooth. Applying firm, even pressure with a heat press or iron helps the vinyl adhere properly on slight curves.
Does Unfinished Wood Affect HTV Adhesion Differently Than Finished Wood?
Unfinished wood is more porous, so HTV may not stick as well without sealing. Painting or sealing the wood first improves adhesion and durability.
Can You Reposition HTV on Wood After Pressing It?
Repositioning HTV on wood after pressing is difficult and may damage the vinyl. Plan your design carefully before pressing for best results.
Is It Necessary to Use a Heat Press Instead of an Iron for HTV on Wood?
A heat press offers more consistent heat and pressure but an iron can work if you apply firm, even pressure carefully.
How Long Should You Let HTV Cool on Wood Before Peeling the Carrier Sheet?
Let HTV cool for about 10 seconds before peeling the carrier sheet to prevent lifting. Cooling increases vinyl adhesion on wood.
Can You Use Multiple HTV Colors Layered on Wood?
Yes, layering HTV colors on wood works if you press the base layer properly before adding each new layer to avoid melting.
Before You Go
Heat transfer vinyl can bond well to the right type of wood when you prepare the surface properly and use suitable heat and pressure. Start by testing your materials on a scrap piece of wood to adjust your settings. Taking this approach ensures your final project looks clean and lasts longer.