How to Apply Window Lettering: Simple Steps and Expert Tips for Perfect Results
Knowing how to apply window lettering correctly ensures a smooth, professional-looking result that lasts. Start by cleaning and prepping your window surface to help the vinyl adhere well. Use a squeegee to firmly press the lettering onto the glass and remove air bubbles for a flawless finish.
Key Takeaways
- Use vinyl lettering pre-spaced on transfer tape to simplify positioning and application.
- Clean the glass with a lint-free cloth and mild cleaner before applying lettering.
- Apply lettering at temperatures between 50, 70 °F (10, 21 °C) for optimal adhesion.
- Choose the dry method for decals under 12 inches (30 cm), wet method for larger ones.
- Peel back the paper liner carefully and smooth the vinyl with a squeegee to avoid bubbles.
- Leave the lettering with transfer tape on the window for 24 hours to ensure firm bonding.
What Is Window Lettering and How Does It Work?

Vinyl window lettering consists of thin sheets of colored or clear vinyl with adhesive backing designed to stick firmly to glass surfaces. The vinyl is cut into letters or shapes, often pre-spaced and attached to a clear transfer tape. This makes it easy to position the entire design accurately on a window.
The adhesive used on vinyl lettering is pressure-sensitive. When you press the vinyl onto the glass with a plastic squeegee or similar tool, pressure activates the adhesive, bonding the vinyl tightly to the window. The bond works best on clean, dry glass, free from cleaning residue or dirt that could interfere with adhesion. Because of this, avoid cleaning the window with products that leave a film; rubbing alcohol and drying in natural light are recommended for preparation.
Window lettering offers an affordable and effective way to promote a small business, display office hours, or decorate a storefront elegantly. Businesses often apply vinyl lettering to entrance doors and front windows to attract attention and convey professionalism. These decals also have good outdoor durability, lasting several years with proper care. For example, some trailers still show their vinyl decals clearly after four to five years.
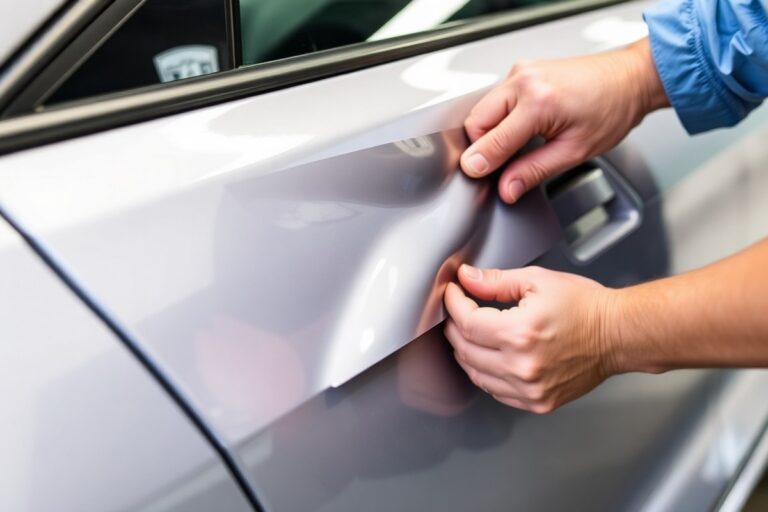
Applying vinyl lettering yourself is straightforward because the material comes ready to use. The pre-spaced transfer tape keeps the letters aligned. You simply peel back the paper liner, position the decal on the clean glass, then use a squeegee to apply firm, even pressure. This step ensures the adhesive bonds properly across the entire surface of each letter. Once pressed, gently peeling away the transfer tape reveals the lettering cleanly applied to the window.
Good results depend on having a smooth, clean glass surface and using consistent pressure when applying the vinyl. Uneven pressure can cause air bubbles or parts of the lettering to lift, reducing durability and appearance. For best adhesion, leave the lettering on the window undisturbed for at least 24 hours after application. This waiting period lets the adhesive fully set, which improves long-term holding power.
Common uses for vinyl window lettering include informational signs, branding displays, and decorative designs on office and retail windows. The material is versatile enough for interior or exterior surfaces and can create a polished, professional look without the expense of custom etching or permanent paint. This makes it a popular choice for seasonal promotions, announcements, and everyday storefront signage.
Essential Tools and Materials Needed for Application
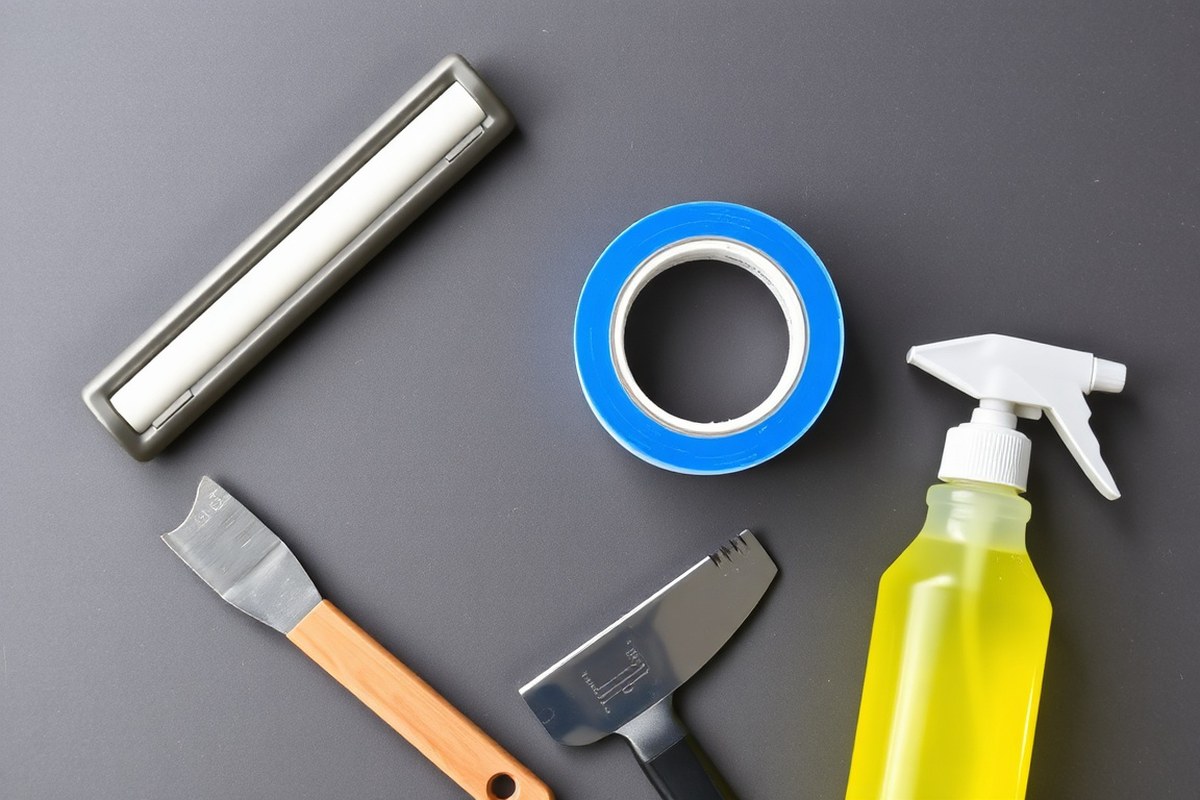
To apply window lettering smoothly, having the right tools and materials is important. Begin with cleaning supplies like rubbing alcohol or soap and water to remove dirt, dust, and any leftover residue from previous decals. This step ensures the adhesive sticks properly and prevents bubbles or peeling later. If residue is stubborn, use a specialized solvent like Rapid Remover designed for decal removal.
You’ll also need the actual window lettering decal with its transfer tape. This transfer tape holds the vinyl letters together for positioning. For applying the decal, use a flat, hard plastic tool such as a credit card, a squeegee, or a thin piece of plastic. These help firmly press the decal onto the window and push out air bubbles.
For larger decals, consider using a spray bottle filled with a mixture of water and a small amount of mild dish soap. This wet application method lets you reposition the decal slightly before it fully sticks. It reduces wrinkles and alignment mistakes but requires patience to smooth out water before it dries.
- Rubbing alcohol or soap and water for cleaning the glass surface thoroughly
- Solvent like Rapid Remover to clear old decal residue or tough grime
- Window lettering decal with transfer tape included
- Flat plastic squeegee, credit card, or similar hard plastic object for pressing the decal
- Spray bottle with water and mild dish soap mixture for wet application of large decals
- Lint-free cloth or paper towels for drying the window surface completely
- Masking tape or painter’s tape for temporarily positioning the decal on the glass
Completely clean and dry the window before starting. Any dust or moisture trapped under the decal will interfere with adhesion. Use the tape to hold the decal in place while you check alignment. After applying, leave the transfer tape on for 24 hours to let the decal set firmly.
Always work in a shaded area and avoid applying decals in extreme temperatures below 50°F or above 90°F, as this can affect the adhesive’s ability to bond properly.
How to Properly Prepare the Window Surface
Preparing the window surface properly ensures your vinyl lettering sticks firmly and lasts longer. This means thoroughly cleaning the glass to remove dirt, oils, and any leftover residue from previous decals. Careful cleaning also prevents bubbles or peeling after application.
Choose the Right Cleaning Solution
Pick a cleaning agent that removes grease and dirt without leaving behind a film that interferes with adhesion. Avoid window cleaners containing ammonia or wax, as they can leave residues that vinyl won’t stick to properly. Rubbing alcohol is a reliable choice because it evaporates quickly and cleans thoroughly.
For best results, use isopropyl rubbing alcohol with at least 70% concentration. It cleans the glass surface by breaking down oils and dirt without leaving streaks. Avoid detergents or soaps as they can leave a greasy film. Also, do not use vinegar solutions, which might not clean oils well enough for vinyl.
Remove Old Vinyl and Residue
Any old vinyl decals must be fully removed before applying new lettering. Leftover adhesive or vinyl pieces create an uneven surface that prevents proper bonding and causes bubbles or peeling.
Start by peeling off the old vinyl slowly from one corner. Use a plastic scraper or your fingernail to carefully lift the vinyl lettering, making sure not to scratch the glass surface. After removal, rub the area with rubbing alcohol on a clean cloth to remove residual adhesive. Apply a glass-safe adhesive remover to clean off any leftover sticky residue, working gently to protect the non-porous surface.
Dry the Window Completely
After cleaning, allowing the window to dry completely prevents moisture from trapping under the vinyl and causing adhesion failure. Air drying is usually best, but to speed up drying or handle humid environments, use a rubber squeegee or a clean, lint-free towel.
Do a second wipe with a dry microfiber cloth just before application to remove any fingerprints or dust picked up during drying. The surface should feel smooth and completely dry to the touch. Avoid using paper towels as they can leave tiny lint particles. Follow these steps to prep your window properly before applying vinyl lettering:
- Peel off any old vinyl decals carefully without scratching the glass.
- Wipe the entire surface with rubbing alcohol using a clean microfiber cloth.
- Use a plastic scraper or adhesive remover if any residue remains, then clean again with alcohol.
- Allow the window to dry naturally or use a rubber squeegee to wipe away any leftover water for a clear finish.
- Do a final wipe with a dry microfiber cloth to remove dust or fingerprints.
- Check the surface to ensure it is smooth, clean, and dry before applying new vinyl.
Step-by-Step Guide to Applying Vinyl Window Lettering
Applying vinyl window lettering correctly ensures a clean, professional look without bubbles, wrinkles, or misplacing. The key is careful measuring and taping for accurate positioning, gently peeling and applying the vinyl, then using a squeegee to press out air bubbles before finally peeling off the transfer tape at the right time.
Measure and Tape the Lettering in Place
Accurate placement prevents crooked or uneven lettering, which can ruin the sign’s appearance. Use a measuring tape and level to find the desired spot on your glass. Masking tape acts as a temporary hinge, helping you adjust positioning and secure the vinyl before final application.
Start by measuring the window width and height, then compare these dimensions to those of your vinyl decal. Mark lightly with a pencil or use masking tape strips to frame the intended location. Hold the vinyl lettering in place and use masking tape to hinge it on one edge, allowing you to lift and readjust if needed.
Peel Backing and Apply Lettering
Properly peeling and applying your vinyl reduces the chance of tangling or damage. Start by flipping the hinged vinyl up like turning a page. Peel off the backing paper carefully to expose the adhesive side without touching it, which can transfer oils or dust.
With the adhesive side now exposed, align the decal back down onto the window starting from the hinged side. Slowly press from top to bottom to avoid trapping air underneath. Keep hands and the surface clean to maintain good adhesion. Avoid rushing to ensure each letter stays in place.
Use a Squeegee to Remove Air Bubbles
Removing air bubbles creates a smooth, professional finish and helps the vinyl stick long-term. Use a hard, flat object like a credit card or a squeegee to firmly press across the decal.
- Start at the center of the decal.
- Push outwards towards each edge, working from the top down.
- Apply firm pressure to squeeze out trapped air and secure adhesion.
- Check for any remaining bubbles and press or puncture them carefully with a pin if needed.
This process takes a few minutes but makes a noticeable difference in appearance and durability. Skipping or rushing this step often leads to trapped air and poor long-term adhesion.
Remove Transfer Tape at the Right Time
Transfer tape holds the vinyl letters in place during application but must be removed after the vinyl has fully stuck to the glass. Wait at least 24 hours after application to allow the vinyl to bond properly before peeling off the transfer tape.
To remove the tape, slowly pull it back against itself at a sharp angle, keeping it close to the glass surface. Do this gently to avoid lifting the vinyl letters. If you see any letters lifting, press them back down and wait longer for better adhesion before trying again.
Choosing Between Wet and Dry Application Methods
Choosing between wet and dry application methods depends largely on your environmental conditions and the type of window lettering you’re applying. Dry application works best in mild, dry weather when the temperature is comfortable, generally between 50°F and 85°F. This method involves peeling the decal and placing it directly onto the window without any liquid. It’s a quick process and usually suits smaller decals or simple designs.
Use the wet application method when you need more time to position the lettering accurately or when the weather is slightly warmer and more humid. This method involves spraying a soapy water solution on the window before placing the decal. The liquid allows you to slide the lettering into the perfect position before it sticks permanently. It’s especially helpful when applying large or multi-piece vinyl lettering because it reduces the risk of bubbles or wrinkles.
Environmental factors are important. Avoid applying decals on very cold days below 50°F, as the vinyl won’t stick well. Also, avoid hot days above 85°F because decals can adhere too quickly, which makes repositioning difficult and may cause air bubbles. Humid or damp conditions are a plus for the wet method, as the moisture prevents premature sticking. For dry weather under 85°F, the dry method saves time and effort.
| Application Method | Best Conditions | Advantages | Limitations |
|---|---|---|---|
| Dry Application | 50°F to 85°F, dry weather | Faster; minimal materials needed | Harder to reposition; risk of bubbles, especially with large decals |
| Wet Application | 50°F to 85°F, mild to humid conditions | Allows repositioning; fewer bubbles; better for large/multi-piece decals | Takes more time; requires spray bottle and towels; can be messy |
To apply using the dry method, first clean and dry the window thoroughly. Peel the backing off the decal, carefully place it on the window, then use a credit card or squeegee to press down firmly from the center outward. Quickly remove any masking tape. The decal adheres immediately, so adjust carefully before fully pressing it down.
For the wet method, prepare a spray bottle with a mix of water and a drop of dish soap. Spray the window surface generously before placing the decal. This liquid layer lets you slide the decal into the perfect spot. Use a squeegee or credit card to push excess water and air bubbles out from the center toward the edges. Wipe away any moisture with paper towels. Allow the decal to dry for at least 24 hours for best adhesion.
Only apply window lettering when the weather is mild; avoid extremely cold or hot conditions to ensure good adhesion.
How Long to Wait and How to Care for Lettering After Application
Leave the transfer tape on your window lettering for about 24 hours to ensure the vinyl fully adheres to the glass. This waiting period helps the adhesive properly bond, which maximizes durability. After removing the tape, avoid heavy cleaning or extreme weather exposure for a few days to maintain the decal’s appearance and lifespan.
Waiting 24 Hours Before Removing Transfer Tape
After applying the window lettering, keep the transfer tape in place for at least 24 hours. This allows the adhesive on the decal to set firmly onto the glass surface. Removing the tape too soon can lift parts of the vinyl, causing bubbles or gaps that reduce the decal’s effectiveness and appearance. To remove, start by carefully lifting one corner of the clear transfer tape at a low angle, pulling slowly and steadily to avoid disturbing the vinyl itself. If you notice any parts sticking to the tape, pause and press the decal back to the glass gently before continuing.
Waiting this full day also gives the adhesive time to cure. The curing process strengthens the bond to your window and helps the decal resist peeling or weather damage. Skipping or shortening this period may lead to poor adhesion, especially on outdoor storefronts exposed to wind and rain.
Ideal Temperature and Weather Conditions
The best temperature to apply and let the vinyl cure is between 50 and 70 °F (10, 21 °C). This range supports proper adhesive set without making the vinyl too stiff or too soft. Avoid application and curing during rain, high humidity, or strong wind, especially outside. Exposure to moisture can weaken adhesion or cause dirt and debris to get trapped beneath the decal.
During colder months below 50 °F (10 °C), the adhesive may not bond well, risking peeling soon after installation. In hot weather above 70 °F (21 °C), the vinyl can become too flexible and may stretch, leading to bubbles or distortion. Plan your application when the weather forecast predicts calm, dry, and mild conditions for at least a full day after applying your window lettering.
Post-Application Cleaning and Maintenance
After removing the transfer tape, wait at least 3 to 7 days before cleaning the decal. This delay helps the adhesive cure further, protecting against lifting when scrubbed. Use a soft cloth or sponge with mild soap and water for cleaning. Avoid harsh chemicals, abrasive pads, or high-pressure water sprays, as these can damage or peel the vinyl.
To protect the lettering long term, keep window surfaces clean and free of abrasive contact. Avoid decals facing constant direct sunlight without UV protection, which can fade colors over time. You may also apply a vinyl-safe clear coat for extra protection, but test a small area first to confirm compatibility.
Common Application Mistakes and How to Fix Them
Common mistakes when applying window lettering include bubbles, wrinkles, misalignment, and dirt trapped under the vinyl. These problems usually occur because the surface was not properly prepared, the lettering was not pressed down firmly, or the application technique was rushed. Fixing these errors quickly improves the final appearance and helps the lettering last longer.
Bubbles often appear when air gets trapped between the vinyl and the glass. To fix small bubbles, use a squeegee to press them firmly toward the edges. Press from the center outward, working slowly to push air out. If the bubble is large or stubborn, gently lift the affected section, realign it, and reapply using the squeegee. Avoid sharp objects to pop bubbles, as this can damage the vinyl.
Wrinkles happen when the vinyl folds over itself during application. Carefully peel back the corner of the lettering where the wrinkle formed. Smooth out the vinyl with your fingers, then use the squeegee to press it flat. Applying slow, steady pressure helps reduce wrinkles as the adhesive bonds with the glass.
Misaligned lettering can sometimes be adjusted right after sticking, but not after the adhesive sets. Immediately after applying, gently lift the decal and reposition it. Use a level or measuring tape before pressing down fully. Once aligned, press firmly with a squeegee again to set the lettering in place.
- Press lettering firmly with a squeegee from center outward to avoid bubbles
- Peel back corners slowly to fix wrinkles without stretching the vinyl
- Reposition lettering immediately after application if misaligned
- Ensure the window surface is clean and dry before applying
- Place paper or painter’s tape to mark layout before removal of backing
- Work in temperatures between 50°F and 90°F for best adhesive results
- Avoid rushing; a careful, slow application reduces mistakes
Correcting mistakes often takes patience and a steady hand. Using a tool like a plastic squeegee protects the vinyl during adjustment and helps apply even pressure. For example, placing three points of contact, one at the bottom, one at the top, and one on the side, can keep the lettering balanced while you press. Remember that cleaning the surface thoroughly reduces dirt-related problems, while controlling temperature and humidity improves how well the vinyl sticks.
When to Call a Professional Installer Instead of DIY
Choosing professional installation for your window lettering makes sense when the project is large, complex, or requires long-lasting durability. If your decal is more than 3 feet wide or spans multiple window panels, a pro can handle precise alignment and smooth application better than most DIY attempts. Professionals are trained to avoid bubbles, wrinkles, or misplacement, issues more likely when the lettering involves intricate fonts, multi-layer designs, or sensitive materials.
Durability matters if you expect heavy sun exposure, frequent cleaning, or outdoor weather conditions. Professional installers use optimal pressure, temperature, and application tools to maximize adhesion. They might also apply protective overlaminates for UV resistance and longer life, which home kits often lack. Proper installation can extend the decal’s lifespan from a typical 3 to 5 years up to 7 or more, depending on materials and climate.
Costs for professional service vary by size and complexity but generally range from $100 to $500 for standard storefront lettering. This includes consultation, surface preparation, application, and a warranty that covers peeling or fading for a year or longer. Warranty coverage means that if the lettering bubbles or lifts within that period, the installer will fix or replace it at no extra charge, a valuable safety net missing in most DIY setups.
To decide if you should hire a pro, consider this: If your lettering is smaller than 2 feet in both width and height, has a simple single-color design, and your window faces moderate weather, DIY is often sufficient. For anything larger, detailed, or exposed to harsh conditions, professional installation reduces risks of poor adhesion and uneven placement. Also, allow extra time and budget for professional help if the storefront has textured or tinted glass, as these surfaces require special techniques and materials.
Professional installation improves your result by using controlled environments and curing times. Installers typically prepare the glass with a specific cleaner that leaves no residue and apply vinyl at temperatures between 50 and 80 degrees Fahrenheit to ensure proper bonding. You can expect them to spend 1 to 3 hours on site for a standard application, compared to a novice’s trial-and-error efforts that might stretch over several hours or days.
Make sure the window temperature and weather conditions meet the installer’s guidelines; applying vinyl in extreme cold or heat often causes adhesion problems no matter the skill level.
Step-by-Step Action Plan for Applying Vinyl Window Lettering
Follow these steps carefully to ensure your vinyl window lettering looks sharp and lasts as long as possible.
- Before you start: Clean the window thoroughly with glass cleaner and a lint-free cloth. The surface should be spotless and dry to ensure good adhesion.
- Immediately after cleaning: Measure and mark the placement with painter’s tape and a level to ensure your lettering is straight and centered.
- Application day: Choose dry or wet application depending on your comfort level. Wet method allows easier adjustment. Peel backing carefully, position the lettering, then press down starting at the center outwards to avoid bubbles.
- Right after application: Use a squeegee or credit card to firmly press the lettering and remove air bubbles and excess moisture if using the wet method.
- Within the first hour: Remove the transfer tape slowly at a sharp angle. The vinyl should stay in place, indicating a good bond.
- After 24 hours: Avoid cleaning the window or touching the lettering aggressively to allow full curing.
- After 1 week: Check edges for peeling or lifting. If any, press down firmly or use a heat gun briefly on low setting to improve adhesion.
Frequently Asked Questions
How Do You Position Window Lettering Accurately Before Application?
Position the lettering by lightly taping it in place on your clean window to check alignment. Use a level or measure edges to ensure it’s straight before peeling the backing and applying with a squeegee.
Can Window Lettering Be Removed Without Damaging the Glass?
Yes, carefully peeling the vinyl lettering off with heat from a hairdryer helps loosen adhesive, minimizing glass damage. Clean any residue with rubbing alcohol afterward.
Is It Better to Apply Window Lettering on the Inside or Outside of Windows?
Apply lettering on the outside for durability and visibility but inside works if protection from weather is needed. Consider your location and exposure.
How to Prevent Bubbles When Applying Vinyl Window Lettering?
Smooth out the vinyl with a squeegee from the center outward during application to push air out and avoid bubbles. A gentle hand helps.
Can Window Lettering Withstand Rain and Sunlight Without Fading?
High-quality vinyl window lettering resists rain and sunlight for long periods but over time some fading may occur. UV-resistant materials last longer.
What Temperature Is Ideal for Applying Vinyl Window Lettering?
Apply vinyl lettering at temperatures between 50°F and 80°F for best adhesion and ease of positioning. Cold or hot weather may affect stickiness and flexibility.
Final Thoughts
Applying vinyl window lettering yourself can give your space a professional look without the cost of hiring an installer. By carefully preparing the window and following precise application steps, you can achieve a clean, lasting finish. Start by gathering your materials and planning your layout today to get the best results from your DIY window lettering project.