DIY Kitchen Sign Ideas: A Complete Guide with Easy Steps and Expert Tips
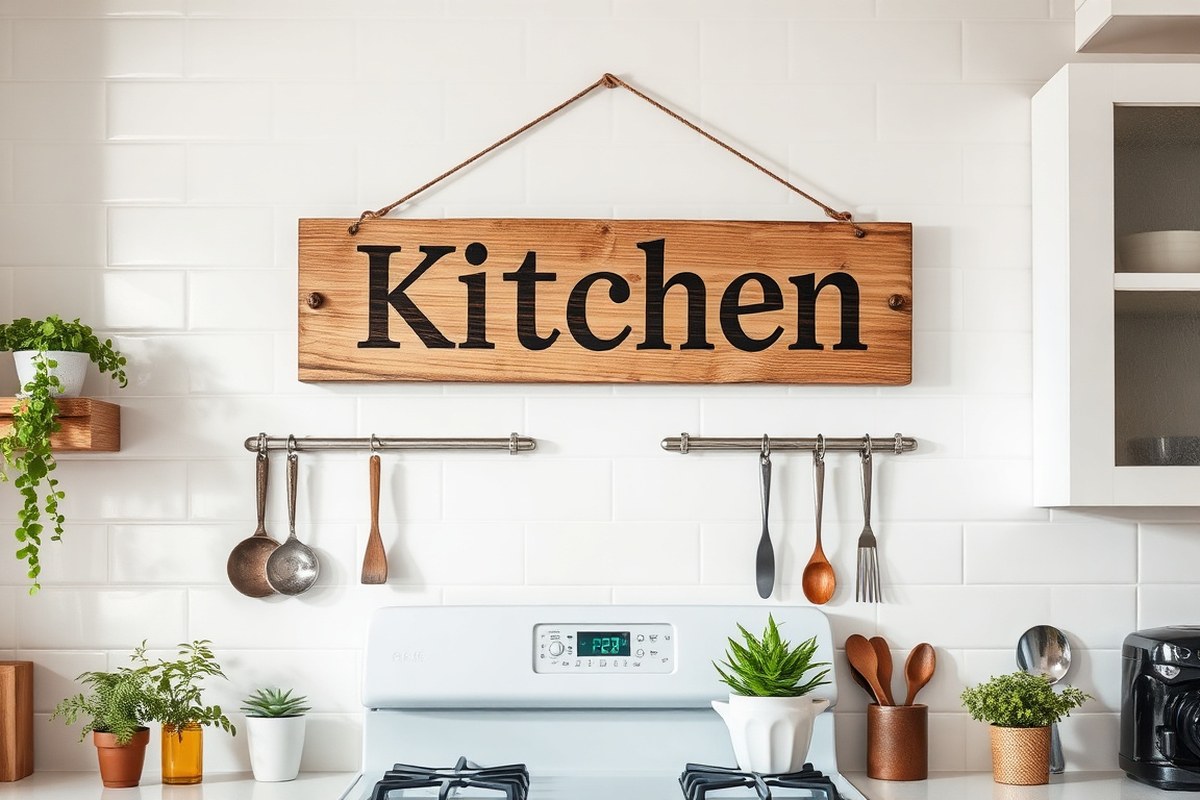
A diy kitchen sign brightens your space with a personal touch and fits your style perfectly. Making one is simple with basic materials like wood, paint, and letters, and it lets you create custom phrases or designs. Start by choosing the right size, 11 by 14 inches works well for framed signs without taking over your kitchen.
Key Takeaways
- Choose wood pieces sized around 11 x 14 inches for easily framed kitchen signs.
- Plan your design by downloading free laser-ready kitchen sign templates for quick personalization.
- Allow paint to dry for at least 24 hours before distressing or sealing to avoid damage.
- Use affordable paintbrush sets ranging from $5 to $15 to apply colors smoothly.
- Lettering adds personality; consider buying pre-cut letters on sale to save time.
- Small signs like pantry labels can be under 12 inches wide, while statement signs range 12 to 24 inches.
What Is a DIY Kitchen Sign and Why Make One?
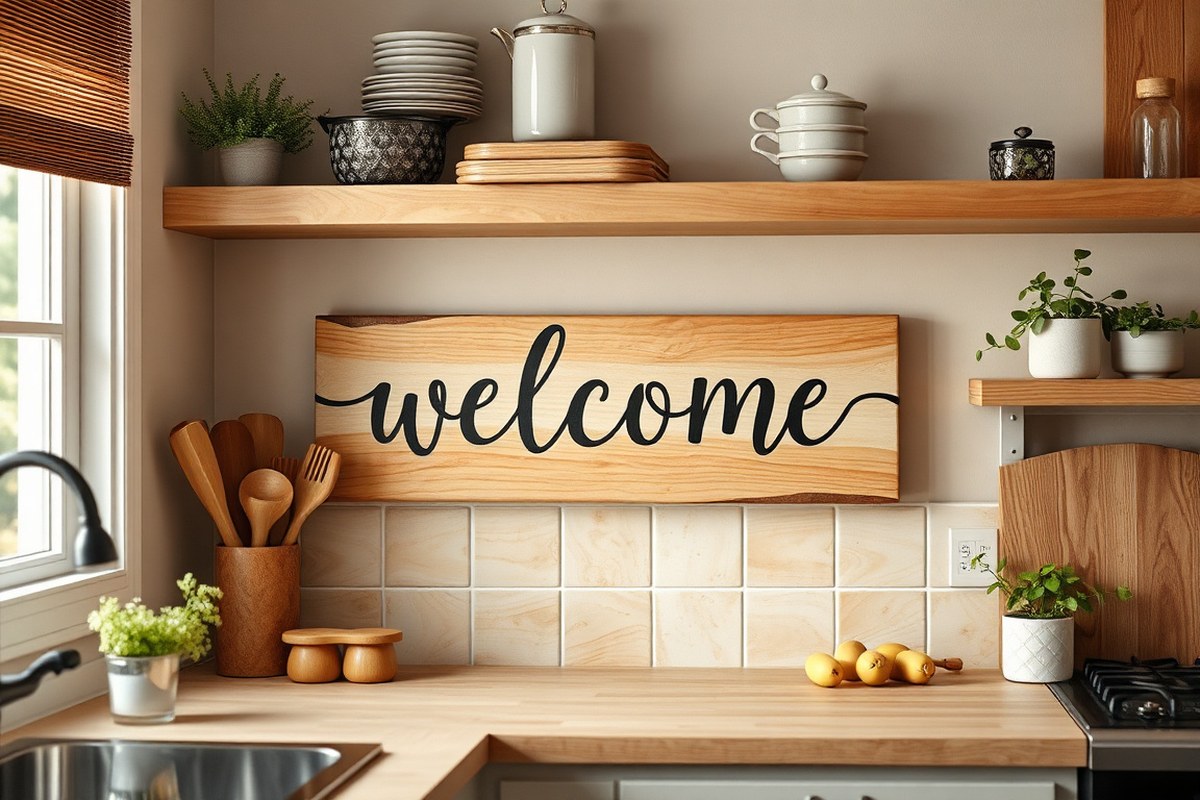
A DIY kitchen sign is a handmade decorative piece designed specifically for kitchen spaces. These signs often feature personalized messages, quotes, or themes that reflect your style and the atmosphere you want to create. Typical sizes for these signs are around 11 by 14 inches, making them large enough to catch the eye without overwhelming the wall space. You can create them using scrap wood, reclaimed materials, or basic craft supplies, which keeps the project affordable and accessible.
Making your own kitchen sign matters because it allows you to add a personal touch that’s hard to find in store-bought options. It also lets you customize every detail, from the phrase and font to the colors and finish, matching your kitchen’s existing decor perfectly. Instead of paying $20 to $50 or more for a pre-made sign, you can complete a DIY project for about $10 to $20 if you reuse materials and purchase only essential supplies like paint and sealer. The process is also a fun creative outlet that can be completed in a few hours, making it a satisfying weekend project.
Popular types of kitchen signs include farmhouse styles with rustic wood and vintage fonts, funny signs that add humor, coffee-bar themed signs that highlight your caffeine corner, pantry labels for organization, and personalized signs with family names or custom sayings. People often aim for a vintage or distressed look to give their signs a timeless feel. To get started, you might download free design templates from online libraries, which can guide your lettering and layout choices, especially if you’re using tools like a Cricut machine for precise cutting.
One practical approach is to first gather scrap wood or an old cutting board from around your home. Sand it lightly, then paint a base color. Next, apply your chosen design either by hand-painting or using vinyl stencils transferred from a Cricut design. After the paint dries, sealing the sign with a matte or satin acrylic sealer protects it from moisture typically found near sinks or stovetops. For a lasting and charming finish, you might distress the edges by lightly sanding after sealing. Mistakes can happen, for example, uneven paint lines or smudges, but these can often be fixed by gently sanding the affected area once dry and repainting.
Creating your own kitchen sign blends personal expression with practicality. It brings warmth and creativity to your space while letting you control the look and feel of your kitchen’s decor. Plus, it serves as an ideal introduction to crafting if you’re new to DIY projects, as it requires basic materials and simple steps that lead to a visible and rewarding result.
Choosing the Right Materials for Your Kitchen Sign
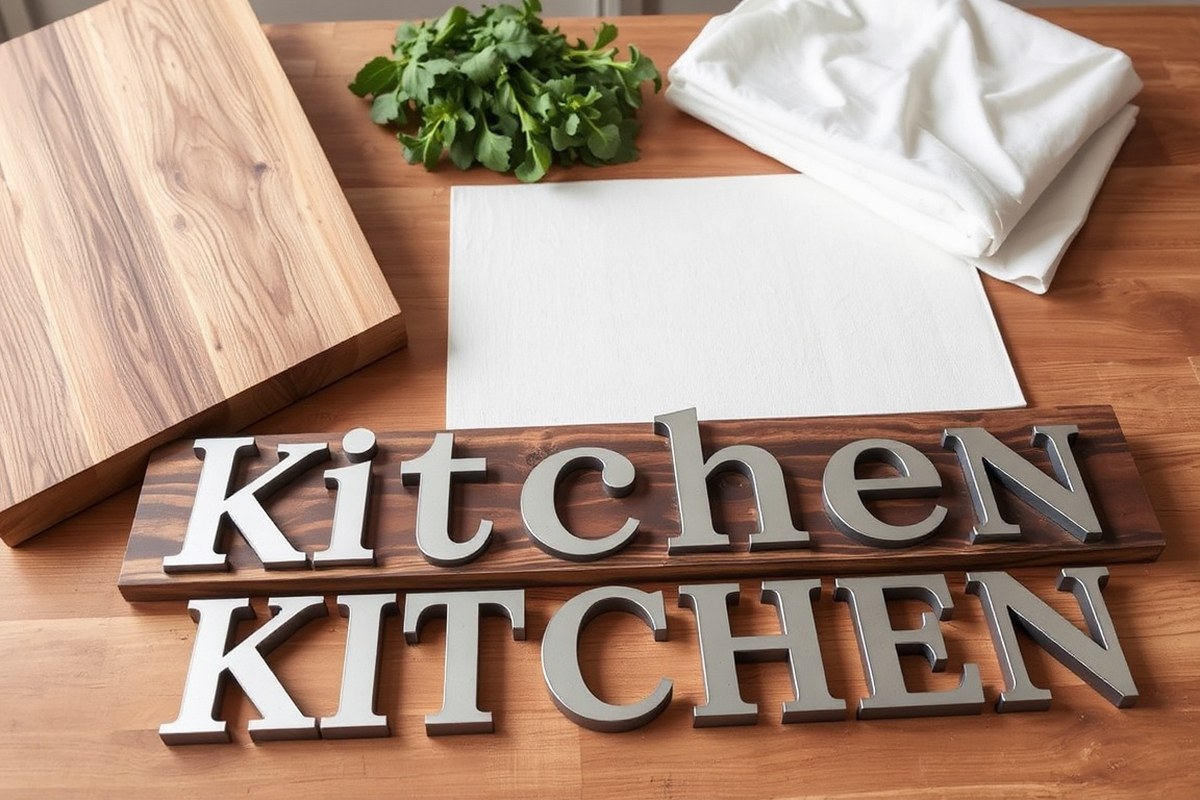
Choosing the right material for your kitchen sign affects its look, durability, and ease of crafting. Wood and metal offer strong bases that stand up well to kitchen conditions, while canvas and vinyl provide lighter, more flexible options for different styles. Sustainable choices also exist, such as reclaimed wood or natural fabrics, that can add character while being environmentally friendly.
Wood and Wooden Letters
Wood is a popular choice for kitchen signs due to its sturdy nature and warm, natural appeal. Hardwoods like maple or oak provide a smooth surface for painting or staining and resist warping in the humid kitchen environment better than softer woods like pine. Using a piece of reclaimed wood adds rustic charm and sustainability. Wood takes paint and sealant well, which is essential because sealing protects the sign from grease, moisture, and wear.
Wooden letters can be cut or laser-engraved, adding depth and texture to your sign. Painting and distressing wooden letters create farmhouse or vintage styles. Expect wood preparation, including sanding and sealing, to take an hour or more, depending on the size and complexity of your project.
Seal your wooden sign with a clear polyurethane or water-based sealer designed for kitchens to prevent damage from humidity and cooking splashes.
Canvas and Fabric Signs
Canvas or fabric signs are lightweight and easier to move or store compared to wood or metal. Cotton or linen canvas stretched over a wooden frame creates a soft backdrop that works well with painted, screen-printed, or stenciled designs. However, fabric signs require more care, as they can absorb kitchen grease and stain over time, so placing them where they won’t catch food splatters is best.
These signs often have a more casual or modern look, and you can use fabric paints or markers suited for textiles. Canvas signs don’t need sealing like wood but benefit from occasional cleanings with dry brushing or a gentle wipe to maintain freshness.
Vinyl and Adhesive Lettering
Vinyl offers a quick, clean way to add lettering or images to various surfaces, including wood, metal, and canvas. Permanent vinyl is best for kitchen signs because it withstands humidity and cleaning better than removable vinyl. It comes in many colors and finishes, including matte and glossy, allowing customization without painting.
Applying vinyl requires a steady hand and a clean surface. Using a cutting machine to produce stencil fonts or designs saves time and provides a professional look. Vinyl signs cost around $5 to $20 per sheet or roll and can be layered for multicolor effects. Avoid unsealed wood surfaces when applying vinyl, as texture and moisture reduce adhesion.
Metal and 3D Elements
Metal signs are highly durable for kitchen use because they resist heat, moisture, and scratches. Aluminum or thin steel sheets work well, especially when powder coated or painted with outdoor-grade paint. Metal signs lend a modern or industrial style to kitchen decor. Adding 3D elements like raised metal letters or layered wooden cutouts creates visual interest and a tactile quality.
Metal requires tools like metal cutters or strong adhesives suitable for metal-to-wood or metal-to-wall bonding. Handling metal edges safely with gloves is essential. The upfront cost can be higher, often $20 to $50 for metal blanks, but the results last longer without fading or warping.
Planning and Designing Your Kitchen Sign
Start your kitchen sign project by deciding what you want it to say and how it will look. Choosing the right phrase and design tools helps make your sign meaningful and visually appealing. Consider your kitchen’s style and the space where the sign will hang to pick the perfect size.
Selecting Your Kitchen Sign Phrase
Pick a phrase that suits your kitchen’s vibe or your personal taste. Popular choices include simple words like “KITCHEN” or fun sayings such as “Bake and Bless” or “Mom’s Kitchen Rules.” Using familiar or family-inspired phrases makes the sign feel more personal and inviting.
Short and memorable phrases work best for reading at a glance. Think about mixing humor, warmth, or motivational words that match your family’s style. Avoid very long text, it can be hard to fit and read on a small sign.
Choosing Fonts and Layouts
The font you pick can change the entire look of your sign. Free, easy-to-find fonts like Times New Roman and Courier New are good starting points because they offer clean, simple styles suitable for kitchen decor. Serif fonts give a classic, farmhouse feel, while sans-serif fonts appear more modern.
Use programs like Canva, Microsoft Word, or Adobe Illustrator to create your design. These tools have templates or let you build your layout from scratch. Including a border or frame design improve the finished look and can match your kitchen’s style. Save your design in an SVG file when using cutting machines like Cricut for accurate shape cutting. Follow these steps to design your kitchen sign:
- Decide on the phrase or word that fits your style or kitchen vibe.
- Choose a font that matches your chosen style, classic serif or modern sans-serif.
- Open a design program like Canva or Word and type your phrase.
- Adjust the layout by adding shapes, borders, or frames that complement your kitchen decor.
- Preview your design to make sure it looks balanced and readable.
- Export the design file in a format compatible with your cutting or printing tools, like SVG or PDF.
Sizing and Scaling for Your Space
Measure the area where you want to hang your sign before choosing its dimensions. Kitchen signs can be small and square, like 11 by 14 inches, or larger and vertical, depending on available wall space and the style you want.
Bigger signs work well in open kitchen walls or dining entryways to create a welcoming look. Smaller signs fit nicely over countertops or near kitchen shelves. Keep in mind that the text and images must be visible from your typical standing distance in the kitchen, usually 3 to 6 feet away. Here’s a simple checklist for sizing your kitchen sign:
- Measure wall width and height where the sign will go.
- Decide if you want the sign to be a focal point (larger) or a subtle accent (smaller).
- Consider typical font size for easy reading, around 1.5 to 3 inches tall letters for most kitchen signs.
- Match the sign’s frame size to common picture frame dimensions like 11 by 14 inches for ready-made frames.
- Adjust design elements to fill the chosen size without overcrowding.
Step-by-Step Methods to Make Your Kitchen Sign
There are several practical methods to create your kitchen sign depending on the materials you have and the look you want. Hand-painting, vinyl lettering, iron-on transfers, and wood burning each offer unique styles and steps to personalize your kitchen decor effectively.
Hand-Painting and Stenciling on Wood
Hand-painting lets you achieve a personalized, custom look by applying paint directly onto the wood. Stenciling is a helpful way to create clean, consistent letters or designs even if you are new to painting. Both methods require preparation to ensure paint sticks well and the finish looks neat.
- Sand the wood surface lightly with 220-grit sandpaper to create a smooth, dust-free base.
- Apply a base coat or primer if needed and let it dry fully to prevent paint bleeding or peeling.
- Position your stencil onto the wood and secure it with painter’s tape to avoid movement.
- Use a small, firm brush or stencil brush with thick acrylic paint. Dab paint gently, avoiding heavy loads that cause bleeding.
- Remove the stencil carefully while the paint is still wet to prevent peeling the edges.
- Touch up any jagged letters with a fine detail brush for clean edges.
- Let the paint dry for several hours, then lightly sand corners and edges for a distressed look, if desired.
- Coat your sign with a transparent sealant to shield it from damage and moisture in the kitchen.
Choosing vibrant colors brightens your kitchen, while neutral tones suit minimalist styles. Avoid watery paint, which can bleed, and make sure surfaces are clean and dry to help paint adhesion.
Applying Vinyl Letters and Decals
Vinyl lettering offers a precise, polished appearance and is excellent for replicate letters or detailed designs. You need vinyl sheets and either a cutting machine like a Cricut or access to a local makerspace that can cut vinyl decals. This method is fast once you have the cutting parts ready.
- Design your letters or images using digital design software or pre-made templates.
- Cut the black permanent vinyl with a Cricut Maker 3 or similar machine using a standard fine point blade.
- Weed the vinyl by removing excess pieces to leave only your design.
- Apply transfer tape over the vinyl, pressing firmly to lift the letters from the backing.
- Position the vinyl on your clean, sanded wood surface and press down firmly.
- Slowly peel off the transfer tape, ensuring the vinyl sticks to the wood.
- Lightly sand edges for a subtle distressed look, if desired, but be gentle to avoid lifting vinyl.
This method avoids paint mess and provides sharp edges, but you must apply vinyl to a smooth, clean surface for best adhesion. Vinyl is cost-effective, with an average pack covering multiple signs costing around $15 to $25.
Iron-On Transfers for Canvas or Wood
Iron-on transfers allow you to apply printed images or text onto fabric canvas or certain types of wood. These transfers require a heat press or household iron, and work best on smooth, heat-tolerant surfaces. This method is great for detailed designs from digital files.
- Print your design in reverse on iron-on transfer paper using an inkjet printer.
- Trim excess paper, leaving a small border around the design.
- Position the transfer paper face down on pre-washed canvas or prepared wood surface.
- Set your household iron to high heat with no steam or use a heat press at around 350°F (175°C).
- Press firmly for the recommended time, typically 30 seconds to 1 minute, applying even pressure.
- Allow the paper to cool slightly, then peel the backing paper off slowly to reveal the transfer.
- Seal the design with a clear acrylic spray to protect from moisture and wear.
Using iron-on transfers suits light-colored fabrics or woods with smooth finishes. Avoid applying on rough wood or very dark surfaces as the image quality may suffer.
Wood Burning and Engraving Basics
Wood burning, or pyrography, uses heated tools to etch designs directly into the wood surface. This method creates a rustic, permanent effect and doesn’t require paint or vinyl. It takes practice for smooth, neat lines but results in distinctive kitchen signs.
- Select a hardwood board since softwoods burn unevenly.
- Sketch your design lightly with pencil on the wood.
- Heat the wood burning tool to about 650°F (340°C), the typical operating temperature.
- Trace your design slowly with the heated tip, controlling pressure for line thickness.
- Let the wood cool, then lightly sand any rough edges.
- Apply a coat of clear sealant to protect the burned areas and improve contrast.
Wood burning tools cost between $20 and $60 for basic kits and require safety precautions since they get extremely hot. Avoid pressing too hard or moving too quickly, which can cause uneven or overly dark lines. Practice on scrap wood first to perfect your technique.
Distressing, Sealing, and Finishing Techniques
Adding a distressed finish can give your kitchen sign a warm, vintage charm that fits farmhouse or rustic decor perfectly. Distressing usually involves sanding or scraping parts of the paint after it fully cures to reveal the underlying wood or paint layers. That worn effect makes each sign feel unique and adds character.
You need to wait at least 24 hours for your paint or base coat to cure before starting distressing. Rushing can cause smudging or peeling in the wrong spots. Tools like fine or medium-grit sandpaper (120-220 grit), steel wool, or even a wire brush work well to create varying textures.
Sealing your sign is important to protect it from kitchen humidity, grease, and spills, especially if it hangs near sinks or stoves. Clear polyurethane or water-based acrylic sealers are great options. Choose a sealer labeled “kitchen safe” or “water resistant.” Avoid oil-based sealers around food prep areas because they can yellow over time. Apply 2 to 3 thin coats, letting each dry fully, usually 2 to 4 hours, depending on brand instructions. Here’s a simple way to distress your DIY kitchen sign for a rustic look while sealing it properly:
- Let the paint fully dry: Wait at least 24 hours for your paint to cure before distressing or sealing.
- Lightly sand edges and raised areas: Use 120-grit sandpaper wrapped around a sanding block or your fingers. Focus on corners, edges, and places where natural wear would occur.
- Test distressing spots: Before sanding the whole sign, test a small hidden spot to ensure you like the effect.
- Increase roughness selectively: For a more worn look, use medium-grit sandpaper or steel wool on a few small spots to expose more wood or paint layers.
- Remove dust: Wipe the sign with a damp cloth or tack cloth to clear sanding dust before sealing.
- Apply a clear protective sealer: Use a water-based polyurethane or acrylic sealer suitable for kitchen use. Apply 2 to 3 thin coats with a high-quality brush or foam applicator, letting each coat dry 2 to 4 hours.
- Final drying: Allow the sealed sign to cure another 24 hours before hanging to ensure full protection.
Do not skip the dust removal step before sealing, dust trapped under the sealer ruins the smooth finish and can cause flaking.
Common painting problems include uneven distressing or paint peeling if you rush curing. Using a gradual sanding approach helps avoid overdoing the distressing. Applying multiple thin coats of sealer prevents a cloudy or sticky finish. Expect to spend about $10 to $20 on sealers for a single kitchen sign, with drying times controlled mostly by your home’s temperature and humidity.
How to Hang and Display Your Finished Sign
Choosing the right hanging method depends on your sign’s size, weight, and wall surface. For light to medium wood signs (under 5 pounds), adhesive strips such as Command strips offer easy installation without wall damage and remove cleanly. Larger signs benefit from hardware like D-rings, sawtooth hangers, or keyhole slots for a secure hold. Use wall anchors or toggle bolts for drywall to ensure stability, especially near areas like above the stove where heat and vibrations occur.
Install hangers about two-thirds down from the top edge of the sign to keep it balanced. Measure and mark the wall first using a level to align perfectly. Drill pilot holes for screws or anchors, then attach hanging hardware to the sign’s back. For heavier signs, use two hanging points spaced evenly to prevent tilting.
- Adhesive strips for light signs and easy removal
- D-rings or sawtooth hangers for medium to heavy signs
- Wall anchors or toggle bolts for drywall stability
- Two hanging points for signs over 10 pounds
- Mount hangers about two-thirds from the sign’s top edge
- Use a level and measuring tape for precise placement
- Avoid hanging over direct flame or high-moisture areas
Placement decisions should match your kitchen’s functional zones. Above the stove is popular since the sign is at eye level and creates a focal point, but keep signs at least 18 inches from cooking surfaces to avoid heat damage. Near the pantry or coffee bar offers cozy, accessible areas to display your work where people gather. Gallery walls combining multiple small kitchen signs and art pieces add visual interest and personality.
If wall space is limited or you prefer flexibility, signs can be shelf-stable. Choose a sturdy wood base, then lean your sign against a backsplash or hang it on a decorative plate holder. Secure the sign with museum putty to prevent slipping, especially near sinks or high-traffic areas. This method lets you swap designs seasonally without new hardware installation and avoids wall damage.
Personalizing Kitchen Signs with Unique Phrases and Styles
Adding personalized text to your kitchen sign is a great way to make it truly unique. Start by choosing a phrase that reflects your kitchen’s character or your family’s personality. Common choices include family names, favorite recipes, or fun food quotes. For example, you might use “The Johnson Family Kitchen,” “Grandma’s Secret Recipe,” or “Life Is Short, Eat Dessert First.” These templates work well because they celebrate the people who use the kitchen and can become meaningful reminders every day.
Look for inspiration in cookbooks, recipe cards, or even popular cooking shows. Food blogs and social media platforms like Pinterest have a wealth of ideas, ranging from witty phrases to heartfelt messages. For example, phrases like “Seasoned with Love” or “Chop It Like It’s Hot” offer a lighthearted flair, perfect for casual or modern kitchens. Jot down several options before settling on one so you can pick the best match for your style.
Once you have your phrase, consider the style that suits your kitchen decor. Rustic kitchens pair well with hand-painted letters or stenciled fonts in distressed wood signs, emphasizing a cozy, homey vibe. For farmhouse-style kitchens, try script fonts with flourishes on whitewashed backgrounds. Modern kitchens benefit from clean, bold fonts on metal or sleek wood signs with minimal decoration. Matching the sign’s style with your kitchen’s theme helps the sign blend in while still standing out as a personal statement.
To transfer your custom text onto the sign, print the chosen phrase using a simple word processor or design app. Use a font size large enough to be readable from a few feet away, typically between 2 and 4 inches tall, depending on the sign size. You can create a stencil by printing the phrase, then carefully cutting out the letters with a craft knife. Place the stencil on your sign and paint within the cut-out letters, allowing the paint to dry fully before removing the stencil. This method keeps the lines clean and professional-looking.
Cost-wise, creating a personalized kitchen sign can be done affordably. Basic materials like wood boards and paint generally cost around $10 to $20, and stencils or lettering tools are available for under $15. Alternatively, adhesive vinyl letters can be purchased for about $5 to $10 and applied directly to the sign surface. This method is quicker and reduces the chance of paint mistakes but offers less texture visually. Both options allow you to create a customized look that fits your budget and skill level.
Personalizing kitchen signs not only improve your kitchen’s decor but often results in gifts that feel meaningful and thoughtful. Gifts featuring family names or treasured recipes typically carry sentimental value and suit occasions like housewarmings or Mother’s Day. Take care to measure text placement carefully and avoid overcrowding the sign, which can make the message hard to read. Keep your design balanced with enough spacing around the text for the best visual impact.
Common Problems and How to Fix Them in DIY Kitchen Signs
A common challenge when making a DIY kitchen sign is paint that won’t stick properly. This usually happens if the surface isn’t clean or smooth enough. Sand your wood sign with medium-grit sandpaper, then wipe it down with a damp cloth to remove dust before painting. Use a primer designed for wood, which costs about $5 to $10 per quart, applied in a thin, even layer. Let it dry for at least two hours. This helps the paint adhere and prevents peeling or flaking.
Paint bleeding off the edges of letters or designs can ruin a kitchen sign’s look. Using stencils offers a reliable fix, keeping your edges crisp and uniform. Secure the stencil firmly with painter’s tape to avoid shifting. Apply paint in light coats with a small, firm brush or sponge. Avoid thick layers, which take longer to dry and increase the risk of bleeding under the stencil.
Letters that peel or appear jagged often result from rushing through drying times or poor surface prep. To fix this, lightly sand the problem area until smooth. Reapply either primer or paint thinly, and allow each coat to dry fully, usually at least one hour per layer. For jagged edges, use a fine brush or paint pen to carefully reshape the letters, steadying your hand on a flat surface.
Refreshing an old kitchen sign requires cleaning, sanding, and repainting. Wipe the sign to remove grease or dirt with a gentle detergent and warm water. Sand the surface with fine-grit sandpaper to smooth chips or rough spots. Repaint using your original color or try contrasting shades for a fresh look. Seal with a clear acrylic finish to protect your work from kitchen humidity and wear.
| Problem | Cause | How to Fix |
|---|---|---|
| Paint not sticking | Dirty or rough surface, no primer | Sand, clean, apply wood primer, wait 2 hours before painting |
| Paint bleeding off edges | Loose stencil, thick paint layer | Use stencil, tape securely, apply thin coats with a firm brush |
| Letters peeling or jagged | Insufficient drying, poor surface prep | Sand smooth, repaint thin coats, dry fully, retouch edges carefully |
| Old sign fading or chipped | Wear, grease, humidity | Clean with detergent, sand rough areas, repaint, seal with acrylic finish |
Each of these fixes can take anywhere from 30 minutes to several hours, depending on drying times and paint layers. Expect to spend $10 to $20 on materials for a basic repair or refresh. Good results look like smooth finishes, sharp edges on letters, and durable surfaces that hold up in a kitchen’s warm and sometimes humid environment. Avoid rushing dry times, or your sign could suffer the same problems again.
Take your time letting each coat of primer and paint dry completely to prevent peeling and smudging on your kitchen sign.
Step-by-Step Action Plan for Your DIY Kitchen Sign
Start creating your custom kitchen sign today with these clear, manageable steps. Follow each phase to bring your design to life with confidence.
- Before you begin: Choose your materials based on your kitchen’s style and where you plan to hang the sign. Using the right wood or chalkboard will make your sign last and look great.
- Day 1: Sketch your design and decide on phrases that match your style. This helps keep your project focused and personalized.
- Day 2: Cut and prepare your sign’s base material. It should be smooth and the correct size for your chosen location.
- Day 3: Transfer your design onto the sign using stencils, paint, or vinyl lettering. Check that your lettering is even and clear before moving on.
- Day 4: Apply distressing techniques if desired for a rustic or vintage look. The finish should look natural and consistent.
- Day 5: Seal your sign with a clear protective coat suitable for your materials to protect against kitchen moisture and light. The surface should feel dry and non-sticky when ready.
- Day 6: Install hanging hardware securely and set your sign in place. Confirm the sign fits well and hangs level.
- Day 7: Add any final personalized touches like small embellishments or additional painting. These details should improve your sign without overcrowding the message.
Frequently Asked Questions
What Size Should I Make My DIY Kitchen Sign?
A common size is 11 by 14 inches, fitting well in most kitchen spaces. This size is easy to frame and display without overpowering your décor.
Can I Use Chalkboard Paint for My Kitchen Sign?
Yes, chalkboard paint allows for changing messages easily. It’s perfect for menus or daily notes but needs sealing for moisture.
How Do I Make My Kitchen Sign Weather-Resistant?
Apply a matte or satin acrylic sealer to protect from kitchen moisture. This keeps paint from peeling near sinks or stovetops.
What Tools Do I Need If I Want to Stencil My Kitchen Sign?
Basic tools include a stencil brush or sponge, painter’s tape, and acrylic paints. These help create clean letters and images.
Is Wood the Best Material for Kitchen Signs?
Wood is ideal because it’s sturdy and suits farmhouse or rustic styles. It accepts paint well and can be distressed for vintage looks.
How Can I Mount a DIY Kitchen Sign Without Damaging Walls?
Use removable adhesive strips or hooks designed for wall hanging. These options let you avoid nails or screws.
Key Points to Remember
Making your own kitchen sign gives you a unique way to express your style and add warmth to your space. Focus on picking meaningful words and a design that feels right for your kitchen. Start by selecting your sign’s materials today, and get ready to enjoy a project that’s truly yours.