How to Make a Lightbox Sign with Simple Steps for Professional Results
How to make a lightbox sign starts with understanding the basics, a framed box with a translucent face lit by LEDs to create vibrant, eye-catching displays. Build a sturdy frame, fit a clear or frosted face, and use energy-efficient LED strips inside for even illumination. Start by selecting the right size and materials to match your display space and lighting needs.
Key Takeaways
- Choose compact sizes (1-3 feet wide) for indoor signs and larger sizes (3-6 feet wide) for outdoor storefronts to maximize visibility.
- Select clear acrylic or frosted polycarbonate sheets for the lightbox face to diffuse LED light evenly across the sign.
- Use quality LED strips rated for 50,000 hours to ensure 10+ years of reliable illumination at typical daily use.
- Prepare a precise 45-degree miter cut on wood or aluminum framing for tight, professional corners and stable assemblies.
- Allow 20-30 minutes for your sign to cool before cleaning to avoid damage or electrical hazards.
- Plan power supply and wiring carefully, as LED driver units have a lifespan of about 3-5 years and may need replacement.
What Is a Lightbox Sign and How Does It Work?
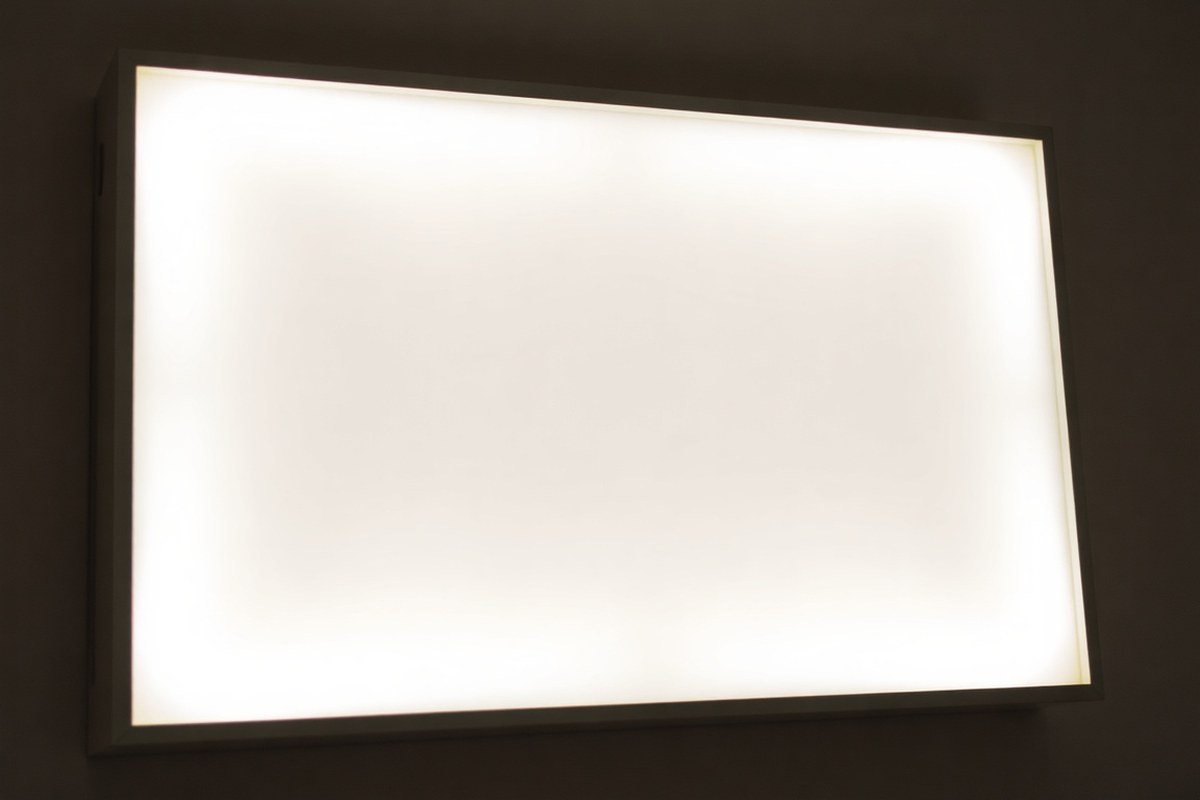
A lightbox sign is a type of illuminated signage that features a translucent front panel lit from behind by internal lighting, most commonly LED lights. This backlighting technique enables the graphics, text, or logo on the face of the sign to stand out clearly, making the display visible both day and night. The core structure includes a sturdy frame, often made of stainless steel or wood, holding an acrylic panel that diffuses the light evenly across the sign’s surface.
The internal LED lighting works by placing LED strips or panels behind the translucent face of the lightbox. These LEDs emit a consistent and bright glow that penetrates the acrylic diffuser, highlighting the sign elements without glare or dark spots. LEDs are highly energy-efficient, using up to 90% less power than incandescent bulbs and lasting up to 50,000 hours, which typically results in 3 to 5 years of maintenance-free operation. The even light distribution provided by LEDs is superior to older fluorescent options, which may flicker or produce uneven illumination, reducing overall visibility.
Backlighting creates illumination by directing light through the translucent acrylic, which can be frosted, opal, or prismatic. Each diffuser type affects the light quality, frosted softens the glow, opal distributes it evenly, and prismatic reduces glare and improve contrast. Choosing the appropriate diffuser depends on the sign’s location and lighting needs. For example, a prismatic diffuser is useful in offices or stores to control brightness and boost readability, while frosted or opal diffusers work well in homes and small businesses for a gentle appearance.
Lightbox signs are popular for their ability to attract attention, especially in retail and business settings, where visibility can directly influence customer engagement. Outdoor lightbox signs generally require larger dimensions, around 3 to 6 feet wide, to maximize impact from a distance. The combination of durable materials like weather-resistant acrylic and IP65-rated LED panels ensures that these signs function effectively in various environments, including outdoors. They also provide a professional and modern look that can improve branding and help your business stand out at any time of day.
While the upfront cost for a lightbox sign ranges from about $500 to $3,000 depending on size and complexity, they offer solid margins for sign makers due to straightforward production and long-lasting components. The key to success lies in ensuring good contrast between text and background, keeping designs simple for easy reading, and using enough lighting to maintain uniform brightness. Regular checks will prevent issues like inconsistent illumination and maintain the sign’s visual appeal over time.
Choosing Materials and Tools for Your Lightbox Sign
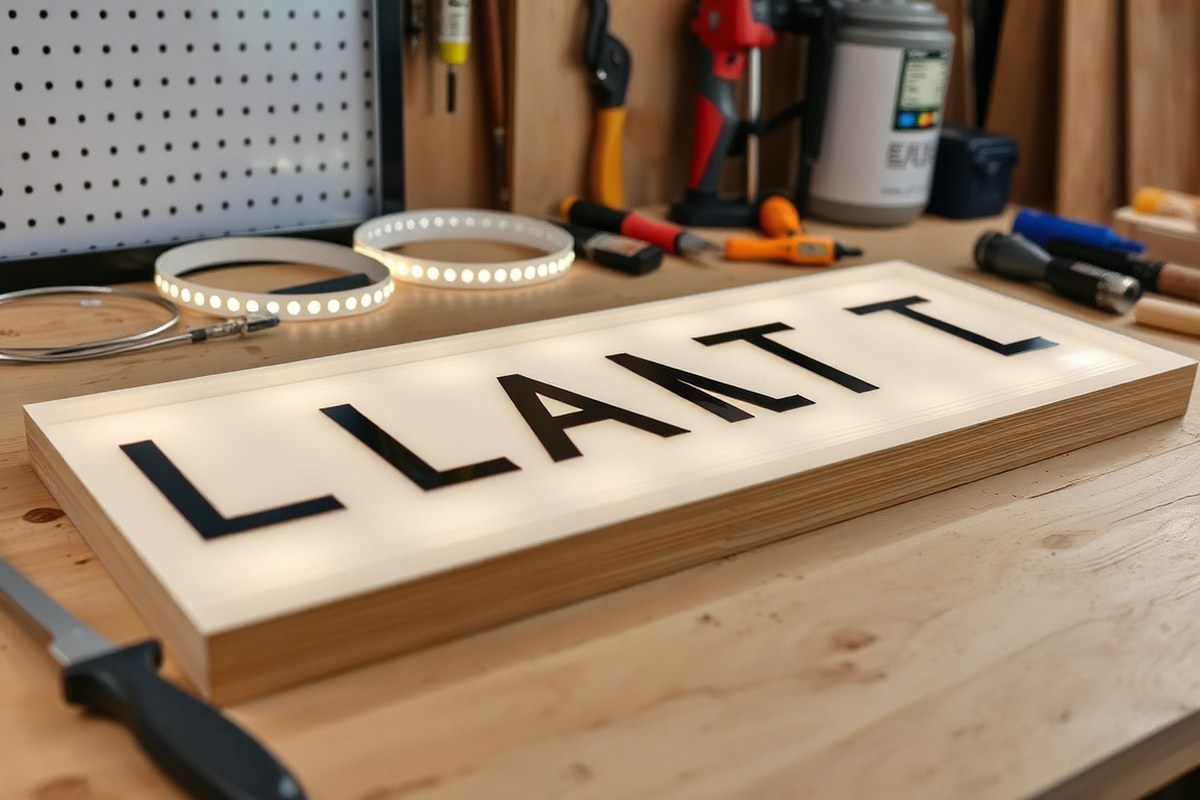
To build a lightbox sign, you’ll need a sturdy frame made from materials like wood, metal, or acrylic. Choose LED strips that offer the right brightness and color temperature for your space, making sure they are suitable for your intended use. Essential tools include saws, drills, and wiring equipment to cut, assemble, and wire your sign properly and safely.
Frame Materials: Wood, Metal, and Acrylic Options
Wood is a popular choice for DIY lightbox frames because it is easy to cut and assemble with basic tools. Pine or plywood around ¾ inch thick provides good stability without being too heavy. Metal, especially aluminum, offers a durable, weather-resistant option, but it requires specialized tools like a metal saw or grinder for cutting. Acrylic serves well both as the face of the box and for decorative parts of the frame, with 3mm opal acrylic being common to diffuse the LED light evenly.
Choosing the right frame material depends on the setting of your sign. Indoor signs typically can use wooden frames easily, while outdoor signs benefit from aluminum for moisture resistance. Remember to seal frame joints with silicone to prevent dust or moisture from entering.
LED Types: Brightness, Color Temperature, and Waterproofing
Look for LED strips rated at 12V or 24V with 60 LEDs per meter to provide ample light inside the box. Brightness typically ranges from 800 to 1200 lumens per meter depending on sign size and desired visibility. Position LED strips 75-100mm from the acrylic face for even light distribution. You can customize LED color temperatures from warm white (3200K) to daylight white (6500K), or pick colored options like red or blue for mood effects.
For outdoor or damp locations, choose LED strips and power supplies with at least IP65 waterproof rating. This helps prevent damage and extends lifespan. Also select a power supply rated to handle the total wattage required; for example, a 600mm × 900mm sign generally needs a 45W power supply to run 3 meters of LED strips efficiently.
- 12V or 24V LED strips with 60 LEDs per meter
- Brightness between 800, 1200 lumens per meter
- Color temperature options: warm white to daylight white, or custom colors
- Place LEDs 75, 100mm from acrylic face for even light
- Use IP65 rated LED strips for outdoor/damp environments
- Power supply wattage matched to LED strip length (e.g., 45W for 3m strips)
Make sure not to cut LED strips outside the designated cut marks to avoid damaging the circuit and reducing light output.
Essential Tools: Saws, Drills, Wiring Tools, and Safety Gear
Start with a saw suitable for your frame material: a circular saw for wood, a hacksaw for metal, or a specialized acrylic cutter for clean edges. A drill with drill bits sized from 3mm up will help create holes for screws and drainage. Wiring tools include wire strippers, a multimeter to check electrical connections, and insulated screwdrivers for safety.
Don’t forget safety equipment like goggles and gloves to protect from sharp edges and flying debris. Adhesive backing on LED strips makes installation easier, but having double-sided tape or hot glue handy helps secure strips on uneven surfaces. Measuring tape and a square ensure precise cuts and alignment, which prevents gaps and ensures a professional look.
Designing Your Lightbox Sign for Maximum Visibility
Choosing fonts, colors, and sizes carefully will boost your lightbox sign’s visibility, making it easy to read both day and night. Legibility depends on clear, bold fonts paired with high-contrast colors and an appropriate size that fits your viewing distance. Planning your layout to avoid clutter and to direct focus helps your sign stand out and deliver its message effectively under any lighting condition.
Font Selection for Illuminated Readability
Simple, sans-serif fonts such as Helvetica, Arial, and Futura work best for backlit signs. Their clean lines and open shapes stay legible when illuminated, avoiding the fuzziness that tiny serifs or intricate details create. For maximum clarity, use bold or semi-bold weights and avoid condensed styles that can shrink letter spacing and reduce readability from a distance. Letter height should be proportional to your sign’s intended viewing range, with at least 1 inch of letter height for every 10 feet of distance desired. For example, if your sign is meant to be read from about 30 feet, letters should be at least 3 inches tall.
Avoid script or decorative fonts that blur when lit from behind or seen in low light. Also, space your letters generously to prevent crowding and flicker effects from the LED behind the sign. Consistent font use supports brand recognition and keeps your design cohesive.
Color Contrast and Visibility in Different Lighting Conditions
Strong color contrast is critical for a lightbox sign’s impact. Use vibrant, high-contrast combinations like black on white, white on blue, or yellow on black to maximize readability under varied light levels. Backlit signs benefit from colors that allow LED light to shine cleanly through, so translucent or semi-opaque acrylic faces paired with bright LED colors improve the glow without losing clarity. Avoid low-contrast pairings such as pastel tones or muted, similar colors, which get washed out in sunlight or appear dull at night.
Colors should also fit your brand but remain legible; a bright, warm color palette complements inviting businesses, while cooler tones work for professional or clinical settings. You can incorporate dynamic color-changing LEDs for event-specific messaging or different times of day, but ensure primary text colors contrast strongly with their backgrounds to keep essential information always visible.
Sizing Considerations for Indoor and Outdoor Signs
The typical 600mm by 900mm (approximately 24 by 36 inches) lightbox size reads clearly from 15 to 20 meters in daylight, and over 30 meters by night with proper illumination. For indoor signs, size your letters and sign face to be readable from the closest and most common viewing angles, usually within 10 to 20 feet. At this range, letters around 2 to 3 inches high are usually sufficient. Outdoor signs should be larger to maintain legibility across streets, parking lots, or sidewalks where viewers may be 30 feet or more away.
Consider placing your sign at eye level or slightly above for the best sightlines, and avoid overly wide layouts that force viewers to scan too far horizontally. Balance your budget and material costs with visibility demands; larger signs and letters use more acrylic and lighting but provide a better return by grabbing attention at greater distances. A properly sized and illuminated lightbox sign ensures your message stays clear and immediate, cutting through ambient light and weather conditions.
Step-By-Step Assembly of the Lightbox Frame and Face
Building the lightbox frame and applying its face requires accurate cutting, precise assembly, and careful preparation of the acrylic and graphics. Following exact measurements and using the right techniques ensures your sign looks polished and functions well by evenly diffusing light.
Cutting and Joining the Frame Pieces
Start by cutting the frame pieces to the rough size needed for your lightbox. Using 1×2 lumber or aluminium is common for the frame, depending on weight preferences. Secure joints with 45-degree bevel cuts that fit tightly for a professional look. Cutting grooves inside the frame pieces can help house internal elements and support the face panel.
Accurate cutting is important; poor cuts lead to gaps and uneven edges that affect assembly and the final appearance. Use a miter saw set precisely at 45 degrees and verify measurements twice. A well-made frame holds the acrylic securely and resists warping.
Preparing and Mounting the Acrylic Diffuser
The acrylic sheet serves as the translucent face of the lightbox that softens the LED light. Cut the acrylic panel to exactly match the interior dimensions of the frame, allowing it to sit flush without forcing it in place. Opal acrylic is typical, but for higher durability, use Lexan polycarbonate, especially in outdoor or high-traffic areas.
To attach the acrylic, either set it into the grooves cut inside the frame pieces or fasten it with clear silicone or framing clips designed not to obstruct light or scratch the surface. Drilling small pilot holes for screws or clips prevents cracking. Avoid adhesive tapes that may damage the acrylic or create bubbles.
Applying Graphics or Vinyl to the Sign Face
The sign’s graphic is usually printed on a translucent substrate that fits just inside or behind the acrylic panel. For a clean light diffusion and vivid visibility, print your design on high-quality translucent vinyl or film. Professional cuts for vinyl graphics can cost between £30-60 but provide sharp edges and durable finish.
Apply the vinyl smoothly onto the acrylic surface, starting from one edge and slowly pressing down with a plastic squeegee or soft cloth to expel air bubbles. Clean the acrylic beforehand with a microfiber cloth and isopropyl alcohol to ensure proper adhesion. For extra polish, a transparent vinyl wrap over the printed design can protect the graphic from UV damage and weather.
- Measure and mark the frame pieces according to your sign dimensions.
- Cut the frame pieces to rough length with a miter saw, ensuring clean straight cuts.
- Set the saw to 45 degrees and trim the ends of each piece to create bevel joints.
- Cut grooves inside the frame pieces using a router or table saw blade for mounting the acrylic panel.
- Assemble the frame by fitting the beveled edges together and secure with wood glue and finishing nails or screws.
- Cut the acrylic sheet to snugly fit inside the frame grooves or frame mount.
- Clean the acrylic and apply your printed vinyl graphics carefully, smoothing out air pockets.
- Secure the acrylic face in place with silicone adhesive or mounting clips designed for lightboxes.
Installing and Wiring LED Lighting Inside Your Lightbox
Positioning LED strips evenly inside your lightbox is essential for balanced illumination without shadows or bright spots. Place the strips around the inner perimeter of the box, about 1 to 2 inches from the edges. This spacing allows light to diffuse uniformly across the sign’s face. Use LED strips rated 5050 or similar high-brightness models for consistent output. Avoid clustering all LEDs in one area to prevent uneven lighting.
Safe wiring protects your project and extends its lifespan. Calculate the power supply wattage by adding the total wattage of all LED strips plus a 20% margin. Use a suitable LED driver compatible with your strips’ voltage and current requirements. Connect the LED strips’ positive and negative terminals to the power supply’s outputs, ensuring polarity matches exactly. Use insulated connectors or solder joints covered with heat shrink tubing to prevent shorts.
Testing the lighting before final assembly confirms which adjustments are needed to avoid costly disassembly later. Power on the strips and inspect for uniform brightness across all lit areas. Watch for flickering or dim spots which could indicate wiring issues or damaged LEDs. Make adjustments by repositioning strips, securing loose wires, or replacing faulty sections.
- Measure and cut LED strips to fit the inside perimeter of your lightbox, leaving some extra length for connections.
- Peel off the strip’s backing to expose the adhesive and stick the strips evenly along the inner edges, maintaining 1 to 2 inches from all sides.
- Calculate total wattage of the installed strips and select a power supply rated about 20% higher wattage for safe operation.
- Connect the LED strips’ positive (+) and negative (−) wires in parallel, using connectors or soldering followed by heat shrink tubing for insulation.
- Attach the combined wires securely to the power supply outputs, double-checking polarity to avoid damage.
- Plug in or switch on the power supply to test the illumination, looking for even lighting with no flickering or dark spots.
- If inconsistencies appear, turn off the power and adjust strip placement or wiring. Retest until the light is uniform.
- Once satisfied, finalize mounting all wiring and proceed with closing up your lightbox assembly.
Always disconnect the power supply before making any wiring changes to avoid electrical shock or damaging components.
Selecting Size and Specifications for Indoor vs Outdoor Lightboxes
The size and specifications of your lightbox sign depend on whether it will be indoors or outdoors. For indoor use, signs typically range from 1 to 3 feet, which fits well in retail shops, offices, or home decor spaces. Smaller sizes make installation easier and keep the sign from overpowering the room. Outdoor signs usually need to be larger to catch attention from a distance, often 3 feet or more on each side, especially if placed by roads or building exteriors.
Materials must differ significantly between indoor and outdoor signs to handle environmental challenges. Indoor signs often use acrylic or polycarbonate for the face because these materials diffuse light evenly and maintain a sleek appearance. Outdoor signs require tougher materials and weatherproof features. Polycarbonate is also suitable here but should be combined with a sealed frame that offers an IP67 waterproof rating to protect against rain, dust, and temperature fluctuations. Expect to replace weather seals every 5 to 7 years on outdoor units in harsh climates.
LED lighting and power specs vary to match the setting too. Indoor lightboxes use LEDs with moderate brightness that won’t overwhelm small rooms, while outdoor LEDs must be high-lumen and sometimes higher voltage to ensure visibility during daylight and over longer distances. Outdoor LED strips or modules should be rated for waterproof use and designed to withstand a broader temperature range. Power supplies also need to be protected from moisture and have surge protection for outdoor installations.
| Specification | Indoor Lightbox | Outdoor Lightbox |
|---|---|---|
| Typical Size | 1 to 3 feet (compact for interior spaces) | 3 feet or larger (visible from greater distances) |
| Face Material | Acrylic or polycarbonate | Polycarbonate with sealed frame |
| Waterproof Rating | Not typically required | IP67 waterproof rating recommended |
| LED Brightness | Moderate lumen output for room illumination | High lumen output for sunlight visibility |
| Power Supply Protection | Standard indoor power supplies | Weatherproof enclosure with surge protection |
| Seal Maintenance | Rarely needed | Replace seals every 5-7 years in harsh conditions |
Choosing the right size first means measuring the available wall or window space, then considering the viewing distance and lighting conditions. Larger outdoor signs need more strong materials and lighting to withstand the weather and remain visible. Indoor signs allow more flexibility on materials and lower power LEDs but focus on fitting the decor and space well.
Maintaining and Troubleshooting Your Lightbox Sign
Turn off your lightbox sign and wait 20 to 30 minutes to let the LEDs cool before cleaning. Use a soft, lint-free cloth dampened with mild soapy water to wipe the acrylic panels gently. Avoid harsh chemicals or abrasive materials that can scratch or cloud the surface. Regular cleaning every few months will keep your sign clear and bright, especially if it’s exposed to dust or outdoor pollutants.
Flickering or dim LEDs often result from loose electrical connections, aging drivers, or worn-out LED strips. First, check all wiring and connectors to ensure they’re secure and free from corrosion. Drivers, which regulate power, usually last about 3 to 5 years before needing replacement. LED strips themselves are rated for roughly 50,000 hours of use, which translates to more than 10 years if running 12 hours daily. Dim lighting can also come from faulty dimmer switches or degraded adhesive failing to hold LEDs firmly in place.
- Turn off power and disconnect before inspecting or cleaning electrical parts
- Clean acrylic panels gently with mild soap and water every 3, 6 months
- Check LED strip adhesion and press or reattach strips if loosened
- Test all wiring connections for firmness and corrosion annually
- Replace driver units every 3, 5 years or if flickering persists after wiring check
- Swap out LED strips if brightness noticeably diminishes or sections go dark
- Use manufacturer-recommended dimmers and settings to avoid overheating LEDs
When components need replacing, plan for simple swaps you can do yourself with basic tools, like screwdrivers and wire cutters. LED strips usually come with adhesive backing, so peeling off old strips and attaching new ones takes about 15 to 30 minutes. Drivers need matching voltage and power ratings, so check the original part or manufacturer specifications before buying replacements. Keeping spares on hand can minimize downtime for your sign.
Good maintenance prevents major failures and keeps your illuminated sign consistently bright and eye-catching. Regularly cleaning and inspecting your lightbox will help spot issues early. Dimming that doesn’t respond to dimmer adjustment or flickering after tightening connections are strong signs to replace drivers or LED strips. Adhering to these steps ensures your lightbox sign performs well for many years.
Finishing Touches and Mounting Your Lightbox Sign Securely
Using vinyl wraps on your lightbox sign can give it a sleek, uniform finish that stands out without the mess of paint. Vinyl comes in various textures and colors, including matte, gloss, and metallic finishes, which let you match your brand or décor precisely. Applying vinyl requires a clean, smooth surface such as acrylic or aluminum. Carefully measure and cut the vinyl slightly larger than your sign face, then use a squeegee to apply it evenly, working from the center outward to avoid bubbles. The cost of vinyl sheets ranges from $10 to $50 depending on size and quality, making it a cost-effective option for a professional appearance.
Paint finishes offer versatility but require more prep and skill to avoid inconsistencies. Choose spray paint for smooth, even coats, preferable for metal or wood bodies. Apply a primer compatible with your sign material first; this helps with adhesion and durability. Two to three light coats are better than one heavy coat, allowing 15-30 minutes drying time between coats. Paint adds texture options and is ideal if you want custom gradients or patterns not available in vinyl. Expect to spend about $15 to $40 on paint supplies, and plan for extra ventilation and longer curing times.
Mounting methods largely depend on where you intend to install your lightbox. For indoor walls, mounting brackets combined with screws and dowels provide secure, level installation. Drill holes at marked points on the wall and your sign frame to align brackets. Use a level tool to keep the sign straight before tightening screws to prevent crooked or unstable mounting. For heavier signs, anchors or toggle bolts add extra weight support. Outdoor installations might require weather-resistant hardware and possibly sealing around the mount to prevent water damage.
Managing wiring is critical for safety and appearance. Use heat-shrink tubing on all wire connections to insulate and protect them from moisture and wear. Velcro strips can help keep power adapters and excess cables tidy and attached behind the sign or near an outlet. Conceal wiring in plastic cable covers or run them inside wall channels if possible to keep everything neat. Avoid leaving wires loose or tangled to reduce tripping hazards or accidental disconnections. Double-check that power adapters are rated for your LEDs and follow local electrical codes.
Secure your mounting brackets firmly and double-check your level before final tightening to avoid uneven displays that can distract viewers or cause long-term mounting issues.
Step-by-Step Action Plan for Building Your Lightbox Sign
Follow this plan to make steady progress on your lightbox sign from start to finish. Each step helps you complete a key part and confirms your work is on track.
- Day 1: Gather all materials and tools. Confirm you have your frame supplies, LED lights, power source, wiring tools, and design printouts ready.
- Day 2: Finalize your sign design. Review your layout for visibility and readability, then print the translucent face at actual size.
- Day 3, 4: Construct the lightbox frame and attach the face. Assemble corners securely and ensure the face fits without gaps or wrinkles.
- Day 5: Install the LED lighting. Wire the LEDs inside the box evenly and test the lights to confirm uniform brightness.
- Day 6: Add weatherproofing for outdoor signs. Seal edges and check that all electrical components are protected from moisture.
- Day 7: Mount your lightbox sign securely. Use appropriate anchors or brackets and verify it is level and stable.
- Week 2: Monitor for issues and perform maintenance. Check for flickering lights or loose fixtures and fix any problems promptly.
Frequently Asked Questions
How Do You Waterproof the Electronics Inside a Lightbox Sign?
Use waterproof LED strips and seal all wiring connections with silicone or waterproof tape to protect against moisture. This prevents short circuits and extends your sign’s durability, especially for outdoor use.
What Type of LED Lights Work Best for Even Illumination in Lightbox Signs?
LED strip lights with a high lumen output and uniform spacing provide smooth, even backlighting. Cold white or neutral white LEDs work well for clear visibility in various lighting conditions.
Can I Use Vinyl Decals on the Lightbox Face Instead of Printed Graphics?
Yes, vinyl decals adhere well to acrylic or polycarbonate faces and allow easy customization. They also diffuse light effectively, although printed graphics can offer more detailed images.
What Is the Best Frame Material for a Long-Lasting Lightbox Sign?
Aluminum frames offer durability, rust resistance, and lightweight handling for both indoor and outdoor signs. They maintain structural integrity over time even when exposed to weather.
How Do You Ensure Your Lightbox Sign Meets Electrical Safety Codes?
Use UL-listed components and ensure wiring is performed by a licensed electrician. Proper grounding and waterproof enclosures help meet national safety standards.
Can You Replace the LED Lights in a Lightbox Sign Later?
Yes, LED strips are usually accessible and replaceable without dismantling the entire sign. This keeps maintenance costs low and prolongs your lightbox’s lifespan.
Before You Go
Your lightbox sign can attract attention and improve your space when carefully built and maintained. Focus on even lighting and a clean, durable finish for the best impact. Start by assembling your frame today and test the light placement to make sure your design stands out clearly.