How to Laser Engrave Acrylic: A Complete Guide with Proven Settings and Tips
How to laser engrave acrylic starts by choosing cast acrylic, which produces a clean frosted-white mark at moderate power and speed settings. Using about 10-50% laser power and speeds between 200-800 mm/min at 300-600 DPI balances engraving quality and efficiency. Begin by applying a tinted polyester mask to test your settings on the acrylic sheet with low power and full speed to ensure precise results.
Key Takeaways
- Use cast acrylic for best engraving clarity, as it responds well to laser marking without excessive burning.
- Set laser power between 10-50% depending on wattage, adjusting speed within 200-800 mm/min for optimal engraving depth.
- Maintain DPI between 300 and 600 to achieve sharp, detailed engravings without overexposing the acrylic surface.
- Apply a tinted polyester masking film to acrylic for testing power and speed settings before final engraving.
- Increase power by about 10% when engraving painted or screen-printed acrylic while keeping speed constant.
- For diode lasers like the 6W Monport, use around 100% power and 900 mm/min speed to engrave clear acrylic effectively.
How to Laser Engrave Acrylic: Essential Steps and Settings
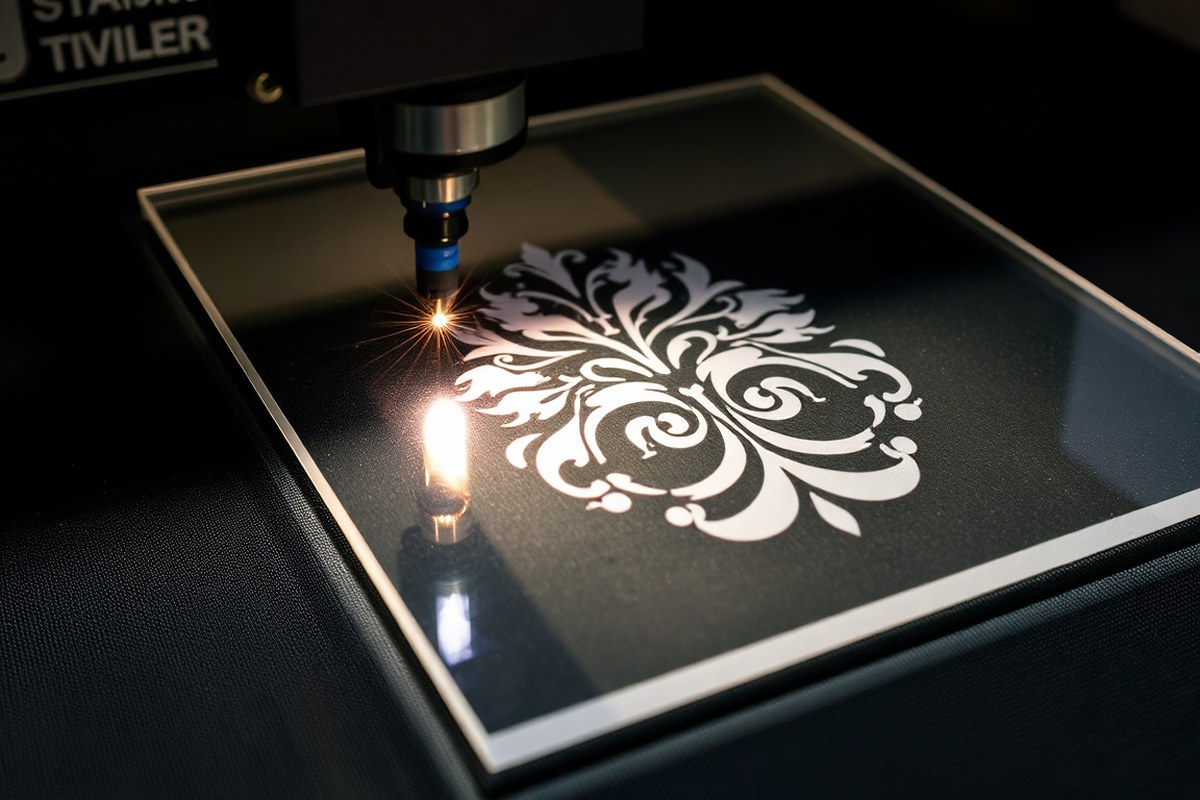
Laser engraving acrylic requires careful control of power, speed, DPI, and passes to achieve a clean, frosted finish. Cast acrylic is most common for engraving because it produces sharp, white marks with proper settings. Using a CO₂ laser between 10% and 50% power and cutting speeds from 200 to 800 mm/min generally works well. The DPI (dots per inch) significantly affects the detail level; 300 to 600 DPI balances resolution and engraving speed effectively.
Engraving requires a methodical workflow starting from material preparation to final checks. You should test your settings on a scrap piece first, adjusting power and speed depending on the acrylic type and laser wattage. Avoid excessive passes to reduce heat buildup that can warp or craze the acrylic. A single pass is often enough, especially with a 100W CO₂ laser set around 20% power and 300-450 mm/min speed. For intricate designs or colored cast acrylic with diode lasers, use slower speeds and multiple passes. Fine tuning airflow and focus also improves the engraving contrast and reduces melting.
- Clean the acrylic surface. Remove dust, oils, or protective films to ensure the laser beam interacts consistently with the material.
- Set your laser parameters. Choose power between 10% and 50% depending on laser wattage; start at about 20% power for a 100W CO₂ laser with 300-450 mm/min speed. Set DPI between 300 and 600 for balanced detail.
- Focus the laser beam. Adjust the focus for a fine point on the surface to improve engraving sharpness and reduce heat damage.
- Perform a test engrave. Use a small scrap piece or an inconspicuous area with low power (~5%) and fast speed to check how your acrylic and laser interact.
- Adjust settings based on results. Increase power or reduce speed if engraving is too light; lower power or increase speed if edges melt or acrylic warps.
- Engrave your final design. Use a single pass wherever possible; for diode lasers on colored acrylic, multiple slower passes may be necessary.
- Use air assist. Apply airflow during engraving to minimize fumes, remove debris, and cool the material, improving edge quality.
- Clean engraved parts. Remove residue carefully with isopropyl alcohol or soapy water to maintain crisp appearance.
| Laser Type | Power (%) | Speed (mm/min) | DPI | Passes | Notes |
|---|---|---|---|---|---|
| CO₂ (100W) | ~20 | 300-450 | 300-600 | 1 | Good balance for detailed engraving on cast acrylic |
| CO₂ (General) | 10-50 | 200-800 | 300-600 | 1 | Adjust within range based on acrylic thickness and detail |
| Diode (colored, cast acrylic) | Moderate-high | Slower speeds | Varies | Multiple | Clear acrylic unsupported; use colored acrylic |
Types of Acrylic and How They Affect Engraving Results
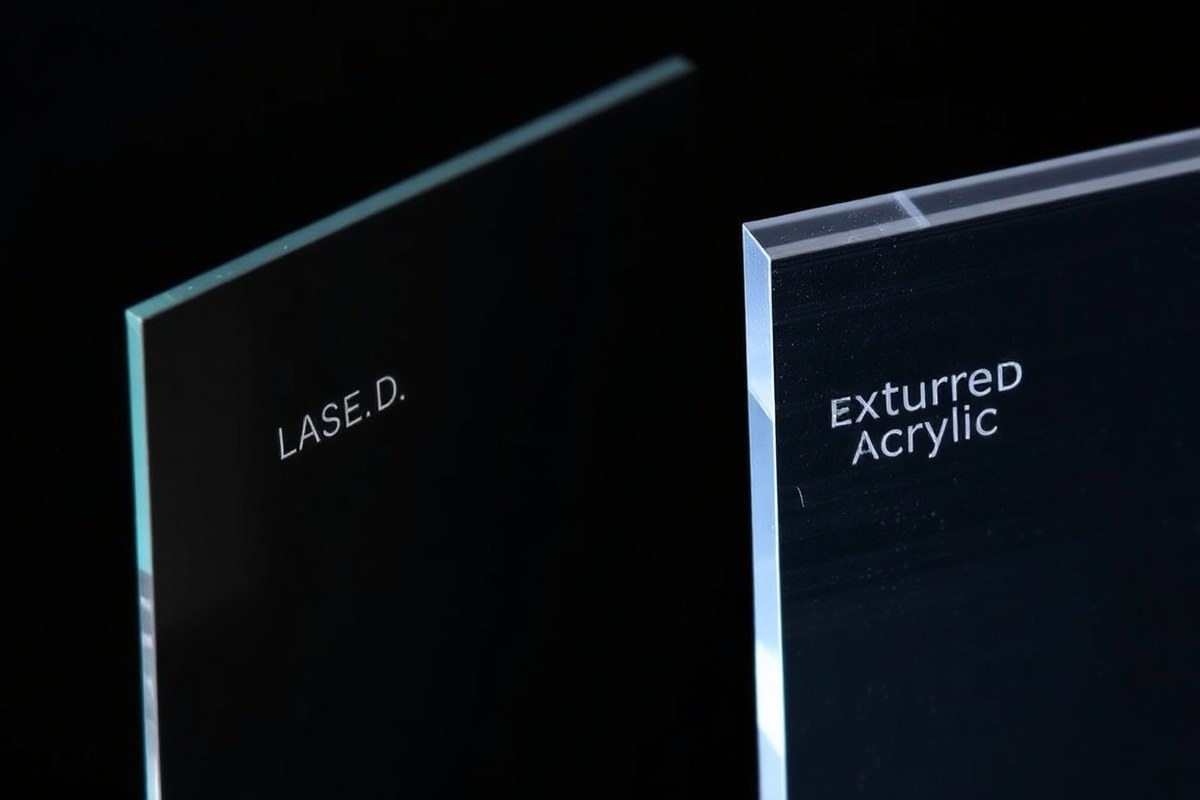
Cast acrylic and extruded acrylic are the two main types used in laser engraving, but they behave differently under the laser beam. Cast acrylic is made by pouring liquid acrylic into a mold, which results in a denser, more uniform material. This density allows cast acrylic to maintain stability during engraving, producing a bright and consistent frosted white mark with strong contrast. It’s your best option when you need sharp clarity, deep detail, or photographic reproductions.
Extruded acrylic is produced by melting and forming acrylic sheets, resulting in lower density and more internal stress. When engraved, it tends to yield a lighter, more transparent marking that lacks the frosted, high-contrast finish seen with cast acrylic. It can also be more prone to melting or deformation from the heat of the laser, especially if settings aren’t perfectly dialed in. Extruded acrylic is better suited for signs and projects where cutting needs to be combined with engraving, or when color and transparency matter more than fine detail.
| Feature | Cast Acrylic | Extruded Acrylic |
|---|---|---|
| Typical Engraving Result | Frosted white with stronger contrast | Lighter, clearer or more transparent |
| Fine Details | Usually suitable for detailed designs and photographs | More dependent on the exact material and laser settings |
| Common Applications | Awards, photographs, plaques, ornaments, premium displays | Signs, displays, projects combining cutting with lighter engraving |
| Sheet Consistency | Thickness may vary slightly between sheets | Thickness more consistent but less stable when engraved |
| Frosted Engraving Effect | Better frosted contrast | Less pronounced engraving effect |
| Melting Behavior | Stable under laser heat | More prone to melting and deformation |
| Recommended for Beginners | ✔ Yes | ⚠ Acceptable |
Thickness impacts engraving results but is generally not as critical as selecting the right acrylic type. Cast acrylic sheets from 1/8 inch (3 mm) to 1/4 inch (6 mm) provide good depth for engraving without excessive melting risks. Thinner sheets may warp or melt if laser power and speed aren’t carefully balanced. Extruded acrylic sheets often come in uniform thicknesses but require more cautious laser power management, especially under 1/8 inch, to avoid damage.
Use cast acrylic for your detailed or photo engraving projects to get the best contrast and avoid melting issues; extruded acrylic may seem easier to cut but can ruin intricate engraving designs.
To achieve crisp detail and vibrant frosted marks, prioritize using cast acrylic whenever your project involves fine text, logos, or photographic elements. Extruded acrylic suits simpler designs where transparency and cutting are more important. Always test your laser settings on a scrap piece to check for overheating or unclear engraving, especially with extruded sheets.
Choosing the Right Laser Type for Acrylic Engraving
Choosing the right laser type is key for successful acrylic engraving. CO2 lasers handle clear and colored acrylic well due to their wavelength absorption, while diode lasers can work on dark or opaque colors but struggle with clear acrylic unless you prep the surface. UV lasers come in handy for fine detail and specialty materials but are less common for standard acrylic engraving.
CO2 Laser Characteristics and Acrylic Compatibility
CO2 lasers emit light at a wavelength of about 10,600 nanometers, which acrylic readily absorbs. This makes them ideal for engraving clear, colored, and opaque acrylic with high precision and clean edges. A CO2 laser, such as models with 30W to 60W power, can easily engrave and cut acrylic sheets up to several millimeters thick. The strong absorption causes the surface to melt and re-solidify, producing a frosted white engraving that contrasts sharply on both clear and colored acrylic. For example, engraving a 3mm clear acrylic sheet with a CO2 laser typically requires power settings around 20-30% and speed settings of 200-300 mm/min, though these vary by laser and material quality.
CO2 lasers offer versatility with minimal preparation, making them the most reliable choice for most acrylic engraving projects. Their ability to work on all acrylic colors and transparencies, along with cutting capability, justifies their higher cost, often starting from $3,000 for hobbyist systems. Investing in a CO2 laser saves time and avoids extra steps, especially when working with clear or edge-lit acrylic products, where crisp, bright engraving is important.
Limitations of Diode Lasers on Clear Acrylic
Diode lasers usually operate around 450 nanometers in wavelength, which passes through clear acrylic without much absorption. Because clear acrylic is transparent to this light, direct engraving is ineffective; the laser beam transmits through without marking the surface. This limits diode laser use mostly to colored or opaque acrylics, particularly black or dark shades that absorb visible light better. For example, a typical 5W to 10W diode laser can engrave black acrylic sheets thinly (up to 2mm thick), but it struggles with light-colored or clear types.
To engrave clear acrylic using a diode laser, apply a laser marking spray or a temporary protective layer first. A black marking spray absorbs the laser light, enabling it to carve visible designs on the surface. This coating fades over time but offers an affordable option for short-term projects when a CO2 laser isn’t accessible. Apply thin, uniform layers and adjust your laser power to 70-90%, running slower speeds around 100-150 mm/min for optimal results. Direct engraving of untreated clear acrylic with diode lasers is ineffective due to low laser energy absorption at visible wavelengths.
UV Lasers and Specialty Engraving Scenarios
UV lasers work at much shorter wavelengths, typically around 355 nanometers, enabling them to engrave materials that don’t absorb longer wavelengths effectively. These lasers can mark both clear and colored acrylic with high resolution, making them suitable for extremely fine detail, small fonts, or medical and electronics applications. However, UV lasers usually have lower power and smaller working areas, limiting their use to specialty tasks rather than large-scale engraving or cutting.
Because UV laser systems tend to be expensive, often costing tens of thousands of dollars, they suit professional or industrial users more than hobbyists or small businesses. Their shorter wavelength also means less thermal effect on acrylic, which reduces melting and distortion but requires precise control of speed and power. Use UV lasers when you need detailed marks on small parts or when CO2 and diode lasers produce unsatisfactory results due to material or resolution requirements.
How to Engrave Clear Acrylic Using a Diode Laser
Diode lasers cannot directly engrave clear acrylic because the laser light mostly passes through the transparent material without being absorbed. Applying a coating like black tempera paint creates a dark surface that absorbs the laser energy, allowing the engraving to form. Using the right paint application, laser settings, and cleaning methods helps you achieve crisp engravings on clear acrylic with a diode laser.
Preparing Clear Acrylic with Black Tempera Paint
Coating clear acrylic with black tempera paint provides a surface that the diode laser can easily engrave. Kwik Stix Black Solid Tempera Paint Sticks are a popular choice because they dry quickly and peel off cleanly after engraving.
To prepare the acrylic, you’ll need the acrylic sheet, a black tempera paint stick, a small synthetic brush, water, and a soft cloth. The paint layer must be thin and even to ensure consistent engraving depth and detail.
- Clean the acrylic surface with water and a lint-free cloth to remove dust and oils.
- Twist up the tempera paint stick a small amount and apply it directly or use the brush to spread it evenly.
- Brush the paint gently into a uniform, thin layer over the area you want to engrave, avoiding thick spots.
- Allow the paint to dry; it typically takes 10-15 minutes at room temperature.
- Check for smoothness and reapply a second thin layer if needed for coverage.
- Keep the acrylic flat during drying to avoid drips or uneven surfaces.
Applying the paint with a brush rather than directly from the stick can help control thickness and texture. Too thick a coating may lead to uneven engraving, while too thin a coating might not absorb enough laser energy. After engraving, the paint layer peels off easily, leaving behind the engraved acrylic surface.
Setting Up Diode Laser Parameters
Since diode lasers have lower power and wavelengths that pass through clear acrylic, the black paint layer is essential to absorb the laser beam. Start with high power and slow speed to get a deep, clean engraving.
For a 6-watt diode laser like the Monport model, 100% power and a speed of about 900 millimeters per minute works well. Always test on a small scrap piece first because the ideal settings depend on your laser wattage, acrylic thickness, and paint thickness. Use the following steps to configure your laser:
- Focus the laser beam precisely on the painted surface for maximum energy delivery.
- Set the power to 90-100% for full intensity on a 6-watt laser; adjust proportionally for other wattages.
- Choose a slow speed around 700-900 mm/min to allow the laser to burn through the paint and slightly into the acrylic.
- Use 1-2 passes depending on the paint opacity and desired engraving depth.
- Enable air assist if available to clear debris and reduce smoke interference.
- Run a test engraving to check depth, edge sharpness, and paint removal.
Higher power or additional passes might be needed for thicker paint layers or acrylic sheets above 1/4 inch. Avoid too fast speeds, which cause light, inconsistent marks or incomplete paint removal.
Cleaning and Finishing Post-Engraving
After engraving, remove the tempera paint layer to reveal the clear engraved acrylic underneath. Since tempera paint is water-based, it peels or washes away easily, preventing damage to the acrylic surface.
Use lukewarm water and a soft cloth or sponge to gently rub the painted area. Avoid harsh chemicals or abrasive sponges that can scratch the acrylic or dull its finish. Steps for cleaning and finishing:
- Allow the acrylic to cool for several minutes to avoid warping.
- Immerse or dampen the engraved section with lukewarm water.
- Use a soft cloth to rub the paint gently until it loosens and peels away.
- If needed, repeat wetting and rubbing to remove all paint residue.
- Dry the acrylic with a soft, lint-free cloth to prevent water spots.
- Inspect the engraving for clarity and smoothness. Repeat cleaning if paint spots remain.
- Optionally, polish the acrylic with a plastic polish to restore shine and smooth edges.
Proper paint removal results in a clear, sharp engraving with smooth edges. Residual paint or improper cleaning may make the engraving look dull or smudged. Regular cleaning tools and gentle methods keep the acrylic surface intact while revealing crisp engravings.
Post-Engraving Finishing Techniques for Acrylic
After laser engraving acrylic, careful finishing improves both the frosted effect and the material’s durability. Residue from burnt film or surface deposits can dull the engraving and affect the clarity around detailed areas. Cleaning removes smoke marks and leftover particles, while polishing restores the crisp contrast between the frosted design and the clear acrylic. Sealing or coating the engraved surface offers extra protection and can help maintain the look over time, especially for items like awards, keychains, or illuminated panels.
To clean and polish engraved acrylic effectively, you’ll need the right materials and a gentle approach. Common tools include isopropyl alcohol (70% or higher), mild dish soap, microfiber cloths, plastic polish (such as Novus #2 or #1), and a soft foam applicator or buffing pad. Masking tape or painter’s tape helps reduce residue during engraving, so if you didn’t use it before, handle the surface carefully to avoid scratches now. Avoid abrasive pads or rough towels that can damage the acrylic surface or the engraved details. Follow these steps to clean, polish, and protect your laser-engraved acrylic:
- Remove loose debris. Gently wipe the engraved acrylic with a dry microfiber cloth to clear dust and loose particles without scratching the surface.
- Wash the surface. Mix a few drops of mild dish soap in lukewarm water, then dampen a clean microfiber cloth and wipe the acrylic to eliminate residue and smoke marks. Avoid soaking the acrylic or letting water pool in engraved areas.
- Rinse and dry. Use a cloth dampened with plain water to remove soap residue, then dry thoroughly with another microfiber cloth to prevent water spots.
- Apply plastic polish. Using a soft foam applicator or a microfiber cloth, spread a small amount of plastic polish onto the clear acrylic surface, avoiding the frosted engraving. Work in gentle circular motions to restore clarity around the engraved design.
- Buff the acrylic. After polish application, buff the surface with a clean, dry microfiber cloth to bring out a smooth and glossy finish.
- Protect the engraving. Consider a clear acrylic spray sealant or wax designed specifically for plastics to protect the engraved surface from scratches and UV fading. Apply thin, even coats according to the product instructions and let dry fully in a dust-free environment.
- Inspect for scratches or residue. If scratches appear, repeat polishing carefully. For stubborn residue within the engraving, use a cotton swab dipped in isopropyl alcohol for spot cleaning, avoiding excess liquid.
Use painter’s tape to mask acrylic before engraving and remove it within 21 days for clean, residue-free results that cut down on post-engraving cleaning.
Common Mistakes When Laser Engraving Acrylic and How to Fix Them
Melting and warping acrylic during laser engraving happens when too much heat builds up. This excess heat can soften or deform the acrylic, especially in thicker sheets or at high laser power. Reducing laser power, increasing speed, or using air assist to cool the material helps prevent damage while still engraving clearly. Testing small pieces first lets you find the safest balance before starting a full project.
Poor contrast or engraving that is faint usually occurs when the laser cannot create enough heat absorption on clear acrylic. Because clear acrylic allows light to pass through instead of absorbing it, adjusting settings or switching to a different acrylic type with additives may be necessary. Using a raster resolution around 300 DPI is a good starting point, but higher DPI increases heat and may cause issues, so testing is key.
Excessive smoke or residue can cover the engraved area and reduce visibility. This happens when power is too high or the engraving speed too low, causing burning rather than clean engraving. A steady air flow near the surface and cleaning the acrylic after engraving will improve the finish. Ensuring the text and image direction are correct in the software preview avoids rework.
| Common Issue | Likely Cause | How to Fix |
|---|---|---|
| Melting/Warping | Laser power too high or speed too low; excessive heat | Lower power, increase speed, add air assist; test on scrap pieces |
| Poor Contrast/Unclear Engraving | Insufficient heat absorption, especially on clear acrylic; incorrect DPI | Use around 300 DPI as a starting point, test acrylic types, adjust power and speed |
| Excessive Smoke/Residue | High power with low speed, burning material | Increase speed, lower power, use air assist, clean surface after engraving |
| Engraving Direction Errors | Incorrect image orientation in software preview | Check text and design direction before starting; preview each job |
Adjusting laser settings carefully will prevent many common problems. Begin with medium power and 300 DPI raster for most acrylic except very thin or special sheets. Increase speed and decrease power if smoke or melting occurs. If engraving is too light, increase power slowly or lower speed in small increments. Testing on scrap acrylic from the same batch makes sure the results meet your expectations without wasting material or time.
Consistent testing saves costs and headaches. Dialing in the correct settings varies by machine, laser power, and acrylic thickness. Some machines may offer preset acrylic settings, but always validate them by engraving a test piece. Taking these steps ensures crisp, clean, and high-contrast engraving with minimal warping or residue.
Optimizing Design and Laser Settings for Best Acrylic Engraving
Optimizing your design and laser settings is key to producing sharp, durable engravings on acrylic that look professional and save you time and materials. The way you prepare your artwork, set the resolution and contrast, and choose between raster and vector engraving will determine the precision and efficiency of the process. Using the right software and making adjustments based on your acrylic type and laser also helps prevent wasted runs and uneven results.
Preparing Artwork Files for Engraving
Design files in standard vector formats like SVG, AI, or DXF work best for laser engraving acrylic because they allow the laser to follow exact paths and create clean edges. Raster images such as PNG or JPEG can also be used but require careful resolution management to avoid pixelated results. When preparing your artwork, make sure lines are not too thin, ideally no less than 0.001 inch thick, to ensure the laser can accurately engrave them. Also, use high contrast in black-and-white designs to improve clarity during engraving. Avoid complex gradients that do not translate well to engraving. Software like LightBurn, CorelDRAW, and Adobe Illustrator commonly integrate with CO₂ laser engravers, allowing you to set parameters directly on the design file, which streamlines adjustment and reduces errors.
For best outcomes on clear acrylic, reverse your design and engrave from the back side. This results in a smooth, polished front surface with the engraving visible inside the material, preventing surface scratches and discoloration.
Adjusting Resolution, Contrast, and Line Spacing
The engraving resolution, measured in dots per inch (DPI), determines the detail level and speed of raster engraving. A resolution between 300 to 600 DPI is typically ideal for acrylic; lower DPI results in faster engraving but sacrifices detail, while higher DPI yields finer lines but takes more time and risks overheating the material. Line intervals should be matched to DPI settings, common spacing is around 0.05 to 0.1 mm between scan lines to avoid gaps or overlaps.
Contrast in your design should be set to maximize the difference between engraved and unengraved areas. This ensures the laser focuses on those areas clearly, avoiding shallow or incomplete engraving. Adjusting brightness and contrast in your image editing software before saving the file helps control this aspect. When engraving, monitoring the heat setting and speed is critical; excessive heat can cause acrylic to melt or discolor, while too little results in faint markings.
Selecting Raster or Vector Engraving Modes
Raster engraving works by scanning line by line across the design, ideal for images, photographs, or solid fill areas. This method can produce textured engraving that stands out on acrylic’s surface but generally takes more time and requires careful resolution and power management. Vector engraving, on the other hand, follows paths along the design’s outlines to cut or etch precise lines. Use vector engraving for logos, text, or line art that needs crisp edges.
Choosing between raster and vector engraving depends on your project needs. Raster engraving is better for detailed images or shading, while vector engraving provides cleaner lines and faster results for simple shapes and text. Many CO₂ laser machines provide software that allows switching between these engraving modes easily, enabling combination jobs where outlines are vector engraved and filled areas raster engraved.
Safety and Maintenance Tips for Acrylic Laser Engraving
Using proper safety gear is essential to protect yourself during acrylic laser engraving. Always wear laser safety glasses rated for your laser’s wavelength, CO₂ lasers need goggles designed for 10.6 microns. Also, use gloves to avoid skin contact with sharp acrylic edges and fumes. Enclose your laser machine or operate it in a ventilated area to keep fumes away from you. Acrylic releases potentially harmful vapors like methyl methacrylate, so installing a fume extraction system or positioning your workspace near a powerful exhaust fan reduces exposure and keeps air clean.
Maintaining your laser engraver affects both safety and the quality of your work. Keep lenses, mirrors, and the laser nozzle clean to ensure focused and consistent beams. A typical maintenance schedule might include daily lens cleaning with lens wipes, weekly inspection of beam alignment, and monthly lubrication of moving parts. Prevent dust buildup inside the machine by wiping surfaces regularly and checking the air filter if applicable. Well-maintained equipment cuts or engraves sharply without unexpected power surges or misfires, which could damage acrylic or pose fire risks.
Proper storage and handling of acrylic sheets also contribute to a safe environment. Store acrylic flat to prevent warping and cover sheets to shield them from dust and UV light, which can discolor the material. Handle sheets carefully to avoid cracks or chips that might become hazards during laser processing. Mark sheets with a soft pencil if layout planning is needed; avoid permanent markers that can burn and leave residue.
- Double-check machine settings before each run to match acrylic thickness and type
- Never leave the laser unattended during engraving
- Ensure the fume extractor is running throughout the cutting or engraving process
- Replace worn lenses or mirrors promptly to maintain beam quality
- Keep fire safety equipment, like a fire extinguisher, nearby
Contact a licensed technician for any laser repairs involving electrical components or if you notice irregular laser output that home maintenance doesn’t fix. Professional servicing is also recommended when upgrading your laser module or if your engraver frequently jams or overheats. Trying to fix these issues without expertise can damage your machine or void warranties.
Always confirm that ventilation systems are functioning before starting your acrylic engraving to prevent harmful fumes from accumulating.
Step-by-Step Action Plan for Laser Engraving Acrylic
Follow these steps to start laser engraving acrylic efficiently and see clear results quickly.
- Before you start: Choose cast acrylic over extruded for higher-quality engravings. Check the sheet thickness fits your machine’s capacity and the laser type you have.
- Day 1: Set up your laser engraver with recommended power and speed settings, typically lower speed and moderate power for clear, precise marks. Run a small test on scrap acrylic to confirm clarity and depth.
- Day 2: Prepare your design using high-contrast, vector-based images for clean edges. Import the file into your laser software, and preview it to verify shape placement.
- Day 3: Conduct a full engraving test on a larger scrap piece, adjusting settings slightly based on the test’s sharpness and engraving depth.
- Week 1: After successful tests, engrave your first actual project. Monitor for smoke residue or discoloration and adjust airflow or speed if needed.
- After engraving: Use post-engraving cleaning techniques like warm water and mild soap or isopropyl alcohol to remove residue without damaging the acrylic surface.
- Weekly maintenance: Clean the laser lenses and mirrors to maintain engraving quality and inspect ventilation to reduce fumes during acrylic engraving.
- Monthly review: Check for any recurring engraving inconsistencies and recalibrate your laser settings or material choices accordingly.
Frequently Asked Questions
Can I Use a Diode Laser to Engrave Clear Acrylic?
Diode lasers struggle to engrave clear acrylic directly because the laser passes through without heating. Applying a marking spray helps absorb the beam and create a visible engraving.
What Power Settings Work Best for Engraving Cast Acrylic with a CO2 Laser?
For cast acrylic, use about 20% power on a 100W CO2 laser with a speed of 300-450 mm/min. This balance provides clear engravings without melting the edges.
How Do I Prevent Melting or Chipping When Laser Engraving Acrylic?
Use moderate power and slower speed with air assist to cool the acrylic, reducing melting or chipping. Proper focus and a stable work surface also limit damage.
Can I Engrave Acrylic from the Back Side?
Yes, engraving from the back lets you see a smooth, polished front finish. It protects the design and improve clarity when viewed through the acrylic.
Is It Possible to Cut Thick Acrylic with a Laser?
You can cut 6-18mm thick acrylic with a 50-55W CO2 laser at slow speeds using full air assist for a polished edge. Cutting thicker acrylic requires higher power and careful settings.
What Post-Processing Can Improve Engraved Acrylic’s Appearance?
Polishing edges with flame or sanding improves clarity and appearance. Clean the surface after engraving to remove resin residue for a sharper design.
Before You Go
Laser engraving acrylic offers precise, attractive results when you match the right material, laser settings, and finishing steps. Your initial focus should be on performing careful test engravings to fine-tune the process for your specific setup. Taking that next step with a controlled project will help build confidence and skill in acrylic laser engraving.