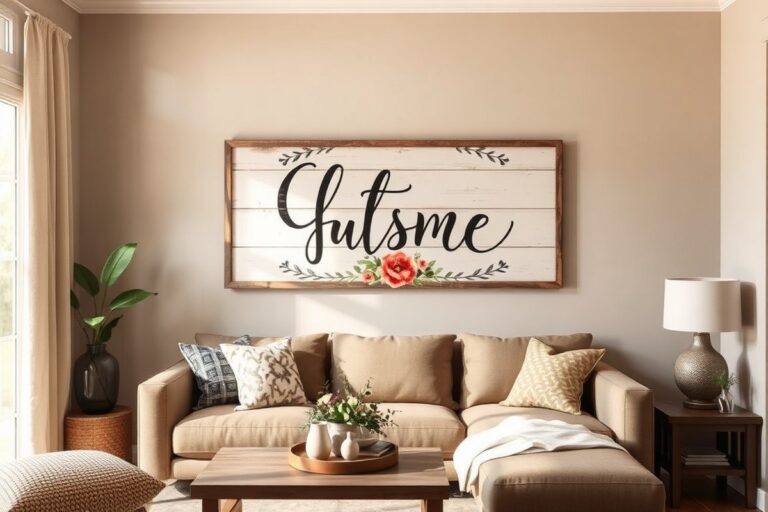
How to Make a Baby Announcement Sign with Cricut a Complete Guide with Steps and Tips
Knowing how to make a baby announcement sign with Cricut means creating a personalized, eye-catching display quickly and efficiently. Start with choosing the right materials like acrylic, wood, or vinyl and use Cricut Design Space to customize your layout. Preparing your machine properly ensures smooth cutting and writing, so you get a clean, professional sign every time.
Key Takeaways
- Pick sign materials under 2mm thick for optimal Cricut cutting performance.
- Use acrylic sheets sized to match your design, such as 8×10 inches for framed signs.
- Upload SVG files in Cricut Design Space to customize and resize your baby announcement design.
- Select designs created for small cuts, around 4 inches tall, for crisp, detailed results.
- Set up your Cricut Explore Air 2 or Maker with the correct blade and material settings before cutting.
- Weed excess vinyl carefully to avoid damaging delicate baby-themed elements.
What Materials and Tools You Need for a Cricut Baby Announcement Sign

Making a baby announcement sign with your Cricut requires specific materials and tools for the best results. The choice of Cricut machine influences what you can create. The Cricut Maker is ideal for intricate projects and can handle fabric, perfect if you want to sew baby blankets or soft toys alongside your sign. The Cricut Explore Air 2 and Cricut Joy also work well for cutting and writing on vinyl, paper, or cardstock, which suits most baby announcement signs.
Materials vary depending on your sign style. For vinyl signs, you’ll need adhesive vinyl sheets and transfer tape. Acrylic signs require clear or colored acrylic sheets, while wood signs call for craft wood or plywood. If writing on acrylic, purchase acrylic markers and pen adapters compatible with your Cricut. For added decoration, you might use ribbons, bows, or paint.
Having the right tools makes crafting simpler and smoother. You’ll need mats matching your material size and type, a weeding tool to remove excess vinyl, and a scraper for applying vinyl smooth without air bubbles. Pen adapters for your Cricut allow you to draw directly on acrylic or paper, adding a personal touch that vinyl can’t. For sewing projects combined with your cuts, a sewing machine can be valuable but is optional depending on your project scope.
- Cricut Maker for fabric, wood, and detailed cuts (approximately $350-$400)
- Cricut Explore Air 2 or Cricut Joy for vinyl and paper projects (ranging $150-$250)
- Adhesive vinyl sheets and transfer tape for easy application
- Clear or colored acrylic sheets and acrylic markers for durable, stylish signs
- Cutting mats matching materials (standard grip, strong grip, or light grip)
- Weeding tools and scrapers to clean and apply vinyl smoothly
- Pen adapters compatible with your machine for custom writing and drawing
Investing in a machine suited for your preferred material is important. The Cricut Maker’s versatility comes at a higher price but offers unmatched capability for various materials. Smaller machines like the Cricut Joy fit smaller projects and tighter budgets but limit size and material types. Good quality materials add to your project’s polish and durability, while poor quality vinyl or acrylic markers can create smudges or peeling edges, especially on a gift you want to last.
Knowing exactly what you need ensures your crafting goes smoothly and your announcement sign turns out gorgeous and professional. Start by selecting the machine that matches your budget and project complexity, then gather the adhesive vinyl or acrylic sheets and the right tools. This approach saves frustration and helps you celebrate your new baby with a personal and lasting sign.
How to Design Your Baby Announcement Sign in Cricut Design Space

Designing your baby announcement sign in Cricut Design Space begins by creating a project that matches your sign size and choosing fonts and graphics that suit the occasion. You can upload ready-made SVG files or craft your own design directly in the software. Proper sizing and positioning ensure every element fits perfectly on your acrylic, wood, or vinyl sign.
Choosing Fonts and Graphics Suitable for Baby Announcements
Select fonts that are clear, soft, and easy to read from a distance. Script and rounded sans-serif fonts work well for baby announcements because they convey warmth and friendliness. Use graphics like baby bottles, footprints, stars, or storks to add charm but keep the design balanced and not too crowded.
Limit your colors and elements to two or three so the sign remains visually appealing without overwhelming the viewer. The overall style should match the baby’s gender or theme if you have one, or stay neutral with pastel shades and simple images.
Uploading and Customizing SVG Files
SVG files are ideal for Cricut projects since they can be resized without losing quality. Before uploading, unzip the folder containing your SVG designs. Use the “Upload” button on the left panel of Design Space to add your files. Once uploaded, you can insert them onto your workspace.
Customize by ungrouping layered SVGs to adjust or recolor individual parts if needed. Cricut’s recent update includes a feature showing similar images when you upload a design, which can help you find matching graphics quickly.
Free baby announcement SVGs like “Welcome Baby” or low-cost options such as “Baby Bottle Card” SVGs are available online for $0 to $3. These designs often come optimized for cutting at small sizes, like down to 4 inches tall, and still maintain good cut quality.
Arranging Layout to Fit Your Sign Dimensions
Start each project by creating a template in Design Space that matches your physical sign dimensions. This template acts as a visual boundary to position your text and graphics accurately. Adjust the size of each element according to your template to maximize space use and keep the design centered and balanced.
Consider spacing between letters and images to ensure the Cricut doesn’t cut too close or too far apart. Angled edges or trimmed corners can give your sign a custom look and help it fit better into a specific display area.
- Open Cricut Design Space and start a new project.
- Create a rectangle the same size as your sign material for a template.
- Upload your chosen SVG files or create text using the Text tool.
- Use the Size controls to adjust each element to fit within your template.
- Position elements by dragging them, or use the Align tool to center or space evenly.
- Ungroup layered designs to tweak colors or simplify details if needed.
- Preview the layout, then save your project before cutting.
Ensure your template matches your actual sign size exactly to prevent cutting errors and wasted material.
Choosing the Best Sign Materials: Acrylic, Wood, or Vinyl Options
Choosing between acrylic, wood, and vinyl for your baby announcement sign depends on how you want it to look, feel, and last. Acrylic offers a sleek, modern appearance and works well with acrylic markers to give a more handmade effect. Wood delivers a classic, rustic vibe that you can personalize with vinyl decals or permanent pens. Vinyl is flexible and easy to apply, perfect for smooth surfaces like wood or acrylic but won’t stand alone as a rigid base.
Cricut machines can write or cut on vinyl easily, but cutting acrylic or wood isn’t usually done directly with the machine’s blade. Instead, acrylic markers let you write on acrylic surfaces, while for wood, the Cricut cuts very thin veneers or scores rather than full cuts. The max thickness for wood veneer compatible with Cricut blades is about 1/16 inch, and acrylic sheets for drawing typically are up to 1/8 inch thick. Thicker materials require other cutting tools outside of the Cricut system.
| Material | Look | Durability | Cricut Compatibility | Thickness for Use | Ease of Use |
|---|---|---|---|---|---|
| Acrylic | Modern, glossy, smooth | High resistance to wear, scratches from markers possible | Write with acrylic markers using the Cricut pen holder; no direct cutting for thick sheets | Up to 1/8 inch thickness for writing | Moderate; requires acrylic markers, careful lettering to avoid ink overlap |
| Wood (thin veneer) | Rustic, natural texture | Good with protective sealant, can chip if thin | Cut or score very thin wood veneer (~1/16 inch) with Cricut Maker blade | Up to 1/16 inch for cutting or scoring | Challenging; limited thickness, sealing needed after |
| Vinyl | Clean, smooth, flexible | Good indoors, may peel over time outdoors | Cut easily with any Cricut machine; apply to surfaces | Thin sheets, generally under 0.01 inch | Easy; beginner-friendly application |
For an acrylic sign, consider using acrylic markers loaded into your Cricut pen holder. Choose the acrylic or acetate setting and allow your Cricut to write the design. The ink is thicker than standard Cricut pens, so plan lettering with spaces to prevent overlap. Avoid scratching your acrylic surface during writing by handling the material carefully. After writing, protect the ink by letting it cure fully before handling or applying a sealant.
Wood signs need thin veneer to work with the Cricut. You can cut or score up to 1/16 inch thick wood sheets with Cricut Maker blades designed for such materials. It may require some trial to get clean cuts, and you’ll want to finish the surface with Mod Podge or sealant for durability and to prevent wear, especially if your sign will be handled often or stored long term.
The easiest route for many parents making a baby announcement sign is cutting and applying vinyl decals. Vinyl cuts cleanly, weeds easily, and sticks smoothly to wood or acrylic bases. Opt for soft vinyl if you plan to add transfers on baby items like onesies, as it’s gentle on skin and wears well after washing.
Setting Up Your Cricut for Cutting and Writing on Your Chosen Material
Setting up your Cricut machine correctly ensures clean cuts and precise writing on materials like acrylic or wood, which are less forgiving than paper or vinyl. Start by sliding the white star wheels on your Cricut machine all the way to the right or left to move them away from the acrylic or wood piece. This adjustment prevents unwanted indentations or marks during cutting or writing. The star wheels are small rollers on the mat that help feed it into the machine but can press too hard on delicate or rigid materials if not moved.
Both the Cricut Explore Air 2 and Cricut Maker can be used for this project. The Maker offers more blade and tool compatibility options but the Explore Air 2 handles standard cutting and writing tasks. When cutting wood, choose a deep-cut blade if your machine supports it, such as with the Maker. For acrylic, use the fine-point blade unless the material is thick; cutting acrylic usually demands more passes at a slower speed. Always select the correct material setting in Cricut Design Space to calibrate the blade pressure accordingly. Proper blade setup avoids jagged edges and broken cuts.
Writing on acrylic or wood calls for pens or markers that fit your Cricut machine. Acrylic paint markers don’t attach to the Cricut’s pen clamp, so use Cricut-compatible pens or fine-tip markers instead. This method adds details without using vinyl, and you can cut and layer designs while improving them with handwritten accents. For brighter lettering on acrylic, turn the sign over and apply acrylic paint to the back after drawing on the front, this helps the letters pop.
To load your mat, place your acrylic or wood sheet firmly on the cutting mat, aligning it to avoid shifting. Use a strong grip mat such as the FabricGrip or StrongGrip for heavier materials. The mats cost around $10 to $20 each and last through multiple projects if cared for properly. Press the mat into the machine evenly, and load it using the load button prompted by Design Space. Keep the cutting speed at a moderate or slow setting to ensure accuracy and prevent burning on wood or cracking on acrylic.
Calibration may be necessary if you notice misaligned cutting or writing. Cricut machines have built-in calibration tools in Design Space. Follow the prompts to cut calibration patterns and adjust for precise tool paths. Regular calibration improves the quality especially when switching between different material thicknesses. Successful setup results in clean cuts without burn marks, smooth edges, and clear, even writing that stays intact through handling.
Step-By-Step Process for Cutting, Weeding, and Applying Your Sign Design
The process for cutting, weeding, and applying your baby announcement sign design involves precise cutting with the right blade and settings, careful removal of excess vinyl, and using transfer tape to position your design on the sign. Properly following these steps ensures clean lines and professional-looking results that hold well over time.
Cutting Your Design with the Correct Blade and Pressure
Select the appropriate blade for your material, use the fine-point blade for standard adhesive vinyl and the rotary blade or knife blade for thicker materials like chipboard or wood. Adjust the pressure and blade depth based on your material settings in Cricut Design Space to avoid cutting too deep or leaving uncut areas.
Keep your mat clean and free of debris for optimal vinyl grip. Load the mat with your vinyl face up, and allow the machine to finish the cut completely before unloading. Cutting usually takes 5 to 10 minutes, depending on design complexity and material thickness.
Weeding Vinyl or Removing Cut Pieces Carefully
Weeding means removing the unwanted pieces of vinyl, especially important for small baby announcement details like tiny letters or shapes. Use a weeding tool with a sharp tip or tweezers to lift the edges carefully without tearing the vinyl. Work slowly under good lighting to avoid missing any small bits inside letters or around design edges.
For multi-color or layered designs, weed each color separately, keeping track of all pieces. Place the weeds aside if you want to keep them for practice or other use, but discard scraps that won’t be reused to avoid confusion during assembly.
Applying Transfer Tape and Mounting to Sign Surface
Cut a piece of transfer tape slightly larger than your weeded design. Remove the backing slowly, and apply the tape over your vinyl, pressing firmly with a scraper tool or credit card to secure the vinyl to the tape evenly. Peel the vinyl backing away carefully, leaving the vinyl on the transfer tape.
Line up your design on the sign surface, then press the vinyl firmly onto the sign. Use the scraper again to smooth out air bubbles and ensure adhesion, then slowly peel away the transfer tape at a sharp angle. For layered designs, repeat this process for each layer, using adhesives appropriate for your sign material, such as craft glue or double-sided foam tape for dimension.
- Place your vinyl on the cutting mat, load it into the Cricut, and start the cutting process.
- Once cutting is complete, unload the mat and carefully weed out the excess vinyl using a weeding tool.
- Cut a piece of transfer tape to size and apply it over your weeded design.
- Use a scraper to adhere the vinyl to the transfer tape firmly.
- Peel the vinyl backing away, leaving the design on the transfer tape.
- Align and place the transfer tape with the design onto your chosen sign surface.
- Press down firmly and smooth out bubbles.
- Slowly remove the transfer tape, leaving the vinyl on your sign.
Press transfer tape firmly and peel slowly to avoid lifting small vinyl details or causing bubbles that can interfere with a clean finish.
Finishing Touches to Personalize and Protect Your Baby Announcement Sign
After completing your baby announcement sign, adding finishing touches can make it more personal and durable. Painting the back of wood or acrylic signs can create a clean, polished look while also protecting the material. Choose acrylic paint or wood stain, and apply it with a small brush or foam applicator. Let it dry for at least an hour in a well-ventilated area. This not only improve the sign’s appearance but also prevents warping or discoloration over time.
3D embellishments like fabric bows, felt shapes, or resin decorations add texture and visual interest. You can attach these by gluing them to your sign after your Cricut cuts and vinyl application are complete. Use a strong craft adhesive such as E6000 or a hot glue gun, applying a small amount to avoid messiness. For example, a small fabric bow beside the baby’s name or felt stars around birth stats add charm and dimension, making the sign unique and special.
Sealing your finished sign helps preserve it, especially if it will be displayed in a nursery or gifted. A clear acrylic spray sealant or mod podge protects against moisture, dust, and fading. Apply two light coats, allowing 20 to 30 minutes to dry between coats. Avoid heavy coats that cause cloudiness. This step is especially important for wooden signs or those with paper or fabric layers, extending their lifespan while maintaining a fresh look.
You can incorporate fabric or 3D elements along with Cricut vinyl cuts by layering them carefully. Cut fabric shapes using your Cricut if your machine supports fabric blades, then glue these pieces onto your base sign. Felt and lightweight cotton fabrics work best. Combining flat vinyl with these tactile details brings personalized craftsmanship to your baby announcement sign.
- Paint the back of wood or acrylic signs with acrylic paint or wood stain, drying for at least 1 hour
- Add glue-on 3D accents like fabric bows, felt shapes, or resin pieces with craft glue or a hot glue gun
- Seal your sign using clear acrylic spray or mod podge for protection against moisture and fading
- Cut fabric shapes on your Cricut with a fabric blade and glue onto your sign for layered textures
- Use lightweight materials and minimal glue to prevent warping or bubbling
- Test sealants and adhesives on scrap materials to ensure compatibility with your chosen sign base
To care for your finished sign, keep it out of direct sunlight and avoid excess moisture. Wipe gently with a damp cloth if needed. Heavy cleaning or abrasive scrubbing can damage vinyl or paint layers. Signs with fabric or glued decorations should be handled carefully to prevent pieces from loosening or falling off. Proper sealing helps keep your sign looking vibrant and ready for display or gifting on special occasions.
Common Mistakes and Troubleshooting Tips for Flawless Signs
Misaligned text can make your baby announcement sign look unprofessional and hard to read. This often happens when the design elements aren’t centered in Cricut Design Space or when the material shifts during cutting. To avoid this, double-check alignment before cutting and secure your material firmly on the cutting mat with strong adhesive or painter’s tape. Using the “Align Center” tool in the software ensures every letter and shape lines up perfectly. After cutting, carefully peel away the excess vinyl while keeping the letters in place to prevent shifts.
Vinyl lifting is a common problem that occurs when the adhesive doesn’t stick well to the sign surface or the transfer process is rushed. It’s important to clean the sign surface with rubbing alcohol and let it dry fully before applying vinyl. Use a scraper or credit card to firmly press down on your vinyl, working slowly from the center outward to avoid bubbles. If you notice edges lifting, apply heat gently with a hairdryer or heat press set to 250°F for 5 to 10 seconds, which helps soften the adhesive and strengthen the bond.
Poor results with the Cricut pen or blade often come from dull tools or incorrect settings. Blunt blades tear vinyl and cause uneven cuts, while the pen might skip or blot when the cartridge is low or clogged. Replace blades after about 200 cuts to keep precision sharp, replacement blades typically cost $10 to $15. Clean the pen tip by gently wiping it with a damp cloth if ink isn’t flowing smoothly or replace the pen if problems persist. Adjust pressure settings in Cricut Design Space if you’re cutting thicker materials like wood or acrylic to reduce strain on your tools.
- Secure material firmly to prevent shifting during cutting.
- Use the “Align Center” tool to fix text positioning before cutting.
- Clean surfaces with rubbing alcohol before applying vinyl.
- Press vinyl firmly with a scraper to reduce bubbles and lifting.
- Replace blades every 200 cuts for crisp edges.
- Check and clean Cricut pen tips for smooth writing.
- Adjust cut pressure for different materials to avoid damage.
Incorrect spacing between letters or words usually means the text wasn’t letter-spaced properly before cutting. Adjust letter and word spacing in Design Space using the “Letter Space” and “Line Space” controls. For small signs or detailed fonts, increasing the spacing slightly by 1 to 2 points can improve readability. Crooked text after application often results from peeling the transfer tape too quickly or unevenly pressing the vinyl down. Patience during transfer and using a flat surface helps keep your announcement sign looking neat and professional.
Where to Find Free and Paid Baby Announcement SVG Files and Templates
Finding the right SVG files and templates for baby announcement signs shapes the success of your project. Both free and paid options offer quality designs, but paying attention to versatility, licensing, and design detail ensures the sign looks professional. Mass-producing these signs for gifts or sales is doable, especially with paid files that come with extended commercial licenses.
Best Free Sources for Baby Announcement SVGs
Free SVG files for baby announcements can be found on many crafting blogs and websites dedicated to Cricut projects. These sources often provide a variety of designs, from simple text with cute baby icons to more complex layered images. Free files are great for beginners testing different styles and for one-off projects, such as a single baby announcement sign. You can download these files directly and upload them into Cricut Design Space.
Free SVGs tend to be less detailed and may have limited customization options compared to paid files. However, sites that regularly update their collections give you access to fresh ideas without cost. It’s important to check the licensing for each free SVG to confirm if personal use only applies or if small commercial use is permitted, especially if you plan to make multiple signs for sale or gifts.
Crafting communities and social media groups for Cricut users often share links to curated collections of free baby-themed SVGs, which can be helpful for inspiration. For example, a simple layered baby bear or rattle design can be great starting points, and many sites include files optimized for layering with different vinyl colors.
Paid Marketplaces and What to Expect
Paid SVG files typically offer higher-quality artwork with finer details and better layering for multi-color designs. Marketplaces like Etsy, Design Bundles, and Creative Market host thousands of baby announcement SVGs at prices ranging generally from $2 to $10 per design. Purchasing from these sites also usually comes with commercial use options, allowing you to produce multiple signs for gifts or to sell without legal issues.
Paid files often include bonus features like matching fonts, additional graphics, or ready-to-use cut files that reduce design time. Some sellers provide customer support or customisation options which can help if you want a unique twist on the design. Investing in quality files is worthwhile if you plan to mass-produce baby announcement signs, as the final product will look more polished and professional.
Keep in mind that the cost of the SVG is just part of the expense. Material costs, time spent on cutting and assembly, and any additional embellishments will add up. For example, a simple vinyl sign could cost under $5 for materials, but signs on wood or acrylic with multiple layers might run $10 or more per sign, excluding your labor.
Tips for Customizing Purchased Designs
After downloading an SVG file, open it in Cricut Design Space and review its layers carefully. Changing colors to match your chosen vinyl or sign background can make the design pop. You can also resize elements or rearrange layers to personalize each baby announcement without altering the original artwork too much.
Adding a baby’s name or birth date is a popular customization. Use Cricut’s text tools to input the details and pick a font that complements the design. For signs you want to mass-produce, create a master template in Design Space that allows you to swap out names and dates easily to save time.
Some paid SVGs come with fonts that require installing separately or license restrictions on commercial use. Double-check font licenses to avoid legal issues when selling signs. Testing a small cut on scrap material helps catch any adjustments needed before cutting the final product.
Always check the licensing terms before using free or paid SVG files for commercial purposes to avoid copyright issues. Some free files restrict use to personal projects only.
Step-by-Step Action Plan
Follow these steps to create your baby announcement sign with confidence and get a polished result.
- Before You Start: Gather your materials, choose acrylic, wood, or vinyl for your sign, plus transfer tape, weeding tools, and paint or sealer if needed. Confirm your Cricut machine is compatible with your chosen materials.
- Day 1: Open Cricut Design Space and upload or select your baby announcement SVG file. Customize the design with your baby’s name, birth date, and any other details. Your design is ready when it looks balanced on screen.
- Day 2: Set up your Cricut by installing the correct blade and mat for your material. Load your material securely. Perform a test cut on scrap material to check settings are accurate.
- Day 3: Cut your design carefully, then use your weeding tool to remove excess vinyl or material. Your design is properly weeded when all unwanted bits are cleanly removed without damaging the main design.
- Day 4: Use transfer tape to apply your design smoothly to the sign surface, pressing firmly to avoid bubbles. Your design is properly applied when it sticks evenly and lifts off the transfer tape cleanly.
- Day 5: Add any finishing touches like paint accents or a clear protective coat to seal the sign. Let everything dry fully before handling. Your sign is complete when the finish feels even and durable.
- After 1 Week: Display your sign or gift it, checking for any needed touch-ups. A flawless finish means your edges are smooth, colors vibrant, and the design securely attached.
Frequently Asked Questions
Can I Use a Cricut Maker to Create Fabric Baby Announcement Signs?
Yes, the Cricut Maker works well for fabric projects like baby blankets or soft toys, allowing you to add personalized fabric touches for a soft announcement sign.
How Do I Paint a DIY Baby Birth Announcement Door Sign?
Paint your wooden or acrylic sign with baby-safe paint, letting each layer dry before adding details for a durable and personalized finish.
Can I Make a Baby Announcement Sign Without Using Vinyl?
Yes, you can create custom acrylic signs without vinyl by cutting and etching designs directly for a clean, modern look.
What’s a Good Way to Decorate Corners of a Baby Announcement Sign?
Adding small bows or similar embellishments at the corners can improve the sign’s charm and personalize it further.
Is Canva Useful for Designing Baby Announcement Signs for Cricut?
Canva is great for creating custom graphics and layouts, which you then upload to Cricut Design Space for cutting.
How Do I Center My Design When Writing on an Acrylic Sign with Cricut?
Use the mat preview in Cricut Design Space to adjust and center your writing before cutting and drawing on the acrylic.
The Bottom Line
Taking these clear steps ensures your baby announcement sign looks professional and personalized. Start by choosing your material and preparing your design in Cricut Design Space today. Once you see your project come together, you’ll have a meaningful keepsake to celebrate your newest family member.