Beach Sign Ideas: Creative Styles, DIY Tips, and Coastal Decor Inspiration
Beach sign ideas can transform your space with coastal charm. Choosing the right style and material ensures your sign looks great and lasts. Start by selecting durable wood or weatherproof materials that suit your decor and location.
Key Takeaways
- Wood signs with distressed finishes bring an authentic rustic beach vibe to your home or patio.
- Using cinnamon in DIY paint blends helps create a unique rusty effect for budget-friendly beach signs.
- Personalize signs with names or beach-themed quotes to make your decor more meaningful.
- Opt for weather-resistant materials like treated wood or canvas for outdoor beach signs.
- Soft coastal color palettes with blues, whites, and sandy neutrals best capture beach vibes.
- Inexpensive DIY projects can cost under $25 while mimicking expensive store-bought signs.
Popular Styles and Types of Beach Signs
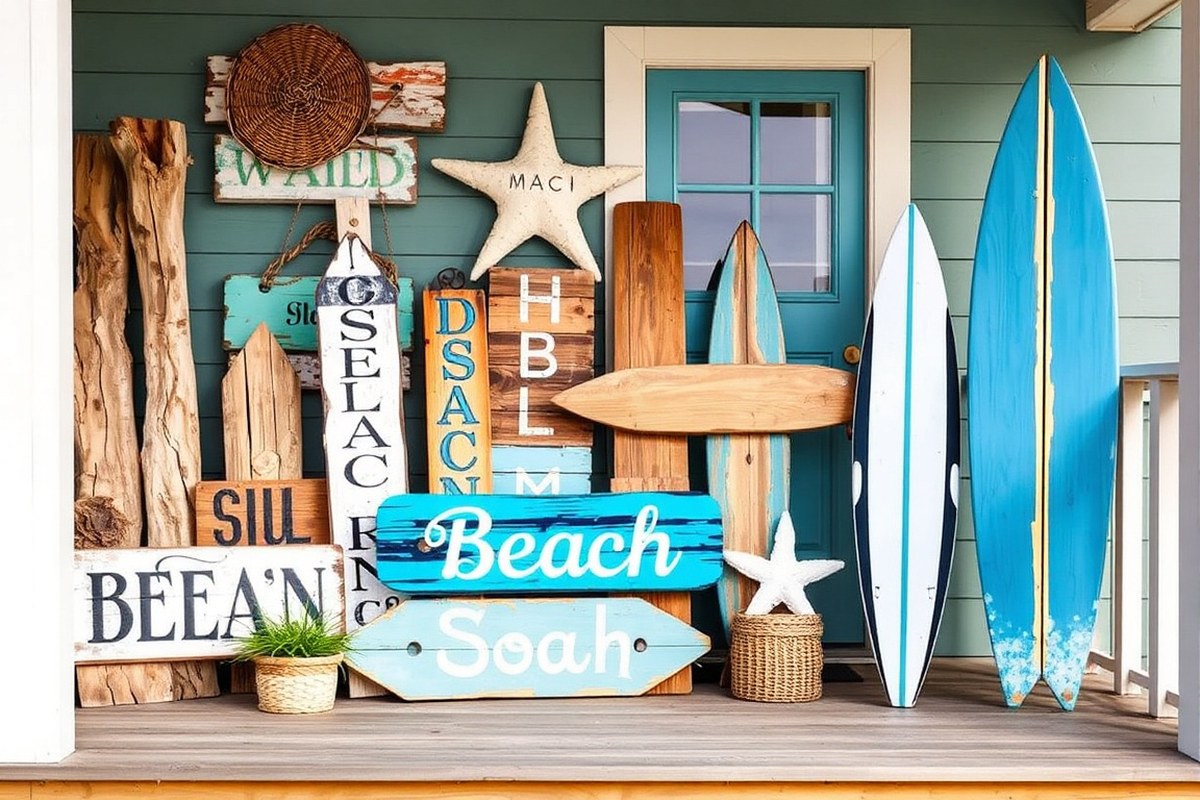
Beach signs come in several popular styles, each offering a distinctive look that fits varied coastal aesthetics. The main types include rustic driftwood signs, painted wooden signs, vintage or retro-inspired pieces, and metal options. Choosing the right style affects both the visual impact and how well the sign blends with your home or outdoor beach decor.
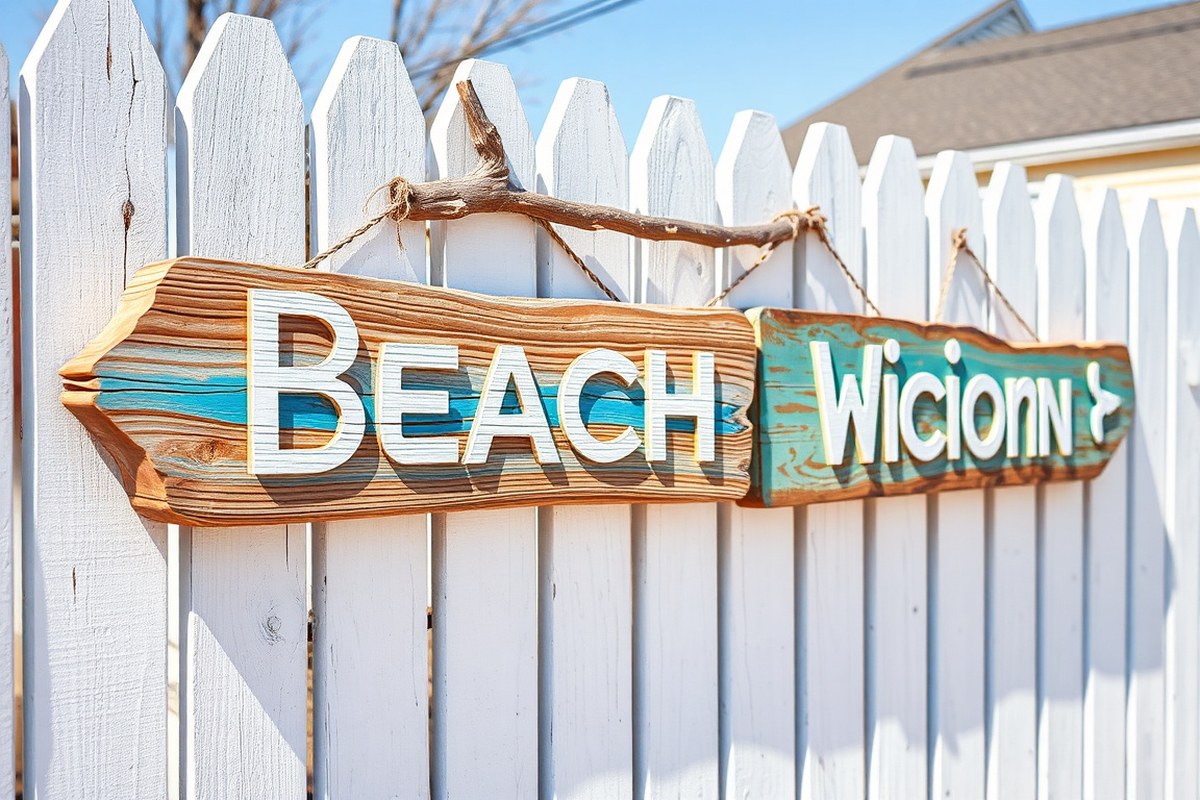
Rustic driftwood signs stand out due to their naturally weathered appearance. Such signs typically use reclaimed or found driftwood pieces loosely assembled or attached to a backing board. The wood’s rough texture and natural patina convey an authentic seaside feel, reflecting the organic and unfinished look of beach shores. This style suits those who prefer a raw, casual attitude and want an earthy charm that feels connected to nature. Assembly takes more time, usually involving cleaning and lightly sanding driftwood before attaching letters or painting. Costs vary depending on whether you collect your own driftwood or source it through craft suppliers; some kits or custom signs range from $20 for DIY projects up to $100 or more for handcrafted pieces.
In contrast, painted wooden signs offer a more polished and versatile option. These typically use smooth pine or cedar boards painted with solid colors, coastal ombre gradients, or beach-themed quotes. The clean lines and bright or soft hues allow these signs to meld with different interiors, from rustic to modern. Painting techniques can include layering colors for a sunrise or sunset effect, stenciling motivational phrases, or adding simple directional arrows. Painted signs require sealed finishes for durability, especially outdoors, with average costs starting around $15 for DIY efforts and running above $100 for personalized, handcrafted designs.
- Rustic Driftwood Decor: natural wood pieces assembled for authentic coastal charm
- Wooden Beach Quote Signs: smooth boards painted with inspiring coastal phrases
- Vintage Beach House Signs: weathered woods or metal featuring retro fonts and classic beach motifs
- Ombre Painted Wooden Signs: gradient shades inspired by ocean sunrises and sunsets
- Metal Beach Signs: durable, often with rusted finishes for a vintage look
- Directional Beach Signs: pointing way to the beach with fun, casual text and arrows
- Personalized Wooden Welcome Signs: custom names and messages for beach home entries
Vintage and retro options offer a nostalgic touch that recalls classic beach motels, surf shacks, or old beach buses. These signs often feature faded paint, distressed wood or rusted metal, and fonts reminiscent of mid-20th century Americana. They evoke memories of summer vacations and laid-back coastal style. Vintage signs work well in casual spaces where a bit of history and playful charm complement the décor. Options like a retro beach motel sign or a beach bus sign typically cost from $50 to $130, depending on size and customisation. They typically require less maintenance than rustic driftwood but may need weatherproofing for outdoor use.
Choosing the Right Material for Longevity and Style
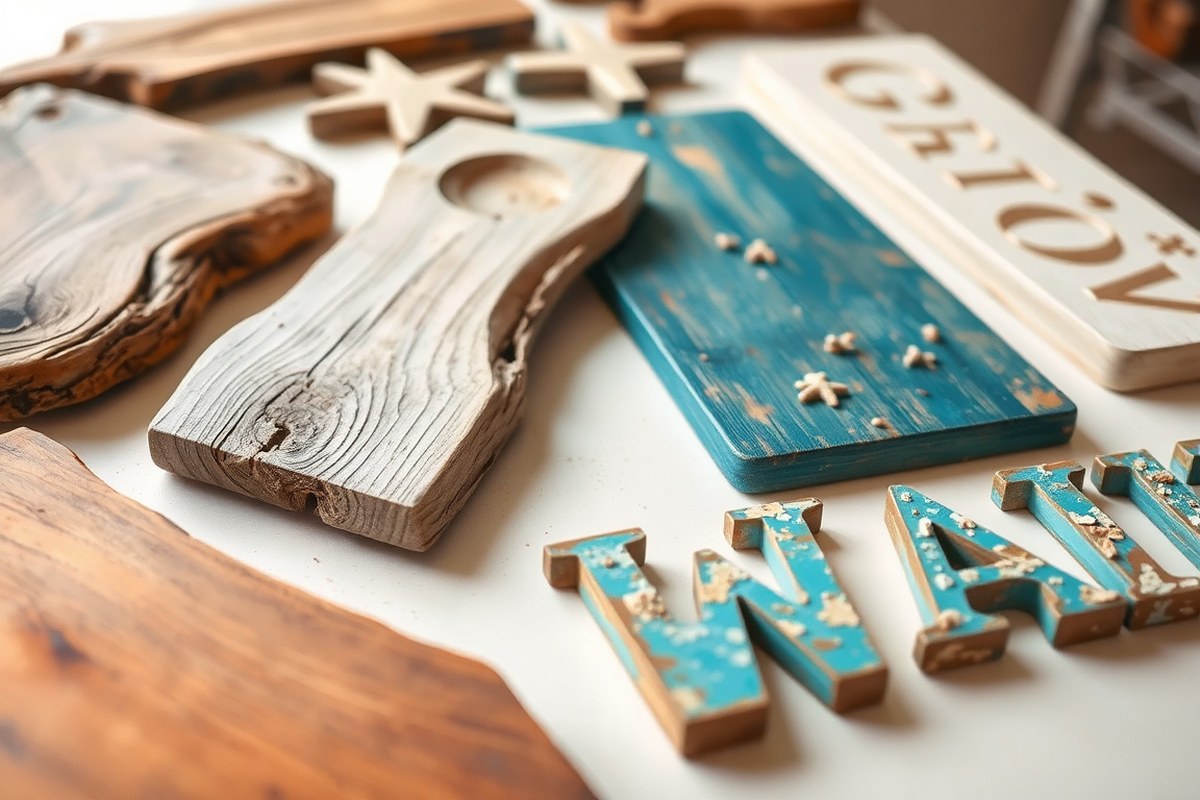
Choosing the right material for your beach sign is essential to balance longevity, style, and maintenance. Wood is the most popular choice due to its natural look, but not all woods behave the same outdoors. Weathered wood offers a charming, rustic vibe and handles moisture and sun better because it’s already been exposed and dried, reducing the risk of warping or cracking. Fresh wood can look cleaner and more polished but needs sealing and regular maintenance to protect it from salt air, sun, and rain.
Metals provide a modern, durable option often resistant to weather damage. Aluminum, for example, is lightweight, rust-resistant, and holds paint well, making it suitable for a sleek beach sign. However, metals can heat up quickly in the sun and sometimes show dents or scratches more easily than wood. Composite materials like PVC or acrylic are very weatherproof and low-maintenance but may lack the authentic beachy warmth of wood textures.
Using weatherproof sealants is key, especially with wood. Sealants prevent moisture absorption, UV damage, and fading, extending your sign’s life, especially in salty or humid locations. Weatherproof markers designed for outdoor signs are advisable for durability in painted details or lettering.
| Material | Durability Outdoors | Maintenance Needed | Style/Vibe | Approximate Cost |
|---|---|---|---|---|
| Weathered Wood | High – naturally resistant to warping and cracking | Sealant application every 1-2 years | Rustic, natural, beachy | Moderate (varies by source, reclaimed wood can be low cost) |
| Fresh Wood (e.g., Pine or Cedar) | Moderate – susceptible to moisture damage without sealant | Regular sealing and occasional repairs | Clean, polished, traditional | Low to Moderate ($50-$130 for personalized surfboard signs) |
| Aluminum/Metal | High – rust-resistant and durable | Minimal – occasional cleaning | Modern, sleek | Moderate to High (depends on fabrication) |
| Composite (PVC, Acrylic) | High – resistant to weather, UV, and salt | Very low – just cleaning | Varies, can mimic wood or smooth, plastic look | Moderate |
For outdoor beach signs, weathered wood stands out by combining authentic style and better resistance to outdoor elements than fresh wood, especially when sealed properly. Personalized surfboard wood signs, sized around 12 x 44 inches, are commonly available in this category for about $108 on sale. Adding a durable outdoor wood sealer preserves colors and wood integrity despite sun exposure and salt air. Metals and composites suit those who prefer modern finishes with less upkeep but might sacrifice the natural appeal wood provides.
Apply a high-quality outdoor wood sealant after any paint or stain dries fully, repeating every 1-2 years to keep your sign protected from sun and moisture damage.
Selecting your sign’s material depends on your style preference, willingness to maintain it, and where you plan to display it. Weathered wood with regular sealing fits well on patios and garden spaces exposed to beach weather, while metal and composite may suit direct oceanfront settings where durability trumps rustic aesthetics.
Step-by-Step Guide to Making a DIY Beach Sign
Creating a simple, budget-friendly DIY beach sign is a fun project that brings a relaxed coastal vibe to your home. Using basic materials and straightforward techniques, you can craft a charming sign that suits your space and style without spending much. The process involves preparing your materials, transferring your design accurately, painting, and sealing the sign for durability.
Materials and Tools Required
Start by gathering your supplies to keep the project organized and efficient. A wooden board about 12 by 24 inches or a repurposed pallet piece works great as your base. Acrylic paint in nautical colors like soft blues, whites, or sandy beiges adds the right beachy feel. You’ll also need paintbrushes, sandpaper, painter’s tape, graphite transfer paper, and a pencil for design transfer. Finish materials include a clear outdoor sealant to protect your sign from moisture.
Budget-wise, expect to spend around $15 to $30 for basic materials if you don’t already have them. Craft stores and big-box retailers often carry affordable paint sets and sealants. Regular acrylic paint dries quickly and provides vibrant color at a low cost.
Painting and Lettering Process
Transferring your lettering or design accurately ensures a professional look without special tools. After sanding your wooden surface smooth with a fine-grit sandpaper, paint the base coat in your chosen background color and allow it to dry completely, which usually takes about one hour. Next, print or handwrite your text or design on standard paper.
Place a sheet of graphite transfer paper between your paper design and the wooden board, then trace over the letters with a pencil or pen to imprint the design onto the wood. This step helps preserve clean, straight lines and consistent letter shapes. For painting, use small, fine brushes in a single direction to keep edges sharp and avoid lumps.
Using painter’s tape can help mask off borders or create straight edges for stripes or color-block designs. Let the paint dry for 30 to 60 minutes between coats, and apply two coats for strong coverage and color depth.
Finishing and Sealing Tips
Sealing your DIY beach sign preserves the painted surface against moisture, UV damage, and general wear, especially if it will be displayed outdoors or in a humid area. Choose a clear polyurethane or acrylic spray sealant rated for outdoor use. Apply at least two thin coats, waiting 2 to 4 hours between layers. Spray sealants create a smooth finish without brush marks.
For an extra touch, you can rub a small amount of cinnamon lightly onto the surface before sealing to mimic a rusted, weathered look that fits rustic beach themes. Ensure fully dry paint before this step. Avoid excess cinnamon to prevent sticky residue.
Let the finished sign cure for 24 hours before handling or hanging. Proper sealing and drying help your sign last through seasonal changes and keep it looking fresh.
- Sand the wood surface smooth and wipe clean.
- Paint the entire board with a background color; let dry.
- Print or write your design; place graphite paper between design and board, then trace to transfer.
- Paint your design using fine brushes, applying two coats if needed.
- Optionally, apply cinnamon lightly for a rusty effect after painting.
- Seal the entire sign with a clear outdoor sealant, applying two coats with drying time between.
- Allow the sign to cure for 24 hours before use or display.
Color Palettes and Designs That Capture Beach Vibes
Choosing the right colors and design elements for beach signs involves balancing bright tropical tones with muted natural shades to evoke a relaxed coastal vibe. Incorporate maritime motifs like palm trees, waves, and vintage beach symbols to bring warmth and seaside charm. Using rustic wooden textures combined with carefully selected palettes can highlight the essence of coastal living effectively.
Best Color Palettes for Coastal and Tropical Themes
Colors that work best for beach decor include ocean blues, sandy beiges, sunset oranges, and coral reds. These shades naturally recall elements of the beach, water, sand, and sunsets, making them ideal for signs meant to evoke the coast. To highlight tropical themes, add bright greens, turquoise teals, and vibrant pinks to infuse energy. Combining muted bases like weathered wood tones or soft whites with these pops of color helps create balance and prevents the design from feeling overwhelming.
For example, a wooden sign painted in weathered white or pale sand with accents of turquoise and coral can instantly radiate coastal charm while maintaining a soft, inviting look. You can use bright colors selectively on lettering or motifs, letting the natural wood or neutral background provide calm contrast. This approach costs little more, just purchase quality acrylic paints ranging from $5 to $15 per color, and use painter’s tape to keep lines crisp for a polished finish.
Mixing Bright and Muted Palettes Effectively
To mix bright and muted palettes, start with a neutral or pastel base that reflects sand or driftwood shades. Layer brighter colors sparingly on top in areas you want to draw attention to, like a “Surf’s Up” phrase or a palm tree silhouette. This technique maintains readability and avoids clashing colors that can distract from the sign’s message. Using a pencil sketch to plan placement before painting helps balance these elements well.
Applying thin washes of paint, then gradually building up saturation, gives control over how intense colors appear. This method suits wooden signs because the grain texture naturally softens color transitions. Avoid covering the whole surface in bright tones unless the sign is small or designed to be a bold statement piece, where eye-catching colors are the goal to evoke tropical paradise vibes.
Design Motifs That Match Beach Settings
Common and effective design motifs for beach signs include palm trees, seashells, waves, surfboards, and sandy footprints. Vintage seaside icons such as retro beach buses or lighthouses add nostalgic charm, particularly in weathered or distressed wood finishes. Choose motifs tied directly to coastal experiences and scenery for authenticity and to trigger beach memories in those who see them.
Hand-painting these symbols or using stencils helps keep the look personalized and playful. For a tropical feel, palm fronds alongside colorful hibiscus flowers fit naturally, while waves and sand dollars suit signs meant to represent calmer beach houses or cottages. Maritime elements like anchors or knots can add a rustic nautical touch without overwhelming the seaside theme.
Adapting Colors and Designs for Specific Spaces
For outdoor signs, durability is key, so use weather-resistant paints with UV protection in colors that resist fading, like deep navy blues and vibrant coral pinks. These shades withstand sun exposure better than pastels. In indoor settings, softer palettes with light blues, pale greens, and sandy beige create a serene ambiance that complements coastal decor.
Smaller signs benefit from brighter palettes to capture attention in compact spaces, while larger wall signs can carry more muted tonal transitions demonstrating delicate shifts from sunset oranges to ocean blues. Choosing designs that allow for layered colors or transitions showcases natural beauty while fitting the scale of the environment.
Common Pitfalls and How to Avoid Them
One mistake is using too many bright colors without a unifying theme, which can make the sign feel chaotic rather than relaxed. Stick to a palette of three to five colors and repeat them in lettering and motifs to create harmony. Another error is neglecting to contrast colors adequately; for example, light lettering on a pale background is hard to read, defeating the purpose of your sign. Test color combinations on scrap material before committing.
Not prepping the surface properly can lead to peeling paint and faded colors, especially with wooden outdoor signs. Sand lightly and apply a primer if needed to ensure colors pop and last. Taking these precise steps helps your beach sign maintain its coastal magic over time, creating both visual appeal and lasting memories.
Personalizing Your Beach Sign with Names and Quotes
Adding personal touches like family names and favorite beach quotes makes your beach sign truly one of a kind. Incorporating your family name, a special date, or even a location instantly transforms a simple sign into a meaningful piece of seaside décor. This connection strengthens your bond with the sign and creates a welcoming atmosphere for guests in your living room or vacation home.
Popular beach quotes and puns often add charm and humor to your sign. Playful sayings like “Sea You Soon,” “Sandy Toes, Salty Kisses,” or “Beach More, Worry Less” fit perfectly with coastal vibes. Inspirational phrases such as “Life’s a Beach” or “Salt in the Air, Sand in My Hair” bring a little motivation and serenity indoors. These messages resonate because they capture the laid-back, carefree spirit of beach living.
To personalize signs easily, consider using paint marker kits designed for wood or weather-resistant vinyl stickers. These tools allow you to add lettering or designs without needing professional skills. You can also find DIY sign kits that include pre-cut wooden slats, stencils, and even pre-cut letters for simple assembly and personalization. These kits generally range from $20 to $50, depending on size and complexity, keeping your project affordable while still looking custom-crafted.
- Use stencils with waterproof paint markers for neat, lasting lettering.
- Gather shells, small driftwood pieces, or sea glass from personal trips to embellish your sign.
- Apply weatherproof sealant over your customized sign to protect the personalized touches.
- Consider layering vinyl lettering over base paint for clean, bold text.
- Align family names and dates centered for symmetry and improve visual appeal.
- Combine fonts, script for quotes and block letters for names, for a dynamic look.
- Add seasonal or event-specific puns to swap out with removable decals or magnets.
Start by sketching your design on paper or use a digital template to plan spacing and alignment. Choose contrasting colors to keep text readable against the wood or background material. For example, white letters show up well on beach-weathered driftwood or darker stains. A typical sign measuring about 12 inches by 24 inches requires only a few paint marker pens or a small vinyl sheet, keeping supply costs under $15.
Use a clear outdoor sealant after painting to ensure your personal touches withstand sun, salt air, and moisture without fading or peeling.
Adding shells or small souvenirs from your beach trips can be glued along edges or corners to deepen the sign’s story. Overloading the sign with decorations can obscure the message, so balance is key. Minimizing complexity while maintaining personal elements results in the best appearance and durability.
Budget-Friendly Beach Sign Ideas That Look Great
Creating a stylish beach sign without spending much starts with choosing affordable materials and simple techniques. Basic wood slats, available at most craft stores for under $10, provide the perfect base. You can buy a wood sign making kit that includes ready-cut boards and stencils for around $20 to $30. These kits save time and ensure your sign looks polished without needing advanced woodworking skills. A coat of whitewash using products like Vintage Effects Wash adds that classic coastal feel without extra effort or cost.
Paint is important for style and budget. A small container of acrylic or exterior paint, generally $5 to $10, lasts through multiple projects and works on wood, MDF, or pre-cut boards. Use a foam brush or sponge for even application. After painting a base layer, stencil or freehand simple messages like “Beach,” “Relax,” or coordinates for a local spot. Seal your sign with a clear acrylic spray to protect it, which costs about $8 and keeps paint from fading outdoors.
For added flair with minimal expense, decorate your sign using natural accents. Assorted seashells can be found for $5 to $15 in craft stores or collected yourself if local laws allow. Use a hot glue gun to attach shells, creating a unique coastal touch that remains affordable and personal. Lightweight decorative anchor hooks or nautical charms, priced around $3 to $10, add subtle design elements without overwhelming your sign or budget.
Buying an inexpensive unique beach sign is easy by exploring online marketplaces such as Etsy or local craft fairs. Handmade signs often start at $25 and offer distinct, authentic beach vibes. Look for sellers specializing in coastal décor who use reclaimed wood or hand-paint natural scenes. Stores like Bella Coastal Décor offer customizable options, letting you add personal names or quotes to their beach-themed designs at moderate prices.
Simple DIY signs work best for first-timers or quick updates to your home. Invest about $30 to $40 total for materials like wood, paint, adhesive shells, and sealants. For a no-fuss option, purchase a pre-made wooden beach sign kit for roughly the same cost and customize it with your favorite colors or phrases. Avoid using cheap plywood outdoors without sealing, as it absorbs moisture and warps, ruining your sign’s look and stability.
Lighting and Decorative Accents for Beach Signs
Adding lighting to your beach sign can create a cozy, inviting look, especially in the evening. Solar-powered LED string lights work well outdoors since they don’t require wiring, making installation simple and safe. Wrap these lights around the edges or weave them through nautical ropes for a soft glow that highlights details like seashells or marine motifs. Battery-operated fairy lights inside or around a frame also add charm with low risk and easy operation.
Decorative accents such as seashells, driftwood, and nautical ropes bring texture and a genuine coastal feel to your sign. Gluing or nailing lightweight seashells along the edges improve the beach vibe without adding much weight. Nautical ropes can be wrapped around the frame or used to border the sign, giving it a tactile, maritime look. Burlap bows and small anchors attached at corners emphasize the seaside theme for a personalized touch. Distressed finishes complement these accents by adding depth and character.
Safety is important with outdoor illuminated signs. Use lights that are rated for outdoor use to withstand moisture and temperature shifts. Keep wiring away from footpaths to prevent tripping, and secure all cords with weatherproof clips or covers. Solar lights should be positioned where they receive at least 6 hours of direct sunlight daily for reliable performance. Battery packs must be sealed in waterproof cases, and replace batteries regularly to avoid corrosion or fire risk.
- Solar LED string lights wrapped around the sign’s border for soft illumination
- Battery-operated fairy lights inside the frame for subtle sparkle
- Glue seashells and small driftwood pieces to edges or corners
- Wrap nautical ropes around the sign frame for texture and style
- Add burlap bows or maritime anchors as focal points
- Use distressed paint finishes to improve the rustic beach look
- Choose outdoor-rated lighting and secure all cords safely
Choosing the size and shape of your lighting should match the sign’s design; for instance, narrow rope lighting suits thin wooden signs, while fairy lights frame chalkboards well. The cost for solar LED string lights starts around $15, with rope and burlap accents costing $5 to $20 depending on quantity and quality. Applying accents yourself is a hands-on way to customize your sign without spending much.
Well-lit beach signs attract attention and create a relaxed atmosphere on patios or porches. Avoid heavy embellishments that make the sign bulky or hard to hang. Keep wiring minimal and check electrical components periodically, especially after storms. When done carefully, lighting and decorative accents provide a bright, authentic touch that highlights your love of the coast day and night.
Weatherproofing and Maintaining Your Beach Sign
To keep your beach sign looking great against sun, salt air, and moisture, start with a protective sealer designed for outdoor use. Marine-grade spar urethane or exterior polyurethane works well. These finishes provide a tough, water-resistant barrier that handles UV rays and salty breeze. Apply at least two coats with a synthetic brush, allowing 24 hours to dry between layers. Expect to spend $15 to $30 for a quart, which covers multiple signs.
Signs made of wood benefit especially from sealers that resist moisture and prevent warping. For metal signs, a clear coat spray can protect against rust and salt corrosion. Avoid using indoor varnishes or sealers not recommended for direct sunlight or wet conditions, as these can peel quickly. Once sealed, signs still need maintenance to keep the protection effective.
Check your beach sign every 6 months for wear. Look closely for peeling or cracking in the finish, especially at edges and corners where moisture can creep in. Fading colors or chalky surfaces indicate UV damage and the need for resealing. Salt deposits may leave white residue; rinse this off with fresh water using a soft cloth to prevent corrosion. Wooden signs may show early signs of splintering or mold, which require light sanding and a new coat of sealer.
Maintain your sign by cleaning it gently with mild soap and water on a regular basis, especially in salty or humid areas. Avoid harsh detergents or pressure washers that damage finishes. After cleaning, let the sign dry completely before applying any touch-ups. Plan to reseal wooden signs every 1 to 2 years, depending on exposure. Metal signs might need a protective spray yearly, especially near the coast where salt levels are higher.
For signs placed indoors but still in humid beach home areas, frequent maintenance may not be as critical, yet occasional dusting and polishing prolong lifespan. Outdoor signs facing full sun and sea spray need more vigilant care. When working on your sign, wear gloves and work in mild weather, ideally between 50°F and 80°F, to ensure sealers cure properly. Weatherproof finishes typically add a slight sheen or subtle gloss that signals good coverage.
Always test a small, hidden area before sealing your entire sign to confirm compatibility and finish appearance.
Multilingual and Themed Beach Sign Options
Multilingual beach signs and themed designs offer a unique way to express coastal living with cultural flair or nostalgic charm. These options connect homeowners and guests to diverse seaside traditions or evoke specific moods tied to beach life. You can find or craft signs that showcase languages like Spanish, Hawaiian, or French, as well as motifs from tropical islands or classic nautical imagery.
Popular Multilingual Sayings
Incorporating multiple languages on a single beach sign promotes inclusivity and reflects the multicultural nature of many coastal communities. Common options include greetings, beach-related words, or inspirational phrases in languages such as Spanish, French, Hawaiian, or Italian. These signs work well in shared spaces or vacation homes where visitors speak different languages.
To create a multilingual sign, select short, easy-to-read phrases for better visual impact. Use clear fonts and contrasting colors to ensure legibility. Wooden plaques measuring around 12 by 18 inches are a good size for home or yard display. Craft stores and online retailers often carry multilingual vinyl decals or stencils that simplify lettering applications.
- “Welcome / Bienvenidos / Aloha”
- “Beach / Playa / Plage”
- “Relax / Relájate / Restez calme”
- “Sunshine / Sol / Soleil”
- “Good vibes only / Sólo buenas vibras”
Costs may range from $15 to $50 for pre-made signs, while DIY kits with stencils and paint typically cost around $20 to $40. Make sure to seal your sign with a weatherproof finish to maintain clarity if placed outdoors.
Hawaiian and Tropical Themes
Beach signs with Hawaiian or tropical themes bring a laid-back island atmosphere to your home. These often feature palm trees, tropical flowers like hibiscus, or popular Hawaiian phrases such as “Aloha” or “Mahalo.” Choosing wood or bamboo as the base captures a natural, warm look fitting for patios or sunrooms.
When making a tropical-themed sign, consider including bright colors such as turquoise, coral, and sunny yellow alongside natural wood tones. You can use acrylic paints designed for outdoor use. Size options vary but a 10 to 16-inch length keeps the sign manageable and easy to hang.
Commercial options typically cost $25-$60, depending on size and craftsmanship. Crafting your own sign takes about 1-3 hours plus drying time. Kits may offer tropical stencils and embellishments, with many online tutorials available to guide you step-by-step.
Nautical and Retro Designs
Nautical beach signs often feature anchors, ship wheels, lighthouses, or sea creatures. Retro signs may echo mid-century beachfront resort styles with vintage fonts, distressed paint effects, and pastel color schemes. Both appeal to those who want to create a classic seaside or nostalgic vibe in their décor.
To get this look yourself, start with distressed wood or simulate weathering using sandpaper and diluted paint washes. Lettering in navy blue, white, or seafoam green fits the nautical theme. For retro signs, pastel pink, aqua, or coral backgrounds with bold script fonts work well. Sizes around 12 by 24 inches suit porch walls or garden fences.
- Classic sayings: “Gone to the Beach,” “Beach House Rules,” “Catch the Wave”
- Symbols: anchors, starfish, seashells, sailboats
- Color schemes: navy and white, soft pastels, weathered wood tones
- Materials: reclaimed wood, cedar, pine, or composite for durability
- Lighting accents like string lights or lanterns improve the theme
Pricing for ready-made nautical or retro signs ranges from $30 to $75, with handcrafted or vintage pieces costing more. For DIY projects, expect to spend $20-$50 on paint, brushes, and sealant. Avoid overly bright or glossy finishes to keep the authentic weathered look intact.
Best Placement and Usage of Beach Signs Indoors and Outdoors
Beach signs create a warm, coastal vibe when placed thoughtfully indoors or outdoors. Indoors, consider hanging them in entryways, living rooms, or bathrooms where their calming messages and seaside imagery can greet guests or offer a gentle reminder of nature’s beauty. A wooden sign with a watercolor design, for example, adds a splash of maritime spirit that complements beach house decor without overwhelming the room. Position signs at eye level to draw attention, typically 57 to 60 inches from the floor, which ensures a natural viewing angle and a balanced look. Avoid placing them too high or low, which can disrupt room harmony and lessen their visual impact.
Outdoors, beach signs work well on porch walls, fences, or garden sheds, especially when combined with driftwood or sand dollar accents for a cohesive coastal feel. Signs made from weather-resistant materials stand up better in sun and salt air, lasting years with minimal maintenance. Hang signs where they won’t be blocked by plants or outdoor furniture, near seating areas or walkways where they’ll catch the eye. Using sturdy hooks, properly anchored screws, or waterproof adhesive keeps signs secure during wind and rain. For added charm, place a beach sign near a coastal-themed planter or lantern, tying the look together while improving the outdoor setting.
Different styles highlight specific locations. Ombre effect signs serve as stunning focal points in a living room or above a mantel, sparking conversations about beach adventures. Driftwood signs with starfish or sand dollar details blend naturally on garden fences or poolside walls, making the outdoor area feel like part of the seashore. For smaller spaces like bathrooms or hallways, compact wooden signs with simple, serene phrases create pockets of calm without cluttering surfaces. Combining signs with other coastal decor, such as matching seashell garlands or nautical throw pillows, strengthens the theme and makes the space feel unified and intentional.
For best results, measure the wall area before buying or making a sign to ensure appropriate scale. A sign that is too large can overwhelm a small space, while a tiny sign may get lost on a wide, empty wall. Installation tools and materials add a small cost, typically $10 to $20, but investing in quality hardware prevents future damage or fallen signs. Watch for signs that fade quickly or peel outdoors, a sign to upgrade materials or increase protective coatings. Regular cleaning of wooden signs indoors keeps colors bright and details clear, sustaining their coastal charm over time.
Avoiding Common Mistakes When Creating or Buying Beach Signs
Choosing or crafting the perfect beach sign requires more than just picking a pretty design. A common mistake is ignoring the sign’s durability, especially if it’s for outdoor use. Signs made from untreated wood or low-quality materials may warp, fade, or peel when exposed to sun, salt, and moisture typical of beach environments. Always check for signs treated with weather-resistant coatings or materials like cedar, teak, or marine plywood. These last longer and keep their look.
Another frequent error is using inappropriate paint or finishes. Interior paints or sealants can fail quickly outside. Opt for exterior-grade paints and marine varnishes designed to endure UV rays and salty air. This extra protection prevents chipping and discoloration, saving you time and money on repairs. For DIY projects, allow enough drying time, usually 24 to 48 hours between coats, and cure the final layer for several days before placing the sign outdoors.
Incorrect sizing and placement also cause problems. Too small a sign gets lost visually; too large a sign can overwhelm a space or be cumbersome to mount. Measure your space and consider viewing distance to find a balanced size. For signs that will hang outdoors, pick locations slightly shaded from direct sun and high winds to slow weather damage. In case you’ve already bought or made a sign with these mistakes, here are effective fixes:
- Apply a clear marine-grade sealant to protect faded or untreated surfaces.
- Sand and repaint peeling or chipped areas with exterior paint followed by a UV-resistant clear coat.
- Attach weatherproof mounting hardware to prevent rust and secure the sign firmly.
- For warping wood, use clamps and moisture to gently flatten the board, then seal immediately.
- Update the sign’s message or add vinyl decals to refresh faded text inexpensively.
- Relocate signs to more sheltered spots to reduce ongoing damage.
- Use temporary indoor displays for delicate or intricately designed signs to preserve them longer.
Assessing durability before purchase involves checking the material type and finish details. Ask about water resistance and UV ratings when available. Reading customer reviews can reveal how well signs hold up after real-world exposure. Proper mounting recommendations and included installation hardware also signal a seller’s focus on longevity.
Always test a small hidden area with your chosen paint or sealant before applying it fully to avoid damaging the sign irreversibly.
Simple planning and material choices make a big difference in how long a beach sign looks great. Taking steps to protect and repair signs extends their lifespan and keeps your space reflecting that coastal charm for years.
Step-by-Step Action Plan to Create Your Perfect Beach Sign
Follow these steps to start your beach sign project and enjoy a stylish, coastal touch at home or as a thoughtful gift.
- Before You Start: Choose the sign style and material based on where you plan to place it. Check that your material suits indoor or outdoor use to ensure lasting results.
- Day 1: Measure your space or decide the size appropriate for your gift. Knowing exact dimensions helps avoid costly mistakes and ensures your sign fits the spot perfectly.
- Day 2-3: Pick your color palette and design, focusing on beach-inspired hues like soft blues, sandy tans, or coral pinks. This step sets the tone and vibe of your sign.
- Day 4: Create or select your personalized message, including names or quotes. Make sure the wording reflects your style and the recipient if it’s a gift.
- Day 5-7: Assemble or paint your sign using the chosen materials. Work in a well-ventilated area and use weatherproof paint or sealant for durability.
- After 1 Week: Apply lighting or decorative accents like shells or rope if desired. Test lighting after dark to confirm the effect improve the sign’s visibility and appeal.
- 2 Weeks Later: Install or gift your beach sign. Choose a visible, weather-protected placement outdoors or a focal spot indoors, then monitor the sign for any early wear.
Frequently Asked Questions
What Types of Wood Are Best for DIY Beach Signs?
Cedar, pine, and redwood are good choices due to their resistance to moisture and decay. They help your sign last longer in a beachy, humid environment.
How Can I Make My Beach Sign Smell Like the Sea?
Adding a few drops of essential oils like eucalyptus or sea breeze can mimic coastal scents. Avoid strong fragrances to keep the smell subtle and natural.
Can Cinnamon Really Make a Beach Sign Look Rusty?
Yes, cinnamon sprinkled lightly on the paint creates a textured, rusty effect on DIY signs. This trick is budget-friendly and adds a unique look.
Is a Surfboard a Good Base for a Beach Sign?
Surfboards provide a fun, authentic canvas, especially for wood signs like the Beach Club Woody Surfboard. They fit well with beach house décor.
How Can I Safely Hang a Beach Sign Outdoors?
Use weather-resistant hooks or screws designed for outdoor use, and anchor signs on secure surfaces like wood or stucco. This prevents damage from wind and moisture.
What’s a Creative Way to Include Shells on My Beach Sign?
Attach a shell decor kit around the edges or in corners to give a coastal vibe. Use waterproof glue to make sure shells hold through weather changes.
Key Points to Remember
Creating or choosing a beach sign that fits your style and lifestyle adds a fresh coastal touch to your space or a personal gift with meaning. Starting with the right material and design ensures your sign lasts and looks great over time. Take the first step today by deciding where your beach sign will live, and use that to guide your creative choices.