Bathroom Sign Ideas: 12 Creative Signs to Beautify and Personalize Your Space
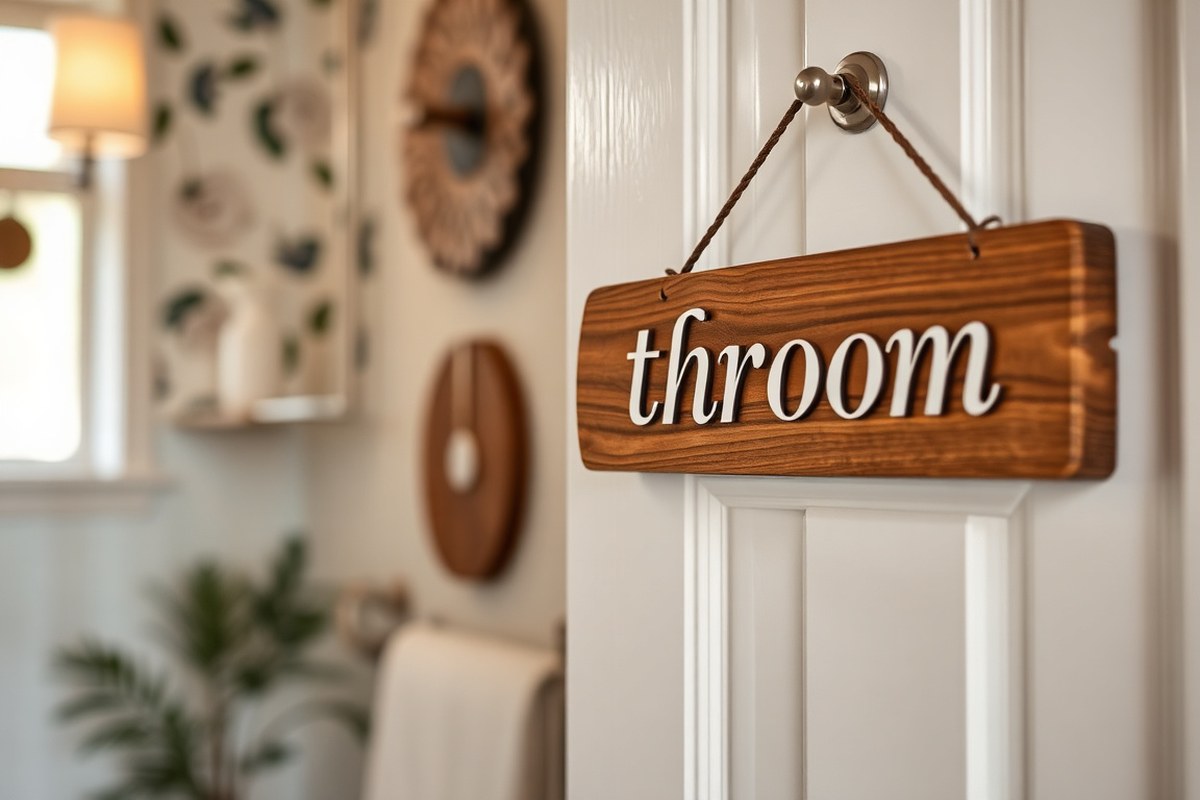
Bathroom sign ideas can transform your space, making it both functional and stylish. Creative signs add personality while reminding guests of bathroom etiquette. Start by choosing a theme that matches your decor and speaks to your household’s vibe.
Key Takeaways
- Select bathroom signs with clear fonts for easy reading and instant recognition.
- Material choice affects durability; wood offers warmth, metal suits modern looks.
- Consider size based on wall space, like a 4×16 inch sign for a coastal vibe.
- Funny or kid-friendly signs can make routines more enjoyable and less of a chore.
- Personalized signs add charm and create a welcoming atmosphere for guests.
- Use 3D or embossed designs to introduce texture and visual interest to plain walls.
1. Creative Bathroom Sign Ideas to improve Any Space
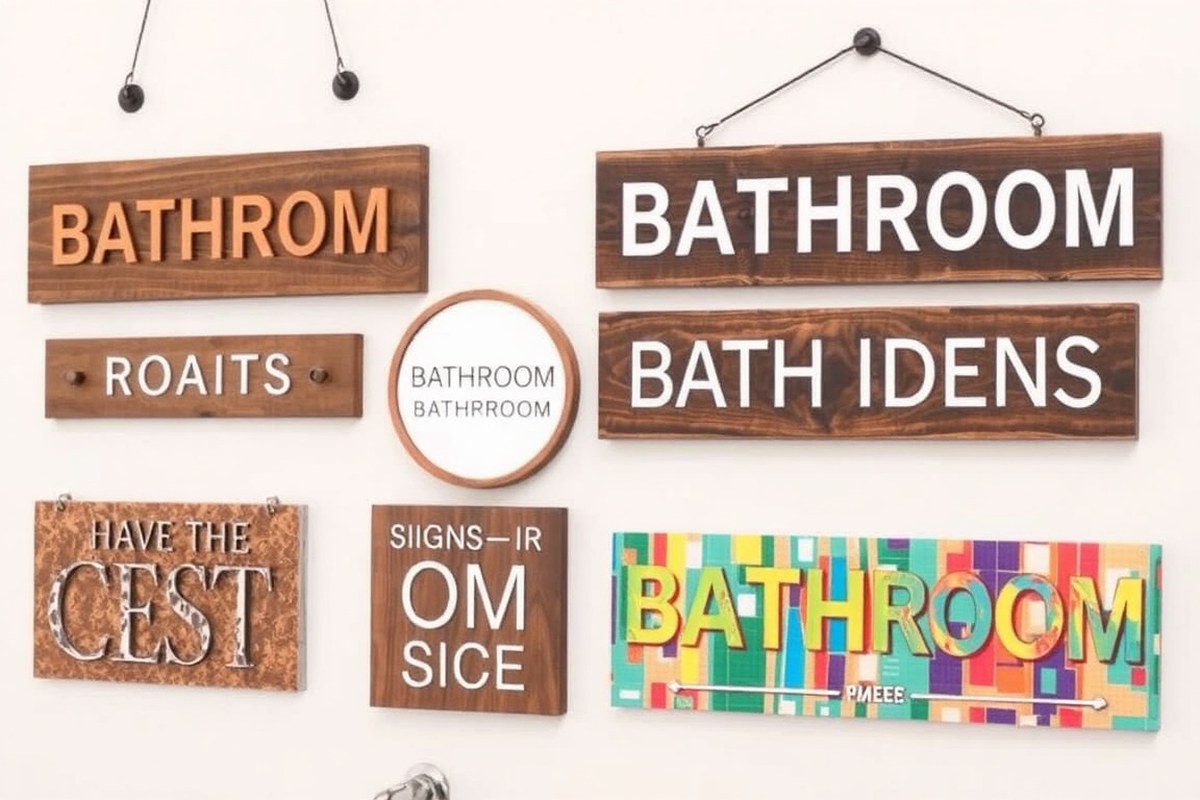
Creative bathroom signs can transform your bathroom from purely functional to a space full of personality and style. Adding a sign with a witty or inspirational message can break the monotony of plain walls and introduce an element of fun or calm. These signs also make the bathroom feel welcoming and complete, reflecting your taste while serving a practical purpose. A well-chosen sign can balance humor, decor, and function, making routine visits more enjoyable for everyone in the household.
To boost your bathroom decor, try choosing signs that offer clever wordplay or motivational quotes. For example, a minimalist black-and-white sign saying “Wash, Rinse, Repeat” adds a modern and clean look while reminding guests of bathroom etiquette in a light and stylish way. Adding a splash of color with signs themed around children’s routines can help in teaching bathroom habits creatively while brightening up the space. Nautical signs work well for bathrooms with sea-inspired decor, tying the whole look together without overwhelming it.
- Use witty phrases like “Please remain seated for the entire performance” for a humorous touch.
- Install minimalist signs featuring simple, elegant fonts for a modern vibe.
- Choose signs with playful, colorful designs to engage kids and encourage good habits.
- Incorporate signs with nautical themes, shells, anchors, or ocean quotes, for coastal decor.
- Opt for wooden or chalkboard-style signs to add warmth and rustic charm.
- Add signs with motivational messages like “You look great today” to start the day positively.
- Try 3D or textured signs for visual interest and a tactile dimension in your bathroom.
The key to improving your bathroom is not only the message but also the style and placement. Properly sized signs around 8 by 10 inches work well over countertops or near towel racks without cluttering the room. Lightweight materials like acrylic or thin wood panels are easy to hang and maintain, typically costing between $10 and $30 for ready-made signs. Custom DIY signs can be made for less than $10 using materials from dollar stores and simple tools, allowing full control over style and wording.
Choose signs that complement your existing decor without overwhelming the space. Coordination with colors, textures, and bathroom fixtures ensures the room feels curated rather than chaotic. Signs placed strategically, near sinks, toilets, or mirrors, catch attention and serve their purpose efficiently. Avoid overly large or too many signs in small bathrooms, as this can make the space feel cramped instead of inviting.
2. Choosing the Right Style and Material for Bathroom Signs

Choosing the right bathroom sign depends mainly on your décor style and the materials that can stand up to moisture and frequent cleaning. Popular styles range from classic and traditional to charming farmhouse and playful kids’ themes. Classic signs often use clean lines and simple fonts, while farmhouse styles feature rustic finishes and distressed wood. Children’s bathrooms benefit from waterproof, colorful signs like those with Mermaid Lagoon themes that blend fun with functionality.
Materials matter because bathrooms are humid environments. Signs made from wood need protective coatings or a waterproof finish to avoid warping or peeling. Plastic and acrylic signs do well with water exposure and are easy to clean, though they might lack the warmth of wood or metal. Metal signs add a sleek or vintage touch but require rust-proofing in damp areas. Vinyl decals work for smooth surfaces and provide an inexpensive, customizable option but don’t add physical texture. Below is a comparison table outlining popular bathroom sign materials, their best uses, upkeep, and typical cost ranges:
| Material | Style Fit | Moisture Resistance | Maintenance | Cost Range |
|---|---|---|---|---|
| Wood (sealed or painted) | Farmhouse, Classic, Rustic | Moderate (needs sealant) | Wipe clean, reseal annually | $15 – $45 |
| Plastic/Acrylic | Modern, Kids’ themes, Minimalist | High | Wipe with damp cloth | $10 – $30 |
| Metal (aluminum, tin, rust-proofed) | Vintage, Industrial, Classic | High (if treated) | Occasional dusting and wipe | $20 – $50 |
| Vinyl Decals | Any, customizable | High | Clean surface before application | $5 – $20 |
| Chalkboard or Slate | Farmhouse, Rustic | Moderate (avoid constant water contact) | Wipe with dry cloth | $15 – $40 |
Matching your sign’s style to your bathroom helps create a cohesive look rather than a random collection of items. For example, classic traditional bathrooms pair well with wooden or metal signs featuring vintage typography, while kids’ bathrooms benefit from waterproof acrylic or vinyl signs that invite playfulness and easy cleaning. Sealing wooden signs or selecting rust-resistant metals safeguards your investment in moist spaces. Vinyl decals offer an affordable way to try different looks before committing.
Always check that any wood-based bathroom sign has a waterproof finish to prevent swelling and peeling in humid conditions.
3. DIY Bathroom Signs: Tools, Materials, and Step-by-Step Process
Making your own bathroom sign lets you customize the look and message to fit your space perfectly. Creating a DIY bathroom sign typically takes two to four hours, depending on the complexity of your design and drying times. Using simple tools and materials, you can craft a sign that adds character and charm without spending much.
Gathering Necessary Tools and Materials
Start by collecting all the essential tools and materials before beginning your project. You’ll typically need a wooden board, acrylic paint, paintbrushes, sandpaper, painter’s tape, and stencils or a pencil for sketching your design. A reverse canvas technique, where you use a stretched canvas frame turned backward as a sign base, offers a stylish alternative to wood, often requiring fewer tools.
Basic supplies often cost under $25 altogether, especially if you have paint and brushes on hand. Choose a smooth wood piece measuring about 10 by 14 inches for a versatile sign size, or opt for canvas frames if you want a textured look. Don’t forget materials to hang the sign, such as adhesive strips or picture-hanging hardware.
Designing and Planning Your Sign Layout
Planning your sign layout carefully saves time later and improves your final result. Begin by selecting the words or phrase for your sign, considering bathroom-friendly messages or personal touches. Next, sketch the layout on paper, deciding on font styles and placement. Using printed stencils or tracing paper can help transfer your design onto the sign surface with accuracy.
Using painter’s tape to mark borders or sections can create clean edges and frames. If you want to include small illustrations like shells or playful icons, draw those lightly in pencil before painting. Keep your design simple at first; intricate details will increase the time and effort needed.
Painting and Finishing Techniques
Painting your DIY bathroom sign requires patience and basic techniques for a polished look. Start by sanding the wood or canvas base lightly for smoothness and better paint adhesion. Apply a base coat of light-colored acrylic paint and let it dry for at least 30 minutes to an hour, depending on humidity and temperature.
Next, paint your letters and designs using small brushes or sponge applicators. Use multiple thin layers instead of one thick coat to avoid drips and uneven coverage. For a weathered or rustic effect, gently sand edges after the paint dries. Seal your sign with a clear acrylic sealer spray to protect it from bathroom moisture. This step takes another 15 to 30 minutes with drying time included.
Drying and Mounting Your Sign
Allow your sign to dry completely before handling or hanging it. Most acrylic paints dry to the touch within 30 minutes, but curing to a hard finish can take 24 hours. Waiting at least several hours ensures the paint and sealant won’t scratch or smudge.
Mounting options vary based on your sign’s weight and surface. For light wooden or canvas signs, 3M Command strips offer a no-damage solution that holds well in bathrooms. Alternatively, small nails or picture hooks provide secure hanging but require wall punctures. Choose placement where your sign is visible but safe from direct water spray or steam.
- Choose your sign base: wood board or reverse canvas.
- Gather supplies: paint, brushes, tape, sandpaper, stencils.
- Sketch and plan your design layout on paper and transfer to sign.
- Sand the base lightly and apply a base coat; dry for 30, 60 minutes.
- Paint your design in thin layers; let each layer dry before next.
- Seal with clear acrylic spray; allow 15, 30 minutes to dry.
- Let the sign cure completely for several hours to 24 hours.
- Install mounting hardware or adhesive strips and hang your sign.
4. Humorous and Kid-Friendly Bathroom Sign Ideas That Delight
Bathroom signs designed for kids combine humor with clear reminders about hygiene and good manners. They make rules easier to follow by turning routine tasks into fun challenges or games, helping reduce bathroom battles. Using playful language or themes, you encourage children to keep the bathroom tidy and respect shared space.
Funny Bathroom Sign Themes for Kids
Humorous bathroom signs for kids often rely on simple, lighthearted phrases or playful reminders. Signs that use rhymes, puns, or cheeky sayings tend to catch a child’s attention. For example, a sign that says “Hello, Sweet Cheeks” in large colorful letters adds a silly tone and invites kids to smile when they enter. Another idea is a sign with “Lift it up, put it down” or “Flush the toilet” written like a playful set of rules, making etiquette feel less like a lecture. Word games also work well, such as creating a word search featuring bathroom-related terms like “soap,” “flush,” or “towels.” This turns the sign into a mini activity that encourages kids to engage with bathroom rules in a fun way.
Creating Clear Rules Through Humor
Signs that state bathroom rules in a humorous style help set expectations for behavior without sounding strict. Phrases like “Please Don’t Forget to Wash Your Hands” alongside cheerful illustrations or cartoons grab attention but remain friendly. A retro style sign with “End Bathroom Etiquette Battles” phrases can serve families by spelling out rules that might otherwise be awkward to voice aloud.
This approach works best if the signs are placed at eye level for children and use bright colors or characters they enjoy. This draws their eyes to the message and makes bathroom time both memorable and manageable.
Examples of Kid-Friendly Bathroom Sign Messages
- “Wash Your Hands Like a Superhero” with a cartoon cape
- “Lift It Up, Put It Down, Let’s Keep It Clean” in bold, easy-to-read font
- “Flush the Toilet, Don’t Forget to Smile” with a smiling toilet illustration
- “Say Hello to Clean Hands!” above the sink area
- “This is a Happy Potty Zone” with fun colors and shapes
- “Little Hands, Big Clean” with handwashing steps illustrated
- Word search or crossword sign with bathroom words highlighted
These ideas blend humor and education to make bathroom use less of a chore and more of an enjoyable routine. Signs like these typically cost between $10 and $30 if purchased pre-made or printed at home for less than $5, depending on materials used.
Placement Tips to Maximize Kid Engagement
Positioning is key. Signs placed where kids naturally look, around the mirror, near the soap dispenser, or above the toilet, remind them at critical moments. Keep signs large enough to read easily (around 8 by 10 inches or bigger), and printed in bold fonts with vivid colors. Using waterproof materials like laminated cardstock or acrylic ensures the signs last despite moisture exposure.
Changing signs seasonally or occasionally updating messages maintains interest. Rotating themes or using chalkboard signs for kids to write their own messages can turn bathroom etiquette into a creative game.
Potential Drawbacks and How to Avoid Them
Overly complicated or text-heavy signs may discourage kids from reading them. Signs that use humor unfamiliar to children or adult-themed jokes might confuse or fail to engage your target audience. Choose language and imagery appropriate for your child’s age and cultural background.
Also, avoid signs that imply blame or shame, as this can create resistance. Keep messages positive and encouraging to promote a willing attitude toward bathroom responsibilities.
5. Personalized Bathroom Signs to Add Warmth and Charm
Personalized bathroom signs bring warmth and a welcoming vibe by reflecting your family’s style and personality. Adding custom touches beyond standard text makes your bathroom feel unique and inviting. You can easily tailor signs with names, themes, or playful designs that match your bathroom’s decor and character.
Choosing Themes That Reflect Your Style
Pick themes that match your bathroom’s mood and your household’s personality. Rustic wood signs paired with humorous quotes create charm, especially for farmhouse or industrial styles. Nautical signs with anchors or sea creatures suit coastal bathrooms, adding a simple but appealing visual cue. For kid-friendly spaces, animal illustrations or cartoon characters combined with names can make the room feel personalized and fun. Using a mix of themes will prevent the decor from feeling too uniform, such as combining paw prints with playful quotes if you have a pet-friendly home. These choices show who you are and create a warm, friendly space.
For example, a “Get Naked” sign over a towel rack adds humor and invites relaxation, fitting a casual bathroom perfectly. Alternatively, a sign featuring your child’s nickname with a bright background adds a personal touch any visitor will notice.
Design Templates to Personalize Your Bathroom Signs
Start with a clear template for your sign’s layout to streamline the creation process. A simple template includes a header line, a decorative icon or illustration, and a personalized name or message below. For instance, a two-line format such as: “[Funny or Welcoming Phrase]” on top and “[Family Name or Nickname]’s Bathroom” beneath works well.
Use design tools like Canva or free sign-making apps to customize fonts, colors, and symbols in a few minutes. If making a wood or metal sign yourself, sketch your design on paper using stencils for lettering or cut-out shapes to keep text neat. For digital printing services, uploading a file with your chosen template speeds up production and can cost between $15 and $40 depending on size and material.
Step-by-Step Tips for Making Personalized Signs
Decide what material fits your bathroom’s style and moisture exposure. Wood is popular for rustic or farmhouse looks but needs protection with sealants or paint designed for damp areas. Metal signs offer durability with a modern or industrial feel and usually survive bathroom humidity without extra coating.
Begin with a background surface of about 8 by 12 inches, large enough to be visible without overcrowding the space. Paint or stain your base untreated wood or order an aluminum board ready to customize. Add your design by painting with waterproof acrylics or using vinyl lettering for clean edges. Allow drying for 24 hours, then seal wood signs with a water-resistant polyurethane to extend longevity.
Place hooks, double-sided tape, or picture hangers on the back depending on your wall type. Avoid stickers directly on doors or painted walls, as removing them later can cause damage. Consider removable mounting strips for renters or if you want to reposition signs easily.
Customizing with Names, Messages, and Art
Incorporate family members’ names or nicknames on your signs to give a personal invitation to guests. You might write “Jane’s Fresh and Clean Zone” for a child’s bathroom or “The Smith Family Washroom” for a shared space. Using phrases beyond basic commands, such as “Wash Your Paws” paired with a cute animal print, adds whimsy and charm.
For kid-friendly bathrooms, choose bright colors and energetic fonts. Combine your personalized sign with related bathroom accessories like a funny towel holder or a chalkboard note for changing family messages or reminders. Handcrafted wooden figures or small gallery wall groups featuring different personalized signs can create a fun focal point, especially in homes with children or pet lovers.
Balancing Costs and Time Investment
Expect to spend between $10 and $40 on materials and supplies for DIY personalized bathroom signs. Ready-made options cost about $20 to $60 depending on size and finish. Homemade signs take 2 to 3 hours including drying times, with additional effort for detailed painting or layering designs. Ordering from custom print shops can save time but reduces control over subtle details.
Good results show in signs that complement your bathroom’s scale and style without overwhelming the space. Avoid overly complicated designs that become hard to read or appear cluttered. Signs that are too small can be missed, while those too large may dominate the room and throw off balance. Proper sealing or choosing moisture-resistant materials prevents warping or fading, ensuring your personalized touch lasts.
Use removable mounting strips in rented spaces to prevent wall damage and make it easy to change signs without residue. Avoid stickers on painted surfaces to keep walls intact.
6. Effective Placement Tips for Bathroom Signs
Place bathroom signs where they’re easy to see and fit the overall style of the room. Common spots include right above or beside the sink, directly on the bathroom door, or near the toilet. These locations make sure the message is noticed at the right time, such as reminding users to wash their hands or flush. For guest or shared bathrooms, signs can help set expectations and add a friendly touch without needing constant verbal reminders. Keeping signs at eye level, about 57 to 60 inches from the floor, matches typical sightlines for adults, improving visibility.
Consider color and size for maximum impact. Bright or contrasting colors catch the eye better in dim bathrooms, while signs matching your decor blend in smoothly. Small signs with rustic frames or playful shapes like clouds or stars work well in children’s bathrooms, especially when placed near the sink or door for daily reminders. Using a chalkboard-style sign lets you update messages easily, which is handy for guest bathrooms where the needs might change. Signs that look intentional and fit the space add charm rather than clutter. Follow this checklist to position your bathroom signs effectively:
- Hang signs at eye level, approximately 57 to 60 inches from the floor.
- Place reminders near sinks and toilets for practical use.
- Use the bathroom door to welcome guests or provide general instructions.
- Choose bright or contrasting colors for visibility in low light.
- Match sign size and style to bathroom decor to maintain a polished look.
- In kids’ bathrooms, use fun shapes and favorite colors to encourage use.
- Consider easy-to-update signs like chalkboards for changing messages.
Signs in guest or shared bathrooms should balance friendliness with clarity. A polite notice about washing hands or keeping the space tidy goes a long way. Because these bathrooms often serve multiple people, choose durable materials like wood or sealed prints that handle moisture without damage. Avoid placing signs too far from where the action happens; a sign by the door won’t remind someone to flush as effectively as one near the toilet. Thoughtful placement improves hygiene habits and improve the bathroom’s style simultaneously.
7. Rustic, Nautical, and Farmhouse Bathroom Sign Inspirations
Nautical and farmhouse style bathroom signs bring character and warmth to your space by reflecting beloved design trends with history and charm. Nautical signs typically incorporate sea-inspired elements like anchors, rope accents, or navy-blue and white color schemes, often on rustic wood backgrounds. These signs remind you of coastal retreats and provide a relaxed, timeless feel that works well in bathrooms aiming for a fresh yet cozy vibe. For example, a rustic wooden sign painted with a simple anchor icon and the word “Beach” or “Wash Up” in white script can instantly set a maritime tone without overwhelming the room.
Farmhouse style bathroom signs emphasize simplicity and practicality with a touch of countryside charm. They often feature distressed wood frames, neutral tones, and clean typography. A popular farmhouse choice might say “Powder Room” on a weathered wooden block or a black-and-white canvas mounted on an earthy wood base. The combination of natural wood tones and muted colors fits perfectly in bathrooms that blend rustic comfort with modern cleanliness. To achieve this look, select signs made from reclaimed wood or pieces finished with light distressing techniques. These give an authentic aged appearance that feels inviting.
Choosing a rustic bathroom sign involves focusing on materials and finishes that suggest natural wear and everyday use. Signs crafted from reclaimed barn wood or knots and grains visible in untreated pine work well. Rustic signs don’t have to be limited to farmhouse themes; those that lean vintage or even antique in style can add elegance without overpowering the design. For instance, a delicate distressed wooden block inscribed with “Powder Room” offers a subtle nod to antique decor while fitting within a rustic setting.
When selecting your sign, consider the bathroom’s overall theme. Rustic and farmhouse signs resonate best in spaces where warmth and texture dominate. Modern, minimal bathrooms may clash with these styles due to their simplicity and clean lines. It’s also wise to pay attention to color contrasts; for example, a sign combining earthy wood with black and white canvas fits a modern farmhouse evenly, avoiding a cluttered look.
Expect to invest between $20 and $60 for a quality rustic or farmhouse sign depending on size and materials. Handmade or reclaimed pieces often cost more but provide better authenticity. Nautical signs can range similarly but sometimes higher if handmade from specialty woods or featuring rope detailing. Proper care involves keeping wooden signs away from direct water exposure to prevent warping or mold.
Overall, choosing between rustic, nautical, and farmhouse signs involves balancing the desired ambience with material choices. Rustic signs highlight natural woods and vintage styles, farmhouse signs add casual country comfort through distressed finishes and muted colors, while nautical signs evoke coastal freshness with sea-themed icons and navy-blue palettes. Matching these signs thoughtfully to your bathroom décor style ensures they improve the space visually and emotionally without feeling out of place.
8. Balancing Humor and Etiquette in Bathroom Sign Messages
Creating bathroom signs that teach manners with a touch of humor requires balancing clear etiquette reminders with lighthearted wording. You want to avoid coming across as demanding or offensive. Clear communication combined with a friendly tone helps guests feel welcomed rather than scolded. The key is choosing words that are polite and playful, making the sign an enjoyable part of the bathroom decor instead of a lecture.
Start by writing short messages that include a question or a gentle request using casual language. For example, instead of “Please do not leave the seat up,” try “Mind the seat? We all appreciate it!” or “Lift with care, sit with grace.” Using rhyme or rhythm adds charm and softens the instruction. Adding a smiley face or subtle icon like a toilet paper roll creates visual cues that reinforce friendliness. Large and bold lettering helps the message stand out, especially when placed where guests naturally look, such as above the toilet or near the sink.
Sample scripts that balance humor and respect include “Spray, Pray, and Put Away,” which reminds users to keep things tidy in a cheeky way, or “If You Sprinkle When You Tinkle, Be a Sweetheart and Wipe the Seat,” a classic that uses rhyme to keep the tone light. Another approach works well for shared bathrooms: “This is Your Throne, Please Keep it Shown, Flush, Wash, Repeat.” For family settings where kids might see the signs, simpler phrases like “Wash Your Hands, Stay Healthy and Grand” add charm and a positive reminder without sounding like a command.
It helps to test your sign ideas on family or friends to ensure they feel friendly and not judgmental. Some humor can be regional or personal, so gauge your audience. Printed signs typically cost between $10 and $30 depending on size and material. Custom wooden signs may run $40 to $80 but add warm character.
Make the sign large enough to read easily from a few feet away, typically at least 8 by 10 inches. Using durable materials like sealed wood or laminated prints keeps the sign looking good after exposure to moisture and cleaning. Mount the sign where it is clearly visible but unobtrusive, near the door, above the toilet tank, or next to the sink work well. Avoid overcrowding with too many signs to keep the bathroom comfortable and visually appealing.
Humor in bathroom signs works best when paired with politeness; avoid sarcasm or anything that might embarrass guests to keep the mood light and respectful.
9. Adding Texture and Dimension with 3D and Embossed Bathroom Signs
Adding texture and dimension to bathroom signs transforms everyday functionality into eye-catching decor. Using 3D details or embossed designs creates tactile interest that stands out in a small, often plain space. Raised letters, layered cutouts, or sculpted figurines give signs physical depth, catching light and shadow to increase visibility and style.
To start, raised lettering is one of the simplest ways to add dimension. For wooden signs, glue wooden or acrylic letters on the base panel. These can be plain or painted to match your bathroom scheme. Raised letters typically add about 1/4 inch to 1/2 inch of depth, enough to create a subtle but appealing shadow effect. This method costs about $5 to $15 depending on letter size and material choice. Acrylic letters work well for moisture-prone bathrooms because they resist humidity better than wood.
Embossing uses heat or pressure to create raised designs directly on materials like metal or leather. Embossed bathroom signs often feature intricate patterns or logos related to the space, like retro-style toilet icons or delicate frames around text. You can buy embossing tools for around $20, or order custom embossed metal signs online, which start near $30. Embossed signs appeal with their classic, refined feel and last well in humid conditions.
Another option is adding small 3D elements such as little figurines or themed cutouts to a flat sign. For example, attach ceramic or resin toilet paper rolls, bathroom slippers, or quirky gender symbols to a wooden base. These pieces bring a playful touch and create a unique visual hierarchy. Use waterproof adhesives suitable for your sign’s material and check drying times, usually 24 hours, to ensure a strong bond. This approach works well if you want a fun, personalized sign that stands out from standard flat plaques.
Materials make a difference in how easily you can add texture. Wood is versatile for raised and attached elements, but requires sealing against moisture. Acrylic is ideal for clean, modern designs with precise raised lettering and light 3D additions. Metal surfaces lend themselves to embossing or laser engraving with raised edges. PVC or foam boards are lightweight and budget-friendly for 3D cutouts but need sealers to prevent water damage.
Good results include crisp edges on letters or shapes, secure attachment of 3D pieces, and a finish that withstands bathroom humidity without warping or peeling. Avoid overly bulky elements that can look cluttered or snag on towels. Also, strong adhesives or proper mounting hardware prevent pieces falling over time.
For a clear process, start by selecting your base material and design. Paint or finish the background first. Then place raised letters or arrange your 3D figures to assess spacing. Attach these carefully using wood glue, epoxy, or a hot glue gun suited for your materials. Allow full drying in a ventilated area at moderate room temperature (65 to 75°F) before mounting the sign. For embossing, follow tool instructions carefully and practice on scraps before applying to your final piece.
10. Maximizing Function: Bathroom Signs with Storage and Utility
Bathroom signs can serve more than one purpose by combining function and decoration. This approach works well in small bathrooms where wall space is limited. Instead of adding a separate sign and storage unit, you can opt for a wall-mounted fixture that acts as both a sign and a container for essentials like toiletries, hand towels, or air fresheners. For example, a floating shelf with the word “Bathroom” or a simple graphic mounted on its front creates a neat storage spot while clearly marking the space.
Choosing dual-purpose signs saves space and keeps the bathroom tidy. Practical examples include a wooden box or crate mounted on the wall with the sign printed or carved on its front panel. This box can hold extra toilet paper rolls or small cleaning supplies. Another idea is a mirrored cabinet with bathroom instructions or names etched on its surface. This not only provides storage but also reduces clutter, which is important for maintaining a clean, organized bathroom.
This type of design matters because it helps prevent confusion for guests rushing to find the right restroom, especially in shared home or rental situations. Placing the sign directly on the storage unit ensures visibility and function in one glance. Also, these fixtures make good use of vertical space, a smart choice for narrow or compact bathrooms.
To implement this solution, first measure the available wall space above your sink or toilet to select a storage unit that fits well without overcrowding. A floating shelf or a shallow box from home stores costs between $25 and $60 depending on materials and size. Attach a customized sign with waterproof paint, vinyl letters, or laser-cut wood to the front of the unit. Use mounting brackets rated for bathroom humidity to prevent rust or damage. Avoid overloading these storage signs; a few well-chosen items keep the look purposeful rather than cluttered.
Good results look like a smooth blend of style and utility. For example, a white floating box with black lettering creates a modern contrast and holds a neatly rolled set of washcloths. A slightly rustic wooden crate with clear labels can suit farmhouse-style bathrooms while storing spare soap bars. On the downside, poor moisture resistance can cause signs to peel or storage to warp, so selecting proper finishing materials and ventilation is key.
For narrower half-baths or powder rooms, consider slimmer shelves or small hanging baskets with the restroom’s name or gender symbol on the front. These delicate designs take less space and provide just enough storage for hand towels or small fragrance sachets. Another variation is a double sign-and-storage unit placed near the entrance with two compartments labeled for “Men” and “Women.” This solution helps avoid mistakes in busy households.
11. Common DIY Mistakes with Bathroom Signs and How to Fix Them
One common mistake when making DIY bathroom signs is choosing paint that doesn’t hold up well in humid environments. Bathrooms can get steamy and moist, which causes chalk paint or non-waterproof ink to peel or smudge quickly. Use waterproof acrylic paint or outdoor-grade spray paint to ensure your design lasts. Let the paint cure for at least 24 to 48 hours before handling the sign, and seal it with a clear waterproof sealant to protect against moisture damage.
Another frequent problem involves mounting signs with the wrong hardware. Signs that are too heavy for simple adhesive strips often fall down. For stability, use wall anchors or screws suited for tile or drywall, depending on your wall type. For a no-damage option with signs under 2 pounds, heavy-duty double-sided hooks can work well, but first test the weight limit of the product.
Uneven spacing and crooked lettering also spoil a sign’s look. Without proper guides, letters may tilt or line up poorly. To fix this, print your design first, then use painter’s tape or a ruler to mark straight lines on the sign board. Apply stencils or vinyl decals rather than freehand painting if you are unsure of your lettering skills. This adds polish and saves time.
Lastly, ignoring the sign’s background color can reduce readability. Too similar colors for text and background make the message hard to see. Opt for high contrast combinations like black on white or navy on pale blue. Test your sign’s visibility under typical bathroom lighting before finalizing.
- Use waterproof acrylic paint and seal the sign with a clear coat.
- Choose mounting hardware based on the sign’s weight and wall material.
- Mark straight lines with painter’s tape to keep lettering even.
- Use stencils or vinyl lettering for cleaner text.
- Pick contrasting colors for better readability.
- Allow paint to fully dry and cure before installation.
- Clean the mounting surface to improve adhesive sticking power.
Before painting, sand the sign surface lightly to help the paint adhere better and prevent peeling later.
Fixing paint smudges is easier when they’re fresh, wipe with a damp cloth immediately. For dried errors, lightly sand the area and repaint. When mounting holes are misplaced, fill the gaps with wood filler or caulk, then repaint to make the surface look good as new. Patience in preparation and setup usually avoids these common pitfalls and ensures your bathroom sign looks smart and stays put.
12. Budgeting and Cost Factors for Bathroom Signs
Bathroom signs generally cost between $10 and $100, depending on size, material, design complexity, and custom features. Basic printed or wooden signs fall at the lower end, around $10 to $25. More durable materials like metal, acrylic, or signs with 3D or embossed elements raise the price toward $40 to $100 or more.
The choice of materials significantly influences the price. Wood is common and budget-friendly, while metal or acrylic cost more because they offer moisture resistance and durability. Personalized or custom-printed signs usually add a fee of $20 to $50 for design and production. Signs with added functionality, such as those incorporating storage or hooks, also tend to be more expensive.
Production methods and finish affect costs too. Hand-painted or laser-cut signs require specialized labor and equipment, increasing the final price. Mass-produced printed signs are cheaper but less unique. Size matters; a 6×12 inch sign costs less than a 12×24 inch masterpiece. Local taxes and shipping fees can impact overall expenses.
| Sign Type | Typical Price Range | Materials | Notes |
|---|---|---|---|
| Basic Printed or Wooden Sign | $10 – $25 | Wood, paper, or vinyl | Simple designs, no customization |
| Metal or Acrylic Sign | $40 – $80 | Steel, aluminum, acrylic | Durable, moisture-resistant, modern finish |
| 3D or Embossed Sign | $50 – $100+ | Wood, metal, resin | Adds texture, needs special production |
| Personalized or Custom Design | $30 – $100+ | Any material | Design fees, unique messages or names |
| Functional Sign (Storage, Hooks) | $60 – $120 | Wood, metal, combination materials | Multi-use, often handmade |
Planning your budget requires balancing cost and features. Choose affordable wood signs for basic reminders, such as bathroom rules to encourage good habits for kids. Signs with humor or decorative designs can range broadly in price, so set aside at least $30 for something with character or personalization.
Ordering custom signs takes extra time. Factor in lead times of 1 to 3 weeks. Avoid rushing if you want hand-crafted quality or special finishes. If the bathroom is humid, invest in water-resistant materials to avoid damage over time, which can cause costly replacements.
Step-by-Step Action Plan for Perfect Bathroom Signs
Use this plan to choose or create bathroom signs that fit your style and needs while adding personality and function to your space.
- Before you start: Measure the space where you want to place the sign to ensure a good fit and visibility.
- Day 1: Decide on the message and tone based on who will use the bathroom, funny, formal, or kid-friendly, and confirm it suits your decor style.
- Day 2: Choose materials that match your bathroom’s humidity level and style, such as waterproof wood for rustic looks or acrylic for a modern touch.
- Day 3: Gather tools and supplies if making the sign yourself; test your design on a small scale to check readability and look.
- Day 4: Create or purchase the sign, focusing on craftsmanship and clear lettering to avoid confusion.
- Day 5: Install the sign securely in the planned spot; make sure it’s at eye level and easy to clean.
- After 1 week: Observe if the sign improve your bathroom’s feel and if users respond as intended; adjust placement or design details if needed.
Frequently Asked Questions
What Unique Themes Can I Use for Kids’ Bathroom Signs?
Use playful themes like Mermaid Lagoon or waterproof signs to keep kids engaged and add fun to the bathroom decor. Grouping signs into themed vignettes makes the design feel intentional.
How Can I Decorate a Bathroom on a Minimal Budget Using Signs?
Choose simple, classic designs made from affordable materials and DIY your signs with basic tools. Minimalist signs can still create a charming, personalized bathroom space without high costs.
What Are Some Examples of Classic Bathroom Sign Ideas?
Classic signs often have simple fonts and clear messages like “Restroom” or “Wash Your Hands,” fitting traditional styles. These work well in timeless or neutral bathrooms and can be made from metal or wood for durability.
How Do I Combine Fun and Practicality in Bathroom Signs?
Combine messages like “Just Add Water” that entertain while reminding users of bathroom etiquette. Signs with waterproof finishes can add both whimsy and function, especially for kids’ bathrooms.
Why Should I Group Bathroom Signs into Themed Vignettes?
Grouping signs creates a cohesive look, making decor intentional rather than random. It improve the bathroom’s overall style and can tie sign themes to the rest of the room’s design elements.
What Materials Are Best for Long-Lasting Kid-Friendly Bathroom Signs?
Use waterproof, durable materials like treated wood or plastic for kid-friendly signs. These withstand moisture and rough handling, keeping signs vibrant and intact over time.
The Bottom Line
Bathroom signs do more than label, they set a mood and make a space more welcoming. Choose or create signs that reflect your household’s personality and needs for a meaningful touch. Start by deciding your bathroom’s style and the message you want to send, then pick materials and placements that carry it well. Take a moment today to pick your sign’s message so you can finalize your choice or project with confidence.