
What Is Reflective Vinyl? A Complete Guide to Types, Uses & Application
What is reflective vinyl? It is a special material that bounces light back to its source, making it highly visible in low light or at night. It works by using tiny glass beads or prismatic patterns that reflect light directly to drivers or observers, improving safety and visibility.
You usually see reflective vinyl on traffic signs, vehicle markings, and safety gear. Before applying it, make sure the surface is clean and smooth for the best stick. Also, remember that reflective vinyl can look different under various light conditions due to slight color shifts.
Key Takeaways
- Reflective vinyl uses glass beads or prism patterns to reflect light straight back for high visibility.
- It’s ideal for vehicle safety markings, traffic signs, and crafting safe, visible decals.
- Clean and smooth surfaces improve vinyl adhesion and reflectivity.
- Color may shift under different lighting, so check appearance in real use conditions.
- Reflective vinyl comes in sheet sizes like 12″x24″ or rolls suitable for small to long runs.
- Outdoor durability ranges from 3 to 12 years depending on the vinyl type and grade.
What Is Reflective Vinyl and How Does It Work?
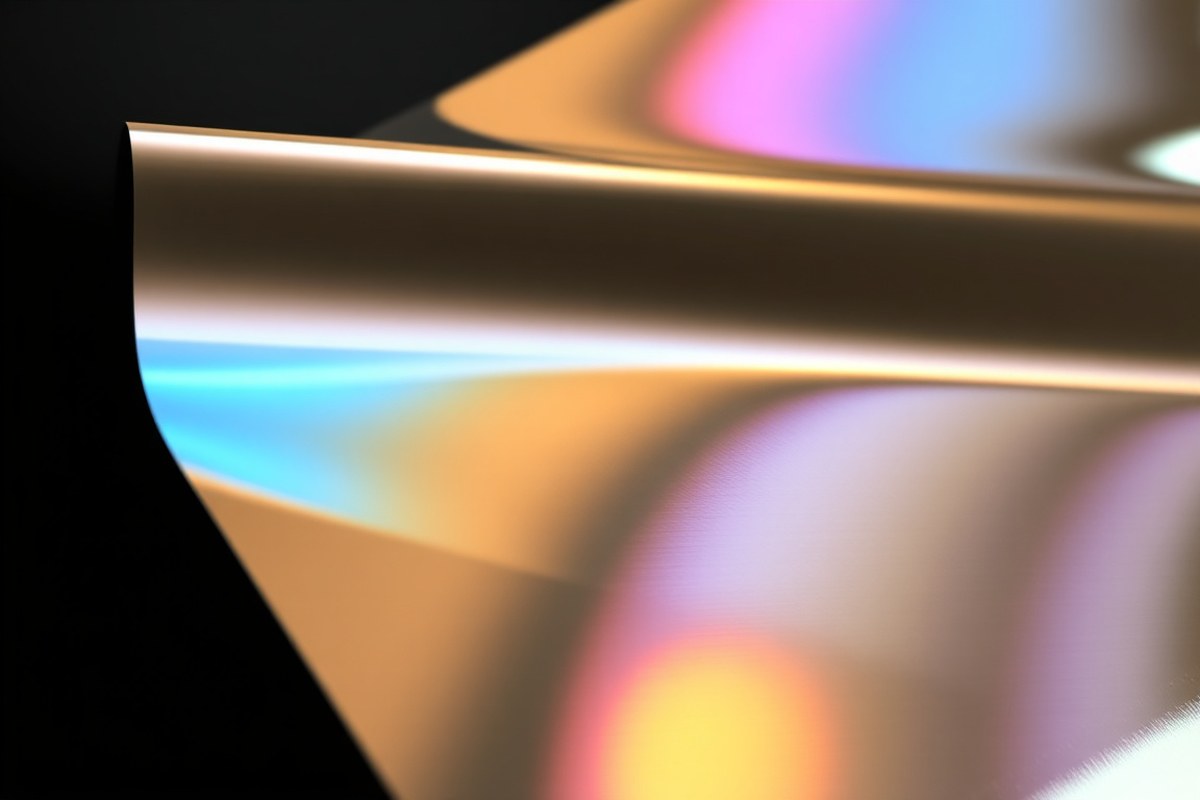
Reflective vinyl is a special type of adhesive film designed to send light back toward its source. Unlike regular vinyl, it contains millions of tiny glass beads or microprismatic elements embedded within the surface. These microscopic features enable the vinyl to bounce light, such as car headlights, directly back to the eyes of the driver or observer.
The core of how reflective vinyl works lies in retroreflection technology. When light hits the vinyl, the glass beads or prism structures capture and redirect the light rays almost exactly back to where they came from.
This means the vinyl appears bright and visible from the original light source, even in low-light conditions. That’s why it’s commonly used on safety signs, emergency vehicles, and road markings to increase visibility at night.
These tiny glass beads or prisms serve as microscopic mirrors. Light rays enter a bead, refract inside, reflect off the back surface, and exit toward the source.
The process requires the vinyl to be applied flat and smooth on a clean panel to avoid distorting the reflection. Different reflective vinyl products offer various reflectivity levels, typically measured in candelas per lux per square meter (cd/lux/m²), which indicate how much light they send back under specific angles.
Reflective vinyl comes in various forms, including options with either glass bead or microprismatic technology. Glass bead vinyl tends to offer good reflectivity at close ranges and lower costs.
Microprismatic types use tiny prisms instead of beads, providing brighter and longer-distance reflectivity but often at a higher price. Some vinyl versions also create a subtle color shift or rainbow effect in different lighting, which can add style while maintaining functionality.
The typical size for DIY reflective vinyl sheets ranges around 12 by 24 inches, suitable for smaller vehicle decals or craft projects. Larger rolls and stripe widths supply options for bigger signage or vehicle striping.
The adhesive backing helps the vinyl stick securely to clean, dry surfaces, but applying it correctly matters to keep the retroreflection working well. Dirt, bubbles, or creases reduce the reflective effect and can lead to patchy visibility.
Types of Reflective Vinyl and Their Key Differences

Glass Bead Reflective Vinyl
This type uses tiny glass beads embedded in the vinyl surface to reflect light. It provides good brightness and works well for commercial signs and flat surfaces. Glass bead vinyl tends to be flexible and easier to install for DIY projects, but its lifetime is shorter, typically 5 to 7 years outdoors.
Applications like storefront signs or vehicle decals benefit from glass bead vinyl’s good visibility at night. It performs best on smooth, clean surfaces and is generally less expensive than microprismatic options. Edge lifting can happen if applied on textured or dirty panels, so thorough surface prep is key.
Microprismatic Reflective Vinyl
This vinyl incorporates microscopic prisms designed to reflect more light than glass beads, resulting in much higher brightness. It lasts longer, around 10 years for high intensity and up to 12 years for diamond grade versions. These types are used extensively on road signs, emergency vehicles, and high-speed roads for maximum safety.
The microprismatic material is less flexible and harder to work with than glass bead vinyl. It requires precise cutting and careful alignment to avoid misplacement, especially on vehicle graphics. Cost is higher, but the superior visibility and durability justify it for critical safety applications.
Grade Comparison: Engineer, High Intensity, Diamond
Grades mainly differ by brightness, lifespan, and cost. Engineer grade uses glass beads and costs the least, lasting about 5 to 7 years with good visibility. High intensity uses microprismatic tech, offers very good brightness, lasts around 10 years, and falls in the mid-price range.
Diamond grade provides the best reflectivity using advanced microprismatic materials, with a lifespan of 10 to 12 years or more. It’s the most expensive and least flexible option. Choose engineer grade for commercial signs or budget jobs, high intensity for road signs, and diamond grade for emergency services or high-speed highway signage.
Tip: Always clean and dry the surface before applying reflective vinyl to avoid edge lift and maximize adhesion.
How Long Does Reflective Vinyl Last and What Affects Its Durability?
Reflective vinyl usually stays effective outside for 5 to 12 years, based on its grade and quality. Higher-quality types, such as engineering-grade or permanent adhesive vinyl, tend to last closer to 12 years. Lower-cost vinyl might only remain reflective for 1 or 2 years, especially under tough weather.
Exposure to sunlight, rain, temperature swings, and abrasion can all reduce the lifespan of reflective vinyl. UV rays gradually break down the vinyl’s surface, dulling its reflective properties.
Water and moisture from rain or washing won’t harm quality reflective vinyl since it is waterproof. Still, prolonged wet conditions combined with dirt or chemicals may weaken adhesives or cause edges to lift.
Any outdoor vinyl should be cleaned gently with mild soap and water to maintain its reflectivity. Avoid harsh chemicals or scrubbing too hard, which can damage the film.
Installing reflective vinyl on a clean, dry surface helps the adhesive bond strongly and resist peeling over time. Protecting edges with clear laminate or sealant can extend durability in rugged environments.
Thicker reflective vinyl usually holds up better against wear and tear but costs more. Rolls sized for larger graphics or longer runs let you cover more area without seams that can lift. Smaller sheets serve well for smaller decals or craft projects but may have shorter use spans outdoors.
Applying Reflective Vinyl: Tools, Steps, and Tips for Best Results
You can apply reflective vinyl yourself with the right tools, clean surface, and steady technique. Avoid using any application fluid, as it often causes bubbles and poor adhesion. Use recommended tools like a felt-edged squeegee and follow temperature guidelines for the best results.
Preparing the Surface for Application
Clean your surface thoroughly before applying reflective vinyl. Dirt, dust, oil, or moisture will prevent the vinyl from sticking properly. Make sure the surface is smooth and free of texture, especially for large vehicle graphics.
The surface temperature should be at least 15°C (59°F) for durable adhesion. You can use isopropyl alcohol and a lint-free cloth to wipe down the area. Avoid wet application methods, as vinyl manufacturers such as 3M, Oracal, and Avery do not recommend them.
Applying the Vinyl Smoothly and Bubble-Free
Follow these steps to apply vinyl without bubbles or wrinkles. Use an air egress liner like Oracal’s Rapid Air technology if available for easier bubble removal. Start slowly and keep the vinyl taut but not overstretched.
- Measure and mark the placement to align your vinyl correctly.
- Peel back a small section of the liner at one edge.
- Press the vinyl onto the surface using a felt-edged squeegee, working from center outwards.
- Gradually peel away the liner while smoothing out the vinyl with the squeegee.
- Work carefully around curves and contours, repositioning if needed before final adhesion.
- Check for bubbles and push them out gently with the squeegee or a pin for small ones.
Don’t rush the process. Moving the vinyl too quickly or folding it may cause creases or air pockets.
Finishing Touches and Curing Time
After application, give the vinyl time to settle and bond to the surface. Avoid washing or heavy contact for 24 to 48 hours. This curing period ensures the adhesive bonds strongly and maintains reflectivity.
If edges lift or bubbles appear later, apply gentle heat with a low setting heat gun and press down with the squeegee. Remember, reflective vinyl like Avery’s or Oracal’s products offers excellent adhesion but needs careful handling to prevent failure modes caused by poor installation.
Choosing the Right Reflective Vinyl for Your Project
Choose reflective vinyl by matching its brightness and grade to your project’s visibility and durability needs. Also consider the surface you’ll apply it to, the budget available, and any safety standards you must meet. Different vinyl types suit decorative uses or demanding safety tasks, so select carefully for the best results.
Matching Vinyl Grade to Application Needs
Reflective vinyl comes mainly in regular, engineer, and high-intensity grades. Regular grade suits decorative projects or low-speed environments where basic reflectivity is enough. Engineer and high-intensity grades offer stronger reflectivity, essential for traffic signs or vehicle safety markings that require notice from long distances and multiple angles.
Visibility changes by vinyl grade, high-intensity sheeting reflects more light across wider angles and greater distances. For example, vehicle markings typically use high-intensity or premium microprismatic films like 3M 680 Series Scotchlite, especially when safety or legal compliance is a factor. Decorative vinyl can be simpler, like Diffuse Microprismatic Red, which works well on flexible posts and adds visibility without traffic-grade brightness.
Considering Costs vs. Durability
Higher-grade reflective vinyl usually costs more but lasts longer and stays bright. Prices vary widely, basic reflective tapes can cost $1 to $3 per linear foot, while premium microprismatic films might run $5 to $10 per foot. Consider how long you want the vinyl to last; some last 5+ years outdoors with proper application, while budget options might fade or peel sooner.
The surface type affects durability too. Vinyl adheres best on smooth, clean surfaces like metal or glass.
Rough or curved surfaces may need special vinyl with extra flexibility and stronger adhesive, which tend to be pricier. Spending upfront on quality often saves money on replacements and avoids failed applications that reduce safety.
Special Considerations for Vehicle and Safety Markings
Vehicle and safety markings have strict standards to meet, including brightness levels and weather resistance. Use vinyl that meets Department of Transportation (DOT) or state regulations, like the R3B-compliant Diffuse Reflective Films. These specialized materials keep their reflectivity under rough conditions and long-term exposure.
For fleet vehicles, choosing a premium reflective vinyl improves nighttime visibility, which can reduce accidents. Also look for vinyl labeled for vehicle use to ensure it withstands washing, fuel spills, and temperature changes. Vinyl that doesn’t meet these demands may peel off or lose reflectivity quickly, compromising safety.
Always check the product specs and local regulations to ensure your reflective vinyl choice meets visibility and safety requirements for your project.
Printing on Reflective Vinyl: Capabilities and Limitations
You can print on many types of reflective vinyl, but not all are suited for full-color printing. Thermal resin printers work well with most reflective films, though some vinyls might not hold the resin print as firmly.
For solvent or eco-solvent inkjet printers, only specific reflective vinyls are compatible. Always check the manufacturer’s recommendations before you print to avoid damaging the material or wasting supplies.
When using solvent or eco-solvent inkjet printers like the PrismJET 54 Gen2 or the MUTOH ValueJet, set the platen and pre-heaters to about 40°C and 45°C. Drying temperature should be around 50°C. Choose an ICC profile made for glossy vinyl to get better color accuracy and adhesion. This setup helps the ink bond well to the reflective layer, preventing smudging or fading.
Colors on reflective vinyl usually don’t appear as bright as on regular vinyl. The vinyl’s reflective microprism or glass beads can change how light hits the colors. Using lighter and more saturated colors often works better.
After printing, adding a compatible reflective overlaminate extends the graphic’s life and boosts UV resistance. The laminate also protects against scratches and weather.
If you are printing vehicle graphics or conspicuity markings, confirm the vinyl meets ASTM D4956 standards. This ensures the reflective film performs well under practical conditions like night visibility.
For example, you might choose a vinyl specifically rated for vehicle use to meet safety rules. Following these details ensures your signs or decals keep their visibility when hit by headlights.
Printing on reflective vinyl takes patience and a small setup adjustment. Using a test piece helps tune the printer settings before doing the full batch. Print a small sample, check clarity and color, and see how the reflective layer shows through the ink.
Tight control over temperature and ink flow often stops ink from running or peeling. Prices vary, but expect to invest more in specialized reflective films and laminates than in standard vinyl for best results.
Common Application Challenges and How to Fix Them
Reflective vinyl can scratch or peel if it’s not handled or applied properly. Scratches often happen during transport or installation, especially if you press too hard or use sharp tools.
Peeling usually starts if the surface wasn’t clean or the vinyl didn’t get enough time to stick down well. You can avoid these issues by prepping the surface with soap and water, then wiping it with rubbing alcohol before applying.
Bubbles are one of the most common problems you’ll see during application. They trap air under the vinyl and make the surface uneven.
Small bubbles can be smoothed out by pressing gently with a squeegee or a credit card wrapped in a soft cloth. For bigger bubbles, poke a tiny hole with a pin to let the air out, then press down again to flatten the vinyl.
Peeling edges often mean the vinyl didn’t get a proper seal. Using a heat gun or a hairdryer on low heat helps soften the material, making it cling better around curves or corners.
Avoid overhearing, which can warp the vinyl or fade its reflective layer. Let the vinyl rest for 24 to 48 hours without touching it so the adhesive bonds fully.
- Clean surface with soap, water, and alcohol before applying
- Use a soft squeegee or wrapped credit card to remove bubbles
- Pop large bubbles with a pin and smooth out carefully
- Heat vinyl gently to improve adhesion on curves and edges
- Wait 1 to 2 days before handling or washing the surface
- Store vinyl flat and away from direct sunlight before use
- Avoid sharp tools that can scratch the reflective surface
Color shift can happen if reflective vinyl is exposed to harsh chemicals or too much sunlight for a long time. Choose black reflective vinyl if you want a stealthier look, as it shows less dirt and fading.
When you spot scratches, light buffing with a microfiber cloth might help, but deep gashes usually need replacement. Following these steps will help keep the vinyl looking brighter and ensure it stays stuck for months or even years.
Typical Applications and Safety Standards for Reflective Vinyl
Reflective vinyl is commonly used on road signs, emergency vehicles, and workplace safety signage to improve visibility in low-light conditions. Commercial vehicle wraps often include reflective elements to improve both safety and branding. Emergency service vehicles like ambulances and fire trucks must use reflective vinyl following strict rules for visibility and identification.
Many states and countries require reflective markings on vehicles according to standards such as the European ECE 104 regulation and the U.S. R3B classification. These standards specify the type, color, and placement of reflective materials to ensure drivers and pedestrians see vehicles clearly at night or in poor weather. Retail or utility vehicles using reflective vinyl also benefit from the same attention to safety compliance to reduce accidents.
The most common colors are red, white, and yellow because they meet visibility and safety requirements while fitting road and workplace standards. Engineer Grade reflective vinyl offers a balance of cost and performance for typical signage, while more advanced grades serve emergency and high-risk environments better. Proper application techniques include cleaning surfaces and applying in moderate temperatures to ensure durability.
| Application | Common Uses | Relevant Standards |
|---|---|---|
| Road and Safety Signs | Street signs, hazard markings, construction areas | R3B, ASTM D4956 |
| Commercial and Fleet Vehicles | Branding wraps with reflective elements, safety markings | R3B, DOT reflective requirements |
| Emergency Vehicles | Ambulances, fire trucks, police cruisers | ECE 104, NFPA 1901, SAE J595 |
| Workplace Safety | Warning signs, high-visibility markings | OSHA, ANSI/ISEA 107 |
Always check local regulations before applying reflective vinyl to vehicles or signs, as non-compliance can lead to fines or safety risks.
Step-by-Step Action Plan for Using Reflective Vinyl
Use this plan to get the most from your reflective vinyl project, ensuring safety and durability.
- Before you start: Choose the right type of reflective vinyl based on your project needs, prismatic for high visibility or glass bead for cost-effectiveness. Confirm your surface is clean and dry.
- Day 1: Gather tools like a squeegee, cleaning supplies, and a cutting tool. Test a small piece on your surface to check adhesion and reflectivity.
- Day 2: Cut vinyl to size using precise measurements. Use a sharp blade to avoid jagged edges that can peel prematurely.
- Day 3: Apply the vinyl slowly from one edge to the other to avoid air bubbles. Use a squeegee to firmly press it down; if no bubbles appear, adhesion is good.
- Day 4: Allow 24 hours for vinyl to fully bond. Check by gently pressing on the edges, if it lifts, reapply or consider a different vinyl type.
- Week 2: Assess the reflectivity by viewing your sign or vehicle in low light with a flashlight or headlights. Make sure the light bounces back clearly.
- Month 1: Inspect for wear or peeling. Clean gently with soap and water; avoid harsh chemicals that reduce reflectivity.
Frequently Asked Questions
What Is Reflective Vinyl Used for Besides Vehicle Safety?
Reflective vinyl is also used for road signs, outdoor advertisements, and personal safety gear. It helps improve visibility in low light, making these applications safer and more noticeable.
Can Reflective Vinyl Be Removed Without Damaging Surfaces?
Most reflective vinyl can be removed carefully without damage if peeled slowly and heat is applied. However, the ease depends on the surface type and vinyl grade. Always test a small area first.
Does Reflective Vinyl Require Special Cleaning Methods?
Yes, gentle cleaning with mild soap and water is recommended to preserve reflectivity. Avoid abrasive cleaners or rough scrubbing, which can damage the reflective surface or adhesive.
Can Reflective Vinyl Be Layered with Other Vinyl Types?
You can layer reflective vinyl with other vinyl but it may affect reflectivity or adhesion. Use compatible products and test layers to avoid peeling or color shifts.
Is Reflective Vinyl Waterproof and Weather-Resistant?
Yes, reflective vinyl is designed to resist water and weather, ideal for outdoor use. However, harsh environments can shorten its lifespan, so choose a suitable grade for your climate.
How Does the Color of Reflective Vinyl Affect Its Visibility?
Color impacts reflectivity; lighter colors like white reflect more light while darker shades like black reflect less. The color also changes the vinyl’s appearance under different light angles.
The Bottom Line
Reflective vinyl offers you a reliable way to improve visibility and safety when chosen and applied properly. Start with a small test area to see how it performs on your surface. Then, apply with care to enjoy your project’s durability and brightness for years.