How to Make a Round Wood Sign: A Complete Step-by-Step Guide for Beginners
How to make a round wood sign begins with choosing the right wood, tools, and design for your space or gift idea. Use edge-glued pine panels sized 12 to 15 inches for indoor signs, and pick 16 inches or larger for outdoor displays. Starting with smooth, sanded wood ensures paint or stain adheres well and the final product looks polished.
Key Takeaways
- Select a 12″-15″ edge-glued pine wood panel for easy shaping and affordability, costing about $8 at home improvement stores.
- Opt for wood 16 inches or larger if your sign will be displayed outdoors for better durability and visibility.
- Sand the wood surface thoroughly before applying paint or stain to eliminate rough patches and ensure smooth coverage.
- Allow wood stain or paint to dry completely, typically 2 to 3 hours, before adding decals or finishing touches.
- Use transfer tape to carefully apply vinyl decals, making sure the painted surface is dry and not sticky.
- Consider adding burlap ribbons or bows for a rustic, personal touch that complements wood textures.
Choosing the Right Wood and Tools for Round Signs
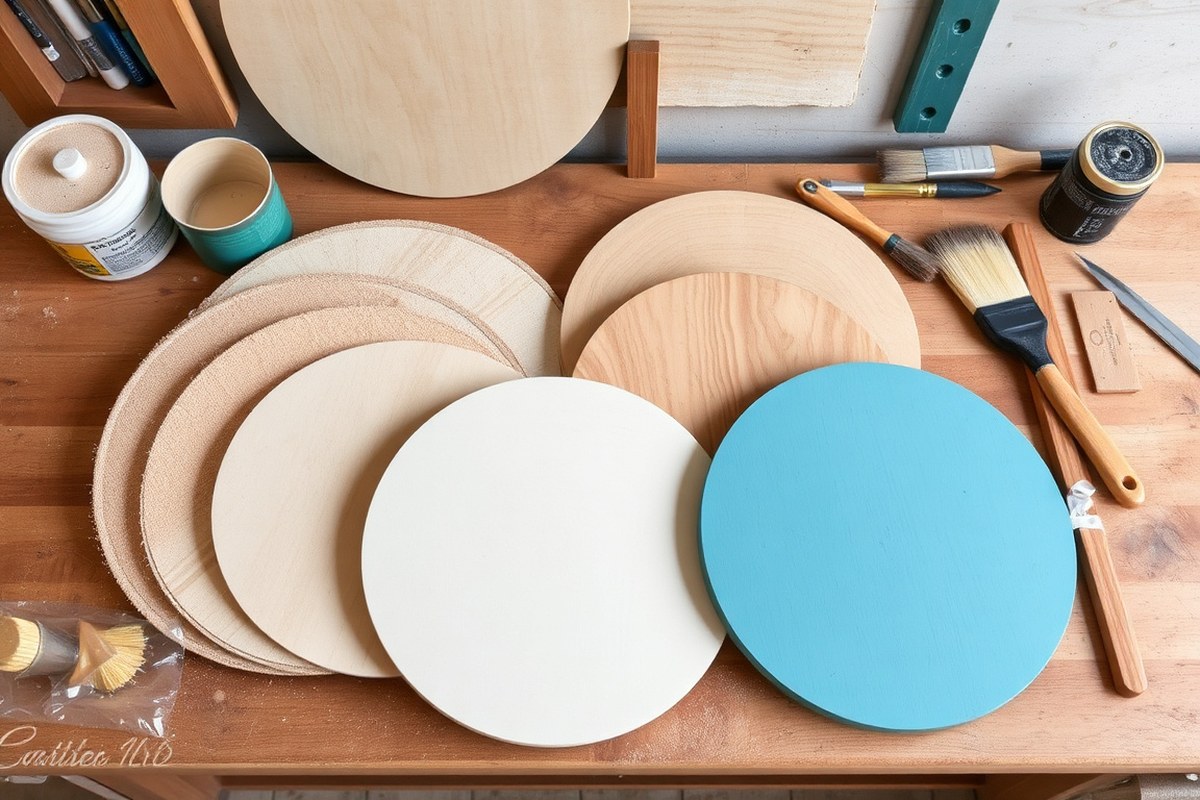
Choosing the right wood for a round sign means picking a type that is easy to work with, looks good, and holds up well. Softwoods like pine and cedar are popular options because they are forgiving for beginners and allow smooth sanding and painting. Reclaimed wood adds character and sustainability but may require more prep work to fix imperfections and remove nails.
Size and thickness matter too. For a durable round wood sign, aim for a diameter of at least 12 to 16 inches. Thickness should be around 3/4 inch (about 19 mm) to prevent warping and to provide enough surface for any carving or paint layers. Pre-cut round edge-glued pine panels are widely available at home improvement stores and cost around $7 to $15 depending on size.
Working with power tools like a jigsaw or power sander speeds up cutting and smoothing, but they aren’t strictly necessary. Hand tools such as a coping saw, sandpaper, and a sanding block can suffice for beginners who want to avoid power tools. These basic tools keep costs low and simplify cleanup.
| Wood Type | Cost per Board | Ease of Use | Durability |
|---|---|---|---|
| Pine | $7 – $15 | Easy to cut, sand, and paint | Moderate, may dent easily |
| Cedar | $15 – $25 | Easy to work, resistant to rot | Good for outdoor use |
| Reclaimed Wood | Often free or low cost | Requires prep, irregular surface | Varies, may have damage |
Gather these essential tools and supplies to start:
- Measuring tape and pencil for marking
- Hand saw or jigsaw to cut your round shape if needed
- Sandpaper or sanding block (grits 80, 120, and 220) for smoothing edges and surface
- Paintbrushes and painter’s tape for clean lines
- Protective gear such as gloves and dust mask
Optional tools that can help but aren’t required include:
- Power sander to speed up finishing
- Router for rounding edges or adding details
- Clamps to secure wood during cutting or painting
By picking the right wood and assembling these tools, you set yourself up for a smooth project. Pine boards are affordable and widely available, while cedar suits outdoor signs better due to its weather resistance. Using the proper thickness and diameter makes your sign sturdy and visually balanced. Working with hand tools keeps the cost and complexity low, while power tools save time, especially for larger or multiple signs.
Preparing and Sanding Your Round Wood Surface
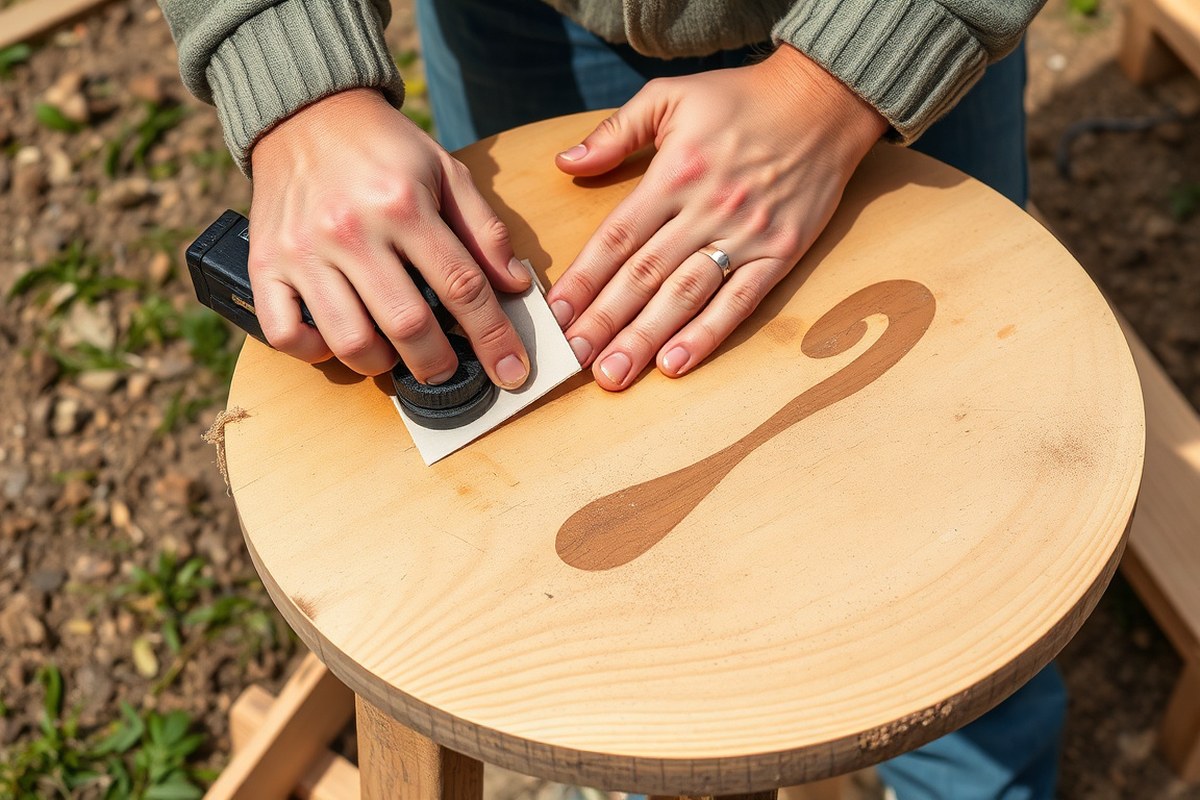
Preparing the round wood surface through proper sanding is essential for achieving a smooth, paint-ready finish. Start by sanding any rough edges and surfaces to create an even base. A systematic approach using different sandpaper grits ensures the wood is ready to accept paint or stain without imperfections.
Initial Rough Sanding with 120-Grit Paper
Begin sanding your wood round with 120-grit sandpaper. This grit is coarse enough to remove rough spots, level uneven surfaces, and smooth out any small bumps along the edges. It’s important to sand in the direction of the wood grain to avoid scratches that show up later in the finish.
Use firm but controlled pressure while sanding to avoid gouging the wood. Pay special attention to the edges, which tend to be rougher after cutting. Initial sanding also helps eliminate minor surface flaws and prepares the wood to adhere to paint or vinyl.
Fine Sanding for a Smooth Finish (220-Grit)
After the rough sanding, switch to 220-grit sandpaper for a fine sanding step. This finer grit smooths the surface so the wood feels almost silky to the touch. It removes the scratches left by the 120-grit paper and ensures paint or stain goes on evenly without blotches.
Lightly sand the entire round wood surface, including edges. This stage requires less pressure as you only want to refine the surface rather than remove wood. After sanding, wipe the surface with a tack cloth or a damp rag to remove all dust before painting.
Treating Knots and Imperfections
Knots and other imperfections in the wood can absorb paint unevenly and affect the final appearance. Sand these areas carefully with 120-grit paper first to smooth out raised parts or rough edges. If knots cause depressions or holes, fill them with a wood filler suitable for your type of wood. Let the filler dry fully, then sand the filled spots with 220-grit paper to blend them in.
For any dark stains or resin spots, sand more aggressively with 120-grit paper until the discoloration reduces. Keep in mind that deep knots may still stain through paint without sealing, so applying a stain-blocking primer before painting might be necessary for a clean look.
- Cut your wood round to the desired size and check for rough edges.
- Use 120-grit sandpaper to sand all surfaces and edges in the direction of the wood grain.
- Inspect the surface for knots, holes, or stains and apply wood filler where needed.
- Allow wood filler to dry completely according to the product instructions.
- Sand filled areas smooth with 220-grit sandpaper along with the rest of the wood.
- Lightly sand the entire surface with 220-grit sandpaper for a fine finish.
- Wipe away all dust using a tack cloth or damp rag.
- Your wood surface is now smooth and ready for painting or staining.
Tip: Avoid skipping the 220-grit sanding step; even a light sanding with fine grit removes rough scratches and improves paint adhesion for a professional finish.
Design Transfer Techniques for Round Wood Signs
Accurately transferring your chosen design onto a round wood sign can be done using popular methods like vinyl stencils with transfer tape, heat transfer vinyl, or hand-painting by tracing or freehand. Each approach offers different ease, detail precision, and cost factors, so picking the right method depends on your tools and skill level.
| Method | Pros | Cons | Best For |
|---|---|---|---|
| Vinyl Stencils with Transfer Tape | Clean edges, reusable, good for intricate shapes | Requires vinyl cutting machine, extra steps | Medium to detailed designs |
| Heat Transfer Vinyl (HTV) | Durable finish, smooth application, vibrant colors | Needs heat source, may require special tools | Bold, graphic designs on wood |
| Hand-Painting or Tracing | No special equipment, flexible for custom art | Less precise, can be slow, requires steady hand | Simple designs or personalized touches |
Using Vinyl Stencils and Transfer Tape
Vinyl stencils cut from adhesive craft vinyl allow you to paint within crisp edges. Transfer tape is key for moving the stencil from its backing to the wood without distorting the design. This method is ideal for sharp, clean lines and delicate details. Follow these steps to apply vinyl stencils using transfer tape:
- Cut your design from adhesive craft vinyl, then weed away excess vinyl not part of the design.
- Place the vinyl design onto a piece of clear transfer tape, using a squeegee to press firmly and remove air bubbles.
- Peel the backing of the vinyl away, leaving the design on the transfer tape.
- Position the taped vinyl stencil onto your prepared wood round, pressing down firmly with the squeegee to ensure adhesion.
- Slowly peel away the transfer tape, leaving the vinyl stencil on the wood.
- Paint over the stencil with your chosen paint, then allow it to dry completely.
- Carefully remove the vinyl stencil to reveal your design, touching up edges as needed.
Applying Heat Transfer Vinyl on Wood
Heat transfer vinyl offers a smooth, permanent finish on wood but requires a heat source like an iron or heat press. The vinyl cuts your design, which then adheres under heat, making it ideal for bold, colorful designs that last. Steps for applying heat transfer vinyl to a wood sign:
- Cut your design on heat transfer vinyl using a cutting machine and weed out excess vinyl.
- Place the HTV design vinyl-side down on a smooth, clean wood surface.
- Cover the vinyl with a thin cloth or parchment paper to protect it during heating.
- Apply firm heat evenly using an iron set to medium-high for about 15 to 30 seconds, or use a heat press at roughly 305°F (150°C) for 10 to 15 seconds.
- Allow the wood and vinyl to cool slightly before carefully peeling off the clear carrier sheet.
- Check adhesion; if edges lift, repeat heating briefly.
Hand-Painting or Tracing Your Design
This method works well if you want to customize freehand or don’t have vinyl tools. Tracing a printed design with graphite or transfer paper transfers outlines onto your wood, enabling accurate painting.
For tracing, place graphite transfer paper graphite side down on your wood. Tape your printed design on top. Next, use a firm pencil to trace over the design lines, transferring graphite marks onto the wood surface. Remove papers carefully and paint within the traced outlines.
Hand-painting freehand takes patience and a steady hand. Use fine brushes for detail and practice on scrap wood before working on your sign. Good lighting and magnification can improve precision. Always start with lighter paint, building up color gradually to avoid mistakes.
Painting, Staining, and Finishing Your Wood Sign
Choosing between painting or staining your round wood sign depends on the look and feel you want. Staining emphasizes the grain and natural beauty of the wood, giving a warm, rustic appearance. Test the stain on a scrap piece of the same wood to check color and absorption before applying it to your sign. Use a lint-free cloth or brush to apply the stain evenly, and wipe off any excess to prevent blotches. Allow at least 24 hours for the stain to fully dry before adding paint or layers.
Painting offers a wide variety of finish options and colors. Acrylic paint works best for wood signs because it dries quickly, usually within 20 to 30 minutes between coats, and adheres well to wood surfaces. Apply thin, even coats using a synthetic brush or small foam roller for smooth coverage. Let each coat dry completely before applying the next, which usually takes about an hour under normal room temperature (around 70°F). For best results, plan on two to three coats to get vibrant and even color.
Seal your wood sign to protect it from wear and environmental damage. For indoor signs, clear polycrylic sealants work well since they are water-based, easy to apply, and offer excellent clarity without yellowing. Use a brush or spray in a thin layer and allow 2 to 3 hours of drying time between coats, applying 2 to 3 coats for durability. Outdoor signs require stronger protection. Exterior-grade spar urethane or outdoor varnish is designed to withstand moisture, UV rays, and temperature changes. These sealants are oil-based and take longer to dry, allow about 24 hours between coats and apply at least 3 coats, sanding lightly with fine-grit sandpaper between coats for a smooth finish.
The right finish depends on the environment where the sign will hang. For outdoor use, prioritize waterproof, UV-resistant sealants to prevent fading and cracking. Indoor signs do not face harsh weather, so polycrylic protects against scratches and minor moisture while keeping the wood’s colors bright. Avoid using oily stains or finishes inside where strong odors could linger. Cost-wise, a quart of acrylic paint usually runs $5 to $10, stains about the same, and sealants vary from $8 for a small bottle of polycrylic to $15 or more for outdoor varnishes. Plan on multiple coats and drying time over several days to get a lasting, professional look.
Adding Decorative Details and Personalization Ideas
Adding decorative details and personal touches can make your round wood sign stand out and fit your style or the season perfectly. Popular additions include bows, greenery, and ribbons, which bring a fresh, textured look especially suitable for holiday or seasonal decor. To attach these securely, use a staple gun for ribbons and greenery, stapling to the back edge or underside of the sign where it won’t be seen. For bows or bulkier 3D elements, attach ribbon to the back first, then tie or glue the bow onto the ribbon, ensuring it sits firmly without damaging your painted surface.
Personalization often involves monograms or family names, which you can create using stencils and paint, vinyl decals, or wood cutouts. When painting, pick a contrasting color to your background for readability. Stencils help maintain clean lines; tape them in place before applying paint in thin layers, allowing each coat to dry thoroughly. Skilled use of wood glue and finishing nails can secure wooden letters or shapes, adding dimension and an upscale appearance to your piece. Here are some popular decorative additions and how to attach them:
- Ribbon, staple to the back edge or a narrow band of wood glued around the sign’s perimeter
- Greenery (eucalyptus, pine sprigs), secured with a staple gun or floral wire twisted behind the ribbon
- Bows, tied onto the attached ribbon or glued carefully with hot glue after paint fully cures
- Wooden monograms or letters, attached with wood glue plus finishing nails for extra hold
- Knobs or hooks, fastened with small screws, adding function to your decorative sign
- Faux flowers, glued with hot glue, positioned to balance the sign’s design
Designing monograms or names means considering size and style balance. Choose fonts or letter shapes that fit the sign’s diameter without crowding edges. For instance, a 12-inch round sign should have letters roughly 2 to 4 inches tall depending on how many characters you want to include. Use pencil sketches on paper to plan spacing, or make a paper template with cutout letters for positioning before committing to paint or glue.
Make sure all paint or stain is completely dry and matte before adding any glued or stapled decorations to avoid peeling or slipping later.
The time and cost for these extras vary. Staples and ribbons cost under $10 for basic supplies and add about 10 to 15 minutes to assembly. Wooden letters or hooks typically cost $5 to $15 depending on style and take longer to attach carefully. These additions bring personality and 3D appeal that a flat painted sign doesn’t have, increasing visual interest without much extra effort.
Common Mistakes and How to Fix Them
Paint bleeding under stencils happens when too much paint seeps beneath edges, blurring your design. This occurs because the stencil isn’t sealed against the wood surface or the paint is too wet or applied in thick layers. To prevent bleeding, use a stencil adhesive spray or tape edges firmly down. Apply paint sparingly with a dry brush or sponge, using a gentle tapping motion rather than brushing. Thin layers of paint dry faster and reduce chances of bleeding.
Uneven staining or blotchy paint can result from applying stain or paint on an unsanded surface, or using inconsistent amounts across the sign. Wood absorbs stains differently based on grain and previous treatments, so sanding the surface evenly with 220-grit sandpaper before staining helps achieve uniform absorption. Lightly sanding the sign and applying a second, even coat of stain or paint can improve the finish when blotchy spots appear after staining. Using pre-stain wood conditioner before staining is another way to avoid blotching, especially on softwoods like pine.
Design transfer problems often happen if the transfer paper or method is not compatible with the wood surface, or if the pressure during transfer isn’t consistent. To improve transfer quality, ensure the wood is smooth and clean. Use a ballpoint pen or a stylus to firmly trace the design on transfer paper, applying even pressure. You can carefully retrace missing parts with a fine paintbrush or paint pen if the design did not transfer fully. For ongoing problems, switch to vinyl stencils or use a projector to paint the design freehand.
- Seal stencils with spray adhesive to prevent paint bleed
- Apply paint in thin coats with a dry brush or sponge
- Sand wood smoothly with 220-grit paper before staining or painting
- Use wood conditioner before staining to prevent blotches
- Apply even pressure when tracing designs with transfer paper
- Retrace faint transfers carefully with a fine brush or paint pen
- Consider vinyl stencils or a projector for complex designs
Fixing paint bleed usually involves sanding blurred edges once dry and repainting carefully within the cleaned lines. Blotchy stains can be corrected with light sanding and a repeated application of stain or paint, allowing each layer to dry completely before proceeding. Clean design transfers can be encouraged by maintaining consistent pressure and clean, smooth surfaces. Patience during each step and testing techniques on scrap wood before the final sign reduces errors and wasted materials.
How to Hang and Display Your Round Wood Sign Safely
To hang your round wood sign securely, choose hardware that suits the sign’s weight and how you want it displayed. Pre-drill holes to avoid splitting the wood, and carefully mount the hardware for maximum stability. Consider indoor or outdoor locations that protect your sign and showcase it well.
Choosing the Right Hardware for Your Sign
Selecting proper hanging hardware depends on the sign’s size, weight, and your display style. For lightweight signs under 5 pounds, adhesive hooks or small sawtooth hangers can work well. Medium-weight signs from 5 to 15 pounds benefit from D-ring hangers or keyhole hangers, which distribute weight evenly. Heavier signs over 15 pounds require sturdy picture wire with secure screw eyes or heavy-duty hooks.
Consider if your sign will hang flat against a wall or dangle by twine. Twine offers a rustic look but needs strong knots and secure anchor points. For outdoor signs, opt for stainless steel or rust-resistant hardware to prevent corrosion and maintain strength over time.
Attaching Hangers and Frames
Pre-drilling pilot holes helps avoid wood splitting, especially near the edges. Use a drill bit slightly smaller than your screws. Attach hooks, sawtooth hangers, or D-rings on the back center or at two points spaced evenly for balanced hanging. Here’s a step-by-step process to attach your hardware safely and securely:
- Measure the back of the sign to mark where you want to place the hardware, typically about 1/3 from the top edge.
- Choose a drill bit about 70% the diameter of your screw or hook shank to pre-drill holes at your marked points.
- Use an electric drill for precise, controlled drilling to prevent cracking or over-drilling.
- Insert screws or hooks into the pilot holes and tighten them firmly but without forcing that could strip the wood.
- Attach twine or picture wire by knotting it securely around hooks or D-rings.
- Test stability by gently tugging the hardware to ensure it’s anchored well and won’t shift or pull loose.
- Optional: Add felt pads on the back edges to protect your wall and keep the sign level.
Using the right guides and tools keeps your sign safe on the wall and preserves its shape and finish over time.
Selecting the Best Location to Display
Pick a hanging spot that supports your sign’s size and protects it from damage. Indoor areas away from direct sunlight reduce fading, while bathrooms or kitchens may require moisture-resistant finishes and hardware to avoid rust or warping.
Outdoor signs should hang under eaves or covered patios to limit exposure to rain and harsh sun. Use anchors suitable for the wall type, such as masonry anchors for brick or concrete and toggle bolts for drywall, to securely hold the weight.
Ensure the mounting surface is level, sturdy, and at a height that allows easy viewing and prevents accidental knocks or bumps. Check for electrical wiring or plumbing inside walls before drilling. Using a stud finder can help you locate studs for the strongest support.
Project Timeline and Cost Expectations for Round Wood Signs
Expect to spend about one to two days completing a round wood sign, including drying times. The process generally involves sanding, painting, and finishing steps, each requiring adequate drying to avoid smudging or uneven surfaces. For example, sanding the wood surface typically takes 30 to 60 minutes depending on size and condition. After sanding, allow at least 1 to 2 hours for the wood to settle before applying paint or stain.
Painting or staining can take an hour or more, depending on the complexity of the design and the number of coats applied. Each coat of paint or stain should dry for 4 to 6 hours, though some craftspeople prefer to wait overnight to ensure complete dryness. A final clear coat or sealant, applied to protect your design, needs 24 hours to cure fully for the best durability and finish.
Cost-wise, materials such as a round wood panel or circle cut from a wood board range from $10 to $30 for a 12- to 18-inch sign. Basic paints and stains cost roughly $5 to $15 per color or finish type. Sandpaper is inexpensive, around $5 for assorted grits. Optional tools like a wood burner or stencil materials can add $10 to $30, but are not necessary for good quality if you use paint and brushes.
| Step | Estimated Time | Typical Cost (Materials) |
|---|---|---|
| Sanding the wood surface | 30, 60 minutes | $5 (sandpaper) |
| Paint or stain application | 1, 2 hours plus drying 4, 6 hours per coat | $5, $15 per color |
| Sealing the finished sign | 10, 20 minutes application, 24 hours curing | $5, $10 |
| Base wood cost (12″, 18″ round) | NA | $10, $30 |
| Optional tools (stencils, wood burner) | NA | $10, $30 |
Making this project on a budget without sacrificing quality means prioritizing good wood and paint and investing time in proper drying. Save money by using leftover wood pieces from other projects or repurposed materials like shingles or wood shims for a unique look. Choose basic brushes and sample-size paints to keep tools affordable. Avoid rushing the drying times, since that can cause poor paint adhesion and chipping later, which leads to extra costs and frustration.
Let each layer dry fully before applying the next to prevent smudges and peeling, which can save you costly repairs or repaints.
Step-by-Step Action Plan for Your Round Wood Sign
Follow these steps to create a personalized round wood sign efficiently and with confidence.
- Day 1: Select your wood circle and gather necessary tools like sandpaper, brushes, paint, and stencils. Confirm your wood has no major cracks or defects.
- Day 2: Sand the wood surface smoothly using medium then fine-grit sandpaper. Run your hand over the surface to check it’s even and splinter-free.
- Day 3: Transfer your design onto the wood using carbon paper or your chosen method. Make sure the entire design is visible and properly aligned.
- Day 4: Start painting or staining your sign, applying thin coats to avoid drips. Let each layer dry fully before adding the next.
- Day 5: Add decorative details and personalization like lettering or small illustrations with fine brushes or paint pens. Check that details are sharp and clean.
- Day 6: Apply a clear finish like polyurethane to protect your work. Wait the recommended drying time to ensure durability.
- Day 7: Attach hardware such as sawtooth hangers or wire hooks securely. Test the hang by gently placing the sign on the intended wall or space.
- After 1 Week: Inspect the sign outside for any smudges or chips. Touch up as needed and enjoy displaying your custom piece or gifting it safely.
Frequently Asked Questions
What Type of Wood Is Best for a Round Wood Sign?
Pine is a popular choice for round wood signs because it’s affordable, easy to find, and sands nicely. You can find 12″-15″ round pine panels at home improvement stores for about $7.78, making them ideal for beginners working on home decor projects.
How Can I Transfer Lettering Onto a Round Wood Sign?
Using heat transfer vinyl is an effective way to apply clean lettering on round wood signs. Check out TeckWrap Craft’s tutorial on using their matte vinyl for a smooth finish specifically designed for curves.
Can I Make a Round Wood Sign Suitable for Outdoor Use?
Yes, using exterior-grade paint and a sealant designed for outdoor conditions will protect your sign from weather damage. White interior/exterior paint is a common choice for durability and a fresh look.
What Is the Easiest Way to Hang a Heavy Round Wood Sign?
Using screw-in hooks on opposite sides of the sign ensures balanced support on your hanging surface. This method keeps the sign stable and minimizes swinging or falling.
How Can I Add Decorative Accents to a Round Wood Sign Without Painting?
Incorporate ribbons or small wreaths attached to the edge or front of the sign. These add texture and visual interest without risking paint smudges or extra drying time.
What’s a Common Mistake to Avoid When Painting Round Wood Signs?
Avoid applying too thick a coat of paint; it can cause drips and uneven drying. Thin, even layers will produce a smoother look and prevent cracking as the wood expands or contracts.
Wrapping Up
Making a round wood sign can be rewarding when you follow a clear process. Start by preparing your wood and transferring your design carefully to avoid mistakes later. Take your time with painting and finishing to get a quality look that lasts. Your next step is to choose a design that reflects your style and gather the wood and supplies to begin your project today.