Lightbox Sign Ideas: Creative Designs & DIY Tips for Lasting Impact
Lightbox sign ideas can transform any space by combining clear visibility with stylish design. Using LED lighting and versatile materials ensures your sign stands out brightly while lasting years. Starting with high-quality LED strips boosts energy efficiency and longevity for a lasting impact.
Key Takeaways
- Choose LED strips rated at 50,000 hours for at least 10 years of reliable light usage.
- Use acrylic panels sized around 19.7″x14.8″ or 24″x36″ for versatile indoor or window lightboxes.
- Bright signs catch up to 60% more attention than dull or dark alternatives.
- Pick Natural White (4,500K) or Daylight White (6,500K) LEDs for versatile graphic visibility.
- Vinyl lettering costs about $7 and allows for customized, colorful text on your sign.
- Double-check miter saw angles with a digital T-Bevel gauge for precise lightbox framing.
Creative Lightbox Sign Ideas for Every Space
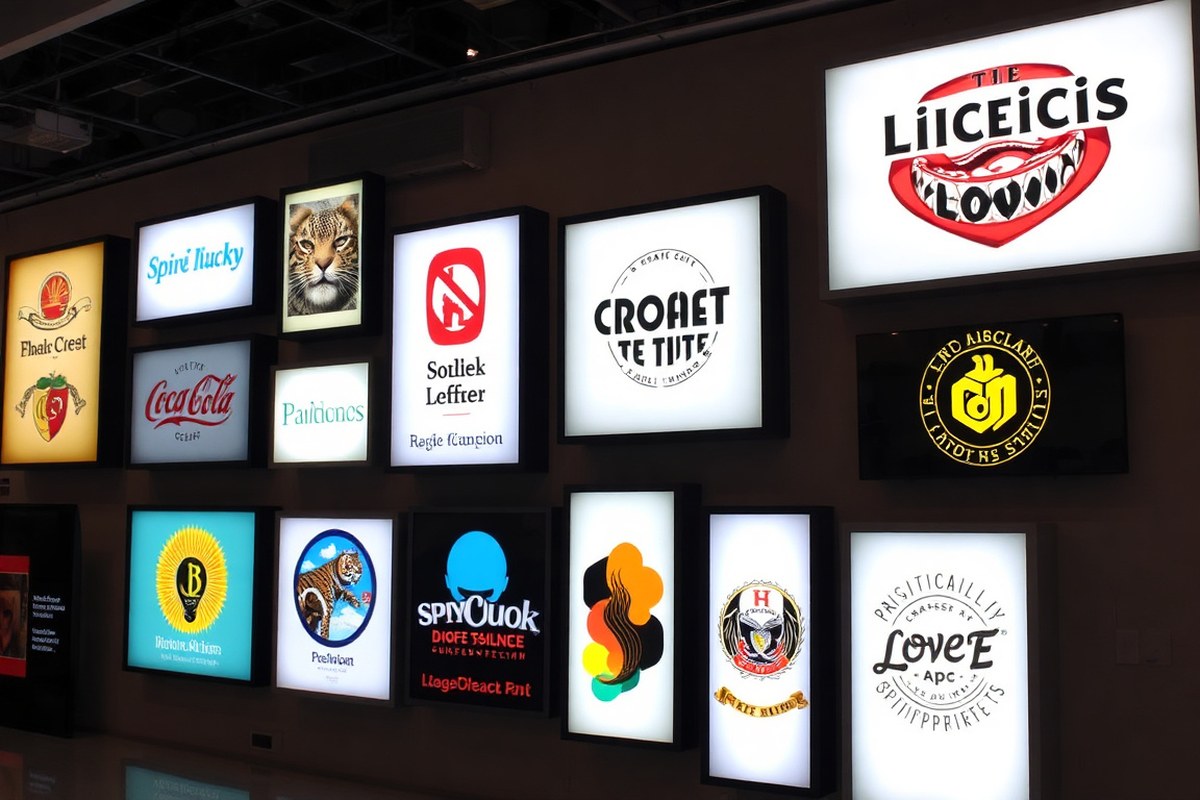
Lightbox signs offer versatile styles and concepts that work well across business storefronts, home decor, and event settings. You can choose sleek rectangular or square shapes for a modern, professional appearance commonly seen in restaurants and retail shops. Round lightbox signs create a softer, welcoming glow that suits boutique stores or cozy home corners. Curve or customized shapes add flair to your branding, drawing attention without overwhelming your space. Many businesses use LED lights inside these signs to offer bright, even illumination that improves visibility day and night.
Customizing a lightbox sign lets you clearly express your brand or personal style. Start by selecting an acrylic panel where you can apply your logo, lettering, or any graphic in your chosen colors. This approach works for businesses wanting a recognizable logo on a backlit panel or for homes displaying family names or inspirational quotes. Seasonal or thematic designs can be swapped in easily by replacing the panel or slide-in decals, which keeps your sign fresh for holidays, special sales, or personal celebrations. Digital printing and vinyl overlays are options that let you add detailed artwork without hiring a professional designer.
- Simple Light Box Sign: A clean rectangular design with customizable text and logos for sharp branding.
- Round Light Box Sign: Classic circle shape that softens your message for cafes, salons, or living rooms.
- Curve Light Box Sign: Gentle curves bring a casual or upscale look to storefronts or trade show booths.
- Interchangeable Panels: Swap designs for events like weddings, graduations, or holiday sales.
- Multi-Color LED Options: Use programmable lights for eye-catching, dynamic displays.
- Dimmer Controls: Adjust brightness for indoor ambiance or outdoor visibility.
Beyond storefronts, lightbox signs fit perfectly in events where branding or messaging changes often. Trade shows benefit from portable, branded lightbox signs that quickly capture attention. At parties or weddings, signs displaying names, welcome messages, or thematic symbols add a glowing personal touch. For homes, smaller lightbox signs brighten up reading nooks, game rooms, or kitchens with fun phrases or family mottos. The key to success is matching size, illumination level, and design to the specific use case, too large or too bright can overwhelm intimate spaces, while too dim might not catch enough attention in busy environments.
How Lightbox Signs Work: Lighting and Visibility Explained
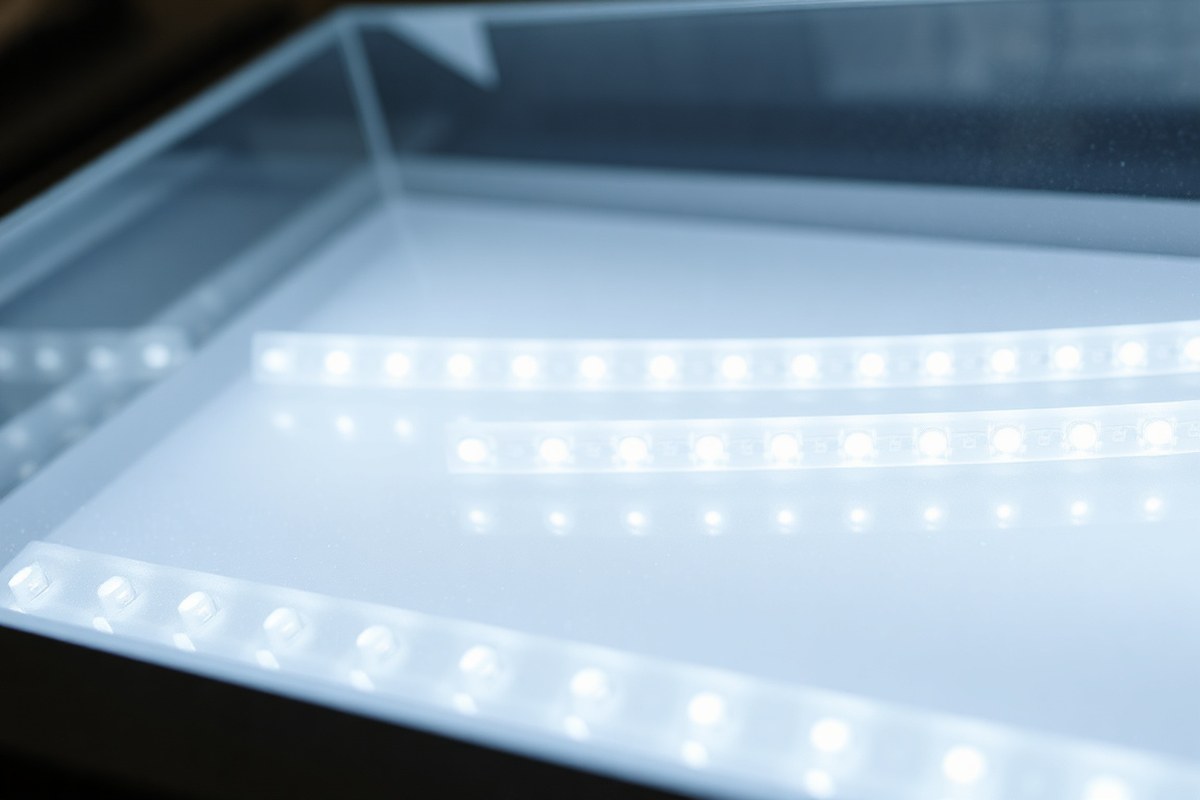
Lightbox signs rely on LED technology to provide bright, even illumination across the sign face. LEDs emit light that passes through pre-treated light-guiding panels inside the sign, typically made of acrylic or polycarbonate. These panels diffuse the light evenly, preventing hot spots and dark areas. This diffusion process is what makes the entire sign glow uniformly, improving visibility from multiple angles and distances. Without proper diffusion, the sign would have uneven brightness, which can reduce its overall effectiveness.
The choice of LEDs is important for brightness and longevity. High-quality LED strips provide up to 5000 LUX light intensity, which creates vibrant and eye-catching displays. LEDs are much more energy efficient than traditional incandescent or fluorescent bulbs, consuming about 90% less power. This efficiency reduces operating costs and heat output, which helps the lightbox components last longer. A typical LED lightbox will operate trouble-free for 3 to 5 years, whereas fluorescent-lit signs often last only 1 to 2 years before needing replacement or maintenance.
The visibility of a lightbox sign depends on several factors beyond LED quality. The thickness and quality of the diffuser panel influence how well the light spreads. Signs installed outdoors or in brightly lit areas benefit from stronger LEDs or dimmable options to adjust brightness depending on ambient light conditions. Weather-resistant construction also helps maintain brightness over time by preventing moisture or dirt buildup that can block light. In indoor settings like window displays, a 24” x 36” acrylic LED lightbox is a good size to ensure clear visibility without overwhelming space. Choosing a dimmer for your LED sign allows you to optimize brightness for day or night, saving energy and avoiding glare.
Energy consumption depends largely on the LED strip’s wattage and how long the sign remains illuminated. LED strips with adhesive backing make installation easier and allow cutting at marked lengths, so you can match the power output to your sign size. While LEDs incur higher upfront costs than incandescent bulbs, their lower energy use and longer lifespan result in better value over time. Expect to spend more for waterproof or outdoor-rated LED signs, as providers often charge around 20% extra for these features.
Use a diffuser panel made specifically for LED lightboxes to ensure even lighting; cheap or untreated acrylic often causes uneven brightness and can shorten LED lifespan.
Types of Lightbox Signs: Choosing the Right Fit
Lightbox signs come in a variety of types tailored for specific uses and placements. Knowing the features of each style helps you select the right sign for indoor or outdoor settings, temporary displays, or permanent installations. Key variables include whether the sign is front-lit or double-sided, its mounting options, and its durability against weather.
Front-Lit Lightbox Signs
Front-lit lightbox signs illuminate graphics or text from inside the box, shining light through a translucent front panel. This type is common and fits well in both indoor and outdoor environments. The even lighting highlights logos or lettering clearly, making it ideal for storefronts, directional signs, and menu boards.
Cost-wise, front-lit signs vary with size. For example, a 600mm × 400mm front-lit box for counter displays costs about £40-60 material and sells for £150-200, while a larger 1200mm × 1800mm shopfront box may cost £150-200 to make and sell for £600-800. Front-lit signs are relatively easy to install with wall-mount options using basic brackets and do not require the complex mounting needed for freestanding or double-sided models.
Double-Sided and Slim Options
Double-sided lightbox signs provide visibility from two directions, better for hanging installations or freestanding uses where viewers approach from multiple angles. Such double-sided units typically add 30-40% to both production cost and selling price compared to single-sided versions. These signs work well for hanging above aisles, outdoor walkways, or at entrance points where visibility is key.
Slim lightboxes are thinner, offering a sleek, modern look, but they do not support freestanding mounts, only wall-mounted or hanging solutions. The magnetic cover box design on some slim models, like a 24” x 36” frame, allows easy content changes, useful for temporary messages or promotions. Slim options are a practical choice if space is limited but visibility remains important.
Freestanding vs Wall-Mounted Signs
Freestanding lightbox signs can be placed nearly anywhere without needing wall or hook support. These are practical outdoors or in large indoor spaces like malls or event halls. These signs tend to be larger and sturdier, often requiring solid bases to remain stable and safe. Monument signs, a type of freestanding option, are usually double-sided and illuminated for strong visibility in outdoor settings.
Wall-mounted signs attach directly to a building or wall. Mounts can be brackets or hooks, and the mounting method must consider sign weight and wind loads outdoors. Outdoor signs often demand brackets rated at three times the sign’s weight to ensure safety. Wall-mounted signs are typical for store entrances, counters, or indoor hallways where space does not allow freestanding solutions.
Weatherproof Features for Outdoors
All outdoor lightbox signs need strong weatherproofing to handle elements year-round. Signs with an IP67 waterproof rating can resist rain, dust, and temperature fluctuations, making them reliable for outdoor use. Outdoor signs often include extra seals and materials to endure wind, sun, and occasional cold snaps. However, seals may require replacement after 5-7 years to maintain waterproofing.
Larger outdoor signs usually measure bigger than indoor ones to be readable from a distance. Bigger size comes with higher material costs and more complex installation needs. Outdoor units typically operate with LED strips using 8-15 watts per meter, which keeps electricity use low, in the range of £20-40/year depending on size and usage.
| Size | Typical Use | Material Cost (GBP) | Selling Price (GBP) |
|---|---|---|---|
| 600mm × 400mm | Counter displays | £40-60 | £150-200 |
| 600mm × 900mm | Shop windows | £70-100 | £250-350 |
| 900mm × 1200mm | Storefront signs | £100-140 | £400-550 |
| 1200mm × 1800mm | Large retail | £150-200 | £600-800 |
This size and price comparison helps align your lightbox choice with your budget and desired placement. Smaller signs cost less but suit close-up viewing like counters or small windows. Larger signs require higher investment but offer greater visibility for storefronts or heavy foot traffic areas. Choosing between one- or two-sided and deciding mounting styles also impacts cost and installation complexity.
Design Essentials: Fonts, Colors, and Graphics for Lightboxes
Choosing the right fonts for lightbox signs ensures clear readability both day and night. Sans-serif fonts like Helvetica, Arial, and Futura are ideal due to their clean lines and simplicity. Aim for a font size of at least 3 inches (around 72 points) for primary text to keep messages legible from a distance. Avoid thin or overly decorative fonts, as backlighting can blur fine details. Use bold or semi-bold weights to improve visibility and maintain simplicity in letterforms for better illumination through the acrylic face.
Color contrast plays a major role in how well your sign stands out under LED illumination. Opt for high-contrast combinations such as white text on a black or navy background for maximum brightness and sharpness. Avoid low contrast pairs like yellow on white or light gray on pale blue, since they reduce legibility when lit. Remember that your acrylic face will diffuse light evenly, so use solid block colors with minimal gradients or patterns. Choosing one of the popular LED color temperatures, Natural White (4,500K) or Daylight White (6,500K), helps maintain consistent color appearance and vibrancy.
For layout, keep graphics and text balanced with ample spacing. Avoid cluttering the sign with too many elements. Position logos or icons on the sides or corners to draw attention without overshadowing your message. Center your main text both horizontally and vertically when possible. Consistent margins of about 1 inch around the edges prevent content from appearing cramped or getting obscured by the lightbox frame. UV-printed graphics work well on acrylic, providing sharp edges and color fidelity. Vinyl cuts can also be applied, but printed graphics offer smoother gradients and are less costly for full-color designs, typically ranging from £30-60 for production.
- Choose clear, sans-serif fonts, 3 inches or larger in height
- Use bold font weights for strong backlit readability
- Apply high contrast colors like white on black or dark blue
- Use solid colors; avoid gradients or subtle hues
- Keep text and graphics spaced with 1-inch margins
- Center main message text for best balance
- Print graphics using UV technology for crisp, durable results
Signs with poor font choice or low contrast appear washed out or hard to read after dark, negating the benefit of LED backlighting. A crowded or uneven layout can confuse customers and reduce brand recognition. Good design maximizes visibility and creates a professional look that draws the eye day and night. For commercial use, ensure your lightbox materials and prints meet local regulations and electrical safety standards to avoid unnecessary issues or risks.
DIY Lightbox Sign Materials, Tools, and Build Timeline
Building a DIY lightbox sign typically requires a few hours and some straightforward materials and tools. For a standard sign about 24 by 36 inches, expect to spend around 4 to 6 hours assembling everything from cutting the frame to wiring the LEDs. Having a clear plan and checklist helps streamline the process and avoid mistakes.
Core Materials Needed
Start by gathering high-quality materials that will ensure durability and a clean look. For a standard 600mm × 900mm (approximately 24″ × 36″) lightbox sign, you’ll need a frame made from wood like a 1×2 pine or walnut board, roughly 6 feet long to cover the perimeter. The sign face should be opal acrylic for even light diffusion, or Lexan polycarbonate if durability is a concern in high-traffic areas. LEDs and a suitable power supply will provide the illumination.
- Wood boards (1×2 size, about 6 feet long)
- Opal acrylic or Lexan sheet for the sign face
- LED strip lights with power adapter
- Backing material (thin plywood or MDF)
- Wood glue and screws or nails
- Paint or finish for the frame (optional)
- Clear tape or silicone sealant for securing wiring
Materials typically cost between £80 and £120, depending on your choice of wood and acrylic type. Using reclaimed wood or materials on hand can reduce costs but may add prep time such as planing or sanding.
Essential Tools List
Having the right tools is important for making clean cuts and precise joins. Basic woodworking tools will work, but pay attention to safety and accuracy. A table saw or circular saw will help cut the frame to size, while a jigsaw or router can shape details if needed. For wiring, wire strippers and a soldering iron or connectors are useful.
- Table saw or circular saw for cutting wood
- Measuring tape and square ruler
- Jointer and planer (if using rough wood)
- Drill with screwdriver bits
- Wire strippers and electrical tape
- Soldering iron or connectors for wiring LEDs
- Clamps for holding frame during glue-up
- Safety glasses and dust mask
Set aside 4 to 6 hours for the entire build. Extra time might be needed if you prepare rough lumber or customize your design heavily.
Construction and Assembly Steps
Follow these main steps to build your DIY lightbox sign from start to finish. The process involves cutting the frame, assembling it, fitting the acrylic face, and preparing the internal space for lights and backing.
- Measure and cut the wooden boards to create the frame perimeter matching your sign size.
- Prepare the acrylic face by cutting it to the exact dimensions of the frame.
- Assemble the wooden frame using wood glue and screws; use clamps to hold during drying.
- Sand all edges smoothly for a professional look and paint or finish the frame if desired.
- Install the LED strip lights evenly inside the frame, securing with adhesive or clips.
- Attach the acrylic face to the front of the frame, sealing edges if needed to prevent dust.
- Fit the backing material to close the sign and keep everything in place.
Take extra care when cutting acrylic to prevent cracking; score and snap gently rather than using rough saw blades.
Electrical Wiring and Testing
Proper wiring is essential for a safe, reliable lightbox sign. Use LED strips rated for your chosen power supply and ensure connections are secure and insulated. Test the lights before final assembly to avoid rework after sealing everything in.
- Strip LED wires carefully and connect them to the power supply according to polarity.
- Solder connections or use quick-connect terminals to ensure firm electrical contact.
- Insulate exposed wires with electrical tape or heat shrink tubing.
- Power on the LEDs to verify even illumination and correct wiring.
- Secure wiring inside the frame with clear tape or silicone to keep it out of sight and safe from movement.
Testing the LEDs before sealing the sign helps catch any faulty strips or loose connections early. Plan wiring routes to avoid visibility from the front and maintain a clean interior.
Installing Lightbox Signs: Mounting and Power Setup
Mounting lightbox signs depends on the surface and location where you want to install them. For solid walls like brick, concrete, or wood, use anchor bolts or heavy-duty screws paired with wall plugs to secure the frame. Drywall or plaster walls require toggles or molly bolts to hold the sign’s weight. For glass or metal surfaces, suction cups or specialized clamps can work, but make sure the mounting hardware is rated for the sign’s size and wind exposure if outdoors.
In some cases, a ceiling or hanging mount uses chains or brackets, ideal for sidewalks or indoor entrances with overhead space. Freestanding lightbox signs come with a base or stand, so no mounting on walls is needed. Choose the mounting method based on the sign size; larger signs, for example, measuring 1200mm by 1800mm, need stronger supports to handle the 120W power supply and greater LED strip length safely.
Electrical setup is critical for both safety and reliable operation. Match the power supply wattage to the sign size and brightness requirements. For instance, a 600mm by 900mm sign with 3 meters of LED strips demanding 45W requires a power adapter rated slightly above that to avoid overload. Use heat-shrink tubing to seal wire connections and velcro strips to organize cables neatly inside the sign casing.
- Measure the sign’s wattage to select an adequate power supply with at least 10% headroom.
- Run power cables through conduit or protective tubing when outdoors to prevent weather damage.
- Use a weather-resistant power adapter marked with an IP67 rating for outdoor signs.
- Keep all wiring connections tight and insulated using heat-shrink and electrical tape.
- Secure cables inside the sign housing with velcro or clips to avoid stress or damage.
Always disconnect power before starting installation or repairs to prevent shock. If an installation involves complex wiring, outdoor electrical codes, or mounting near power lines, professional installation is highly recommended. Electricians ensure compliance with local rules and can handle tasks like running circuits or installing weatherproof junction boxes.
Attempting a DIY electrical setup without experience risks shorts, fires, or poor performance. A properly mounted and wired lightbox sign not only looks professional but lasts longer by avoiding strain and weather exposure on components. Investing in professional help can save money compared to damages caused by faulty installation.
Weatherproofing and Maintenance for Longevity
Protecting your outdoor lightbox sign from weather damage begins with waterproofing every joint and seal. Use a high-grade silicone sealant around edges where rain and moisture can enter. Vacuum-formed pan face designs, made from resilient materials, resist impact and weather better than flat acrylic but still require these protective steps. Installing a weatherproof cover or canopy above the sign also reduces exposure to direct rain and sunlight, which can accelerate fading and material wear. Aim for an enclosure rated at least IP65 for water and dust resistance to ensure the electrical components stay dry.
Regular maintenance helps maintain the brightness and appearance of your lightbox sign over time. LED strips carry a rated lifespan of about 50,000 hours, which can translate to over 10 years if used around 12 hours daily. However, the adhesive holding the LED strips may weaken and require reattachment. A monthly inspection schedule should include checking for loose LED strips, cleaning the sign face with a soft cloth and mild cleaner, and inspecting the power supply and driver unit. The driver unit tends to fail every 3 to 5 years and should be replaced promptly to avoid further damage.
A basic maintenance checklist includes wiping down the sign face and housing to remove dirt and debris, ensuring seals and gaskets remain flexible and intact, and testing all lights for consistent brightness. In areas with extreme temperatures, check the sealant and adhesive more frequently since heat and cold can cause cracking or peeling. Be aware of fading or dimming, signs that the LED or driver is nearing the end of its lifespan. You can expect 9 out of 10 visibility if the sign remains well-maintained and the brightness is consistent all over.
If your lightbox sign develops flickering or dim areas, begin troubleshooting by tightening connections and replacing or reattaching LED strips as needed. Check the driver unit for voltage irregularities; these devices convert main power to the correct LED voltage, and failure often causes erratic lighting. Inspect wiring for any signs of corrosion or damage caused by water intrusion. Keep spare LED strips and sealant on hand for quick repairs, which can cost between $20 and $100 depending on the replacement parts. Prompt action prevents minor issues from causing more costly downtime or damage.
Keeping your lightbox sign bright and durable requires a combination of weatherproofing and scheduled care. Signs that show no visible damage, maintain a uniformly bright display, and remain securely sealed against moisture hold up best against outdoor conditions. Signs exposed to harsh sunlight or heavy rains may require more frequent checks and maintenance to uphold visual impact and longevity. Investing time in these steps lowers operational costs and keeps your sign a compelling presence for your business.
Energy Use, Costs, and Choosing Professional vs DIY
Lightbox signs, especially those using LED illumination, offer an energy-efficient way to make your business visible day and night. Typical costs vary from budget-friendly DIY options to higher-priced professional installations, with warranty lengths reflecting this range. Consider your skills, time, and desired quality when deciding between building your own or hiring a pro.
LED Energy Efficiency Overview
LED lights consume significantly less power than incandescent bulbs, translating into lower electricity bills for your lightbox sign. LEDs also last longer, reducing replacement frequency and maintenance efforts. For small business owners, this means sustained visibility without large operating costs. The following table compares typical energy use for different lightbulb types used in lightbox signs:
| Light Source | Power Consumption (Watts) | Average Lifespan (Hours) |
|---|---|---|
| LED | 10, 15 | 25,000, 50,000 |
| Incandescent | 40, 60 | 1,000 |
| Fluorescent | 15, 20 | 7,000, 15,000 |
Choosing LED lighting for your sign can reduce power consumption by roughly 70% compared to incandescent bulbs. This efficiency not only cuts costs but also lowers heat output, extending the life of the sign components.
Typical Costs and Warranty Info
Lightbox sign costs depend on size, complexity, and installation method. Small DIY kits may start as low as $50 to $150, while professionally made signs with full installation often range from $500 to $2,000 or more.
Warranty coverage varies widely; DIY kits often include a 1-year warranty on electrical components, while professional signs can come with 2 to 5-year warranties covering both parts and workmanship. Longer warranties generally indicate higher-quality materials and expert assembly. Key factors that affect costs include:
- Sign size and brightness requirements
- Frame material, such as aluminum or plastic
- Type of lighting and power setup complexity
- Installation fees for professionals
- Additional weatherproofing treatments
Pros and Cons of DIY vs Professional
DIY lightbox signs appeal due to lower upfront costs and creative control. You can save money by purchasing kits or materials and investing your own time for assembly and mounting. However, you’ll need basic electrical knowledge, tools, and patience to avoid poor wiring or uneven lighting.
Professionals deliver polished results with custom designs and proper electrical connections, often complying with local codes. Their expertise minimizes risks like short circuits or water damage but comes at a higher price and may require more lead time.
Prioritize safety: never skip following electrical codes or manufacturer instructions, especially when working with wiring and power supply in DIY projects.
Here’s a simple decision template to guide you:
- Assess your electrical skills and tool availability.
- Determine your budget for materials and/or labor.
- Consider timeline: DIY takes longer; pros may expedite.
- Decide on desired quality and durability.
- Check warranty terms and support options.
Choose DIY if your budget is tight, you enjoy hands-on projects, and your sign is small to medium-sized. Opt for professional help if you want guaranteed long-term performance, complex designs, or local code compliance.
Your First Steps: A Quick-Start Plan for Your Lightbox Sign
Getting your lightbox sign ready involves clear steps that balance creative design and practical setup. Follow this plan to move from idea to a working, well-maintained sign.
- Day 1: Choose the type of lightbox sign that fits your business space, consider size, mounting options, and visibility. Assess the location to confirm visibility and power access.
- Day 2: Select your lightbox design elements like font, colors, and graphics. Pick options that align with your brand and are easy to read from your target distance.
- Days 3, 5: Gather your materials or hire a professional if you’re not doing a DIY build. Confirm materials and tools fit the lightbox type you chose and that you have a power supply plan.
- Week 2: Build or install your lightbox sign following safe electrical and mounting guidelines. Test the lighting for evenness and brightness once installed.
- Week 3: Weatherproof your sign with proper sealants or covers if outdoors to ensure durability. Check for any water ingress and maintain a clean face to preserve readability.
- Week 4 and ongoing: Monitor energy use and perform routine maintenance. Adjust your sign’s power settings or cleaning schedule based on energy costs and performance.
Frequently Asked Questions
What Materials Are Best for Creating Durable DIY Lightbox Signs?
Acrylic and aluminum are common for durable DIY lightbox signs due to their weather resistance and lightweight. Acrylic diffuses the light evenly, while aluminum provides sturdy framing, making them ideal for long-lasting outdoor or indoor use.
How Can I Make a Lightbox Sign Stand Out Without Using Bright Colors?
Using bold fonts, unique shapes, and backlit designs can make a lightbox sign stand out without bright colors. Focus on contrast and illumination to draw attention subtly while keeping a clean, minimal look.
Is It Possible to Update the Graphics on a Lightbox Sign Easily?
Yes, many lightbox signs have interchangeable panels or slide-in inserts that make updating graphics simple. This feature is great for seasonal promotions or changing messaging without rebuilding the entire sign.
Can Lightbox Signs Be Used Effectively in Small Retail Spaces?
Lightbox signs work well in small retail spaces because they provide bright, clear branding without taking up much room. A well-placed lightbox over a doorway or window adds visibility while maintaining a neat appearance.
Do Lightbox Signs Offer Benefits for Nighttime Visibility Compared to Neon Signs?
Lightbox signs provide bright, energy-efficient illumination that is often more uniform and lower maintenance than neon signs. They consume less power and produce less heat, making them safer and more cost-effective for long-term use.
What Safety Certifications Should I Check When Buying a Commercial Lightbox Sign?
Look for a UL label on commercial lightbox signs to confirm they meet electrical safety standards and national codes. This certification ensures the sign has been tested to reduce fire and electrical hazards.
Final Thoughts
A well-designed and properly installed lightbox sign creates effective visual marketing that draws attention day and night. Make your next step reaching out to a trusted local sign professional or starting your DIY assembly, whichever suits your budget and skills best. Keeping your sign maintained ensures it stays bright and appealing for as long as possible. Take action now to make your business stand out with a customized lightbox sign.