Pylon Sign Ideas That Boost Visibility: 8 Essential Tips & Types
Pylon sign ideas can boost your business visibility by combining height, lighting, and bold design elements. Using tall, standalone signs with clear logos and readable lettering ensures your message reaches drivers and pedestrians from a distance. Start by selecting a pylon sign with internal lighting to increase legibility and extend viewing range.
Key Takeaways
- Choose letter heights that allow readability at about 30 feet per inch for maximum visibility.
- Use internal lighting to improve sign visibility by 40 to 60 percent compared to external lighting.
- Incorporate 3D letters on your pylon sign to add depth and increase attention-grabbing appeal.
- Opt for durable materials and rigid faces supported by metal poles for structural stability.
- Include your company’s logo prominently to create a memorable and iconic sign presence.
- Select multi-panel pylon signs for shopping centers or multi-tenant properties to organize directories clearly.
1. What Is a Pylon Sign and How Does It Work?
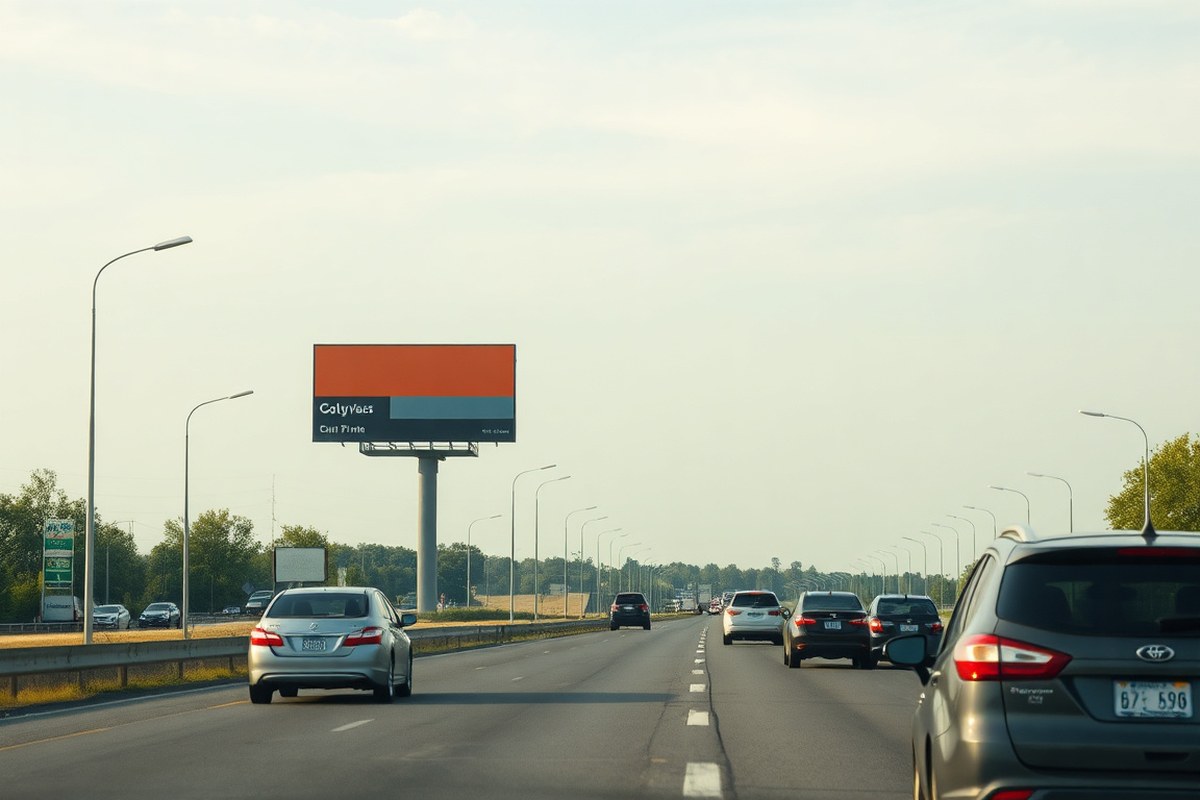
A pylon sign is a tall, freestanding outdoor sign typically mounted on one or more poles or a column, designed to display the names or logos of multiple businesses at a single location. These signs stand high above ground level, making them visible from a distance, which helps drivers on highways or busy roads easily identify shopping plazas, gas stations, or commercial complexes. Unlike lower monument signs, pylon signs target drivers who are moving faster and further away, making height and visibility critical features.
How a pylon sign attracts attention involves several factors. According to the United States Sign Council’s legibility guidelines, a one-inch tall letter on a sign can be read clearly from about 30 feet away. Signs with internal lighting can be seen 40 to 60 percent farther than signs with external lighting, improving visibility during both day and night. Choosing bold, recognizable logos and bright colors also helps the sign stand out among roadside clutter. A unique shape or texture that differs from other standard pylon signs in the area can draw more eyes and make it easier for potential customers to locate your business. These visual elements combined with strategic lighting create an effective way to grab attention from afar.
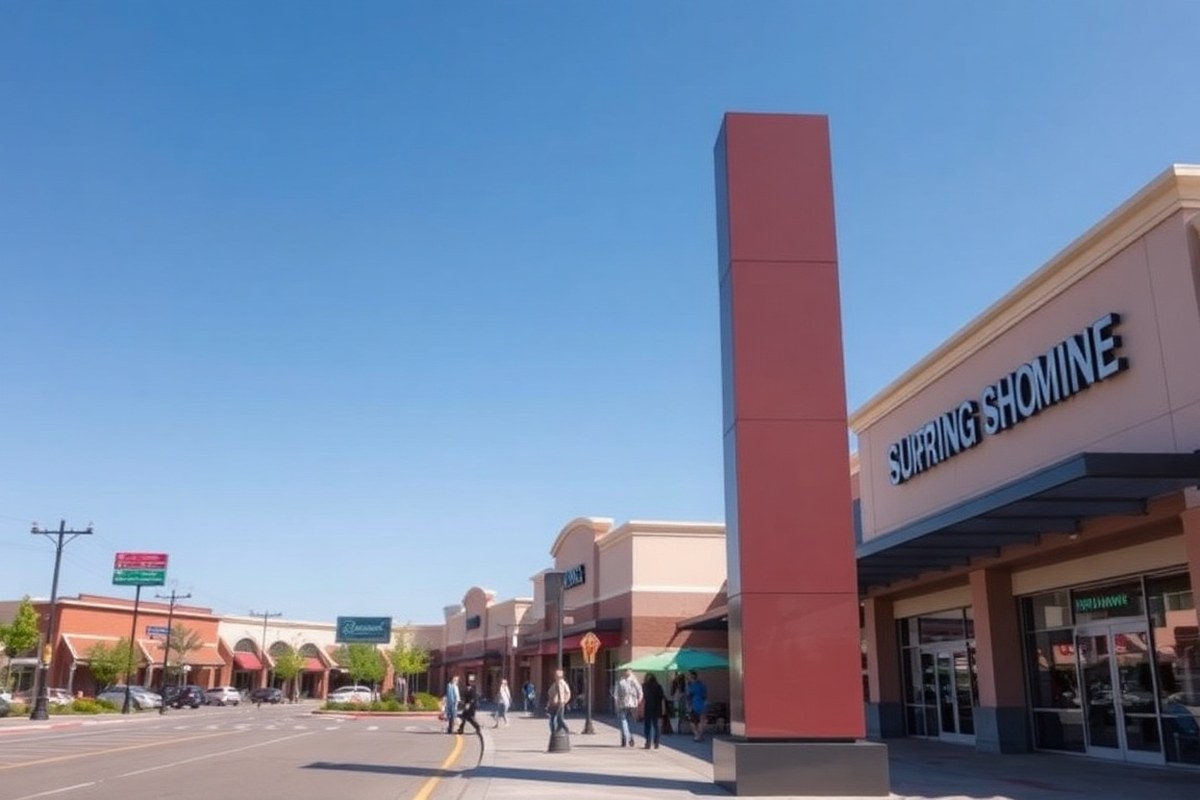
Businesses that benefit most from pylon signs are those located in shopping plazas, along busy highways, or in areas where multiple businesses share a commercial space. Strip malls, gas stations, and retail centers often use pylon signs to advertise several tenants on one structure, offering clear direction for customers who might otherwise overlook those businesses while driving quickly. Large enough to accommodate multiple panels or logos, pylon signs provide excellent brand visibility and help distinguish your business from competitors nearby. For example, a multi-tenant plaza with a well-crafted pylon sign can see increased foot traffic from drivers who spot the sign early and decide to stop in.
Installing a pylon sign involves a deeper foundation and careful wind load engineering, given its height and exposure to varying weather conditions. This typically means a higher upfront cost than simpler ground signs but pays off through extended reach and brand impact. Working with a professional sign manufacturer ensures the design not only meets your branding needs but also complies with local regulations and structural requirements. A well-designed pylon sign reflects your brand clearly and pulls more customers by effectively communicating your location and offerings while standing out against other signage along busy roads.
2. Types of Pylon Signs and When to Use Each

Pylon signs come in several types, each suited to different business needs and site conditions. The main structural types are single-pole, twin-pole, and covered-pole pylon signs. Single-pole designs are supported by one central pole, making them a classic and economical choice. These signs often reach higher, standing out in places with tall buildings or heavy visual competition. Twin-pole signs use two poles, offering more rigidity and a symmetrical look preferred by some marketers. Covered-pole signs hide the structural supports with decorative coverings, improving curb appeal without sacrificing stability.
Choosing the right pylon sign depends on your location, visibility needs, and branding goals. For example, if your business is located near a busy road or in a plaza with multiple tenants, a pylon sign that displays multiple tenant panels can increase visibility for everyone in the center. Single-pole signs are best when you want to maximize height for long-distance visibility, especially near highways. Twin-pole signs work well in medium-height applications where you want extra strength to hold larger or heavier sign faces and a balanced appearance. Here’s a comparison table showing key characteristics of each main type and when to use them:
| Type | Structure | Advantages | Best Use Case | Typical Height | Visibility |
|---|---|---|---|---|---|
| Single-Pole | One central pole | Economical, tall, classic look | High-rise areas, highway visibility | Over 24 feet to 40+ feet | Excellent from a distance |
| Twin-Pole | Two supporting poles | More rigid, symmetrical | Medium height, larger signs, plazas | 15 to 30 feet | Good, particularly in parking lots |
| Covered-Pole | Poles enclosed with decorative materials | Better aesthetics, protects pole | High-visibility retail, upscale plazas | Varies, usually 15 to 35 feet | Good with design impact |
Pylon signs are highly effective for multi-tenant properties because they provide stacked panels that display many business names in a single structure. Shopping plazas often rely on these to help drivers identify all the businesses at their destination from a distance and within parking areas. If you manage or own a property with several tenants, consider a multi-panel twin-pole or covered-pole pylon sign for clear, durable branding. It’s important to have engineered drawings and permits, especially for signs over 24 feet tall, which is a requirement in some cities like Chicago.
Make sure your pylon sign complies with local height and size regulations to avoid costly redesigns and delays in permit approval.
Selecting the right type involves balancing your site’s physical context, visual goals, and budget. Single-pole signs shine when you need tall, straightforward impact; twin-pole signs suit multi-business signs that need more strength; and covered-pole options add style without losing structural integrity. Understanding these differences helps you choose a sign that gives your business or property the best possible visibility and curb appeal.
3. Key Materials and Construction Features for Durability
Pylon signs typically feature a steel or aluminum framework with a concrete foundation, providing essential stability and safety. Steel poles offer high strength and wind resistance, which is important for signs placed in exposed locations or areas prone to storms. Aluminum pole covers add a weather-resistant finish that reduces corrosion and improves appearance. Ensuring the foundation is large and deep enough, often several feet into the ground, helps prevent tilting or shifting over time. For example, a foundation might be poured at least 3 feet deep with reinforced concrete to meet local wind-load requirements.
The faces of pylon signs are commonly made from materials like acrylic, polycarbonate, aluminum, or backlit flex-face material. Acrylic and polycarbonate are preferred for their durability and clarity, offering resistance to fading and cracking under UV exposure and extreme temperatures. Acrylic is known for its smooth finish and translucency, ideal for LED illumination that improve visibility at night or during bad weather. Polycarbonate is more impact-resistant, making it suitable for locations susceptible to contact or vandalism. Aluminum faces and cabinets also offer excellent durability, with natural corrosion resistance and the ability to be powder coated for long-lasting colour retention.
Choosing materials that withstand harsh weather extends the sign’s lifespan and maintains its appearance, which cuts down on repair and replacement costs. For instance, using UV-protected acrylic or polycarbonate can help prevent yellowing and reduce discoloration over 10 to 15 years. Proper sealing and a quality paint finish also protect steel or aluminum structures from rust and water damage. This is important in regions with heavy rain or snow where moisture exposure is constant.
Construction features such as reinforced joints and welded steel connections improve the pylon sign’s integrity. Welded steel frames provide better resistance to bending or warping compared to bolted assemblies. Incorporating drainage holes or vents in the sign cabinet prevents moisture buildup inside the housing, which can otherwise lead to electrical failures in lighting elements. Adding LED lighting inside acrylic or polycarbonate faces improves visibility while consuming less energy and withstanding temperature variations better than traditional bulbs.
Some pylon signs include decorative accents like brick bases or textured aluminum panels, which add stylistic appeal without sacrificing durability. A brick base, for example, offers additional protection against impacts and harsh weather, while visually grounding the sign in its environment. You should balance aesthetics with structural needs and local code requirements to ensure safety and permit approval. Budget-wise, investing in higher-quality materials and professional installation typically ranges from several thousand to tens of thousands of dollars, depending on size, complexity, and finish choice.
4. Design Elements That Make Pylon Signs Stand Out
Your pylon sign’s design elements are key to catching attention and communicating your brand clearly. Using the right colors and fonts, placing your logo effectively, and choosing distinctive shapes and lighting all contribute to a sign that stands out both day and night.
Color and Font Choices for Legibility
Choose high-contrast colors to ensure your sign can be read at a glance. For instance, dark text on a light background or vice versa works well, especially along highways where drivers see your sign at 50 mph or more. Stick to a simple color palette of two to three colors to avoid visual clutter. Fonts should be bold and sans serif, which are easier to read from a distance. Avoid script or overly decorative fonts, as these reduce legibility.
Keep the text size large enough to be legible from at least 100 feet away. Consider the height and placement of your pylon sign; larger fonts may be needed for higher placements or busy locations. Use uppercase letters selectively, as all caps can reduce readability. A good rule is to use uppercase for short words or acronyms, and mixed case for longer words.
- Use contrasting colors, such as white on navy blue or black on yellow
- Limit fonts to one or two complementary styles
- Choose bold sans serif fonts like Helvetica or Arial
- Ensure minimum letter height of 12 inches for visibility at a distance
- Avoid tightly spaced letters that reduce clarity
Implementing these choices improve clarity and makes the sign catch the eye quickly without confusing viewers.
Incorporating Logos and Branding
Place your logo in a prominent position on the sign, typically near the top or centered, where it naturally draws attention. Your logo often serves as the visual identity, so it should stay true to your brand colors and proportions. Keep it simple, avoiding complex details that don’t translate well at large sizes or from a distance.
Make sure the logo does not compete with text but complements it instead. Balance the size between logo and business name to maintain harmony. For multi-business pylon signs, allocate individual panels or sections for each logo to maintain clarity.
Logos can also be improve using 3D lettering or illuminated inset options, which give your brand a more upscale look. This can cost several hundred to a few thousand dollars extra but often pays off by improving retention and brand recognition.
Innovative Shapes and Lighting Options
Unique shapes help your sign stand out in places surrounded by standard squared-off signs. Shapes like diamonds, ovals, or custom contours matching your company name or logo outline create a memorable silhouette. These custom forms can cost 20% to 40% more than standard rectangular panels but increase visual impact considerably.
Lighting extends visibility into the night hours and makes your sign hard to miss. Internal LED illumination offers bright, energy-efficient light that can highlight colors and lettering evenly. For businesses open after dark, consider LED displays for dynamic images or video, attracting more attention than static signs. To add aesthetic appeal, incorporate a decorative base like brick or stone to tie the sign into your property’s style.
- Choose custom shapes matching your brand identity for uniqueness
- Use internal LED lighting for bright, uniform illumination
- Consider 3D lettering with backlighting to improve depth and visibility
- Employ programmable LED displays for dynamic content in high-traffic areas
- Add decorative bases such as brick or stone for a polished look
- Balance cost increases with potential gains in customer recall and foot traffic
Combining shape and lighting strategically ensures your pylon sign plays a strong role in attracting customers any time of day.
5. How to Navigate Permits and Regulations for Pylon Signs
Yes, pylon signs always require permits, including approval for size, placement, and safety features. Most locations also require engineered drawings and electrical inspections to ensure the sign is safe and compliant. Following the permit process carefully helps avoid costly delays or penalties.
Permit Application Steps
Applying for a pylon sign permit usually starts with submitting detailed plans to your city or county’s planning or building department. These plans should include scale drawings of the sign, its exact location on your property, and any electrical specifications if illuminated.
Next, you must pay any applicable permit fees, which vary but typically range from a few hundred to a few thousand dollars depending on local rules and sign size. You may need to attend a hearing or provide additional documents if your sign is larger or includes digital displays. Permits often take 2 to 8 weeks to process, so start early. A typical checklist for the permit application includes:
- Site plan showing sign location relative to property lines
- Complete sign design drawings with dimensions
- Details on materials and lighting, including electrical specs
- Engineered structural drawings stamped by a licensed engineer
- Proof of payment for permit fees
- Photos of the property and surrounding area (sometimes required)
- Completed application forms provided by your local jurisdiction
Failing to submit engineered drawings upfront often results in application delays or rejections.
Engineering and Structural Requirements
Most jurisdictions require engineering approval to certify that the pylon sign’s structure can withstand winds, earthquakes, and other forces common to the area. Licensed structural engineers typically prepare these drawings, including foundation details and pole specifications.
Electrical permits are also essential if your sign has illumination, especially LED or digital displays. Local electrical inspectors may require proof that wiring complies with safety codes. Coordination between your sign fabricator and engineer helps meet these requirements efficiently. Using a knowledgeable sign company can simplify this process since they usually handle engineering documents and permit filings for you, reducing complexity and risk of errors.
Local Height and Size Restrictions
Height and size limits for pylon signs differ widely depending on zoning, lot frontage, and street classification. Suburban areas may limit pylon heights to 20 to 35 feet, while commercial corridors often allow taller signs up to 50 feet or more.
These limits also consider driver speed and sightlines so signs are effective and safe to view from a distance. Recording your local zoning code or speaking with city planning staff confirms precise limits before design begins.
Restrictions might also cover digital sign brightness, area, and hours of operation to reduce neighborhood impact. Observing the full set of local regulations keeps your sign project on track and legal.
6. Step-by-Step Installation Process for Pylon Signs
Installing a pylon sign involves multiple stages, beginning with thorough site preparation and ending with a detailed final inspection and lighting setup. Proper preparation matters because it ensures the sign is stable, visible, and meets safety standards. On-site, you’ll need a clear area with proper soil compaction and underground utilities marked before excavation. Timing can vary, but typical installation takes between three to five days, depending on sign size, design complexity, and local conditions.
Start by excavating the foundation holes according to the engineering design, often requiring reinforced concrete footings at least 3 feet deep. This strength supports the tall poles or posts that hold the lightbox cabinet. After the foundation cures, which generally takes 48 to 72 hours, installers place the steel poles and make sure they’re perfectly vertical using a level and plumb lines. Steel connections should be bolted or welded in place with corrosion-resistant materials to extend longevity and safety.
- Mark and clear the site, ensuring no underground cables conflict with digging
- Dig foundation footings according to local building codes and engineering specs
- Pour and cure concrete footings, usually around 2 to 3 days
- Install steel poles or double posts securely with proper alignment
- Affix the lightbox cabinet on top of poles using heavy-duty fasteners
- Connect electrical wiring for internal lighting, checking voltage and weatherproofing
- Conduct a thorough final inspection including structural and electrical safety tests
The lightbox sign cabinet is generally mounted last to avoid damage during earlier steps. Electrical setup involves connecting LED or fluorescent lights inside the sign to a dedicated power source. Wiring must comply with local electrical codes, including grounding and waterproofing. Lighting improve visibility at night and can be adjusted depending on brightness needs or energy efficiency goals.
After the electrical and structural work, a final inspection checks the sign’s stability, foundation integrity, and that all lighting functions properly. Weather conditions can delay installation, especially if concrete curing or electrical components are affected by rain or extreme cold. Costs for installation can range widely based on site conditions and sign size but generally fall between $7,000 to $15,000, not including permits and design fees.
7. Maintenance Tips to Keep Your Pylon Sign Looking Great
Your pylon sign needs regular upkeep to maintain its visual appeal and functional performance. Check your sign at least every three to six months, depending on the location and weather exposure. Signs near highways or in harsh climates may need more frequent attention to prevent damage from dust, rain, wind, or sun fading.
Start each inspection by cleaning the sign’s surface using a mild detergent mixed with water. Avoid harsh chemicals that can degrade paint or acrylic panels. Use a soft cloth or sponge, rinsing with clean water afterward, and drying with a microfiber towel. Removing dirt, bird droppings, and pollen keeps your sign clear and inviting, preserving its colors and visibility.
Electrical components need checks alongside cleaning. Turn off power before inspecting lights or LED modules to avoid shock and damage. Look for burnt-out bulbs, loose wiring, or corrosion around connections. Test timers and photocells that control illumination times or brightness to confirm they’re working correctly. Replacing bulbs or repairing wiring can cost between $50 and $200, depending on the sign size.
- Inspect and clean sign faces and cabinet surfaces for dirt and fading
- Check structural supports and bases for corrosion or cracks
- Test electrical wiring, light fixtures, and control systems
- Confirm mounting hardware is secure and not rusted
- Replace worn or damaged components promptly to prevent further damage
- Trim nearby trees or shrubs that cast shadows or block visibility
- Document maintenance dates and actions in a log for tracking
Structural issues often appear as rust on metal poles or loose bolts at mounting points. Addressing these early avoids costly replacements and safety risks. Use a rust-inhibiting primer and paint for metal, and tighten loose brackets with proper tools. For signs with acrylic faces, inspect for cracks or yellowing; cracked panels reduce attractiveness and risk water damage inside the sign box.
Electrical failures commonly cause signs to appear partially lit or completely darked out. Frequent outages may indicate wiring problems or poor weather sealing. Have a qualified electrician review the sign periodically or whenever problems arise. Keeping records of repairs helps identify recurring problems before they cause major downtime and lost visibility.
8. Creative Pylon Sign Ideas to Capture Attention
Creative pylon sign ideas can transform your business frontage into a powerful marketing tool. Incorporating digital displays, 3D lettering, and unique shapes grabs attention from long distances and keeps your message fresh. Using colorful LEDs improve visibility during both day and night, maximizing your sign’s impact.
Dynamic LED and Digital Displays
Digital displays on pylon signs allow you to change messages instantly, promoting special offers, events, or announcements in real time. This flexibility keeps your signage relevant and engaging without costly replacements. Usually, LED modules range from a few hundred to several thousand dollars depending on size and resolution; however, the ability to update content remotely saves time and printing costs.
In high-traffic areas or locations where your message competes with many distractions, bright, colorful LEDs on digital displays ensure your sign remains visible from hundreds of feet away, even in direct sunlight. For example, use bold graphics and contrasting colors for time-sensitive promotions to capture the attention of passing motorists quickly.
Proper installation is key to avoid technical failures. Ensure weatherproofing is precise because moisture or extreme temperatures can damage electronic components. Routine software updates and scheduled maintenance are essential to keep the display operating smoothly and your messages clear.
3D Lettering and Textures
Adding 3D lettering improve your pylon sign by creating depth and shadow effects that draw the eye. Raised letters made from durable materials like aluminum or acrylic can be illuminated with LED backlighting, improving readability in low-light conditions. This kind of signage costs more upfront, typically 20-50% above flat-faced designs, but lasts longer and offers a premium look.
Use 3D elements to emphasize your business name or logo, especially when your sign is viewed primarily from a distance. Vary the letter thickness or add surface textures such as brushed metal or high-gloss finishes to create a tactile feel that stands out under natural light. This technique works best for businesses wanting a distinctive, upscale appearance that complements the building’s architecture.
Custom Shapes and Artistic Designs
Breaking away from the standard rectangular pylon frame with custom shapes or sculptural designs can make your sign memorable. Sculpted edges, curved forms, and abstract shapes draw curiosity and can reinforce your brand identity. Custom fabrication often adds 15-30% to the standard sign budget and may require more complex permits due to size or design.
Use artistic designs to echo your business’s products or services, like a coffee cup shape for a café or a leaf pattern for a landscaping company. While the upfront cost is higher, custom shapes attract attention longer than typical fits, increasing brand recognition over time. Be mindful that unusual shapes may increase wind load, so consult a structural engineer during planning.
Before choosing a custom design, check local zoning laws to ensure your pylon sign’s size and shape won’t cause delays or extra fees during approval.
Your First Steps to a Successful Pylon Sign
Follow this quick-start plan to get your pylon sign project off the ground and ensure it achieves the visibility your business needs.
- Before You Start: Research local sign regulations to confirm your desired sign size and location are allowed; success looks like obtaining preliminary approval or identifying permit requirements.
- Day 1: Choose the type of pylon sign that fits your business location and message, such as single-pole for main roads or multi-tenant for shopping centers; confirm your choice by reviewing site traffic and visibility.
- Week 1: Work with a sign fabricator to select durable materials based on your climate and maintenance capacity; you’ll know this worked when you have a detailed design and material list.
- Week 2: Submit your permit application with all required documents; track the status regularly to avoid delays.
- Week 3: Schedule professional installation after permit approval; confirm installer is licensed and insured to avoid compliance issues.
- After Installation: Conduct a thorough inspection of the sign for stability, visibility, and electrical safety; successful inspection means your sign is ready for use.
- Monthly: Perform routine cleaning and check lighting; signs that stay bright and clean keep attracting customers effectively.
Frequently Asked Questions
What Are Effective Lighting Options for Pylon Signs?
LED lighting is a popular choice for pylon signs because it’s energy-efficient and highly visible at night. Backlit or halo lighting can also make your sign stand out without adding excessive maintenance costs.
How Can Branding Consistency Be Maintained in Pylon Sign Design?
Using your company’s colors, fonts, and logos on the pylon sign keeps your branding consistent. This helps reinforce your brand identity and makes your business easily recognizable to passing drivers and customers.
What Are the Typical Lifespan and Durability Expectations for Pylon Signs?
Pylon signs usually last 10 to 15 years depending on materials and weather conditions. Regular maintenance like cleaning and light bulb replacements can extend their life.
How Do Pylon Signs Impact Customer Traffic for Shopping Centers?
Pylon signs attract attention from passing traffic, increasing visibility and potentially directing more customers to your shopping center. Locations near highways benefit the most due to higher travel speeds.
Can Pylon Signs Incorporate Digital Display Technology?
Yes, digital LED panels can be part of pylon signs to show changing information or promotions. This adds flexibility but may require extra power and permissions depending on your location.
What Are Common Challenges When Designing Multi-Tenant Pylon Signs?
Balancing visibility and branding for multiple businesses can be difficult. Equal panel sizing and clear text help ensure all tenants benefit without overcrowding the sign.
The Bottom Line
Choosing and installing the right pylon sign can significantly boost your business’s visibility and attract more customers. Start by understanding your location’s rules and picking a durable, eye-catching design. Getting professional help with permits and installation will keep the project on track. Take the first step by contacting a reputable sign specialist to discuss your needs and next steps.