How to Make a Canvas Sign with Cricut: Complete Step-by-Step Guide
Learning how to make a canvas sign with Cricut allows you to create personalized home decor easily and affordably. Start by selecting the right canvas size and a suitable vinyl type, then use Cricut Design Space to upload or choose your design. Preparing your canvas surface properly will ensure the vinyl adheres well and lasts longer.
Key Takeaways
- Use a 16″ x 20″ canvas as the ideal size for most DIY Cricut sign templates.
- Upload SVG files or choose designs from Cricut Access for better cutting precision.
- Apply a base coat of white acrylic paint on the canvas to improve vinyl adhesion.
- Separate the canvas from the frame carefully if creating a reverse canvas sign for different effects.
- Cut vinyl designs on a 12″ x 24″ Cricut mat by breaking large designs into smaller pieces.
- Set heat press or EasyPress to 280 degrees and press vinyl for 5, 10 seconds for best results.
How to Create a Canvas Sign with Cricut Step-by-Step
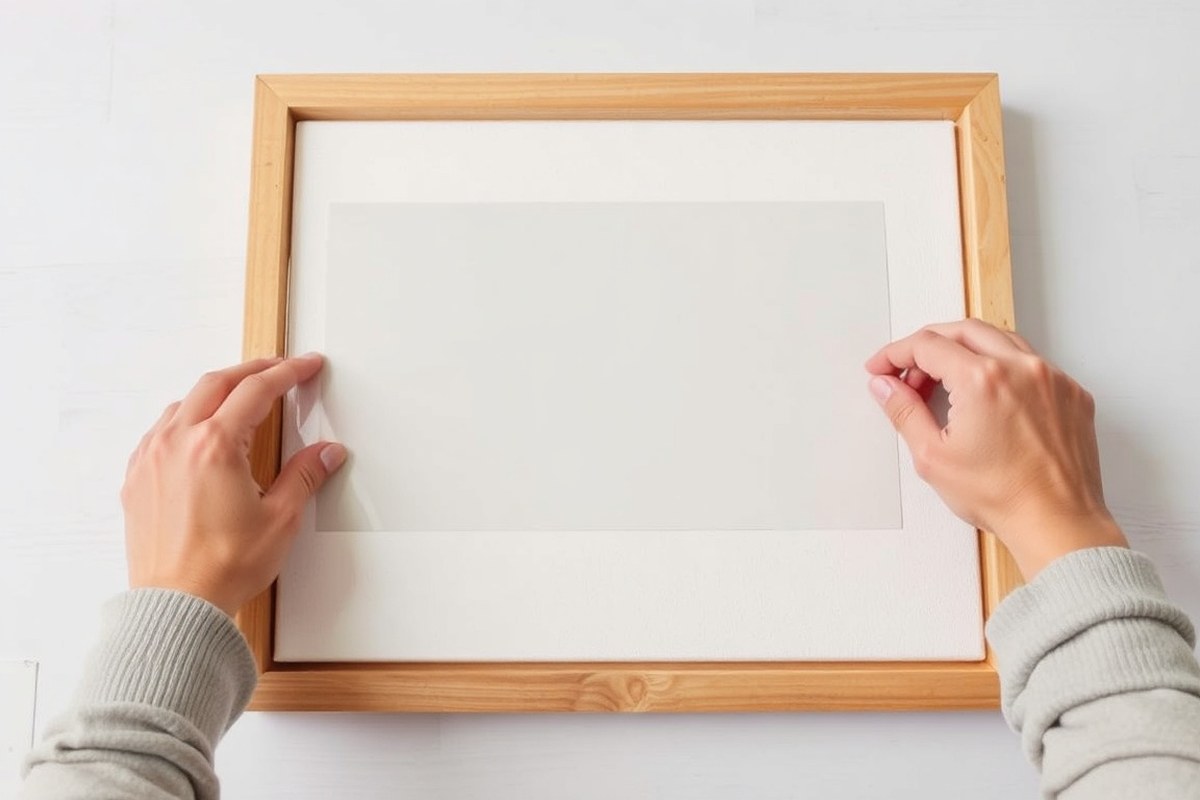
Creating a canvas sign with a Cricut machine involves cutting your design from heat transfer vinyl (HTV), carefully weeding away the unwanted parts, and transferring the design onto the canvas using heat and pressure. This process allows you to add crisp, custom designs that stand out on your canvas sign. Following specific steps for design preparation, vinyl cutting, and heat pressing ensures your sign looks professional and lasts.
Preparing Your Design File for Cricut
Start by selecting or uploading your design file in Cricut Design Space. For canvas signs using Cricut Iron-On Lite vinyl, it’s essential to mirror your image because heat transfer vinyl requires the design to be cut in reverse. Size the design according to your canvas dimensions, usually around 16″ x 20″ for a standard canvas sign, making sure it fits well on your cutting mat, which can be 12″ x 24″. If your design is larger, consider breaking it into smaller pieces to cut in sections.
Uploading an SVG file gives you flexibility to resize and edit, while Cricut Access provides thousands of cut-ready designs for $9.99 a month. Once your design is mirrored and sized correctly, you’re ready to proceed to cutting.
Cutting and Weeding the Vinyl Design
Load a piece of Iron-On Lite vinyl onto your Cricut cutting mat with the shiny, clear backing facing down. Confirm the material setting is set to “Everyday Iron-On” or “Iron-On Lite” for best results with this type of vinyl. This ensures the blade cuts the vinyl without cutting through the backing. After starting the cut, wait until the machine finishes completely before removing the mat.
Weeding is the process of removing the excess vinyl not part of your final design. Use a Cricut weeding tool or tweezers to pick away unwanted bits gently. Take care around small letters and detailed parts. A clean weeding job prevents sticky pieces from transferring unintentionally to the canvas.
Applying the Design to Canvas with EasyPress
Heat your Cricut EasyPress or household iron to 315°F, which is the recommended setting for Cricut Iron-On Lite on canvas. Set a timer for 30 seconds of pressing time, applying firm, even pressure. Always place a light cloth or Cricut Protective Sheet over the vinyl before pressing to protect both the canvas surface and the vinyl from heat damage. Press once firmly, then allow the vinyl to cool slightly before slowly peeling away the clear carrier sheet.
After removing the carrier sheet, cover the design again with the protective sheet and press one more time for about 15 seconds. This second press helps the vinyl fully adhere to the canvas, improving durability. Avoid shifting the press during application to prevent smudging or warping of the design.
- Upload your SVG or select a design in Cricut Design Space.
- Mirror the image horizontally, then size it to fit your canvas.
- Place the Iron-On Lite vinyl on the cutting mat with the shiny side down and load it into the machine.
- Select the Iron-On Lite setting and start the cut.
- Weed away excess vinyl carefully using a weeding tool.
- Preheat your canvas area with the EasyPress for about 5 seconds.
- Position the vinyl design on the canvas, cover it with a heat protective sheet or light cloth.
- Press at 315°F with firm pressure for 30 seconds, let cool, peel carrier sheet, then repress for 15 seconds.
Materials and Tools Needed for Cricut Canvas Signs
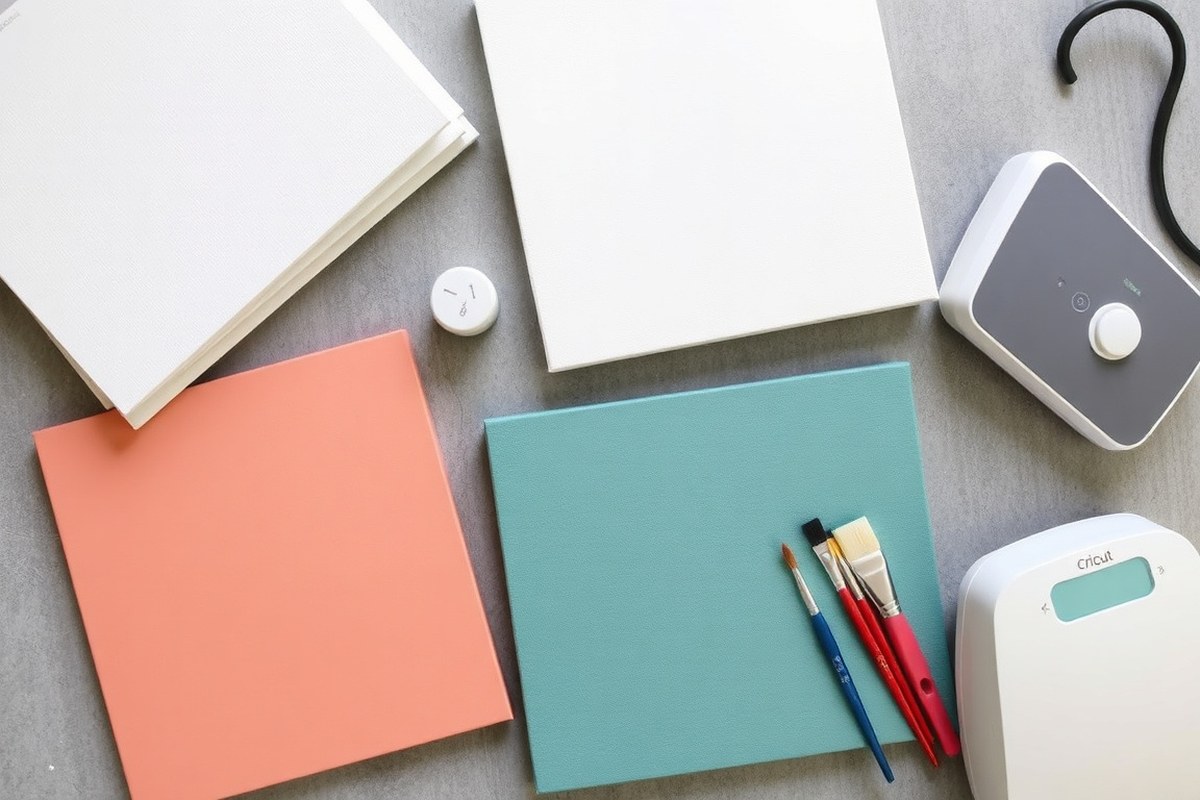
To make canvas signs using a Cricut machine, you need specific materials and tools carefully chosen to ensure clean cuts and smooth application. Start with a quality canvas; a 20×24 inch level 1 canvas from craft stores like Michaels is ideal for beginners. This size offers enough workspace for lettering or small designs without overwhelming detail. Choosing the right vinyl is critical. Cricut Iron-On Lite or Everyday Iron-On Vinyl works well on canvas due to its flexible, heat-activated adhesive that bonds better to fabric-like surfaces. Avoid standard adhesive vinyl, which may not adhere firmly or could peel off.
For cutting, both the Cricut Maker and Explore Air 2 machines suit this project. They provide the precision needed for detailed text or shapes. Use a fine-point blade for iron-on vinyl cutting; it delivers clean cuts without fraying vinyl edges. Avoid deep or rotary blades unless working with thicker materials beyond canvas.
- Canvas (20×24 inches recommended for beginners)
- Cricut Maker or Explore Air 2 machine with a fine-point blade
- Cricut EasyPress or EasyPress 3 for heat application (preheats canvas and sets vinyl)
- Cricut Iron-On Lite or Everyday Iron-On Vinyl for durable adhesion
- Weeding tools (hook and tweezers) to remove excess vinyl
- Teflon sheet or parchment paper, unless using EasyPress 3 with Everyday Iron-On vinyl
- Standard household iron or pressing cloth as a backup heat source
Preheating the canvas before applying vinyl removes moisture and wrinkles, improving vinyl adhesion. The EasyPress offers reliable, even heat that stabilizes the design area. Keep the temperature around 315°F and press for 30 seconds, adjusting slightly by your EasyPress model’s guidelines. Using weeding tools ensures clean edges around letters or images and prevents lifting during transfer.
Avoid using too much pressure or heat when pressing vinyl on canvas to prevent scorching the material or warping the design.
Optional supplies that can improve your workspace and end results include scrap cardboard to place inside the canvas frame, preventing heat transfer to the back, and painter’s tape to hold the vinyl design securely during pressing. Some crafters also use a lint roller to clear dust from the canvas surface before vinyl application, improving adhesion.
Choosing the Best Vinyl for Canvas Signs
Heat transfer vinyl (HTV) is generally better suited for canvas signs than adhesive vinyl if you want your design to last and maintain its quality. HTV, also called iron-on vinyl, bonds with canvas fibers through heat, creating a more durable and flexible application. Adhesive vinyl can stick to canvas, especially if the canvas is painted or treated, but it tends to peel and wear off faster due to the textured surface.
Choosing the right vinyl depends on your project details. HTV works well with heat sources like a Cricut EasyPress, heat press, or a household iron. It adheres best to unpainted or lightly textured canvas, including reverse canvas signs. Adhesive vinyl, especially Cricut 651 permanent vinyl, needs a smooth, primed, or painted canvas to stick properly. You’ll often have to seal or prep the canvas surface for better adhesion with adhesive vinyl.
| Feature | Heat Transfer Vinyl (HTV) | Adhesive Vinyl (e.g., Cricut 651) |
|---|---|---|
| Adhesion Method | Bonded with heat to canvas fibers | Sticks with adhesive backing |
| Best Canvas Type | Raw or lightly textured canvas, works well on reverse canvas | Painted or prepped canvas for better grip |
| Durability | Lasts longer with heat-pressed bond, flexible with fabric movement | Can peel or lift over time, less flexible on textured fabric |
| Application Tools Needed | Cricut EasyPress, heat press, or household iron at 305, 320°F for 15, 30 seconds | None (peel and stick), but surfaces need prep or sealing |
| Cost and Brands | Siser Easyweed and Cricut Everyday Iron-On typically $1, $2 per sq ft | Cricut 651 permanent vinyl around $1.50 per sq ft |
| Usage Tips | Use protective sheet, press firmly, allow cooling before peeling carrier | Prep with gesso or paint canvas, press down edges firmly for better hold |
Applying HTV requires heating the vinyl onto the canvas carefully. Place a protective Teflon sheet or parchment paper over the design to avoid scorching. Press at 305 to 320 degrees Fahrenheit for 15 to 30 seconds, applying firm and even pressure. After cooling a bit, peel the carrier sheet slowly. Doing this right ensures the vinyl bonds fully and resists cracking or peeling.
Adhesive vinyl offers the advantage of being quicker with no heat needed, but it struggles on raw canvas. Prepping the canvas by painting or applying a layer of gesso improves its stickiness. Even then, the vinyl is more prone to lifting, especially around edges. Ideal use is for smoother painted canvases or for short-term decorative signs.
For longer-lasting signs or those that will be handled often, HTV is preferred as it withstands folding, stretching, and minor abrasions better. Adhesive vinyl works best for projects that don’t require high durability or when heat tools aren’t available. The choice depends on your tools, canvas condition, and how you plan to display or use the sign.
Preparing and Painting the Canvas Surface Before Applying Vinyl
Preparing your canvas by painting or staining before applying vinyl improves both adhesion and looks. Unpainted canvas has a rough, porous texture that makes it difficult for adhesive vinyl to stick well. Adding a paint or stain layer creates a smoother, firmer surface and helps the vinyl last longer without peeling or wrinkling.
Start by placing a thick book or a small stack of magazines under the canvas. This support prevents the canvas from stretching or warping when you press on it during painting and vinyl application. Using this firm base keeps your sign neat and straight.
Acrylic paint is the best choice for painting canvas prior to vinyl application. It is affordable, quick-drying, and available at craft stores for less than $1 for small bottles. Choose a white or light-colored base coat to make your vinyl design pop. Paint a thin, even layer over the entire canvas surface, then let it dry fully. Drying usually takes about 30 minutes to an hour at room temperature. Avoid heavy coats that may crack or peel once vinyl is applied.
Choosing a natural wood look or rustic style works well when you apply wood stain to the wooden frame sections. Use a cloth or brush to evenly spread the stain, then allow it to dry completely. Plan for at least 24 hours drying time with stain, because incomplete drying can ruin adhesion and affect the appearance of the finished sign.
After the paint or stain is dry, test the canvas by lightly pressing a piece of the vinyl to check for good stickiness. When the vinyl does not adhere properly, try applying another thin paint coat and let it dry again. Avoid painting with house paint intended for walls; craft acrylics provide better grip for vinyl.
Painting the canvas white even if it’s already white prepares a smooth base and adds a hand-painted character that looks more polished under vinyl. The key is to keep layers light and smooth to avoid texture buildup that can cause the vinyl to lift. Waiting until the painted surface is fully dry is important; applying vinyl too soon can trap moisture and cause bubbling or peeling later.
Using iron-on vinyl is recommended over adhesive vinyl on canvas fabric because iron-on sticks better to the textured surface. After painting and waiting for the canvas to dry at least an hour, you can apply iron-on vinyl with your Cricut and heat press or home iron. Adhesive vinyl tends to struggle on unprimed canvas, but painting gives the bonding surface the texture and firmness needed for a neat finish.
Separating Canvas from Frame for Reverse Canvas Signs
Removing the canvas from its wooden frame requires patience and the right tools to avoid tearing or stretching the fabric. This step is important for creating clear, clean reverse canvas signs, where the canvas design shows from the back side and the frame acts as a front border. Handling the canvas carefully ensures a smooth crafting process and a polished finished sign.
Tools Needed for Canvas Removal
Good tools make separating the canvas from the frame easier and reduce the risk of damage. A craft knife with a sharp blade helps cut through any adhesive or staples along the edge. A flathead screwdriver or needle-nose pliers assist in removing staples or small nails without ripping the canvas. Spring clamps or twisty clamps keep the frame steady if you need to work on each side individually.
Having a soft cloth or gloves protects your hands while you work. Optional tools like a putty knife can gently pry staples loose when combined with pliers. Avoid using tools with sharp or serrated edges that can accidentally cut or snag the canvas.
Step-by-Step Removal Process
Detach the canvas carefully to keep the fabric intact for your reverse canvas design. Following the right sequence reduces tearing and helps maintain the original stretch for reassembly.
- Lay the canvas face down on a clean, flat surface with plenty of working space.
- Use the craft knife to cut around the outer edge of the wooden frame, between the canvas and frame, to loosen any glued areas or finish staples.
- Gently pry up a staple or nail with the flathead screwdriver or needle-nose pliers, working slowly along one side to avoid ripping the canvas.
- Continue removing staples or nails on all sides, easing the canvas away from the frame step by step.
- Once all fasteners are removed, carefully lift the canvas off the frame keeping the fabric taut to prevent stretches or wrinkles.
- Cut off any excess canvas that will not be used when reattaching to the frame so the front view looks clean and tight.
Take your time when removing staples and nails to prevent small tears that can worsen during re-stretching.
Cleaning and Re-Stretching Canvas
Cleaning the wooden frame of leftover staples and residue ensures a smooth surface for reapplication. Use sandpaper or a scraper to remove stubborn bits without splintering the wood. Check the frame for any damages or loose joints and repair as needed before re-stretching.
Re-stretch the canvas evenly across the wooden frame to create a taut surface ideal for vinyl application. Use your clamps to hold the canvas securely in place while you staple or nail it back to the frame’s backside. Working from the center of each side toward the corners helps maintain even tension. Trim any remaining canvas edges for a neat finish.
Tips to Avoid Common Mistakes When Making Canvas Signs
Vinyl peeling off canvas happens mainly because canvas is a textured, porous fabric that doesn’t provide a perfectly smooth surface for vinyl to stick. Without the right preparation and adhesive choice, the vinyl edges can lift or curl after application or with handling. Using permanent adhesive vinyl rather than removable vinyl, and applying firm, even heat with a Cricut Easy Press or iron set to about 305°F for 15 seconds can help create a stronger bond. Press with medium pressure, then allow the canvas to cool before peeling the vinyl carrier sheet at a low angle.
Misaligned designs on your canvas sign usually come from incorrect positioning or shifting during the application of vinyl or heat transfer vinyl (HTV). To avoid this, use transfer tape for adhesive vinyl, and gently place the design where you want it before pressing it down fully. For HTV, use a ruler or grid lines drawn lightly in pencil on the canvas to measure the layout. When your design shifts during heat application, place a sheet of parchment paper over it and apply heat with steady pressure, avoiding pressing down hard in one spot.
Poor heat press adhesion often results from insufficient heat, pressure, or time, or from skipping necessary surface preparation. Canvas signs must be clean, dry, and free of loose fibers or dust before applying vinyl. Setting your Easy Press to 305°F for 15-20 seconds with medium pressure usually yields good adhesion, but check the vinyl manufacturer’s instructions as times may vary slightly. Avoid pressing for too long or at too high a temperature, as this can scorch or warp the canvas, causing bubbling or lifting.
- Clean canvas surface with a lint roller before applying vinyl
- Use a ruler or painter’s tape to mark alignment guidelines
- Set Easy Press to 305°F and press for 15 seconds with medium pressure
- Peel carrier tape slowly at a 45-degree angle after cooling
- Apply a second press if edges lift, but use a heat protector sheet
- For reverse canvas, ensure frame is fully removed to avoid uneven pressing
Watching for small bubbles or lifting edges before completing the peel is important. Spot bubbles? Gently lift the vinyl and apply heat and pressure again to smooth it out. A firm, even press across the entire design is best; avoid quick touches or sliding movements. Pay attention to the type of vinyl, permanent adhesive or HTV works best on canvas surfaces for signs because of the textures and fabric stretch you’re working with. When done correctly, your vinyl will lie flat without peeling, aligned symmetrically, and with a durable bond to the canvas.
Designing and Sizing Your Canvas Sign in Cricut Design Space
Creating and sizing your canvas sign design properly in Cricut Design Space ensures a clean, professional look and saves material. Measure your canvas accurately, choose SVG or compatible image files, and position your design thoughtfully within the available space. Proper mirroring and layout prevent errors during cutting and application.
Measuring and Setting Canvas Dimensions
Start by measuring your canvas with a ruler or tape measure. Note the width and height in inches, as Cricut Design Space uses inches by default. Record these measurements carefully because setting the exact canvas size in your project keeps your design from appearing too large or too small.
To input canvas dimensions, open a new project and use the “Shapes” tool to create a rectangle matching your canvas size. Lock the aspect ratio and enter the width and height values. This shape serves as a visual guide to design within the correct boundaries. It also helps you avoid trimming parts of your design during vinyl application.
Uploading and Preparing SVG Files
Cricut Design Space accepts multiple file types, but SVG files are preferred since they maintain quality when resized. You can upload your own SVG files or find free and paid designs via Cricut Access or third-party libraries. Preparing your files correctly impacts cut accuracy and project quality. Follow these steps to upload and prepare an SVG file for your canvas sign:
- Open Cricut Design Space and start a new project.
- Click “Upload” from the side toolbar.
- Select “Upload Image” and browse to your SVG file or drag and drop it into the upload window.
- Name your file and add tags if desired to find it easily later.
- Choose “Save” to add the file to your uploaded images.
- Select the uploaded SVG from “Recent Uploads” and click “Insert Images” to add it to your canvas.
- Resize the design to fit within your canvas shape, maintaining the aspect ratio to avoid distortion.
For designs larger than about 11 inches wide or tall, consider breaking them into sections. This keeps individual cuts manageable and vinyl use efficient. Place these parts side by side in your project space to plan alignment during assembly.
Design Placement and Mirroring
Arrange your design on the canvas shape so it sits well within the edges, leaving at least half an inch margin. This spacing prevents design elements from wrapping onto the frame or edges, which affects appearance.
Before cutting with iron-on or heat transfer vinyl, mirror your design horizontally. This flips the image so it appears correct when transferred onto the canvas. Failure to mirror can result in reversed or unreadable text and images. Steps to position and prepare your design for vinyl cutting:
- Drag and move your design to the desired location on your canvas template in Design Space.
- Use alignment tools to center or evenly space design elements if working with multiple parts.
- Click the “Make It” button to move to cutting preview.
- Toggle the “Mirror” option on for each mat that uses iron-on or HTV vinyl.
- Confirm vinyl dimensions match your design size on the preview mats.
- Place your material on the cutting mat as shown in the preview, ensuring proper orientation.
Finishing and Protecting Your Completed Canvas Sign
Sealing the vinyl design on your canvas sign helps protect it from moisture, dirt, and fading. A clear acrylic spray sealant designed for fabric works well, applied in light, even coats. Spray in a well-ventilated area and allow each coat to dry for about 20 minutes before applying another. Two to three coats usually suffice for good protection without altering the canvas texture. Avoid brushing on sealants as they can cause the vinyl to lift or wrinkle.
Framing your canvas sign not only adds a finished look but also supports and preserves the edges. Simple wooden frames that are 3/4 inch wide are a popular choice and can be stained or painted to match your décor. When reattaching your canvas, ensure the sides extend beyond the frame by about 1.5 inches to allow for secure stapling or tacking without pulling the fabric too tight. Frames with a thin lip hold the canvas securely while keeping the entire design visible.
Proper care keeps your canvas sign looking fresh. Dust it gently with a soft brush or microfiber cloth to avoid scratching the vinyl. For spot cleaning, use a damp cloth with mild soap and water, then dab dry. Avoid soaking the canvas or using harsh chemicals, as excessive moisture can weaken the adhesive holding the vinyl. Keep your sign out of direct sunlight for prolonged periods to prevent fading and discoloration.
Check that your canvas and vinyl design are perfectly straight before sealing or framing to prevent wrinkles or misalignment that are difficult to fix later.
Step-by-Step Action Plan to Create Your First Canvas Sign with Cricut
Use this plan to turn your supplies and designs into a finished canvas sign you’ll be proud to display or gift.
- Before you start: Gather all materials and tools like your canvas, Cricut machine, vinyl, transfer tape, and paint. Check that your canvas surface is clean and dry to ensure vinyl sticks well.
- Day 1: Design your sign in Cricut Design Space, adjusting size to fit your canvas. Confirm your design fits within the canvas edges without parts getting cut off.
- Day 2: Prepare and paint your canvas surface if desired. Let paint dry fully, usually 24 hours, for best results before applying vinyl.
- Day 3: Cut vinyl with your Cricut using settings matched to your vinyl type. Weed excess vinyl carefully and test if the weeded design transfers cleanly to transfer tape.
- Day 4: Apply transfer tape to your vinyl design and position it on the canvas. Press firmly with a scraper tool and remove transfer tape slowly, checking that all vinyl sticks.
- Day 5: Add any finishing touches like protective spray or sealing coat. Allow it to dry completely to protect your sign and keep your vinyl from peeling.
- After one week: Display your sign in a dry area away from direct sun to maintain colors and vinyl adhesion longer.
Frequently Asked Questions
What Type of Vinyl Works Best for Canvas Signs Made with a Cricut?
Heat transfer vinyl like Cricut Iron-On Lite works best for canvas because it adheres smoothly and flexes with the fabric, creating a clean look and durable finish on canvas signs.
Can You Use Standard Adhesive Vinyl on Canvas Instead of Heat Transfer Vinyl?
Yes, you can, but adhesive vinyl may not stick as long or resist peeling as well as heat transfer vinyl when used on textured canvas surfaces.
How Do You Prevent the Canvas from Stretching While Applying Heat Transfer Vinyl?
Place the canvas on a flat, firm surface like stacked books before pressing, which prevents distortion and keeps your design straight.
Is It Necessary to Seal the Canvas Sign After Applying Vinyl?
Sealing is optional but helps protect your vinyl design and canvas surface from moisture and wear, especially on hanging signs.
Can You Reuse Cut Vinyl Designs for Multiple Canvas Signs?
Vinyl designs can be reused if cut precisely, but heat transfer vinyl may not reuse well after initial pressing because it bonds permanently to the surface.
What Font Styles Work Best for Canvas Signs with Cricut Vinyl?
Choose bold, simple fonts to ensure clean cuts and easy weeding on fabric surfaces like canvas for a crisp, legible sign.
Before You Go
Making a canvas sign with your Cricut lets you customize home decor or gifts with ease. Trying your first project using this clear, step-by-step approach will build your skills and confidence for more advanced designs. Start by creating a simple design today and enjoy personalizing your space with your own handcrafted sign.