How to Make a Canvas Sign by Hand: A Complete Guide with Pro Tips
How to make a canvas sign by hand begins with choosing the right canvas and supplies before prepping your surface for painting. Use a sturdy, primed canvas around 16″ x 20″ to fit most DIY designs comfortably. Start by painting a smooth base layer with white acrylic paint to ensure your colors and designs stand out clearly.
Key Takeaways
- Purchase pre-stretched canvases measuring 16″ x 20″ for an ideal balance between size and ease of handling.
- Apply a coat of white acrylic paint as a primer to create an even surface for your design.
- Gather quality brushes and a 9” foam paint roller for smooth, consistent paint application.
- Use graphite paper or a light pencil to transfer lettering outlines before painting to reduce mistakes.
- Choose acrylic paint for durability, quick drying time, and easy cleanup.
- Let each paint layer dry 30 minutes before adding details or repeating paint layers for deeper colors.
Materials and Tools Needed for a Canvas Sign
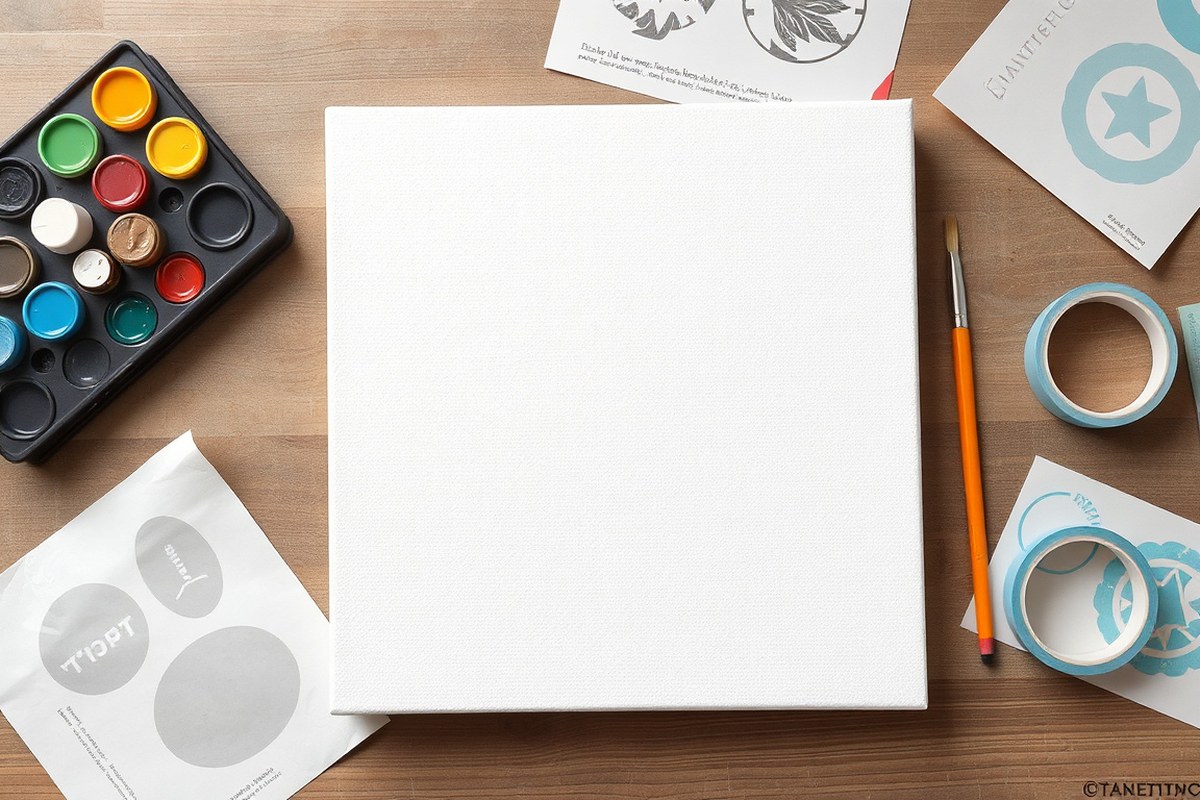
Making a canvas sign by hand calls for a handful of key materials and tools, each serving a specific purpose to help you achieve a neat and personalized design. The most essential item is a stretched canvas, typically sized around 16″ x 20″ or 20″ x 24″ for manageable sign projects. Stretched canvases already provide a firm, flat surface, but placing a few books or a sturdy board underneath can help prevent warping while you paint and work on your design.
Acrylic paint is highly recommended for these signs due to its quick drying time, good coverage, and vibrant colors. It also adheres well to canvas and allows for layering or touch-ups. Instead of specialized sign-making paint, beginner-friendly acrylic craft paints costing about $1 to $3 per bottle from craft stores like Michaels offer both affordability and quality. Brushes with synthetic bristles in a variety of sizes, from fine liner brushes for details to flat brushes for filling larger areas, are what you’ll need to get tidy results.
- Stretched canvas (16″ x 20″ or 20″ x 24″), ready to paint on or prime
- Acrylic paints in colors of choice, beginner-friendly craft sets available
- Synthetic brushes in varied sizes, including fine detail and flat brushes
- Stencil paper or tracing paper for transferring designs cleanly
- Pencil or graphite transfer paper to outline your artwork on the canvas
- Ruler or straight edge to mark guidelines for lettering and alignment
- Optional: wooden strips (1″ x 2″) or stakes to create a simple DIY frame
Using tracing or graphite transfer paper ensures your lettering or design transfers neatly without freehand errors. This step is particularly useful if precise letter placement matters, as it lets you outline before painting. Simple household items like pencils and rulers help keep lines straight and evenly spaced, much like practicing letters on lined paper from school days. The optional wooden strips or 1″ x 2″ boards can be glued to the back edges of the canvas to form a makeshift frame, helping the sign look professionally finished without costly framing.
Choosing budget-friendly versions of these supplies rarely compromises the quality of your final sign. For example, basic craft acrylics provide enough pigmentation and durability for indoor signs. Brushes with synthetic bristles are less expensive than natural hair and clean easily, but ensure they hold their shape well to avoid rough edges in your painting. Canvas from stores like Michaels can range from under $10 for basic, level 1 canvases to more costly or larger options. Opting for intermediate-level canvases helps balance cost and surface quality.
Getting set up with these materials and tools provides a solid foundation for creating hand-lettered or painted canvas signs that look neat and custom-made. Clear lines, vibrant colors, and stable canvas support, these key elements come from your choice and use of materials, not fancy equipment. A few simple, affordable items allow you to build skill and confidence without overwhelming your craft budget.
Preparing Your Canvas for Painting and Design Transfer
Preparing your canvas before painting helps you achieve a smooth, even surface and ensures your design transfers cleanly and looks polished. Priming the canvas, optionally sanding it for texture, and setting up clear guidelines will make your hand-painted sign easier and more professional-looking.
Priming the Canvas Base
Start by applying a base coat of white acrylic paint to prime the canvas. A white background improve paint colors and creates a consistent surface for lettering. Use a 9-inch foam paint roller for an even coat, which helps prevent brush marks and speeds up the process. Craft store acrylics are affordable, often under $1 for a 2-ounce bottle, making this step inexpensive.
Let the primer dry completely before moving on. Drying can take about 30 to 60 minutes depending on room temperature and humidity. Your workspace being cool or damp means you should allow extra drying time to prevent smudging while transferring designs or painting.
Sanding for Texture and Smoothness
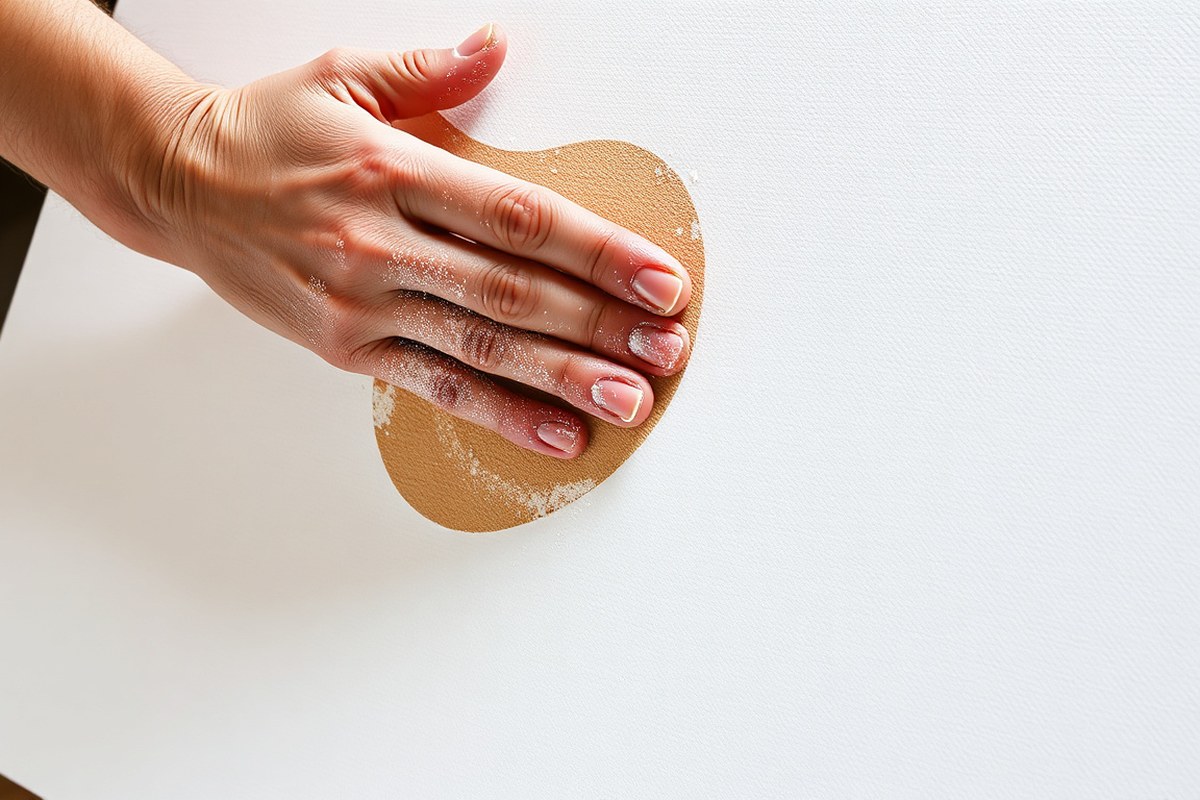
Sanding is optional but useful if you want a smoother or distressed look. Lightly sand the dried primer with very fine grit sandpaper (around 220 grit). This removes any raised fibers or rough spots and helps paint adhere better.
A light sanding also creates a slightly textured surface if you prefer a rustic or weathered style sign. Avoid heavy sanding, which can damage the canvas or create uneven areas that will affect paint application.
Setting Up Guidelines and Grids for Layout
Use guidelines to keep your lettering and design aligned. Light pencil marks work best because they are easy to erase or paint over later. To create straight horizontal lines, use a long ruler or a yardstick against the canvas and lightly draw pencil lines where the base of your letters or key design elements will sit.
For more complex designs, grid lines help spacing and proportions. Measure equal distances vertically and horizontally, and use a carpenter’s square or a level to ensure straight lines. Carbon paper tracing is a great method for transferring designs; place the carbon paper between your template and canvas and trace carefully.
Step-by-Step Canvas Preparation
Follow these exact steps to prep your canvas efficiently and set it up for a clear, well-aligned design transfer and painting.
- Lay your canvas flat on a firm surface, place a book or magazines underneath to stabilize and prevent sagging.
- Roll on an even layer of white acrylic paint using a 9-inch foam roller; cover the entire surface smoothly.
- Allow the paint to dry thoroughly, usually 30 to 60 minutes depending on conditions.
- Optionally, lightly sand the canvas with 220 grit sandpaper to smooth the surface or add texture.
- Wipe away any dust from sanding with a clean, dry cloth.
- Use a ruler and pencil to draw horizontal guidelines where your lettering will go.
- Create a grid with equal spacing and straight lines when you need help guiding complex designs.
- Transfer your design using carbon paper or by tracing a template, keeping your template securely in place.
Work on a firm surface underneath the canvas to maintain tension; this keeps your paint and pencil lines crisp and helps design transfer stay accurate.
Techniques for Adding Lettering and Designs by Hand
When adding lettering and designs to your canvas sign, several methods can help achieve neat and attractive results. You can draw freehand directly on the canvas, use stencils or printed templates, or transfer your design with carbon paper. Each technique suits different skill levels, tools, and time commitments, helping you create eye-catching custom signs with confidence.
Freehand Lettering Basics
Freehand lettering lets you write or draw directly onto the canvas using markers or paintbrushes. This method works well if you feel comfortable with your handwriting or want a more organic, personal look. To keep letters balanced and straight, lightly sketch guidelines with a pencil or use a ruler to mark horizontal lines about 1 to 2 inches apart, depending on your letter size. Practice your lettering on scrap paper first, focusing on consistent letter height and spacing.
Freehand has the advantage of flexibility and speed, but it requires steady hands and some confidence. Mistakes can be harder to correct, so start with light pencil sketches to trace over. Avoid this method if you have little artistic skill or want perfectly uniform text, as uneven letters or spacing can be noticeable on canvas.
Using Stencils and Templates
Stencils offer an easy way to replicate clean, consistent letters and designs. You can buy letter stencils at craft stores or create your own by printing templates on regular 8.5″ x 11″ paper and cutting out the letters with a craft knife. Position the stencil on the canvas and secure it with painter’s tape so it doesn’t move while you fill the spaces using a foam brush or stencil brush.
Stenciling is ideal for beginners seeking uniform lettering. Take care not to apply too much paint, which can cause bleeding under the stencil edges. Dab the paint gently or use a sponge for even coverage. If you used a printed paper template, you can also trace the outline with a pencil before painting for extra precision. The cost is low since you only need printer paper and basic brushes, and the results look professionally neat.
Carbon Paper Transfer Method
Carbon paper transfer helps you get detailed and accurate designs onto canvas without freehand drawing. First, print your design or lettering on regular printer paper, no special printing required. Then place a sheet of carbon paper on top of the canvas with the shiny, carbon side facing down. Put your printed design over the carbon paper and tape both layers lightly in place.
Trace over the printed letters or shapes with a stylus or pencil, pressing firmly but not tearing the paper. The carbon paper transfers a clear, faint outline onto the canvas, which you can then fill in carefully with paint or markers. This technique works great for complex or large scale signs and costs less than buying stencils or vinyl letters. Using a carbon paper and stylus pack typically costs under $10.
Be mindful that carbon transfer requires a steady hand to avoid double lines or smudges. Clean up any stray carbon marks with a soft eraser or small brush dipped in water before painting. Carbon paper works best on smooth canvas surfaces and is an excellent option if you want precise lettering without freehand skills or tedious cutting work.
Painting Your Canvas Sign: Best Practices and Tips
For painting your canvas sign, choosing the right paint is essential for a smooth, vibrant finish. Acrylic paint is a top choice because it adheres well to canvas, dries quickly, and holds color without cracking. Use high-quality acrylics, as lower-quality paints can appear dull or may need extra layers. You’ll likely need 3 to 5 coats to achieve full coverage, especially if you want a crisp white background or bold lettering. Each coat should fully dry before applying the next, which usually takes 20 to 30 minutes in a room with normal temperature and ventilation.
Select brushes that suit the details of your design. Larger flat brushes or dry brushes work well for covering background areas with even, broad strokes. Smaller craft brushes with fine, firm bristles are ideal for lettering and detailed sections. Using the right brush tip helps prevent visible brush marks and keeps edges sharp. Before painting, lightly dip the brush in paint and remove excess on the edge of your palette or container to avoid heavy paint blobs that can lead to bleeding or uneven lines.
Maintain a medium-thin paint consistency. Thick paint can cause unwanted texture or clumping, while overly thin paint may run or bleed beneath your guide lines. Adding a drop of water to acrylic paint can make it easier to spread, but be careful not to over-dilute. Test your mix on a scrap piece of canvas to see how it dries and adjust accordingly.
Allow each paint layer to dry fully before adding the next. This drying time helps prevent colors from mixing unintentionally and reduces smudging risks. Plan for about 20 to 30 minutes dry time indoors; warmer or better-ventilated spaces speed up drying. You can lightly touch the painted surface to check for tackiness but avoid pressing hard to prevent dents or fingerprints.
Fixing mistakes can be done by letting the paint dry completely, then painting over errors with a matching base color before repainting the correct design. If paint bleeds under your lines, lightly sanding the area with fine-grit sandpaper after drying smooths the surface to repaint. For small smudges, damp cotton swabs or a clean, damp brush can sometimes lift wet paint carefully, but act quickly to avoid spreading smears.
Prevent paint bleeding by using slow, deliberate strokes and avoiding excessive paint on the brush near edges. Applying thin coats helps control bleed because it reduces excess paint pooling. Some painters also use a light layer of matte medium or a clear acrylic sealant on the canvas before painting to create a smoother surface that holds paint better. However, this is optional and depends on how textured your canvas is.
Finishing and Protecting Your Hand-Painted Canvas Sign
Sealing your hand-painted canvas sign protects both the paint and canvas from moisture, dust, and fading. Varnishes act as a clear protective layer that can also improve the finish, either by adding gloss or maintaining a matte look. Craft varnishes designed for acrylic paint are widely available at craft stores and often cost between $5 and $15 per item, depending on the brand and size. Choosing the right type depends on the finish you want. Glossy varnish reflects more light and brightens colors, while matte varnish reduces shine for a more subtle effect. Satin varnish offers a balance between these two.
Before you varnish your sign, make sure the paint is completely dry, which can take 24 hours for thick or multiple layers. Using a soft, wide, flat brush, apply the varnish in thin, even strokes following the grain of the canvas. Avoid pressing too hard or brushing over the same area repeatedly, as this can lift dry paint. After the first coat, wait at least 1 to 2 hours before applying a second coat. Two coats typically provide good durability without obscuring details. Keep the varnish container sealed well between uses to avoid drying out.
For a distressed or vintage look, you can combine finishing techniques. After varnishing, gently use fine-grit sandpaper (220 to 320 grit) or a sanding block to lightly rub areas where natural wear would occur. Common spots include edges, corners, or raised lettering. Sand just enough to reveal subtle hints of the base canvas or layers beneath without damaging the design. Dry brushing off-white paint over the entire sign before sealing can also soften the look and unify the design. Dilute the paint slightly with water, dip a large brush into it, then wipe most off on a paper towel before lightly dragging the brush across the canvas to create streaks and texture.
Keep in mind that distressing requires a gentle hand and patience. Too much sanding or wet brushing can remove your paint entirely or cause uneven colour patches. Test your distressing technique on a scrap piece of painted canvas first. Protective varnish should be the final step to lock in all your work.
Always wait until the paint is fully dry before applying varnish, applying too soon can cause smudging or lifting of the design.
Framing and Display Options for Canvas Signs
Building a frame for your canvas sign adds structure and polish, making it easier to hang and improving its overall look. Simple wooden frames or floating frames both work well and can be made with basic materials at low cost. For those who want quick options, there are also alternative mounting methods that don’t require a frame but still display your work attractively.
Building a Simple Floating Frame
A floating frame gives your canvas sign a modern look by creating a slight gap between the canvas edges and the frame. Use 3/4″ wide wood boards for the frame, which are affordable at hardware stores. The frame boards should extend about 1.5″ beyond each side of the canvas to properly border it.
To make the frame, cut four pieces of wood to match the canvas dimensions plus the extra length for overlap. Form a rectangle by arranging the pieces with mitered corners or simple butt joints for easier cutting. Sand edges smooth to avoid splinters.
- Measure the length and width of your canvas, then add 3 inches total to both dimensions (1.5 inches per side) for frame overlap.
- Cut two pieces of wood for the length and two for the width using a handsaw or miter box and saw.
- Sand the cut edges thoroughly with fine-grit sandpaper to smooth rough spots.
- Arrange the four pieces into a rectangle matching the canvas size plus overlap.
- Join corners with wood glue to hold the frame shape temporarily.
- Optionally, reinforce joints with small nails or brad nails once the glue sets.
- Finish the frame with paint or stain to suit your sign’s style, allowing it to dry fully before attaching.
Attaching the Frame to Canvas
Attaching a frame requires care so you don’t damage or warp the canvas surface. One effective approach is to apply wood glue on the frame edges and press it onto the canvas sides while the glue is still warm. Then, use a brad nailer to secure the frame, placing nails about every 6 to 8 inches.
Work on a flat surface to keep everything aligned. Avoid over-nailing, which can split the wood or puncture the canvas. The frame should sit flush against the canvas edges with no gaps for a clean finish.
- Lay the canvas face down on a clean, flat surface.
- Spread a thin layer of wood glue along the inner edges of the floating frame.
- Press the frame firmly onto the edges of the canvas, aligning all sides carefully.
- Use a brad nailer to attach the wood frame through the frame edges into the canvas stretcher bars, spacing nails 6 to 8 inches apart.
- Wipe away any glue squeeze-out quickly with a damp cloth.
- Let the glue dry according to the adhesive’s instructions, typically 30 minutes to 1 hour.
- Flip your sign over and check that the frame sits evenly without warping.
Alternative Display Methods
Frames aren’t the only way to display your canvas sign. For a casual or rustic look, consider mounting the canvas directly on the wall using adhesive strips designed for artwork. These strips hold lightweight canvas securely and avoid holes in your walls.
Another option is to staple the canvas onto a thin plywood backing cut to size. This adds rigidity without a visible frame and allows you to hang the plywood with standard wall hooks or wire.
Using clip hangers or bulldog clips connected to a decorative string or wire can also work for temporary or frequently changed signs. This method keeps the canvas unaltered and is easy to update.
Common Mistakes and How to Fix Them When Making Canvas Signs
Common mistakes with canvas signs start with lettering errors and uneven paint application. Lettering can smudge if your paint is too wet or you touch it before it dries. Blurred letters often result from using overly thick paint or a brush that’s too large for the size of your text. To fix smudges, wait until the paint dries completely, then carefully use a fine-tip brush dipped in the canvas background color to clean edges and remake letters. Avoid pressing too hard to prevent damaging the canvas.
Uneven paint coverage usually happens from applying paint in thick coats rather than thin, multiple layers. This can lead to bubbling or cracking later. When bubbles appear, gently prick them with a needle once the paint is dry and smooth over with a soft brush loaded with a tiny amount of matching paint. For cracks, some light sanding with fine-grit sandpaper, followed by repainting the spot, works well. Keeping paint thin and applying 2-3 coats with 20-30 minutes drying between coats will prevent many problems.
Warping of the canvas usually occurs when too much moisture soaks into the fabric or the frame isn’t tight enough. To reduce warping, make sure you stretch the canvas tightly over a wooden frame and keep the paint layers thin. Canvas warping can be fixed by placing it face down on a flat surface under moderate weight and leaving it for 24 hours. Doing this before the paint fully cures (typically 48-72 hours after painting) has the best effect. Here are some key beginner errors, their causes, and fixes you can do at home:
- Smudged lettering from wet paint: Let dry fully, then touch up with background color using a fine brush.
- Blurred edges caused by too-large brushes: Use smaller detail brushes for letters and outlines.
- Uneven paint application: Sand lightly, then repaint with thin coats, waiting 20-30 minutes between layers.
- Paint cracking from thick layers: Lightly sand cracked spots and repaint; always apply thin coats.
- Warped canvas from moisture or loose stretching: Stretch tightly at the start and weigh flat to re-flatten.
- Paint peeling or flaking: Ensure canvas primed properly with gesso and allow full drying time before finishing.
Prevention is the best fix. Always allow each paint layer to dry completely, dry times vary with temperature and humidity but usually take 20-30 minutes indoors at 70°F. Use a good quality gesso primer to seal the canvas before painting. Choose brushes that fit the size of your design, especially small round brushes or liners for lettering. Avoid touching painted areas until completely dry and keep your workspace dust-free to prevent debris from getting stuck in paint. Proper canvas tension and priming reduce warping and cracking, saving you time on repairs later.
Choosing the Right Method: Hand Painting vs Stencils vs Vinyl Transfers
Choosing the right technique for creating a canvas sign depends on your skill level, the time you want to invest, and the look you want to achieve. Hand painting requires brushes, paint, and steady hands. It often takes more time to complete but offers a unique, personalized touch. Stencils simplify the process by providing clear outlines to fill in, making them friendly for beginners and faster to work through.
Vinyl transfers, especially heat transfer vinyl (HTV) like Cricut Iron-On Lite, are great for sharp, clean graphics. Using a cutting machine like a Cricut or Silhouette Cameo helps you precisely cut vinyl shapes for a professional finish. Applying these designs requires an iron or heat press and some practice to ensure the vinyl sticks properly to canvas. Each method has different durability, appearance, and effort levels.
| Method | Tools Required | Skill Level | Time Needed | Durability | Visual Result |
|---|---|---|---|---|---|
| Hand Painting | Brushes, acrylic paint, palette | Intermediate to Advanced | Several hours | Long-lasting if sealed | Unique, textured, artistic |
| Stencils | Pre-cut or homemade stencils, paint, sponge or brush | Beginner to Intermediate | 1-2 hours | Good with sealing | Consistent shapes and edges |
| Vinyl Transfers (HTV or 651 vinyl) | Cutting machine, vinyl, weeding tools, heat source (iron/press) | Beginner to Intermediate | 30-90 minutes | Durable, but may peel without proper adhesion | Crisp, sharp, clean lines |
Hand painting gives you full creative control but requires practice to avoid brush marks and uneven lettering. Stencils speed up the process and reduce mistakes but limit details and custom changes. Vinyl transfers provide precision but need special tools and careful heat application. For the fastest route, vinyl transfers work well if you have a cutting machine. Beginners often find stencils best because they reduce the chance of errors while still allowing paint on canvas.
Combining these techniques can also be effective. For example, use vinyl for the main text, then add hand-painted accents to create depth and personality. Stencils can outline a design before filling in with hand paint to reduce uneven edges. Trying a small test patch helps avoid issues like vinyl not sticking well, a known challenge with canvas fabric.
Test your vinyl adhesion on a scrap canvas piece before transferring to your final project to avoid peeling or bubbling.
Step-by-Step Action Plan
Follow these steps to create your own hand-painted canvas sign, ensuring each phase sets you up for success.
- Before you start: Gather all materials and tools listed earlier, checking paint colors, brushes, canvas size, and protective finishes. Confirm everything is on hand to avoid interruptions.
- Day 1: Prepare the canvas by stretching it if needed, then prime with gesso and let it dry fully, which usually takes a few hours. The surface should feel smooth and ready for paint.
- Day 2: Transfer your design or lettering onto the canvas using transfer paper or a light pencil outline. Verify the placement matches your plan before going to paint.
- Day 3-4: Begin painting your design, starting with background colors and broad areas, then adding details and lettering once the base layers dry. Your brush strokes should look even and the colors vibrant.
- Day 5: Apply touches to fix any uneven edges or spots after paint dries. Make sure all colors are opaque and lines crisp.
- Day 6: Seal the sign with a clear protective finish, like a spray varnish suited for acrylic paint. Let it dry in a dust-free area overnight.
- Day 7: Frame or hang your canvas sign as desired, making sure it’s securely supported. Check that it hangs straight and looks as you pictured.
Frequently Asked Questions
What Canvas Size Is Best for a Beginner Making Hand-Lettered Signs?
A 16″x20″ or 20″x24″ canvas works well for beginners, offering enough space for practice and design without being too large to handle. These sizes are commonly used and fit standard DIY sign templates, making your process smoother and more manageable.
Can I Use Regular Acrylic Paint Directly on Blank Canvas?
Yes, acrylic paint works well on canvas for signs. It dries quickly and provides vibrant colors. Make sure your canvas surface is clean and consider lightly sanding for a subtle texture that helps paint adhere better.
How Do I Keep My Canvas Flat and Stable While Working on It?
Put several heavy books underneath the canvas to stabilize it. This stops the canvas from moving or bending during painting, which might otherwise lead to uneven letters or distorted designs.
What Is a Simple Way to Transfer a Design Onto a Canvas Without Tracing?
Use printing and a transfer method like Mod Podge to apply your design. This avoids freehand painting mistakes and speeds up the process. Allow it to dry fully before painting over the transfer.
How Long Should I Wait Between Painting Layers on a Canvas Sign?
Wait about 20 minutes or until each layer feels dry to the touch. This avoids mixing colors unintentionally and keeps your lettering or design crisp. Thinner paint layers dry faster and reduce the risk of smudging.
Can I Frame a Canvas Sign Myself?
Yes, simple frames can be made from 1×2 wood strips glued to the canvas edges. This “cheater’s” frame method adds polished looks without needing professional framing tools or skills.
Wrapping Up
Creating a hand-painted canvas sign gives you a lasting piece of personalized decor that fits your style perfectly. Start by designing a simple layout to build your skills and confidence. Once you’ve completed your first sign, you’ll have the foundation to customize signs for every room or occasion.


