What Are Sign Standoffs? A Complete Guide with Selection & Installation Tips
What are sign standoffs? They are small hardware components that securely mount signs or displays away from the wall, creating a clean floating effect. Sign standoffs hold panels using a simple two-part system that screws into the wall and clamps the sign, making installation both sturdy and visually appealing.
Using sign standoffs improves sign visibility and allows for quick mounting and removal without damaging the display or wall. Start by selecting standoffs compatible with your sign thickness and wall type to ensure proper fit and hold.
Key Takeaways
- Choose sign standoffs that match your sign panel thickness for a secure and stable installation.
- Stainless steel standoffs resist corrosion and are ideal for both indoor and outdoor use.
- Aluminum standoffs offer a lightweight option with a modern silver finish for aesthetic appeal.
- Measure wall surface type before selecting standoffs to ensure proper anchors and screws are used.
- Use sign standoffs to create a professional floating appearance that improve signage impact.
- Install standoffs by drilling pilot holes first to avoid cracking or damaging your wall or panel.
What Are Sign Standoffs and How Do They Work?
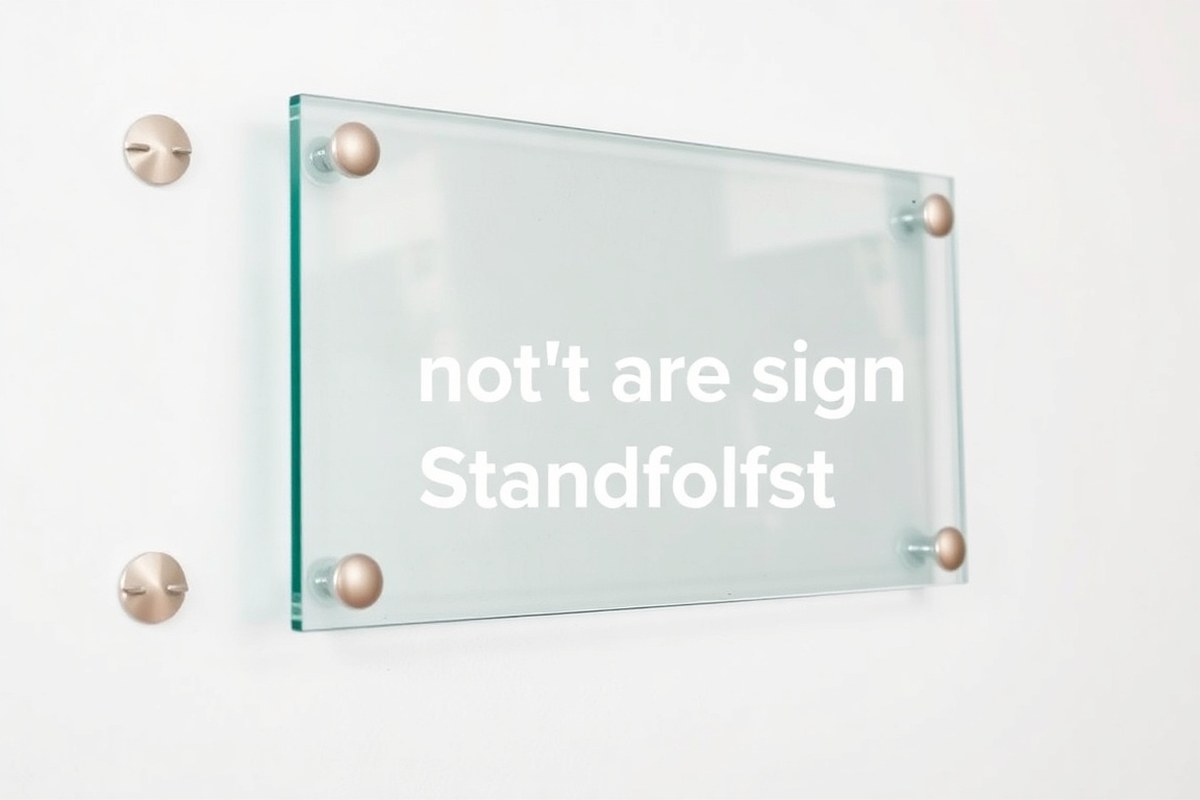
Sign standoffs are small hardware components that secure signs or display panels to walls or other mounting surfaces while creating a visible gap between the sign and the surface. This gap usually ranges from a quarter inch to over an inch, depending on the size and style of the standoff. The raised space helps protect the sign from moisture buildup, scratches, and impacts by preventing direct contact with the wall or mounting surface. This feature proves especially useful in environments prone to condensation or accidental bumps, such as lobbies, office corridors, or retail spaces.
Functionally, sign standoffs work by piercing through pre-drilled holes in the sign material and anchoring into the mounting surface with screws or anchors. The standoff consists of two parts: a barrel attached to the wall and a cap that screws over the barrel, clamping the sign securely between the two pieces. This design allows for easy installation and removal, unlike adhesive methods that can damage surfaces or signs during replacement. Stainless steel varieties typically mount panels from 4.5 to 16 millimeters thick, accommodating materials like acrylic, glass, or metal.
For example, imagine mounting an office directory sign made from a 10mm thick acrylic sheet using stainless steel standoffs. You start by drilling holes in the corners of the sign to match the standoffs’ diameter. Next, drill pilot holes into the wall, insert anchors if necessary, and screw the barrel portion of the standoffs into the wall. Then, position the sign over the barrels and screw on the caps. This process secures the sign with about a half-inch gap, improving visual appeal and protecting the sign’s finish.
The cost of sign standoffs can vary by material and finish, but a set of 12 plastic hidden standoffs might cost around $26.50. Metal sets with polished or satin finishes tend to be higher priced but offer better durability and aesthetics. Basic installation requires only a drill, screwdriver, level, and measuring tape, taking under an hour for a standard 24″ x 36″ sign. Accurate measurement and alignment matter to achieve a clean, professional look; uneven installation may cause the sign to tilt or create uneven gaps.
Standoffs offer flexibility for different mounting surfaces, including drywall, concrete, or wood. Selecting the right anchors for the wall type is essential to ensure a firm hold. In spaces like conference rooms, the ability to easily remove and replace signs for updates or maintenance is a significant advantage. Some installations also use perpendicular mounts that can hold signs extending away from a corner or partition.
The gap created by standoffs also promotes better air circulation behind the sign, which can help reduce humidity-related damage in some environments. This mounting method balances durability, style, and functional protection, making it a common choice for businesses, designers, and architects looking to present signage in a neat, secure manner without permanent adhesive.
Common Materials and Finishes for Sign Standoffs

Sign standoffs come in several durable materials, each offering distinct benefits in strength, appearance, and weather resistance. The most common are stainless steel, aluminum, brass, and acrylic or plastic. Stainless steel standoffs are known for their excellent corrosion resistance and strength, making them suitable for outdoor or high-traffic areas. Aluminum units are lightweight but sturdy, often anodized or polished for an attractive and weatherproof finish. Brass stands out for its elegant, vintage look, ideal in galleries and corporate offices where aesthetics matter. Acrylic or plastic standoffs create a striking three-dimensional effect but generally perform better indoors as they can be prone to UV damage and wear outdoors.
Finishes impact both durability and the look of your sign standoffs. For example, a satin or polished finish on metal standoffs provides a sleek, professional look while offering some scratch and corrosion resistance. Anodized aluminum finishes add a protective layer that prevents oxidation and fading under sunlight, extending the standoff life in exterior settings. Brass standoffs are often polished or left with a natural patina that can develop over time, giving the sign a distinguished character but requiring occasional maintenance to maintain shine. Choosing the right finish depends on balancing budget, environmental exposure, and desired style for your sign display.
| Material | Durability | Typical Finish | Weather Resistance | Ideal Use | Price Range (Set of 4) |
|---|---|---|---|---|---|
| Stainless Steel | High; corrosion-resistant | Polished, satin | Excellent; suitable for outdoor use | Outdoor, high-traffic areas | $27.69 – $32.99 |
| Aluminum | Moderate; lightweight and sturdy | Anodized, polished | Good; anodized finish resists oxidation | Indoor/outdoor with moderate exposure | $13.69 – $24.29 |
| Brass | Moderate; can tarnish without care | Polished gold, natural patina | Fair; indoor preferred or protected outdoor | Elegant indoor spaces like galleries | $36.99 – $53.99 |
| Acrylic / Plastic | Low to moderate | Clear, colored finishes | Poor; less UV and weather resistant | Indoor signs, decorative use | Varies; generally lower cost |
Selecting the right material and finish ensures your standoffs maintain their appearance and function over time. For outdoor signage, stainless steel with a polished or satin finish and anodized aluminum are your best bets as they withstand rain, sun, and temperature changes well. Brass requires maintenance in outdoor settings to prevent dulling, while acrylic should be reserved mainly for indoor use due to its vulnerability to UV light and weathering. The price varies accordingly, with brass generally costing more due to its decorative appeal and stainless steel often priced moderately for its durability.
Always check for rust or discoloration periodically on outdoor brass standoffs and consider sealing or polishing yearly to extend their life.
Choosing the Right Standoff for Your Sign and Location
Choosing the right sign standoff depends on your sign’s size, weight, panel thickness, and where you plan to install it. Selecting a standoff that matches these factors ensures the sign stays secure and looks professional. Consider panel material, environmental exposure, and the number of standoffs needed to properly distribute weight and resist wear.
Panel Thickness Compatibility Chart
Standoffs come in sizes that fit different panel thicknesses. Using the correct size avoids damage and keeps the installation stable. Most standoffs support rigid panels from 2mm up to 13mm thick, but the most common sizes are 6mm, 8mm, and 10mm.
| Panel Thickness | Typical Standoff Size |
|---|---|
| 2mm to 4mm | Small (aluminum or black finishes available) |
| 5mm to 8mm | Medium (standard sizes for glass and acrylic) |
| 9mm to 13mm | Large (heavy-duty standoffs for thick panels) |
Check the standoff’s specifications to confirm it fits your panel’s thickness. If your panel falls near the limits, use a slightly larger standoff to avoid pressure points that can crack or warp the material.
Indoor vs Outdoor Considerations
Indoor and outdoor environments affect which standoff material and finish you should use. Outdoor signs face moisture, temperature changes, and UV exposure. Indoor signs rarely deal with these but may require a cleaner look to match interior decor.
- Choose corrosion-resistant materials like stainless steel or anodized aluminum for outdoor use.
- For outdoor placement, seals or gaskets can help prevent water damage behind the sign.
- Indoor signs can use less corrosion-resistant materials if protected from humidity.
- Consider UV-resistant finishes for signs that get a lot of sun exposure outdoors.
- Temperature ranges vary by location, extreme cold or heat can affect some plastics or coatings.
- Wind load matters outdoors; larger signs may need more or heavier-duty standoffs.
Match your standoff to the environmental demands to avoid premature failure or fading over time. Good planning reduces maintenance costs and keeps your sign looking sharp.
Material and Weight Guidelines
The size and weight of your sign determine how many standoffs you need and which style will hold it safely. Larger or heavier panels require more points of contact to prevent sagging or damage. For instance, signs over 24 inches wide often need at least four standoffs, one near each corner.
Sign standoffs also vary in load capacity depending on their diameter and mounting hardware. Aluminium standoffs are common for light to medium signs but use stainless steel for heavier applications or outdoor use. Typically, a standoff 1.5 inches in diameter can support panels weighing up to 10 pounds each.
- Calculate total sign weight, including panel and graphics.
- Distribute weight evenly across all standoffs, adding more for larger signs.
- Choose standoffs rated for heavier loads if your sign exceeds 10 pounds.
- Use anchors and screws compatible with your wall type for secure installation.
- Verify load limits in manufacturer specifications before purchase.
Following these guidelines ensures a safe installation that maintains your sign’s position and appearance over time. Improper standoff sizing or insufficient quantity can cause warping, falling signs, or costly repairs.
Step-by-Step Installation Process for Sign Standoffs
Installing sign standoffs typically takes about one to two hours depending on the size of the sign and wall material. The process involves precise measurement, drilling, and securely attaching the standoffs to hold your sign panel firmly. Careful preparation and following each step helps avoid misalignment or unstable mounting.
Required Tools and Materials
Start by gathering all tools and materials before beginning the installation. You will need a cordless drill with drill bits sized for your wall anchors and screws, a tape measure, a level, a pencil for marking, a screwdriver or hex key to tighten caps, and the standoff hardware set that includes barrels, screws, and wall anchors.
Use anchors designed for your wall type, toggle bolts or expansion anchors for drywall, masonry anchors for brick or concrete, or wood screws for studs or wooden surfaces. Having a helper can make handling large signs easier and safer.
Marking and Preparing the Wall
Marking the mounting holes accurately is critical for a flush and balanced sign installation. First, decide the exact height and position on the wall where the sign will appear. Use the tape measure and level to mark the centers of all mounting holes corresponding to the standoff placement on your sign panel.
Drill pilot holes at your marks sized appropriately for the wall anchors. Insert the anchors, ensuring they sit flush with the wall. Double-check that all holes line up evenly and the level reads correctly before proceeding.
Mounting the Sign and Securing Standoffs
Follow this step-by-step process to mount your sign with standoffs:
- Attach the threaded standoff barrels to the wall by inserting the screws into the anchors and tightening until secure.
- Hold the sign panel near the wall, aligning mounting holes with the barrels.
- Insert the sign over the barrels’ threaded posts carefully.
- Screw the caps onto the standoffs’ posts by hand or with a hex key to clamp the sign panel in place firmly.
- Check the sign for level and adjust if necessary by loosening the caps slightly and repositioning.
- Tighten all caps evenly to secure the sign without over-tightening, which could damage the panel.
After installation, inspect the standoffs to confirm they hold the sign flush and stable with no wobbling. Properly mounted standoffs should sit ½ to 1 inch away from the wall, creating a professional floating effect. Avoid rushing any steps to reduce risk of damage or misaligned mounting.
Benefits of Using Sign Standoffs over Other Mounting Methods
Sign standoffs provide several distinct advantages compared to simpler mounting methods such as tape or direct screw mounting. These hardware pieces secure your signage while adding an elegant, professional look by allowing the sign to float off the wall. The space created between the sign and the surface adds dimension and shadow effects, raising the visual appeal of your installation. This makes standoffs popular among business owners or designers who want their signage to stand out in lobbies, retail spaces, or conference areas.
Durability is another benefit. Compared to tape, which can lose adhesion over time especially in humid or fluctuating temperatures, sign standoffs are strong metal fixtures designed to hold signs securely for years. They typically use tamper-proof grub screws that lock the cap in place, reducing the chance of theft or loosening. These fixings provide security without compromising the sign’s appearance, making your investment safer in public or semi-public settings.
Sign standoffs also protect both the sign and the wall underneath. Tape adhesives can damage paint or wallpaper when removed, and direct screw mounting requires drilling holes into the sign panel, which might crack or weaken it. The protective gap created by standoffs keeps moisture and dirt from accumulating behind the sign and prevents scratching or warping of materials over time. This gap can be adjusted by selecting shorter standoffs for a cleaner, tighter look or longer ones to emphasize three-dimensional depth based on your design goals.
In terms of installation and maintenance, using sign standoffs is straightforward. Some designs include side grip panel mounts that hold the sign without any holes, so you can avoid damaging the panel entirely. Installation often involves gluing a small spacer button to the sign, securing the spacer to the wall, and then clipping or screwing the sign onto these mounts. This method is faster and more precise than applying tape or manually aligning screws, which helps reduce installation errors. Standoffs make removal or relocation simple since they dismount signs without leaving adhesive residue or unsightly holes.
Choose tamper-proof standoff mounts if your signage is in a high-traffic area or exposed to potential theft, as the grub screw fixings help secure the sign firmly while maintaining a clean look.
Sign standoffs provide a versatile mounting solution that combines visual appeal with functional security. The tradeoff is typically a higher upfront cost compared to tape or direct screws, generally ranging from a few dollars to about $20 per standoff depending on material and finish. However, this investment results in longer-lasting installations, better aesthetic outcomes, and easier maintenance. For interior signs that demand professionalism and durability, especially in commercial settings, sign standoffs outperform other mounting methods by providing strength, style, and protection with minimal risk of damage to your surface or sign panel.
Common Mistakes and How to Avoid Them When Installing Standoffs
Choosing the wrong size of standoffs is a common error. Using standoffs that are too short can cause the sign to sit too close to the wall, defeating the purpose of the standoff spacing. Too long, and the sign can look awkward or lose stability. Measure your sign’s thickness plus the desired gap from the wall, typically 1/2 inch to 1 inch, then select standoffs that match that total depth. Confirm the barrel length suits the sign thickness and wall surface.
Poor hole alignment is another frequent issue that can cause crooked signs and uneven gaps. Mark the hole locations carefully on both the sign and wall. Pre-drill holes using a level or laser guide tool to keep them perfectly aligned. Misaligned holes waste time and may require repositioning the anchors, which weakens the mounting.
Overtightening the screws can strip wall anchors or damage the sign material, especially if using softer substrates like acrylic or PVC. Tighten the screws snugly but stop when you feel resistance. Using a torque-limited screwdriver can help prevent overtightening. Loose screws, on the other hand, risk the sign detaching over time.
Improper wall anchors reduce mount security and can cause signs to loosen or fall. Choose anchors rated for the wall type: plastic expansion anchors for drywall, toggle bolts for hollow walls, or metal anchors for masonry or concrete walls. Insert anchors fully and ensure they are flush with the wall surface before attaching the standoff barrels.
- Select standoff size by measuring sign thickness plus desired gap.
- Use a level or laser guide to mark hole positions accurately on wall and sign.
- Pre-drill holes with the correct drill bit size for anchors.
- Choose appropriate anchors for wall type and ensure secure installation.
- Tighten screws just until firm; avoid using excessive force.
- Double-check alignment before final tightening.
- Test sign stability gently after installation to confirm secure mounting.
Fixing these errors typically involves removing the standoffs, patching or filling old holes, and re-marking correctly. Using a dowel or wall filler can restore damaged holes. Replace anchors if stripped or loose to regain holding power. Take time to measure and align carefully before installing again to avoid repeated fixes. Paying attention to these details will ensure a professional, durable, and visually balanced sign display.
Custom Options and Specialized Standoff Types
Custom sign standoffs allow you to match your sign’s size, design, and mounting conditions precisely. Standard standoffs come in common sizes like A4 to A1 to fit most signage dimensions, but custom options can handle unique measurements or special applications. These are especially useful if you’re working with an unusually thick sign panel or want a specific gap between the sign and the wall for aesthetic or lighting effects.
Finish choices can also be customized to complement your sign panel and overall decor. Options include polished chrome, brushed nickel, matte black, or even colored coatings. Matching the finish to your sign ensures a cohesive look, which matters in professional environments such as retail stores or corporate offices. You can request samples from suppliers to see how different finishes look with your specific sign material before committing.
Illuminated standoffs offer a specialized way to improve your signage. These contain LED lighting inside the standoff barrels, casting subtle glows around the sign edges or mounting points. Illumination adds visibility at night and draws more attention. Installing illuminated standoffs requires considering power access near the mount location and typically involves a licensed electrician to handle wiring safely.
Tamper-proof standoffs provide security in public or high-traffic areas. These standoffs use specialized fasteners that require unique tools to remove, discouraging theft or vandalism. They are common in schools, transportation hubs, or outdoor signs. While a bit more expensive than standard models, tamper-proof variants reduce maintenance and replacement costs from unauthorized removals.
For high-precision needs or custom designs, CNC machining can fabricate standoffs to exact specifications. CNC fabrication allows for unique shapes, hole patterns, or branding engravings on the hardware. This option suits architects or interior designers who want standoffs integrated as part of a broader design theme. Custom CNC standoffs generally take several weeks to produce and will cost more than off-the-shelf hardware, with pricing varying by complexity and material.
Requesting a custom quote is a helpful first step when you know your project requires nonstandard dimensions or features. You’ll need to provide detailed drawings or measurements so the manufacturer can confirm feasibility and cost. For example, a set of four through-grip standoffs in a standard finish runs from about $11 to $21 per set, but custom or illuminated versions can run upwards of $50 or more depending on complexity.
Ultimately, customizing your standoffs ensures your signage looks intentional, fits perfectly, and performs well in its environment. Misfits or poor finish choices can lead to uneven mounts, damaged signs, or unsightly hardware that detract from your message. Investing time in selecting the right custom or specialized standoff improves both the visual impact and longevity of your signage installation.
Maintenance and When to Call a Professional for Installation
Maintaining sign standoffs ensures your signage stays secure and looks professional over time. Regular cleaning and inspection prevent buildup and loosening that can damage both the standoffs and signs. Calling a professional is wise for complex installations or when wear compromises safety.
Routine Cleaning Tips
Clean sign standoffs at least once every three months to remove dust, dirt, and grime that can affect their finish and operation. Use a soft cloth dampened with mild soap and water. Avoid abrasive cleaners or harsh chemicals that can scratch or corrode metal finishes like stainless steel or anodized aluminum.
Pay special attention to outdoor signs exposed to weather, as airborne pollutants and moisture can accelerate wear. Rinse with clean water after cleaning to remove soap residue, and dry thoroughly to prevent water spots or oxidation.
- Use a microfiber cloth for gentle cleaning
- Avoid bleach or ammonia-based products
- Wipe standoffs and mounting surfaces separately
- For stubborn spots, a 50/50 vinegar and water solution can help
- Do not spray cleaner directly on the standoffs to avoid drips behind signs
Maintaining a consistent cleaning routine preserves the appearance and function of the standoffs. Neglected buildup can hide early signs of damage or corrosion.
Inspection and Tightening Schedule
Check your sign standoffs at least twice a year, or more often for heavy-use or outdoor signage. Start with a visual inspection for corrosion, cracks, or loosened caps. Gently try to move the mounted sign; it should feel solid without wiggle or play.
Use the proper Allen wrench or screwdriver to tighten any loose standoff screws evenly. Avoid overtightening, which can damage the sign panel or strip the threads. A snug fit ensures the sign stays flat against the mounting surface without gaps.
- Inspect for discoloration or rust regularly
- Test tightness of each standoff cap and base
- Replace any worn or stripped screws promptly
- Record the date of each inspection and any maintenance done
Loose standoffs increase the risk of sign damage or detachment. Proper maintenance extends the life of both hardware and signage while maintaining a professional impression.
When to Hire a Professional Installer
Consult a professional installer when your sign standoff setup is large, heavy, or mounted on complex surfaces like brick or concrete. Professionals will ensure the anchors and fasteners are correct for the material and weight, reducing risks of failure. Also consider a pro if you notice any of these issues:
- Cracked or deformed standoff components
- Sign panels shifting despite tightening
- Difficult access to mounting surfaces
- Electrical or lighting wiring integration needs
- Local building codes requiring licensed installation
Professional installation can cost between $150 and $500 depending on complexity, but it protects your investment and avoids costly damage or liability. Licensed installers have tools and experience to address unseen issues like wall integrity or hidden pipes.
Do not ignore loose or damaged standoffs; ongoing neglect can lead to safety hazards or expensive sign repair down the line.
Your Quick-Start Action Plan for Installing Sign Standoffs
Get your sign mounted securely and professionally with this straightforward action plan. Follow each step carefully to ensure your standoffs are installed correctly and look great.
- Before you start: Measure the sign and mark the wall where each standoff will go, ensuring even spacing. Check your marks with a level; the mounting points must be perfectly aligned.
- Day 1: Choose standoffs made of appropriate material and finish for your sign location, such as stainless steel for outdoor use. Verify resistance to weather elements by reviewing product specs.
- Day 2: Drill pilot holes at your marks using the right drill bit size for your wall type. Confirm that holes are clean and correctly positioned before inserting anchors.
- Day 3: Insert anchors and screw the base of each standoff into the wall. The bases should feel secure and not wiggle when gently tested.
- Day 4: Attach the sign panel to the standoff bases with the screws or caps provided. Check the panel is held firmly and sits level, with a consistent gap from the wall.
- After 1 week: Inspect the standoffs and sign to ensure everything remains tight and stable. Tighten any loose connections to maintain safe mounting.
- After 1 month: Clean your sign and standoffs with a damp cloth to remove dust and maintain appearance. Avoid harsh chemicals that can damage finishes.
- Ongoing: Schedule periodic checks every 3 to 6 months, especially for outdoor signs, to tighten fasteners and inspect for corrosion or damage.
Frequently Asked Questions
Can Sign Standoffs Be Used Outdoors?
Yes, many sign standoffs are designed for outdoor use. Choose stainless steel or weather-resistant finishes for durability. Proper sealing helps prevent corrosion in wet environments.
Do Sign Standoffs Work with Glass Signs?
Yes, they securely mount glass signs using specialized grips or gaskets. This prevents damage and holds the glass firmly in place.
What Is the Maximum Weight a Sign Standoff Can Hold?
Weight capacity varies by size and material; heavier signs require larger or reinforced standoffs. Check the product specifications for exact limits.
Are Sign Standoffs Compatible with Wall Types?
Sign standoffs work with drywall, masonry, and wood walls with appropriate anchors. Select anchors based on wall material for stability.
Can I Reuse Sign Standoffs If I Change My Sign?
Yes, standoffs can often be reused. Remove them carefully to avoid damage and reinstall with the new sign dimensions in mind.
How Long Does It Take to Install Sign Standoffs?
Installation typically takes 30 minutes to an hour depending on sign size and wall type. Pre-drilling holes speeds up the process.
Key Points to Remember
Sign standoffs provide a clean, professional way to mount your signage while adding depth and durability. Choosing the right type and properly installing them protects your investment and improve your space’s look. Start by measuring your space and selecting a finish suited to your environment, then follow installation steps carefully or consult a professional if needed. Taking these simple actions will help your sign stand out safely and attractively.