How to Weed Vinyl Like a Pro: 8 Essential Steps for Flawless Designs
How to weed vinyl means removing the excess material around your design to reveal the final image clearly. The best way is to use precise tools and a steady hand to lift small pieces without damaging the design. Starting with sharp weeding tools and a clean workspace helps keep the process smooth and error-free.
Key Takeaways
- Use a sharp weeding tool like an Xacto knife or a fine-point hook for clean removal.
- Choose vinyl types like Oracal 651 for permanent projects and Oracal 631 for removable vinyl.
- Work on a solid, clean surface to avoid slipping and protect your vinyl.
- Weed slowly, lifting small pieces to prevent tearing intricate designs.
- Keep the vinyl warm if possible, which can make peeling easier.
- Use transfer tape like Oratape MT80P to handle and move your design after weeding.
1. What Does Weeding Vinyl Actually Mean?
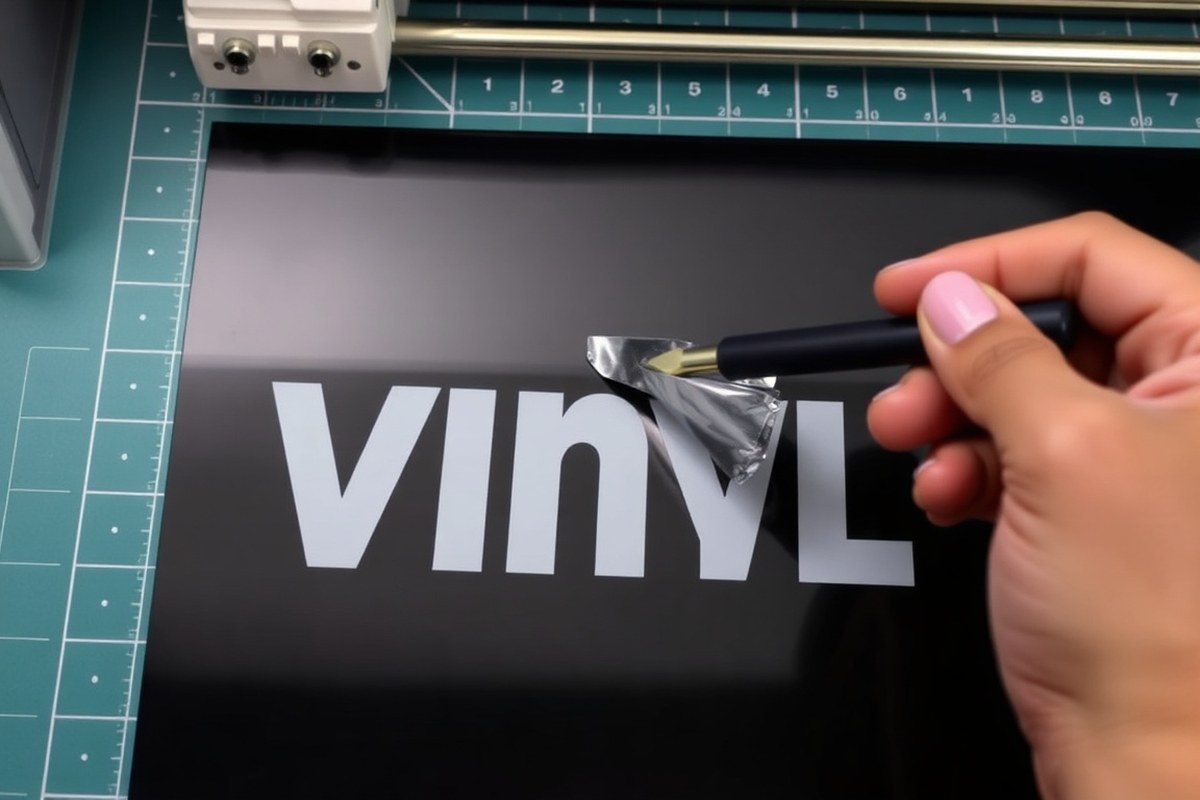
Weeding vinyl means removing the excess pieces of vinyl that are not part of your final design after it has been cut. When you use a cutting machine like a Cricut or Silhouette, the design gets precisely cut into a sheet of vinyl, but everything outside the actual shapes or letters remains uncut and stuck to the backing. The weeding process peels away this unwanted background vinyl, revealing only the parts of the design you want to transfer. This step happens after cutting but before applying your design to any surface like a t-shirt, mug, or wall.
This process is necessary because the unwanted vinyl would interfere with how the design looks and sticks to the project surface. Without weeding, the entire vinyl sheet would transfer, ruining your custom look and result in sticky, messy edges. Weeding ensures clean, crisp details, particularly around small letters or intricate shapes. When you remove the excess vinyl, only the shapes you want to appear remain, making the final project neat and professional. Skipping or doing a poor job at weeding can leave stray vinyl pieces on your finished product, making the design unclear or incomplete.
Weeding involves carefully peeling out the negative space, the parts around and inside your design. Use tools like a fine-point weeding hook or tweezers to lift tiny pieces. The process takes patience, especially for detailed designs, but it becomes faster and easier as you gain experience. Some crafters use a bright LED light pad under the vinyl to better see the cut lines, which helps avoid accidentally pulling parts of the design away. Another key tip is to include weed lines, or a weed box, around your design in the cutting software; this keeps you from removing vinyl unnecessarily.
Good weeding looks like clean outlines and clear shapes with no bits of vinyl stuck where they shouldn’t be. For example, the small gaps inside letters like “O” or “A” should be completely removed so the design appears open and distinct. If you notice areas of the design missing or lifting off the backing, it usually means too much pressure applied during weeding or the vinyl didn’t cut deep enough. Conversely, if the vinyl around the design remains, the weeding process was incomplete.
Weeding heat transfer vinyl (HTV) can require more care because after you remove the excess vinyl, you’ll press the design onto fabric with heat. Proper weeding affects how well the vinyl adheres and how clean your final project looks. Spending the time to weed thoroughly prevents having to redo the project or waste materials, which can cost $2 to $5 or more per vinyl sheet. Taking the time to weed carefully helps avoid frustration and produces the best results for all your vinyl craft projects.
2. Tools You Need for Efficient Vinyl Weeding
Essential tools for weeding vinyl include a weeding hook or pick, a weeding pen, and tweezers. These tools help you lift and remove small vinyl pieces with precision, especially within intricate designs where accuracy really matters. A basic weeding tool set usually costs between $5 and $15 and is worth the investment for clearer, cleaner results.
A light pad is highly beneficial if you work with detailed or fine-cut vinyl designs. Placing your vinyl on a bright, evenly lit surface lets you see the cut lines more clearly, reducing eye strain and preventing mistakes. If your vinyl doesn’t stay flat on the light pad, taping down the edges with painter’s tape or washi tape helps keep it secure while you weed.
Some optional but helpful tools include a silicone weeding ring to catch stray small pieces and reverse weeding tools that let you work from the backing side of the vinyl, making it easier to handle very tiny or complex shapes. Using tweezers can also improve precision for removing tiny bits, especially from narrow or tight curves.
- Weeding hooks/picks: Thin, pointed for lifting small pieces straight out
- Weeding pens: Good for removing vinyl from cavities inside letters or shapes
- Light pad: Illuminates cut lines, helpful for seeing fine details clearly
- Tweezers: Grasp and pull tiny vinyl bits without damage
- Painter’s or washi tape: Secures vinyl edges to keep it flat during weeding
- Silicone weeding ring: Holds scrap vinyl pieces to avoid mess
- Reverse weeding tools: Enable working from vinyl backing for complex designs
Maintaining your tools is straightforward but important. Keep hooks and picks clean by wiping off adhesive residue with rubbing alcohol after each use. Store sharp tools safely in a container or case to prevent injury and damage to the tool tips. Dull or sticky tools reduce efficiency and can tear your vinyl, so replace them if worn.
Always handle pointed weeding tools carefully to avoid scratching surfaces or injuring yourself.
Using the right combination of these tools lets you tackle both simple and intricate vinyl designs with confidence. The weeding pen or hook is perfect for picking out tiny details, while a light pad ensures you never miss a cut line. Securing the vinyl flat and keeping your tools in good shape helps you finish your projects faster with professional-looking results.
3. Step-by-Step Guide to Weeding Vinyl Perfectly
Weeding vinyl perfectly means carefully removing unwanted vinyl to reveal your design cleanly and accurately. This process starts with preparing your vinyl, followed by removing the excess material in the best order, and ends with inspecting your work to catch any missed bits or flaws before applying or transferring your design.
Preparing Your Vinyl for Weeding
After your design is cut on a vinyl cutter, prepare your vinyl by checking the quality of your cut. Look for fully sliced lines; incomplete cuts make weeding difficult and risk tearing your design. Lightly peel a corner of your vinyl to test if the excess lifts easily, if not, your blade or cut settings may need adjustment.
Before starting, trim off the large excess vinyl around your design using scissors or a craft knife. This reduces mess and makes it easier to weed precisely. Keep your workspace clean and well-lit, so you can clearly see all cut edges and tiny details.
Removing Excess Vinyl Step by Step
Removing excess vinyl is best done in a particular sequence to avoid damaging the design and to keep your workspace manageable. Start by removing the largest pieces of excess vinyl from around your design, then move on to smaller and more intricate inner sections.
- Cut away the excess vinyl around your design, leaving about a ¼ inch border to use as a “weeding box.”
- Use a weeding tool or sharp craft knife to lift and peel excess vinyl starting at one corner of the weeding box.
- Slowly peel away large outer sections of excess vinyl, cutting off what you remove to keep it manageable and avoid sticky vinyl edges from catching.
- Focus next on “negative space” by carefully lifting and removing smaller inner cut pieces within letters or shapes, using the tip of the weeding tool.
- Take your time with tiny details; a bright magnifying lamp helps spot small cuts and removes unwanted pieces without pulling your design.
- Along the way, keep your work area free of cut waste by discarding bits regularly to prevent them preventing or sticking to your project.
For intricate designs or heat transfer vinyl (HTV), consider applying transfer tape first (reverse weeding) and then weeding on the tape. This helps keep tiny pieces securely in place.
Inspecting and Perfecting Your Design
After removing all unwanted vinyl, inspect your design under good light to find any missed pieces or small bits of vinyl debris. Use tweezers or your weeding tool to clean these up carefully without stretching or distorting the design.
If any parts of your design start to lift unintentionally, press them back down firmly on the backing to keep them secure. Double-check edges for smoothness and make sure all cut lines are clean and complete. Removing all bits before transferring or pressing ensures a crisp, professional look and prevents bubbles or wrinkles.
4. How to Weed Small and Intricate Vinyl Designs
Small and intricate vinyl designs demand a steady hand and specific strategies to ensure clean weeding without damage. Detailed letters and delicate shapes can easily tear or shift, so using the right tools, techniques, and lighting is key to success. Tackling these projects requires patience and precision, but mastering these approaches will save time and yield professional-looking results.
Using Magnification and Proper Lighting
Small vinyl details can blend together under regular lighting, making it hard to see cut lines clearly. Using a bright, focused light source, such as a daylight LED lamp, helps you spot where to begin lifting the unwanted vinyl. For very tiny designs, a magnifying glass or headband magnifier can make a big difference, helping you accurately identify fine edges. Creating a clean, well-lit workspace allows you to work comfortably without eye strain, reducing mistakes caused by poor visibility.
Good lighting paired with precise tools like a weeding pen or fine tweezers lets you gently separate vinyl pieces without forcing them. Avoid relying solely on overhead room lighting; instead, invest in an inexpensive illuminated magnifier for less than $20, which improve your control on detailed cuts significantly.
Reverse Weeding Technique Explained
Reverse weeding is particularly effective for handling very small text or intricate shapes. Start by applying transfer tape directly onto the entire vinyl sheet before removing any vinyl pieces. This approach holds all the tiny sections in place and prevents delicate bits from lifting prematurely. Then, flip the vinyl over onto a hard surface and carefully peel away the excess backing vinyl from the backside, leaving the design intact on the transfer tape.
This method reduces the risk of tearing or losing minute vinyl parts because the transfer tape holds everything firmly. Although reverse weeding may take a bit longer initially, it often speeds up the overall project by reducing handling errors. This technique works well for both adhesive vinyl and heat transfer vinyl (HTV) and can save time on particularly complex designs with multiple small letters or shapes.
Handling Common Small-Design Problems
Tiny pieces can easily pull away when you don’t expect it or get stuck to leftover vinyl scraps. To avoid tearing, work slowly and methodically, lifting only one small section at a time using a pointed tool suited for precision. When a piece resists, use fine-tipped tweezers to carefully coax it loose instead of pulling hard. This also helps when pieces are close together and risk shifting.
For very delicate designs, keep your hands dry and avoid touching the sticky side frequently, as oils from your skin can reduce tackiness and cause lifting issues. Small vinyl bits that curl up can be pressed back down gently with your finger or a small, flat tool before you continue. Patience is essential here; rushing increases the chance of damage and frustration.
5. Choosing the Right Vinyl Type for Easy Weeding
Choosing the right vinyl can make a big difference in how easy and successful your weeding process turns out. Adhesive vinyl and heat transfer vinyl (HTV) are the two most common types you’ll encounter, and they vary in difficulty, durability, and best uses. Adhesive vinyl sticks to surfaces like wood, glass, or plastic and usually requires transfer tape to move your design. HTV is designed for fabric projects and comes on a carrier sheet, so no transfer tape is needed.
For beginners, adhesive vinyl is often easier because you can weed it directly on the transfer tape and adjust your handling as you go. Heat transfer vinyl, especially certain brands, requires an accurate cut and precise weeding tools since you can’t reverse weed (peel away excess before cutting). Among HTVs, Siser EasyWeed is noted for being the easiest to handle. More complex vinyl types like glitter vinyl tend to be pricier and harder to weed, so those are best saved for experienced crafters.
| Vinyl Type | Weeding Difficulty | Durability | Best Project Uses | Notes |
|---|---|---|---|---|
| Adhesive Vinyl | Easy to moderate | Good for indoor and outdoor | Signs, decals, glass, wood | Weed on transfer tape; good for beginners |
| Heat Transfer Vinyl (HTV), Siser EasyWeed | Easy | Durable for fabric use | T-shirts, fabrics, soft surfaces | No transfer tape needed; weed carefully with proper tools |
| Heat Transfer Vinyl (other brands) | Moderate to hard | Durable for fabrics but varies | Fabric projects requiring strong adhesion | Can’t reverse weed; proper blade and speed settings are important |
| Glitter Vinyl (adhesive or heat transfer) | Hard | Durable but fragile edges | Decorative projects needing sparkle | Pricey and challenging; not recommended for beginners |
The difference between adhesive vinyl and heat transfer vinyl extends beyond weeding. Adhesive vinyl’s sticky side faces the liner, making it easy to position with transfer tape after weeding. Heat transfer vinyl has its adhesive side away from the liner, with the decorative side visible through it. This difference means HTV must be weeded carefully after cutting because you can’t peel away pieces in reverse order.
Use a dedicated weeding tool designed for vinyl to avoid frustration, especially when working with heat transfer vinyl that doesn’t allow reverse weeding.
Choosing vinyl based on your project helps you avoid wasting money and time. For fabric projects like t-shirts, HTV is your go-to, with Siser EasyWeed offering beginner-friendly handling. For more durable or outdoor applications like decals or windows, adhesive vinyl will provide better adhesion and easier weeding. Start with basic adhesive or EasyWeed HTV before moving to more complex options like glitter vinyl.
6. Common Mistakes When Weeding and How to Fix Them
One common reason vinyl tears during weeding is using a dull blade or insufficient cut depth. When the blade isn’t sharp, it doesn’t slice cleanly through the vinyl, causing it to lift or rip unexpectedly. To fix this, replace your blade before starting the project. Always test your cut settings on a scrap piece, adjusting blade pressure and speed until the vinyl cuts fully without cutting the backing. After cutting, press down firmly with a scraper tool to help the vinyl stick to its backing, ensuring the cut lines stay intact as you weed.
Difficulty seeing cut lines is another frequent hurdle, especially with darker or heavily patterned vinyl. Cut lines can blend with the vinyl color, making it hard to tell where to weed. Using a bright light source or a lightbox underneath the vinyl can illuminate these lines, revealing exact edges and weeding boxes. Alternatively, you can carefully add extra cut lines with an X-Acto knife after cutting to outline shapes or letters. This provides a clear guide to where cuts begin and end, which helps prevent accidental tearing.
Bubbles or vinyl sticking where it shouldn’t often result from poor surface adhesion or incomplete cuts. Check the blade sharpness and depth first when vinyl resists peeling. For bubbles, use a sharp pin or needle to prick the bubble gently, then smooth it out with a scraper tool. When vinyl sticks accidentally, peeling back slowly and at a sharp angle helps avoid stretching or tearing. A piece that remains stubborn can be placed back on the backing and recut with a craft knife, then you can continue weeding carefully along the new cut lines.
Here is a simple checklist to troubleshoot and fix common mistakes during weeding: replace dull blades regularly, adjust cut settings for full penetration without cutting through backing, use a bright light or lightbox to see cut lines clearly, add hand-cut weeding lines with a craft knife when needed, use a scraper tool to press vinyl firmly on the backing, peel vinyl slowly and steadily at a sharp angle, and puncture any bubbles gently before smoothing. This approach saves time and helps you keep clean edges free from tears or missed bits.
Before a project, inspect your cuts under strong light for any uncut areas. Press the vinyl thoroughly with a scraper to secure cut lines. During weeding, peel at a low angle and watch the edges carefully. After removing large sections, check for small vinyl bits trapped inside letters or corners. Catching these early avoids project flaws that need starting over. By addressing these mistakes promptly with the fixes above, you can salvage your vinyl project and achieve smooth, precise designs that look professional and last longer.
7. Preparing Your Workspace and Vinyl for Best Results
Setting up a clean, organized workspace is essential before you begin weeding vinyl. Start by clearing your work surface to remove any dust, crumbs, or debris that could interfere with the vinyl’s adhesion or cause dirt to stick to the sticky back while weeding. Use a lint-free cloth slightly dampened with rubbing alcohol or mild soap and water to wipe down the area. Make sure the surface is completely dry before placing your vinyl.
Prepare the vinyl carefully on the cutting mat to get smooth, accurate cuts. Lay the shiny vinyl side down onto the sticky mat so the blade cuts only the vinyl layer, not the backing paper. This keeps the vinyl firm and easier to weed afterward. Use a brayer to press the vinyl firmly onto the mat and smooth out any bubbles or wrinkles, preventing any movement that might distort your design.
- Clear your workspace of all debris to keep vinyl clean
- Wipe the work surface with rubbing alcohol or mild soap, then dry
- Position vinyl shiny side down on a clean, sticky cutting mat
- Use a brayer to smooth vinyl on the mat and remove air bubbles
- Check that the mat is stable and flat to avoid cutting errors
- Set cutting blade to kiss-cut (cut vinyl only, not backing)
- Perform a test cut to confirm blade and pressure settings
Maintaining a stable, flat surface during weeding helps prevent the vinyl from curling or lifting, which can make peeling the unwanted pieces difficult. The use of a well-chosen cutting mat provides that flatness and support. When handling the vinyl, avoid touching the sticky side too much to reduce lint and oils transferring from your fingers. Use low-tack tape, such as washi tape, to gently remove small pieces that are hard to weed without damaging your vinyl design.
Before applying vinyl to your project surface, clean that area thoroughly with a mild cleaner or rubbing alcohol to remove dust, grease, or residues. This step ensures proper adhesion and a long-lasting finish. Dry the surface fully to eliminate moisture, which can prevent vinyl from sticking evenly. These preparation steps add minutes to your process but significantly improve the results of your vinyl crafting.
8. Using Transfer Tape for Clean Vinyl Transfer and Weeding
Transfer tape is essential for moving your weeded vinyl design cleanly onto your project surface. It keeps all the individual pieces in place and helps position the design without distortion or misalignment. Use transfer tape after you finish weeding and before applying the design to avoid stretching or losing small vinyl parts.
Choosing the Right Transfer Tape
Select transfer tape that matches your vinyl project. Clear tape is best for designs requiring precise placement because it lets you see exactly where you’re placing the vinyl. For larger or more intricate designs, a sturdier, slightly thicker tape prevents the vinyl from stretching or tearing during transfer. The transfer tape should extend beyond the design edges by at least one inch all around, providing enough margin to grip and position the design easily without losing parts. Transfer tapes come in sheets or rolls, usually priced between $5 and $15 per roll depending on size and quality. For reverse weeding, apply the transfer tape to the entire vinyl sheet before removing the backing, ensuring every piece stays perfectly aligned.
Applying Transfer Tape Properly
Start by cutting your transfer tape larger than your weeded design, about one inch bigger on every side. Lay the transfer tape sticky side down onto the vinyl design. Slowly press from one edge to the opposite edge using a scraper tool or a plastic card to avoid bubbles. Apply firm, even pressure to burnish the tape onto the vinyl, making sure every part sticks well. Once fully adhered, carefully peel the vinyl backing off, leaving the design on the tape.
Position the transfer tape and vinyl design on your project surface, aligning it exactly where you want the design. Press down using the scraper again, going over the entire design and edges to bond the vinyl to the new surface. Slowly peel the transfer tape at a sharp angle, checking to ensure the vinyl sticks to the surface and not the tape. When parts lift with the tape, lay it back down and burnish again before peeling. Working slowly and deliberately prevents wrinkles or gaps.
Troubleshooting Transfer Tape Issues
Air bubbles under the transfer tape or vinyl can spoil the finished look. Avoid this by applying tape slowly and burnishing thoroughly with consistent pressure. Bubbles that appear after transfer can be smoothed out gently with your finger or a soft cloth. Misalignment happens when the tape slips during placement. Using a transfer tape larger than your design helps grip better and lets you reposition slightly before final burnishing. For very delicate designs, specialty low-tack transfer tapes reduce the chance of vinyl lifting off the surface prematurely.
Sometimes, parts of the design won’t release from the tape cleanly. This often means the vinyl didn’t burnish firmly enough during application. Re-press using your scraper and try peeling again. Leftover transfer tape residue can be removed by using a vinyl-safe adhesive remover sparingly. Storing transfer tape in a cool, dry place before use helps maintain its tackiness and avoid issues during transfer.
Always use a piece of transfer tape larger than the vinyl design to ensure full coverage and easy handling without accidentally losing small pieces.
Step-by-Step Action Plan for Weeding Vinyl
Start your vinyl weeding project with clear steps to get clean, precise designs every time.
- Before You Begin: Gather your tools, precision tweezers, weeding hook, and transfer tape, and work in a brightly lit, clutter-free space. You’re ready when all tools are within reach and your workspace is clean.
- Right After Cutting: Remove the excess vinyl around your design while the vinyl is still warm and flexible. The leftover vinyl should come away smoothly without tearing.
- During Weeding Small Designs: Work slowly using your weeding hook to lift tiny pieces, keeping your fingers steady. You’ll know you’re doing it right when delicate parts stay intact and no tiny details lift off accidentally.
- Midway Through: Frequently check your progress by holding the vinyl up to the light to spot any missed spots or unwanted bits. Adjust your technique if too much vinyl is coming off or bits remain stuck.
- Before Applying Transfer Tape: Smooth your design with a scraper tool to secure all vinyl pieces to the backing. The vinyl should lie flat and stick firmly before moving on.
- Applying Transfer Tape: Place transfer tape gently over your design, smoothing from the center outward to prevent bubbles. The tape should adhere evenly with no air pockets.
- After Weeding and Transfer: Test your vinyl on a scrap surface or practice piece to see how it applies. Your design should transfer cleanly without stretching or tearing.
Frequently Asked Questions
How Long Does It Usually Take to Weed a Vinyl Decal?
It typically takes 5 to 20 minutes depending on the design’s complexity and your experience. Simple designs weed faster, while intricate details require more patience and precision to avoid mistakes.
Can I Reuse Vinyl Pieces After Weeding Mistakes?
Small pieces can sometimes be repositioned, but vinyl is generally not reusable once removed. Careful weeding is best to avoid wasting material and extra costs.
Does Temperature Affect the Vinyl Weeding Process?
Yes, warmer vinyl is softer and easier to weed, especially heat transfer types. Using a heat press or warm environment can improve weeding efficiency.
How Do I Store Leftover Vinyl for Future Projects?
Keep scraps flat in a cool, dry place away from direct sunlight. Using plastic sleeves or folders helps avoid dust and damage.
What’s the Best Lighting for Weeding Vinyl Accurately?
Bright, natural light or a well-lit desk lamp works best. Good lighting reduces eye strain and helps you see tiny cut lines clearly.
Can I Weed Vinyl Without a Light Pad?
Yes, but a light pad makes it easier to see cut lines, especially for intricate designs. If unavailable, use natural light and hold the vinyl at an angle.
Wrapping Up
Weeding vinyl correctly takes patience and the right approach, but once you get the hang of it, you’ll create sharp, clean designs with less frustration. Focus on steady, controlled movements and use the proper tools for your design’s size and detail. Start your next project by prepping your workspace and gather your tools, your best results come from a solid starting point.