How to Use Transfer Tape: Simple Steps for Perfect Vinyl Application
Learning how to use transfer tape correctly ensures your vinyl designs stick smoothly and look professional. Apply the tape over your vinyl, press firmly, then peel it back slowly at a 45-degree angle after waiting 15 to 20 minutes for adhesion. Starting with a slightly larger piece of tape than your vinyl makes handling and placement much easier.
Key Takeaways
- Cut transfer tape slightly larger than your vinyl to make peeling and placement easier.
- Use clear transfer tape for better visibility and more accurate alignment of your design.
- Press the tape firmly onto the vinyl to ensure all parts stick before lifting.
- Peel the transfer tape slowly at about a 45-degree angle to avoid lifting the vinyl off the surface.
- Wait 15 to 20 minutes after applying adhesion before peeling to improve vinyl transfer success.
- Dark side of transfer tape should face the receiving surface when applying vinyl to ensure stickiness.
What Is Transfer Tape and Why Use It
Transfer tape is a clear, pressure-sensitive adhesive sheet designed specifically to move vinyl designs from their backing paper onto the final surface. Unlike regular masking tape, which is meant for temporary holding and lacks precision adhesive strength, transfer tape has just the right amount of tackiness: it easily lifts the vinyl decal from its backing without stretching or misaligning it, then releases the vinyl cleanly onto the target surface. This makes it indispensable for applying vinyl decals accurately, especially when working with detailed or multi-part designs.
The role of transfer tape in vinyl projects is to preserve the arrangement and shape of the vinyl pieces during the move. After you weed your vinyl design, removing excess vinyl from the backing, you place the transfer tape sticky side down onto the top of the design. The adhesive on the transfer tape clings to the vinyl surface, allowing you to lift the entire design off its backing in one piece. By holding the design on the transfer tape, you can position it on your project surface without misalignments, wrinkles, or distortions. This is particularly important when applying complex shapes, multiple layers, or decals that must fit into tight spaces.
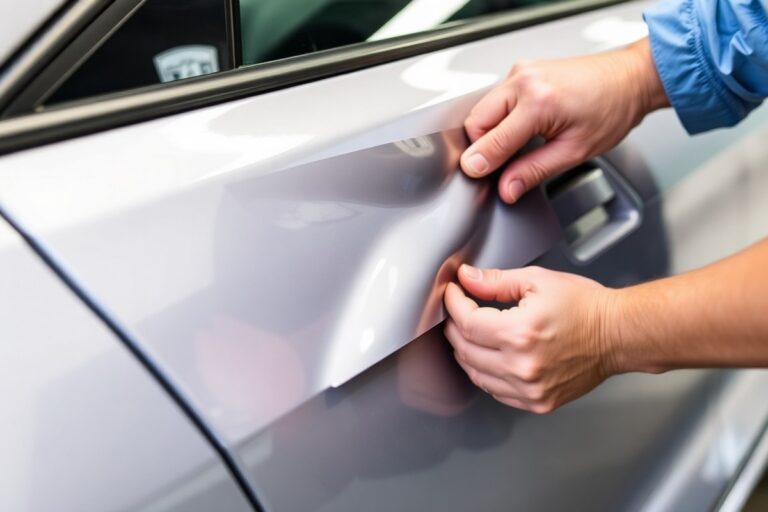
The application process requires pressure: once the transfer tape is applied to the vinyl, you use a squeegee or firm pressure with a flat tool to ensure the vinyl adheres to the tape fully and to remove air bubbles. After lifting the vinyl from its backing with the transfer tape, carefully position it on the clean, prepared surface. Press the design down with the squeegee again to stick the vinyl firmly to the project. Let the vinyl sit for about 15 to 20 minutes to achieve optimal adhesion before slowly peeling the transfer tape away at a 45-degree angle. The vinyl should stay on the surface while the transfer tape pulls away cleanly.
Compared to masking tape, which usually has a stronger adhesive that can damage delicate vinyl or leave residue, transfer tape is made to balance holding power and easy release. Masking tape cannot reliably hold fine vinyl details in place during transfer and often causes distortion or loss of small elements. Transfer tape’s tack level is designed for vinyl’s thin material and adhesive backing, making it suitable for various substrates, including wood, glass, metal, and plastic surfaces often used in craft projects.
The cost of transfer tape typically ranges from $5 to $20 per roll depending on quality, width, and length. Clear transfer tape is common and preferred for most home vinyl applications because it allows you to see the design beneath clearly, ensuring accurate positioning. Some tapes have different tack levels or patterns to better handle delicate vinyl or textured surfaces, but the standard clear tape works well for most crafting needs.
Good results mean the vinyl design maintains its shape and position from backing to project surface without bubbles, wrinkles, or missing parts. Poor use or the wrong tape can cause parts of the design to lift off or stick improperly, forcing you to restart the process. For curved or textured surfaces, you might need to cut or score the transfer tape in sections to prevent creases, but for flat surfaces, a single piece will transfer the entire design in one go.
Types of Transfer Tape and Choosing the Right One

Choosing the right transfer tape depends on the type of vinyl, project size, and the surface you’re applying to. Clear and paper transfer tapes differ in transparency, tack level, and reusability. Match the tape’s tack strength with your vinyl’s thickness and texture to avoid application problems like poor adhesion or vinyl damage.
Clear Transfer Tape Advantages and Uses
Clear transfer tape is transparent, making it easy to see your vinyl design and alignment during application. It usually comes with medium to high tack adhesive, providing a firm grip on most standard and textured vinyls. This transparency is especially helpful for precise placement on detailed or multi-piece decals, where visual accuracy is key.
Clear tape works well for small to medium-sized projects since it allows you to position the vinyl accurately before pressing down. It’s an excellent choice for glossy vinyl because tapes with low tack won’t damage the finish, and you can still see exactly where the design goes. Some clear tapes include alignment grids printed on them, adding an extra layer of precision for straight lines and spacing.
The higher tack versions of clear transfer tape hold firmly on textured vinyl like glitter, which makes them suitable for specialty materials. However, clear tape can sometimes leave residue if the tack is very high, so test a small piece before applying to delicate surfaces.
Paper Transfer Tape Benefits and Drawbacks
Paper transfer tape offers a strong grip and is a strong option for intricate designs with many small pieces. Its slightly less transparent nature compared to clear tape might make alignment trickier, but it excels on rough or uneven surfaces where adhesion needs to be extra strong.
Because paper tape holds thick vinyl firmly, it suits large projects or layered decals where precise placement is less critical than reliable adhesion. Many users find paper tape easier to reposition during application, which can help if you’re working on a big surface and need to adjust placement by “hinging” one edge first to avoid bubbles.
One downside is paper tape usually isn’t reusable, as the adhesive can weaken or pick up debris after a single use. The paper texture can also sometimes interfere with smooth squeegeeing, causing small wrinkles if applied too quickly.
Understanding Tack Levels: Low, Medium, and High
Tack level is key for choosing transfer tape that works with your vinyl and surface type. Low tack tape is gentle, perfect for thin or delicate vinyl like glossy finishes, and smooth surfaces. It releases easily without damaging your vinyl or leaving residue but might struggle to hold heavier or textured materials firmly in place.
Medium tack is a versatile, balanced option that fits most standard adhesive vinyls on a variety of surfaces. It provides good adhesion to hold vinyl during transfer but still allows you to reposition slightly, which is helpful on flat, clean surfaces. Many crafters prefer medium tack for everyday projects because it reduces the risk of vinyl distortion or tearing.
High tack is best for thick, textured, or specialty vinyl like glitter or outdoor materials applied to rough or uneven surfaces. It creates a strong grip that prevents transfer tape from peeling off. The tradeoff is a higher chance of residue and possible damage to delicate vinyl, so avoid high tack unless you have the appropriate vinyl and surface. Testing in a small area helps prevent costly mistakes.
Always match the tack level to your vinyl type to avoid the vinyl not releasing from the backing or sticking poorly to your project surface.
Preparing Vinyl and Surfaces Before Application
Before using transfer tape, confirm your vinyl is cut precisely and free of extra material. Remove any vinyl outside your design to leave only the parts you want to transfer. Doing this first helps avoid pulling up unwanted sections when you apply the tape. Cut transfer tape a bit bigger than your decal so it’s easier to handle and fully covers your vinyl for a clean transfer.
The surface you plan to apply the vinyl to must be clean, dry, and free of dust, grease, or any residue. Dirt and oils prevent the vinyl from adhering properly and can cause bubbles or edges to lift over time. Use a lint-free cloth dampened with isopropyl rubbing alcohol or mild soap and water to clean hard surfaces like glass, plastic, or metal. Avoid household cleaners with wax or conditioners. After cleaning, allow the surface to air dry fully, usually 5 to 10 minutes depending on humidity and temperature, to ensure it is completely dry.
- Cut and weed vinyl design before transfer tape application
- Cut transfer tape slightly larger than the vinyl decal
- Clean surface with rubbing alcohol or mild soap and water
- Dry surface completely before applying transfer tape
- Avoid touching cleaned surface with fingers to prevent oils
- Work in a dust-free environment to minimize particles
- Use a lint-free cloth for cleaning to avoid leftover fibers
Take care not to stretch the transfer tape during application, as this can create creases that disrupt the design. Also, avoid using transfer tape on fabrics, as it generally does not adhere well to them. You can reduce a transfer tape’s stickiness by pressing it repeatedly onto a soft surface like fabric or paper before placing it on your vinyl. Preparing the vinyl and surface correctly sets the foundation for a smooth, bubble-free transfer that holds strong over time.
Step-by-Step Guide to Using Transfer Tape Effectively
Applying transfer tape correctly is key to moving your vinyl design cleanly onto your project surface without wrinkles or misplaced graphics. Following a precise series of steps ensures your design stays intact and aligned during transfer. The right cutting, pressing, and peeling techniques will help you avoid common issues like vinyl lifting with the tape or air bubbles under the design.
Cutting and Applying Transfer Tape to Vinyl
Start by cutting transfer tape just slightly larger than your vinyl design to protect edges and permit easy handling. Position the tape’s sticky side down over your vinyl, then use firm pressure to adhere the tape to the vinyl surface evenly.
- Measure your vinyl design’s dimensions and cut the transfer tape at least ¼ inch larger on all sides.
- Peel the backing from the transfer tape carefully to expose the adhesive side without touching it too much.
- Place the tape’s sticky side down onto the vinyl design, aligning it so the entire design is covered.
- Use a squeegee, scraper, or a clean credit card to firmly burnish the tape onto the vinyl in overlapping strokes, pressing from the center outward to avoid bubbles.
- Check for any loose spots and reapply pressure until the tape is securely attached to the vinyl surface.
Positioning and Pressing Down on the Target Surface
When your vinyl is attached to the transfer tape, align the design carefully on your project’s surface before sticking it down. A gentle initial press lets you adjust placement without the vinyl fully bonding to the surface.
- Lay the entire design with the dark, adhesive side of the transfer tape facing down onto your target surface.
- Before pressing firmly, double-check alignment and positioning visually and adjust as needed to ensure the design sits straight and centered.
- Once positioned, smooth the tape and vinyl onto the surface using your hand or a squeegee, applying light, even pressure first to keep the vinyl from sticking irreversibly.
- After initial placement, apply stronger, even pressure with a squeegee in overlapping strokes to burnish the vinyl well onto the surface.
Peeling the Tape at the Correct Angle and Speed
The manner in which you remove transfer tape makes a big difference in preventing the vinyl from lifting with it. Peel slowly at a low angle to preserve the design on the surface.
- Wait a few minutes after burnishing to allow the vinyl to adhere fully. Immediate peeling can risk lifting or shifting the design.
- Hold the surface steady and slowly peel the transfer tape back on itself at a shallow angle, about 45 degrees or less.
- Maintain steady, gentle speed, too fast can lift vinyl edges, too slow allows static buildup or tape residue.
- When your design wraps around a curve, add small slits in the tape at these spots to avoid wrinkles and peeling vinyl.
- When parts of the vinyl lift with the tape during peeling, gently press the design back and burnish again before moving on.
Avoiding Common Transfer Tape Mistakes and How to Fix Them
Vinyl lifting with transfer tape often happens when the tape doesn’t grip the vinyl’s surface well. This can result from using the wrong type of transfer tape for your vinyl, especially if you’re working with textured or glitter vinyl, which needs a stronger adhesive tape. To fix this, press firmly over the vinyl with a burnishing tool and let the vinyl and tape rest for 15, 20 minutes before peeling. This waiting period allows the adhesive to bond better and reduces the risk of vinyl lifting.
Air bubbles between the tape and vinyl cause uneven adhesion and look unprofessional. Avoid bubbles by applying the transfer tape slowly, at a 45-degree angle, while smoothing it down with a plastic scraper or burnishing tool as you go. Another approach is the “taco” method: fold the tape slightly lengthwise to create a taco shape, then apply one edge to the vinyl and slowly unroll the tape while pressing firmly. This method helps prevent wrinkles and bubbles.
Poor vinyl adhesion to your target surface usually means the surface wasn’t clean or smooth enough. Clean the area with isopropyl alcohol and let it dry completely before sticking the vinyl. If the vinyl still doesn’t stick well, apply more pressure with a scraper and warm the vinyl slightly with a hair dryer or heat gun to activate the adhesive.
Misalignment and shifting are common if you peel the transfer tape off too quickly or do not align your vinyl precisely before pressing down fully. To prevent this, position the vinyl with the tape on the surface lightly, secure one edge with a small piece of painter’s tape as a hinge, then lower the rest slowly. Once aligned, burnish the vinyl to the surface firmly before peeling the transfer tape off at a slow, low angle.
Reusing transfer tape is possible but depends on the tape’s quality and residue left after the first use. Proper storage, keeping the tape flat, clean, and away from dust and heat, extends its life and allows safe reuse. Check if the tape still sticks well to the vinyl before reuse; if not, it’s better to use a new piece to avoid adhesion failures.
- Use the correct transfer tape for your vinyl type, especially for glitter or textured vinyl.
- Always burnish the tape onto the vinyl firmly before lifting from the backing.
- Apply transfer tape slowly and use tools to smooth out bubbles and wrinkles.
- Clean surfaces thoroughly for good vinyl adhesion.
- Use painter’s tape to create a hinge for easier alignment.
- Peel the transfer tape at a slow, consistent angle to avoid shifting or lifting.
- Store unused transfer tape flat and dust-free to maintain stickiness.
Letting the vinyl and transfer tape sit for 15, 20 minutes before peeling helps ensure the vinyl stays firmly adhered and prevents lifting during transfer.
Using Transfer Tape for Curved and Textured Surfaces
Transfer tape works well on curved and textured surfaces, but you need to choose the right type and adjust your technique. Using a higher-tack, flexible tape and applying pressure carefully helps the vinyl stick without bubbling or stretching. Taking your time with smoothing and tool use also improves the results on uneven areas.
Selecting Transfer Tape for Curved Surfaces
Clear transfer tape is usually the best choice for curves because it’s more pliable and conforms better to rounded shapes like tumblers, bottles, and mugs. Paper-based transfer tape tends to be stiffer and can lift or wrinkle on corners or rounded edges. For textured vinyl like glitter, select a super-strong, high-tack tape to hold all the pieces firmly during transfer.
The adhesive strength, or tack level, matters a lot. Higher-tack tapes stick better on uneven surfaces but can sometimes pull parts of the vinyl up if the tape is too aggressive. Start with a medium to high tack transfer tape, especially if your vinyl isn’t sticking well during practice runs. Tape brands usually list tack levels on their packaging, so look for those labeled “high tack” or “strong adhesive.”
Applying Vinyl with Flexible Pressure Techniques
Apply the tape to your vinyl by burnishing firmly with a squeegee or scraper. Applying significant pressure, around 5 to 10 pounds, helps the tape grip the vinyl completely, which is important for curves. Hold the item steady with one hand and slowly peel back the backing paper with your other hand, keeping pressure on the tape to prevent lifting or shifting.
When transferring vinyl onto the curved or textured surface, apply the transfer tape in overlapping sections if the area is large or highly curved. Start attaching at the highest point and work outward, smoothing as you go to prevent bubbles or stretching. Use your fingers or a soft scraper to apply firm but gentle, flexible pressure following the surface contour, so the vinyl molds without tearing or warping.
Smoothing and Trimming Vinyl on Textured Objects
Once the vinyl is positioned on the object, burnish the design again with a scraper to ensure full adhesion. Focus on one area at a time, using firm strokes that follow the curves or textures. For heavily textured surfaces, pressing longer and applying slightly more pressure helps vinyl settle into grooves and uneven spots.
If any bubbles or wrinkles appear, use a sharp craft knife to gently trim excess vinyl or release trapped air without damaging the rest of the design. For sharp corners or tight curves, scoring the backing or tape lightly along fold lines can make the vinyl easier to apply smoothly. Careful trimming after transfer keeps edges neat on textured or irregular shapes.
Storing, Reusing, and Caring for Transfer Tape
You can reuse transfer tape generally three to five times if you take good care of it. The sticky surface gradually loses its tack with each use, which increases the risk of vinyl pieces not lifting or repositioning correctly. For best results, reuse it for simpler designs without many fine details because intricate patterns can separate or fail to transfer cleanly as the tape’s grip weakens.
Store transfer tape flat on its original backing paper to keep the adhesive clean and prevent dust, lint, or moisture buildup. Rolling or folding the tape can cause creases that damage the adhesive layer and reduce effectiveness. Place the tape in a cool, dry spot away from direct sunlight or heat sources. Proper storage can extend the tape’s usefulness up to about five uses before you should replace it.
Cleaning transfer tape between uses can help preserve its adhesive strength, especially if dirt or small fibers stick to it after peeling. Gently wipe the sticky side with a lint-free cloth slightly dampened with water or rubbing alcohol. Avoid soaking or using strong chemicals, as these can break down the adhesive. After cleaning, allow the tape to dry completely before storing it on its backing again.
Signs that you should replace transfer tape include noticeable loss of stickiness even after cleaning, visible residue or debris embedded in the adhesive that can’t be removed, and failure to pick up vinyl decals during application. When you notice the tape doesn’t hold the vinyl firmly or the design separates during transfer, switch to a fresh piece. Using transfer tape beyond five uses often leads to these issues regardless of appearance.
When you finish applying vinyl with transfer tape, gently peel the tape slowly at a 45-degree angle while using the “taco” method, fold the tape loosely over the design to better control placement. Leave a portion of transfer tape still attached to its backing after removing it, so you can cover and protect the sticky side for the next use. Keeping it slightly larger than the design allows for easier repositioning multiple times.
When the transfer tape feels too sticky for repeated use, press it onto a soft surface like cloth or clean paper a few times to reduce tackiness. Alternatively, using painter’s tape or Press-n-Seal film over the transfer tape can protect and extend its life. Remember, proper storage, gentle cleaning, and careful handling are key to getting the most uses from your transfer tape before investing in new rolls for fresh projects.
Advanced Tips for Perfect Transfer Tape Application
Peeling transfer tape at a 45-degree angle or less helps the vinyl release smoothly without lifting. Pulling too steeply can tear delicate details or cause the vinyl to stick to the tape. Move slowly and steadily to maintain control. Notice any vinyl lifting? Pause, press it down again, then change your peel angle.
Using masking tape or guides improves alignment, especially for multi-layer designs. Place small strips of masking tape at the edges as hinges before removing the backing. This holds your vinyl in place while allowing you to lift just one side for a test position. For layered vinyl, apply the permanent base layer first, then use transfer tape to add subsequent layers carefully to avoid pulling the base layer off.
Let vinyl sit for 15 to 20 minutes after applying it to the surface before peeling the transfer tape. This waiting period allows the adhesive to bond properly. Skipping this step can result in lifting or incomplete adhesion. Working with vinyl that has strong adhesive or a shimmer finish requires careful timing and using a transfer tape with the right grip to avoid peeling the first layer.
Temperature and humidity also affect transfer tape application. Aim for a workspace between 65 and 75°F and moderate humidity. Too cold or dry conditions may cause the adhesive to be less sticky, while heat can soften the tape and vinyl, making application messy. Adjust the burnishing pressure accordingly; firmer pressure helps in cooler air, while lighter pressure prevents distortion in warmer environments.
- Pull transfer tape at a 45-degree angle, slowly and steadily
- Use masking tape hinges for precise placement and alignment
- Wait 15, 20 minutes after applying vinyl before peeling transfer tape
- Apply layered vinyl in sequence, using appropriate transfer tape types
- Maintain workspace temperature near 70°F and moderate humidity
- Burnish firmly in cool conditions; use lighter pressure when warm
Handle shimmer or delicate vinyl layers separately by applying them one after another instead of stacking them on the transfer tape.
Following these professional tips cuts down errors and helps you achieve a clean, crisp vinyl transfer quickly. Preparation, patience, and using simple tools like masking tape guides make the difference between a rushed job and a flawless finish. Consider these tactics the next time you work on a detailed or multi-layered vinyl project for smoother, faster results.
Step-by-Step Action Plan for Using Transfer Tape
Follow this plan to apply transfer tape successfully on your next vinyl project, ensuring clean and accurate results every time.
- Before you start: Clean your vinyl and surface with a lint-free cloth and rubbing alcohol to remove oils and dust. You’ll know it worked when the surface feels dry and clean without residue.
- During vinyl cutting: Choose the right transfer tape for your vinyl type (standard or delicate). Test a small piece to check adhesion and ease of removal.
- Right after cutting: Weed your vinyl carefully, removing unwanted areas but leaving all parts you want to transfer intact. The design should be fully visible and connected where needed.
- Application phase: Apply the transfer tape over the vinyl using a scraper with firm, even pressure to eliminate bubbles. You’ll see the vinyl sticking to the tape evenly without gaps.
- After taping: Slowly and steadily lift the transfer tape from the backing, watching the vinyl lift off cleanly without pieces left behind.
- Placing on surface: Position and press the vinyl with transfer tape onto your project surface, then use the scraper again to secure adhesion. If you don’t see wrinkles or air bubbles, the transfer was successful.
- Final step: Carefully peel the transfer tape off at a sharp angle, leaving only the vinyl on the surface. The vinyl should stay firmly in place with no lifting edges.
Frequently Asked Questions
Can I Use Transfer Tape on Painted Surfaces?
Yes, transfer tape works well on smooth, cured painted surfaces, ensuring better vinyl adhesion. Avoid fresh paint as it may peel off with the vinyl.
How Long Should I Press Vinyl After Applying with Transfer Tape?
Press vinyl firmly for about 30 seconds to 1 minute using a squeegee for best adhesion. This helps remove air bubbles and ensures vinyl sticks evenly.
Does Temperature Affect Transfer Tape Application?
Yes, applying vinyl between 60°F and 80°F is ideal; extreme temperatures can affect adhesion and tape tackiness. Avoid very cold or hot conditions for better results.
Can Transfer Tape Damage Delicate Surfaces?
Yes, it can pull off paint or finishes on delicate surfaces if removed too quickly. Peel slowly at a 45-degree angle to minimize damage.
Is Clear or Paper Transfer Tape Better for Beginners?
Clear transfer tape is usually easier for beginners because it’s more flexible and allows better visibility during placement. Paper tape can be stiffer and less forgiving.
How Do I Remove Residue Left by Transfer Tape After Application?
Use a mild adhesive remover or rubbing alcohol on a soft cloth to gently clean residue. Test first on a small area to prevent damage to the surface.
Key Points to Remember
Using transfer tape correctly can make your vinyl projects look sharp and professional. Start by mastering clean surfaces and the right tape, then practice steady application and removal. Your next move: grab a small vinyl decal and transfer tape to try applying on a practice surface today.