What Is Transfer Tape? A Complete Guide for Perfect Vinyl Application
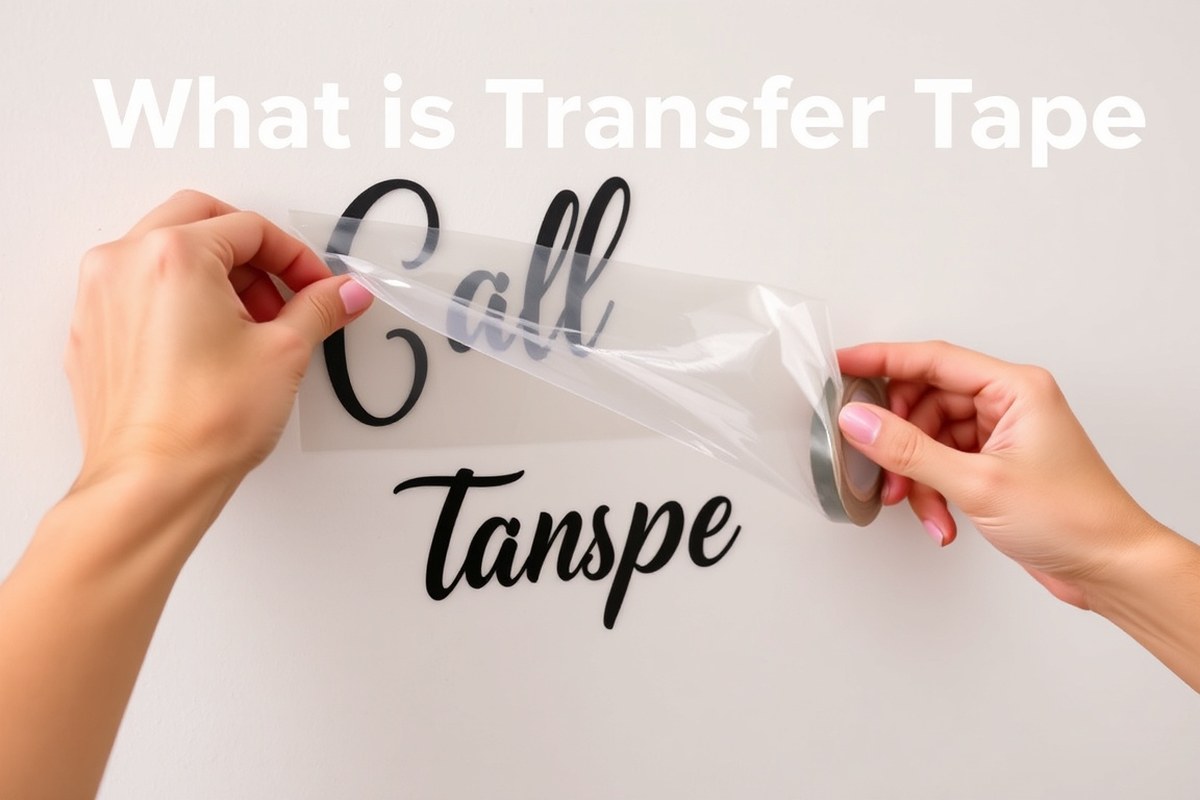
What is transfer tape? It’s a clear, sticky sheet that helps you move your vinyl design from its backing paper to your project surface without messing it up.
The tape holds all the vinyl pieces in place so you can apply them smoothly and accurately where you want. Transfer tape comes in different tack levels, so you can pick one that works best for delicate patterns or stronger adhesion needs.
To start, cut your vinyl design, place the transfer tape over it, and rub it down well. Let it stick for 15 to 20 minutes before peeling to make sure the vinyl sticks properly and doesn’t lift off with the tape. Using a squeegee or scraper tool makes this easier and helps avoid air bubbles during application.
Key Takeaways
- Cut transfer tape slightly larger than your vinyl design for easier handling and complete coverage.
- Align and center the transfer tape carefully before pressing to avoid misplacement of your vinyl.
- Use a scraper or credit card to firmly burnish the tape onto the vinyl for a strong bond.
- Slowly lift the transfer tape and vinyl design away from the backing paper at a 45-degree angle to keep the vinyl intact.
- Wait 15 to 20 minutes after applying transfer tape before peeling it off for best vinyl adhesion.
- Start peeling the transfer tape from a corner at a 90-degree angle to lift the design cleanly.
What Is Transfer Tape and How Does It Work?

Transfer tape is a strong, thin, sticky material used to move vinyl decals from their backing paper to the surface where you want to place them. It’s not regular tape; it’s specially designed to pick up vinyl graphics without pulling the backing or stretching the design. This tape can be made from paper or clear plastic film.
Both types have adhesive that sticks enough to hold vinyl. The adhesive is not so strong that it harms the decal.
The key to transfer tape’s usefulness is its pressure-sensitive adhesive. When you press the tape onto the vinyl, it sticks to the top layer, lifting it off the backing paper while keeping everything in place. This keeps the design intact, so you can move it precisely where it belongs.
Then, you apply the tape with the vinyl onto your project surface, usually a smooth one, and carefully press it down. Pulling the tape away leaves the vinyl perfectly stuck to your project.
Unlike regular tape, transfer tape won’t leave sticky residue, and it won’t tear or distort your vinyl. Paper transfer tape usually costs less. It works well for large, flat surfaces.
Clear plastic transfer tape lets you see where you place the design. This is useful for detailed or layered vinyl work. Using transfer tape means you can apply vinyl shapes or letters exactly where you want them without holes or missed spots.
Good transfer tape fits your project surface. Smooth, indoor projects might work well with paper tape. Outdoor signs often need a stronger tape that holds up to wind or weather before sticking permanently.
Applying the vinyl also takes a bit of patience, after pressing the vinyl down, wait about 15 to 20 minutes before peeling off the tape. This wait lets the adhesive soften and stick better, reducing peeling problems later.
Knowing how transfer tape works and choosing the right kind helps avoid common issues like lifting corners or bubbles. Your vinyl stays flat, and the edges stay sharp.
Since transfer tape temporarily holds the vinyl, it gives you a chance to adjust the placement if needed. This makes putting on vinyl graphics less stressful and more professional-looking, whether you’re making crafts or small business signs.
Types of Transfer Tape and Their Best Uses

There are four main types of transfer tape you’ll find: clear, ultra-clear, gridded, and paper. Each type has different stickiness levels, called tack, that affect how well it holds and releases vinyl. Picking the right kind depends on your vinyl type and project needs, like size, shape, and surface.
Clear Transfer Tape Characteristics
Clear transfer tape is smooth and lets you see your vinyl design underneath, making it easy to line up on smooth, flat surfaces. It usually comes in medium to high tack, which is great for most standard vinyl projects and thicker materials like glitter vinyl. Brands like RTape and ORATAPE offer medium and high tack clear tapes known for firm grip and clean release.
Ultra-clear tape has a more transparent look without a cloudy finish. This helps when you need to position your design precisely on detailed or layered projects. It’s often medium tack, enough to hold delicate vinyl parts without tearing them but strong enough to keep everything intact.
Gridded Transfer Tape Benefits
Gridded tape shows a grid pattern printed on the tape’s surface, helping with precise placement and alignment of your vinyl. This works well for bigger or more complex designs where measuring and straight lines are essential. Most gridded tapes come in medium and high tack, which keeps the vinyl pieces from shifting during transfer.
One popular gridded tape option is the 2670 Series, which balances stickiness and clear visibility. The grid lines are easy to see against light and dark vinyl, so you can quickly check that your design stays straight. This saves time and frustration, especially if you’re doing repeated or batch crafting.
Paper Transfer Tape Features
Paper transfer tape is a thin paper sheet with adhesive on one side. It tends to have lower clarity than clear or gridded tapes, so better for simple or bold designs where you don’t need to see fine details. Paper tape comes in low, medium, and high tack options, making it flexible for different vinyl thicknesses.
This tape is often cheaper and good for bulk projects where cost matters more than perfect precision. It’s best for indoor crafts or temporary transfers because it doesn’t stick as firmly or last as long on vinyl during outdoor use. Paper tape can wrinkle more easily, so handle it gently.
Tack Level Differences Explained
Tack means how sticky the transfer tape feels. Low tack tapes release vinyl easily and reduce the chance of pulling up delicate designs. Use low tack for thin or fragile vinyl, like printed or heat transfer vinyl, especially on sensitive surfaces.
Medium tack is the most versatile choice, good for standard vinyl most hobbyists use, like adhesive or craft vinyl. It holds the pieces firmly but peels off cleanly without leaving residue or damaging the vinyl. High tack tape is for thick materials like glitter vinyl or vinyl with heavy backing that needs extra grip during transfer.
Choosing the wrong tack can waste time and material. High tack on thin vinyl might pull parts apart while low tack on glitter vinyl can fail to pick up the whole design. Consider the vinyl type and project scale before picking your tape tack.
Test a small piece of vinyl with your chosen tape tack before starting the full project to avoid damaging your design or wasting material.
How to Choose the Right Transfer Tape for Your Project
Choosing the right transfer tape depends on your vinyl type, surface, design size, and project details. These factors help pick a tape that holds your vinyl well and makes application smoother. Use the tape’s tack level and width to match your project needs.
Matching Tape Width to Design Size
Select transfer tape slightly wider than your vinyl design. Use tape about 7 to 8 inches wide for a decal that’s 6 inches wide. This extra width makes it easier to handle and apply without losing grip on the edges.
For small designs under 4 inches, narrow tape works great and reduces waste. Larger projects like wall decals or tumblers over 12 inches call for wide tapes that cover the whole design in one piece. Cutting tape too small causes lifting or misalignment during transfer.
Considering Surface Type and Texture
Smoother surfaces like glass, metal, or plastic work well with low or medium tack transfer tape. These tapes hold enough but peel off cleanly to avoid damage. Avoid high tack if the surface is painted or delicate because it could lift paint or leave residue.
Textured or rough surfaces like wood, fabric, or textured walls need high tack tape. Its stronger grip keeps the vinyl in place during transfer. Keep in mind, these tapes might be tougher to remove and possible residue means cleaning after.
Tack Level vs Vinyl Material Compatibility
Thin or glossy vinyl calls for low tack tape to prevent damage or missing bits when removed. Standard adhesive vinyl fits well with medium tack for balanced grip and easy peel. Thick, flocked, or specialty vinyl require high tack to lift the material without it falling apart.
High tack tape is strong but risky on delicate vinyl, as it can stretch or tear your design. Medium tack gives a safe middle option for most everyday craft vinyls. Always test a small piece if you are unsure about how strong the tape should be.
Project Complexity and Design Detail Factors
Complex designs with many tiny pieces need a transfer tape that holds firmly but releases cleanly, usually medium to medium-high tack. That balance stops pieces from shifting and helps keep alignment perfect. You’ll apply more pressure with a squeegee to secure all parts.
Simple and large block designs are easier with lower tack tape since they don’t have small parts to shift or peel off. Projects with curves or 3D shapes do best with flexible, clear transfer tapes that mold to contours. They help avoid bubbles or warping during application.
Step-by-Step Guide to Using Transfer Tape Successfully
Using transfer tape correctly helps you move your vinyl designs smoothly and keeps them perfectly aligned without air bubbles or tears. You’ll need to handle the tape gently and use the right tools to keep your vinyl flat and secure. Follow these clear steps to get your project to the finish line without frustration.
Preparing Your Vinyl and Workspace
Make sure your work surface is clean and flat before starting. Dust, dirt, or uneven spots can cause bubbles or misalignment when applying the tape and vinyl. Cut your vinyl design with clean edges to prevent lifting or tearing during transfer.
Prepare your tools: you’ll need transfer tape, a squeegee or scraper, scissors, and a clean cloth. Have everything within reach so you can work steadily without rushing or interruptions. The right environment supports careful placement and adhesion.
Applying and Burnishing Transfer Tape
Cut the transfer tape so it extends a few inches beyond your vinyl design on every side. Peel off the backing paper from the transfer tape before laying it over the vinyl. Start applying the tape from one edge to avoid air bubbles and wrinkles.
Use your squeegee to firmly press the transfer tape down, moving from the center outward. This pushes out air bubbles and helps the tape stick well without creases. Avoid stretching the tape as that causes wrinkles that damage your design.
Let the tape sit for a minute or two; this waiting period helps the tape grab the vinyl fully, especially if working with specialty or textured vinyl. Doing this reduces lifting or shifting later.
Peeling the Backer and Positioning the Design
Turn your vinyl and tape over before peeling the vinyl backing. Slowly remove the vinyl’s backing paper to expose the adhesive side without shifting the design.
Spot the vinyl lifting from the backing? Stop and carefully smooth the tape back down to keep it stuck.
Align the vinyl and transfer tape on your project surface carefully. Hold one side down first, then lower the rest slowly while smoothing with the squeegee. The tape’s clarity helps keep your placement exact, avoiding mistakes.
Final Adhesion and Tape Removal Tips
After positioning, press the vinyl firmly onto the surface using your squeegee. This pressure bonds the vinyl securely, reducing the chance of lifting when removing the tape. Press especially around edges and corners.
Peel the transfer tape back slowly at about a 45-degree angle. Pull it close to the surface instead of pulling straight up to avoid stressing your vinyl. This slow removal prevents the vinyl from coming off with the tape.
Stick with a fresh piece of transfer tape for each new project. Reusing old tape risks poor adhesion and wrinkles. Stronger tape is best for heavy or glitter vinyl to keep your design smooth and secure throughout.
- Gather your clean workstation, vinyl design, transfer tape, squeegee, and scissors.
- Cut transfer tape slightly bigger than the vinyl to cover edges fully.
- Remove the paper backing from the transfer tape carefully.
- Place the tape on your vinyl, starting at one edge to avoid wrinkles.
- Squeegee firmly outward to remove bubbles and ensure adhesion.
- Turn your vinyl over, then slowly peel off the vinyl backing paper.
- Position the design on your project surface and smooth with the squeegee.
- Press firmly and peel the transfer tape back slowly at a 45-degree angle.
Common Problems with Transfer Tape and How to Fix Them
Transfer tape that’s too sticky can tear delicate vinyl or pull up the backing paper. To fix this, press the tape lightly on a clean pair of jeans or a soft blanket before use.
This reduces its stickiness and helps prevent damage to thin or fragile vinyl. On the flip side, if the tape isn’t sticky enough, choose a higher tack transfer tape designed for heavier vinyl or add more pressure when applying it.
If the vinyl lifts or tears during transfer, it usually means the adhesive hasn’t set well or the tape was peeled too quickly. After placing the vinyl on your surface, rub firmly with a scraper or credit card to secure it.
Then wait at least 1 to 2 minutes before peeling off the transfer tape slowly. Moving too fast can cause the vinyl to peel up or tear.
Sticky residue left behind can be annoying but is usually removable. Use a mild adhesive remover, rubbing alcohol, or warm soapy water on a soft cloth to gently wipe the area.
Avoid scrubbing hard, which may damage painted or delicate surfaces. Cleaning right after the transfer limits residue buildup and makes cleanup easier.
Applying steady, even pressure with a scraper during transfer tape application helps avoid wrinkles and bubbles. This pressure activates the tape’s adhesive, ensuring the vinyl sticks without shifting.
Take your time lining up the design accurately before pressing it down. Proper pressure saves frustration later.
Different surfaces and vinyl types affect how long you should wait before peeling tape. Smooth, non-porous surfaces like glass or metal usually allow immediate peeling.
Porous or textured surfaces may require 1 to 3 minutes for the vinyl’s adhesive to bond fully before removing the transfer tape. Testing a small corner can show if the vinyl sticks well or needs extra curing time.
Press transfer tape lightly onto fabric before using it on delicate vinyl to reduce stickiness and prevent tearing.
Using Transfer Tape on Different Surfaces and Shapes
Transfer tape works well on flat surfaces, but curved or uneven spots need a careful approach. Clear transfer tape bends better around curves because it’s more flexible than paper tape. When applying vinyl to a car door or a curved mug, start by cutting the tape slightly larger than the design to cover it fully.
Textured or rough surfaces can challenge the tape’s grip. Lightly sanding the area creates a smoother patch for the tape to stick firmly.
Using a high-tack transfer tape is best for textures like glitter vinyl or heavily grained wood. This stronger adhesive makes sure the vinyl doesn’t lift or bubble during application.
For tricky 3D shapes, press the tape down in small sections instead of all at once. This method helps avoid air bubbles and keeps the vinyl aligned. If you’ve got delicate designs with tiny parts, smooth out the tape carefully to stick every piece securely.
When working with fabrics or heat-press materials, choose transfer tape made for those uses to avoid damaging your project. Some tapes peel off easily after heat application without pulling vinyl up. For irregular forms like helmets or rounded signs, hold the tape gently against the surface first, then slowly press down with a squeegee or a credit card.
Once the vinyl adheres well, pull the transfer tape straight back at a 90-degree angle. This motion stops the vinyl from moving or stretching. On curves, take your time peeling, so the design stays exactly where you want it.
Alternatives to Transfer Tape for Vinyl Projects
You can swap transfer tape for some other materials when moving vinyl designs. Painter’s tape is a common choice. It’s cheaper, widely available, and sticks lightly to vinyl.
But it’s less precise, so it’s harder to line up detailed or large designs perfectly. It may also leave a sticky residue if left too long.
Clear contact paper works like a budget transfer tape. It’s sticky enough to pick up vinyl but not as durable or easy to reposition.
Contact paper helps with small or simple designs but isn’t reliable for thick vinyl or complex shapes. You might need to cut it larger than the design for easier handling.
Some crafters use parchment paper for quick transfers without sticky backing. It lets you slide the vinyl into place but doesn’t hold it for long or give much control. Parchment paper is good for trial placements but not for permanent sticking or tricky shapes.
| Material | Cost | Ease of Use | Best For | Drawbacks |
|---|---|---|---|---|
| Transfer Tape | Moderate ($5-$10 per 12″x12″ sheet) | Easy | All vinyl sizes and details | None for intended use |
| Painter’s Tape | Low ($3-$6 per roll) | Moderate | Small, simple projects | Less precise, residue risk |
| Contact Paper | Low to moderate ($4-$8 per 12″x12″) | Moderate | Simple, small vinyl cuts | Weak stick, hard to reposition |
| Parchment Paper | Very low ($1-$3 per sheet) | Hard | Trial placements only | No stick, less control |
It’s okay to skip transfer tape for tiny decals or single letters. Carefully peel vinyl by hand and press it firmly onto the project surface.
This works best on flat, clean surfaces and simple shapes. Larger or detailed designs often stick unevenly if you don’t use transfer tape, which adds stability and holds the parts together.
Using transfer tape adds confidence and control, especially for complex or layered vinyl. When budget or time limits make alternatives tempting, choose based on your design size and detail.
Painter’s tape or contact paper might save money but expect more adjustments. Parchment paper is more of a last resort and not for permanent transfers.
Can Transfer Tape Be Reused? Tips and Limits
Transfer tape can be reused, but only a few times before it loses its stickiness. Most tapes last between 2 and 5 uses if you handle and store them right. It is not made for repeated use like regular tape, so expect it to weaken after a few projects.
Check your used transfer tape before reapplying it. Press it lightly onto your skin; it should feel tacky but not overly sticky or dry.
Look for dirt, dust, or wrinkles on the tape, which make it hard to get clean transfers. When you notice damage on the tape, it’s time to replace it.
Store your transfer tape flat and still on its backing paper. Avoid folding or bending it since creases can ruin its stickiness.
Keep it away from dust, moisture, and direct sunlight to prevent it from drying out or catching particles. Proper storage can stretch its life and save money by letting you reuse it up to five times.
Discard old transfer tape when it no longer lifts your vinyl cleanly or leaves residue. Tape that loses tack and can’t grip the design fully will cause misaligned or incomplete transfers. Using fresh tape helps keep your designs crisp and your workflow smooth, especially with detailed Cricut cuts or layered graphics.
Store transfer tape on a clean, flat surface with the liner still attached to keep its adhesive ready for reuse.
Step-by-Step Action Plan for Using Transfer Tape
Follow these steps to use transfer tape correctly and get clean vinyl applications every time.
- Before you start: Select the right transfer tape for your vinyl type, based on its weight and tack level. Test it on a small vinyl scrap to confirm it lifts the design without damage.
- Day 1: Cut your vinyl design and weed away the excess. Check that all elements are properly separated and ready for transfer.
- Day 1: Apply the transfer tape smoothly over the vinyl using a scraper tool. Press firmly and evenly so the vinyl sticks to the tape, then lift it carefully to check the design sticks.
- Day 1: Place the vinyl covered with transfer tape on the surface you want to decorate. Make sure it lines up exactly before pressing firmly so the vinyl sticks. Slowly peel away the transfer tape at a steep angle, leaving the vinyl attached to your project.
- After applying: Smooth out any bubbles or wrinkles gently with a scraper or your fingers. When bubbles appear, gently pop them using a pin and smooth the vinyl by pressing firmly.
- Day 2 or later: If needed, clean the surface with rubbing alcohol before applying new vinyl to improve adhesion for future projects.
- Ongoing: Store leftover transfer tape flat, away from heat and dust to keep its stickiness for your next project.
Frequently Asked Questions
How Do You Apply Transfer Tape?
Cut a piece slightly larger than your design, then use a squeegee or your thumb to press the tape onto the vinyl. After waiting 15, 20 minutes for good adhesion, peel the backing and place the design on your surface. Apply pressure again to stick it well.
What Is the Difference Between a Transfer and a Decal?
A decal is the vinyl design itself, while transfer tape is the sticky paper used to move that decal from its backing to your project surface accurately. Transfer tape helps keep the design intact during placement.
Why Do I Need Transfer Tape for Cricut?
Transfer tape keeps your vinyl design in place after cutting, making it easier to apply precisely to your project. It especially helps with multi-piece or delicate designs that can shift or stretch without it.
What Can I Use as an Alternative to Transfer Tape?
You can use clear contact paper or painter’s tape as a substitute, but they might not give the same grip or clarity. These options work best for simple or small designs where precision is less critical.
What Is Transfer Tape?
Transfer tape is a sticky sheet used to move cut vinyl designs from their backing to your project surface. It holds everything together, so your decals don’t lose shape during application.
Can Transfer Tape Be Used on Textured Surfaces?
Transfer tape can work on lightly textured surfaces, but it may struggle with deep textures where vinyl won’t fully stick. Using a squeegee to press firmly can help improve adhesion.
Before You Go
Transfer tape is a simple tool that helps you move intricate vinyl designs easily. Try using the right tape with care to get clean, well-aligned applications. Now, grab your vinyl and tape, and make your next project look sharp and professional.