How to Make a Solar Address Sign: A Complete DIY Guide with Wiring and Placement Tips
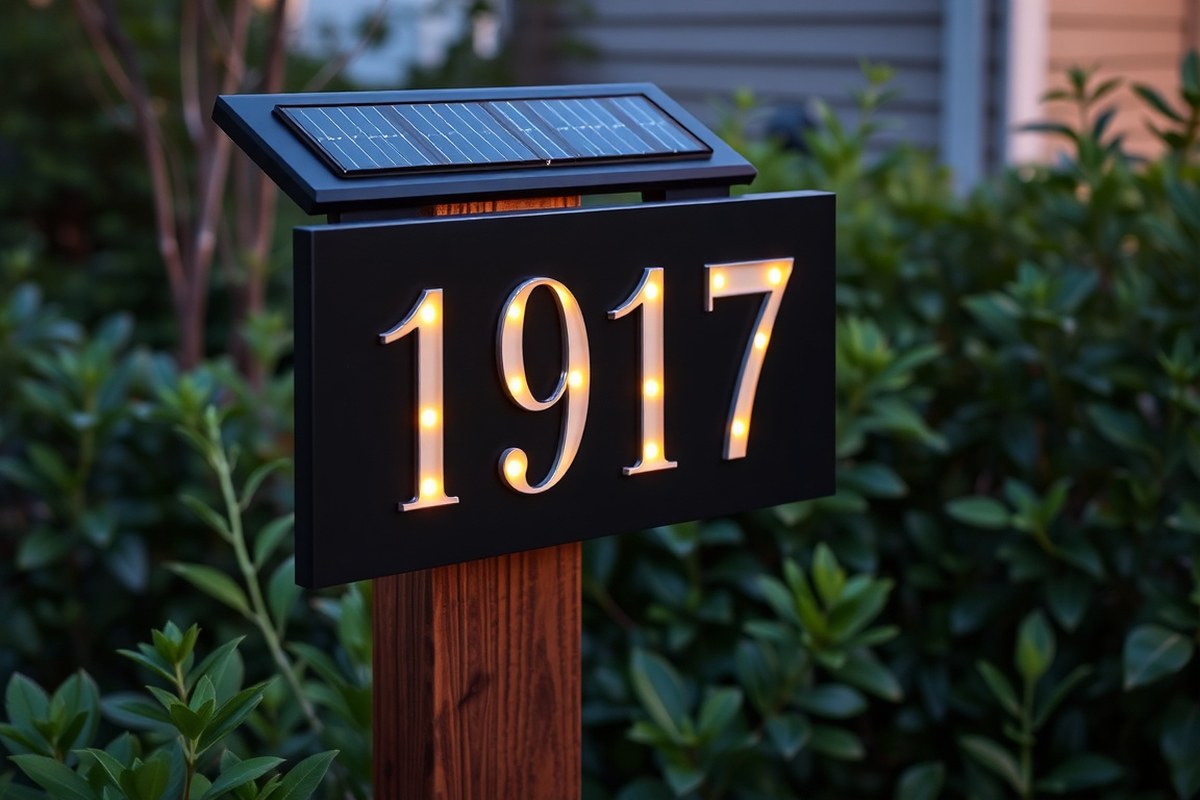
How to make a solar address sign depends on combining basic woodworking, solar LED lighting, and proper placement to ensure visibility. Use a 4″ x 4″ post, a 24V solar panel with LED strip lights, and an automatic dusk-to-dawn sensor for easy, energy-efficient illumination. Start by selecting a spot that gets at least 5 to 6 hours of direct sunlight daily for optimal solar charging.
Key Takeaways
- Cut two 1/4-inch spacers at 1-inch by 2-5/8 inches for mounting solar LED strip lights securely.
- Use a 6.5-foot extension wire to connect the solar panel safely to the address sign’s LED system.
- Identify the grey wire with a black stripe as positive and white wire as negative for correct electrical connections.
- Drill a 1/2-inch hole to feed LED strip lights and solar panel lead wires inside the sign box.
- Place the solar panel where it receives direct sunlight for at least 5 to 6 hours every day for maximum efficiency.
- Ensure the solar panel is flush with the bottom blocks and that 1/8-inch slots line up correctly during installation.
What Is a Solar Address Sign and How Does It Work?
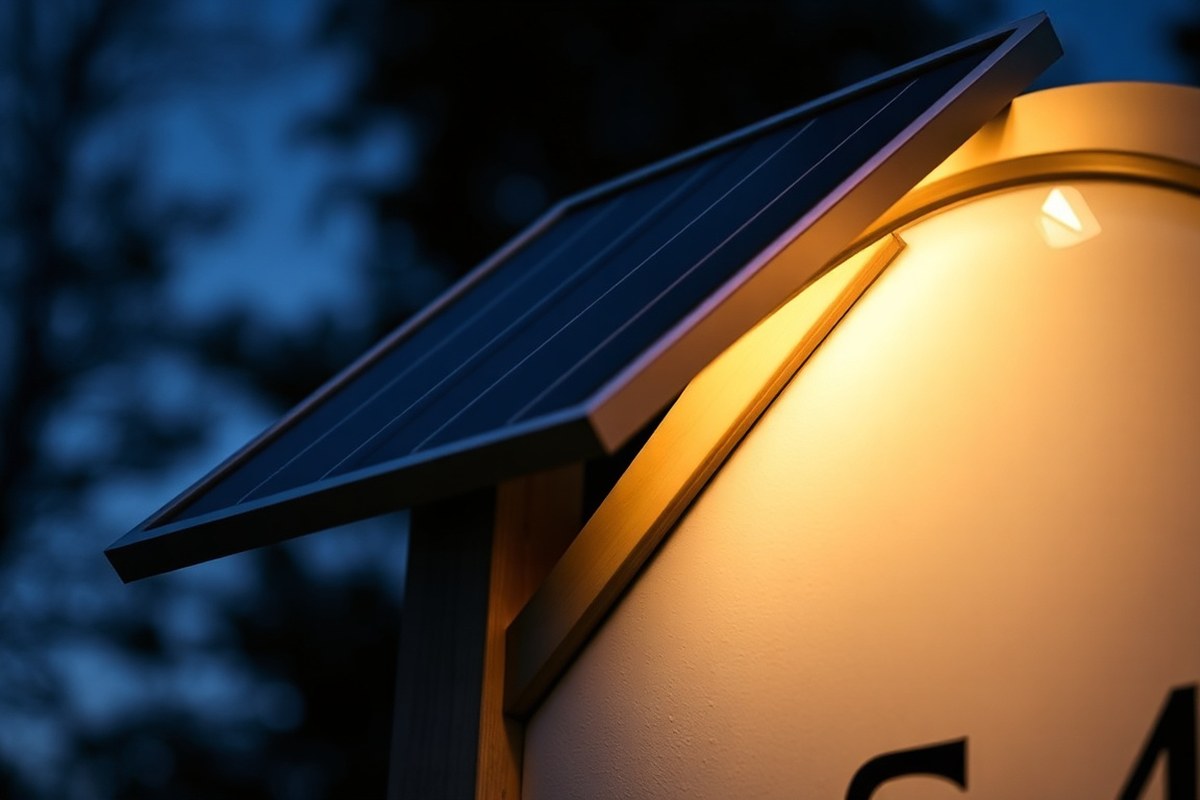
A solar address sign is an outdoor house number display powered entirely by solar energy. It uses a small solar panel to capture sunlight during the day and convert it into electricity. This electricity charges a rechargeable battery, which then powers LED lights embedded around or behind the house numbers. The bright LEDs illuminate your address at night without the need for any external wiring or electrical connection.
The main advantage of a solar address sign lies in its independence from the electrical grid. You don’t have to dig trenches or run underground wires from your home’s electrical system to the sign. The solar panel and LED lighting operate together as a compact, self-contained system. During daylight hours, the solar panel generates power, which is stored in the battery. A dusk-to-dawn sensor built into most solar panels automatically triggers the LEDs to turn on after sunset, lighting your house numbers efficiently until dawn.
The components making up this system generally include a solar panel, a rechargeable battery, LED lights, wiring, and a light sensor. The solar panel is typically mounted on or near the sign, facing the sun for maximum exposure. LED strip lights or individual LED bulbs are attached directly to or behind the house numbers to provide bright, focused illumination. Wiring connects the solar panel to the battery and then to the LEDs. Many setups use color-coded wires for easy installation, for example, one wire might be positive with a black stripe and another negative in white.
Choosing a sunny location away from shadows cast by trees or roof overhangs is essential for the solar panel’s effectiveness. If placed under shade, the solar panel won’t charge the battery fully, leading to dim or non-functioning lights at night. Also, avoiding nearby external light sources ensures the dusk-to-dawn sensor isn’t triggered prematurely by streetlights or other illumination.
On average, building a solar address sign can be an economical project costing under $50 for basic materials like a small solar panel, LED strips, and wiring. Installation is quick since no complex electrical work is required. When working well, the LED lights shine evenly and brightly, making your address visible from the street and improving curb appeal. A common issue to watch for is insufficient sunlight exposure, which reduces battery charging and sign brightness. Regularly dusting the solar panel surface and checking for wiring connections can help maintain consistent performance.
Essential Tools and Materials Needed for Assembly

To build a durable and attractive solar-powered address sign, you’ll need a set of specific tools, materials, and lighting components. Choosing quality parts and preparing the right workspace makes the assembly easier and ensures your sign functions well for years.
Tools Required for Cutting and Assembly
Having the proper tools on hand is essential for cutting wood precisely, securing parts together, and handling the electrical wiring safely. A basic toolkit tailored to woodworking and light electrical work covers most tasks needed for the sign. Key tools include:
- Cordless drill with a set of drill bits and screwdriver bits
- Hand saw or electric miter saw for clean wood cuts
- Measuring tape and carpenter’s square to ensure straight edges
- Hammer for nailing pieces and tapping blocks into place
- Wire stripper and small pliers for preparing and connecting wiring
- Clamps or wood glue for holding parts while fastening nails
- Sandpaper or sanding block for smoothing edges and surfaces
Using a miter saw will speed up cutting and improve accuracy, but a quality hand saw can suffice for small projects. Clamps help keep wood blocks flush during gluing and nailing, avoiding misalignment.
Materials for the Sign Structure and Lighting
The main structure usually consists of wooden blocks shaped and glued to create the frame and backing, providing support and a neat housing for the solar LED strips. Opt for weather-resistant wood like cedar or treated pine to withstand outdoor exposure. The wood should be cut to dimensions that suit your desired sign size, commonly around 6 inches tall by 12 inches wide.
Along with wood, you’ll need 3/4-inch nails and wood glue for strong, lasting joints. Installing stop blocks made from glass or thin acrylic helps secure the LED strips inside without damage. Use a soft cloth under the sign during assembly to prevent scratches to wood or glass surfaces. For wiring, a 6.5-foot extension wire connects the solar panel to the LED lights, allowing flexible placement of the panel in a sunny location while keeping the sign in view from the road or driveway.
Ensure all nails are galvanized or stainless steel to prevent rust from outdoor moisture.
Recommended Solar Panels and LED Lights
Select solar panels sized to provide enough power for your LED lights, considering that 5 to 6 hours of direct sunlight daily is optimal for charging. Most small address signs work well with 1 to 3-watt panels, which cost between $10 and $30. Choose panels with a built-in sensor to turn the lights on automatically at dusk.
LED strips should be weatherproof (IP65 or higher) and economically sourced from hardware suppliers or online, typically costing $10 to $20 per 16-foot roll. Stick the LED strips inside the frame, starting at the top and running them along all four inner edges for even illumination.
Solar lights from discount stores can be adapted for use as the light source but check their dimensions and power output to ensure compatibility. Durable wiring and connectors rated for outdoor use improve reliability and safety in humid or wet conditions.
Step-by-Step Construction of the Solar Address Post
Start by cutting the wood to size and assembling the frame that will hold your solar address sign. Next, plan where to place the LED strips inside the box and create grooves or channels for the wiring. Finally, fit the solar panel into its compartment or mount it nearby, ensuring it gets plenty of sunlight for charging.
Cutting and Preparing Wood Components
Select cedar, redwood, or pressure-treated pine boards, which resist weathering well outdoors. Cut the main sign panel roughly 12 inches wide by 18 inches tall, enough space for numbers or lettering. Use ¾-inch thick wood for durability. Then cut side pieces and a back panel to create a shallow box about 2 to 3 inches deep. This depth provides room for the LED lights and wiring.
Make grooves roughly ¼ inch deep and wide on the inside edges of the box to run wiring discreetly. A router or chisel works well for this. Drill six holes spaced evenly around the back panel edge for 1¼-inch screws to attach it securely. Sand edges smooth to avoid splinters.
Installing LED Strips and Wiring Inside the Sign
LED strips work best mounted along the inside edges of the front panel, shining light through cut-out numbers or translucent address plates. Use waterproof LED strips rated for outdoor use to avoid damage from moisture. Trim LED strips to length, if necessary, using manufacturer markings for cutting points.
Use adhesive backing or small clips to hold LED strips firmly in place. Route wires through the grooves cut earlier to keep them hidden and protected. Leave enough slack near the connection point to avoid strain. Strip ½ inch of insulation from wire ends before connecting to terminals or solar controller outputs.
Mounting the Solar Panel and Final Assembly
The solar panel either fits into a compartment on the top of the box or mounts separately on a stake or wall bracket. Adjust the compartment by adding spacers inside or notching the wood to fit your panel snugly. Press the ON button on the solar panel before installation to activate it.
Mount the solar panel in full sun location for 6 to 8 hours of direct sunlight daily to maximize charging. Attach the panel using the included brackets or insert the stake into the ground nearby, depending on your setup. Connect panel wires to the LED wiring according to the instructions and test the system by covering the panel during daylight to trigger the dusk-to-dawn sensor.
- Measure and cut front, sides, and back panels of wood as per your desired sign size.
- Create grooves on inside edges for hiding wiring using a router or chisel.
- Assemble box by joining sides and back with wood screws; sand all edges smooth.
- Trim outdoor-rated LED strips to fit around edges and apply adhesive backing or clips to mount.
- Run wiring through grooves, strip wire ends by ½ inch, and connect to LED strips.
- Customize solar panel compartment to fit panel snugly by adding spacers or notching wood.
- Press the ON switch on the solar panel and mount it using included brackets, stake, or attach to the box.
- Connect solar panel wiring to LED circuit and test operation by blocking sunlight on the panel.
Wiring and Connecting the Solar LED Lighting System Safely
Proper wiring and secure connections are essential to ensure your solar address sign functions safely and reliably. Correctly identifying positive and negative wires, protecting all connections from moisture, and testing before final installation helps avoid electrical faults and weather damage.
Identifying and Connecting Positive and Negative Wires
Knowing which wires are positive and negative prevents reversed polarity, which can damage LED strips or the solar panel. Solar panel wires generally use red for positive and black for negative. On LED lighting systems, grey wires connect to positive terminals and white wires connect to negative terminals.
Prepare the wires by cutting them to length with some slack, then strip about ½ inch of insulation from the ends. Always match positive to positive and negative to negative when making connections. Use wire connectors or solder connections to ensure a solid contact.
- Cut each wire to the needed length, leaving a few extra inches for flexibility.
- Strip ½ inch of insulation from each wire end using wire strippers.
- Identify the positive wires: red from the solar panel, grey from the LED strips.
- Identify the negative wires: black from the solar panel, white from the LED strips.
- Connect all positive wires together securely with wire nuts or by soldering.
- Connect all negative wires in the same manner.
- Double-check each connection to ensure no wires are crossed or loose.
Tips for Weatherproofing Wiring and Connections
Outdoor wiring for solar address signs faces rain, humidity, temperature swings, and UV exposure. Proper weatherproofing prevents corrosion and shorts, extending your system’s lifespan. Use waterproof wire connectors or seal soldered joints with heat shrink tubing designed for outdoor use.
Cover exposed wiring and connectors with silicone sealant or electrical-grade outdoor caulk to keep moisture out. Place all junctions near the sign or solar panel where you can inspect them annually. Avoid burying connections unless you use specifically rated underground wiring and conduit.
Testing the Electrical System Before Mounting
Test the wiring and connections before mounting the sign to avoid troubleshooting after installation. Use a multimeter to check for correct voltage polarity and continuity. Testing under daylight helps confirm the solar panel charges and powers the LEDs as expected. Here’s how to test your connections:
- Turn off all power sources if applicable before testing connections.
- Set the multimeter to measure DC voltage for testing the solar panel output.
- Connect the multimeter probes to the positive and negative terminals.
- Expose the solar panel to direct sunlight and check that you read a voltage between 5 to 12 volts, depending on the panel.
- Switch the meter to continuity mode and check each connection for a solid circuit.
- Confirm the LED strip lights up when connected to the panel output under a bright light.
- Address any reversed wires or loose connections before final installation.
Choosing the Best Location for Solar Panel and Sign Placement
Placing the solar panel where it receives the most sunlight is essential for your solar address sign to work well. Ideally, position the panel in a spot that gets direct sun for at least 6 hours daily, typically on a south-facing surface in the Northern Hemisphere. Avoid areas shaded by trees, buildings, or other structures throughout the day, as shadows significantly reduce charging efficiency.
The angle of the solar panel impacts how much sunlight it captures. Tilt the panel to match your location’s latitude for the best year-round performance. For example, if you live at 40° latitude, tilt the panel around 40° from horizontal. This alignment maximizes sun exposure, especially during peak sunlight hours, allowing the battery to charge fully and power the LED lights throughout the night.
Sign placement matters, too. Set the address sign where it’s clearly visible from the street and at a height between 3 and 5 feet, making it easy for visitors or delivery drivers to spot. Position the sign so incoming headlights or porch lights illuminate it, improving visibility after dusk without relying solely on the solar lighting. Here’s a simple checklist to help you choose the best spots:
- Solar panel faces true south with no obstructions.
- Panel tilted to match your geographic latitude angle.
- Panel in direct sunlight 6+ hours daily without shade.
- Address sign placed 3, 5 feet above ground for visibility.
- Sign oriented for easy viewing from street or driveway.
- Avoid placing the sign where porch or yard lights cast harsh shadows.
- Maintain a clear space around the solar panel to prevent dirt buildup.
Cloudy days can reduce solar charging, so consider cleaning the panel regularly to maintain efficiency. Your solar panel’s Type-C charging port is a handy backup. Use the provided cable to charge the panel directly if natural sunlight isn’t enough for long periods. This approach ensures your sign stays illuminated even in bad weather.
Keep trees and nearby plants trimmed to prevent shade creep over time, which can quietly undermine solar panel performance.
Design Variations and Customization Options
You can choose several materials beyond wood to create a solar address sign, including glass blocks, mason jars, recycled bottles, and other repurposed items. These options offer a balance between design appeal and cost-efficiency. Glass blocks, priced around $5 each at craft stores, allow for easy customization with attached numbers and work well for lighting diffusion.
Mason jars serve as charming holders for numbers and solar lights, perfect for rustic or vintage styles. Each jar holds one address number, and you’ll use the jar lids to mount the numbers securely. Recycled bottles like coffee syrup containers also make budget-friendly alternatives; one bottle per number is enough. Using recycled materials not only saves money but adds a unique look.
Customizing the numbers and lighting involves experimenting with fonts and colors. You can buy adhesive numbers or cut them from thin sheets, depending on your material and style preferences. For lighting, solar LED modules fit inside glass or jars easily, either wired directly or with battery packs for easier maintenance. Below is a table summarizing common material options, their typical size or quantity per number, ease of assembly, and approximate cost:
| Material | Size/Quantity per Number | Assembly Notes | Approximate Cost per Unit |
|---|---|---|---|
| Glass Block | 2-5/8 × 3-7/8 inches | Glue side blocks leaving 1/8-inch gap, attach numbers with nails | $5 |
| Mason Jar | One jar and lid per number | Attach numbers on lid; fits solar lights inside easily | $3-$7 (varies by style) |
| Recycled Bottle | One bottle per number | Clean and repurpose, attach numbers externally | Free (if reused) |
When working with glass blocks, ensure you keep the 1/8-inch gap between the front and the block bottom for light diffusion and proper number placement. Use wood glue and 1-1/4-inch nails to attach side blocks below the one-inch line for support. Mason jars require securely fastening the numbers to the lids and sealing well if outdoors. For recycled bottles, thorough cleaning and possibly light sanding will prepare a good surface.
Choosing the right material depends on your budget and aesthetic. Glass blocks add a modern, clean finish and good lighting effects but cost more than reused bottles or jars. Mason jars offer a classic look and moderate cost, with easy solar light integration. Recycled bottles provide the most budget-conscious choice yet may require more prep work and creative assembly to look polished.
Common Mistakes and How to Avoid Them
Your solar address sign might not light up due to common issues like insufficient sunlight, faulty wiring, or poor battery charge. The small solar panel on top needs at least 6 to 8 hours of direct sunlight daily to fully charge the battery. Placing the sign in a shaded spot or behind trees can severely limit its performance. To fix this, relocate the sign or solar panel to a sunnier location, ideally facing south in the northern hemisphere.
Incorrect wiring is another frequent cause of failure. Using mismatched wires or loose connections can disrupt power flow, so double-check that connections are secure and wires follow the manufacturer’s color coding. Avoid splicing wires without proper connectors, which can cause short circuits or corrosion. If your sign uses a plug-and-play solar light stem, remove it and inspect the contacts for dirt or damage before reinstalling. Routine testing with a multimeter can verify continuity and voltage output, helping spot wiring problems early.
Weatherproofing is key for durability since your sign faces rain, snow, and temperature swings. Sealing around wiring entry points with waterproof silicone or rubber gaskets stops moisture intrusion, which can short out electrical parts. Use rust-resistant screws to attach the solar post light to the post and optionally tap the sign flush against the wall with a block of wood and a rubber mallet to ensure a tight fit. Check seals yearly for cracks or wear and replace any weatherproofing materials showing damage. UV-resistant paint or finish on the wood or metal surface will also protect against sun damage that degrades signs over time.
- Place the solar panel in a location receiving full sun for at least 6 hours daily
- Use color-coded, weather-rated wiring and check all connections are tight
- Remove and clean the solar light contacts regularly to maintain good electrical contact
- Seal all wiring holes with silicone caulk to keep moisture out
- Attach the sign firmly with rust-proof screws and consider a rubber mallet for a snug fit
Signs not lighting up often show that battery capacity has dropped from insufficient charging or wiring issues. Swapping rechargeable batteries every 1 to 2 years can keep the system reliable. Poor weatherproofing might cause corrosion inside the housing, so avoid painting over seals and use only materials labeled for outdoor exposure. A solid installation with regular checks ensures your solar address sign lasts through seasons without dimming or flickering.
Maintenance, Troubleshooting, and When to Get Professional Help
Maintaining your solar address sign starts with keeping the solar panel and lights clean to ensure efficient energy absorption and clear illumination. Dust, dirt, and debris can reduce the panel’s ability to charge the battery, so wipe the solar panel surface with a soft cloth and mild soap solution every one to two months, especially after storms or heavy dust exposure. Avoid harsh cleaners or abrasive materials that might scratch the panel.
Battery replacement is another key maintenance task. Most solar batteries last between 2 to 3 years depending on usage and temperature. Notice the lights dimming consistently or not turning on at dusk? Check the battery. To replace it, disconnect the power, remove the old rechargeable battery typically housed inside the light compartment, and install a new one with the same voltage and size specifications. Recycling old batteries properly is important due to their chemical content.
Low light issues often stem from shading, dirty panels, or battery problems. Begin troubleshooting by cleaning the panel and removing anything casting shadows during the day. Confirm the battery is fully charged or replace it if necessary. Wiring connections should be checked for corrosion or looseness as outdoor exposure can impact contact points. LED lights flickering or staying off? Test the circuit with a multimeter to find faults in wiring or the solar controller unit. Here’s a simple checklist for regular maintenance and troubleshooting:
- Clean solar panel and light covers monthly with a soft cloth and mild soap
- Inspect and clear any debris or shading from the solar panel
- Replace rechargeable battery every 2 to 3 years or when dimming occurs
- Check wiring connections for corrosion, tightening any loose terminals
- Test electrical components using a multimeter if lights fail to operate
- Confirm sign mounting is secure and weatherproofed
Contact a professional electrician or solar technician under these conditions: if wiring issues persist despite tightening or cleaning, if you need to upgrade components like the solar panel or battery bank to higher capacity versions, or if local code requires certification for outdoor electrical modifications. Professional help ensures safety in handling electrical parts and compliance with regulations. The cost for expert repair or installation varies but expect $75 to $150 per hour depending on location and complexity.
Always disconnect power before inspecting or replacing batteries to prevent shock or short circuits.
Step-by-Step Action Plan to Build Your Solar Address Sign
Follow these steps to assemble and install your solar-powered address sign efficiently, ensuring it works well from the start.
- Before you start: Gather all necessary tools and materials, including wood, solar LED lights, wiring components, and a small solar panel. Confirm you have everything ready before assembly.
- Day 1: Build the address post following the step-by-step guide, making sure joints are secure. The post should stand steady without wobbling.
- Day 2: Wire the LED lighting system carefully, connecting it to the solar panel according to instructions. Test the circuit during daylight to verify correct wiring before installation.
- Day 3: Select a location with 6-8 hours of direct sunlight for the solar panel and a visible spot for your sign. Check solar panel angle and exposure to confirm good sunlight.
- Day 4: Mount the solar panel and secure the address sign post in place, using concrete or ground anchors as needed. Confirm the sign is stable and the panel angle hasn’t shifted.
- Week 1: Observe the sign at night to ensure the LED lighting activates properly. Adjust wiring or panel angle if the light dims too early or stays off.
- Monthly: Clean the solar panel surface and check wiring for corrosion or damage. Confirm steady illumination each night to keep your sign working well.
Frequently Asked Questions
Can I Use Rechargeable Batteries for My Solar Address Sign?
Yes, rechargeable batteries designed for solar systems are ideal. They store energy efficiently and reduce waste, ensuring your sign stays lit through the night.
How Durable Is a Solar Address Sign in Extreme Weather?
Most solar address signs are weather-resistant but may need extra sealing against heavy rain or snow. Using treated wood and waterproof paint can extend the sign’s lifespan.
Can I Install the Solar Panel Higher Than the Sign?
Yes, mounting the solar panel higher can improve sun exposure while keeping the sign visible. Just ensure the wiring is safely secured and weatherproofed.
What Is the Average Cost to Build a Solar Address Sign?
Building your own solar address sign usually costs $40 to $80. It’s affordable since you avoid professional installation fees and electricity expenses.
How Do I Prevent Glare from the LED Lights?
Using frosted or diffused covers over the LEDs reduces glare without dimming the address visibility. This helps drivers see your address comfortably at night.
Is It Okay to Paint over the Solar Panel Wires?
No, painting wires can cause overheating or connection issues. Keep wires clear and protected with electrical tape or conduit instead.
Wrapping Up
Creating your own solar address sign adds a custom touch to your property while saving energy. Installing it thoughtfully and maintaining it regularly will keep it bright and reliable for years. Begin with gathering your materials today to start building a sign that works day and night without added electric bills.