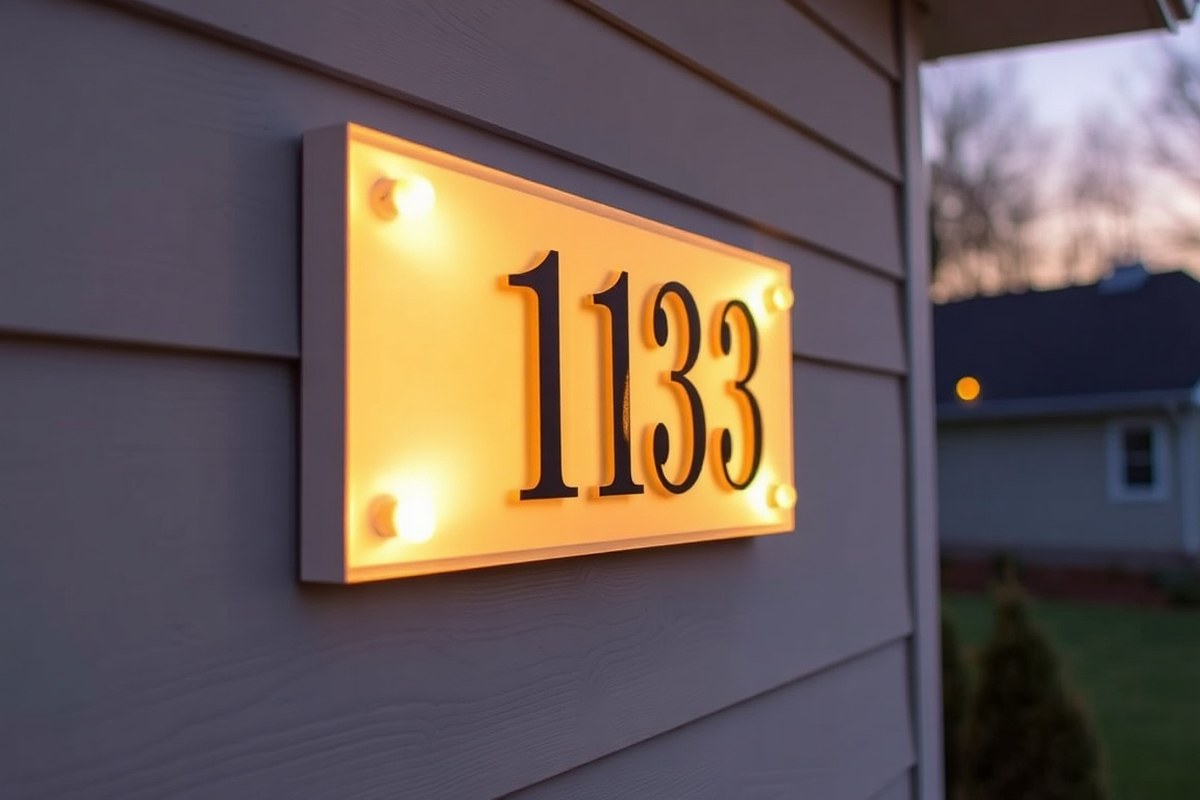
How to Make a Lighted Address Sign with LED Lights: A Complete DIY Guide
How to make a lighted address sign starts with choosing the right materials and LED lighting to ensure visibility and durability. Use cedar wood for the sign base and trim, and backlight your numbers with bright, energy-efficient LEDs for clear nighttime visibility. Begin by measuring your space accurately to size your sign proportionally and plan the LED placement for even illumination.
Key Takeaways
- Use 1×2, 1×4, and 1×6 cedar boards for a sturdy, weather-resistant sign frame.
- Choose LED strip lights with a color temperature around 10000K for clear, crisp illumination.
- Cut sign components precisely, using measurements like 18” wide by 24” tall for balanced proportions.
- Drill holes 3/16” wide and 1” deep to insert plastic anchors securely when mounting the sign.
- Opt for a matte black or neutral finish to highlight LED lighting without glare.
- Plan your LED wiring with low voltage for safety and ease of installation.
Materials and Tools Needed for a Lighted Address Sign

Start with durable, weather-resistant wood like cedar for your sign base and trim. For example, use a 1×6 cedar board, cut to your desired width for the sign back, paired with 1×2 cedar trim pieces to frame the edges. Cedar’s natural resistance to rot and insects suits outdoor use. Dimension your wood based on the size of numbers or letters you plan to display, ensuring the back is sturdy enough to hold lighting components without warping or bending.
Lighting requires LED strips or modules designed for outdoor use, ideally with waterproof ratings like IP65 or higher. Choose LED lights that provide sufficient brightness, look for around 100 lumens per LED, powered by a 12-volt DC system for easy wiring. Include a compatible power adapter, ensuring it matches the voltage and current requirements of your LED setup to avoid burnout or dimming.
Hardware includes exterior-grade screws and wall anchors to secure the sign to your home’s exterior. For attaching the trim and backboard, 1 1/2-inch exterior flat-head wood screws work well. Use hanger cleats for a secure mounting bracket system, typically fastened with two 1 1/2-inch screws. Opt for stainless steel or brass screws to prevent rust and corrosion.
- 1×6 cedar board (size depends on sign dimensions)
- 1×2 cedar trim pieces to frame the sign
- Outdoor-rated LED strips or modules (IP65 or higher), approx. 12 V DC
- Compatible 12 V LED power adapter
- 1 1/2″ exterior flat-head wood screws, stainless steel or brass
- Wall anchors matched to your home’s exterior material
- Hanger cleats for mounting, plus wood glue for assembly
Common cutting tools include a miter saw or circular saw for precise wood cuts, a drill with drill bits for screws and wiring holes, and sandpaper (150-grit) to smooth all cut edges. You will also need wire strippers and a multimeter to ensure safe and correct electrical connections. Pre-cut letters or numbers can speed assembly; these are often available from sign-making suppliers or online, made from metal or acrylic. Using pre-made parts reduces cutting time and increases accuracy, especially if you prefer a polished, professional look.
Assembly involves gluing and screwing trim pieces onto the backboard, installing spacers behind metal signs if used, and running wires neatly behind all components. Concealing wiring prevents exposure to elements and maintains cleanliness. Make sure to pull excess wire behind walls or mounting surfaces to hide it and reduce the risk of damage. Test the LED lighting thoroughly before final mounting to confirm connections and brightness meet your expectations.
Choosing the Right Lighting: LED Types and Power Options
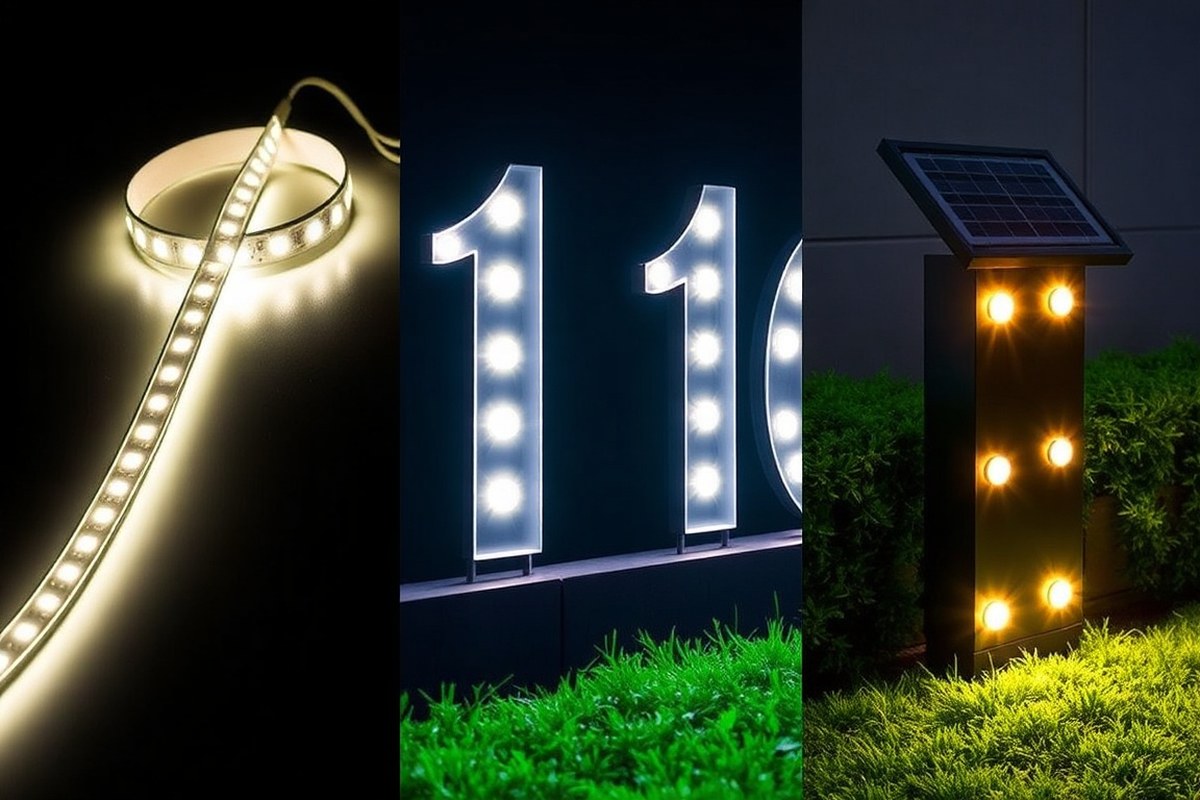
Choosing the right lighting for your address sign depends on your location, budget, and desired impact. LED strip lights are affordable, flexible, and easy to install, making them popular for DIY projects. They can run up to 65 feet, offer color-changing options, and often come with IR sensors to adjust brightness automatically. Backlit 3D channel letters provide a striking, modern look that works well on stone, brick, or marble surfaces. These use LED chips hidden behind raised letters for a halo effect but cost more and require precise cutting and assembly.
Solar-powered LEDs offer energy independence and low maintenance. They work well if your sign is in a sunny spot, avoiding wiring complexity. However, solar units typically provide less brightness and may not support advanced color-changing features like wired LED strips. A detached solar panel captures sunlight during the day, powering LEDs after dark without extra electricity cost. For programmable colors or effects, wired LED strips are the better choice due to their compatibility with controllers.
| LED Type | Brightness | Installation Complexity | Power Source | Cost Range | Color Options | Maintenance |
|---|---|---|---|---|---|---|
| LED Strip Lights | Medium to High (depends on length) | Easy, flexible and cuttable | Wired (electricity) or some with solar kits | $20, $60 for 50 ft | Single or multi-color, programmable available | Low |
| Backlit 3D Channel Letters | High (halo backlit effect) | High, precise assembly and wiring | Wired (electricity) | $50, $150 per letter (DIY can reduce cost) | Usually single color or warm white | Moderate (sealed letters dry well) |
| Solar-Powered LEDs | Low to Medium (depends on sun exposure) | Medium, panel placement and wiring to sign | Solar (battery charged) | $30, $100 including panel and lights | Mostly single color | Very Low (solar panel cleaning) |
When deciding, match lighting to your environment. Bright, backlit letters work best where clear visibility and style are priorities, especially on dark or textured walls. LED strips fit various shapes and allow color effects for a playful or modern look. They are simple for beginners and budget-friendly. Solar LEDs serve well in sunny locations lacking outdoor outlets, ideal for energy savings and simpler setups.
Always check that your power supply location matches your lighting type; placing it inside a sign can block remote controls or reduce accessibility.
Cutting, Assembling, and Finishing Your Sign Components
Start by accurately cutting and assembling the cedar boards to create a sturdy and attractive base for your lighted address sign. Proper sizing and smooth edges ensure the sign looks professional and lasts outdoors. Finish with a weatherproof coat that highlights the wood grain and prevents damage from moisture and sunlight.
Cutting Cedar Boards to Size
Use cedar boards because they resist rot and weather better than most woods, which is essential for an outdoor sign. Cut one sign back board from 7/8″ thick cedar sized to about 5 1/2″ wide and 23 3/4″ long for good visibility without being oversized. The trim pieces should surround the backboard and provide framing while keeping the overall thickness manageable.
Numbers should be at least 4 inches tall for maximum readability from the street. The sign’s width around 24 inches balances visibility and ease of installation. Keep your cuts square and measure twice before cutting to avoid mistakes that throw off assembly.
Assembling the Frame and Backing
Secure the frame and backboards with wood glue and finishing nails for a strong hold that resists warping. Add spacers as needed to allow for LED wiring behind the numbers without bulging the face. Follow these steps:
- Use 1×2 cedar to cut one long trim piece and two shorter trim pieces that will fit the edges according to your sign’s measurements.
- Cut the small hanger spacer from 1×2 cedar to attach behind the trim board for mounting.
- Apply wood glue along the edges of the sign backboard, then press on the cut trim strips flush against it.
- Use finishing nails to secure the trim in place, driving them every 6 to 8 inches for stability.
- Attach the hanger spacer to the trim’s back with glue and nails, ensuring it aligns with your planned mounting method.
- Sand all edges and surfaces smoothly with 120-grit sandpaper to remove splinters and rough spots.
- Wipe away dust before moving to finishing steps to help paint or sealer adhere properly.
Applying Weatherproof Finishes
A matte black finish looks sleek on exterior walls and contrasts well with bright LED lights, making your address clearly visible at night. Exterior acrylic latex paint offers durability and prevents peeling or fading. Apply at least two coats with a good-quality brush, allowing 24 hours to dry between coats.
Alternately, a clear exterior wood sealer preserves the natural cedar look while protecting from moisture. Reapply the sealer every one to two years depending on local climate conditions. Avoid oil-based finishes for outdoor signs as they can yellow and attract dirt.
Wiring and Safely Installing LED Lights
Wiring and installing LED lights on an outdoor address sign requires careful attention to electrical safety, proper insulation, and using the right power adapters suited for exterior use. Following recommended steps and safety precautions minimizes risks such as electrical shock, shorts, or damage to the sign’s components. Knowing when to enlist professional help ensures the job is done safely and correctly.
Selecting Safe Power Sources and Adapters
Choose outdoor-rated power adapters designed for LED lighting with the correct voltage and wattage to match your sign’s requirements. Low-voltage adapters (12V) are commonly used because they reduce shock hazards. Make sure the adapter has a weatherproof casing if positioned near or exposed to moisture.
Verify the adapter’s electrical rating matches the total wattage of your LED lights to prevent overload. Also, ensure your chosen power source is protected by a Ground Fault Circuit Interrupter (GFCI) outlet, which shuts off power quickly if a ground fault occurs. This is a key safety feature for outdoor electrical work.
Proper Wiring and Insulation Techniques
Proper wiring prevents electrical shorts and prolongs your sign’s lifespan. Use 22 or 24 gauge speaker wire for connecting LEDs if the supplied wire isn’t long enough. Supplementary wires should be securely attached before running through any holes in walls. Follow a step-by-step checklist for wiring:
- Turn off power at the circuit breaker before starting any wiring tasks.
- Drill a hole through the interior and exterior wall to feed the power wire from inside to outside.
- Attach any additional wiring needed using wire connectors rated for outdoor use.
- Feed the complete power wire assembly through the hole to the exterior side.
- Secure wires along walls using cable clips or staples, avoiding tight bends or sharp edges.
- Ensure all wire connections are insulated with electrical tape and/or weatherproof wire nuts or heat shrink tubing.
- Plug the adapter into a GFCI-protected outdoor electrical outlet only after completing all wiring and double-checking insulation.
Use outdoor-rated junction boxes at any exposed wiring junctions to protect connections from moisture and mechanical damage. Avoid running wires near metal edges unless protected by conduit. Maintain at least 12 inches clearance between low-voltage wires and high-voltage power cables to reduce interference.
Testing and Troubleshooting Electrical Connections
After installation, test the lighting system before final mounting. Turn on the power only after confirming all wires are insulated and secure. Check that each LED illuminates correctly and watch for flickering, which could indicate loose connections.
Use a multimeter to measure voltage across connectors and verify continuity if lights fail to come on. Double-check the adapter’s output voltage matches the LED manufacturer’s specifications. For intermittent lighting or overheating wires, turn off the power immediately and inspect wiring for damage or incorrect gauge size.
Call a professional electrician if you encounter complex wiring layouts requiring new circuits, if your installation involves high voltages beyond 24V, or if you’re unsure about local electrical codes. Professional assistance ensures compliance with safety standards, especially in older homes where wiring might be outdated or fragile.
Mounting Your Lighted Address Sign Securely
Selecting the right spot and method to mount your lighted address sign ensures it stays secure and visible all year round. Begin by choosing a location that’s easily seen from the street and allows for wiring concealment. Smooth surfaces like wood siding or a post make installation straightforward, while harder surfaces like brick require special anchors or brackets.
Common mounting options include hanging from a bracket attached to your house, fastening directly onto a post, or securing to flat siding. Use metal or plastic brackets that come with screw holes matching your sign’s mounting points. For wood, wood screws that penetrate at least 1.5 inches provide a sturdy hold. When mounting on brick or stucco, use masonry anchors or sleeve anchors with screws designed for masonry to prevent loosening.
Concealing wiring keeps your install neat and protects cables from weather damage. Route wiring inside wall cavities when possible or run it along trim lines using cable clips matching your siding color. Paintable cable covers provide a clean finish if the wire must cross open surfaces. For mounting on posts, drill a hole through the post to feed wiring inside.
- Mark the location. Hold your sign against the desired mounting surface. Mark the top center of the sign on the wall or post for leveling.
- Attach the bracket. Use appropriate screws or anchors depending on the surface: wood screws for wood siding, masonry anchors for brick, and lag bolts for posts.
- Secure the sign. Fasten the sign to the bracket with screws through the bracket holes into the sign’s mounting channels. A spacer behind the sign can help it hang straight.
- Route wiring. Run the wiring along trim or inside walls if possible. Use cable clips or covers to secure and hide cables neatly against the surface.
- Seal holes and covers. Weatherproof drill holes and cable covers with exterior-grade caulk to prevent moisture entry.
- Test stability. Gently shake the sign to confirm it’s firmly anchored and won’t loosen over time.
When drilling into brick or concrete, use a hammer drill and suitable masonry bits to avoid cracking and ensure proper anchor holding strength.
Protecting and Maintaining Your Illuminated Address Sign
Protect your illuminated address sign by applying a clear, outdoor-rated sealant that repels water and resists UV rays. Polyurethane or marine varnish works well on wood, while acrylic spray sealers suit metal and plastic surfaces. Apply two to three thin coats, allowing 24 hours to dry between layers. This step prevents fading, warping, and moisture damage across seasons. Use a silicone-based caulk to seal gaps where wiring enters or exits the sign enclosure, blocking water intrusion and pests.
Maintain the sign’s brightness and appearance by scheduling cleaning every three to six months, adjusting for your local weather and dust levels. Use a soft microfiber cloth dampened with mild soapy water to gently wipe down the sign face and LED covers. Avoid abrasive cleaners or rough sponges that could scratch surfaces or remove protective coatings. For stubborn dirt or insect residue on LEDs, use a cotton swab dipped in isopropyl alcohol, testing on a small spot first. Dry thoroughly to prevent water spots or electrical issues.
Check the seal integrity once a year by inspecting for cracks, peeling sealant, or loose wiring covers. Reapply sealant or caulk as needed to maintain a continuous barrier. In cold climates with freezing temperatures, verify the enclosure is well-ventilated but tight enough to prevent condensation, which can cause corrosion. Regularly clear leaves and snow from solar panels on the sign to keep them charging efficiently. Typical costs for sealant and caulk range from $10 to $25 per container, providing a year or more of protection.
Keeping wiring connections clean and dry prevents shorts and extends light life. Test replaceable LED strips during warm months and promptly replace any dim or flickering lights. Avoid direct water spray during cleaning or use a gentle hose spray from a distance. Signs facing intense sun may require more frequent resealing or replacing faded paint. By committing to these maintenance habits, your illuminated address sign will remain a bright, welcoming feature that withstands weather and time. This helps ensure emergency responders and visitors can easily spot your home at night, maintaining both safety and curb appeal.
DIY Solar Lighted Address Signs: Planning and Installation
Solar power is a practical choice for lighting your address sign, especially if you want a low-maintenance, energy-efficient setup. By selecting the right solar panel, battery, and arranging your lights thoughtfully, you can create a warm, glowing sign that stays illuminated after dark without wiring to your home’s electrical system.
Choosing the Right Solar Components
Select a solar panel with enough wattage to power the LED lights on your address sign. Typically, a panel rated between 5 to 10 watts suits small signs, balancing cost and energy needs. Choose a sealed lead-acid or lithium-ion battery sized to store at least 2 to 3 times the LED system’s hourly wattage, ensuring it holds enough charge to light the sign through the night. Use warm white LED strips or modules for a soft glow that highlights your numbers clearly.
Look for weatherproof components rated for outdoor use to withstand rain, sun, and temperature swings. Most quality solar panels and batteries cost between $20 to $50 each, depending on capacity and brand. Keep in mind that larger panels will charge faster but take more space on your signpost or nearby surface.
Installing the Solar-Powered Lighting System
Proper installation guarantees your solar address sign runs efficiently. Start with locating a spot that receives at least 6 hours of direct sunlight daily. Mount the solar panel angled toward the sun’s path, usually facing south in the northern U.S., to maximize exposure. Secure the LED lights inside or behind your address numbers to create an even backlit effect, hiding wiring from view. Follow these steps to install your solar light system:
- Mount the solar panel on a sturdy surface with a slight tilt facing the sun’s direction.
- Connect the solar panel wires to the charge controller to regulate battery charging.
- Attach the charge controller to the battery, ensuring proper polarity matching.
- Wire the LED lights to the battery via the charge controller output.
- Install the LED lights behind or within the address sign for concealed, even illumination.
- Secure all wiring with waterproof connectors and seal exposed joints with silicone.
- Test the system at dusk to confirm lights activate and stay on throughout the night.
Optimizing Solar Charging and Runtime
To maximize the efficiency and lifetime of your solar-powered sign, keep the solar panel clean and free of shade from trees or structures. Dirt or debris can reduce charging efficiency by up to 25 percent. Avoid placing the panel where snow or leaves may accumulate during winter months. Adjust the panel tilt seasonally when possible: steeper angles in winter and flatter in summer will improve energy capture.
Choose LED lights with low wattage (around 1 to 3 watts total) to extend battery runtime. You can also add a timer or light sensor to turn the lights off during daylight or late-night hours when visibility is less critical. This saves battery power and prolongs the system’s operating period during cloudy days or short winter daylight hours.
Common Mistakes and Troubleshooting Tips
One common error in building a lighted address sign is using fasteners that are too long or too short for your materials. For example, if your lumber is 3/4″ thick, setting your pocket-hole jig to match and using 1 1/4″-long pocket-hole screws prevents splitting or loose joints. Using screws that are the wrong length can cause the sign to sag, especially if you don’t include spacers to support the middle of a metal sign panel. These spacers keep the sign flat and sturdy over time.
Wiring mistakes often show up as flickering lights, no lighting, or blown fuses. If your LEDs fail to turn on, first check the wiring connections for loose or reversed polarity. LEDs require the positive and negative wires to be correctly connected; swapping these will prevent the lights from working. Use a multimeter to test voltage at different points in the wiring to isolate where the power is lost. Poor solder joints or connectors exposed to moisture can also cause intermittent lighting problems. Ensuring all solder points are clean and sealed with heat shrink tubing stops corrosion and shorts. To avoid recurring lighting problems, follow a troubleshooting checklist:
- Confirm all power sources are working and properly grounded.
- Check each LED strip or bulb for physical damage or burned spots.
- Verify wire polarity before final installation.
- Test all solder joints and connectors with a multimeter.
- Use spacers or supports to prevent sagging metal or wood that stresses wiring.
- Seal all electrical connections against moisture with silicone or weatherproof boxes.
- Regularly inspect the sign after installation to catch early signs of wear or damage.
Careful attention to these details reduces the risk of safety hazards and extends the life of your sign. Avoid overloading your power supply by calculating the total wattage of your LED lights and choosing a power supply rated for 20-30% more capacity. Overheating can also cause components to fail prematurely. Mount your wiring and lights so they don’t rub against or pinch under screws or frames, which wears insulation over time and can cause shorts.
Always disconnect power before troubleshooting wiring issues to avoid electric shock or damage to components.
Step-by-Step Action Plan
Follow these steps to build and install your lighted address sign successfully. Each phase includes a clear action to keep your project on track.
- Before you start: Gather all materials and tools listed, and select the LED lighting option that suits your power source and style. Confirm everything matches your design and needs.
- Day 1: Cut and assemble the sign components using safe practices and precise measurements. Verify parts fit snugly and edges are smooth.
- Day 2: Wire the LED lights carefully, following safety guidelines and double-checking connections. Test the lights to ensure they turn on without flickering.
- Day 3: Mount your sign securely at the chosen location using appropriate fasteners. Check that the sign is level and firmly attached.
- Day 4: Apply protective finishes to shield your sign from weather. Inspect for even coverage and no missed spots.
- After 1 week: Review the sign’s lighting performance at night and make any minor adjustments or repairs. The illumination should be clear and consistent.
- After 1 month: Perform routine maintenance by cleaning the surface and inspecting wiring for wear or damage. Confirm the sign remains bright and stable.
Frequently Asked Questions
How to Make a Lighted Address Sign?
Plan your design and materials, assemble sign components, wire LED lights safely, and mount securely for best illumination and visibility. Choose the right LED type and power source to match your home’s exterior and power availability.
Can I Use Solar Power for a Lighted Address Sign?
Yes, solar LED signs save energy and are ideal where electrical access is limited. You’ll need a solar panel, battery, and LEDs designed for outdoor use.
What Is the Best Location to Install a Lighted Address Sign?
Choose an easy-to-drill spot with clear visibility and access to an electrical outlet, like a garage wall near your driveway. This simplifies wiring and mounting.
How Do I Protect the Wiring of My Illuminated Address Sign from Weather?
Ensure all electrical parts are installed away from direct water exposure and conceal wiring to prevent damage. Use weatherproof connectors and seal entry points.
Can I Make a Lighted Address Sign with Premade Numbers?
Yes, premade numbers work well for DIY signs; frame or shadow box them with LEDs for consistent lighting and a polished look.
How Long Does a Typical Lighted Address Sign Last?
Most lighted signs last several years, with warranties usually around one year against defects. Proper installation and maintenance extend their lifespan.
The Bottom Line
Your illuminated address sign will add visibility and style to your home when built and installed carefully. Begin by selecting quality materials and following safety steps for wiring and mounting. Starting the project with the right tools and plan puts you on the path to a durable, attractive sign that works well year-round. Take your first step by preparing your workspace and double-checking your material list today.