How to Program an LED Sign: Complete Steps for Easy Setup and Customization
How to program an LED sign starts with choosing the right software for your model and connecting your sign to a computer or mobile device. Most signs allow connection via USB, Bluetooth, or Wi-Fi, enabling direct control of display content through an app. Beginning with the provided USB cable or the recommended app ensures you establish a stable connection for easy programming and customization.
Key Takeaways
- Download the official app specific to your LED sign model to simplify programming and connection.
- Connect your LED sign to your computer using the supplied USB cable for reliable initial setup.
- Use Bluetooth or Wi-Fi via the app for wireless programming and remote updates of your display.
- Verify your sign’s controller type by checking wireless connections on your computer if uncertain.
- Enter the correct password to access your sign: use SN2008@+ for purchases after March 2024 or 123456 before.
- If your sign includes a 4G modem, attach it to the antenna port to enable cellular connectivity.
Start Programming Your LED Sign: Software and Initial Setup
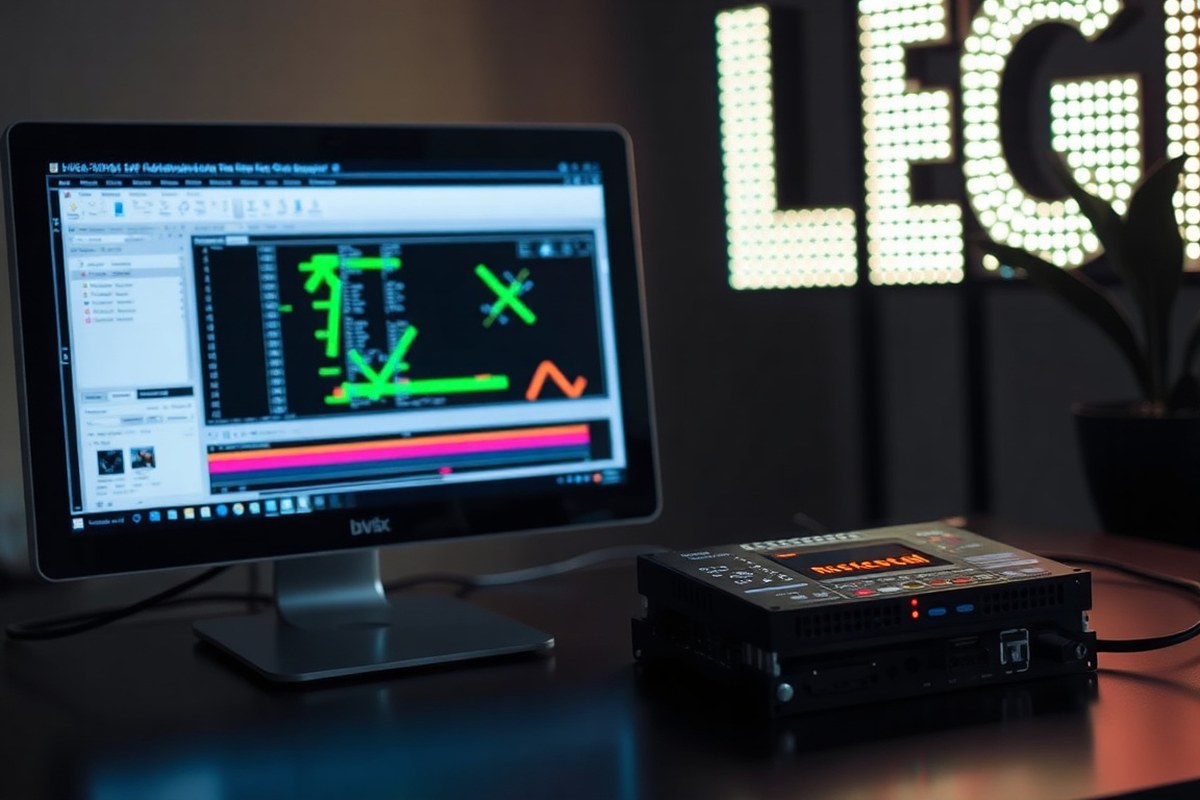
Programming your LED sign starts with selecting the right software designed for your specific LED display model. This software typically comes bundled with your sign or is downloadable from the manufacturer’s website. Using software that doesn’t match your sign can lead to incorrect display settings, poor resolution, or failed uploads.
Once you have the correct program, installation is straightforward but requires careful attention to detail before you start adding content. Key steps include selecting the exact dimensions of your LED sign to create an accurate screen configuration and verifying module mapping using test patterns. These initial settings ensure your messages display correctly without pixelation or misalignment. Mistakes like choosing the wrong pixel pitch or skipping module mapping tests are common and will negatively impact your sign’s appearance.
Before you upload any messages, you should also configure color contrast and text density settings. High contrast combinations like white text on a dark background improve readability, while keeping text to two or three short lines prevents crowding. Completing these steps prepares your LED sign to clearly showcase your business messages.
- Download the correct software: Visit your LED sign manufacturer’s official website and download the programming software tailored to your sign model. This ensures compatibility and access to all features your sign supports.
- Install the software on your Windows computer: Run the downloaded installer, follow the on-screen prompts, and complete installation. Avoid interruptions during setup to prevent software corruption.
- Create a new screen configuration: Open the installed software, click “File” then “New,” and enter the exact dimensions of your LED sign in pixels or millimetres. Accurate dimensions ensure content fits your display area correctly.
- Select your LED sign model: From the software menu, choose the specific model you own. This adjusts the settings for pixel pitch, module layout, and display protocols to match your hardware.
- Perform module mapping and test pattern verification: Use the software’s test pattern feature to confirm each LED module lights up correctly. This identifies connection issues or misconfigured modules early on.
- Adjust display settings for contrast and text density: Set the text color and background for high contrast (e.g., white on black) and limit lines of text to two or three short ones to maintain legibility from typical viewing distances.
- Connect to your LED sign: Link your computer to the sign via Wi-Fi or Bluetooth as supported. Ensure stable connectivity before sending any content.
- Send a test message: Upload a simple message like your business name and a short tagline. Verify the display quality, readability, and timing before moving on to more complex content.
Connecting Your Device to the LED Sign: Methods and Best Practices

You can connect your computer or mobile device to your LED sign using USB, Wi-Fi, Bluetooth, Ethernet, or 4G LTE, depending on the sign’s features and your programming needs. USB and Ethernet connections offer stable, wired options suitable for initial setup or areas with poor wireless coverage. Wi-Fi and Bluetooth enable wireless control, with Wi-Fi allowing remote updates over a network and Bluetooth working best for short-range, direct connections from your device. 4G LTE is less common but useful for outdoor signs needing wide-area connectivity without local networks.
To connect via USB, use the provided cable to link your computer to the LED sign. First, install the manufacturer’s software or app on your computer. Once connected, the software should detect the sign, allowing you to upload and program content directly. For Wi-Fi, ensure your device is on the same network as the sign. Open the app, select the LED sign from the network list, and enter the password if required. Bluetooth connections require turning on Bluetooth on both your device and the sign, then pairing them through the app.
| Connection Type | Range | Speed | Setup Complexity | Use Case | Stability |
|---|---|---|---|---|---|
| USB | Direct cable | High | Low | Initial programming, local updates | Very Stable |
| Wi-Fi | Up to 300 ft indoors | Moderate to High | Moderate | Remote updates, networked control | Moderate to High |
| Bluetooth | Up to 30 ft | Low to Moderate | Low | Quick nearby changes | Moderate |
| Ethernet | Wired cable | High | Moderate | Stable wired connections, long-term installations | Very Stable |
| 4G LTE | Wide area (cellular) | Variable | High | Outdoor signs without local networks | Variable, depends on signal |
For stable and secure wireless connections, always confirm your LED sign and device are on the same Wi-Fi network and that the wireless signal is strong. Use passwords or encryption if the app supports them to prevent unauthorized access. When using Bluetooth, make sure the device is close enough to avoid connection drops. Ethernet connections require a suitable cable length and sometimes network configuration, so check your router settings if the sign does not respond. If USB programming isn’t recognized, try another port or replace the cable.
Ensure your device’s Bluetooth or Wi-Fi is enabled before starting and use the manufacturer’s recommended app to avoid connection issues.
Creating and Customizing Content for Your LED Sign
Designing your LED sign’s messages involves selecting clear fonts, high-contrast colors, and appropriate animations to ensure maximum visibility and impact. Adding graphics or logos requires matching your content to the sign’s resolution to avoid distortion. With a clear layout and engaging motion effects, you can capture attention effectively.
Choosing Fonts and Colors for Readability
Select fonts that are simple and legible at a distance. Sans-serif fonts without excessive decoration work best because they remain clear on LED boards. Font size should be large enough to read easily; a good starting point is at least 1 inch tall per 10 feet of viewing distance. Keep your messages short to avoid overcrowding.
Use high-contrast color combinations for text and background, such as bright white or yellow text on a black or dark blue background. Consistent use of your brand colors helps reinforce recognition but avoid low-contrast pairs like light green on yellow, which reduces readability. Limit colors to two or three per message to maintain clarity.
Importing and Adjusting Graphics or Logos
Before importing images or logos, check your LED sign’s pixel resolution and aspect ratio. Use graphics that fit the screen precisely to prevent stretching or pixelation. Common supported file types include BMP, PNG, or JPEG, but refer to your sign’s manual to confirm.
Resize images with an editor before uploading, ensuring the width and height match the LED module grid (for example, 64×32 pixels). Crop unnecessary parts of the graphics to focus on the brand element or message. Avoid using high-detail photos that lose clarity on LED displays.
Applying Text Animation and Special Effects
Adding animation helps make your messages more dynamic and eye-catching. Common text effects include scrolling horizontally from right to left or vertically from bottom to top. Flashing or fading can highlight key words but use these sparingly as excessive motion may reduce legibility.
To create a scrolling message example, start with a blank canvas sized to your LED sign’s resolution. Type your message and select a legible font and color with high contrast. Apply the “scroll left” animation effect and set the speed so the text takes about 10 seconds to fully pass across the screen. Preview your design before uploading. Step-by-step to create a scrolling animated message:
- Open your LED sign programming software and create a new message project.
- Set the canvas to match your LED sign’s resolution (e.g., 64×32 pixels).
- Type your message using a clear, sans-serif font at a size readable from the expected distance.
- Choose high-contrast colors for the text and background.
- Select an animation style like “scroll left” to make the text move horizontally across the screen.
- Adjust animation speed to ensure the message is neither too fast nor too slow (typically 8 to 12 seconds per full scroll).
- Preview the animation within the software for readability and smoothness.
- Save and upload the message to your LED sign controller for display.
Scheduling and Managing Multiple Messages on Your LED Sign
To schedule and manage multiple messages on your LED sign, use your sign’s programming software to create playlists or sequences of slides. Assign specific times and dates for each message to display, and set looping options to control how often content repeats. This keeps your sign timely, relevant, and engaging without constant manual updates.
Creating Multiple Slides or Messages
Most LED sign software allows you to build playlists by combining individual messages, images, or animations into multiple slides. This helps you rotate different content throughout the day or week. Before creating slides, confirm your content meets your sign’s format and size requirements to avoid compatibility problems. Here’s how to create and organize multiple slides in your LED sign software:
- Open your LED sign programming software and select “New Playlist” or “Add New Slide.”
- Create each message or upload your designed image for each slide, ensuring text is clear and concise.
- Adjust settings like brightness, animation effects, and duration for each slide.
- Order your slides in the playlist by dragging or using up/down controls.
- Preview the playlist to check transitions and message flow.
- Save your playlist file once satisfied with the slide sequence and settings.
Setting Time-Based Schedules for Content
Scheduling lets you automate when each message or playlist appears on your LED sign. This is essential for businesses that want to show special promotions during business hours or different messages on weekends. The scheduling options typically allow specifying exact start and stop times, days of the week, and date ranges. Use this checklist to set schedules effectively:
- Choose the slides or playlists you want to schedule.
- Set the start and end date to control how long the message runs.
- Specify daily start and stop times to restrict messages to certain hours.
- Select repeat options, such as every day, weekdays only, or weekends.
- Save the schedule and upload it to your LED sign to activate timing.
- Regularly review and update schedules for upcoming events or promotions.
Managing Looping and Transitions
Looping ensures your messages continuously display without needing manual restart. You can control the number of loops or set infinite looping until a schedule ends. Smooth transitions between messages keep your sign readable and visually appealing. To manage looping and transitions:
- Set individual slide display durations long enough for viewers to comfortably read (usually 5 to 10 seconds).
- Enable loop settings in your playlist, choosing either a fixed number of iterations or continuous play.
- Use fade, slide, or cut transitions based on your software’s options, balancing attention-grabbing effects with readability.
- Test your looping on the sign to confirm messages cycle correctly without gaps or glitches.
- Update loops when adding new content or adjusting schedules to avoid conflicts.
Understanding LED Modules and Display Settings
LED modules and display settings directly influence how your content appears on an LED sign. Knowing the types of LED modules you have, along with their pixel pitch and correct module mapping, lets you adjust programming for clear, sharp visuals. These details ensure your message displays without distortion, mirroring, or splitting.
Types of LED Modules and Their Sizes
LED signs are built from modules, which are smaller, standardized sections of the larger display. Common sizes include 5×7 and 8×8 modules, referring to the arrangement of LEDs in rows and columns. A 5×7 module has a grid of 5 LEDs wide and 7 high, while an 8×8 module is square with 8 LEDs on each side. These sizes affect how fine or coarse your displayed content will look.
For example, a sign built of 14 5×7 modules lined up side-by-side creates a long, narrow display ideal for scrolling text. An 8×8 module offers a more balanced shape better suited to images or logos. Each module type requires wiring and programming that fits its size and LED count to avoid imperfect visuals.
Understanding Pixel Pitch and Its Impact
Pixel pitch measures the distance between the centers of adjacent LEDs, often given in millimeters. This distance controls both the resolution and viewing clarity of your LED sign. A smaller pixel pitch means LEDs are packed closer together, producing sharper text and images up close. A larger pitch suits signs viewed from farther away.
When programming, pixel pitch affects the detail level you can include. For instance, a 5×7 module with a 10 mm pixel pitch will display less detailed graphics than an 8×8 module with a 6 mm pitch. Adjusting your content size and font styles according to pixel pitch ensures readability and visual appeal at the expected viewing distance.
Module Mapping: Why It Matters
Module mapping tells your sign’s software where each LED module sits and how they connect to the controller. It defines which module is the top-left, which is the bottom-right, and the electrical wiring order. Accurate mapping ensures your sign renders content in the correct orientation and position.
Without proper module mapping, images can appear mirrored, split, or misaligned. For example, if a 14-module sign shows mirrored text, reviewing the mapping settings often fixes the issue. Setting up module mapping typically involves entering coordinates or serial orders into the programming software. Some software lets you drag modules into the right order visually. Take time to verify these settings before planning your full content layout.
Adjusting Screen Parameters in Software
Most LED sign programming software allows you to set screen dimensions, module type, pixel pitch, and module layout. Accurate input of these parameters is essential. Enter the total number of modules, their size (like 5×7 or 8×8), and how they are arranged horizontally and vertically.
Changing these values updates the software’s pixel grid, so your graphics and texts align with physical LED positions. Preview your content on the software before uploading to the sign. This step helps spot issues such as missing rows, scrambled images, or inverted colors, most commonly caused by mismatched settings.
For example, if you switch from using 5×7 to 8×8 modules, adjust parameters accordingly instead of reusing old values. This ensures the controller software generates correct signal timing and image data corresponding to the new module configuration.
Check your module mapping and pixel pitch settings early to avoid content display errors like mirrored or split images that may waste programming time and frustrate viewers.
Troubleshooting Common LED Sign Programming Problems
When your LED sign screen is blank or flickering, it usually means a hardware or connection issue. Start by checking all cables for secure attachments and inspect the power supply to ensure it’s stable and connected. Loose wires or voltage drops can cause flickering or complete blackout. Testing with a different power source or cable can rule out these issues.
Mirrored or distorted text happens mostly because of incorrect module mapping or display orientation settings in the software. Each LED sign model requires specific module mapping so content displays correctly. When you notice reversed or broken displays, check your sign’s make and model, then adjust the mapping in your programming software or control panel accordingly.
Color or size issues tend to arise from mismatched settings between the message editor and the screen’s resolution or LED type. Editing your message to match the screen’s pixel configuration and LED module compatibility solves these problems. For example, when working with 8×8 LED modules, checking the C code comments or manufacturer instructions will guide you on what parameters to change.
Running a troubleshooting checklist can speed up fixes. Start with hardware: verify power, connections, and module status. Then check software: confirm message format, resolution, and module mapping. Lastly, send the message again and monitor the feedback from the control software or onboard panel.
Testing connections involves sending simple test messages or patterns from your device to the sign. When the sign displays a test pattern correctly, it means the connection and modules are working properly. If the sign does not display the test pattern, inspect network or USB interface settings, depending on your connection type such as Ethernet, Wi-Fi, or direct USB.
| Symptom | Possible Cause | How to Fix |
|---|---|---|
| Blank screen | Loose cable or no power | Check all cables, ensure power source is stable, replace damaged cables |
| Flickering display | Unstable voltage or loose connection | Use a regulated power supply, firmly reconnect cables |
| Mirrored or distorted text | Incorrect module mapping or display orientation | Verify sign model, adjust mapping in software or control panel |
| Color or size issues | Mismatched message formatting or LED module settings | Edit message to match LED type and resolution, check programming code comments |
| Message fails to update | Software communication error | Restart software, resend message, test connection |
For module mapping, use the manufacturer’s software or onboard control panel to ensure that each LED cluster corresponds to the correct message section. Incorrect mapping causes split or broken images, making the sign confusing. Some models let you directly edit or upload new mapping files, which is helpful if you add or replace display modules.
Regularly test connections using simple text or color patterns to verify your sign software settings and hardware. Start with a basic single-color message or scrolling test text, then add complexity once you confirm the basics work. This approach reduces troubleshooting time and prevents misaligned or distorted displays during busy business hours.
Advanced Features to improve Your LED Sign Programming
You can program your LED sign remotely using 4G connectivity and cloud management platforms, giving you control from virtually anywhere. Many modern LED signs support these advanced options, which let you update content, schedule messages, and manage multiple signs without physical access. To get started, choose an LED sign model compatible with cloud-based remote management and confirm it supports a mobile app or web interface. For example, Premier outdoor LED signs and Alpha LED boards work with MEGA Cloud, a platform offering a clean editor, smart templates, and streamlined remote control designed around real user workflows. Setting this up typically requires internet-enabled hardware in your sign and a subscription to a cloud service, often costing between $10 and $50 monthly depending on features and sign quantity.
Advanced content options go beyond static text and simple scrolling messages. Modern signs often support multi-zone layouts where different areas show separate content simultaneously. You can integrate animations, videos, and live data streams such as weather updates or stock tickers. Interactive content is possible by connecting sensors or external inputs that change what the sign displays in real time. For instance, a sensor could trigger specific promotions based on environmental conditions or customer presence. To program these, use the sign’s software or cloud dashboard to upload files and set triggers, often in common formats like MP4 for videos and GIF for animations. These features may require more storage and processing power on your LED sign’s controller, so check the specifications carefully before purchasing or upgrading.
Working with 4G modules enables truly wireless operation and remote updates where Wi-Fi isn’t available or reliable. Your LED sign must include a built-in 4G cellular modem or have a compatible adapter. You’ll need a separate data plan from a cellular provider, usually costing $10 to $25 per month depending on usage. Once connected, you use the manufacturer’s app or cloud platform to push new content or schedule automatic changes. 4G connectivity ensures updates reach the sign promptly, but cellular signal strength and weather conditions may affect reliability and speed.
For real-time and interactive content, integration with APIs and sensor inputs allows your sign to reflect live information like sports scores, traffic reports, or social media feeds. These capabilities depend heavily on your sign’s firmware and software ecosystem. Check if your platform supports these integrations out of the box or requires custom coding. Common practice involves linking a server or cloud script to provide data feeds, which the sign retrieves and displays dynamically. This approach benefits businesses aiming to engage customers with fresh, relevant information without daily manual updates.
Safety and Maintenance Tips for LED Sign Programming
Handling electrical connections for LED signs requires care to prevent shocks, damage, or fire hazards. Always disconnect the sign from its power source before wiring, programming, or performing any repairs. Check that the power supply delivers a stable voltage; fluctuations can cause your sign to reset or damage internal components. A surge protector suited for your sign’s voltage rating offers additional protection against electrical spikes.
Maintaining a clean and stable environment extends the life of your LED sign and keeps programming consistent. Protect the sign from moisture, excessive heat, and direct exposure to harsh weather, particularly if it’s designed for indoor use only. Dust buildup on LED modules can reduce display clarity and cause overheating, so cleaning with a dry, soft cloth every few months is recommended. Regularly inspect wiring and connectors for corrosion or wear, especially in outdoor or high-humidity areas.
- Always turn off and unplug the sign before touching wiring or internal parts.
- Use a surge protector to guard against power surges.
- Keep the sign dry and shielded from rain or direct sunlight if for indoor use.
- Clean LED surfaces gently with a dry cloth every 3 to 6 months.
- Check and tighten loose wiring connections annually.
- Ensure ventilation space around the sign to prevent overheating.
- Follow manufacturer instructions for any software or firmware updates.
Check your sign’s power supply regularly; unstable voltage can cause flickering or erratic displays, signalling it’s time for maintenance or repair.You should call a licensed electrician or professional sign technician if you notice frequent power interruptions, visible damage to cables or housing, persistent error messages during programming, or if your sign requires complex internal repairs. Attempting repairs beyond basic cleaning and connection checks risks injury and voids warranties. In some cases, professional help may cost between $100 and $300 depending on the problem, but it protects your investment and ensures safe operation.
Your First Week: Step-by-Step Action Plan
Follow this plan to get your LED sign programmed and displaying your messages effectively.
- Day 1: Install the recommended software for your LED sign and complete the initial setup. Confirm your sign is connected and visible in the software interface.
- Day 2: Connect your computer or device to the LED sign using the advised method, USB, Wi-Fi, or Ethernet. Verify the connection by uploading a simple test message.
- Day 3: Create your first custom message using the software’s editing tools. Upload it to the sign and check the display for correct formatting and clarity.
- Day 4: Explore scheduling options to set multiple messages for different times or days. Confirm the schedule activates by observing at least one timed message change.
- Day 5: Adjust display settings like brightness and scroll speed to suit your environment. Stand at typical viewer distance and verify readability.
- Day 6: Familiarize yourself with common troubleshooting steps by intentionally disconnecting and reconnecting the device. Ensure you can restore connection without errors.
- Day 7: Test advanced features your software supports, such as animations or external data feeds. Confirm your sign reacts as expected with these features active.
Frequently Asked Questions
How Do I Program My LED Sign Without a Remote?
You can program your LED sign using the manufacturer’s software app via Bluetooth or Wi-Fi. Download the app for your sign model and follow on-screen instructions to connect and customize the display.
Can I Use a Universal Remote to Program My LED Sign?
Most LED signs require their specific remotes or apps, so a universal remote usually won’t work. Check your sign’s manual before trying a universal remote to avoid any programming issues.
What Should I Do If My LED Sign Is Not Responding to Commands?
First, check all connections and power supply. Restart the sign and try reconnecting through the app or remote. If the problem continues, consult the troubleshooting section in your sign’s manual.
How Often Do I Need to Update the Software for My LED Sign?
Update your LED sign software whenever the manufacturer releases a new version to fix bugs or add features. Regular updates improve performance and security.
Can I Program Multiple LED Signs Simultaneously?
Yes, some software supports scheduling and managing multiple signs from one device. This saves time for businesses with several locations or signs.
Is Programming LED Signs Complicated for Beginners?
Programming LED signs is straightforward with practice and the right software. Start with simple messages to gain confidence before using advanced features.
Final Thoughts
Programming your LED sign is a practical way to boost visibility and share information effectively. Begin by mastering the software basics and connection methods, then build your skills with scheduling and customization. Start creating content for your sign today and experiment with one advanced feature to see how it can improve your messages.