How to Put Up a Yard Sign: 8 Essential Steps for Perfect Installation
How to put up a yard sign begins with selecting a sturdy stake that fits your sign and the soil type. Next, pick a visible location with good foot or vehicle traffic, and ensure the sign is placed at eye level for clear viewing. Start by measuring and marking where you will insert the stake, about 12 inches deep for stability.
Key Takeaways
- Use a standard H-stake for typical 18″ x 24″ corrugated signs in soft soil to ensure firm placement.
- For hard or rocky soil, drill pilot holes or use smaller half-sized H-wires to ease installation.
- Place yard signs every 600 feet along streets for optimal visibility and reach.
- Install signs so the top is 3 to 4 feet above ground for the best viewing height.
- Check local regulations for sign placement time limits, such as political signs allowed 60 days before an election in Georgia.
- Bury stakes at least 12 inches deep to prevent signs from tipping or blowing away.
1. How to Install a Yard Sign: Step-by-Step Process
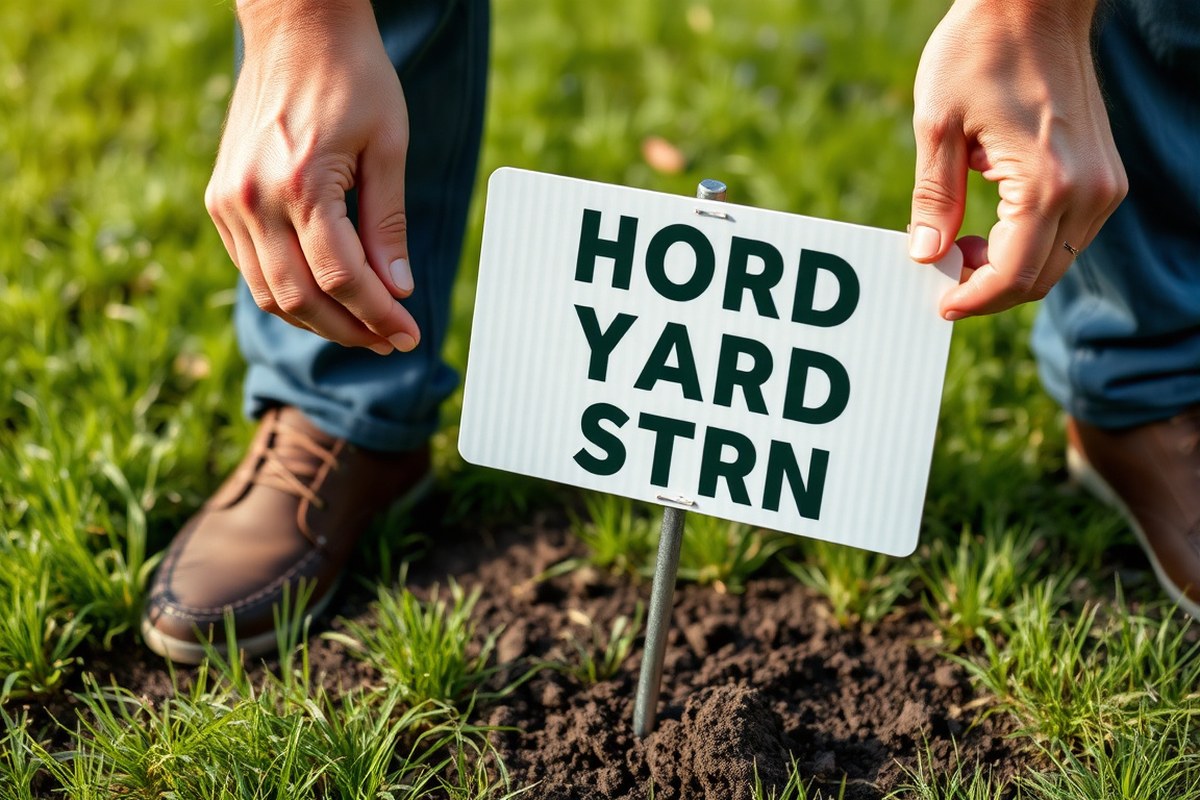
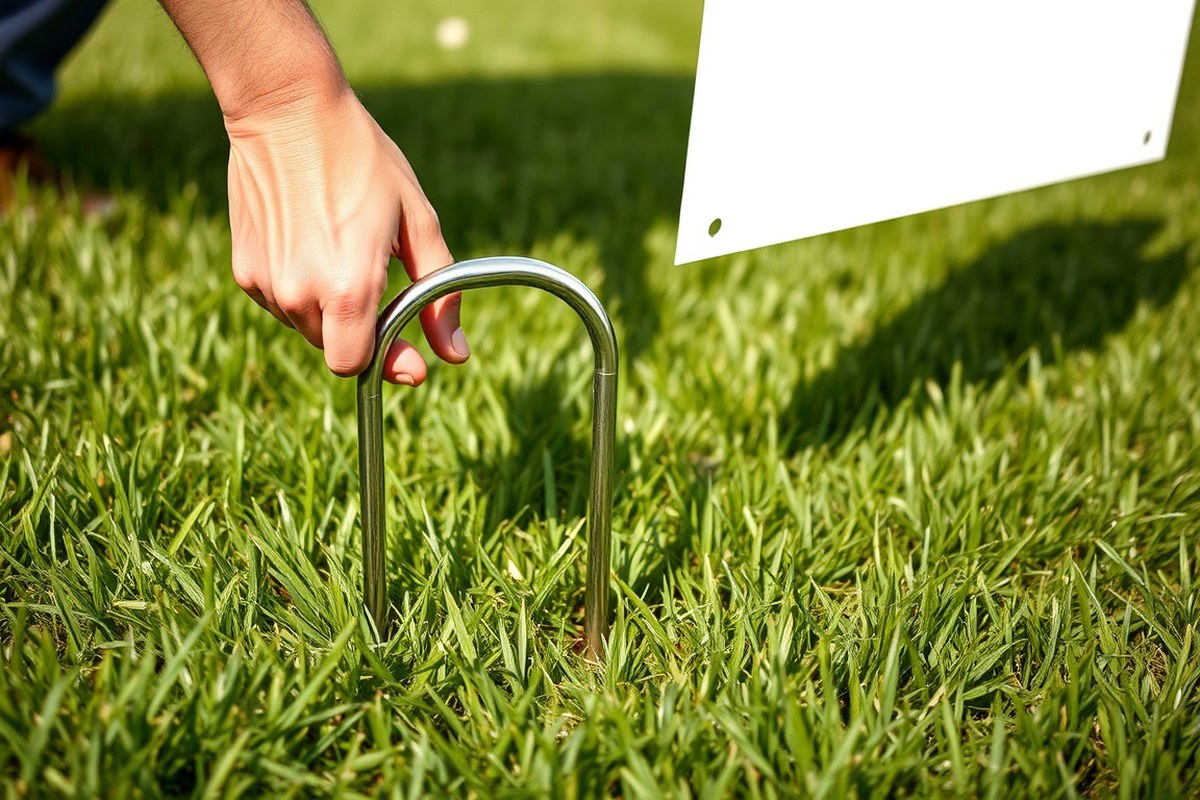
Installing a yard sign with stakes works best by pushing the stake into the ground first, then attaching the sign. This approach reduces the risk of bending or damaging the sign and keeps the installation process straightforward, especially for volunteers or those new to yard signs. The depth you insert the stake matters for stability: typically, push it at least 6 to 8 inches deep to secure the sign firmly, but this can vary depending on soil conditions and sign size. Below is a simple, step-by-step process for setting your yard sign using an H-stake and a standard 18-by-24-inch corrugated plastic sign.
- Check the ground condition: Determine if the soil is soft, hard, rocky, or sandy. Soft soil may need packing after stake insertion, while hard or rocky soil might require moistening or metal stakes.
- Select your spot: Choose a visible location where the sign can be easily seen. Avoid putting stakes in public right-of-way areas like the curb by placing them about six feet back from the curb line.
- Push the stake into the ground: Hold the top of the stake and press it straight down at least 6 to 8 inches. For hard or compacted soil, use a mallet or hammer to tap the stake in carefully. Avoid pushing the stake too shallow, which risks instability, or too deep, which makes sign removal harder.
- Adjust the stake if needed: If you hit resistance, especially rocks, reposition the stake slightly rather than forcing it. This prevents bending the stake or damaging the sign later on.
- Attach the sign to the stake: Slide the corrugated plastic sign’s flutes onto the upper horizontal wires of the H-stake. Make sure it fits snugly and is aligned straight for uniform appearance.
- Check stability: Push against the sign lightly to confirm it stays upright. In soft or sandy soil, pack soil tightly around the stake or use longer stakes for added firmness.
Pushing the stake into the ground first ensures easier handling and allows you to test multiple locations without stressing the sign. This method also reduces the risk of accidentally bending the plastic sign during installation. Stakes inserted 6 to 8 inches deep generally provide enough support to keep signs upright in typical soil. For tougher ground, moistening before insertion or using specialized tools can make the job manageable.
2. Choosing the Best Location for Your Yard Sign

You should place your yard sign on private property with the owner’s permission, avoiding public rights-of-way where signs may be removed and could result in fines from $50 to $500. Check local sign ordinances and any homeowners association (HOA) rules before installation to stay compliant. Signs located near busy intersections, high-traffic driveways, or sidewalk edges generally attract the most attention from passing vehicles and pedestrians.
For maximum visibility, position your sign about 2 to 3 feet above ground level, aligning with the average driver’s sight line. This height helps the sign stand out without being obscured by grass or shrubs. Place the sign where it faces oncoming traffic directly, so drivers can read it easily without needing to turn their heads. Avoid placing signs behind objects like trees, mailboxes, or parked cars, as these can block sight lines.
Spacing multiple yard signs about every 600 feet along your targeted route helps maintain consistent visibility without overcrowding a single area. This approach balances message repetition with visual clarity and reduces the chance your signs appear as a “sign farm,” which can diminish their impact. In residential neighborhoods, consider the sight distances at corners or along main streets where cars slow down or stop, increasing reading time.
Develop a checklist to make placement decisions simpler: Verify property ownership and permissions, review local regulations and HOA restrictions, assess traffic flow and sight lines, ensure the sign stands 2 to 3 feet high, and space multiple signs roughly 600 feet apart. Take photos of the spot beforehand to confirm no obstructions or hazards like uneven ground that might cause the sign to lean or fall.
Choosing the right spot may require small adjustments after installation. Signs installed too low or in shaded areas can be missed by drivers. Conversely, placing signs too close to the road can lead to damage from lawn equipment or make the sign a distraction. If you expect that weather or vandalism could be issues, consider a more protected area on your property that still offers good exposure.
Check local rules carefully; placing signs on public property without permission can lead to removal and fines, ruining your investment before your message gets seen.
3. Choosing the Right Stakes for Your Yard Sign
Selecting the right stakes depends on the type of yard sign you have and the soil where you’ll install it. Metal H-stakes work well for most corrugated plastic signs and offer sturdy support in firm, loose, or moderately compact soil. Wood stakes are common too but can degrade faster outdoors and may bow or split. Plastic stakes tend to be lightweight and best suited for temporary or very light signs in soft soil.
Tools needed for installing yard signs usually include a rubber mallet or hammer to gently tap stakes into the ground. A level or simple visual check helps ensure stakes are properly aligned to keep signs straight instead of tilted. In tougher soil, a digging bar or a small hand trowel can clear a path for the stake, reducing risk of bending.
| Stake Type | Best For | Soil Conditions | Advantages | Disadvantages |
|---|---|---|---|---|
| Metal H-Stakes | Corrugated plastic yard signs | Firm, loose, or moderately packed soil | Strong, durable, re-usable, good stability | Can bend if hammered improperly |
| Wood Stakes | Heavier or larger signs | Loam or soft soil | Easy to cut to length, inexpensive | Prone to bowing, rot, and splitting |
| Plastic Stakes | Light, temporary signs | Soft soil or sand | Lightweight, affordable, rustproof | Less sturdy, can break under pressure |
If a stake bends or leans, reposition it into firmer soil or use a tool to gently straighten it back. Avoid pushing a weak or lightweight stake repeatedly into loose soil, as it will not hold the sign securely. To improve stability, gather soil around the stake, packing it firmly to minimize movement. For recurring problems, choosing a heavier gauge metal stake or a larger diameter wooden stake can provide better results.
4. How to Install Yard Signs in Hard, Rocky, or Clay Soil
Installing yard signs in hard, rocky, or clay soil requires extra preparation and the right tools to avoid damaging the stakes. Using proper techniques to loosen the ground and protect the thin wires on H-stakes helps you set up signs securely without bending or breaking parts. Planning the spot carefully and following step-by-step actions will make this task easier and improve the sign’s stability.
Testing Soil and Choosing the Spot
First, check the soil firmness by pressing or poking the area where you want to install the sign. Hard clay or rocky soil feels tough under pressure and may resist normal stake insertion. Choosing a spot with fewer rocks or slightly softer ground will help you avoid excessive force that could bend your stakes.
Also, avoid areas with frozen soil, as this significantly hardens the surface and risks damaging the wire frame. When freezing conditions last and the sign isn’t urgent, wait for the ground to thaw to make installation easier.
Using Tools to Loosen or Break Ground
For tough soils, prepare by loosening the ground with tools before pushing in stakes. Small manual tools work well and minimize stake damage.
- Probe the soil first with a sturdy screwdriver or a metal rod to identify rocks and create a pilot hole.
- Use a post-hole digger or a garden trowel to loosen and break up compact soil around the pilot hole.
- When stones block progress, carefully remove them with pliers or pick them out by hand.
- For very hard ground, gently tap a metal stake or rod into the loosened soil using a rubber mallet to widen the hole without bending the thin wires.
Avoid striking the thin upper wire of an H-stake directly with a hammer or mallet, as this can bend the frame and make sign attachment difficult.
Inserting Stakes Without Damage
Push stakes into the pre-loosened soil vertically and steadily to maintain shape and integrity. Applying uneven pressure or forcing stakes through hard spots risks bending or breaking the thin wires.
Use a rubber mallet to tap the stake gently if it meets resistance. This spreads force evenly without concentrated impact on weak points. For clay soils, moistening the ground slightly before insertion softens the soil and reduces stress on the stake.
Securing Signs in Challenging Conditions
After placing the stake, check that it is stable by pressing it lightly from different angles. Hard, rocky soil can shift if the hole is too large, so firm the soil firmly around the stake with your hands or a small tamper.
Using soil or gravel to fill any gaps around the stake improves grip. For extra support in unstable conditions, secure the sign with zip ties or garden wire connected to nearby sturdy structures like fences or poles. This prevents the sign from leaning or falling in strong wind or rain.
5. Tips to Keep Your Yard Sign Upright and Secure
To ensure your yard sign stays upright and stable, bury the stakes at least 12 inches deep. This depth offers enough strength to stop wobbling or leaning during normal wind. For signs standing 3 to 4 feet tall, firmly anchored stakes are necessary to resist wind pressure and avoid tipping.
Using durable metal or plastic stakes designed for outdoor use is essential. Thin or weak stakes can bend or break, especially with larger signs or in windy areas. Attach your sign firmly to these stakes using strong ties, clamps, or zip ties to avoid the sign shifting on the stakes. Horizontal braces connecting two stakes add extra firmness, especially if the ground is soft, helping the sign resist bending or swaying.
Regular maintenance during bad weather keeps signs in good condition. Check after storms or high winds to make sure stakes have not loosened. Should the stakes feel loose or the sign lean, move it to more solid soil or drive the stakes in further. In very loose or shifting ground, sturdy metal rods can be added next to stakes to stabilize the sign further by clamping or tying them together.
Signs installed in clay or rocky soil may require pre-drilled holes to push stakes in deeply enough. In sandy or loose soil, consider additional weights or anchoring devices at the base to prevent the sign from toppling. For smaller signs, simply ensuring the stakes are fully driven into the ground with no movement often suffices, but larger signs need more strong support.
The cost of these materials varies but typically stays low: metal or plastic stakes range from $2 to $10 each, while clamps or zip ties cost under $1 each. Investing in stable supports can extend the life of your yard sign and help your message stay visible without interruption. Signs that do not wobble or lean not only look better but also prevent potential damage or loss from falling.
Good results mean your sign stays upright through daily winds and weather changes, without requiring constant repositioning. Check the sign soon after installation and then weekly, especially during windy seasons or storms. Notice leaning or a shaky base? Tighten the ties, add braces, or push the stakes deeper without delay.
Pro tip: Avoid driving stakes too shallow; a depth of less than 12 inches increases the risk of your sign toppling in moderate wind or shifting soil.
6. Attaching Yard Signs to Fences or Poles Safely
Attaching yard signs to fences or poles provides a practical alternative when stakes are not suitable, such as on hard ground or areas with no soil. This method often requires specific tools and hardware to secure the sign safely without damaging the structure or violating local ordinances. Prior planning and care ensure your sign stays visible and stable while adhering to safety and legal standards.
Assessing the Support Structure
Start by checking the fence or pole where you intend to mount the sign to confirm it can support the sign’s weight. Avoid placing signs on surfaces that could be damaged or on structures that create obstructions to paths, views, or safety lines. For example, thin wooden fences may need gentler fasteners to avoid splits, while metal poles require rust-resistant hardware.
Signs with grommets and horizontal flutes handle mounting on fences or poles better because they hang straighter and resist twisting in the wind. If you frequently mount signs this way, consider ordering signs pre-equipped with these features.
Selecting Appropriate Fasteners
Choosing the right fasteners depends on your fence or pole material. Common options include zip ties, bungee cords, wire, or screws with washers for wooden fences. Zip ties are a cost-effective choice, usually costing under a dollar each, and work well on chain-link fences. For metal poles, stainless steel or coated wire prevents rust. Avoid adhesives or staples that damage surfaces or signs.
Keep in mind local rules forbidding signs on public property without permission, and always mount signs on private property where allowed. Use materials that can be removed cleanly to avoid penalties or damage claims.
Mounting Procedure
Follow these steps to securely mount your yard sign on a fence or pole:
- Measure the sign’s dimensions to determine how many fasteners you will need. Larger signs require more support points.
- Align the sign on the fence or pole at the desired height and position to maintain visibility without blocking walkways or creating hazards.
- Thread zip ties or wire through the sign’s grommets or flutes if present, or around the frame edges if not.
- Secure the fasteners tightly but avoid over-tightening, which can damage the sign or fence.
- Trim excess zip tie tails or wire ends neatly to prevent sharp edges.
- Check that the sign hangs flat with minimal twisting. Adjust fasteners if needed.
- Periodically inspect during the display period to ensure all fasteners remain secure.
This approach typically costs between $5 and $15 for materials per sign, depending on size and fastener type. Signs may need removal during severe weather to prevent moisture damage, especially if exposed to heavy rain.
Removing Signs Without Damage
Removal should protect both the sign and the mounting surface. Cut zip ties or wire carefully with scissors or wire cutters. Avoid pulling signs forcefully, which can tear them or damage fences.
Store reusable materials like zip ties for future use if undamaged. Inspect the fence or pole for marks or residue and clean gently with water if required to maintain the property’s condition. Signs that are regularly removed and remounted hold up better if designed with durable materials and proper reinforcement.
7. Common Challenges and How to Fix Yard Sign Issues
Leaning yard signs often result from loose soil, uneven ground, or poorly driven stakes. This not only reduces visibility but can cause damage to the sign and stake over time. To fix a leaning sign, start by removing it carefully and inspecting the stake. Bend the stake back by hand if the material allows, or buy a new metal stake, which generally costs about $3 to $5. Drive the stake deep enough, at least 12 inches into the ground, to provide solid anchoring, using a mallet for firm placement.
Misalignment happens when signs face the wrong direction or tilt far enough to obscure the message. To correct this, adjust the sign so it faces the primary line of sight, typically the street or sidewalk where viewers will be passing. Use a level to ensure the sign stands vertically. Position the sign so it’s perpendicular to the slope, or use a stake with an adjustable bracket to handle sloped ground. When a sign tilts, remove it and reinsert the stake vertically by tapping it straight with a hammer or mallet, checking again with a level before reattaching the sign.
Bent stakes often occur during installation in hard or rocky soil. Avoid forcing the stake if it resists; instead, try loosening the soil first with a garden tool or pouring water to soften the ground. Straighten a bent stake on a solid surface with pliers, or replace it if it cannot be reshaped. Metal stakes are more durable and often come free with custom yard signs from suppliers like Sign-On LLC, which can reduce replacement costs.
Another common issue is that the sign suffers damage from strong winds, causing it to bend or fall. Secure the sign with additional support by driving two stakes instead of one or placing weights like sandbags at the base. Check the tension regularly, especially after storms, to keep the sign upright and visible. Signs placed too close to trees or fences may get blocked by leaves or branches, so move your sign a few feet away or trim any obstructing foliage.
Visibility problems also arise when signs are installed too low. The ideal height for most yard signs is about 18 to 24 inches above the ground, so they are easily seen from the sidewalk and street without obstruction by grass or low plants. Use taller stakes or mount the sign on a lightweight frame if the desired height cannot be reached. Make sure to orient the sign so it faces oncoming pedestrian or vehicle traffic for maximum impact.
Small installation mistakes have big effects on how your yard sign performs. Taking the time to check stake condition, ground firmness, angle, and height will help ensure your message stands clear and strong. Tools like a mallet, level, and replacement stakes cost under $20 in total and can save hours of frustration and signs lost to weather or ground conditions.
8. Planning Your Yard Sign Installation for Large Campaigns
Installing multiple yard signs efficiently requires careful planning of spacing, timing, and organization. Spacing signs typically 6 to 10 feet apart ensures visibility without clutter while organizing your crew and materials speeds up the process. Planning the timeline around your campaign dates helps maintain sign quality and presence, maximizing impact.
Pre-Planning Sign Locations and Spacing
Map out your sign locations before purchase or installation. Aim to place signs 6 to 10 feet apart in a row or along sidewalks and roads to balance visibility and avoid overlapping messages. Consider local ordinances or neighborhood guidelines, as some areas limit sign proximity or quantity. Use tools like a measuring tape or smartphone app to maintain consistent spacing. Mark these spots with flags or chalk to guide your team during installation.
Spacing affects how many signs you can deploy and their collective visibility. Too far apart, and your message may lose continuity; too close, and signs may compete for attention. Good spacing helps passersby read each sign without visual confusion. Prioritize high-traffic areas but ensure you have permission to place signs to avoid fines or removal.
Organizing Tools and Materials
Gather all signs, stakes, and necessary tools in one location before heading out. Check that stakes fit each sign and bring extras for replacements. Include mallets or hammers for securing signs, a measuring tape for spacing verification, and gloves for hand protection. Organize signs by location or route for easy distribution. Pack materials in labeled containers or boxes to keep everything accessible and prevent lost items.
Preparing a checklist with all needed items reduces trips back to your base and cuts downtime. Before leaving, confirm that your vehicle can transport all materials safely. Decide if you need signs printed well in advance to avoid last-minute delays. Having everything prepped accelerates installation and reduces errors.
Team Roles and Installation Workflow
Assign specific roles like navigator, installer, and supply handler to streamline the workflow. The navigator guides the installer to each marked location, while the supply handler passes out materials and tools. This division allows one person to focus on measuring and staking signs without interruptions. Establish clear communication channels, such as phone calls or walkie-talkies, to coordinate team members efficiently.
Install signs during daylight hours when visibility is good and safety risks are lower. Plan installation 1 to 3 days before your event or campaign start to avoid weather damage or premature removal. For removal, organize a dedicated team to retrieve and pack signs promptly after the campaign ends, especially if you rent private land or comply with local rules.
Quick installations benefit greatly from a two-person team per route: one measuring and marking spots, another driving and passing out supplies.
Maintenance and Post-Campaign Cleanup
Inspect signs periodically during long campaigns to address weather damage, vandalism, or displacement. Replace stakes or signs showing wear to maintain a professional appearance. Keep extra signs and stakes on hand for quick fixes. Store removed signs flat in a clean, dry area to prevent warping and support reuse for future campaigns.
Plan post-campaign cleanup immediately after the event closes, ideally within 24 to 48 hours. This timely removal prevents fines and maintains good community relations. Thorough cleanup saves money by preserving signs and stakes for reuse instead of buying new sets every time. Use the same team to collect and count materials, noting any damage that might require repair or replacement.
Step-by-Step Action Plan for Installing Your Yard Sign
Follow these steps to get your yard sign up quickly and securely, ensuring it catches attention and stays in place.
- Before You Start: Check local regulations about yard sign placement to avoid fines or removal. Confirm your permit if required.
- Day 1: Choose a visible spot near the street with good lighting and foot traffic. Test visibility by viewing from multiple angles and distances.
- Day 1: Select the right type of stakes based on your soil conditions, use sturdier metal stakes for rocky or compacted soil.
- Day 1: Prepare the ground by loosening soil if needed using a trowel or soil stabber. This makes inserting stakes easier and more stable.
- Day 1: Insert stakes into the ground about 6 to 8 inches deep. Use a rubber mallet gently, making sure the stakes are straight and solid.
- Day 1: Attach your yard sign securely to the stakes using zip ties or appropriate fasteners. Check tension to avoid flapping or sagging.
- After Installation: Inspect your sign daily for the first week. Adjust stakes or rewiring if the sign leans or moves excessively in wind.
- After 2 Weeks: Monitor for any damage or weather impacts. Replace broken fasteners or re-anchor stakes as needed.
Frequently Asked Questions
Can I Install a Yard Sign on Hard Concrete?
You cannot insert stakes on concrete. Use heavy bases or weights to hold a yard sign in place without damaging surfaces.
Is It Necessary to Remove Yard Signs After an Event?
Yes, removing yard signs promptly prevents local fines and keeps your yard neat. Some areas have time limits for sign display.
What’s the Best Way to Clean a Yard Sign?
Wipe with mild soap and water using a soft cloth to avoid damaging the surface. Avoid harsh chemicals that can fade print or damage plastic.
Can Yard Signs Be Reused for Different Campaigns?
Yes, if the sign has a reusable frame or you use printed inserts. Durable signs can be taken down and stored for later use.
Are Blackout Yard Signs Effective in Rainy Weather?
Most corrugated plastic signs withstand rain well, but heavy storms can reduce visibility. Use waterproof inks and secure the sign firmly to protect it.
Is It Better to Place Yard Signs Along Busy Streets or Residential Areas?
Busy streets offer higher visibility and more potential views per sign, but residential areas may target local audiences more effectively. Choose based on your campaign’s goal.
The Bottom Line
Properly installing a yard sign starts with the right location, equipment, and care during setup. Taking a few extra minutes to secure the stakes and regularly check their condition can prevent damage and keep your message clear. Your next step is to pick your sign’s spot and prepare the soil before setting the stakes firmly in place.