How to Light a Wood Sign: A Complete Guide with Proven Lighting Methods
How to light a wood sign comes down to choosing the right lighting type, proper placement, and secure installation to highlight your design. LED strips with adhesive backs work well for most wooden signs, offering flexibility and brightness while consuming little power. Start by measuring your sign accurately and pick lights that fit within those dimensions for an even glow.
Key Takeaways
- Measure your wooden sign precisely before selecting lighting to ensure a perfect fit.
- Use LED strips with adhesive backs for easy installation and consistent illumination.
- Prepare the wood surface by sanding and cleaning to improve light adhesion.
- Cut LED strips to length based on your sign’s interior dimensions to avoid excess.
- Plan your wiring carefully, choosing between battery or plug-in power depending on placement.
- Consider backlighting or cutouts for visual depth if you want a standout effect.
How to Light a Wood Sign Effectively
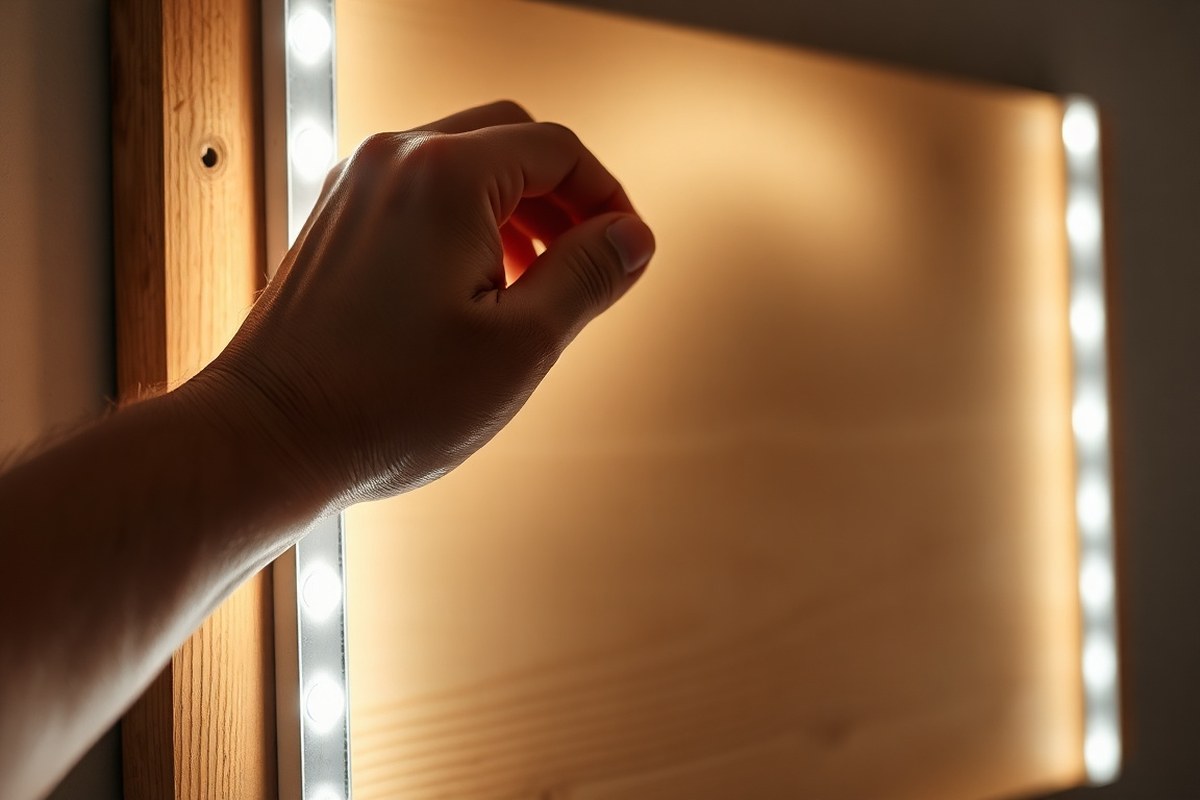
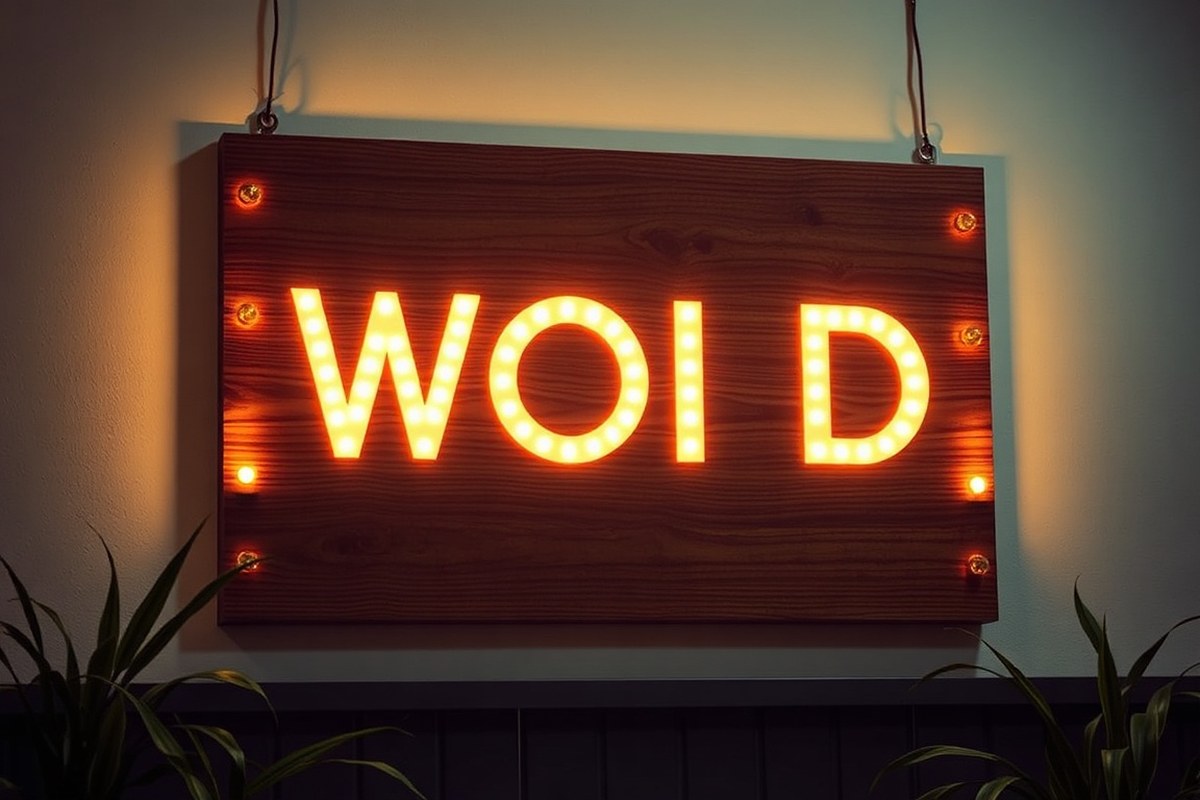
Lighting a wood sign effectively depends on your desired visual impact and the sign’s location. You can use either front-lighting, which shines light onto the face of the sign, or backlighting, where the light source sits behind the sign to create a halo or glow effect. Front-lighting works best with painted or stenciled signs and highlights details, while backlighting suits cutout or layered signs that allow light to shine through openings or edges.
For the brightest, even illumination, consider LED strip lights. They offer energy efficiency, low heat, and flexible installation options. Position them carefully to avoid hotspots or uneven shadows, keeping the lights about 2 to 4 inches away from the wood surface for a smooth glow. For backlighting, create space between the wood and the light source using standoffs or a frame. Using a dimmer switch can help adjust brightness based on room lighting or time of day. To light a wooden sign, follow these steps to achieve the best results whether front or backlit. Adjust the method to your sign’s size, thickness, and finish:
- Prepare the sign surface: Make sure your wooden sign is fully dry and sealed with a top coat spray paint to protect from light heat and dust.
- Choose your lighting type: Decide between front-lighting with directed LEDs or backlighting with LED strips mounted behind the sign.
- Measure and plan: For backlighting, leave a 1 to 2 inch space behind the sign to mount LED strips and allow light diffusion. For front-lighting, space LEDs 2 to 4 inches away from the wood face.
- Mount the lights: Attach the LED strips using adhesive backing or small brackets. Ensure even coverage by positioning strips along all edges or behind cutouts evenly.
- Wire and power: Connect the LED strips to a suitable power source, preferably one with an inline switch or dimmer for control.
- Test the lighting: Turn on the lights and check for any dark spots or glare. Move or add diffusers like frosted acrylic if needed to soften harsh light.
- Secure all wiring: Hide wires by running them along the back or edges of the sign, securing them with clips or cable organizers to prevent damage.
- Adjust brightness and angle: Use dimmers or reposition lights to perfect the sign’s glow based on ambient lighting and viewing distance.
Backlighting is ideal for signs with laser-cut letters or cutouts made from 1/4 inch plywood or similar materials. Front-lighting works well for painted or decoupage wooden signs around 12 by 12 inches where you want to highlight surface details. Avoid placing lights too close to raw wood or painted surfaces to prevent heat damage, keep temperatures below 104°F (40°C) around LEDs. The cost of LED strips varies but expect to spend $15 to $30 for 16 feet of basic strips, enough for a small to medium wood sign.
Choosing the Right Lights for Wooden Signs
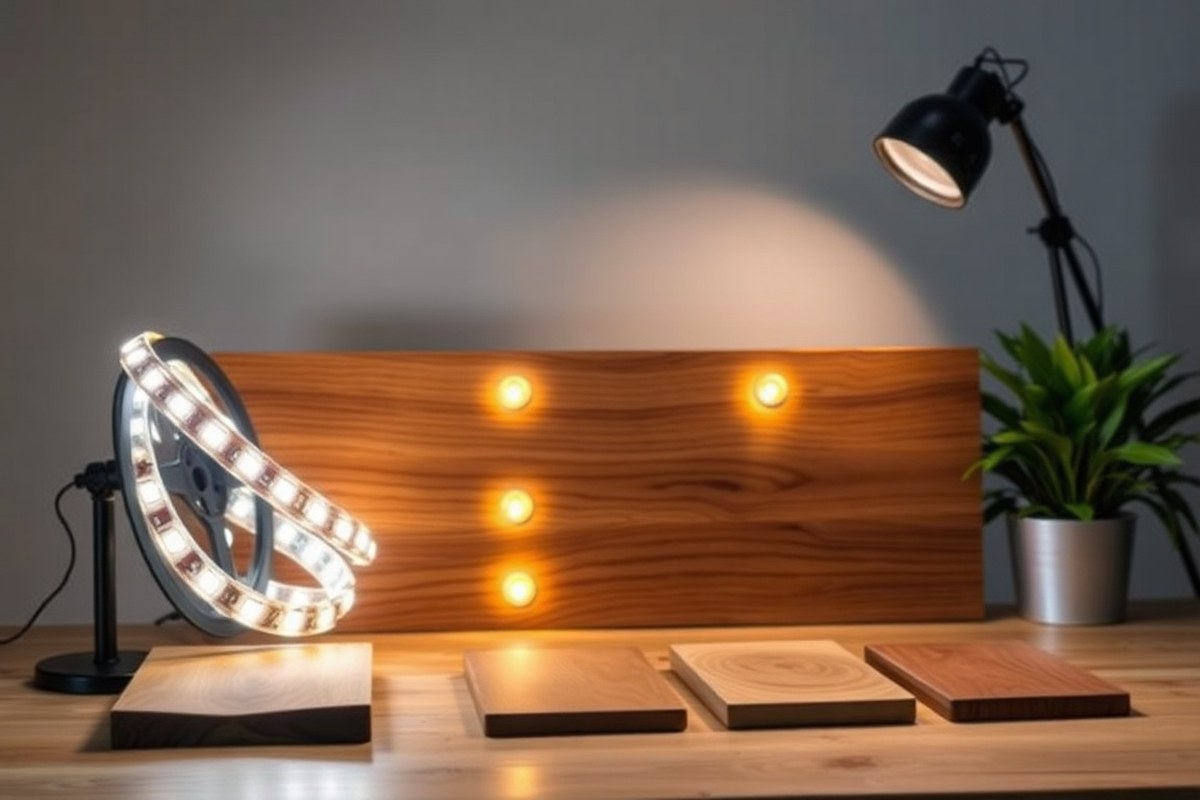
Choosing the right lighting for your wooden sign depends on what look you want and where the sign will be displayed. LED strips are popular because they use little power, remain cool, and provide even light. They are flexible and easy to hide behind or around the sign, making them ideal for indoor settings and covered outdoor areas.
Other lighting options include battery-powered fairy lights or spotlights, solar lights, and traditional incandescent bulbs. Battery-powered and solar options are convenient where wiring isn’t practical, but they may offer less brightness and require more frequent maintenance. Incandescent bulbs can produce more heat and consume more energy, so they are less recommended for wood signs because heat may dry out or warp the wood over time.
The best choice depends on your setup and goals. For example, use LED strips for indoor signs with detailed designs or cutouts since they highlight without heat damage. Battery-powered LEDs work for temporary or remote setups without access to power. Solar lights suit outdoor signs with good sun exposure but check for consistent brightness during cloudy days.
| Lighting Type | Brightness | Heat Emission | Power Source | Cost Estimate | Best Use Case |
|---|---|---|---|---|---|
| LED Strips | High, even distribution | Low, stays cool | Wired (plug or battery) | $10, $30 for 5 feet | Indoor or sheltered outdoor signs |
| Battery-Powered Fairy Lights | Medium, point light | Low | Battery | $5, $15 per string | Temporary setups, remote locations |
| Solar Lights | Low to medium | Low | Solar panel/rechargeable battery | $15, $40 per unit | Outdoor signs with sun exposure |
| Incandescent Bulbs | High | High, can cause heat damage | Wired (plug) | $5, $20 per bulb | Rare, controlled indoor use |
LED strips often come with adhesive backing, making them easy to install directly on or behind the wood sign. Cut the strips to size with scissors at marked breaks, then stick them along edges or behind cutouts to create a glow effect. Use a dimmer or controller to adjust brightness and colour temperature depending on the wood tone and context. Avoid placing lights too close to unsealed rough wood surfaces to prevent snagging and damage to wiring.
Tip: Ensure any battery compartments or solar panels remain accessible for replacement or charging without removing your sign from its display spot.
In general, focus on light types that minimize heat and allow flexible installation while meeting your illumination needs. LED strips usually offer the best balance of affordability, ease, brightness, and safety for most wood sign projects.
Preparing Your Wood Sign for Lighting Installation
Preparing your wood sign is key to a smooth and durable lighting installation. Proper surface conditioning and precise layout marking ensure your lights attach securely and look great. You’ll gather materials, sand and clean the wood, finish the surface, then carefully mark where each light will go before installation.
Sanding and Cleaning the Wood Surface
Start by sanding the wood smooth with a sanding block, focusing on removing rough spots and any old paint or finishes. Sand lightly if your wood is already stained or painted to avoid stripping too much color. After sanding, clean the surface thoroughly with a dry rag or tack cloth to remove dust and debris. This step helps lights and any adhesives hold better over time. Gather these materials for this stage:
- Sanding block (medium-grit around 120-150 grit works well)
- Clean, dry rag or tack cloth
- Gloves to protect your hands
- Optional: Vacuum or brush to clear dust
A well-sanded and dust-free surface promotes even stain or paint absorption, which keeps the sign attractive after lighting. Skipping sanding or poor cleaning may cause patchy finishes or poor light adhesion.
Applying Stain or Paint Compatible with Lights
Choose a stain that improve your wood grain and works well under lighting, such as a Minwax Espresso Color stain. Use a small foam brush or a rag made from an old t-shirt to apply stain evenly, working in the direction of the wood grain. Let the stain dry fully, which usually takes 4-6 hours for oil-based stains at room temperature. Wear gloves to avoid staining your skin.
If painting instead, apply thin, smooth layers with painter’s tape covering areas where lights will attach to protect finish from damage. Avoid painting over where lights must shine through or be mounted. Post-staining or painting, handle the sign carefully, especially when removing painter’s tape. Paint and stain can chip or crack if pulled too hard or too soon. Supplies needed for this step include:
- Wood stain or paint that allows light transmission or does not peel easily
- Small foam brush or rag for application
- Painter’s tape for masking
- Gloves
- Sharpie or oil-based paint pen for detail marking
Marking Measurements for Light Placement
Lay out your lighting plan carefully before installing any lights. Use a white charcoal pencil or a fine Sharpie to mark exact light positions without damaging the finish. Measure spacing evenly with a ruler or tape measure and mark locations where lights will attach or cutouts will shine through.
Common spacing is about 2 to 4 inches apart depending on light size and desired glow effect. Mark mounting holes or adhesive spots clearly but quietly to avoid overcrowding or uneven light coverage. Marking early helps prevent moving lights after installation, which can damage paint or wood. Key materials for this step include:
- White charcoal pencil for light, erasable guidelines
- Sharpie oil paint pen for permanent small marks
- Ruler or measuring tape for precise spacing
- Painter’s tape to temporarily hold lights for layout testing
Planning light placement thoroughly prevents confusion during wiring and mounting stages. Poor marking can cause uneven lighting and potential rework that damages your sign’s surface.
Installing LED Strips on Wood Signs Step-by-Step
Installing LED strip lights on a wood sign brightens it while adding a modern touch. The key is proper preparation, precise placement, and secure connections to achieve even lighting and long-lasting adhesion. This involves gathering the right tools, cleaning the wood surface thoroughly, cutting the strips to size, attaching them firmly, and wiring them correctly.
Gathering Tools and Materials Needed
You will need LED strip lights designed for indoor use, ideally with an adhesive backing. Choose strips with brightness suited to your sign size, typically 12V strips with 300 to 600 LEDs per reel offer good coverage. Additional materials include a power supply compatible with your strip voltage, wire connectors or soldering tools, and mounting accessories if needed.
Essential tools include a scissors or utility knife for cutting the strips, a ruler or measuring tape for accurate sizing, a cleaning cloth or alcohol wipes, and optionally a small screwdriver or wire stripper for wiring tasks. Having a heat gun or hair dryer can help improve adhesive bonding on colder days or rough wood surfaces.
Cleaning and Preparing the Sign Surface
Thorough surface preparation ensures strong adhesion and even light distribution. Dust, oils, or uneven textures can cause the LED strips to peel or produce uneven light spots. Start by wiping the wood sign’s surface with isopropyl alcohol or a mild cleaner to remove dirt and oils.
Inspect the wood for rough or splintered areas that could lift the strips. Lightly sanding these spots with fine-grit sandpaper smooths the surface. Allow the wood to dry completely and avoid applying adhesive to damp surfaces. For porous or highly textured wood, you may want to seal or prime the area where strips will go to improve stickiness.
Cutting and Attaching LED Strips Correctly
Most LED strips come in segments cuttable at marked points, usually every 2 to 4 inches. Measure your sign’s perimeter or the area you want illuminated, then cut the strip only at these designated spots to avoid damaging the circuitry.
Before peeling the backing, test fit the strips along your sign edges or behind letters to confirm placement. For longer runs, consider mounting the strips in multiple sections connected by jumper wires for neat curves or corners.
Press the strip’s adhesive firmly to the wood, applying pressure for about 30 seconds to secure. Using a heat gun for 10 to 15 seconds over the attached strip can boost the adhesive’s tack on cooler surfaces. Avoid bending the strips sharply, which can damage the circuitry.
Wiring and Securing Power Connections
LED strips typically require a DC power supply compatible with their voltage, often 12V or 24V. Before connecting, identify the positive and negative terminals on your strips and power supply. If using multiple strip sections, connect them in parallel where possible to maintain consistent voltage across all lights.
Secure connections using wire nuts, soldering, or clip-on terminals depending on your setup. Once wired, tuck the cables neatly along the back of the sign, using cable clips or hot glue to prevent movement. Test the lighting before finalizing wiring to confirm all LEDs light evenly.
Remote-controlled LED strips require placement of the IR receiver where the signal can reach it, typically on a visible front edge or side of the sign. Allow some space for ventilation around the power supply to avoid overheating.
- Measure the area of your wood sign to determine the length of LED strip needed.
- Clean the wood surface with isopropyl alcohol and sand any rough patches for a flat base.
- Cut LED strip segments at marked points matching your measurements.
- Test fit the strips and plan wiring routes before peeling adhesive backing.
- Apply heat if needed and press strips firmly onto the wood for at least 30 seconds.
- Wire strip ends to the power supply, ensuring polarity matches and connections are secure.
- Mount and hide wires on the back with clips or glue, leaving the IR receiver accessible.
- Power on and check for even lighting and firm adhesion before wall mounting or display.
Wiring and Power Options for Illuminated Wood Signs
Powering your wood sign lighting safely requires choosing the right electrical wiring method and power source based on where you plan to install the sign. For indoor signs, plug-in LED strips or small battery packs are common and simplest options. Outdoor signs often benefit from solar-powered lights or hardwired connections to a weatherproof power source to handle moisture and temperature changes. Each method has tradeoffs related to cost, maintenance, and reliability.
Using plug-in lights is straightforward. Pick LED lights with a standard AC adapter and place your sign within 6 feet of an outlet to avoid unsafe extension cords. You can hide the power cord along the back or frame of the sign using cable clips or raceways. For battery-powered setups, choose high-capacity rechargeable batteries to get 8 to 12 hours of illumination per charge. These work well for small to medium signs where running wires is difficult. However, frequent battery changes or recharging are needed, adding upkeep and sometimes extra costs of $15 to $30 per battery pack.
Solar power is an option for outdoor use. Solar panels with integrated batteries charge during the day and power LEDs at night. Plan for about 4 to 6 hours of direct sunlight exposure daily to maintain brightness. Solar lights cost more upfront, often $40 to $100 or more, but save electricity and avoid wiring. Protect solar components with waterproof housings rated at least IP65 for weather resistance. You must install solar panels facing south with minimal shading to ensure charging efficiency.
When hardwiring your sign to home electricity, use low-voltage LED lighting powered by a transformer to reduce shock risk. Employ UL-listed electrical components and waterproof junction boxes. Route wires safely with conduit or behind drywall. Always turn off the electrical circuit before wiring and consult local electrical codes. Hiring a licensed electrician is strongly recommended if you lack experience with household wiring. This option costs more upfront but provides the most permanent and consistent power source.
For safety, ensure the power source matches your lights’ voltage and wattage to prevent overheating and fire hazards. Use outdoor-rated cables and connectors for signs exposed to humidity or sun. Avoid running wires where they can be pinched or tripped over. Check for exposed metal parts on fixtures and add electrical tape or heat shrink tubing where wires connect. Installing a ground fault circuit interrupter (GFCI) outlet protects against electrical shock, especially outdoors.
Always test your power setup with a voltage tester before connecting lights to avoid shocks or damage.
Use this checklist before powering your sign: location (indoor/outdoor), light type (LED strip, bulbs), available power sources (outlet, batteries, solar), wiring method (plug-in, hardwired, battery), weather protection needed, and safety devices (GFCI, fuse). Smaller indoor signs usually work best with plug-in LED strips or batteries, while outdoor signs often require solar or hardwired solutions with weatherproofing. Cost ranges can vary from $10 for battery setups to $100+ for solar or professional electrical installs. Proper planning reduces safety risks and keeps your wood sign brightly and reliably lit.
Creating Backlit and Cutout Wood Signs with Lighting
Creating backlit wood signs with acrylic or cutouts lets you add depth and glowing effects that stand out. It combines woodworking and lighting carefully to let light shine through the design areas, offering a vibrant, professional look. The process involves designing precise cutouts, choosing the right acrylic, and installing lighting strategically to get even illumination.
Designing the Sign for Cutouts and Light Diffusion
Start by planning your design so that the parts you want to illuminate are cut out from the wood. You want to use a stencil or vinyl to transfer the design, removing the positive space like lettering or shapes to serve as windows for the light. The cutout edges need to be smooth and well-defined to prevent uneven light spill.
To help light fill the cutout areas evenly, design the sign with a frame or box behind it. Inside this box, add reflective material such as mirrored or white acrylic to bounce the LED light around. This reflection softens shadows and gives a uniform glow. For larger signs, consider splitting the design into multiple printable sheets or sections to size and place accurately.
Selecting Acrylic Sheets and Mounting Options
Clear or frosted acrylic sheets work best behind your wood cutouts to diffuse the light evenly and protect the lighting elements. Frosted acrylic softens the light for a warm, glowing effect and hides any hot spots where the LEDs are brightest. Choose 1/8 to 1/4 inch thick acrylic for rigidity without adding too much bulk. Price typically ranges from $10 to $50 per sheet depending on size and thickness.
For mounting, secure the acrylic inside the sign’s frame with glue or small brackets. Leave a small air gap between the wood and acrylic sheet when possible to prevent heat buildup from the lights. Use double-sided tape to attach the reflective liner behind the acrylic if included. Make sure the acrylic lies flat against the back of the cutouts for effective diffusion.
Installing Lighting Behind the Wood Cutouts
LED strips or rope lights are the most common lighting choices for backlit wood signs. Install the lights inside the framing box behind the acrylic sheet to hide bulbs from direct view. Position LED strips evenly around the interior perimeter or in multiple rows for large signs to avoid dark spots. Use diffusers on the LEDs when possible to spread light more smoothly behind the acrylic. Follow these steps for installation:
- Measure the inside dimensions of the wood frame or box behind the cutouts.
- Cut adhesive LED strips to length, using sections between cut lines only.
- Attach the reflective liner on the inside walls of the frame to improve light bounce.
- Stick LED strips evenly on all walls or along planned rows inside the box.
- Secure the acrylic sheet onto the back of the wood with glue or brackets, maintaining an air gap if possible.
- Wire the LED strips to a suitable power source, checking polarity and voltage ratings.
- Test the lighting before fully assembling the sign.
Good results show even glowing without bright spots or dark shadows through the cutouts. Watch for overheating and ensure the lighting source matches the sign size to avoid under or over-illumination. Reflective backing and a frosted acrylic help solve common lighting issues like uneven light distribution or harsh hotspots.
Common Mistakes and How to Fix Lighting on Wood Signs
Lighting wood signs often runs into common issues that can ruin the intended look. One frequent mistake is creating hotspots, bright, uneven spots that throw off the sign’s visual balance. Hotspots happen when lights are placed too close or concentrated in one area without enough diffusion. To fix this, space your lights evenly and use diffusers like frosted acrylic or thin fabric to spread the glow evenly. Aim for a gap of 1 to 2 inches between the light source and the diffuser, which softens harshities without reducing brightness.
Uneven lighting also shows up when you don’t consider the shape and depth of the wood sign. Flat signs light differently than signs with carved or raised letters. For dimensional signs, position multiple light sources from different angles to avoid shadows that hide details. Test your setup by turning on the lights before final mounting to spot dark patches. Adjust angles or add extra strips strategically to fill gaps.
- Never cluster LEDs in one corner to avoid bright spots
- Use light diffusers to soften and spread illumination
- Align lighting angles for carved or thick signs to minimize shadows
- Check wiring connections to prevent flickering or outages
- Secure wires firmly to avoid loose contacts causing flickers
- Match power supply capacity with LED strip length to ensure stable voltage
- Test lighting before final assembly to spot problems early
Flickering lights or power hiccups point to wiring or power supply issues. Flickering can result from loose connections or cheap power adapters that don’t deliver steady current. Check connectors for corrosion or loose ends, and replace faulty adapters with ones rated for your total LED wattage. For example, a 16-foot LED strip running at 5 watts per foot needs at least an 80-watt power supply to avoid dimming or flickering.
Also, consider the temperature and humidity around the sign. Wood expands and contracts with moisture and heat changes, which can affect wiring or adhesive mounts for lights. Choose weather-resistant LED strips for outdoor signs, rated for temperatures from -4°F to 113°F (-20°C to 45°C), and keep wiring flexible to tolerate slight movements without disconnection. Using silicone-coated wires and waterproof connectors helps maintain consistent performance.
Safety Tips and When to Hire a Professional
Lighting wooden signs involves working with electricity and potentially flammable materials, so following strict safety measures is important. First, always turn off power at the circuit breaker before starting any electrical work to prevent shocks. Use insulated tools and wear rubber-soled shoes to reduce the risk of electrical injury. Check that all wiring, connectors, and light fixtures are rated for the intended use and compatible with your power source. Avoid overloading circuits by calculating the total wattage of your lights and ensuring it stays within safe limits for the power supply.
Wood is combustible, making careful fire risk management essential. Keep all heat-producing lighting, such as incandescent bulbs or halogens, away from direct contact with wood surfaces. LEDs are preferred because they generate less heat. Maintain at least a half-inch gap between the lights and the wood, ensuring adequate airflow to prevent heat buildup. Use fire-resistant sealants or coatings on the wood around lighting areas if possible. Regularly inspect your installation for signs of overheating like discoloration, scorching, or smell of smoke.
Hiring a licensed electrician is advisable whenever the project involves high-voltage wiring or permanent installations. When your sign needs hardwiring to your home’s electrical system or changes to existing circuits, a professional helps make sure it meets electrical codes and local rules. This reduces risks of electrical fires, short circuits, and power surges. Basic plug-in LED setups that do not require altering wiring often can be installed safely by hobbyists familiar with electrical basics. Lacking confidence in testing voltages, working with junction boxes, or making secure wire connections calls for a professional, which may cost $65 to $125 per hour based on where you live and the job difficulty.
Here is a checklist you can use to stay safe throughout the project: cut power before working, use insulated tools, choose LED lights to minimize heat, maintain space between lights and wood, secure all wires with approved connectors, avoid overloading circuits, apply flame-retardant finishes near light fixtures, and inspect regularly for damage or heat signs. Also, follow manufacturer instructions for all lighting components and observe local electrical and fire codes. These steps help avoid electrical hazards and prevent fires.
Always test your lighting setup before permanently mounting it to make sure it runs cool and without flickering or tripping breakers.
Good results show the wood sign evenly lit without hotspots or heat damage. Wires should be neat, secure, and hidden but accessible. Installing a dedicated circuit breaker or fuse for the sign can add protection from shorts. Watch for melted insulation, buzzing sounds, or flickering lights; these are signs that professional inspection is needed. Fire risks rise when lights are too close to wood or circuits are overloaded, so early detection and prompt correction are critical to avoid accidents.
Step-by-Step Action Plan to Light Your Wood Sign Today
Get your wooden sign glowing by following these clear steps. This plan helps you take action confidently and see results fast.
- Before you start: Choose your lighting type, LED strips, spotlights, or backlights, based on your sign’s size and style. You’ll know it’s right when the bulbs or strips fit neatly without overpowering the wood.
- Day 1: Prepare your wood by sanding and sealing the surface to prevent light damage or moisture issues. The wood should feel smooth and clean to the touch.
- Day 2: Measure and mark where the lights will go on your sign to ensure even illumination. Check that all marks line up symmetrically when viewed from different angles.
- Day 3: Install the lighting carefully, following the installation method for your light type. Test the lights immediately; they should power on with no flickering or dim spots.
- Day 4: Connect wiring to your power source using weatherproof connectors and secure any loose cables. Confirm that the wiring is neat and the connection stable after powering on.
- Day 5: Adjust your lighting brightness and angles to highlight the sign’s text or design clearly without glare. You’ll know it’s right when the wood grain and letters stand out cleanly.
- After 1 week: Inspect your installation for any signs of wear or safety issues. No exposed wires or overheating means your setup is safe and durable.
Frequently Asked Questions
How Do You Add Lighting to a Wooden Sign Without Damaging It?
Use LED strip lights attached with double-sided tape or mounting clips to avoid drilling holes. This method keeps your wooden sign intact and allows easy removal or repositioning of the lights.
What Type of Paint Works Best for Wooden Signs with Lights?
Acrylic paint is best because it dries quickly and provides good coverage without peeling under LED heat. It also lets you add vibrant colors or patterns while protecting the wood from moisture.
How Can I Create a Glowing Effect Behind a Wooden Sign?
Backlighting works well by placing LED strips or rope lights behind the sign’s edges or cutouts to produce a soft halo effect. Use a frosted acrylic sheet for diffusing light evenly if needed.
What’s a No-Lighter Alternative to Darken or Burn Wooden Sign Edges?
Sandpaper or a wood-burning tool provides controlled darkening or detailing without an open flame. This prevents accidental damage and lets you create rustic or textured finishes safely.
How Do I Power LED Lights on a Wooden Sign Safely?
Use low-voltage, battery-operated LED strips or plug-in adapters with weatherproof connectors. Avoid overloading circuits and follow manufacturer instructions to prevent electrical hazards.
Can I Waterproof a Lit Wooden Sign for Outdoor Use?
Yes, apply a clear, light coat of spray sealant after painting and lighting installation to protect wood and electronics from moisture. Ensure all electrical parts are rated for outdoor use to avoid damage or shock.
Wrapping Up
Lighting your wooden sign effectively transforms its look and makes your message pop in low light. Start with choosing the right lights and prepare your sign carefully to avoid common pitfalls. Your next step is to find the best spot for your sign’s new lighting setup and enjoy the glow it adds to your space.