Metal Sign Ideas: 8 Expert Tips to Choose, Design & Install Perfect Signs
Metal sign ideas can transform plain spaces into eye-catching displays by combining durability with custom design. The best signs start with selecting the right metal type and finish to suit your environment and style. Begin by thinking about where the sign will hang and what message or image it should convey for lasting impact.
Key Takeaways
- Choose heavy-duty 18-gauge steel for a strong, weather-resistant metal sign that lasts indoors and outdoors.
- Select powder coating as a finish to protect your sign against rust and fading over time.
- Personalize signs with logos, text, or artwork that reflect your brand or personal taste clearly.
- Consider size and shape carefully to fit the display area without overwhelming the space.
- Use wall clamps top and bottom for secure mounting that prevents warping or damage.
- Sandblasting and steel wool techniques can create a washed metal look for unique textures.
1. Top Metal Sign Ideas for Home and Business
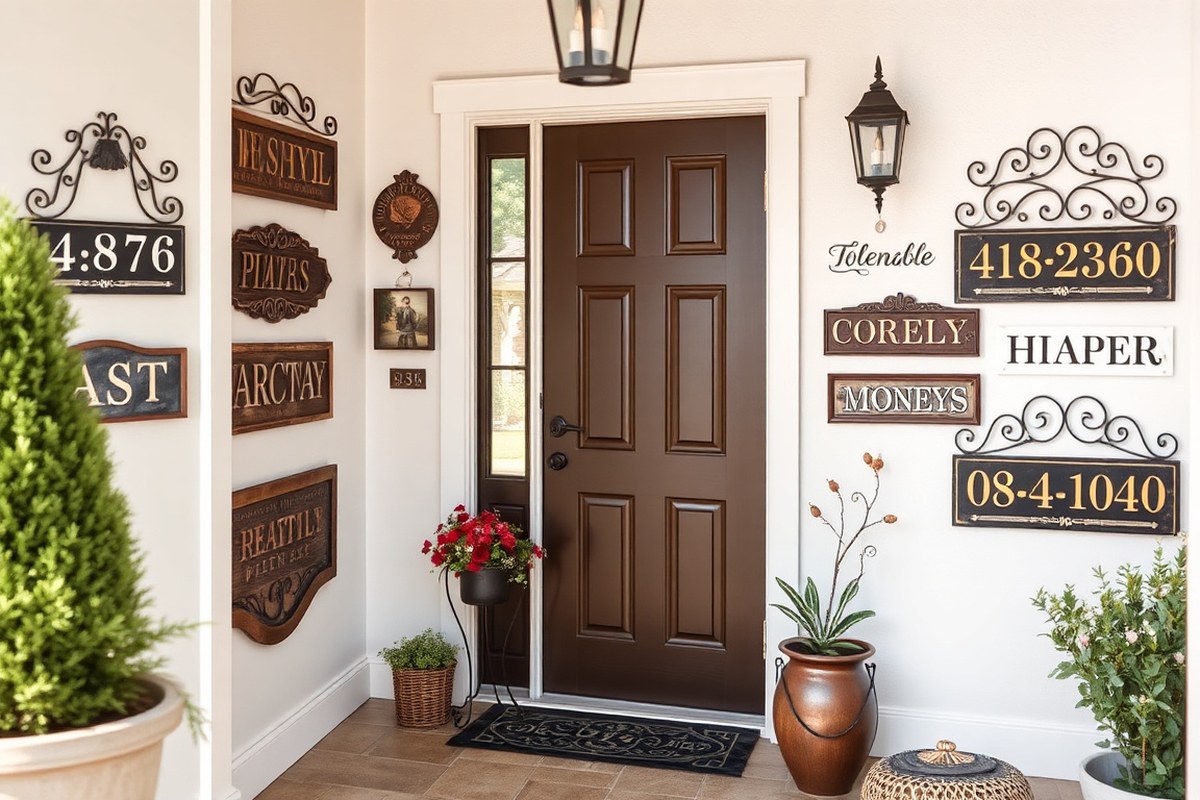
Metal signs offer a versatile and durable option for decorating homes, garages, and businesses. They stand up well to outdoor conditions when crafted from heavy-duty 18-gauge steel with powder-coated finishes, ensuring long-lasting wear and vibrant appearance. Popular choices range from personalized nameplates and address plaques for homes to bold business logos and directional signage. These signs can add a touch of personality and professionalism while serving practical functions like branding or wayfinding.
Trendy metal sign styles include vintage-inspired designs, modern minimalistic logos, and colorful abstract artwork. For home décor, options like personalized family name signs or themed garage art, such as a motorcycle silhouette, create focal points that match your style. Businesses often opt for custom logo signs or nameplates with fade-resistant inks and coated aluminum for exterior use, making the sign eye-catching while surviving weather exposure. Combining metal with lighting effects also improve visibility and aesthetic appeal, especially in retail or hospitality settings. The best metal sign ideas for home or business are:
- Personalized family name or address plaques for entryways
- Custom garage signs featuring hobbies or vehicle themes
- Business logo signs with powder-coated steel and fade-resistant ink
- Directional or informational signs for outdoor spaces
- Artistic metal wall art inspired by regional or cultural motifs
- Commemorative signs for anniversaries or milestones
- Business name signboards with custom fonts and finishes
To create these signs, you provide your design or text to the manufacturer, who uses precision plasma cutting and powder coating for a sturdy, polished result. The production time and cost depend on size and complexity; simple custom signs start around $64. Proper installation, using wall clamps at the top and bottom, keeps signs secure and flat against the surface. Visually sharp edges, consistent paint, and durable finishes signal quality. Avoid signs with uneven surfaces or fading, which often result from cheaper materials or poor coating.
Choosing the right style and function for your metal sign affects how well it fits your space and purpose. For instance, a business logo sign in brushed metal makes a strong brand impression, while a personalized metal wall art piece can add character to a home or garage. Outdoor signs must withstand weather, so opt for treated metals and finishes designed for exterior use. Selecting from traditional, modern, or abstract designs lets you tailor the sign to your décor or branding goals effectively.
2. Choosing the Right Metal and Finish for Lasting Quality
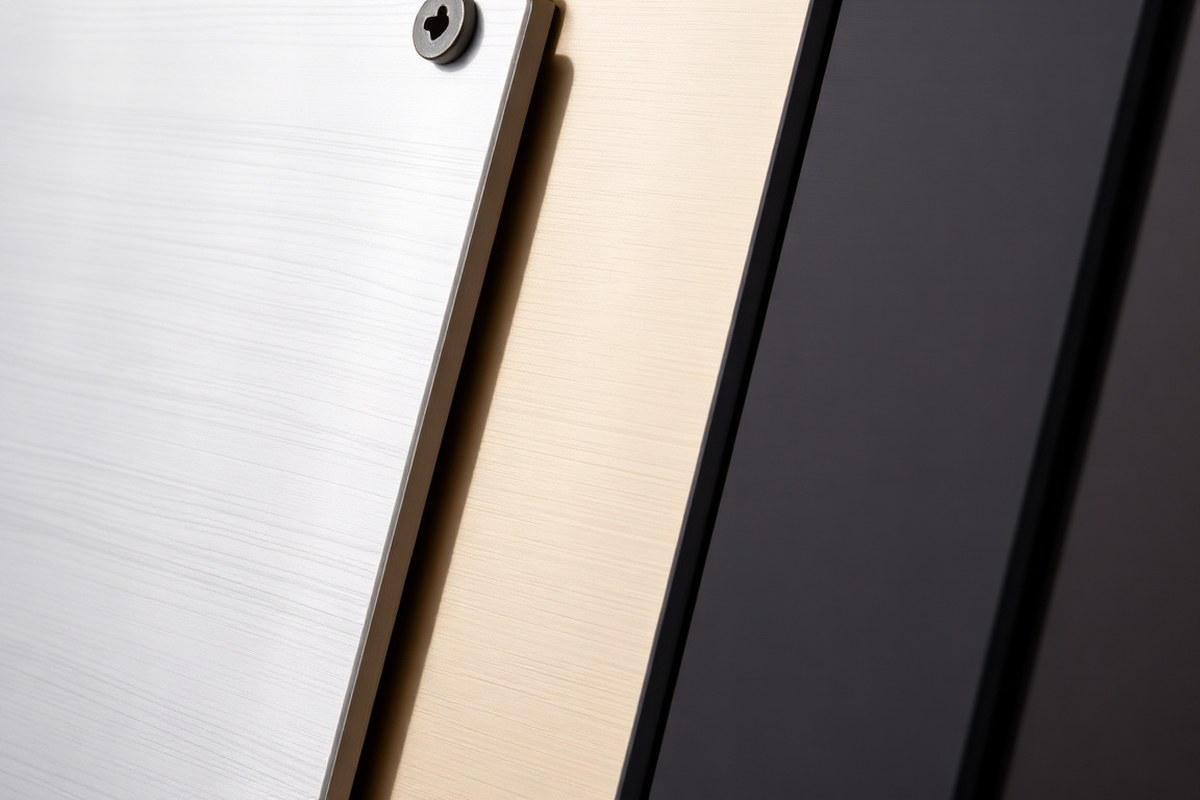
Choosing the right metal and finish is key to getting a custom metal sign that lasts and keeps looking good. Steel and aluminum are the two most common metals for signs. Steel is known for its strength and durability, especially when it’s 18 gauge or thicker. Powder coating steel adds a protective layer that resists rust and weather, making it ideal for outdoor signs like garden decor or barn signs. Aluminum, on the other hand, is naturally rust-free and lightweight. Signs made from 3 mm aluminum sheets often include a plastic core to add strength without extra weight, which is great for indoor or lighter outdoor use.
Finishes do more than just look good. Powder coating is popular because it creates a hard, smooth, and colorful surface that protects against UV rays, chips, and moisture. This coating generally costs more upfront but reduces maintenance and extends the life of your sign. For outdoor use, powder-coated steel or rust-free aluminum with a coating will hold up well against rain, sun, and temperature swings. Indoors, less protective finishes can be enough and usually cost less. The choice depends on your budget, where you’ll place the sign, and how long you want it to last. Here’s a comparison table of common metals and finishes for metal signs, showing key details to help you decide:
| Material | Gauge/Thickness | Finish | Durability | Best Use | Cost Range |
|---|---|---|---|---|---|
| Steel | 18 gauge (~1.2 mm) | Powder coated | High; rust-resistant with coating | Outdoor signs, gardens, barns, business signs | $$ |
| Aluminum | 3 mm sheets (with plastic core) | Standard painted or powder coated | Rust-free; moderate impact resistance | Indoor wall art, light outdoor use | $$$ |
Knowing how to choose depends on your sign’s purpose and environment. For example, if you want a sign to hang outside your business year-round, steel with powder coating is a solid choice. It holds up well even after years of sun and rain exposure. Aluminum suits indoor settings or outdoor spots away from heavy abuse or moisture because it’s lighter and easier to mount. It also includes plastic cores in some signs for extra strength without bending. Budget also plays a role; steel powder-coated signs often cost less than thicker aluminum with cores but both are investments that pay off in durability and appearance.
Tip: Avoid cutting custom signs with a hacksaw; using an angle grinder speeds up the process and leaves a cleaner edge for professional-looking results.
Investing in powder coating is usually worth it when you expect exposure to weather, dirt, or other wear. However, powder coating requires professional equipment and adds to production time and cost. If you want a short-term indoor sign or temporary use, basic painted metals can still look great without the extra expense. Consider sizes and installation too, matching thickness and material to mounting surface strength to avoid warping or damage.
3. How Custom Metal Signs Are Made: Techniques and Effects
Custom metal signs are made using different fabrication methods that influence their look, detail, and durability. The common techniques include plasma cutting for bold shapes, laser etching for fine details, and finishing processes like powder coating or painting. Each method shapes the style and quality of the final sign and affects production time.
Plasma Cutting: Speed and Strength
Plasma cutting uses a high-temperature ionized gas (plasma) to cut through thick metal quickly. This method is ideal for creating strong, durable signs with bold profiles, especially when you want a fast turnaround. It typically works best on metals like mild steel, stainless steel, or aluminum with thicknesses from 1/16 to 1/2 inch.
Because plasma cutting involves melting the metal, edges may be slightly rough, which suits rustic or industrial aesthetics. The equipment costs range from $15,000 to $30,000, so shops usually charge $2 to $10 per square inch, depending on complexity. The whole process, from design to finished cut, usually takes 1 to 3 days. Here’s the typical plasma cutting process:
- Create a digital vector design specifying the shape and size of your sign.
- Prepare the metal sheet, cleaning it to remove dirt and rust for a clean cut.
- Set up the plasma cutter with the right amperage and gas pressure for the metal thickness.
- Use the CNC plasma cutter guided by the design to cut out the sign’s shape and any internal details.
- Remove the cut piece and smooth the edges with sanding or grinding for safer handling.
- Inspect the cut for accuracy and make any necessary small trimming adjustments.
Plasma cutting suits outdoor business signs or large decorative pieces where thickness and resistance matter. For intricate designs with delicate details, it’s less precise than laser options.
Laser Etching: Detail and Texture
Laser etching uses a focused beam of light to remove surface material and create precise, permanent designs. It excels at adding fine details such as logos, text, or images on metal signs. Unlike plasma cutting which cuts through metal, laser etching only engraves the surface.
This method is best suited for thinner metals, often under 1/8 inch thick, like aluminum, stainless steel, or zinc-plated steel. It can expose the underlying base metal by removing coatings, but note this may reduce corrosion resistance since you lose some anti-rust coating. The price typically runs $50 to $200 depending on size and detail. The process often takes 1 to 2 days for a standard-sized sign:
- Design the artwork in a high-resolution format suitable for laser engraving software.
- Secure the metal plate in the laser etcher, ensuring it’s clean and free of debris.
- Set laser parameters like power and speed according to the metal type and thickness.
- Run the laser to etch the metal surface precisely, following the design layout.
- Use a negative pole, or sacrificial metal piece, during etching to complete the electrical circuit, which improves etch quality.
- Clean the etched sign to remove residue and inspect the depth and clarity of the etching.
Laser etching is perfect for personalized nameplates, detailed business logos, and artwork where crisp lines and texture contrast matter most.
Powder Coating and Painting Finishes
After cutting or etching, adding a finish protects the metal and boosts the sign’s appearance. Powder coating involves applying a dry powder electrostatically to the metal and then curing it under heat. This creates a tough, uniform, and weather-resistant finish.
Powder coating normally costs around $50 to $150 depending on size and color. It typically requires 1 to 2 days: cleaning and prepping the metal, applying the powder, baking the sign in an oven at around 350°F (175°C) for 10-20 minutes, and cooling it down.
Painting is a less costly alternative but usually less durable outdoors. It involves applying primer, one or more coats of paint, and a clear protective sealant. The drying time varies by paint type but generally takes 2 to 5 days total including prep and curing.
Finishing completes the metal sign by improving durability and complementing the cut or etched design with vibrant or matte colors. Proper surface preparation before finishing helps prevent peeling, rust, or fading over time.
4. Personalizing Metal Signs with Logos and Text
Personalizing metal signs with logos, names, or custom text is a powerful way to boost brand recognition and showcase unique style. Metal signs can absolutely be customized to include your business logo or personal text, making them perfect for retail storefronts, office décor, or special gifts such as ranch brands and memorial pieces. Clear, well-designed logos help attract the right audience and leave a lasting impression.
To start, gather your artwork in a high-resolution digital format. Common file types accepted by metal sign makers include vector files such as AI, EPS, or SVG for logos because they maintain crisp lines at any size. Avoid low-resolution JPEG or PNG files, which may appear pixelated when enlarged. Ensure your artwork uses clean lines and simple shapes to preserve detail during cutting or engraving.
For readable text on your sign, choose fonts that are bold and clear, avoiding complicated scripts or thin lines. Text size should be at least 1 inch tall for signs viewed from a few feet away, increasing proportionately for larger viewing distances. Contrast is key: light text on a dark background or vice versa prevents your message from blending into the metal.
Designing a metal sign with logos and custom text requires a checklist approach. First, confirm your artwork resolution and file type meet the supplier’s specifications. Next, decide on the placement of logos and text to balance visual weight and flow, usually logos go to one side or centered above text. Include proper spacing between letters and elements to maintain clarity.
Be aware of the metal sign’s surface finish, as it can affect color visibility. Matte finishes reduce glare and improve legibility outdoors, while glossy finishes can highlight colors but risk reflections that obscure details. Adding painted or powder-coated colors usually raises production costs by $50 to $150 per sign, depending on size and complexity.
Effective personalized metal signs show sharp logo lines, vibrant or contrasting colors, and text that can be easily read at intended viewing distances. Poor results often arise from low-quality artwork files, overly intricate logos scaled too small, or insufficient contrast. Working closely with the sign fabricator during the design proofing stage helps avoid these issues.
Custom text and logos on metal signs stand out well for outdoor business signage, welcome plaques with family names, or unique gift items. To ensure your personalized metal sign clearly expresses your style and message, provide clean, vector-based artwork and design it for readability, whether it’s a simple monogram or a detailed brand emblem.
5. Selecting Sizes and Shapes That Fit Your Space
Start by measuring the space where you want to place your metal sign. Use a tape measure to note both the width and height, and consider the viewing distance. Signs meant for customers or pedestrians should be larger and more visible from a distance, usually starting around 12 by 18 inches or bigger. For indoor decoration or small business branding near doors and windows, sizes can be smaller, such as 8 by 12 inches or compact handcrafted rod iron signs for house numbers. Choosing the right size helps maintain balance and ensures your sign grabs attention without overwhelming the area.
Shapes play a role in both style and function. Rectangular and square metal signs are the most common and work well for lettering, logos, and directional information. Rounded corners or oval shapes soften the look and suit classic or elegant designs. Custom shapes are available if you upload a design, allowing for unique cutouts like logos or themed shapes to add personality or fit specific brand aesthetics. Keep in mind that spacing matters; design elements should stay at least 0.44 inches from the edge to accommodate wall clamps safely.
For outdoor signs that face streets or large parking lots, a wider rectangle or horizontal shape improves readability at a glance. Vertical rectangles or tall narrow signs suit door decals or entryways where height is limited but visibility at eye level is preferred. Consider the mounting method as well; heavier or larger signs might need specially designed brackets or secure wall clamps positioned according to the sign’s size.
- Measure your display area carefully and note any obstacles like door frames or trim.
- Choose a sign size proportional to the distance viewers will be standing.
- Select shape based on design style and the physical space for mounting.
- Allow clear margins of at least 0.44 inches from edges for clamps.
- Use custom sizes for unique spaces or branding needs, checking available maximum dimensions.
- Opt for simpler shapes like rectangles for text-heavy signs.
- Consider visibility angles and mounting height for best impact.
Keep design elements away from edges by at least .44 inches to avoid interference with mounting hardware.
Common standard sizes include options like 12 by 18, 18 by 24, and up to 24 by 36 inches, but custom dimensions can be ordered to fit non-standard areas. Custom shapes require uploading your design shape through the design upload option, letting you match a specific brand mark or architectural feature. Expect custom sizes and shapes to take a little more time and sometimes cost more depending on complexity. A properly sized and shaped metal sign complements the physical setting, improve readability, and supports effective branding or decoration.
6. Safe and Secure Installation Methods for Metal Signs
Installing metal signs requires the right preparation, tools, and hardware to ensure they stay secure and safe over time. How you mount a sign depends on the surface, whether it’s wood, brick, or metal, and if the sign will be outdoors or indoors. Taking the right steps prevents damage to the sign and surface while maintaining its appearance.
Required Tools and Hardware
Reliable installation starts with selecting proper tools and hardware. For most metal signs, drilled holes and spacers come standard, allowing for straightforward mounting. Essential tools often include a drill, level, measuring tape, and screwdriver or wrench.
Common hardware options include stainless steel screws or bolts, wall anchors for masonry, and spacers to create a separated look for a sleek finish. Using stainless steel prevents rust, especially outdoors. Wall anchors provide extra grip in unstable materials like drywall or brick mortar. Spacers ensure airflow behind the sign, reducing moisture buildup.
Mounting on Wood, Brick, and Metal Surfaces
Each surface requires a tailored approach to install the metal sign securely.
- Measure and mark where the sign will be placed using a level to keep it straight.
- Drill pilot holes through the sign’s drilled holes and into the mounting surface, matching drill bit size to screws or anchors.
- Mounting on drywall or brick requires inserting suitable wall anchors into the holes to ensure firm support.
- Position the sign using spacers if provided, then align the holes.
- Insert screws or bolts through the sign into the anchors or directly into the surface for wood or metal.
- Tighten hardware evenly with a screwdriver or wrench, avoiding overtightening that can damage the sign.
Wood surfaces allow direct screwing with wood screws, while brick requires masonry anchors and a hammer drill. For metal surfaces, self-tapping metal screws or bolts offer the best hold. Ensure the hardware size matches the holes to avoid looseness.
Ensuring Weather Resistance and Safety
Outdoor metal signs face rain, sun, wind, and temperature changes. Stainless steel hardware resists corrosion, maintaining strength and appearance for years. Using spacers helps prevent moisture from collecting behind the sign, reducing rust and paint damage.
Check regularly for loose screws or signs of wear, especially after storms or temperature swings. Seal any exposed edges or drilled holes with waterproof caulking to prevent water intrusion. Heavy or large signs may need extra supports or a professional installation to minimize the chance of falling.
7. Maintaining and Protecting Your Metal Sign over Time
Maintaining your metal sign properly helps preserve its appearance and extends its lifespan by preventing corrosion, fading, and damage. Start by regularly cleaning the surface to remove dirt, grime, and pollutants that can wear down coatings over time. Use a soft cloth or sponge with mild soap and warm water. Avoid harsh cleaners with ammonia, bleach, or acids, which can damage powder coatings or paint. Rinse thoroughly with clean water and dry with a soft towel to prevent water spots or rust.
For powder-coated or painted metal signs, cleaning once every three to six months usually suffices unless the sign is in a high-traffic or heavily polluted area. Signs exposed to road salt, industrial pollution, or coastal salt air may need more frequent cleaning to stay in good condition. Avoid pressure washers on delicate finishes, as water pressure can chip paint or coatings. Instead, gently wipe the surface, focusing on areas around mounting holes and edges where moisture can collect.
Weather plays a significant role in your sign’s longevity. Sunlight causes fading and mild surface chalking of painted finishes over several years. Applying a UV-resistant clear coat or wax designed for metal can slow this process and keep colors vibrant. Rain and humidity increase corrosion risk, especially for untreated steel. To prevent rust, inspect the sign annually for scratches or chips in the paint or coating. Touch up these spots promptly with compatible paint or sealant to block moisture entry.
Strong winds can cause physical damage, such as bending or loosening hardware. Confirm that mounting bolts or screws are tight and replace any rusted fasteners to maintain a secure hold. Sealing mounting holes with waterproof caulk stops water from penetrating the back of the sign, a common source of corrosion. Applying a silicone-based sealant around drilled holes costs about $5 to $10 and is a simple way to protect vulnerable points.
For outdoor signs, placing them in shaded or partially sheltered positions reduces direct sun and rain exposure. However, avoid locations with poor air circulation, as trapped moisture accelerates deterioration. A maintenance checklist includes regular washing with mild soap, inspecting for damage or rust every six months, touching up coatings as needed, checking mounting hardware, and sealing holes. This routine typically takes 30 minutes to an hour depending on sign size and will cost minimal materials if you do repairs yourself.
Signs made from aluminum, stainless steel, or galvanized metal need less upkeep than untreated steel but still benefit from routine cleaning and inspections. Aluminum signs often come with a factory-applied clear coat that helps resist weathering. For these, focus on gentle cleaning and prompt attention to any scratches. Stainless steel signs resist rust but can develop surface stains; a nonabrasive cleaner made for metal is ideal to keep their shine without scratching.
Ignoring maintenance leads to faded graphics, peeling paint, rust spots, and eventually structural weakening. A neglected metal sign often costs more to restore or replace than the time and effort involved in regular care. By sticking to simple cleaning steps, inspecting seasonal damage, and applying protective coatings or sealants correctly, your metal sign will stay attractive and durable for many years. Following these practices ensures you protect your investment and keep your sign’s message clear and professional.
8. Creative Enhancements: Lighting and Layering Effects
Creative lighting and layering techniques bring new life to metal signs, making them stand out visually and catch attention in any setting. Adding LED lighting or using layered metal panels can give your sign depth and a distinctive look, which is especially useful for branding and artistic displays. Incorporating other materials like wood can complement metal, creating a mixed-media effect that highlights the metal artwork.
Integrating LED Lights and Backlighting
LED lights work well with metal signs because they are energy-efficient, long-lasting, and relatively easy to install. Attaching LED strips along the edges or behind the sign creates a glowing halo effect that makes the design pop in low-light conditions. Backlighting a metal sign gives it a floating appearance and increases nighttime visibility, improving its impact for outdoor business signage or decorative art pieces.
To integrate LED lighting, mount the LED strips or modules behind a metal panel with space for light diffusion, for example, by raising it on standoffs about 1 to 2 inches from the wall. Use waterproof LEDs for outdoor signs to prevent damage. Wiring should be done securely with weatherproof connectors to withstand the elements. Power supplies typically range from $15 to $50 depending on brightness and size, and installation can take 1-3 hours based on complexity.
Overusing LED brightness may cause glare and obscure fine details on the metal surface. Dimmer switches or adjustable LEDs can help find the best balance. Adding warm white LEDs softens the metal’s industrial look, while color-changing LEDs suit artistic or seasonal displays.
Layered Metal Designs for Depth and Texture
Layering metal pieces adds physical depth and visual interest to signs. This technique involves stacking cut metal elements with varied finishes, such as brushed aluminum, rusted steel, or polished copper. The contrast between layers creates a 3D effect that draws the eye and lends a premium feel to your sign. Businesses benefit by conveying a richer brand identity, while personal art signs become more dramatic and tactile.
Creating layered signs starts with designing separate pieces that can be attached using hidden fasteners, welding, or adhesive suitable for metal. Thickness often varies from 1/16 to 1/4 inch per layer, with a common total thickness of 1/2 inch or more. Spacing layers slightly apart improve shadow play, which adds to the depth. The process requires careful planning to align each piece perfectly and maintain structural stability.
Signs with layered metal work best for styles that emphasize contrast, such as industrial, vintage, or contemporary geometric patterns. Overly complex layers may add cost and weight, making installation more challenging. Expect a price increase of 25-40% compared to flat metal signs due to material and labor.
Combining Metal with Wood and Other Materials
Combining metal with wood delivers warmth and natural texture that balances metal’s sleekness or ruggedness. This mix suits rustic business logos, boutique shop signs, or custom artwork in homes. Wood frames, backings, or inlays improve the metal without overshadowing it. Other materials like acrylic, glass, or stone can also complement metal to create multi-textured signs that stand out.
To combine materials, start by selecting wood types that resist moisture such as cedar, redwood, or treated pine for outdoor use. Attach metal pieces to wood panels using screws, clamps, or industrial adhesives designed for mixed materials. Ensure wood surfaces are sealed properly to prevent warping or rot. Contrasting finishes, like painted metal on raw wood, add layers of visual interest.
Mixed-material signs often cost more and need more maintenance depending on the wood finish. They also may require professional installation, especially for larger pieces. This style works best in spaces where a warm or artisanal look is desired, such as cafés, galleries, or craft stores.
Ensure all electrical components for lit signs are rated for outdoor use to avoid short circuits or damage from weather exposure.
Step-by-Step Action Plan for Creating Your Custom Metal Sign
Follow these steps to design, order, and install a metal sign that perfectly suits your needs and style.
- Day 1: Decide on the primary purpose of your sign, whether it’s for branding, decoration, or both. Check if the design clearly reflects this goal.
- Week 1: Select the appropriate metal and finish based on location and durability needs. Confirm your choice by reviewing sample materials or supplier recommendations.
- Week 2: Sketch your design including logos, text, sizes, and shape preferences. Ensure the design aligns with the space where the sign will be installed.
- Week 3: Consult with a metal sign fabricator to finalize production techniques and effects like lighting or layering. Approve a preview or mock-up before production begins.
- Week 5: Schedule installation using recommended mounting methods to guarantee security and safety. Verify stability after installation with a physical check.
- After installation: Apply a maintenance routine such as regular cleaning and protective coatings based on the metal type. Track the sign’s condition monthly to catch any wear early.
- Ongoing: Consider enhancements like adding lighting or additional layers to refresh appearance. Test each enhancement in a small section to ensure durability and effect.
Frequently Asked Questions
What Are Some Unique Themes for Metal Signs?
Unique themes include vintage, industrial, rustic, and nature-inspired designs. Customizing with local landmarks or hobbies adds a personal touch.
Can Metal Signs Be Used for Branding Purposes?
Yes, metal signs with logos and text work well for branding. They create a professional look that attracts customers and withstand outdoor conditions.
What Type of Metal Is Best for Outdoor Signs?
18-gauge steel with powder coating resists weather and rust effectively. It maintains quality for years outside with minimal maintenance.
How Can I Make My Metal Sign Stand Out at Night?
Adding LED lighting or reflective coatings improves visibility after dark. These enhancements draw attention and boost safety for signs in dim areas.
What Is the Typical Size Range for Custom Metal Signs?
Sizes typically range from small plaques around 12×12 inches to large signs over 48×72 inches. Choose size based on viewing distance and wall space.
Are There Safety Concerns When Installing Metal Signs Outdoors?
Secure mounting with appropriate wall clamps and anchors is essential to prevent accidents. Using rust-resistant hardware extends the sign’s life.
Final Thoughts
Your custom metal sign will stand out and last longer with the right choices and care. Start by focusing on the purpose and materials that best match your space and needs. Reaching out to a qualified fabricator can guide you through details specific to your design. Take the first step by gathering design ideas and material samples to move confidently toward creating your perfect sign.