Neon Sign Ideas for Every Space: A Complete Guide to Design, Use & Buying
Neon sign ideas help transform any space with vibrant, glowing style tailored to your mood and function. Choosing LED neon signs delivers energy efficiency, long lifespan, and versatile designs that suit rooms, events, and businesses. Start by selecting a size and brightness that complements your space, then customize colors and features to create the perfect glowing statement.
Key Takeaways
- Set neon sign brightness around 30% during video calls to get a flattering glow without underexposing your face.
- Use 10-20% brightness at night as a warm, non-disruptive nightlight that won’t affect your sleep cycle.
- Mount LED neon signs at least 1.5 inches off the wall with stainless steel standoffs for a halo glow effect.
- Choose LED neon signs, consuming up to 80% less energy than traditional ones, ideal for sustainable lighting.
- Custom LED neon signs start at $61 for two-letter designs, offering affordable personalization options.
- Expect up to 50,000 hours of use from quality LED neon signs, minimizing maintenance needs.
Top Neon Sign Ideas for Rooms and Events
Choosing the right neon sign design depends on the room or event to create the best atmosphere and complement your space. Bedrooms benefit from smaller, softer neon signs that add charm without overwhelming the room. Popular bedroom designs include motivational quotes, simple shapes like hearts or stars, or calming phrases in soft pinks, warm yellows, or ice blues. These colors promote a relaxing vibe suitable for a personal sanctuary. You can place a small neon sign ($150 and up) on a bedside table or wall for a subtle glow. Avoid overly bright or large signs here to maintain a cozy environment.
Gaming rooms call for bold and immersive neon designs. Signs featuring game-related themes like controllers, lightning bolts, or pixels in vibrant blues, reds, and greens boost energy and focus. Larger wall-mounted signs with dynamic color options improve the competitive spirit. Some signs even offer programmable features to sync with your gaming setup. A well-chosen LED neon sign becomes a visual anchor, increasing immersion while serving as a cool piece of decor. Typical signs start around $150, with prices rising for custom or large displays.
Bars and night venues thrive with neon signs that draw attention and set the mood. Popular choices include vintage cocktail glasses, beer mugs, catchy phrases like “Cheers” or “On Tap,” and brand logos. Bright, saturated colors such as electric blue, neon green, and hot pink work well to energize the setting. Light and portable signs work best to accommodate changes in layout or events. For a permanent feature, a custom wall plug with a 12V transformer ensures consistent illumination. This investment varies by size but adds lasting visual impact to your bar space.
Weddings often use neon signs to personalize the event and highlight special moments. Couples commonly select signs with their names, wedding dates, or romantic quotes like “Love Never Fails.” Soft pastels or warm white neon make the signage elegant and photogenic. Lightweight LED neon signs allow portability, and many rental services cater to weddings for convenience. Placing these signs near the entrance, on the gift table, or behind the sweetheart table provides memorable focal points without taking up much space.
- Bedroom: Motivational quotes, hearts, stars, calming colors, subtle and small signs
- Gaming room: Controllers, lightning bolts, pixels in blue, red, green; dynamic, large wall signs
- Bar: Cocktail glasses, beer mugs, “Cheers”, brand logos; bright, saturated colors
- Wedding: Names, dates, romantic quotes in pastels or white; lightweight and portable
- Business storefronts: Brand logos, slogans, open signs in bold colors; designed for visibility
- Home decor: Fun shapes and quotes that reflect personality, customizable colors and fonts
For business storefronts, neon signs must be bold and highly visible. Custom logos, taglines, or “Open” signs in vibrant colors attract customers and set your brand apart. These usually require professional installation and can cost several hundred dollars or more depending on size and complexity. Choosing a durable, weather-resistant design is important for outdoor use. Indoor home decor allows more freedom with fun shapes or quotes tailored to your taste. This could be anything from a favorite phrase to an abstract art piece, enabling you to add personality and style unique to your room.
Trend-wise, neon signs are leaning toward minimalistic fonts and pastel or soft hues for home settings, while vibrant, multi-color designs dominate gaming and bar environments. The choice depends on how bright or bold you want the effect and the room’s existing décor. Investing in a high-quality LED neon sign with customizable options will ensure you get the right glow and durability needed for your specific purpose.
How LED Neon Signs Work and Differ from Traditional Neon
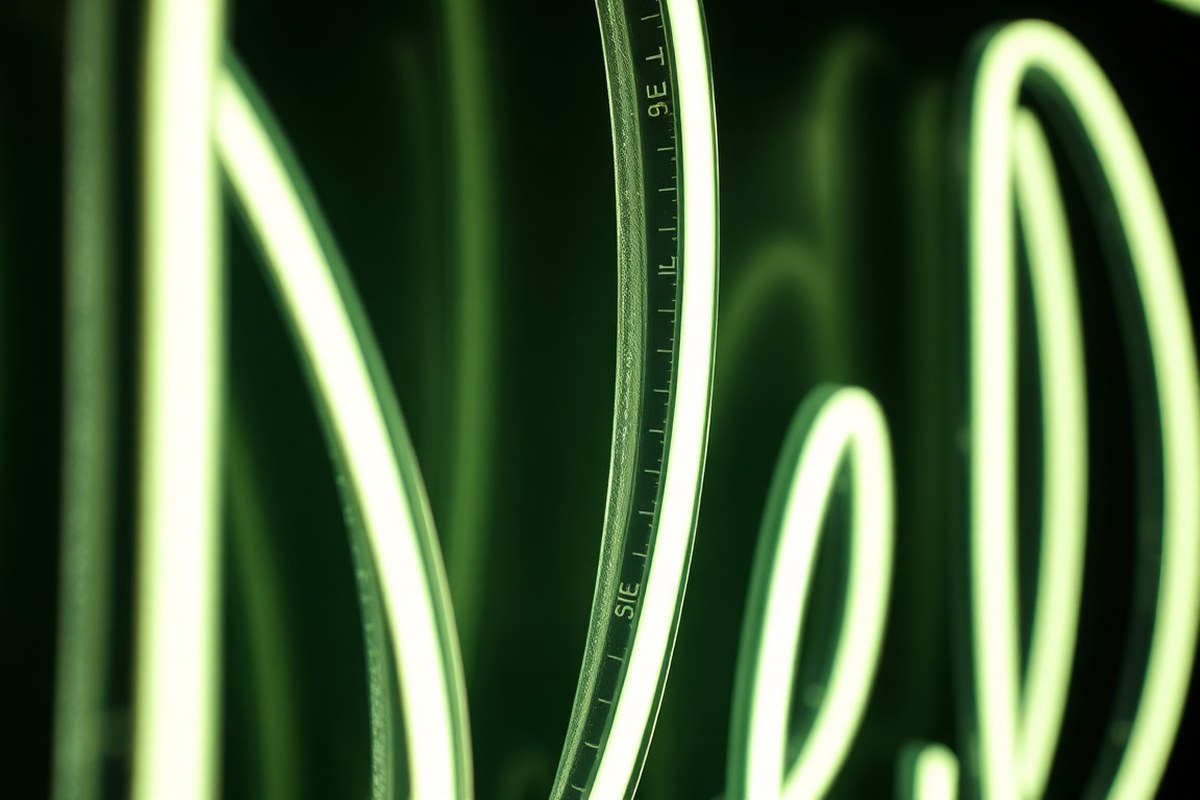
LED neon signs use flexible silicone tubing filled with small light-emitting diodes (LEDs) powered by low-voltage electricity, unlike traditional neon signs that rely on fragile glass tubes filled with noble gases energized by high voltage. This difference in construction makes LED neon signs more durable and safer for everyday use, especially in homes and event spaces where breakage and electrical hazards are a concern. The LED strips stay cool to the touch and are shatterproof, which prevents injuries and property damage. Meanwhile, glass neon requires careful handling and regular maintenance to avoid costly repairs and gas leaks.
In terms of brightness and energy use, LED neon signs offer similar visual impact but consume significantly less electricity. LEDs can be up to 75% to 80% more energy efficient than traditional glass neon lighting. For example, a typical LED neon sign uses around 150 watts, while a comparable glass neon sign consumes approximately 400 watts or more. This translates into lower power bills and a smaller environmental footprint, making LED neon a practical choice for long-term use. The 100,000-hour lifespan of LED signs also means fewer replacements over time, whereas traditional neon tubes may dim faster and require costly refills of noble gases.
The flexibility of LED neon comes from the silicone jacket encasing the LEDs, which can be bent and shaped to create custom designs without breaking. This plastic tubing is weather-resistant and suitable for both indoor and outdoor applications. Designers appreciate the ability to produce intricate shapes, smooth curves, and continuous lines that maintain consistent brightness along the entire sign. Glass neon signs, by contrast, require hand bending and sealing of individual glass tubes, restricting design options and increasing production time and costs.
| Feature | LED Neon Signs | Traditional Glass Neon Signs |
|---|---|---|
| Material | Flexible silicone tubing with LED lights | Fragile glass tubes filled with noble gases |
| Energy Consumption | Approximately 150 watts (up to 80% more efficient) | Around 400 watts or more |
| Lifespan | Up to 100,000 hours | Around 15,000 to 30,000 hours |
| Durability | Shatterproof and weather-resistant | Fragile and prone to breakage |
| Safety | Low-voltage, cool to touch | High voltage, risk of gas leaks and burns |
| Cost (Custom Signs) | Starting around $61 for two letters | Significantly higher due to materials and labor |
Choose LED neon signs with fully rounded or D-shaped silicone jackets to capture the vintage neon look while benefiting from modern durability.
When buying a neon sign for your room, event, or small business, carefully consider how the materials and technology affect safety, costs, and design freedom. LED neon provides a safer, more affordable, and energy-efficient alternative to traditional glass neon, while delivering the bright, customizable aesthetics that suit modern interior decor tastes. Their resilience to weather and breakage also ensures your vibrant signs will stay glowing for years without the hassles associated with glass.
Customizing Your Neon Sign: Designs, Colors & Features
Customizing your neon sign lets you create a piece that fits your style perfectly. Choosing the right fonts, colors, and extra features like dimmers or remote controls can make your sign both functional and attractive. Using digital mockups before ordering helps you see exactly how your design will look in your space.
Picking the Perfect Font and Colors
Fonts and colors define the personality of your neon sign. Select fonts that match your décor and the message you want to convey, for example, cursive fonts with thicker tubing work well for elegant or vintage styles, while block fonts in brighter colors suit modern, eye-catching designs. Acrylic backings or mounting styles may affect the size of letters, so plan for a minimum letter height of 3 to 4 inches for simple fonts and 4 to 5 inches for cursive styles.
Color choice matters for visibility and ambiance. Soft pinks, ice blues, and crisp whites show up well on camera and create a gentle glow indoors. Deep reds or saturated hues can be intense but might appear fuzzy in dim light. Match colors to your existing décor by pulling shades from your room’s paint, furniture, or artwork for a cohesive look.
Popular Features: Dimmers, Multi-Colors, Remote Controls
Features like dimming controls and color-changing options add versatility to your neon sign. A dimmer allows you to reduce brightness down to around 10%, which is perfect for turning your sign into a nightlight or creating a cozy atmosphere. Multi-color gradients can make your sign stand out by blending colors smoothly or highlighting different design parts through a remote control.
Using a remote makes adjusting your sign convenient without needing to unplug or reach behind walls. Some signs also offer battery-powered operation for portable use or when outlet access is limited. Keep in mind that adding these features usually increases the price slightly but can be worth it for customized use.
- Dimming options let you control brightness for different times and moods
- Multi-color gradients add dynamic visual interest
- Remote controls simplify switching colors or settings
- Battery operation improve location flexibility
- Color presets and gradual fades can be programmed
Choose features based on where you plan to use your sign and how often you’d like to change the look.
Backing and Mounting Customization Options
The backing material and mounting style affect both the aesthetics and durability of your neon sign. Common backings include clear acrylic, black or white acrylic, and metal plates. Clear acrylic creates a floating effect on the wall that works well with minimalist décor. Black or white backings add contrast, making colors pop and improving visibility in well-lit rooms.
Mounting kits usually come with screws, hooks, or adhesives suited for drywall, wood, or glass surfaces. For moisture-prone areas like kitchens, moisture-resistant materials prevent damage from steam. Deciding on your backing and mount also impacts installation ease and sign depth, with thicker acrylic adding about ⅓ inch to the overall thickness.
Getting a Realistic Digital Mockup
Reviewing a digital mockup before placing your order helps you avoid costly mistakes. Most custom neon sign makers provide a free mockup within 24 hours after you submit your design details, which may include your preferred fonts, colors, size, and any logos or images you want. Requesting a mockup involves these steps:
- Draft your design using online tools or prepare reference files.
- Submit your request through the company’s website, specifying your requirements and budget.
- Wait for the digital mockup, usually delivered as a photo-realistic image showing how your sign looks on a sample wall or backing.
- Review and request any adjustments before finalizing the order.
This process ensures your sign matches your vision and fits well within your space. Make sure to test your chosen colors on your screen or with a camera preview, as lighting conditions can change their appearance.
Choosing the Right Size and Brightness for Your Neon Sign
Choosing the right size and brightness for your neon sign depends on where you’ll place it and how you want it to look. For a small desk or webcam background, keep the sign no wider than 20 inches so it fits fully within the camera frame without being cut off. A small desk sign can be a simple phrase or icon powered by USB or batteries.
Brightness matters most for evening use or creating the right mood. To avoid harsh lighting that irritates your eyes, set the brightness around 30% when using the sign during video calls. This setting keeps the sign glowing but prevents your face from appearing too dark on camera. For a nightlight, dial the brightness down to 10-20%, producing a soft glow that won’t interfere with your sleep cycle.
Remote controls or smart plugs that come with many modern neon signs make it easy to adjust brightness on the fly. You can quickly dim the sign during meetings or brighten it up for ambiance without getting up. These controls also allow for convenient scheduling or integration with other room lighting.
The height and distance of your neon sign affect its visibility and appeal. Aim to place the sign’s center around 57 to 60 inches above the floor, which matches typical gallery display height. This keeps the sign close to eye level for comfortable viewing. Stainless steel standoffs help hold the sign at least 1.5 inches away from the wall, producing a gentle halo effect around the tubes. This spacing improve depth and gives the light a smoother appearance.
- Choose a sign less than 20 inches wide for webcam backgrounds
- Set brightness around 30% for video calls and 10-20% for nightlights
- Use remote controls or smart plugs to adjust brightness easily
- Mount neon signs 57, 60 inches from the floor for ideal viewing
- Project sign 1.5 inches from the wall to create a halo glow
- Pick battery-powered or USB models for small desks to reduce cords
When brightness is too high in a bedroom or study, it can cause irritation and interfere with focus or sleep. Lower brightness levels help maintain comfort without sacrificing style. Proper planning for size and placement avoids overwhelming the space or making the sign hard to see. Integrating the neon sign with your room’s smart home system through a smart plug or USB power gives you the flexibility to control it alongside your other lighting for the best experience.
Safe and Stylish Installation Methods for Neon Signs
Hanging your neon signs safely and stylishly requires the right hardware and careful installation. Using stainless steel standoffs, suction cups on glass, or ceiling grid mounts creates secure displays while allowing space behind the sign for a halo glow effect. Proper techniques prevent damage to walls or windows and keep electrical wiring safe, even in outdoor settings.
Using Stainless Steel Standoffs for Wall Mounts
Standoffs lift the neon sign a few inches off the wall, creating a halo glow around the edges and aiding air circulation to keep the sign cool. This method works best on drywall or wooden walls and needs heavy-duty drywall anchors to hold the sign’s weight securely. Most neon signs come with metal standoffs and pre-drilled holes for straightforward installation. Follow these steps to mount your sign using standoffs:
- Mark the mounting holes on your wall where the sign will hang, ensuring it is level and centered.
- Drill holes at the marked points using a drill bit sized for your drywall anchors.
- Insert heavy-duty drywall anchors into the drilled holes to provide stable support.
- Screw the stainless steel standoff bases into the anchors, leaving the screws protruding slightly.
- Align the neon sign’s pre-drilled holes with the standoff screws.
- Secure the sign by twisting on the standoff caps over the screws, holding the sign firmly but allowing a gap from the wall.
- Tidy the wiring behind the sign, tacking cables safely out of reach and away from heat sources.
Use rust-resistant standoffs indoors to avoid corrosion that could stain your walls or weaken support over time.
Mounting Signs on Glass with Suction Cups
For signs under 5 pounds, industrial-grade suction cups can securely attach neon signs to smooth glass surfaces like windows or glass doors. This avoids drilling holes and lets you position your sign for natural light exposure, improving the halo glow. However, signs weighing more than 5 pounds should not use suction cups as they risk falling and damage.
Choose suction cups designed for glass, preferably with clear cables or hooks if your sign has a hanging chain kit for additional support. Clean the glass thoroughly to improve suction before attaching the sign.
Ceiling Grid Hanging Techniques
Hanging neon signs from a ceiling grid works well for event spaces or rooms with drop ceilings. Using the ceiling’s structural grid provides a secure anchor point and lets you suspend signs where they catch light and attention. A hanging chain kit or clear cables often come with the sign for easy installation. Here is how to safely hang your sign from ceiling grids:
- Locate strong sections of the structural grid near your desired sign position, preferably close to a window or light source.
- Attach the hanging chain kit or cables securely around the grid framing.
- Hook or clip the neon sign loops onto the chain or cables, ensuring the weight is evenly distributed.
- Adjust the height of the sign so it is visible but does not obstruct movement or violate ceiling clearance.
- Secure and tuck any electrical wiring along ceiling edges or through cable covers to avoid sagging or tangling.
Avoid hanging heavier signs over high-traffic areas to reduce risks if mounting hardware loosens.
Outdoor Installation Tips and Precautions
Outdoor neon signs must withstand weather exposure, so use signs with an IP67 waterproof rating or better. Mount them using rust-proof exterior screws and metal standoffs to prevent corrosion. Wooden fences or exterior walls can serve as mounting surfaces if properly prepared with waterproof sealants to avoid moisture damage.
Before installation, confirm the sign’s power source is protected from rain and UV rays, perhaps with a weatherproof electrical box. Outdoor signs also benefit from dimmer controls to reduce glare at night. To mount an outdoor sign:
- Choose a location with shelter from direct rain or install a canopy above the sign.
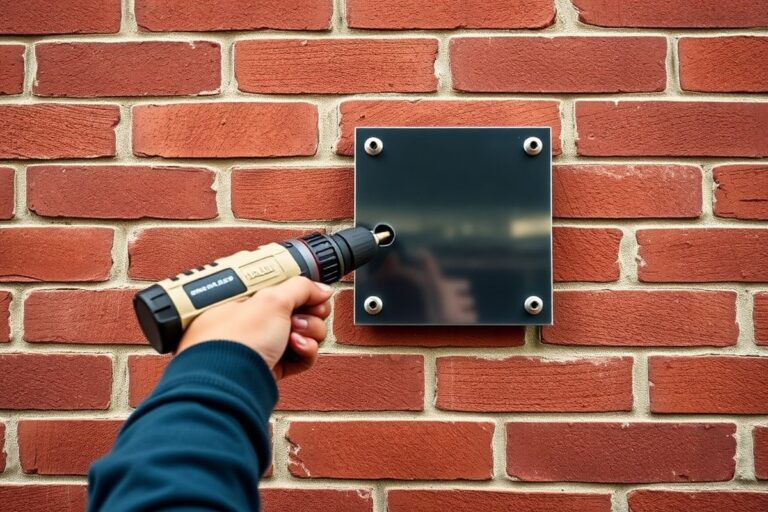
- Drill pilot holes in exterior wall or fence at marked positions, using a rust-proof bit.
- Insert rust-resistant anchors or plugs suitable for masonry or wood.
- Secure standoff screws into the anchors, then mount the sign using the standoff caps.
- Seal around mounting holes with exterior-grade silicone to prevent water ingress.
- Protect the wiring with outdoor-rated conduits and fasten it safely along the wall.
Never install outdoor neon signs without checking their IP rating and using corrosion-resistant hardware to ensure durability.
Estimating Costs and Lifespan of Custom Neon Signs
Custom neon sign pricing depends largely on the number of letters or inches, the backing material, size, and any additional features like extra colors or special fonts. Typically, the cost per letter for a custom LED neon sign ranges from $50 to $100, and prices can also be calculated per inch, often between $15 and $30 per inch. Adding a clear acrylic backing generally increases the price by $50 to $100, depending on size. Extra colors or more complex designs may add $20 to $50 per color or design element. Consider a typical custom neon text sign for a bedroom wall, such as a phrase with 10 letters mounted on a clear acrylic backing. When the average cost per letter is $75 and the backing adds $75, the base price might be:
- 10 letters × $75 = $750
- Backing cost = $75
- Total estimated cost = $825
Adding a second color could add another $30, bringing the total to around $855. Size matters, too. A small sign under 12 inches might cost less per inch, but larger signs require more LED strips and power, increasing costs accordingly. You’ll often see prices scale up with size and complexity, so deciding on the size and features upfront can help manage your budget.
LED neon signs use LED strips crafted into shapes that mimic traditional neon glass tubing but are energy efficient and more durable. Their lifespan is a major selling point. A high-quality LED neon sign can last between 40,000 and 50,000 hours with continuous use. Running the sign 24 hours a day, every day, totals 5 to 6 years before you notice significant dimming or failure. Some premium LED neon products can even last up to 100,000 hours under ideal conditions, though typical consumer use usually falls within the 40,000 to 50,000-hour range.
Manufacturers often back these products with warranties covering 1 to 2 years. A standard 2-year warranty usually includes coverage for defects in materials and workmanship, providing peace of mind during the initial use period. Extended warranties may be available depending on the vendor or sign type.
| Cost Factor | Typical Price Range | Notes |
|---|---|---|
| Cost per letter | $50, $100 | Depends on font complexity and size |
| Cost per inch | $15, $30 | Used for signs measured by length |
| Acrylic backing | $50, $100 | Clear or colored backing adds support and style |
| Extra colors | $20, $50 per color | Multiple colors increase manufacturing complexity |
| LED neon lifespan | 40,000, 50,000 hours | 5, 6 years continuous use, longer with intermittent use |
| Warranty period | 1, 2 years | Typically covers defects, varies by manufacturer |
Planning your sign with these cost factors in mind ensures you won’t face surprises on the final price. Longer or more intricate signs naturally cost more upfront but offer years of durable, energy-efficient lighting. Keep the warranty terms handy in case anything needs repair or replacement during the first couple of years of use.
Maintaining and Troubleshooting Neon Signs
Keeping your neon sign clean and functional starts with regular, gentle care. Use a dry microfiber cloth to wipe the surface and remove dust or airborne oils, especially in kitchens where cooking vapors can dull the glow. Avoid water or cleaning sprays, as moisture can cause flickering or damage the electrical components. For LED neon signs, this simple routine can extend their vibrant look for years without the need for harsh chemicals.
Check the power source first when your neon sign flickers or dims. Testing it during light rain while plugged into a GFCI outlet helps identify issues caused by moisture. Ensure all plug connections are tight and dry. Flickering often indicates a loose wire or a problem with the transformer. Dim lighting could result from voltage drop or ageing components, and replacing the power supply may restore brightness.
Minor issues such as loose cables or connector problems can sometimes be fixed yourself by carefully unplugging all cords and reconnecting them firmly. LED neon flex tubes, however, are more delicate. A common fix for a dead section or damaged LED strip part involves sending the sign back to the manufacturer for a full strip replacement, which helps keep your design intact but can cost between $50 and $150 based on size and complexity. A basic maintenance checklist will help maintain your neon sign’s longevity and performance:
- Dust gently with a dry microfiber cloth weekly
- Inspect power cords and plugs for fraying or looseness monthly
- Test operation during different conditions, including light rain, to detect moisture problems
- Keep sign away from direct water exposure or high humidity areas
- Turn sign off when not in use to reduce electrical wear
- Have a professional inspect or repair electrical and transformer issues annually
Calling a professional is advised when you notice persistent flickering, signs of burning smell, cracked tubes, or when parts of the neon or LED components seem physically damaged. Licensed electricians or neon specialists can safely handle repairs involving high voltage or delicate manufacturing parts. Attempting to fix complex issues yourself risks voiding warranties and causing further damage.
DIY Neon Sign Creation: What to Expect and How to Start
Creating your own LED neon sign at home involves gathering the right materials, following clear assembly steps, and taking important safety measures. Expect to spend several hours on the project depending on the complexity of your design. DIY signs often look impressive and allow you to customize colors and shapes, but they may lack the perfect finish of professionally made signs.
Gathering Materials and Tools
Start by obtaining a DIY LED neon sign kit designed for beginners. These kits usually include flexible LED neon tubing made of shatterproof silicone, a low-voltage 12V power supply, mounting backer board, wire connectors, and installation hardware. You’ll also need some basic tools at home: a wire stripper, scissors, a hot glue gun, a ruler or tape measure, and possibly a soldering iron if your kit requires it.
Choose kits with clear instructions and customizable lengths; prices range from $30 to over $100 depending on size and complexity. Keep in mind silicone neon flex tubing is flexible but doesn’t stretch, so accurate measurements matter for clean curves and angles.
Step-by-Step Assembly Process
Assembling the sign carefully by following these steps helps ensure your finished product looks neat and functions safely:
- Plan and sketch your design on paper or software, making note of measurements.
- Cut the silicone neon flex tubing to the lengths matching your design sections.
- Arrange the tubing on the backer board, securing ends and curves with clips or hot glue, avoiding tight bends.
- Strip wire ends and connect them to the LED controller or power supply terminals, double-checking polarity.
- Mount the power supply in an accessible, ventilated area behind the sign or nearby wall.
- Test the sign by plugging in the power supply; ensure all sections light evenly.
- Attach mounting hardware to hang the sign securely where desired.
Take your time with wiring connections; reversing polarity or loose contacts can prevent your sign from lighting or cause damage.
Safety Tips for Electrical Components
LED neon signs run on low voltage (around 12V), making them safer than traditional neon signs that use high-voltage transformers. However, you should still follow safety precautions while assembling and installing:
- Always unplug the power supply before handling wires or connections.
- Use insulated tools and avoid working with wet hands to prevent shocks.
- Check that wires and connectors are rated for your sign’s voltage and current.
- Avoid sharp bends or crushing tubing to prevent wiring damage inside.
- Place the power supply away from flammable materials and provide ventilation to avoid overheating.
Wearing safety glasses and gloves adds protection when cutting tubing or soldering wires. Following the kit’s instructions and local electrical guidelines minimizes risks and helps your sign last longer.
Step-by-Step Action Plan for Getting Your Perfect Neon Sign
Follow these steps to find, order, or create a neon sign that fits your space and style. Each phase helps you move closer to a sign that looks great and works well.
- Day 1: Measure your room or event space to determine the ideal sign size. Confirm your measurements by using a tape measure and visualising where the sign will hang.
- Day 2: Choose your sign type, traditional neon or LED neon, based on your budget, brightness needs, and maintenance preferences. Know your choice is right if it meets your lighting and energy goals.
- Week 1: Sketch or select your design, color, and font options. Verify your design by previewing mock-ups or using online customization tools.
- Week 2: Compare quotes from sign makers or prepare materials for your DIY project. Ensure the quotes fit your budget or that your materials list is complete.
- Week 3: Place your order or start your DIY build following safety guidelines. Check your order confirmation or have all tools ready to proceed.
- Week 4: Install your sign using secure mounting hardware and follow electrical safety rules. Confirm it’s stable and lights up correctly.
- After 1 month: Perform maintenance checks, such as cleaning and inspecting wiring. Your sign is ready for ongoing enjoyment if it shines consistently without issues.
Frequently Asked Questions
What Are Some Unique Neon Sign Ideas for a Coffee Station at Home?
Unique neon sign ideas for a home coffee station include phrases like “But first, coffee” or a steaming cup design, adding charm and personality to your kitchen space. Choose colors that match your kitchen decor to improve the overall aesthetic.
How Can I Create a Cozy Neon Nightlight Effect with My Sign?
Set your neon sign brightness to 10-20% during the evening for a warm nightlight effect that won’t disturb your sleep cycle. Operating the sign with a remote control at low brightness makes it comforting and easy to adjust.
What Size Neon Sign Works Best as a Webcam Background?
A neon sign no wider than 20 inches fits well within most webcam frames without being cut off. This size allows the sign to be a bright, attractive part of your background without overpowering your video image.
How Far Should I Mount My Neon Sign from the Wall for a Halo Glow?
Position your neon sign using stainless steel standoffs set at least 1.5 inches away from the wall to produce a glowing halo effect behind the tubes. This gap improve depth and makes the illuminated sign more eye-catching.
Are There Weight Limits for Hanging a Neon Sign on Glass Windows?
Signs weighing under 5 pounds can be hung on glass using industrial-grade suction cups for a clean, temporary installation. Heavier signs may require ceiling mounts or wall brackets for safety and stability.
What Are Some Popular Motivational Quote Neon Sign Ideas?
Motivational neon sign ideas include short phrases like “Dream Big” or “Be Brave” that inspire daily positivity. Customizing fonts and colors helps match your personal space or business vibe while making the message stand out.
Wrapping Up
A well-chosen neon or LED neon sign can transform your space with personality and light. Decide on your sign’s location and style now, and start browsing designs that speak to you. Taking action today brings you closer to lighting up your room or event just the way you want.