Porch Sign Ideas for Front Doors: 12 Creative Ways to Welcome Guests
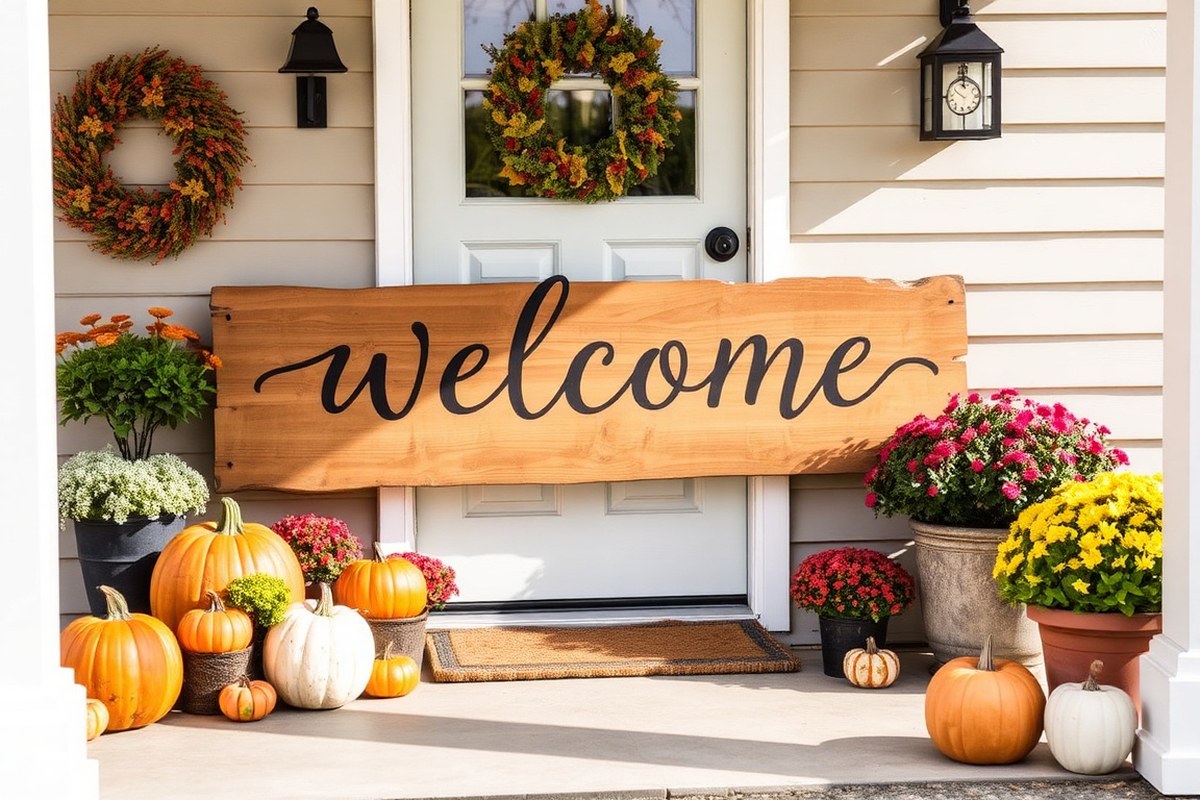
Porch sign ideas can transform your entryway from plain to welcoming in minutes. Choose creative designs and materials that match your style and season. Start by selecting a size that fits your porch and ensures visibility to guests and passersby.
Key Takeaways
- Opt for porch signs sized between 24 and 36 inches wide for street visibility and balance with your porch’s dimensions.
- Use reclaimed wood to add unique, weathered character and eco-friendly appeal to your porch sign.
- Select solid wood for durability and safety, especially for signs exposed to outdoor elements.
- Consider a 4-foot-tall sign to create a warm, inviting presence at your front door.
- Keep signs around 13 x 13 inches if hanging directly on the door or in smaller spaces like a deck or backyard.
- Incorporate seasonal or holiday elements for year-round charm and easy updates to your porch décor.
1. 12 Creative Porch Sign Ideas to Brighten Your Entryway
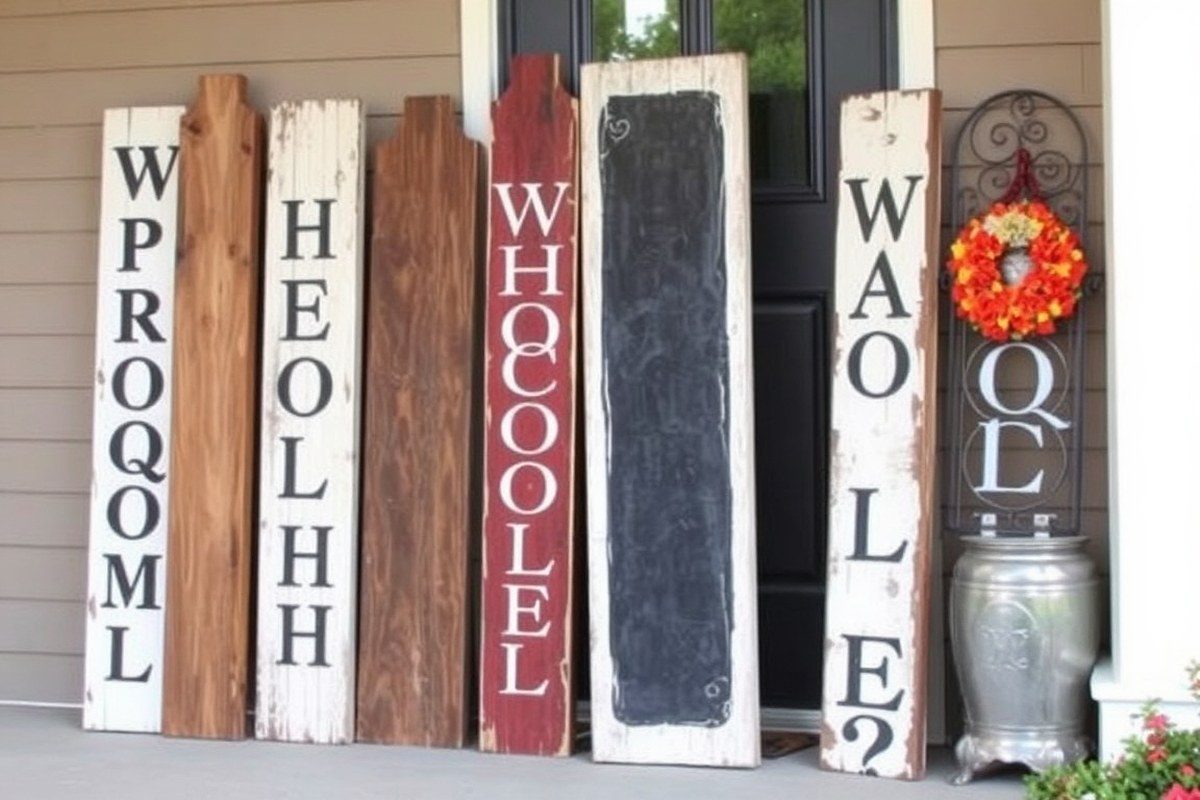
Porch signs come in a wide range of styles and themes that can brighten up your entryway while reflecting your personality. Popular styles include rustic farmhouse signs made from reclaimed wood, which add a heartwarming and weathered character to your porch. These often measure around 4 feet tall to create an inviting focal point visible from the street. Eco-friendly solid wood signs about 13 by 13 inches are also common for smaller spaces like front doors or backyards.
Creative porch sign themes range from simple welcome messages to more personalized or seasonal designs. Chalkboard signs stand out as a versatile and cost-effective option, allowing you to change your message or artwork whenever you like. Floral and nature motifs, including hand-painted flowers and leaves, suit cozy cottage vibes, while sleek, modern letter styles work well for minimalistic décor.
- Seasonal signs featuring autumn leaves, winter snowflakes, or spring flowers for year-round charm
- Family names or established date signs to add a personalized touch
- Inspirational quotes or warm greetings to welcome guests
- Rustic farmhouse signs with distressed finishes and classic lettering
- Chalkboard signs that can be updated regularly with different messages or drawings
- Decorative signs combined with functional elements like built-in potting shelves
- Brightly painted signs with bold colors for a cheerful and modern look
Choosing the right size and materials improve your porch sign’s appeal and durability. Signs around 24 to 36 inches wide are ideal for most porch spaces, ensuring your message is easy to read from the street. Using solid wood is both safe and durable, catering to outdoor conditions while providing a natural look. Crafting your own sign allows you to customize colors, fonts, and details for a truly unique entryway accent. Taking time to plan your design and picking a theme that suits your home’s style will make your porch feel more inviting to visitors.
2. Choosing the Best Materials for Durable Porch Signs
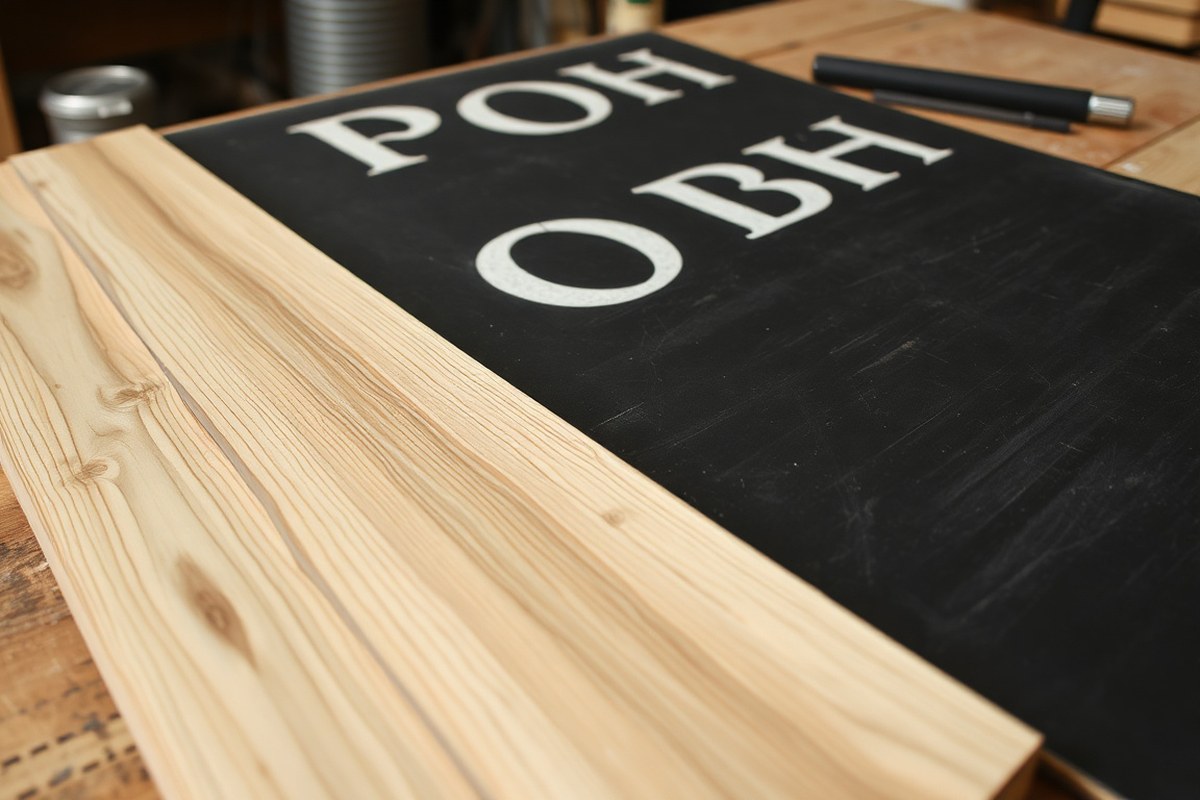
Choosing the right materials for porch signs affects how well they hold up outdoors and how they complement your home’s style. Wood, metal, chalkboard, and reclaimed materials all offer different benefits. Wood provides warmth and can be customized easily but needs weatherproofing. Metal signs offer durability and a sleek look but can get hot in sun and may rust if untreated. Chalkboard signs let you change messages often but require protection from rain and sun. Reclaimed wood brings rustic charm and unique texture but varies in condition and may need extra sealing.
Consider the climate where you live and how much maintenance you want. Wood signs made from cedar or similarly durable woods resist rot and insects better. Metal signs often use aluminum or coated steel to avoid rust. Chalkboard signs should have a sealed surface and ideally be covered when not in use. Reclaimed wood adds character and is eco-friendly; just prepare for potentially uneven surfaces and nail holes that add to the aesthetic.
| Material | Durability Outdoors | Visual Style | Maintenance | Cost Range | Eco-Friendly? |
|---|---|---|---|---|---|
| Wood (cedar, pine) | Resistant to rot with sealant, lasts 3-5 years untreated | Warm, classic, customizable with paint or vinyl | Needs annual sealing or paint touch-ups | $20-$50 per sign | Moderate, depends on sourcing |
| Metal (aluminum, coated steel) | Highly durable, resists rust if coated | Sleek, modern, versatile color options | Low, check coating every few years; may heat up in sun | $30-$80 per sign | Variable, often recyclable |
| Chalkboard | Low unless sealed and protected from rain | Casual, changeable messages, rustic or modern | Must be covered or brought inside during wet weather | $15-$40 | Good, reusable surface |
| Reclaimed Wood | Good with proper sealing; may be unstable if untreated | Rustic, unique, historic textures | Sealing needed to prevent decay | $10-$40 (material cost often low or free) | Excellent, eco-friendly reuse of materials |
Wood surfaces require sanding before painting or sealing to ensure paint adheres well. Applying an outdoor polyurethane finish or marine-grade varnish extends the lifespan of woods significantly. Metal signs often come pre-coated but may benefit from additional rust-preventive sprays, especially if mounted in moist environments. Chalkboard signs should use weatherproof chalk markers for longevity and be shielded from direct exposure. Reclaimed wood may contain nails or splinters; remove these before finishing.
Protect wooden and chalkboard signs with a clear, weatherproof sealant and cover them during heavy rain to prevent premature wear.
Choosing eco-friendly options like reclaimed wood or reusable chalkboard surfaces helps reduce waste and adds character to your porch. Wood and metal both can suit various styles, from rustic to contemporary, so think about what complements your porch and how much upkeep you want over time. Materials like cedar wood and coated metals give you balance between look and durability for a sign that lasts through seasons.
3. Ideal Porch Sign Sizes for Maximum Visibility
The ideal porch sign size balances visibility from the street and the scale of your porch. A good rule of thumb is a sign between 18 to 24 inches wide and 12 to 18 inches high for most average porches. Adjust the size based on how far the sign needs to be seen and how much space you have on your porch to keep it prominent yet proportional.
Finding the Right Sign Dimensions for Street Visibility
Visibility largely depends on both the size of letters and the overall sign size. For clear reading from 20 to 30 feet away, choose letters at least 3 to 4 inches tall. This typically requires a sign roughly 18 to 24 inches wide and 12 to 18 inches high. Larger signs or taller letters help in cases where the house sits far from the road or the street speed is higher. Narrower signs with smaller letters tend to get lost from distance.
Consider the width of your porch or the wall space available. On a narrow porch, a 24-inch wide sign might overwhelm the space, while a tiny sign on a wider porch could seem out of place. Ideally, your sign’s width should take up about one-third to one-half of the horizontal porch wall or railing space. For instance, if your porch is 72 inches wide, a 24-inch sign fills a comfortable visual chunk without overcrowding.
Adjusting Sign Size for Porch Dimensions
Smaller porches call for smaller signs, especially if your porch walls or entryway are under 48 inches wide. A sign closer to 12 by 8 inches won’t overpower the space. In contrast, porches 72 inches or wider handle signs up to 30 by 20 inches without looking cramped.
Think about the height of your porch walls or railing too. A sign that’s too tall compared to the porch height can disrupt the balance. For example, a 20-inch tall sign is fine if your porch railing or wall is at least 36 inches tall. On lower porch walls, keep signs under 15 inches tall to maintain good proportion.
Checklist for Sizing Your Porch Sign
Start with measuring the visible space on your porch where the sign will hang or stand. Then evaluate how far away from the street viewers will be. Next, decide on a letter height for readability, 3 to 4 inches for clear street visibility.
Choose a sign width that fills roughly 30 to 50% of your porch’s horizontal space. Match the sign height to your porch height so it doesn’t look too big or too small. For example, if your porch wall is 60 inches wide and 36 inches tall, aim for a sign about 20 inches wide by 15 inches tall with letters about 4 inches high.
Finally, consider material thickness and mounting method. Sturdy wood or weatherproof board around ¾ inch thick works well to keep your sign rigid and visible without excessive bulk.
Costs and Materials Impacting Sign Size Choices
Wooden porch signs typically cost between $10 and $30 to make depending on size and wood type. Larger signs require more wood, paint, and possibly stronger mounting hardware, increasing costs slightly. For DIY, extra-large signs may be harder to handle and finish nicely without warping or stains.
If you want a lightweight option, consider foam boards or PVC signs, which can be made bigger but remain easy to hang. Weather resistance also affects size decisions; thicker wood resists warping better in rain and sun but adds weight and cost. Balance your budget and porch space when choosing your sign size and material.
Common Size Mistakes and How to Avoid Them
One common mistake is choosing a sign too small to read comfortably from the street. This often happens with overly decorative or intricate designs that reduce letter readability. Stick to clear, bold lettering at 3 to 4 inches tall to prevent that problem.
Another issue is oversized signs that crowd or overwhelm a small porch. Oversized signs can block doorways or look awkward beside porch furniture. Always measure your porch space first and keep to the proportional guidelines, don’t assume bigger is always better.
Signs that are too heavy or flimsy for the mounting area often get damaged. Make sure your sign size fits the mounting hardware or stands easily without tipping or bending. Proper size plus solid mounting ensures your porch sign lasts and stays visible year-round.
4. Step-by-Step Guide to DIY Wooden Porch Signs
Making a wooden porch sign involves choosing the right wood, preparing it properly, and applying lettering that suits your style. The process is manageable with a few basic tools and some patience. Following step-by-step instructions ensures a sturdy, attractive sign perfect for your porch.
Selecting the Right Wood and Tools
Start by choosing wood that suits outdoor use, such as cedar, pine, or reclaimed barn wood. Cedar is naturally weather-resistant and costs about $10 to $20 for a 1-inch thick board measuring 12 by 24 inches. You will need basic tools like sandpaper (80 and 220 grit), a pencil, stencils or painter’s tape, acrylic paint or outdoor wood stain, paintbrushes, and optionally, wood sealer.
Other helpful tools include a sanding block for even sanding, a ruler or measuring tape for accurate sizing, and a cloth to wipe dust off the wood before painting. For lettering, you can either use stencils available at craft stores or create a simple template printed from your computer. Gather all materials before starting to avoid interruptions.
Preparing and Painting the Wood Surface
Preparation is key to a smooth finish and durability. Begin by sanding the wood with coarse 80-grit sandpaper to remove splinters and then smooth it with 220-grit sandpaper. Wipe off dust with a damp cloth and let the wood dry completely. Painting on a clean, dry surface prevents peeling and ensures the paint adheres well.
Apply one to two coats of outdoor wood paint or stain, allowing each coat to dry for at least 2 hours, depending on the product instructions. Use light, even strokes to avoid drips and runs. If your wood is untreated, finish with a clear wood sealer to protect against moisture, extending your sign’s life.
Adding Letters with Stencils or Freehand
Lettering adds personality and message clarity to your sign. Position your stencil or lightly sketch your letters with a pencil. Use painter’s tape to secure stencils and prevent slipping. Paint letters using a small, firm brush or foam brush for clean edges. Acrylic paint designed for outdoor use typically dries within 30 to 60 minutes.
For freehand lettering, choose a brush with a fine tip and practice on scrap wood to gain confidence. Avoid applying too much paint at once, which can cause drips. Allow the paint to dry fully before handling the sign to prevent smudges and damage.
- Choose weather-resistant wood such as cedar or pine, cut to your desired sign size.
- Sand the wood starting with 80-grit paper, then smooth with 220-grit; wipe clean.
- Apply one or two coats of outdoor paint or stain, letting each coat dry for at least 2 hours.
- Seal the wood with a clear outdoor sealer if it is untreated for extra protection.
- Use stencils or pencil to lightly mark letters, then paint them with a fine brush.
- Allow painted letters to dry completely, typically 30-60 minutes.
- Optionally, apply a clear coat over the entire sign for added durability.
- Attach mounting hardware suitable for your porch, like hooks or brackets.
5. Customizing Porch Signs for Seasons and Holidays
Customizing porch signs to match different seasons and holidays keeps your entryway fresh and inviting without the need to buy a new sign for every occasion. Using interchangeable elements like removable letters, attachable decorations, or slots for seasonal panels allows you to switch themes quickly and easily. This approach saves money and storage space while maintaining a personalized feel year-round.
To update your porch sign for fall, use rustic colors such as burnt orange, deep reds, and browns. Attach wooden pumpkins, autumn leaves, or harvest motifs like corn stalks. For winter, swap in evergreen wreaths, snowflake decals, or holiday greetings written in festive fonts. Spring updates might include pastel colors, floral cutouts, or messages like “Bloom Where You Are Planted.” Summer designs work best with bright colors and tropical themes, featuring flamingos, sunshine, or beach elements. Here are practical ideas for seasonal customization:
- Use Velcro or small hooks to attach seasonal cutouts or small wreaths directly to your sign
- Create a base sign with interchangeable letters or panels spelling out greetings or themes
- Incorporate mason jars as holders for flowers or twinkle lights that change with the season
- Paint your base sign in neutral colors so seasonal accents stand out
- Combine fonts and textures, such as script for holidays and block letters for general greetings
- Store seasonal elements in a labeled box to keep them organized and protect them from weather damage
- Consider lightweight materials for decorations to avoid damage in windy conditions
Using a reusable base sign setup with attachable décor elements can cost from $20 to $60, depending on materials and how elaborate your decorations are. Good results show in smooth transitions between seasons without damage to the sign. Your porch will always look fresh without last-minute rushes to change décor. Avoid permanent glue or paint on seasonal pieces to keep them easy to swap and preserve their condition.
Choose weather-resistant materials and keep your porch sign in the shade during peak summer heat to prevent fading and warping.
Reusable porch signs also reduce waste and make decorating enjoyable rather than a chore. By planning ahead and investing in versatile components, you can celebrate every season and holiday with minimal effort and maximum curb appeal.
6. Lettering Techniques: Paint, Stencils, and Vinyl Decals
Choosing the right lettering technique for your porch sign depends on your skill level, weather exposure, and the look you want. Paint offers durability and authentic charm, especially for a farmhouse-style sign. Stencils help you achieve precise lettering with less skill, while vinyl decals provide a quick, clean option for modern designs.
Painting your sign involves selecting outdoor-grade acrylic or latex paint. Use brushes or foam rollers for smooth coverage. Hand-painting can create a vintage feel, but steady hands are essential to avoid uneven edges. For best results, prime the wood first and apply a clear, waterproof sealant once dry to protect the paint from rain and sun. Expect to spend $5 to $15 on quality paint and sealant.
Stencil lettering simplifies the process by guiding consistent letter shapes and spacing. Secure the stencil to your sign with painter’s tape or temporary adhesive sprayer. Use a small stencil brush or foam pouncer to dab paint gently, avoiding drips or bleeds under the stencil edges. Good stencils have clear, connected letters to prevent paint gaps. Essential Stencils offers designs that work well for rustic and seasonal porch signs. Dry time is about 1 to 2 hours before applying a waterproof finish. Stenciling is budget-friendly, generally under $10 for materials.
Vinyl decals are cut from durable adhesive sheets using tools like the Silhouette Cameo. They stick directly to your sign surface without needing paint or dry time. These decals resist fading and peeling in typical weather but may be less durable against extreme sun or moisture over several years. They are perfect for simple messages like “hello” and require only cleaning the surface and careful application to avoid bubbles. Decals cost between $10 and $30 depending on size and design complexity.
| Technique | Durability Outdoors | Skill Level | Cost Range | Time to Complete | Best Use |
|---|---|---|---|---|---|
| Paint | High (with sealant) | Intermediate | $5, $15 | Several hours (including drying) | Farmhouse, rustic, vintage styles |
| Stencils | High (with finish) | Beginner to intermediate | Under $10 | 1, 2 hours (drying time) | Precise letters, seasonal signs |
| Vinyl Decals | Moderate to high | Beginner | $10, $30 | Less than 30 minutes | Modern, clean designs |
Stenciling effectively involves cleaning your sign surface, aligning the stencil carefully, and using light dabbing motions with your brush to prevent paint bleeding. Allow the paint to dry fully before removing the stencil to avoid smudging. Use multiple light coats for color saturation rather than one heavy coat.
Vinyl decals offer instant personality and require little maintenance. Press firmly from the centre outward during application to release air bubbles. They work best on smooth, clean surfaces and may not stick well to rough or peeling wood. For longer outdoor use, paint and sealant remain a more durable choice.
7. Creating Reversible and Interchangeable Porch Signs
Building a reversible or interchangeable porch sign lets you switch messages or designs without making a new sign each time. Using the right materials and hardware makes updating your porch display simple and fast. You can create one sturdy base with panels or inserts that hold different seasonal or themed signs, giving your porch a fresh look all year round.
Choosing a Stable Base and Frame
The first step is selecting a solid foundation that can support reversible or interchangeable panels. Materials like sturdy wood or a metal frame work well because they can hold weight and resist weather. A base around 18 to 24 inches wide and 12 to 18 inches tall fits most porch spaces without overwhelming the area.
Look for frames with smooth edges that can hold panels securely but allow easy removal. If your porch has a railing, you could design a long horizontal frame to hang along it for extra display space. To ensure durability, use weather-resistant wood treated with sealant or powder-coated metal to avoid rust and rot.
Attaching Reversible Panels or Inserts
Reversible signs typically use two panels fixed back to back or sliding inserts that you can swap out. Using removable hooks or clips on the frame allows you to take off one panel and replace it with another depending on the season or occasion. This setup prevents the hassle of uninstalling screws or nails every time you want to update the sign.
For sliding inserts, design grooves or tracks into the frame where panels slide in and out. Each panel should be lightweight, no more than 2 pounds, made from plywood or foam board with your chosen lettering or graphics. Paint panels with weather-resistant paint to keep colors vibrant despite rain or sun. Here is a basic step-by-step for assembling reversible or interchangeable panels:
- Cut two plywood panels the same size, about 12 by 18 inches.
- Paint or decorate each panel with your designs, letting them dry completely.
- Use removable adhesive hooks or clips spaced evenly on the back of each panel.
- Attach matching hooks or clips to the frame where panels will hang.
- For sliding inserts, install thin wood strips or metal channels along frame edges to hold panels in place.
- Hang or slide the first panel onto the frame securely.
- Store the alternate panel in a dry place until it’s time to switch.
Adding Seasonal Decorative Hooks or Clips
Adding removable hooks above or around the base sign gives you more decorating freedom with seasonal wreaths, garlands, or smaller signs. Choose rust-resistant hooks designed for outdoor use, typically costing around $5 to $10 for a set of four. Position hooks so you can hang items without covering your main message.
Brackets with removable hooks make seasonal swaps easy and prevent damage to the sign or porch surface. You might place a wreath frame around the sign and hang interchangeable message panels inside it to combine greenery with words. This creates a versatile and layered display that celebrates holidays, seasons, or special events without rebuilding your sign.
8. Weatherproofing and Maintenance Tips for Porches
Protecting your porch sign from sun, rain, and seasonal wear helps keep it looking fresh and attractive for years. Wood and painted surfaces are especially vulnerable to fading, warping, and moisture damage if left untreated. Applying a weatherproof coating creates a barrier that blocks UV rays and repels water, preventing these common issues.
To weatherproof a wooden porch sign, begin by sanding it smooth and wiping away any dust. Select a UV-resistant outdoor paint or stain designed for exterior use. Once dry, apply a clear protective sealant such as spar urethane, marine varnish, or an acrylic outdoor clear coat. These sealants cost between $10 and $30 per quart and generally cover 200 to 300 square feet. Two or three thin coats applied with a clean brush work best, with light sanding between coats to ensure good adhesion.
Signs made from materials like metal or plastic still benefit from a protective clear coat, though choose one compatible with the base material. For example, a clear enamel spray designed for metal can prevent rust and fading, while UV-protective sprays can extend the life of plastic signs. Avoid sealants that can cause discoloration or cloudiness.
Maintenance is equally important. Clean your porch sign every few months using a mild soap and water solution and a soft cloth to remove dirt, pollen, and mildew. Avoid harsh cleaners that could strip coatings. After cleaning, inspect the sign for any peeling paint or scratches where moisture could seep in. Touch up these spots promptly with paint and a fresh layer of sealant to maintain protection.
Seasonal changes and extreme weather can accelerate wear, so consider bringing delicate or heavily decorated signs indoors during harsh winters or intense summers. If your porch sign features interchangeable parts or seasonal inserts, rotate and store them properly to extend their life and keep your decor looking intentional year-round.
Use thin, even coats when applying sealants and allow full drying time between each to prevent bubbling and peeling later on.
9. Budget-Friendly Porch Sign Projects Under $20
Creating an attractive porch sign doesn’t have to break the bank. You can design charming, eye-catching signs for under $20 by using recycled materials or low-cost supplies. The key is to repurpose items you already have or find inexpensive bases like scrap wood, cardboard, or old shutters. These materials offer a sturdy surface for paint or vinyl decals. Using leftover paint from other projects or buying small sample pots can keep costs down. Simple lettering done with stencils and acrylic paint costs just a few dollars and gives clean results, even for beginners.
Quick projects for beginners often involve minimal tools and straightforward techniques like stencil painting or attaching pre-cut vinyl letters. Starting with a small wooden plaque or even a reclaimed piece of pallet wood makes the process less intimidating, and it’s easy to finish in a couple of hours. Weatherproof your sign with an inexpensive clear polyurethane spray to keep it looking fresh. Keeping dimensions modest, around 12 by 18 inches, saves money and uses less material while remaining visible on most porches. Here are some budget-friendly porch sign ideas including material reuse and quick DIY tips:
- Repurpose an old shutter: sand, paint, and stencil a welcome message.
- Create a sign from scrap wood or pallet boards, combining several pieces for a rustic look.
- Use a large piece of cardboard as a temporary seasonal sign, decorated with paint or markers.
- Turn a baking sheet or metal tray into a sign by painting or applying vinyl decals.
- Frame a piece of leftover fabric with ribbon or twine and add a painted or stitched message.
- Cut letters from reclaimed wood scraps and glue them onto a painted base board.
- Apply stencils over a simple piece of plywood using leftover acrylic paint for a clean look.
For these projects, sand the base material lightly to help paint stick better. Acrylic paint is affordable and dries quickly, usually in 30 minutes to an hour, which speeds up the process. When stenciling, secure the stencil with painter’s tape and use a sponge or foam brush with dab-and-lift pressure to avoid paint bleeding. Clarify the message with a brief welcoming phrase like “Hello Sunshine” or “Home Sweet Home” to keep it joyful and inviting.
Signs made from reused materials may need a couple of coats of paint or sealant applied outdoors to resist weather damage. Budget signs generally show minor wear faster than pricier, professionally made signs but can easily be refreshed with a touch-up of paint each season. Avoid complex carved letters or expensive finishes in these projects to stay within budget and avoid extra tools or skills. Using what you already have allows you to create something unique without extra expense.
10. Creative Ways to Add Personality and Family Touch
Personalizing a porch sign starts with incorporating elements that reflect your family identity and style. Using your family name followed by “Established [Year]” is a popular format that adds both charm and a sense of history to your welcome sign. This format not only makes your porch unique but also creates a warm introduction for visitors. Including your house numbers directly on the sign increases practicality while maintaining an inviting look. You can highlight these numbers in various materials, such as metal or wood, or even add illumination for nighttime visibility.
Lettering style significantly influences the character of your porch sign. Choosing fonts that match your home’s architecture or your personal taste will make your sign blend well with your porch décor. Employ distressing techniques or uneven lettering to add a handcrafted feel. Applying paint with a dry brush on weathered wood can give your sign a charming aged look, making it feel like a one-of-a-kind treasure. Adding a favorite family motto or inspirational quote improve the warmth of your porch, making the sign more than just decoration.
Decoration plays a key role in how your porch sign’s personality shines through. Seasonal flowers are a simple yet effective addition that refresh your sign throughout the year. Customized décor including small wooden shapes, metal accents, or even a chalkboard section for messages lets you change the sign’s look to suit holidays or special occasions. Consider adding a pet-friendly note or a playful phrase if you have pets, giving guests an extra welcoming touch.
- Include your family name with “Established [Year]” for a personal and historical touch
- Add house numbers using metal, wooden, or illuminated styles for easy recognition
- Paint your favorite quote or family motto in a legible, attractive font
- Apply distressing or weathered effects to create character and uniqueness
- Decorate with seasonal flowers or thematic items to update the sign regularly
- Incorporate small custom accents like pet notices or holiday symbols
To create your personalized porch sign, start by selecting the material that suits your porch conditions and style, such as wood or metal. Plan your wording and layout before painting or applying decals. Use stencils or vinyl decals for precise lettering if hand-painting is challenging. Budget $20 to $50 depending on materials, with more costly options including illuminated numbers or custom metal work. Displaying your sign securely with weatherproof hardware protects your investment.
11. Hanging and Displaying Porch Signs Securely and Stylishly
Securely hanging and displaying a porch sign calls for choosing the right mounting option and hardware for your specific sign type. Wall mounting is the simplest approach, attaching the sign flush against a sturdy porch wall requires just screws or nails, minimizing the chance it sways or falls in the wind. This method works best for medium to large wooden or metal signs and provides a casual, easygoing look. If your porch sign is small or you worry about wind gusts, hanging your sign with hardware like hooks or chains offers extra stability and mobility. For a polished, dimensional look, floating installations using invisible mounting brackets create subtle shadows and visual depth on your porch walls.
Consider the location carefully to maintain visibility and protect your sign from harsh weather. Placing it under eaves or a porch overhang shields the sign from rain and sun damage while keeping it clearly seen by visitors. Signs mounted on sturdy brackets attached to porch posts or walls tolerate wind and weather better and can be positioned more freely. For a creative display, layering your welcome sign with smaller decorative accents at varying heights adds movement and prevents a flat appearance.
- Use corrosion-resistant screws or wall anchors for wood or brick exterior walls.
- Install S-hooks or eye hooks and chains for hanging lightweight signs from overhead porch beams.
- Attach heavy-duty L-brackets for larger, heavier signs to ensure strong support.
- Try adhesive strips or outdoor-rated Velcro for temporary or seasonal signs under sheltered areas.
- Use freestanding sign holders on flat porch surfaces for easy repositioning without wall damage.
- Measure placement height so the center of the sign is at eye level, roughly 57 to 60 inches from the ground.
- Check for solid mounting points behind walls or posts before drilling or attaching hardware.
These careful mounting choices help your porch sign maintain its look and function through changing weather. Signs properly anchored won’t twist or catch wind, which prolongs their life and keeps your porch welcoming. Placing signs out of direct sun or heavy rain extends paint and material durability while keeping your entry inviting. Always assess your porch’s unique structure and exposure when selecting hardware and placement to find the best balance of style, security, and visibility.
Use stainless steel or brass fasteners outdoors to prevent rust that can damage your porch walls and sign over time.
12. Avoiding Common Porch Sign Mistakes and How to Fix Them
Poor weatherproofing, incorrect sizing, and unclear lettering are frequent mistakes with porch signs that can reduce their visual impact and durability. Weatherproofing matters because porch signs face rain, sun, wind, and temperature changes daily. Without good protection, paint can peel, wood can warp, and vinyl decals can crack or fade. To fix peeling paint or faded signs, start by sanding down rough or flaking areas with medium-grit sandpaper until smooth. Clean the surface thoroughly with a damp cloth and let it dry. Then, apply an exterior-quality primer made for wood or metal, depending on your sign’s material, to seal it. Follow with two coats of outdoor acrylic paint or a UV-resistant enamel, allowing at least 4 hours between coats. Finally, add a clear waterproof sealant like polyurethane or spar urethane. This process usually costs between $15 and $40 for supplies and adds several years to your sign’s life.
Choosing the right size is essential. Signs that are too small won’t be readable from the street, while oversized signs may look cluttered or unbalanced on your porch. The ideal size depends on how far your visitors view the sign; for example, signs meant to be seen from the sidewalk or driveway should generally be 12 to 18 inches wide and at least 6 to 8 inches tall. Poor lettering choices such as overly thin fonts, cramped spacing, or low contrast colors also hurt readability. To fix lettering issues, consider repainting with stencils or applying vinyl lettering. Use wide, simple fonts and high-contrast colors like white on dark wood or black on light backgrounds.
- Sand and clean peeling or damaged areas before repainting.
- Use exterior-grade paints and primers for all outdoor signs.
- Apply at least two paint coats and a clear waterproof sealant.
- Choose sign sizes visible from your typical viewing distance.
- Select simple, bold fonts with high color contrast.
- Consider vinyl decals to replace worn painted letters.
- Store signs indoors during extreme weather to extend life.
Quick wear and tear usually happens when signs lack proper sealants or get direct sun for long hours, causing fading and cracking. A consistent maintenance routine can prevent this. Every year or two, clean the sign and inspect for cracks or peeling paint. Touch up spots with primer, paint, and sealant as needed. If your porch faces intense sun, adding a small overhang or moving the sign to a shaded spot reduces UV damage. For wooden signs, avoid contact with soil or standing water, which promotes rot. Following these steps helps keep porch signs welcoming and intact for years with minimal repairs.
Step-by-Step Action Plan for Your Porch Sign
Follow these steps to create and display a porch sign that fits your style and stands up to the elements.
- Day 1: Choose your materials based on durability and style preferences. Confirm that the wood or other material feels sturdy and appropriate for outdoor use.
- Day 2: Design your sign, deciding on size and lettering method. Sketch your layout and check that letters are readable from a distance you expect visitors to stand.
- Day 3: Cut and prepare your sign base, sanding edges smooth. Run your hand along the edges to ensure no splinters remain.
- Day 4: Apply your chosen lettering technique, whether painting, stenciling, or vinyl decals. Verify the letters are clear and evenly spaced before the paint or adhesive dries.
- Day 5: Apply weatherproofing sealant evenly on all surfaces. After drying, lightly test the seal around edges to make sure it is complete.
- Day 6: Attach your hanging hardware securely and select a location on your porch with good visibility and protection from harsh weather. Gently tug the hanging method to confirm stability.
- After 2 weeks: Inspect the sign for any touch-ups or adjustments. Check that colors haven’t faded or peeled and that the sign remains firmly mounted.
Frequently Asked Questions
What Are Some Unique Themes for Porch Signs Beyond Holidays and Seasons?
Unique themes include favorite quotes, family names, hobbies, or local landmarks. These add personal character and make your porch sign stand out year-round.
How Can I Incorporate Lighting into My Porch Sign?
Adding solar or battery-operated LED lights around or behind the sign improve visibility and creates a cozy ambiance at night. Choose waterproof fixtures for durability outdoors.
What Paint Finishes Work Best for Outdoor Porch Signs?
Satin or semi-gloss finishes resist weather better and are easier to clean than flat paint. They provide a subtle shine while protecting the sign from moisture.
Can I Use Fabric or Soft Materials for Porch Signs?
Fabric signs can add texture and charm but need treatment for weather resistance. Consider sealed canvas or acrylic-coated textiles to prevent fading and mildew.
How Do I Safely Remove Old Porch Signs Without Damaging Surfaces?
Use gentle tools like plastic scrapers and warm soapy water to loosen adhesives. Avoid metal tools that might scratch or chip paint or wood beneath the sign.
Is It Possible to Create Modular Porch Signs for Frequent Updates?
Yes, modular signs made with interchangeable panels or chalkboard paint let you update messages easily and keep your front porch fresh and dynamic.
The Bottom Line
Creating a porch sign lets you express your home’s character while welcoming guests. Start by focusing on materials and clear lettering to ensure visibility and durability. Next, personalize your sign to suit your style and keep it well-maintained for lasting appeal.