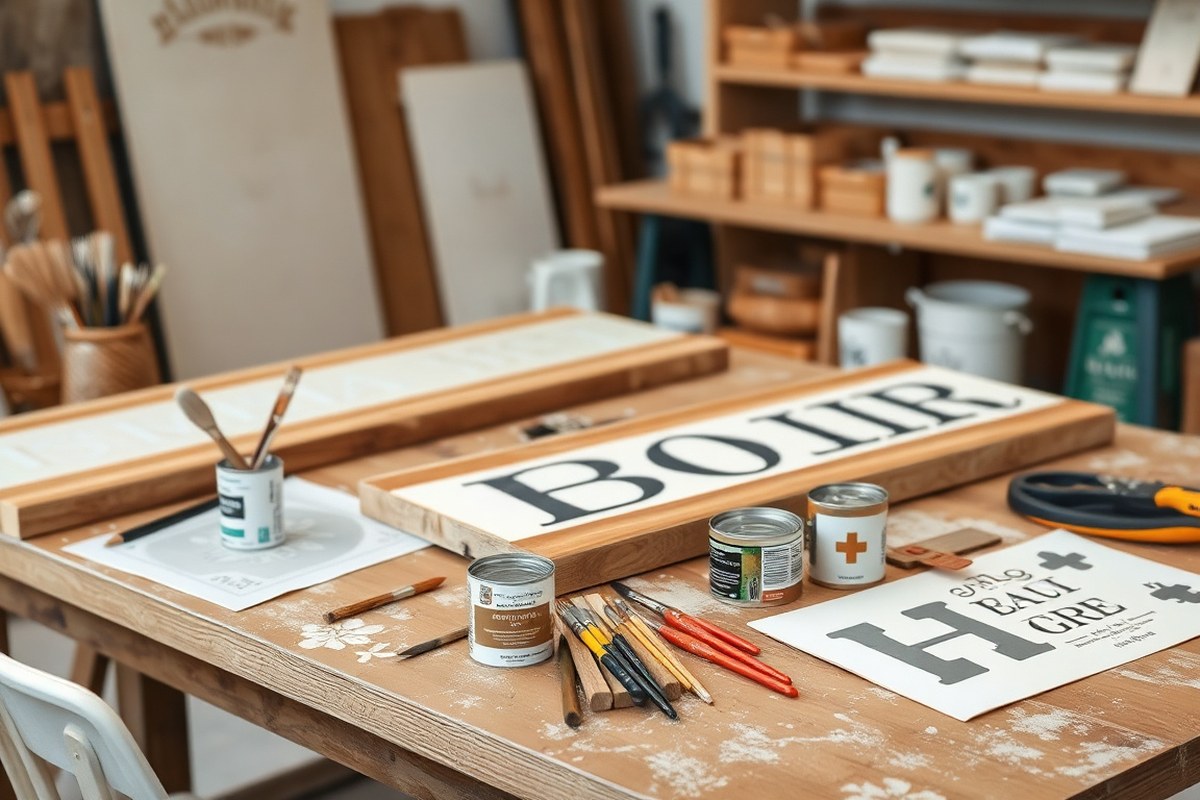
How to Make Farmhouse Signs: A Complete Guide with Materials, Methods, and Finishing Tips
How to make farmhouse signs starts with choosing simple wood boards like 1×10 planks or lightweight plywood that fit your project size. You’ll prepare the wood by sanding it smooth and cleaning the surface for paint or stain to adhere evenly. Adding letters or graphics usually involves stencils, vinyl decals, or hand painting for that authentic farmhouse feel.
Key Takeaways
- Use recycled wood or inexpensive boards like 1×10 planks to keep costs low while creating farmhouse signs.
- Sand wood surfaces thoroughly to ensure paint or stain applies smoothly without blotches or rough spots.
- Stencil letters or use vinyl decals for clean, professional-looking farmhouse graphics on your sign.
- Apply a light wood stain first before painting for a warm, rustic base that improve farmhouse style.
- Create weathered effects by sanding edges and using dry brushing techniques to simulate age and wear.
- Frame signs with simple 2×4 molding pieces to add depth and a finished farmhouse look.
What Materials and Tools Are Needed for Farmhouse Signs?
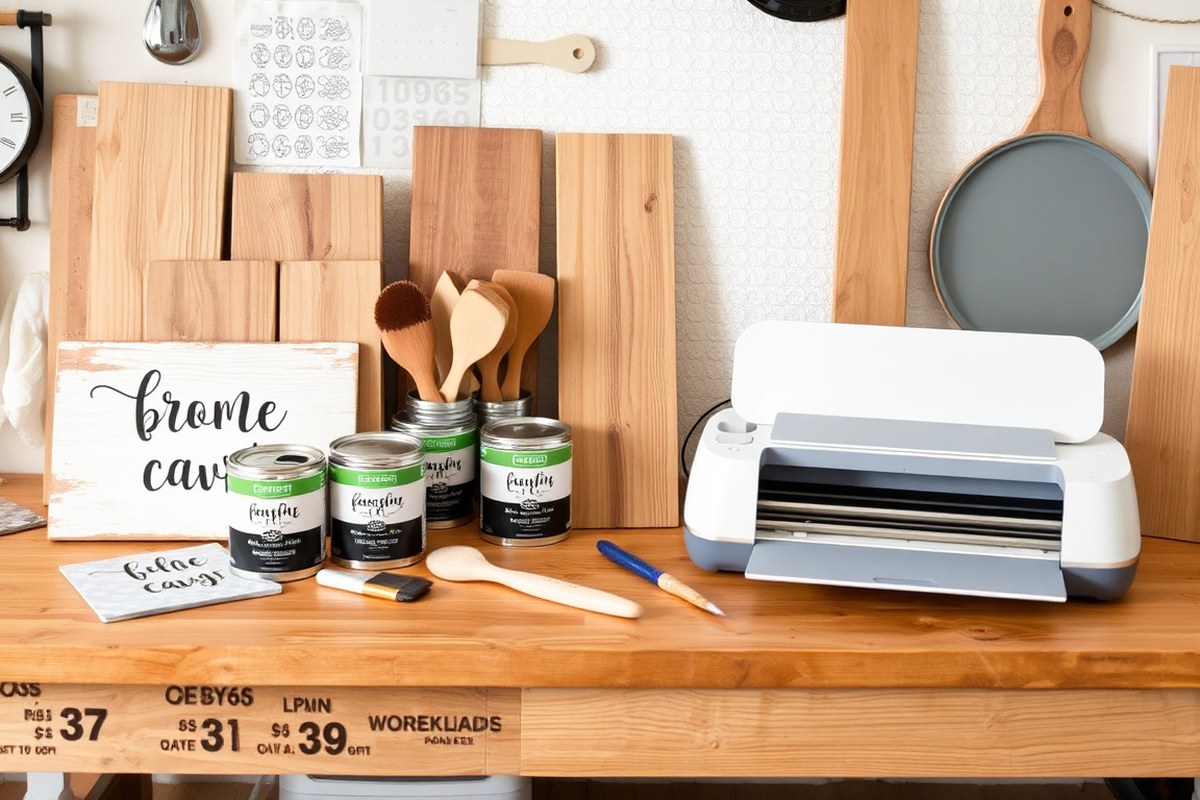
Farmhouse signs typically use wood boards that measure between 6 to 12 inches in height and 18 to 24 inches in length. Pine, cedar, and reclaimed pallet wood are popular choices because they offer a rustic texture and are easy to work with. Recycled wood from old furniture or pallets can drastically reduce costs and add character to your sign. Smooth the surface with 120 or 150 grit sandpaper to prepare it for painting or staining.
For paints, acrylic craft paints or latex paints work well. They dry quickly and provide good coverage. You can layer the paint to achieve a bolder look, applying multiple coats as needed. Wood stains in warm, natural tones improve the vintage aesthetic typical of farmhouse signs. Sealing the sign later with a matte or satin clear coat protects your work without shining, keeping the rustic feel intact.
Regarding lettering and graphics, many makers use vinyl cutters like Cricut machines to cut out detailed stencils. These allow precise and repeatable designs but come with a price tag of around $200 to $400 for the machine itself. Beginners can start with premade stencils, which cost between $5 and $15 each, or create freehand designs using painter’s tape and a stencil brush. Hand painting letters with stencils or freehand requires more skill but no special tools, letting you save money.
- Wood boards: 6, 12″ high, 18, 24″ long, pine, cedar, or recycled pallet wood
- Sandpaper: 120 or 150 grit for smoothing wood
- Paints: acrylic craft or latex paint in farmhouse colors
- Wood stain: warm, natural tones for rustic look
- Clear coat: matte or satin polyurethane for protection
- Lettering tools: Cricut vinyl cutter, premade stencils, or stencil brushes
- Hand tools: hammer and nails or small brush for freehand painting
Using recycled wood boards is the most cost-effective option, often free if you salvage from old furniture or pallets. Sanding and prepping the wood will take roughly 30 minutes but ensures the paint adheres well and lasts longer. If you don’t want to invest in a Cricut machine, shop for stencils online or in craft stores, or print templates and transfer letters by tapping charcoal dust under the paper to trace outlines. Painting by hand lets you customize fonts and sizes but requires patience and a steady hand.
Basic tools like a hammer and nails or a cordless drill for assembling frames and attaching hanging hardware keep your budget low. Quality paintbrushes vary in price from $3 to $15 depending on size and bristle type. Buying a small set of brushes designed for stenciling or detail work will improve your results without a large cost. You don’t need expensive tools to create farmhouse signs, but investing in a few specialty supplies can help you achieve a polished, professional look.
How to Prepare Wood for Painting and Staining
Preparing wood properly before painting or staining is essential to create a smooth surface and ensure the paint sticks well without peeling or chipping. This process includes selecting the right wood, sanding it to remove rough spots, cleaning off dust and debris, and applying an appropriate primer, stain, or base coat. Taking these steps carefully will improve the durability and appearance of your farmhouse sign.
Choosing the Right Wood Type
For DIY farmhouse signs, selecting a wood with a smooth surface and easy workability makes the preparation process easier, especially if you’re a beginner. Pine or poplar are affordable softwoods that sand well and are light enough to hang on walls easily. These woods absorb paint and stain evenly, which helps your design look professional. Hardwoods like oak have a rougher texture and require more sanding but can produce a more rustic look if desired.
Wood that is too rough or full of knots will need extra prep and may show uneven paint absorption, causing blotchy finishes. Look for clear boards with minimal defects to reduce prep time and get cleaner results.
Sanding Techniques for Smooth Finish
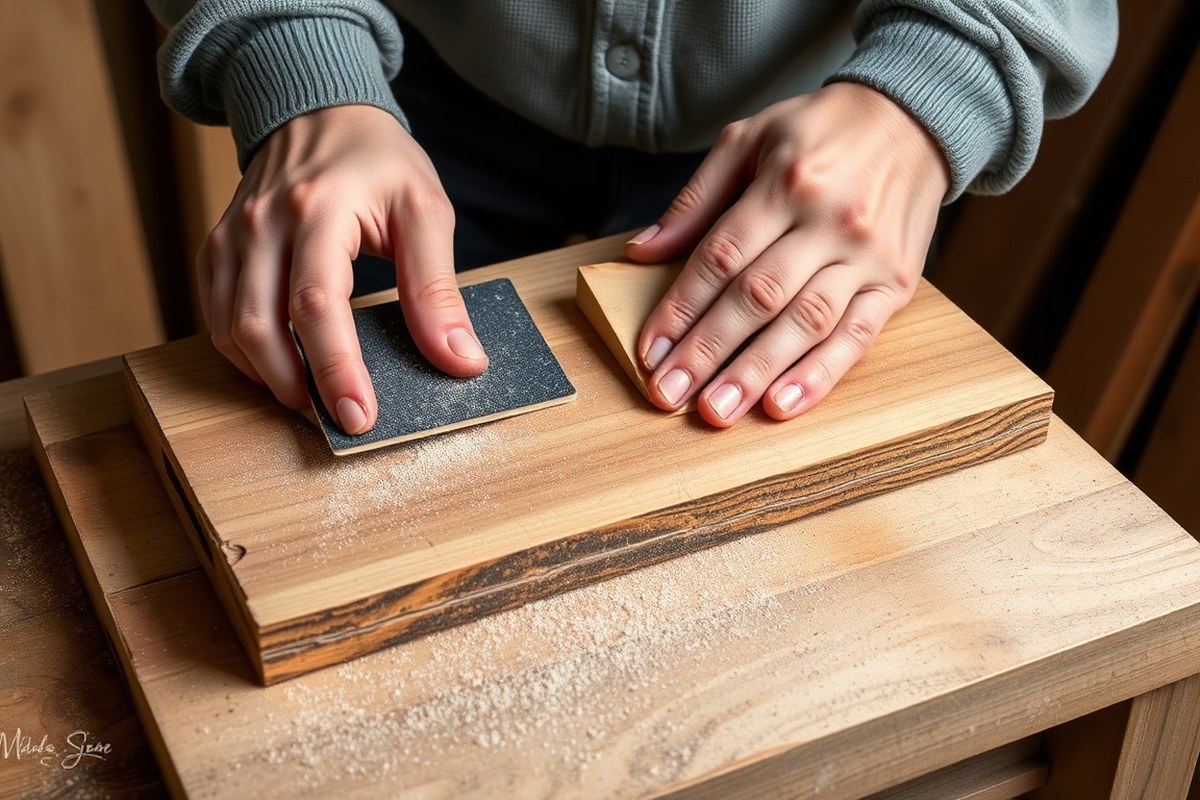
Light sanding is key to smoothing the wood’s surface and creating a base that paint or stain can grip onto. Sanding removes splinters, bumps, and any factory finish if present. Use medium grit sandpaper, around 120 grit, to even out the surface, then finish with a fine grit like 220 grit for a smooth touch that won’t resist paint. Here’s a simple step-by-step sanding guide:
- Start by sanding the wood with 120 grit sandpaper, applying even pressure to remove rough patches and flatten the surface.
- Sand along the grain of the wood to avoid scratches and rough spots that won’t fill in with paint.
- After the initial sanding, wipe away dust with a clean, dry cloth or tack cloth to check for remaining imperfections.
- Use 220 grit sandpaper to gently smooth the surface further, especially around edges and corners.
- Dust off the wood thoroughly after sanding to prevent paint adhesion problems.
Avoid heavy sanding that creates grooves or uneven areas; light, even passes produce the best base for paint or stain.
Applying Primer, Stain, or Base Paint
Decide whether you want a stained wood base or a painted base coat depending on your farmhouse sign’s look. Staining before painting is useful if you want the wood grain to show through or to create a warm, natural tone. A penetrating stain like Minwax Espresso adds depth and improve the rustic style.
Apply wood stain with a brush or rag, wiping away excess and letting it dry 6 to 8 hours before applying paint or sealer. For a painted base, use a primer to help paint stick and last without peeling. Two thin coats of a quality primer, such as Zinsser, will seal the wood and create a smooth surface.
Applying multiple thin paint layers rather than one thick coat prevents cracking and peeling as it dries. Allow each coat to dry for at least 1 to 2 hours before adding the next. Light sanding between coats with 320 grit can improve paint adhesion and remove brush marks, but only if the previous coat is fully dry.
What Are the Best Methods to Add Letters and Graphics?
Adding letters or graphics to farmhouse signs can be done through painting, vinyl lettering, stencils, or transfer methods. Each approach suits different skill levels, budgets, and project goals. Choosing the right method depends on your comfort with tools like Cricut machines, the level of detail needed, and whether you want a quick or highly customizable finish.
Cutting and Applying Vinyl Letters
Using a Cricut or Silhouette Cameo machine to create vinyl lettering is popular for farmhouse signs, especially when you want clean, precise designs. Start by designing your quote or graphic on the machine’s software, then cut the vinyl without needing a cutting mat if you have the newer Cricut Explore 3 or Maker 3 models. After cutting, weed out the excess vinyl, leaving only your letters or shapes on the backing paper. Apply transfer tape over the vinyl to lift it off the backing, then position and stick it onto your prepared wood surface.
Vinyl offers a smooth, professional look with crisp edges and is waterproof when sealed, which is useful for signs displayed outdoors. It can be more expensive upfront, with machines costing around $200 to $400 and vinyl rolls at $10 to $20, but it saves time when making multiple signs. A drawback is that vinyl letters might peel if the surface is not smooth or if the adhesive is poor. Beginners benefit from vinyl since you skip freehand painting and stenciling, though learning the software and machine setup is required.
Using Stencils and Paint Pens
Stencil and paint pen techniques are ideal when you want control over the paint’s texture but prefer a more guided approach than hand-painting freehand. You can buy pre-made stencils or create your own with a vinyl cutting machine or printer and stencil material. After securing the stencil on your wood, use a paint pen or a stiff-bristle brush with minimal paint to fill in the letters or graphics. Remove the stencil carefully while the paint is still damp to avoid smudging.
This method is budget-friendly, often under $15 for basic supplies, and works well on rough or uneven wood where vinyl may not adhere well. It requires patience to avoid bleeding outside the stencil edges, recommended to dab paint straight down instead of brushing side to side. Beginners often appreciate stencils for accuracy without needing steady freehand skills, while advanced crafters can customize stencil shapes or combine multiple layers for dimensional effects.
Hand-Painting and Pencil Transfer Techniques
Hand-painting letters lets you add personal flair but takes practice to get clean, readable results. Start by printing your design on paper, then use carbon paper or pencil transfer by shading the back of your printed design with pencil graphite. Place the design face up on the wood, trace the letters firmly with a pen or stylus, and faint pencil marks will transfer onto the wood surface. Fill these outlines with paint or permanent markers customized for wood.
Carbon paper is cost-effective, with 100 sheets available for less than $10, making it better for repeated projects than freehand drawing. This method works also without any vinyl machine, suitable for beginners who don’t mind the extra step of tracing. Mistakes occur if your pen strokes aren’t firm enough, or if you paint too thick, causing paint to bleed and letters to blur. Advanced crafters use hand-painting to add rustic imperfections or varying brush strokes that fit farmhouse style’s charm.
| Method | Pros | Cons | Best for |
|---|---|---|---|
| Vinyl Cutting (Cricut/Cameo) | Precise, reusable designs; fast application; waterproof | Requires investment in machine; surface must be smooth; machine learning curve | Intermediate to advanced crafters & mass production |
| Stencil and Paint Pens | Accurate shapes without freehand skill; budget-friendly; textured finish | Risk of paint bleeding; time-consuming; less flexible than freehand | Beginners and beginners who want guidance |
| Hand-Painting with Pencil/Carbon Transfer | Custom handmade look; low cost; no machines needed | Needs steady hand; slow process; risk of smudging and bleeding | Beginners practicing technique; advanced crafters adding detail |
How to Achieve a Rustic or Weathered Look on Your Sign
To achieve a rustic or weathered look on your farmhouse sign, distressing and antiquing paint creates authentic charm and character that mimics naturally aged wood. This look complements the farmhouse style by making your sign appear like a treasured vintage find rather than a brand-new piece. You can chip or sand paint to expose underlying layers or bare wood, adding texture and visual interest.
Start with sanding for controlled distressing. Use medium-grit sandpaper (around 120-150 grit) to gently rub edges, corners, and any areas where natural wear would happen. For more pronounced chipping effects, apply a layer of wax in random spots before painting. When you paint over the waxed areas, the paint won’t fully adhere there, allowing you to scrape or sand those spots more easily to create a chipped paint look.
Layering paint improve the weathered effect. Start with a darker base coat, like brown or gray, and let it dry completely. Then apply a lighter topcoat such as white, cream, or muted pastel. After the topcoat dries, lightly sand areas to reveal the darker base coat underneath, emphasizing age and depth. Antiquing glaze or watered-down dark paint can be brushed on and wiped off to add subtle shading and highlight wood grain. Common distressing tools and materials include:
- Medium-grit sandpaper (120-150 grit) for gentle sanding
- Old paintbrushes and stiff bristle brushes for chipping and distressing paint
- Wax sticks or candle wax for resist technique before painting
- Antiquing glaze or diluted dark acrylic paint for shading
- Scrapers or metal putty knives for chipping paint
- Clean rags for wiping glaze and paint
An important tip is to avoid over-distressing, which can make your sign look damaged rather than charming. Start with light sanding and add more distressing gradually. Step back frequently to check the effect and stop as soon as the sign feels naturally worn. If you find some areas too rough or uneven, lightly add more paint and sand again after it dries to blend the look. Too much sanding can weaken thin wood or remove stenciled letters, so take care around detailed areas.
Applying a matte or satin clear finish after distressing protects your sign while keeping the aged look intact. Avoid high-gloss finishes that reduce the rustic appearance. This finishing step costs about $10 to $20 for a small can of protective topcoat, which usually covers multiple signs.
How to Build and Attach Frames to Farmhouse Signs
Building and attaching frames to your farmhouse signs gives them a finished look and adds rustic charm. Use wood moldings cut to fit the exact size of your sign and secure them with nails or screws, stained or painted to match. Frames can be simple or detailed, depending on your skills and available materials.
Selecting Lumber for Frames
Choose wood that complements your sign’s style and size. Pine and poplar are affordable and easy to work with, while cedar and oak offer more durability and a rustic appearance. Look for 1×2 or 1×3 inch molding pieces, as these sizes provide enough thickness without overwhelming the sign. You can also repurpose old molding or pallet wood for a distressed look, saving money and adding character.
| Wood Type | Dimensions | Cost Range (per 8 ft piece) | Best Use |
|---|---|---|---|
| Pine | 1×2 or 1×3 in | $5 – $8 | Beginner frames, easy to paint or stain |
| Poplar | 1×2 or 1×3 in | $6 – $10 | Smooth finish, good for painting |
| Cedar | 1×2 or 1×3 in | $10 – $15 | Weather-resistant, rustic look |
| Reclaimed Pallet Wood | Variable | Free-$5 | Rustic, eco-friendly frames |
Cutting Frame Pieces to Size
Measure your sign first to get accurate frame dimensions. The four frame pieces should match the sign’s perimeter length: two longer sides and two shorter ends. For example, a 45-inch by 21-inch sign will need two pieces cut to 45 inches and two pieces cut to 21 inches, creating a rectangular frame. Use a miter saw set at 45 degrees for clean, angled corners if you want a traditional picture frame look. Otherwise, simple square cuts can work for a straightforward frame.
Double-check measurements before cutting to avoid wasting wood. Cut each piece carefully and sand edges smooth to prevent splinters and ensure tight joints when assembling.
Assembling and Attaching the Frame
Frames can be assembled with wood glue and finishing nails or small screws, depending on the look and strength you want. Using brad nails and a nail gun speeds up assembly and leaves smaller holes. Adding a wood clamp keeps pieces steady during assembly. Stain or paint frame pieces before attaching them to guarantee even coverage. Attach the frame by aligning it flush with the edges of your sign, then securing from the back with screws or nails so the front stays clean. Here’s a step-by-step approach to assembling and attaching your frame:
- Lay out all four frame pieces flat and check that corners meet correctly.
- Apply wood glue along the ends of each piece at the joining edges.
- Use a miter clamp or corner clamp to hold two pieces together at a right angle.
- Secure the corner with two finishing nails or small screws on both sides of the joint for extra strength.
- Repeat steps for the other corners until the frame is assembled.
- Sand the frame corners lightly to smooth out any uneven joints.
- Pre-stain or paint the frame, allowing it to dry completely before attaching.
- Align the frame on the sign surface, then fasten from the back using screws or nails evenly spaced (every 6 to 8 inches) for a secure hold.
Using clamps during assembly ensures tight corners and helps avoid gaps or misaligned joints in your frame.
How to Finish and Protect Finished Farmhouse Signs
Sealing and protecting your farmhouse signs is essential to preserve their look and durability, especially if you plan to display them outdoors. Common options for sealing wood signs include polyurethane, clear acrylic spray, and wax finishes. Polyurethane is popular because it offers strong protection against moisture, scratches, and sunlight. It’s available in satin, semi-gloss, and gloss sheens. However, oil-based polyurethanes take longer to dry (up to 24 hours) and can yellow over time, while water-based versions dry faster (around 2 hours) and remain clear. Clear acrylic spray dries quickly and is easy to apply, making it a good choice for indoor signs or lightly used outdoor signs. Wax finishes, like beeswax or clear furniture wax, provide a subtle sheen and improve color but offer less moisture resistance, so they’re better suited for indoor settings.
Applying the finish correctly ensures your paint or stain remains intact and the wood doesn’t warp or crack. Start by making sure your sign is completely dry, paint or stain should cure for at least 24 hours before sealing. For polyurethanes and acrylic sprays, apply thin, even coats using a clean foam brush or spray can, moving steadily and avoiding drips. Wait for the recommended drying time between coats, usually 2 to 4 hours for water-based products and 24 hours for oil-based polyurethanes. Lightly sand with fine-grit sandpaper (220 grit) between coats to prevent bubbling and ensure smoothness. For wax finishes, rub the wax on in small sections with a clean cloth and buff it after it dries; repeat as needed to build up protection.
Outdoor farmhouse signs require more strong weatherproofing to withstand rain, sun, and temperature changes. Using a high-quality spar urethane is a reliable way to guard against UV rays and moisture. Spar urethane remains flexible and resists cracking, which is helpful for signs exposed to humidity or direct sunlight. Apply at least three coats, sanding lightly between each after they dry. Position outdoor signs where they get some shade or protection when possible to extend their life. For additional water resistance, sealing the back and edges of the board, including any frames, prevents moisture from seeping into the wood, which can lead to warping or rot.
Indoor signs don’t need as heavy-duty protection. A couple of coats of clear acrylic spray or water-based polyurethane usually provide enough cover to prevent damage from dust, cleaning, and minor spills. Wax finishes work well for achieving a soft, rustic appearance without a shiny surface, fitting the farmhouse style. Those who want a matte look with good durability can use a matte finish polyurethane that resists fingerprints and smudges.
Costs for sealers vary widely: a small can of water-based polyurethane costs about $10 to $15 and covers roughly 50 square feet with 2 coats. Clear acrylic spray cans are typically $6 to $12 and cover about 20 square feet. Wax is usually sold in small tins for $8 to $15 and a little goes a long way. Tools needed include foam brushes, fine-grit sandpaper, lint-free cloths, and possibly a respirator or mask when using sprays or oil-based products in poorly ventilated areas.
Signs with properly applied sealers show a consistent finish without peeling, bubbling, or cloudiness. Avoid thick coats and drying in humid or cold conditions to prevent tackiness or uneven curing. If the finish feels sticky or looks blotchy after drying, gently sand and reapply thin coats. For the longest-lasting farmhouse signs, taking time on proper sealing and choosing the right finish for your environment pays off with beautiful results that stand up to wear.
How Long Does It Take and What Are Common Mistakes?
Making a farmhouse sign typically takes about 4 to 8 hours spread over 1 to 2 days, depending on your experience and the size of the sign. Preparing the wood can take 1 to 2 hours, including sanding and cleaning. Painting or staining usually requires 1 to 2 hours, plus drying time of 4 to 6 hours or overnight for the best results. Adding letters and graphics might take 1 to 3 hours, depending on the method you choose and your precision. Finally, finishing and protecting the sign will add another 1 hour, including applying sealers and any touch-ups. This table shows an approximate timeline for each step:
| Step | Average Time Needed | Key Tips |
|---|---|---|
| Wood Preparation | 1-2 hours | Sanding until smooth; wipe dust off before painting |
| Painting/Staining | 1-2 hours + 4-6 hours drying | Use thin coats; allow full drying to avoid smudges |
| Lettering/Graphics | 1-3 hours | Use guides or stencils for accuracy; steady hand when painting |
| Distressing (optional) | 30-60 minutes | Sand edges lightly; don’t overdo to maintain readability |
| Finishing/Sealing | 1 hour | Apply a clear sealer evenly; allow full cure for durability |
Common mistakes during this process include paint runs, uneven lettering, and poor distressing. Paint runs often happen when too much paint is applied at once or the surface isn’t fully dry. To fix paint runs, let the paint dry completely, then smooth the area lightly with fine-grit sandpaper before reapplying paint in thin layers.
- Uneven lettering: This happens if you skip guides or try freehand without enough control. Prevent it by using stencils, vinyl decals, or tracing the letters with a pencil first. When filling in with a Sharpie paint pen or brush, do so slowly and steadily. A fix for uneven lines is to carefully touch up the edges with a small brush or paint pen after the first layer dries.
- Poor distressing: Over-sanding can ruin the sign’s readability, while too little makes it look artificial. Distress by sanding only the edges and some raised parts lightly, then check how it looks before sanding more. If distressing is excessive, repaint those areas and distress again more gently once dry.
Taking your time and allowing paint and sealers to dry properly prevents most issues. Remember, a few hours of patience improve a simple wood board into a farmhouse sign you can proudly display.
Creative Design Ideas and Tips for Custom Farmhouse Signs
Farmhouse signs speak a lot about your personality and style, so choosing the right phrase matters. Popular sayings like “Gather,” “Home Sweet Home,” “Bless This Nest,” “Farm Fresh Eggs,” or “Grateful, Thankful, Blessed” resonate well and fit the cozy farmhouse vibe. These phrases are easy to read, inviting, and pair nicely with rustic wood textures. Lay out your text to maintain balance, center alignment works best on square or wide rectangular signs, while left alignment suits tall, narrow boards.
Designing a multi-season or interchangeable farmhouse sign saves space and keeps your décor fresh year-round. One approach is painting a scratch-off or chalkboard surface where you can write new messages with seasonal flair. Another option: make a base sign with a neutral phrase like “Welcome” and add removable wooden letters or embellishments (like small holiday-themed shapes) with Velcro or magnets. This way, switching from “Welcome Spring” to “Happy Holidays” takes minutes without extra storage hassle.
Choosing the right size for your sign depends on its placement. For entryways or above door frames, wide boards around 24, 36 inches long and 8, 10 inches high work well. Kitchen or dining areas benefit from medium sizes, about 18 by 12 inches, which provide a friendly but unobtrusive touch. Smaller signs, 10 by 8 inches or less, suit shelves or cozy nooks. Keep in mind that overloading a small sign with long phrases can clutter the design, so simplicity is key for smaller dimensions.
Adding embellishments like wooden arrows, small flowers, stars, or dimensional wood letters can give character and depth to your farmhouse signs. You can glue or nail these pieces around your lettering or in corners to avoid crowding the text. For example, a “Gather” sign with a subtle wooden arrow underneath points visitors inward and improve the welcoming feeling. Painting embellishments in muted tones, such as white, gray, or soft pastels, helps them blend with the rustic look.
- Short prime farmhouse sayings: “Home,” “Family,” “Farmhouse,” “Eat,” “Welcome”
- Combine script and block fonts for visual interest
- Create a border with dots, dashes, or stenciled leaves for framing
- Use removable elements to swap seasonal greetings easily
- Scale text size according to sign dimensions, larger font for short phrases
- Add texture with burlap ribbon or small metal accents for farmhouse charm
- Leave extra space around edges to avoid cramped appearance
When adding dimensional elements, avoid heavy embellishments on thinner wood to prevent warping or cracking over time.
Step-by-Step Action Plan to Make Your Farmhouse Sign
Follow these steps to create a farmhouse sign with a rustic, custom look you’ll be proud of. Each phase ensures you stay on track and get the results you want.
- Before You Start: Gather all your materials and tools like wood, paint, brushes, and stencils. Double-check that everything is on hand to avoid delays.
- Day 1: Prepare your wood by sanding and cleaning it. The surface should feel smooth and look dust-free.
- Day 2: Apply your chosen stain or base paint coat. Let it dry completely, which usually takes 1 to 2 hours depending on the product.
- Day 3: Add lettering or graphics using stencils, vinyl, or freehand painting. Make sure the paint looks sharp and fully covers the design.
- Day 4: Create the weathered look by sanding edges or using distressing tools lightly. The sign should look naturally worn, not overdone.
- Day 5: Build and attach your frame securely with wood glue and nails or screws. Check that the frame fits tightly around your sign.
- Day 6: Finish your sign with a clear protective sealant for outdoor durability. Allow 24 hours for curing.
- After 1 Week: Inspect your sign for any touch-ups needed or loose parts and fix them promptly before hanging.
Frequently Asked Questions
Can I Make Farmhouse Signs Using Recycled Wood Materials?
Yes, many farmhouse signs can be made from 100% recycled wood, cutting costs while adding charm. Reclaimed wood can add character with natural variations ideal for a rustic look.
Are There Specific Paint Types Best for Outdoor Farmhouse Signs?
Exterior acrylic paint works well for outdoor signs, resisting weather and fading. Sealing with a clear protective coat improves durability against moisture and sunlight damage.
What Size Wood Boards Are Best for Beginner Farmhouse Signs?
Starting with 12 by 24 inches wood boards is manageable for beginners. This size is large enough for clear designs yet small enough to handle easily at home.
Can I Add Personal Messages to Farmhouse Signs Without Stencils?
Yes, freehand painting or using vinyl letter decals lets you customize signs uniquely. Practice lettering on scrap wood first to gain confidence and control.
How Do I Attach Farmhouse Signs Securely to Walls or Doors?
Use heavy-duty double-sided tape or picture hanging hooks for secure wall mounting. For doors, small sawtooth hangers or adjustable hooks are effective and avoid damage.
Could I Use a Vinyl Cutting Machine Without Prior Experience?
Yes, machines like Cricut have beginner-friendly features and tutorials. Start with simple designs to learn cutting and transferring vinyl letters correctly.
Before You Go
Making farmhouse signs is a rewarding project that combines creativity with hands-on skills. Start with a simple design and use quality materials to ensure your sign lasts. Take your time on preparation and finishing, that’s what creates the authentic rustic look. Now, pick a small wood board and try painting your first stencil design today to build confidence and enjoy the process.