How to Make Round Wood Signs with Ease: Complete Step-By-Step Guide
How to make round wood signs starts with choosing the right wood size and type for your project. Pine edge-glued panels from 12 to 16 inches offer an affordable, smooth surface ideal for painting or staining. Starting with a properly sanded and prepared wood base ensures your design transfers cleanly and the final sign looks professional.
Key Takeaways
- Select a 12″-15″ pine edge-glued wood panel for indoor signs, and 16″ or larger for outdoor durability.
- Buy unfinished wood rounds from home improvement or craft stores to control cost and quality.
- Sand your wood surface thoroughly for smoothness, focusing on edges to prevent splinters.
- Choose your design transfer method carefully: vinyl decals offer precision, paint gives a handcrafted look, and stencils provide flexibility.
- Allow each paint or stain layer to dry completely, waiting at least 2 hours between coats for best results.
- Seal your finished sign with an appropriate outdoor polyurethane or clear coat to protect from weather.
Choosing the Best Wood and Size for Round Signs
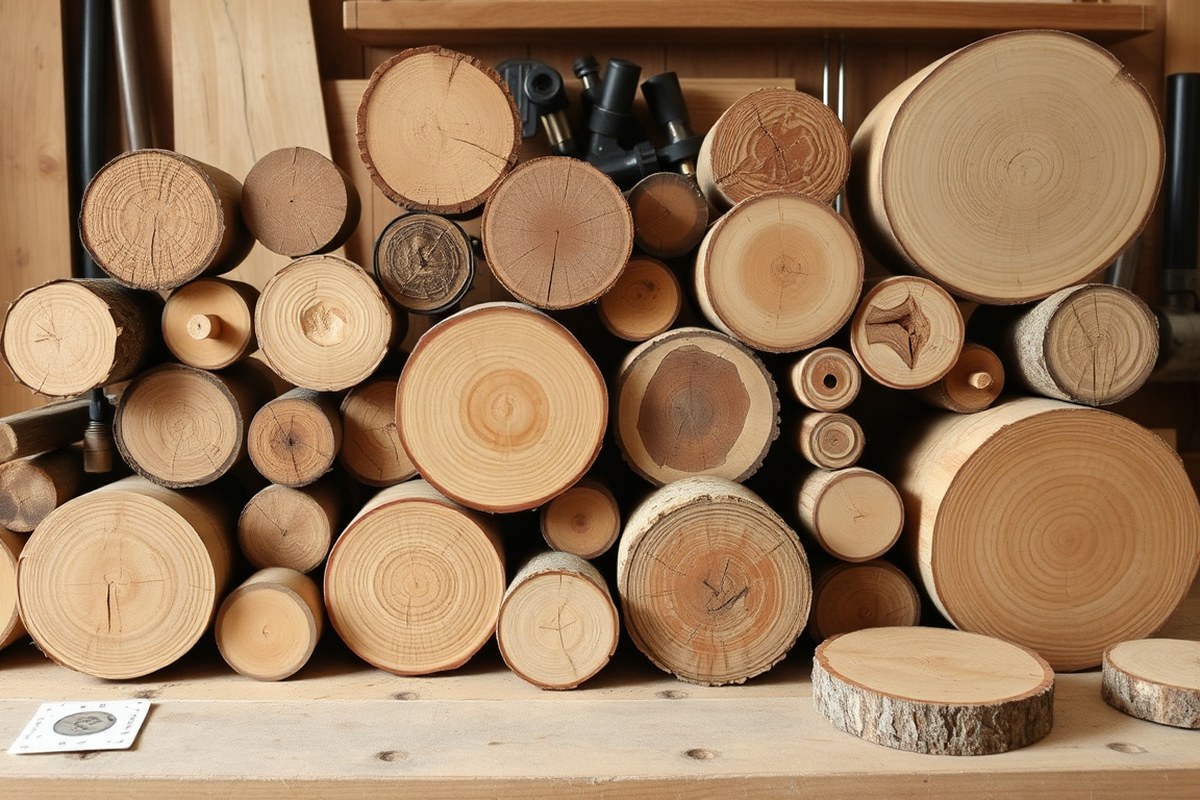
Picking the right wood type, size, and thickness for your round wood sign affects its durability, appearance, and ease of handling. Pine is a popular choice because it’s lightweight, affordable, and accepts paint and stain nicely. Other good options include birch and poplar, which have a smoother surface for detailed designs. Avoid woods with heavy grain or knots, as they can complicate painting and sanding.
Size depends on where you plan to display your sign and the complexity of your design. Common sizes range from 12 to 15 inches in diameter. Twelve-inch rounds fit well on most doors and walls, while larger rounds up to 15 inches provide more room for detailed graphics or lettering. Use a paper template cut to the intended diameter to visualize placement and sizing before buying or cutting wood.
Thickness impacts the sign’s sturdiness and weight. For most round signs, ¾ inch thick wood offers a balance between durability and manageability. Thinner rounds below ½ inch might warp or break more easily, especially outdoors. Thicker pieces over 1 inch can be heavy and harder to hang but offer a more substantial look.
- Choose pine, birch, or poplar for smooth surfaces and easy painting
- Select a diameter between 12 and 15 inches based on space and design detail
- Opt for ¾ inch thickness for a sturdy yet lightweight sign
- Use a paper circle template to plan your sign size and layout
- Look for unfinished wood rounds at craft stores, home improvement centers, or online retailers
Many craft stores like Michaels, Hobby Lobby, and Joann carry unfinished wood rounds, often in the 12-inch diameter range priced around $7 to $15 each. Home Depot and Lowes usually stock edge-glued pine panels with round edges, which can be cut to size if you have the tools. For convenience and variety, online marketplaces such as Amazon offer bundles and individual blanks in multiple sizes and thicknesses.
Check that your chosen wood round is flat and free of cracks or major imperfections before starting. Proper wood selection minimizes sanding time and ensures your painted or vinyl design looks clean and professional. Remember to consider where your sign will hang, indoor or outdoor, as that affects wood choice and thickness needed for weather resistance.
Essential Tools and Supplies for Making Wood Signs
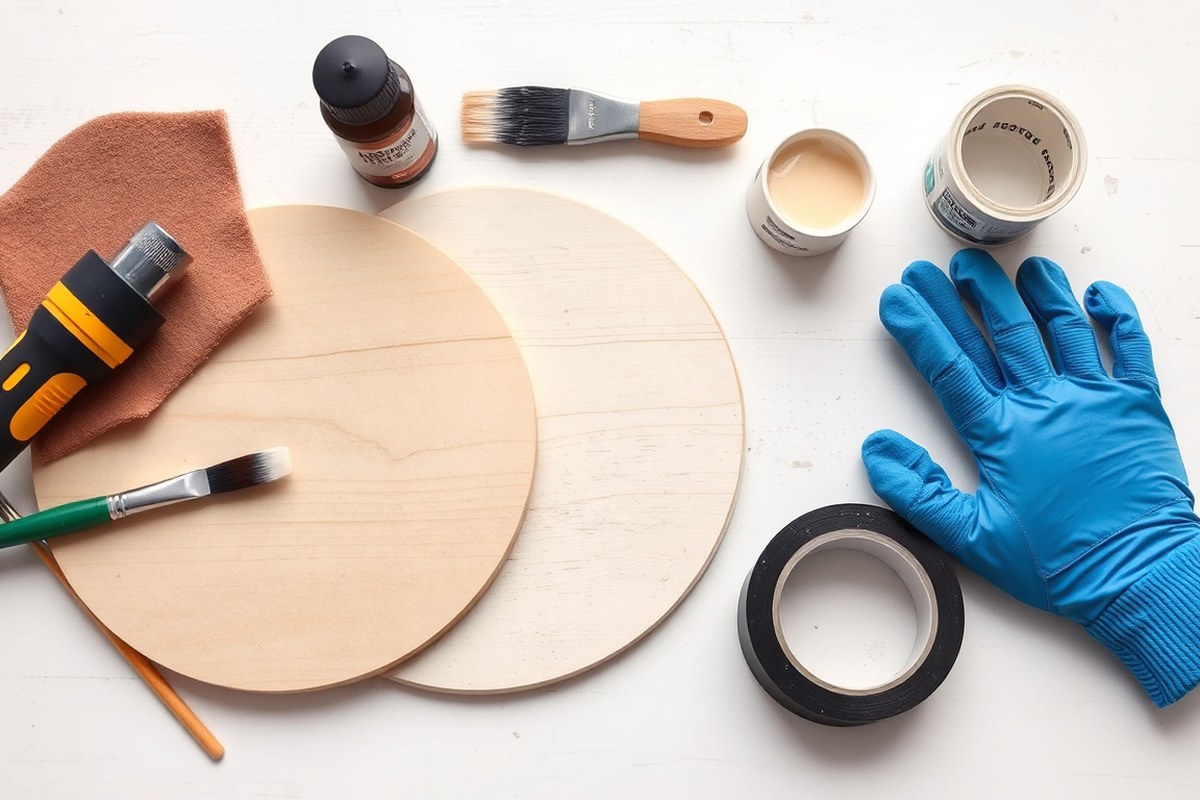
To make round wood signs, you need a mix of basic and optional tools that suit your skill level and project complexity. At a minimum, you’ll want sandpaper or a sanding block to smooth the wood surface and a pencil for sketching your design. For applying paint, inexpensive acrylic paints are excellent due to their quick drying time and ease of use on wood. A regular paintbrush or foam brush works well for most sign projects. You can complete simple signs entirely with hand tools, so power tools aren’t required.
Optional tools like a jigsaw or scroll saw make cutting perfect circles from larger wood pieces faster and more precise but aren’t essential if you buy pre-cut round wood plaques or use pallet wood pieces. Vinyl cutters, heat transfer tools, or stencils can help with transferring designs cleanly, but you can also hand-paint your design using transfer paper or freehand sketches. Sealants such as clear acrylic spray or polyurethane protect your finished sign from moisture and wear, especially if the sign will be outdoors.
- Sandpaper (medium and fine grit) or sanding block for surface smoothing
- Acrylic paints in colors of your choice, plus paintbrushes or foam brushes
- Pencil and eraser for drawing or tracing your design
- Pre-cut round wood plaque or scrap wood (smooth plywood or pine recommended)
- Optional: jigsaw or scroll saw for cutting rounds
- Optional: adhesive vinyl or stencil materials for design transfer
- Clear acrylic spray or polyurethane for sealing and protecting the sign
Working with scrap or pallet wood allows you to avoid buying new wood and keeps costs low. When choosing wood, look for a smooth surface to reduce sanding time and improve paint adhesion. Using hand sanding with around 120-grit sandpaper followed by 220-grit produces the best surface for painting. Take your time with sanding to avoid rough spots or splinters that show through paint. After painting your design, let it dry fully, usually 1 to 2 hours for acrylic paint at room temperature, before applying a sealing coat to protect your work.
Seal your wood sign in a well-ventilated area and apply multiple thin coats of sealant instead of one thick layer to avoid cloudiness or drips.
Power tools offer convenience but are entirely optional, especially for beginners or those working in small spaces. You can carefully hand-cut smaller round signs using a coping saw or purchase pre-cut wooden rounds from craft stores or online. Using brushes lets you easily clean tools and correct mistakes, unlike using permanent vinyl or heat transfers that require precision. Best results come from patience in prepping the wood and layers of paint rather than rushing to finish.
Preparing and Sanding the Wood Surface Properly
Properly preparing and sanding your round wood blank is key to a smooth, attractive finish and strong paint or vinyl adhesion. Start by sanding the entire surface with medium-grit sandpaper to remove rough spots and splinters, then finish with fine-grit paper for a smooth touch. Remove all dust before painting or staining to ensure your design sticks well and looks professional.
Sanding the Surface Smoothly
Use 120-grit sandpaper first to even out bumps and smooth rough areas on the rounded wood. This grit level effectively removes splinters and surface imperfections without gouging the wood. Follow up with 220-grit sandpaper for a finer finish that helps paint or stain absorb evenly.
Sand in circular strokes that match the shape of the sign rather than back and forth. This technique keeps the surface consistent and avoids flat spots, which can show through paint or vinyl. Avoid pressing too hard; let the sandpaper do the work to prevent uneven sanding.
Rounding and Smoothing Edges
Rough edges and splinters can cause your sign to look unfinished and make handling uncomfortable. Use 120-grit sandpaper or a sanding sponge wrapped around a round object roughly the size of your sign to follow the curve of the edge.
Take your time to gently sand all the way around the edge, smoothing any sharp or jagged areas. Finish by lightly sanding with 220-grit to create a smooth transition from the edge to the surface. This process also helps prevent paint or stain from pooling or cracking at the edges.
Cleaning Dust and Prepping for Paint
Removing sanding dust is essential before adding stain or paint. Dust left on the surface can weaken adhesion and cause a rough texture. First, wipe the wood with a dry, lint-free cloth or tack cloth to remove loose dust.
For deeper cleaning, mildly dampen a cloth with water and wipe the surface, then let the wood dry completely, usually about 30 minutes to an hour. Avoid staining before sanding; always sand first to ensure the wood absorbs the stain uniformly. After sanding and cleaning, your wood is ready for the next step, whether that’s staining or painting.
- Start sanding the wood surface with 120-grit sandpaper, using circular motions to smooth out rough spots and remove splinters.
- Switch to 220-grit sandpaper and lightly go over the surface again for a fine, smooth finish.
- Sand the edges by wrapping 120-grit sandpaper around a round form matching your sign’s shape, smoothing out sharp or jagged areas.
- Follow with 220-grit sandpaper around the edges for an even, soft finish.
- Wipe the entire wood surface thoroughly with a dry tack cloth or lint-free cloth to remove sanding dust.
- If needed, gently wipe the wood with a damp cloth and let it dry completely before proceeding.
- Your wood blank is now smooth and clean, ready for stain or paint application to help colors adhere properly and last longer.
Design Transfer Methods: Vinyl, Paint, and Stencils Compared
Vinyl decals, hand-painting, and stencils each have strengths that fit different round wood sign projects. Vinyl offers clean, sharp designs and is fast for simple graphics. Hand-painting adapts well to custom artwork with a personal touch. Stencils help replicate intricate or repeatable patterns with less freehand skill. Selecting the best method comes down to your design detail, skill level, and the look you want.
Using Adhesive Vinyl Decals
Adhesive vinyl involves cutting your design with a vinyl cutter or buying pre-cut vinyl shapes. Transfer tape holds the cut vinyl in place while applying it onto the wood round. Carefully align the vinyl by folding the transfer tape into a taco shape and positioning it over the wood before pressing it down. Vinyl allows crisp edges and solid colors without brush strokes, making it popular for text and simple shapes.
Applying vinyl requires a clean, dry wood surface. Paint under vinyl can lift if the paint is still soft or not fully cured, so wait at least 24 hours after painting before applying vinyl decals. Vinyl costs vary but expect around $10 to $20 for a small sheet of vinyl material. Vinyl application speed and neatness make it ideal for quick projects or when you want a smooth, professional look without hand-painting skills.
Hand-Painting Your Design
Hand-painting a round wood sign offers full control over your design. Use brushes, paint pens, or markers to add text and art. Painting requires more time and steady hands but lets you add color gradients, shading, or freeform details that vinyl cannot replicate.
Start with a clean and sanded wood surface. Lightly sketch your design with a pencil or use transfer paper to trace a printed design, shading the back with graphite and tracing over the lines. Use acrylic paint or paint pens for vibrant colors. Dry time depends on the paint, usually 1 to 2 hours for acrylics. Paint costs roughly $1 to $5 per color for small craft bottles.
Good hand-painted signs show neat edges and consistent coverage. Mistakes can be fixed by light sanding or repainting, although careful brush control minimizes errors.
Applying and Removing Stencils
Stencils are templates cut from plastic or paper that guide where to paint. Tape your stencil securely to prevent paint from bleeding underneath. Use a sponge or stencil brush to dab or brush paint carefully within the stencil openings.
Stencils work well for detailed or repeatable designs while requiring less artistic skill than freehand painting. After painting, remove the stencil slowly and clean it for reuse. Costs for stencils vary widely, from $5 for basic designs up to $20 or more for intricate or custom stencils. You can also cut your stencils from vinyl or cardstock for a more personalized touch.
Tips to avoid smudging include applying thin paint layers and letting each coat dry between applications. Stencils provide crisp edges and pattern uniformity that hand-painting may not achieve, especially on curved wood rounds. Here’s a comparison table highlighting key pros and cons of vinyl, paint, and stencils for your round wood sign project:
| Method | What It Is | Pros | Cons | Typical Cost | Best For |
|---|---|---|---|---|---|
| Vinyl Decals | Pre-cut adhesive designs applied with transfer tape | Crisp edges, fast, clean finish, good for text and simple shapes | Paint can lift if not fully dry, limited to solid colors | $10, $20 per sheet | Simple graphics, quick projects, consistent color blocks |
| Hand-Painting | Using brushes or pens to paint designs freehand or traced | Full design control, custom shading, multi-color gradients possible | Time-consuming, requires steady hand, potential for mistakes | $1, $5 per paint color | Custom artwork, detailed designs, personal touch |
| Stencils | Templates to guide paint application within cut-out designs | Good for intricate or repeatable patterns, easier than freehand | Paint can bleed if stencil not secure, needs careful removal | $5, $20 depending on complexity | Intricate patterns, repeatable designs, less painting skill needed |
Choosing the right design transfer method depends on your project goals. Vinyl works best if you want smooth, modern designs without painting. Hand-painting suits personalized, detailed artwork. Stencils strike a balance for intricate designs with less freehand skill. Considering time, cost, and skill level will help you pick the option that fits your round wood sign perfectly.
Painting and Adding Decorative Details Effectively
Acrylic paint works best for round wood signs because it dries quickly, usually within 20 to 30 minutes, allowing you to add multiple layers without long waits. It also lasts well outdoors with proper sealing, resisting fading and cracking better than latex or oil-based paints. Use high-quality, water-based acrylics for vibrant colors and easier clean-up. When painting your design, start with a thin base coat to avoid drips and uneven texture. Allow each coat to dry completely before adding the next one, this usually takes about half an hour in warm conditions.
To add stripes, shading, or intricate details, use painter’s tape or stencils to keep lines crisp. For stripes, measure and mark evenly spaced lines with a pencil, apply tape, then paint the exposed areas. Remove the tape after 10 to 15 minutes or when the paint is dry to the touch to prevent peeling. For shading, blend colors while the paint is still wet by lightly brushing a clean, damp brush over the edges where colors meet. This creates smooth transitions and depth in your design.
Layering colors produces a polished look but requires patience. Wait until the previous layer is dry to prevent muddying colors. For best results, use light layers and build up color gradually. If your design includes hand-lettering, fine-tipped brushes or paint pens work well for precision. Practice steady strokes on scrap wood before applying to your sign. Foil accents can be added after painting and sealing by applying a clear adhesive or medium designed for foil. Press the foil sheet onto the adhesive once it’s tacky, then peel it off to reveal shiny details. This adds a sophisticated touch but take care to use foil products intended for woodworking.
Allow each paint layer to dry fully before adding another; layering wet paint causes colors to blend unintentionally and look messy.
Applying decorative details like distressing around edges or adding small embellishments after painting improve the finished product. Use fine sandpaper to gently rub edges for a vintage feel. This method highlights layers underneath and adds character. Before hanging, ensure all paint is dry and sealed well to protect your work and maintain its appearance over time. Good ventilation and moderate temperatures (around 65 to 75°F) speed drying and improve paint adhesion. Expect to spend about 2 to 3 days from painting to final sealing, considering drying times between steps.
Sealing and Protecting Your Finished Wood Sign
Sealing your round wood sign is essential to protect it from wear, moisture, and sun damage, whether it’s displayed indoors or outdoors. Choosing the right sealant and applying it correctly will ensure your sign remains attractive and durable for years. Proper drying and curing times let the finish harden fully, preventing tackiness and premature wear.
Choosing the Right Sealant Type
Polyurethane is a popular choice for sealing round wood signs because it provides a tough, water-resistant finish suitable for both indoor and outdoor use. There are oil-based and water-based polyurethanes; oil-based varieties tend to dry slower (6 to 8 hours per coat) and have a slightly amber tone, while water-based dry faster (2 to 4 hours) and stay clear. For outdoor signs, look for polyurethane labeled as “exterior” or “marine” for added UV protection.
If you want a softer, more natural look, especially indoors, wax finishes offer a matte sheen and feel smooth to the touch. However, wax is less protective against moisture and wear, so it’s best used on signs kept away from harsh conditions. Some eco-friendlier options include water-based polyurethanes that emit lower VOCs (volatile organic compounds), making them better for indoor air quality.
Applying Sealant Evenly
Applying sealants evenly prevents streaks, bubbles, and uneven wear. Start by ensuring your painted or stained sign is fully dry, usually 24 hours, before sealing. Use a clean, high-quality synthetic brush or a foam brush for polyurethane. Wax comes in paste or liquid form and is applied with a soft cloth or brush. Follow these steps to apply sealant for best results:
- Stir the sealant gently without shaking to avoid bubbles.
- Apply a thin, even coat along the wood grain using smooth strokes.
- Let the first coat dry fully (refer to product instructions: 2, 8 hours depending on sealant and temperature).
- Lightly sand the surface with fine-grit sandpaper (220 grit) to remove imperfections and improve adhesion.
- Remove dust with a tack cloth or damp rag.
- Apply a second thin coat repeating the same technique.
- For outdoor signs, apply at least three coats for maximum protection.
- Allow final coat to dry and cure completely before use.
Drying and Curing Timeframes
Drying times vary by sealant type and environmental conditions such as temperature and humidity. Polyurethane usually dries to the touch between 2 to 8 hours. Oil-based versions need longer, sometimes up to 24 hours for recoat. Water-based polyurethanes dry faster, so you can apply additional coats after about 2 hours.
Curing is different from drying: it means the sealant reaches full hardness and durability. Allow sealed signs to cure for 24 to 72 hours indoors, and up to a full week outside before exposing them to heavy wear or water. Wax finishes may require buffing after drying, which usually takes 1 to 2 hours, and need occasional reapplication every few months for ongoing protection.
Attaching Hanging Hardware and Adding Final Decor
Heavier round wood signs need sturdy hardware to hold their weight without warping or falling. D-ring hangers and heavy-duty sawtooth hangers are reliable choices; they screw securely into the back of the wood and distribute weight evenly. For a rustic or casual look, strong twine or wire loops can work, but make sure they are knotted tightly and tested before hanging. Use appropriately sized screws, usually 1 to 1.5 inches long, to avoid splitting the wood, and pre-drill holes for a cleaner finish.
When attaching decorative elements like ribbons or bows, apply them only after sealing the wood with urethane to protect the finish and adhesive bond. Hot glue works well for securing fabric bows, flowers, and similar 3D pieces. Press each item firmly and hold for 30 to 60 seconds to ensure a good hold. For more permanence, wood glue or small finishing nails might be better depending on the thickness of the decor. Check for balance and placement by holding the sign up before the glue fully sets.
Double-sided signs are a great way to showcase different designs for different seasons or events. To do this, attach hardware like a wire loop across the top edge so it can hang without tilting the sign one way or the other. Be sure to seal and decorate both sides separately, allowing adequate drying time, typically 2 to 4 hours per coat of sealant. Avoid heavyweight decor on both sides if hanging on a thin twine line to prevent flipping.
- D-ring hangers for heavy signs, install two about 2-3 inches from each side edge on the back
- Heavy-duty sawtooth hangers for medium weight, centered near top edge
- Twine, ribbon, or wire loops tied through drilled holes for light to medium signs
- Hot glue or wood glue for attaching bows, flowers, and lightweight 3D decor
- Pre-drill holes for screws to prevent wood cracking
- Seal the wood and vinyl with urethane before adding any glued decor
- Use wire loops for double-sided signs to balance the weight
Cost for most hanging hardware ranges from $3 to $10 per package, depending on the type and quantity. Investing in good fasteners ensures your sign stays securely displayed. Check the weight of your round wood sign before choosing hardware to avoid unnecessary wall damage or sign falls. Align all hardware carefully using a ruler or level for professional-looking results.
Common Mistakes and How to Fix Them Quickly
Paint smudges and bleeding can ruin the clean look of your round wood sign. This usually happens when paint is too watery or applied too thickly over an uneven surface. Fix paint smudges by lightly sanding the area with fine-grit sandpaper (around 220 grit) once the paint is dry, then repaint the spot using a small brush with less paint and thinner coats. To avoid bleeding, seal the wood with a clear sanding sealer or polyurethane before painting designs. Using painter’s tape around edges also helps keep lines sharp.
Vinyl peeling or bubbling after application usually means the surface wasn’t clean or dry enough, or the vinyl wasn’t pressed down firmly enough. You can fix bubbles by using a pin or sharp needle to gently prick the bubble and then smooth out the vinyl with a scraper or credit card. To reapply peeled vinyl, warm the backing slightly with a hair dryer to soften the adhesive and press it back down carefully. Ensuring your wood is dust-free and sealed before applying vinyl reduces the chance of these issues.
Staining mistakes like blotches or uneven colours usually happen because the wood was not sanded thoroughly or was left damp. To fix blotchy stains, sand the affected area with fine-grit sandpaper and wipe the dust off. You may need to apply a wood conditioner beforehand next time, especially on soft woods like pine. A stain that’s too dark or uneven can be fixed by stripping it with a wood stain remover or mineral spirits, then sanding and applying a new coat. Allow stains to dry for 24 to 48 hours in a well-ventilated area before sealing.
Sealing errors such as a cloudy finish or sticky surfaces often result from applying sealer too thickly or on a damp sign. To fix, sand lightly with very fine sandpaper (320 grit or finer), wipe clean, and apply a thin, even layer of sealer according to the product instructions. Use polyurethane or acrylic sealers designed for wood signs. Let each coat dry fully, usually 4 to 6 hours, before adding another. For outdoor signs, apply at least two coats for protection.
Always test paint and stain on a scrap piece of the same wood to prevent surprises before working on your sign’s main surface.
Step-by-Step Action Plan for Your Round Wood Sign
Follow these steps to complete your round wood sign confidently and efficiently.
- Before you start: Choose a smooth, unfinished wood round 12 to 18 inches in diameter and gather all your tools and supplies. Check wood for cracks and smoothness to ensure a good paint surface.
- Day 1: Sand the wood surface with 120-grit sandpaper and finish with 220-grit for a smooth base. It should feel smooth and free of rough patches.
- Day 2: Transfer your design using vinyl stencil or paint stencil, making sure edges are firmly stuck to avoid paint bleed. Your outline should be crisp and clear.
- Day 3: Paint your design with acrylic paint using light layers, allowing each coat to dry fully. Colors should be even and vibrant without drips.
- Day 4: Add decorative details like borders or lettering with fine brushes once the base paint is dry. Details should be sharp and fully dry before sealing.
- Day 5: Apply two coats of outdoor polyurethane or a water-resistant sealer with light sanding between coats if advised by the product instructions. Finish should be smooth and protective.
- Day 6: Attach appropriate hanging hardware securely to the back, such as D-rings or sawtooth hangers. The hardware should feel tight and stable.
- After 1 week: Add any final decor like faux greenery or small embellishments using hot glue or strong adhesive, ensuring all attachments hold firmly.
Frequently Asked Questions
What Is the First Step in Making a Round Wood Sign?
Start by selecting a smooth, round wood blank that suits your desired sign size. Sand the surface thoroughly to prepare it for painting or staining, ensuring the design adheres well and the finish looks clean.
Can I Use a Silhouette CAMEO or Cricut to Create Designs on Round Wood Signs?
Yes, round wood signs are very popular for use with Silhouette, Cricut, and ScanNCut machines. You can cut vinyl designs to transfer onto your wood sign for precise, crisp lettering and images.
How Do You Make a Double-Sided Round Wood Welcome Sign?
To make a double-sided sign, create your design on both sides of the wood blank, allowing each side to dry fully before handling. A step-by-step video tutorial can guide you through aligning the designs on each side accurately.
How Long Should I Let Paint or Stain Dry on a Round Wood Sign Before Sealing?
Let the paint or stain dry completely, usually a minimum of 2 hours, before applying any sealer. This ensures the finish sets properly and prevents smudging or peeling during sealing.
Can I Use Heat Transfer Vinyl on Round Wood Signs?
Yes, heat transfer vinyl can be applied but works best on smooth, flat areas of wood. Adhesive vinyl is generally easier to use for curved surfaces like round signs.
What’s a Simple Design Idea for Beginners Making Round Wood Signs?
A “Home Wreath Welcome Sign” svg file is a straightforward design that’s easy to apply on round wood signs, perfect for creating a warm, inviting look without complex detailing.
Final Thoughts
Making a round wood sign involves choosing the right materials, preparing the surface, transferring your design sharply, painting carefully, and sealing for durability. Start by picking a quality wood round and sanding it smoothly to create a perfect canvas. Your next step: plan your design method and gather the right stencils or vinyl for clean paint application.