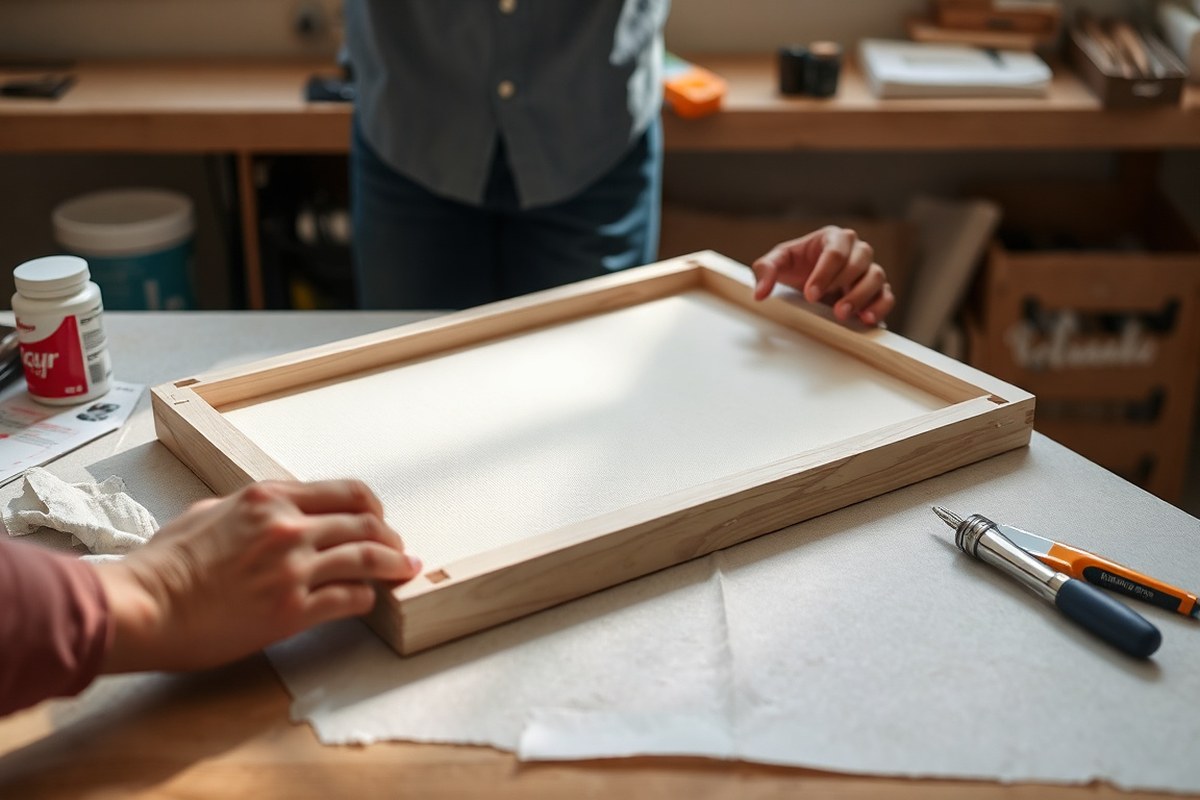
How to Make Reverse Canvas Signs a Complete Guide with Pro Tips & Design Ideas
How to make reverse canvas signs is simple and affordable, turning cheap canvases into trendy home decor. The process involves removing the canvas from its wooden frame, applying your design to the back, and then reassembling it for a rustic, framed look. Start by carefully detaching the canvas using staple removers or pliers, protecting both canvas and frame for an easy redo.
Key Takeaways
- Use an effective staple remover or pliers to carefully detach the canvas without tearing it.
- Use an iron or heat press to press the canvas for 10-15 seconds to eliminate any moisture before starting your design.
- Apply vinyl designs using the proper heat settings: 290°F for Foil Iron On and 270°F with a Cricut EasyPress.
- Place staples 2-3 inches apart along the canvas edges when reattaching for a secure hold.
- Use stain or paint to improve the wood frame, repeating stain after 30 minutes for a darker finish.
- Remove small slots near inside corners of the frame to prep it for reattaching the canvas smoothly.
What Is a Reverse Canvas Sign and How Does It Work?
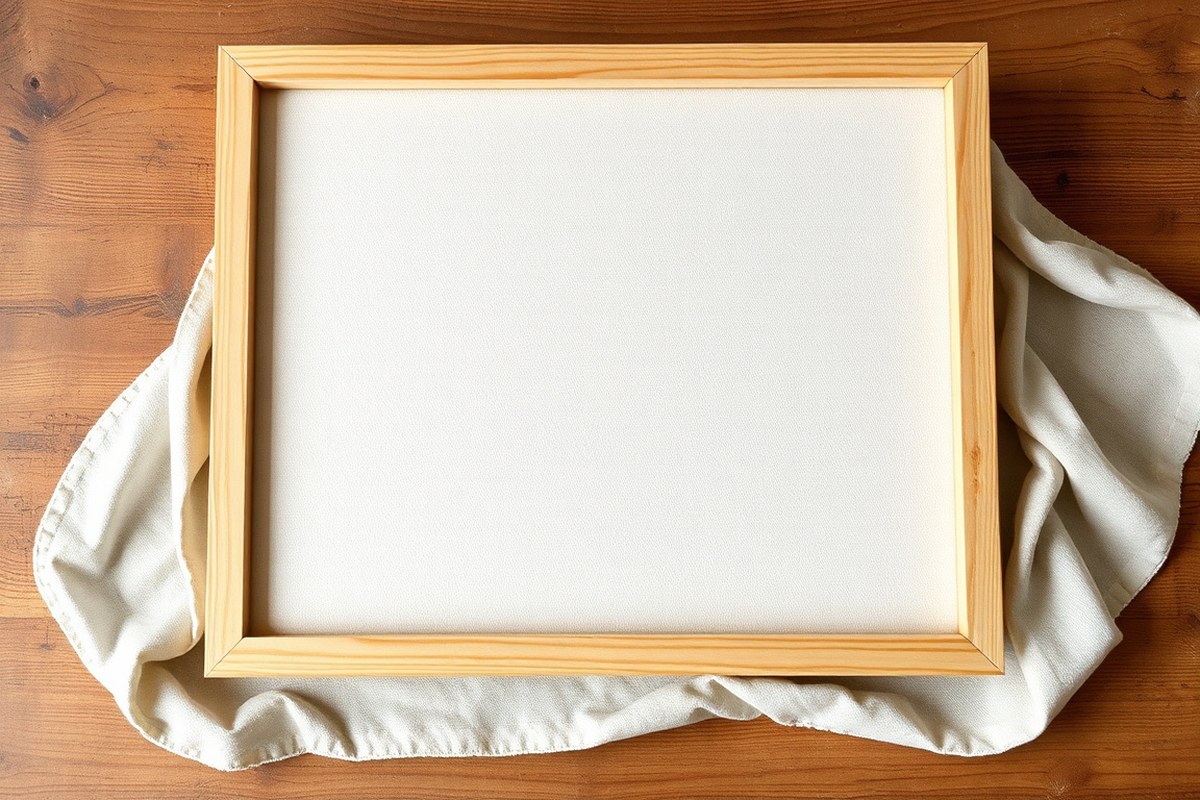
A reverse canvas sign uses a stretched canvas in a way that flips the traditional canvas art concept. Instead of painting or drawing on the front as usual, you carefully remove the canvas from its wooden frame, flip it around, and then staple the back of the canvas to the front side of the frame. This exposes the wooden frame’s front, which becomes the base for your design. The canvas side, now facing inward, serves as a stretched fabric backing that gives texture and depth behind your design.
This technique differs from a regular canvas sign because it changes the focus from the stretched painted canvas to the frame itself. By flipping the canvas, the wood frame essentially becomes the face of the sign, and the canvas fabric works like a backdrop. This creates a textured shadow box effect without needing additional framing or backing materials. It allows you to make farmhouse-style, rustic, or modern signs with visible wooden edges, giving your DIY decor a distinctive handmade look.
To make a reverse canvas sign, you start by removing the canvas from the wooden frame. This involves pulling out staples with a staple remover or pliers, which usually takes about 10 minutes depending on the frame size and staple placement. Once free, flip the canvas over and smooth out any wrinkles. You then stretch the canvas back across the wood frame’s front side, tacking the fabric onto the wood’s front edges. This stretched canvas provides a tensioned fabric surface behind the exposed frame.
The reason for flipping the canvas is to use the frame as part of the design and to reveal the wooden edges for a more textured, dimensional sign. It adds visual interest you don’t get with a standard canvas stretched tightly over a frame. This also frees you to add vinyl lettering or paint directly onto the wooden panel, letting you customize the sign with different colors, fonts, or themes depending on your space. For example, many crafters use a Cricut or other cutting machine to create vinyl words or shapes that stick well to the wood surface, making it easy to personalize your project.
Reverse canvas signs have gained popularity because they are budget-friendly and accessible for people new to crafting. They often reuse inexpensive dollar store canvases, so the material cost typically stays under $10 per sign. The process doesn’t require advanced woodworking skills or heavy tools, making it available for beginners. Many find it faster and simpler than building a wood sign from scratch, yet it produces a similar farmhouse-style aesthetic that suits modern home decor.
You can customize your sign’s size by choosing different canvas sizes, typically ranging from 8×10 inches to 16×20 inches or larger, based on your wall space. Variations include stenciling or painting directly on the wood frame or layering seasonal embellishments. Some creators even remove the canvas completely after flipping it to use only the frame and backing, but most keep the canvas stretched for added dimension and to protect walls when hanging. Using Velcro strips for mounting is a common method that lets you swap signs out damage-free with seasonal decor changes.
Essential Materials and Tools for Making Reverse Canvas Signs
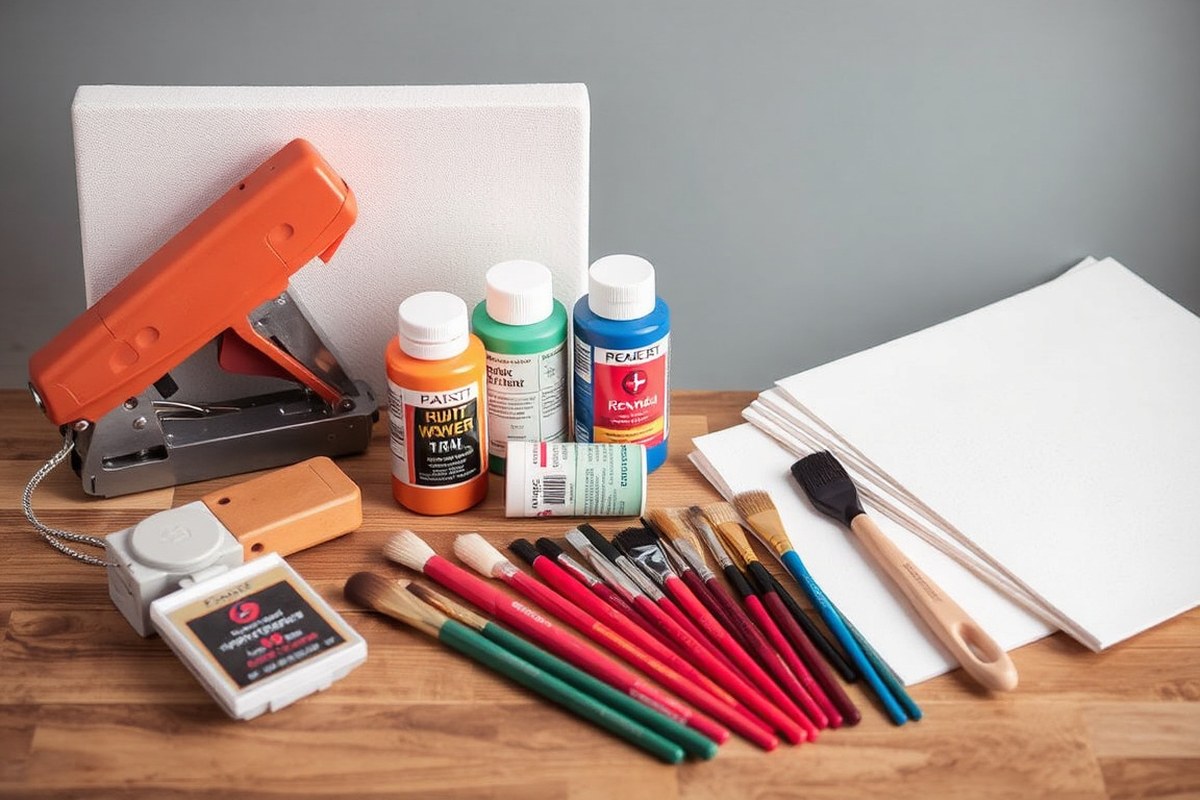
You’ll need a few basic tools and materials to make reverse canvas signs, but you don’t have to spend a lot to get started. The right canvas size, type, and vinyl choice will affect your final look and ease of crafting. Picking usable supplies helps beginners avoid frustration and saves money.
Required Tools for Reverse Canvas Signs
Some tools are essential for every project, while others are optional extras that can make the process easier or add variety to your design. At minimum, a staple remover or flathead screwdriver to take off the canvas, scissors or a craft knife for trimming, and strong adhesive or a staple gun to reattach the canvas are needed.
If you plan to use vinyl designs, a cutting machine like a Cricut or Silhouette helps cut precise images and letters. However, it’s possible to craft without one by painting directly on the canvas or using stencils. A basic iron or heat press is required only if you use heat transfer vinyl (HTV).
- Staple remover or screwdriver
- Scissors or craft knife
- Staple gun or strong glue
- Cutting machine (Cricut or Silhouette) – optional but helpful
- Iron or heat press – only if using HTV
- Paint and brushes or stencils (alternative to vinyl)
Beware that removing staples can damage your canvas if done roughly, take your time to avoid tears.
Best Canvas Types and Sizes Explained
Standard canvases in sizes from 8×10 to 16×20 inches work well for reverse canvas signs. These sizes are manageable for beginners and fit most wall spaces. Choose a canvas with a medium weave; too coarse or too fine could affect how your vinyl or paint adheres.
Pre-stretched canvases with wooden frames are ideal because they allow easy removal and reattachment of the fabric. Cotton canvases tend to hold paint and vinyl better than polyester blends. Consider the depth of the frame too, deeper frames (around 1.5 inches) make reattaching the canvas simpler without awkward folds or stretching.
| Canvas Type | Best Size | Material | Frame Depth |
|---|---|---|---|
| Pre-stretched standard canvas | 8×10 to 16×20 inches | Cotton canvas | 1.5 inches or deeper |
| Value pack canvases (budget option) | Varies, often 11×14 | Mixed cotton/polyester | 1 inch minimum |
Vinyl Options: HTV vs 651 vs Foil Iron-On
Heat transfer vinyl (HTV) and 651 permanent vinyl are the most popular materials for applying designs to reverse canvas signs. HTV requires heat to adhere, so you’ll need an iron or heat press and usually a backing surface inside the canvas frame area. It works well for fabric surfaces but can be tricky without the right tools.
651 vinyl is permanent adhesive vinyl that you can apply directly to the canvas frame or the front if desired. It does not require heat, making it easier for beginners who don’t own a heat press. However, getting 651 vinyl to stick firmly to canvas fabric requires extra care in prepping the surface.
Foil iron-on vinyl adds a metallic finish and also requires heat pressing, usually around 290° Fahrenheit for 30 seconds on a heat press mat. This option is decorative but less durable outside controlled environments.
| Vinyl Type | Application | Required Tools | Suitability |
|---|---|---|---|
| Heat Transfer Vinyl (HTV) | Pressed onto canvas fabric | Iron or heat press | Best for fabric; needs backing |
| 651 Permanent Vinyl | Adhesive applied directly | No heat required | Good for smooth surfaces; careful prep needed for fabric |
| Foil Iron-On Vinyl | Pressed with heat for shine | Heat press, 290°F, 30 sec | Decorative, less durable outdoors |
Affordable supplies can often be found at dollar stores or craft discount retailers. Buying the basic tools and canvas kits instead of individual canvases and frames cuts costs. Online marketplaces also offer starter vinyl packs at reasonable prices. Experiment with alternatives like painting or stenciling until you’re ready to invest in a cutting machine.
Step-By-Step Process to Remove and Prep Your Canvas and Frame
Removing and prepping the canvas and frame are the first hands-on steps to making a reverse canvas sign. You want to carefully detach the canvas without tearing it, clean up the wood frame, then remove any wrinkles or moisture from the fabric. Each part requires attention to avoid damage and keep materials ready for the next steps.
Removing Canvas and Staples Safely
Use tools like a flat screwdriver, an awl, and needle-nose pliers to pry up staples gently along the edges of the frame. Avoid pulling staples from the corners, as these often hold the frame assembly together. Run a razor blade or X-acto knife between the wood frame and canvas to cleanly separate the fabric. Expect some dents in the wood and roughness on the canvas edge; these will not show in the finished sign since the canvas will be trimmed and stapled on the back. A careful process prevents tearing the canvas or breaking the frame apart.
- Place the canvas face down on a flat surface, exposing the staple-backed frame.
- Use needle-nose pliers to gently pull staples up a little at a time, working along one side.
- Slide a flat screwdriver or awl under the partially lifted staples for use if needed.
- Repeat for all sides, avoiding corners where frame supports are stapled.
- Use a razor blade to separate the canvas edge fully from the wood frame, cutting any stubborn fabric attached.
- Remove the canvas from the frame completely, setting aside both pieces for prepping.
Prepping the Wood Frame with Sanding or Staining
Once the canvas is removed, the wooden frame will likely have scratches and staple dents. Sand it lightly with 120- to 220-grit sandpaper to smooth rough spots and prep the surface for paint or stain. This step matters most before adding any finish to improve adhesion and appearance. Allow the frame to dry completely if you stain it, to avoid sticking when reattaching the canvas. Choose sanding or staining now because the canvas will cover the back, keeping the front visible and fresh.
Flattening and Ironing the Canvas Fabric
The canvas normally holds wrinkles and moisture from storage and removal, so pressing it before reusing makes a big difference. Heat your iron or heat press to around 365°F (185°C). Press the canvas on a hard, flat surface for 10 to 15 seconds at a time, moving carefully to avoid scorch marks. Do not slide the iron to prevent distortion.
You can use flat push pins to carefully stretch the canvas taut when pinning it later during reattachment. Wrinkles may soften with heat, but deep creases often need careful gentle stretching or minor trimming. Take your time preparing the canvas for a smooth, professional look in your finished sign.
Applying Your Design: Techniques for Vinyl and Other Decorations
To apply vinyl designs on your reverse canvas sign, heat transfer vinyl (HTV) is usually your best choice because it adheres better to canvas when heat is applied. You’ll need to cut your design mirrored on HTV using a machine like Cricut or Silhouette, then press it onto the canvas using a heat press, iron, or Cricut EasyPress with precise temperature and timing. When you don’t have a cutting machine, paint and stencils work well for adding custom graphics and text.
Using Cricut or Silhouette to Cut Vinyl Designs
Start by creating or selecting your design in the Cricut Design Space or Silhouette Studio software. Always remember to mirror your design before cutting so it reads correctly when transferred. Choose heat transfer vinyl (HTV) rather than regular adhesive vinyl for canvas, as HTV bonds firmly and withstands washing or handling better.
Prepare your HTV sheet by placing it glossy side down on the cutting mat. After cutting, use a weeding tool to remove all excess vinyl from your design, leaving only the final graphic on the clear carrier sheet. This makes the piece ready for pressing onto your canvas.
Ironing Vinyl Onto Canvas with Heat Press Settings
Place your canvas on a heat-resistant surface, then position the vinyl design on the canvas with the carrier sheet facing up. Use a heat press, iron, or Cricut EasyPress to apply heat and pressure to the design.
| Heat Source | Temperature | Time | Pressure |
|---|---|---|---|
| Heat Press | 315°F (157°C) | 15 seconds | Medium firm |
| Cricut EasyPress | 315°F (157°C) | 15 seconds | Medium firm |
| Iron (no steam) | High cotton setting | 15 seconds | Firm, even pressure |
After pressing, let the vinyl cool slightly before carefully peeling the carrier sheet away. To avoid bubbling or peeling later, don’t skip this cooling step, and be sure to apply steady, even pressure during the entire press time. When bubbles appear, pressing again with a protective cover sheet like parchment paper can help fix them. Checklist to press vinyl smoothly:
- Clean and dry your canvas surface.
- Position vinyl design glossy side up on canvas.
- Set heat press or iron to proper temperature and disable steam.
- Apply medium firm pressure for 15 seconds.
- Allow design to cool before removing carrier sheet.
- Press again if bubbles or edges lift.
Design Ideas Without Cutting Machines
No cutting machine? You can still create beautiful reverse canvas signs using paint, stencils, and embellishments. Use acrylic paint with fine brushes or foam brushes to hand-paint your design or words directly onto the canvas.
Stencils are a dependable way to get sharp lines without a vinyl cutter. Secure your stencil with painter’s tape and apply paint through it with sponges or stippling brushes to avoid bleeding. After the paint dries, you can add decorative touches like glitter, adhesive gems, or small wood cutouts attached with craft glue or hot glue.
- Hand-paint designs or lettering with acrylic paint.
- Use premade or DIY stencils for crisp shapes and text.
- Apply Mod Podge after painting for a protective finish.
- Add embellishments like wood shapes, jewels, or ribbons.
- Layer multiple paint colors using sponging techniques.
These alternatives allow more flexibility with design and materials if you’re new to vinyl or don’t own a cutter. Painted and stenciled signs have a charming handmade style and are easier to modify or fix over time.
How to Reattach and Secure the Canvas to the Frame Perfectly
Stretching and stapling the canvas evenly onto the frame is essential for a clean, wrinkle-free reverse canvas sign. The key is to apply even tension while stapling and secure the canvas with consistent staple spacing. This prevents sagging and loose edges that can spoil the final look. Using a staple gun is the most common and effective method, but other options like double-sided tape or upholstery tacks can work depending on your project needs.
Stapling starts with proper alignment and progresses symmetrically to keep tension equal around the canvas. The staple gun should be set to insert staples about 2 to 3 inches apart along each edge. Adjust the canvas as you go to maintain smoothness. For best results, paint or stain the wooden frame before attaching the canvas to avoid wet paint staining the fabric.
- Prepare the frame: Make sure the frame is clean and dry. Apply stain or paint to the front side only and allow it to fully dry away from the canvas.
- Position the canvas: Lay the canvas flat with the painted side down. Center the frame on the canvas, leaving enough excess fabric to staple inside the back edges (about 1 to 2 inches).
- Start stapling at the center top: Pull the canvas tightly upward and staple one or two staples at the center of the top edge on the back of the frame.
- Staple the bottom center: Stretch the canvas downward evenly and place staples at the bottom center, matching the tension from the top.
- Attach the sides: Move to the left and right centers, pulling the canvas taut and stapling. Continue to staple from the center out toward the corners in small increments (every 2 to 3 inches), adjusting tension as needed.
- Secure the corners: Fold the canvas neatly at corners, pulling taut to prevent wrinkles, and staple firmly.
- Check for sagging or loose edges: If you notice uneven spots, remove the staples in that area and restretch before stapling again.
- Trim excess canvas: Use a sharp utility knife to cut away any surplus fabric from the back, leaving a neat edge inside the frame.
| Method | Advantages | Disadvantages |
|---|---|---|
| Staple gun | Strong hold, quick, widely available, adjustable | Requires a staple gun and staples, possible fabric damage if over-stretched |
| Double-sided tape | Easy to apply, no damage to fabric | Weaker hold, less durable, may peel over time |
| Upholstery tacks | Decorative options, strong hold | Slower to apply, requires hammering, risk of splitting frame |
Stretch the canvas evenly from the center toward each side before stapling to avoid wrinkles and loose edges.
Finishing Touches: Embellishments, Stains, and Paint Options
Stains change the wood’s appearance by soaking into the grain, improving its natural texture and color. Gel stains offer richer, deeper hues without runniness, making them ideal for wooden frames. Apply with a cloth or brush, and wipe off excess within 5 minutes to avoid blotches. For a classic look, use walnut or dark mahogany; lighter finishes like oak brighten the frame. Two to three coats typically provide an even color and protection, drying around 2 to 4 hours between coats.
Acrylic paint works well for both frames and canvas, especially for bold, solid colors. Thin the paint slightly by adding a few drops of water; this helps prevent cracking and gives smoother coverage. Apply with a foam brush or sponge for even coats. One to two coats usually suffice on wood, but canvas might need three thin layers to avoid stiffening the fabric. Let each coat dry completely, about 30 minutes to an hour. Use chalk paint for a matte, shabby-chic finish on the frame.
Adding embellishments personalizes your sign and matches your style. Tassels, ribbons, or faux greenery glued to the corners bring texture and dimension. Small decals or vinyl cutouts add detail without bulk. Use a hot glue gun to attach heavier items securely. For autumn or Halloween, add miniature pumpkins or leaves; for Christmas, try ornaments or twine bows. Summer designs can include red, white, and blue elements for holiday spirit, such as small flags or star-shaped charms.
- Layer different stain colors by applying a base coat, lightly sanding, then adding a second color for depth
- Use painter’s tape to create crisp paint edges or stripes on the frame
- Add a clear matte or satin sealant to protect stains and paint from wear
- Trim excess canvas after reattaching for a neat edge
- Pair white acrylic paint on the frame with a natural canvas background for contrast
- Try iron-on vinyl for designs but avoid the glossy side of the canvas as it might not adhere well
- Seasonal embellishments can be swapped out for different holidays, making the sign reusable year-round
For good results, test stain or paint on a scrap piece of wood or canvas first, especially if mixing colors. Avoid thick paint layers on canvas to keep it flexible. Protect your work area and wear gloves when staining or painting. Finishing touches are key to making your reverse canvas sign look professional and reflect your personal taste, whether rustic, modern, or festive.
Common Mistakes with Reverse Canvas Signs and How to Fix Them
Wrinkles and sagging canvas often happen when the fabric isn’t stretched evenly during reattachment. Pull the canvas taut, starting from the center of each side and then moving toward the corners. Use a staple gun to secure the canvas step-by-step, alternating sides as you go, to maintain even tension. Avoid overstretching, which can cause tears or warping. You may notice wrinkles after stapling; in that case, gently loosen a few staples on that side and re-stretch the canvas.
Vinyl that won’t stick or forms bubbles typically means the surface wasn’t clean, dry, or smooth enough before application. Wipe the canvas with a lint-free cloth and isopropyl alcohol to remove dust and oils. Apply the vinyl slowly using a squeegee or credit card, pressing from the center out to push air bubbles toward the edges. Small bubbles can be smoothed out by puncturing them carefully with a pin and pressing the air out. For stubborn vinyl peeling, heating it gently with a hair dryer on low can improve adhesion.
Misaligned staples and damage to the frame can spoil the overall look. Use needle-nose pliers to carefully pull out staples that went in crooked and reposition the canvas. Minor frame damage such as staple holes or dents can be covered with wood putty. After the putty dries (usually 15 to 30 minutes), sand it smooth and paint over to match the frame’s finish. Alternatively, paint over visible staples on the front of the frame for a quick fix.
Smudged paint or stain can be tricky to fix depending on how much it affects the surface. When the paint is still wet, wipe it gently with a damp cloth without spreading it further. Once dry, sanding the affected areas lightly with fine-grit sandpaper (220 grit) and repainting or re-staining often works best. Prevent smudges by allowing adequate drying time between coats, usually at least 2 hours, and avoid handling the sign during this period.
- Clean surfaces thoroughly before vinyl application to prevent peeling.
- Stretch canvas evenly, starting from the middle of each side, to avoid wrinkles.
- Remove crooked staples with needle-nose pliers and fill holes with wood putty.
- Use a hair dryer sparingly to fix stubborn vinyl edges.
- Sand and repaint frame repairs for a smooth finish.
- Allow paint or stain to dry completely before touching or applying extra coats.
Uneven tensions or crooked finishing mostly result from rushing the stapling or uneven measurements. Measure the frame and canvas carefully before reattaching. Use clamps or extra hands if available to maintain stable tension while stapling. Take your time aligning the canvas edges and corners with the frame’s edges. Check periodically that the canvas isn’t twisting or bunching, adjusting staples as needed before finalizing.
Hanging and Displaying Your Finished Reverse Canvas Sign
Lightweight reverse canvas signs give you plenty of options for hanging without heavy-duty hardware. For most projects, small sawtooth hangers or adhesive picture hanging strips work well and cost under $5 at craft stores. These options easily support the weight of your sign and keep it flush against the wall, which helps maintain a clean look.
Position your sign at eye level, typically between 57 and 60 inches from the floor to the center of your canvas. This height range suits most adults and maximizes visibility. Place the sign in a spot with low humidity and away from direct sunlight to preserve colors and materials. Reverse canvas signs generally aren’t designed for outdoor use or humid environments like bathrooms since the canvas and wood frame components can warp or degrade.
- Choose lightweight hanging hardware like sawtooth hangers or adhesive strips
- Mount the sign’s center at roughly 57, 60 inches from the floor
- Avoid direct sunlight and humid places such as bathrooms or kitchens
- Consider using a plate stand for tabletop or shelf display
- Use a level when installing to keep your sign straight
- Check the wall surface for damage before hanging heavy or large frames
Care for your sign by dusting with a soft, dry cloth or lightly vacuuming the canvas with a brush attachment. Avoid water or cleaning sprays, as they might stain the fabric or cause paint and vinyl decals to peel. For long-term upkeep, keep your sign indoors and away from heat sources like radiators or vents. This prevents drying or shrinking of the materials.
Use a stud finder when hanging larger signs heavier than 5 pounds to safely anchor into wall studs.
Take your time to select hanging hardware suitable for your wall type and sign weight. Proper placement not only improve visual impact but protects your work from premature wear. With the right care, your reverse canvas sign can keep looking great for years to come.
Step-by-Step Action Plan for Your Reverse Canvas Sign
Follow these key steps to create your reverse canvas sign smoothly and confidently.
- Before you start: Gather all essential materials and tools like a pre-stretched canvas, staple remover, vinyl or paint supplies, and scissors. Check that your workspace is clean and well-lit.
- Day 1: Carefully remove the canvas from the frame using a staple remover. The canvas should come off cleanly with minimal tearing.
- Day 2: Stretch and prep the canvas back onto the frame inside out. Ensure it is taut and wrinkle-free before stapling it securely on the back.
- Day 3: Apply your design using vinyl decals or paint. Verify the design adheres well and the paint is dry before moving on.
- Day 4: Add finishing touches such as wood stains, embellishments, or a top coat. Confirm these are thoroughly dry and look even.
- Day 5: Inspect your sign for any loose staples or uneven areas. Make small adjustments or repairs as needed.
- Day 6: Hang your reverse canvas sign using appropriate hardware. Test that it hangs straight and securely on your chosen wall.
Frequently Asked Questions
What Is the Best Tool for Removing Staples from Reverse Canvas Signs?
A staple remover designed for upholstery works best as it easily pulls staples without damaging the canvas or frame. This tool saves time and reduces frustration during prep.
Can I Use a Cricut Machine to Create Designs for Reverse Canvas Signs?
Yes, a Cricut machine is ideal for cutting custom vinyl words or shapes, making your signs personalized and crisp. Combine it with iron-on vinyl for easy application.
How Do I Prevent Wrinkles When Reattaching Canvas to a Frame?
Pull the canvas tight evenly before stapling to avoid wrinkles; work from center outwards. This keeps the surface smooth and professional looking.
Are Reverse Canvas Signs Suitable for Outdoor Use?
Reverse canvas signs are best used indoors since exposed canvas may deteriorate outside. Use a protective sealant if you plan short outdoor display.
What Type of Paint Works Well on Canvas for Decorating Signs?
Acrylic paint is ideal as it dries quickly and adheres well to canvas without soaking through. It also offers many color options.
Can I Reuse Old Canvases for Making Reverse Canvas Signs?
Yes, reusing old canvases saves money and adds a rustic feel to projects. Make sure to clean and prep the canvas surface before applying new designs.
Key Points to Remember
Making reverse canvas signs lets you personalize your home or gifts with style and creativity. Start with a simple design and build your confidence as you go. Pick a small canvas, remove and prep it today to get hands-on experience with this craft right away.


