How to Make Porch Signs: A Complete Guide with Expert Tips for Durable DIY
How to make porch signs starts with choosing the right materials and size for your space. Pick wood that’s weather-resistant and cut it to fit your porch height, usually around 4 to 5 feet for most homes. Preparing the wood properly and using quality finishes will ensure your sign stays durable outdoors.
Key Takeaways
- Select vertical porch signs between 3.5 and 6 feet tall based on your porch size for balanced aesthetics.
- Use cedar or pine boards for a good mix of durability and easy painting.
- Frame the sign with 1-by-2 wood pieces mitered at 45 degrees for a professional look.
- Allow paint to dry fully, about 24 hours, before gentle sanding to smooth the surface.
- Permanent Cricut Smart Vinyl works well for crisp, long-lasting lettering on porch signs.
- Incorporate inexpensive accents like grapevine wreaths and faux flowers for seasonal customization.
Essential Materials and Tools for Porch Signs
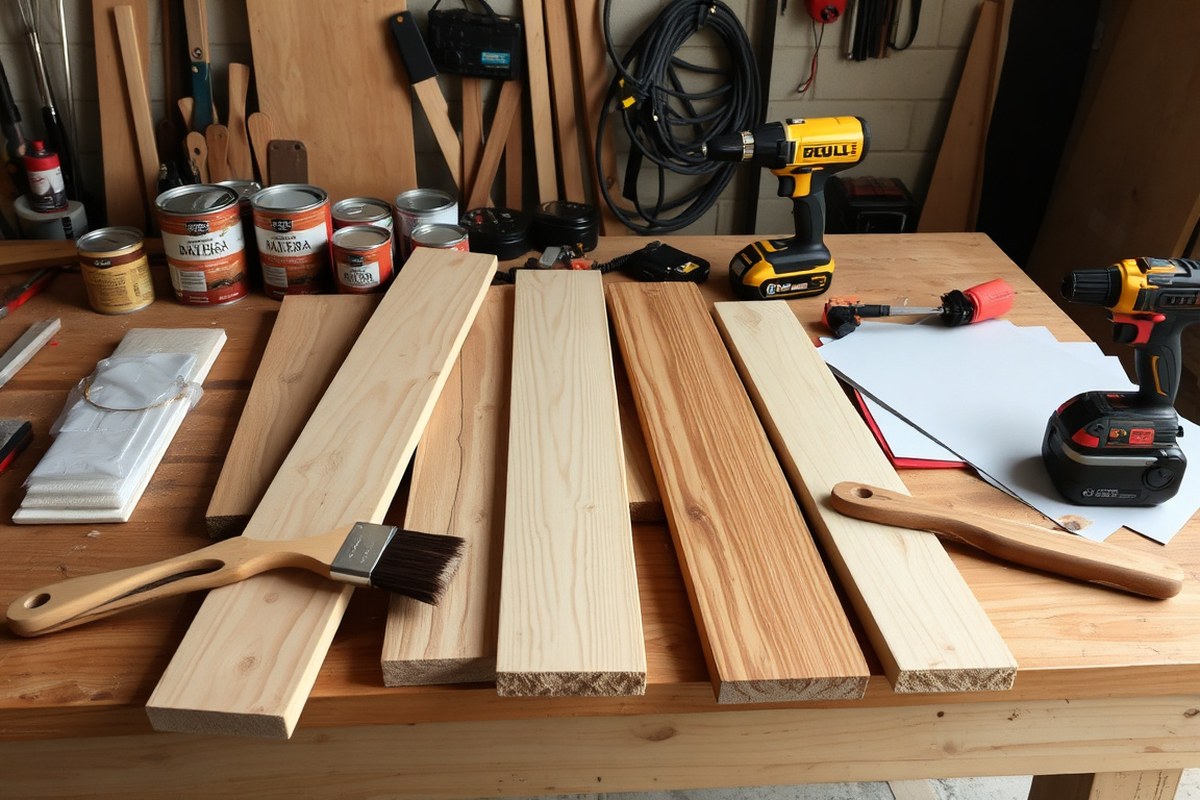
Starting a porch sign project requires choosing the right materials and tools to ensure durability and a professional look. Selecting weather-resistant wood like cedar, redwood, or pressure-treated pine is key because these woods withstand moisture, heat, and cold better than softer woods like pine or spruce. Using hardwoods such as white oak delivers a sturdy surface and looks great, but you can use any solid wood as long as it’s properly sealed and painted.
Paint choice matters for long-lasting finishes. Look for outdoor enamel or porch and floor paint, which resist fading and peeling in sun, rain, and ice. After painting, protect your sign with a clear acrylic sealer if you’ve used paint, or polyurethane if you stained the wood; both will help prevent cracking and weather damage. Let each paint and sealer layer dry for at least 24 hours before handling.
Basic but effective tools keep your build straightforward and efficient. A good handsaw or electric saw cuts the wood to size, and 220-grit sandpaper smooths rough edges and surfaces for clean paint application. Brushes or foam rollers apply paint evenly, while stencils or vinyl cutters help create sharp lettering. You should also have something to measure and mark your wood like a tape measure and pencil.
- Wood board: Cedar, redwood, pressure-treated pine, or white oak (prices vary, about $20-$50 per board)
- Outdoor enamel or porch/floor paint: weather-resistant, around $15-$25 per quart
- Clear acrylic sealer or polyurethane: protects painted or stained surfaces, $10-$20 per can
- Saw (handsaw or circular saw) for cutting wood to size
- 220-grit sandpaper for smoothing surfaces and edges
- Brushes or foam rollers for paint application
- Measuring tape and pencil for accurate layout
Protective gear is necessary to safeguard your health while working. Safety glasses shield your eyes from sawdust and flying debris when cutting wood. A dust mask helps prevent inhaling fine wood particles during sanding. Gloves can protect your hands from splinters and paint chemicals.
For a successful porch sign that lasts, start by cutting your chosen wood to the desired size, usually between 3.5 and 6 feet tall for vertical signs. Sand all surfaces and edges thoroughly with 220-grit sandpaper to ensure smooth paint adhesion. Apply two coats of outdoor paint, allowing at least 24 hours drying time between coats. Finish by sealing the painted surface with a clear acrylic or polyurethane sealer, letting it cure for 24 hours before installation.
Choosing the Right Wood and Finishes for Longevity
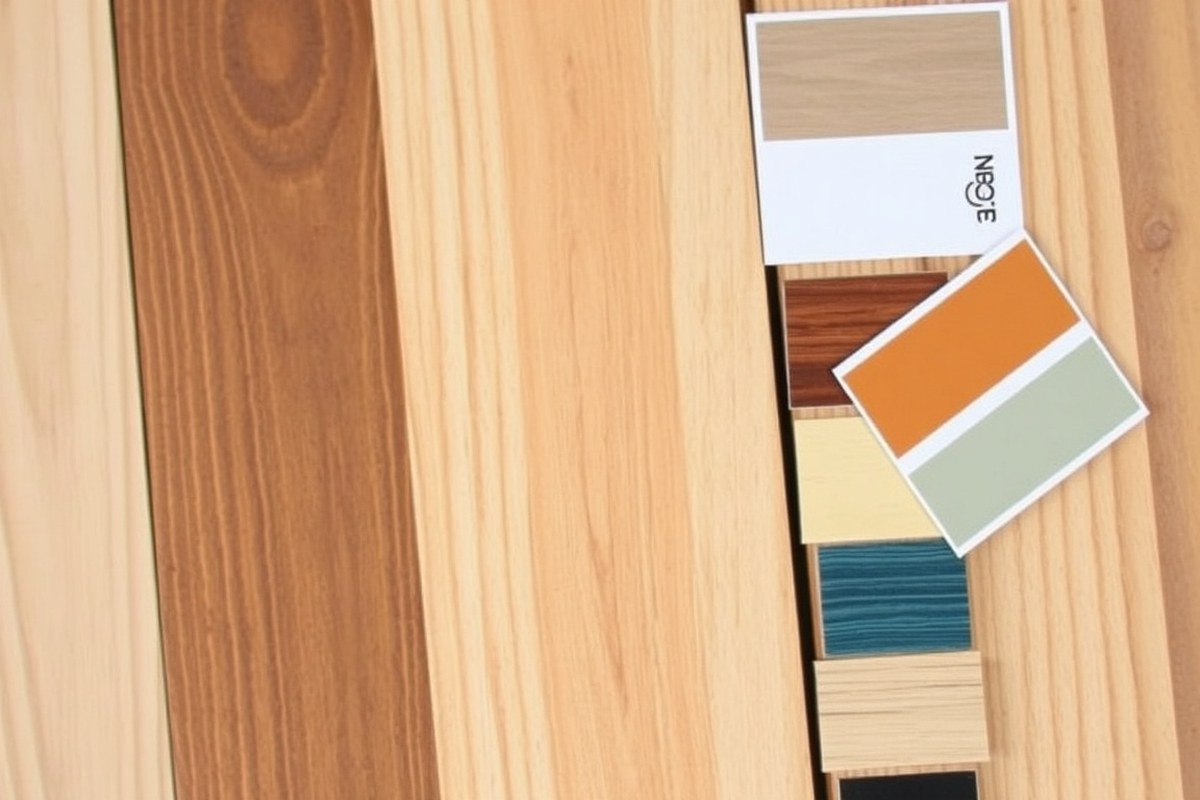
Choosing the right wood for your porch sign is essential to ensure it lasts through weather changes and stays attractive. Woods like teak, cedar, and redwood are top choices because they resist rot and insects naturally. These softwoods often cost more upfront but save you from frequent replacements. Pine and marine plywood can work if you apply a strong sealant and protect them properly, though they are less durable against moisture.
Paint and stains both protect wood but serve different purposes. Paint provides a solid, colorful surface that hides wood grain and offers a thick barrier against UV rays and moisture. Stains soak into the wood, highlighting its natural texture while giving some water resistance. Stains typically require a clear sealant on top for full protection outdoors. Paint may chip over time but covers imperfections better, while stains may fade but maintain a natural look.
Sealing your porch sign protects it from water damage and sun fading. Use a clear outdoor polyurethane or spar varnish for several reasons: they create a flexible, waterproof barrier and resist ultraviolet light that fades colors. Apply at least two coats with a clean brush, letting each dry 24 hours before the next coat. Reapplying sealant every 1 to 2 years helps maintain protection. Avoid indoor sealants, which can crack or yellow outdoors.
Using reclaimed or scrap wood can be a budget-friendly and eco-friendly option, but choice and preparation matter. Ensure the wood is clean, dry, and free from rot or mold. Sand thoroughly to remove old finishes and splinters. Test for durability by spraying water and watching if the wood absorbs it quickly. Add several layers of primer and paint or sealant to improve weather resistance. While scrap wood can be suitable, it may require more maintenance.
| Wood Type | Resistance to Rot & Insects | Cost Range (per board foot) | Best Finish Type | Typical Maintenance |
|---|---|---|---|---|
| Teak | High | $$$ | Oil or spar varnish | Annual oiling or every 2 years varnish |
| Cedar | High | $$ | Exterior paint or clear polyurethane | Re-seal every 1-2 years |
| Redwood | High | $$ | Exterior stain + sealer | Re-stain every 2 years |
| Pine | Low | $ | Exterior paint & multiple sealant coats | More frequent repainting, about yearly |
| Marine Plywood | Moderate | $$ | Exterior paint + varnish | Re-seal yearly |
Tip: Always sand and clean the wood surface thoroughly before applying paint, stain, or sealant to ensure the finish bonds well and lasts longer.
When sealing, cover every surface, including edges, to prevent moisture from entering. For paint, choose a quality exterior acrylic designed for wood, and add a clear topcoat for extra UV defense. For stains, pick a type labeled for exterior use, and follow with a waterproof sealer. Both methods offer good protection, but paint generally blocks more UV damage, while stain preserves wood’s natural look.
Applying these steps carefully increases your porch sign’s lifespan and preserves its charm through changing seasons and weather conditions. Wood choice and finishing are investments that pay off by reducing repair frequency and keeping your sign looking fresh year-round.
Planning Your Porch Sign Design: Size, Font, and Layout
Designing an effective porch sign means balancing size, font, colors, and layout to match your porch space and style. Selecting the right dimensions prevents the sign from overwhelming or disappearing beside your door. Choosing fonts that are easy to read and colors that stand out outdoors helps visitors see your message clearly. Planning the layout ensures your text and any decoration look balanced and appealing from a distance.
Measuring Porch Space Accurately
Start by measuring the width and height of the space where you plan to place your porch sign. Small porches typically suit signs around 4 feet tall, which fit comfortably without crowding the entrance. Larger porches can handle taller signs, even up to 6 feet, as long as they align with the entrance width and don’t block pathways.
For example, an 8-inch by 48-inch pine board is a common porch sign size that fits neatly beside most doorways. Make sure the sign’s width doesn’t extend beyond one-third of the door’s width to maintain visual balance. Avoid signs taller than your entryway’s vertical space to prevent a cramped feel.
Selecting Readable and Stylish Fonts
Pick fonts that are easy to read from several feet away. Sans-serif fonts or bold script styles usually work well for porch signs. Avoid overly decorative or thin fonts, as they become hard to read outdoors, especially in low light. Limit your design to two font styles to keep it clean and professional-looking.
For a friendly, inviting sign, consider a casual script teamed with a simple block font for your message. Your style is modern or minimalist, so crisp sans-serifs like Arial or Helvetica may be best. Test your fonts on paper at actual size before finalizing. This helps verify how readable and attractive the lettering will appear.
Choosing Outdoor-Friendly Color Schemes
Use high-contrast colors to ensure your porch sign stands out against the background and is visible from the street. Light-colored text on a dark background or dark text on a light background works well. Avoid colors similar to your porch or door to prevent the sign from blending in.
Consider durability: outdoor paint rated for exterior use or vinyl with UV protection will maintain color longer. For example, white letters on a navy or forest green background create a classic look that resists fading. Bright colors like red or yellow can catch attention but may require more frequent touch-ups.
Planning Text and Decorative Layout
Sketch or use a digital design tool to arrange your text and any decorative elements on your chosen board size. Center your text horizontally and vertically within the sign area to create a balanced appearance. Leave margins of at least 2 inches around all edges to avoid crowded lettering.
Use spacing consistently between lines and words. Avoid cramming words together, which reduces legibility. Adding decorative elements like flowers or bows works best at the corners or along the edges, keeping the main message clear and unobstructed. Follow these steps to plan your porch sign’s layout:
- Measure your board’s width and height and mark margins on paper or in design software.
- Write your sign message and select fonts, then scale each text section to fit within the margins neatly.
- Arrange text lines with even spacing, avoiding cramped or overly large letters.
- Add decorative elements outside the main text area, ensuring they complement rather than obscure.
- Review the overall balance and adjust sizes and placement for harmony.
- Create a final mock-up or printout to visualize the completed sign.
Step-by-Step Build Process for a DIY Wooden Porch Sign
Creating a wooden porch sign involves several careful steps from preparing the wood to sealing your finished artwork. Follow each stage closely to ensure your sign is durable and looks professional. Precise cutting and sanding, neat painting, exact lettering, and thorough sealing all contribute to a finished product that lasts outside and impresses visitors.
Prepping and Cutting Your Wood Boards
Begin by selecting wood that suits outdoor use, like cedar or pine. The boards need to be cut to the desired size safely and evenly. Use a saw suited for your wood thickness, such as a miter or circular saw, and always wear safety goggles and gloves during cutting. Keep your fingers clear of the blade and work on a stable surface.
After cutting, sanding smooths the edges and surface to remove splinters and prepare the wood for paint. Use medium-grit sandpaper (around 120 grit) first, then smooth it with fine-grit (220 grit). Always sand along the grain to avoid scratches. Clean the dust off the sign with a tack cloth or damp rag before painting.
Applying glue between boards before attachment adds stability. For example, a thin line of wood glue between 2×6 boards before securing 1×4 boards creates a solid base without gaps.
Painting Base Coats and Drying Times
Applying a base coat ensures the paint adheres properly and creates a uniform background. Use an outdoor acrylic or latex paint for durability. Spread thin, even coats with a foam roller or brush, avoiding drips. Let the first coat dry fully before applying a second coat for solid coverage and even color.
Drying time is essential for good results. Typically, allow 24 hours for each coat to dry, though some faster-drying paints may require less. Patience prevents peeling or smudging later. Lightly sand the surface with 220-grit sandpaper between coats for a smoother finish, then clean off the dust before the next coat.
Adding Letters and Decorative Elements
Choose your lettering method, vinyl, stencils, or hand painting. Vinyl adhesive letters provide crisp, uniform text and are easiest for beginners. After mirroring and cutting your letters using a machine like Cricut Maker 3, weed out excess vinyl carefully, then position and apply the vinyl to the dry, primed sign. Use a squeegee or credit card to smooth out air bubbles and ensure good adhesion.
Stencil use requires taping the stencil securely to the wood and painting inside the cutouts carefully with a small foam brush or sponge to prevent paint bleeding. Lift the stencil while paint is still tacky for crisp edges. Alternatively, hand painting lets you customize styles but demands a steady hand and practice. Additional decorations such as bows or flowers can be attached with strong craft glue or small nails, depending on weight.
Applying Protective Sealers and Curing
Protecting your finished sign from weather and fading requires sealing it properly. Many DIY enthusiasts prefer a clear, water-based polycrylic for this purpose. Use a brush or foam applicator to apply two to three thin coats evenly over the whole sign, covering vinyl and painted sections as well. Let each layer dry completely according to the sealant instructions before adding the next to prevent moisture from getting trapped.
After the final coat, let your sign cure in a dry, ventilated area for at least 24 hours before hanging. This thorough curing solidifies the protective layer, helping the sign endure outdoor conditions season after season.
- Cut your wood boards to size using a saw, wearing safety goggles and gloves.
- Sand each board with medium then fine grit sandpaper along the grain; clean off dust.
- Apply wood glue between boards where necessary for a secure base; clamp and let dry.
- Paint a thin, even base coat using outdoor acrylic paint; let dry 24 hours, then apply a second coat if needed.
- Choose lettering method: apply vinyl letters with a squeegee or paint stenciled/hand-painted letters carefully.
- Add any decorative elements like bows or flowers with glue or nails.
- Seal the entire sign with 2-3 coats of water-based polycrylic, letting each coat dry fully before the next.
- Allow the final sign to cure for 24 hours in a ventilated space before installing outdoors.
Using Vinyl and Stencils for Professional Lettering
Using vinyl cutting machines or stencils lets you create sharp, professional lettering on your porch signs that lasts. Choosing the right vinyl, preparing the wood surface properly, and applying the letters carefully help prevent peeling, bubbling, and fading over time. Following each step reduces mistakes and ensures a clean look that holds up to outdoor elements.
Choosing the Right Vinyl for Porch Signs
Permanent outdoor vinyl is the best choice for porch signs because it resists weather, UV rays, and moisture. Cricut Premium Vinyl or Cricut Smart Vinyl are popular options, designed specifically for long-term outdoor use. The Smart Vinyl comes in rolls up to 4 feet wide and allows for cuts up to 12 feet long on newer Cricut Explore 3 and Maker 3 machines, making it possible to tackle large signs without seams.
Permanent vinyl costs around $5 to $10 per 12-by-24-inch sheet, though prices vary by brand and quantity. Avoid removable or indoor vinyl since it tends to peel quickly when exposed to sun and rain. Look for labels stating “outdoor use” or “permanent.”
Preparing the Wood Surface
Proper surface prep is key for vinyl or stencil adhesion. Smooth, clean wood surfaces reduce bubbling and peeling. Start by sanding your wooden sign to a fine grit (220 grit works well), removing rough spots and splinters. Clean off dust with a tack cloth or damp rag, then let dry completely.
Painting or sealing your unfinished porch sign before applying vinyl helps it stick better and lasts longer. Use an exterior-grade paint or sealer and allow it to dry fully, usually 24 hours or as directed. Avoid applying vinyl on surfaces exposed to dirt or uneven texture.
Cutting and Applying Vinyl Letters
You can use Cricut Explore 3, Cricut Maker 3, or earlier models, though newer machines handle longer cuts up to 12 feet, perfect for large porch signs without piecing. Cut your design into smaller parts using registration marks to align letters perfectly if your machine limits the cut size. Cricut’s design software supports this layout prepping.
Before cutting, set your blade for vinyl material and load your vinyl on the machine’s mat. After cutting, weed out excess vinyl carefully using weeding tools. Use transfer tape to pick up your letters, then position and press them firmly on the wood.
Apply firm pressure across the entire decal and smooth with a plastic scraper or squeegee to avoid bubbles. Use a heat gun on low for a few seconds if the vinyl resists sticking, but don’t overheat as this might warp your wood or vinyl.
- Cut your design with the appropriate Cricut machine and vinyl setting.
- Weed out extra vinyl around letters with a weeding hook.
- Place transfer tape fully over the design and rub firmly to adhere.
- Peel transfer tape with vinyl off the backing paper slowly at a 45-degree angle.
- Clean and dry your prepared sign surface.
- Position the vinyl decal on your sign and press it down starting from the center outward.
- Use a scraper to smooth out air bubbles and ensure adhesion.
- Remove transfer tape carefully, keeping vinyl letters in place.
Align your vinyl carefully before peeling off the backing. Once stuck, repositioning can damage the vinyl or cause bubbles.
Maintaining Vinyl Lettering Outdoors
Proper care keeps your vinyl lettering crisp. Avoid power washing or harsh chemicals on the sign for at least a week after application to let the adhesive cure fully. Clean gently with a soft cloth and mild soap if needed.
Inspect your sign regularly for edges starting to lift and press them back down or touch up with a vinyl adhesive if you notice peeling early. Permanent vinyl like Cricut Premium has been shown to last two and a half years or more outside without significant wear, but extreme sun or rain exposure can shorten this lifespan.
Customizing Porch Signs for Seasons and Styles
Personalizing your porch sign for year-round appeal works best when you plan for easy seasonal changes. One popular method is creating a reversible sign with different designs or messages on each side. Paint one side with a warm autumn theme, think pumpkins, leaves, and harvest colors, and the other side with a bright spring or summer design, such as flowers or a welcoming phrase. You can flip the sign based on the season without needing extra storage for multiple signs.
For a more flexible option, make your sign frame or base sturdy and neutral in color, then attach removable inserts for each season. Use thin plywood or heavy cardstock painted with seasonal motifs and slot them into grooves or hang them with small hooks. This setup lets you swap out decorations in minutes without repainting or risking weather damage to the entire sign. Costs remain reasonable, mostly around $10 to $20 for replacement inserts, depending on size and materials.
Accents add character and make porch signs feel more connected to the season and your home’s style. Natural elements such as pinecones, small branches, dried flowers, or twine work well for a rustic look. For modern signs, choose minimalist metal or matte black hooks and geometric shapes as accents. Vintage styles benefit from weathered or distressed finishes and soft-colored ribbons or lace. Artificial options like battery-operated fairy lights or silk flower garlands offer durability and easy cleanup, especially in climates with rain or snow.
To achieve a rustic style, allow the natural wood grain to show through your paint or stain, using sandpaper to distress edges gently. Pair this with accents like burlap bows, twine wraps, or clusters of dried autumn berries and mums placed around the sign. For a modern look, stick to clean lines and monochrome paint themes, white, black, grey, with metal hangers and minimalist fonts. Vintage-inspired signs come alive with pastel colors, script fonts, and peeling paint effects, paired with antique-style hardware or gently glowing lanterns nearby.
One practical tip is placing the sign slightly off-center near your front door. This balances the overall porch décor and leaves room for seasonal adornments such as wreaths or potted plants. For example, a pine sign with autumn berries and a wreath creates a welcoming fall display without overwhelming the space. Make sure any glued or nailed accents are weatherproofed, especially if you live in an area with damp winters or hot summers to avoid premature wear.
Common Mistakes and How to Avoid Them
Paint or vinyl peeling outdoors usually happens when the surface underneath is not fully prepared or the materials are not suited for exterior use. Applying vinyl on paint that hasn’t cured makes it lift within weeks. Paint needs a full 12 to 24 hours to cure in dry, moderate temperatures before you apply vinyl. Using indoor vinyl leads to peeling by about three months because it cannot withstand outdoor weather. Proper sealing of the wood is also important. Without a good seal, moisture seeps into the wood causing it to swell and crack, which ruins the finish and shortens the sign’s lifespan.
Uneven letters or smudges often result from poor paint transfer or misaligned vinyl application. Skipping registration marks makes it hard to place letters straight. Transfer tape can sometimes damage the wood if you press too hard on blank areas, so burnish only over the lettering. Filling in letters by hand demands a steady hand and patience to avoid smudges. Inspect your sign for stray paint marks and clean them carefully with a small brush or soft cloth after drying.
Safety is important when building porch signs. Always wear eye protection when cutting wood and ensure your workspace is stable to avoid slips. Handle blades and hot glue guns with care. Avoid working outside in temperatures above 95 degrees or during ice storms because heat and cold can damage even sealed wood signs. Long-term damage leads to cracking and warping.
- Wait 12 to 24 hours for paint to cure completely before applying vinyl to prevent lifting.
- Use outdoor-rated vinyl, not cheaper indoor vinyl, for durability in all seasons.
- Seal wood with a water-resistant finish to stop water damage and warping.
- Apply registration marks lightly in pencil to align letters accurately.
- Burnish transfer tape only over letters to avoid lifting paint from bare areas.
- Use steady strokes and a small brush for hand-painting letters to prevent smudges.
- Wear eye protection and keep tools steady to avoid injury during cutting and assembly.
Following these steps adds about $5 to $10 to the cost compared to skipping them but results in a sign that lasts years. A properly cured and sealed porch sign with firmly adhered vinyl looks smooth and vibrant, with clean letters and no peeling after months outdoors. Signs exposed to extreme temperatures should be stored indoors during hot spells above 95 degrees or ice storms to prevent cracking. This care ensures your work holds up longer and looks professional.
Mounting and Long-Term Maintenance Tips
Choosing the right hardware is key to mounting your porch sign securely. Lightweight signs work well with hooks, brackets, or D-ring hangers, which you can find at most hardware stores for under $10. The choice depends on your sign’s weight and where you plan to hang it. For example, hooks are easy to install on wooden porch walls, while brackets offer more stability for heavier signs or those exposed to wind.
Placement matters both for visibility and protection. Position your sign at eye level near the entryway where visitors can see it easily without obstructions like plants or furniture. Avoid spots directly exposed to harsh weather like intense sun or rain, which can fade paint or damage the wood faster. Mounting under a porch roof or overhang extends the lifespan of your sign by reducing weather exposure.
Cleaning your porch sign regularly helps maintain its look and durability. Use a soft brush or cloth to remove dust and debris. For deeper cleaning, mild soap and water work well. Avoid harsh chemicals that can strip paint or finishes. After cleaning, dry the sign thoroughly to prevent moisture damage.
Touching up your sign involves inspecting for fading, peeling paint, or damaged wood. Use matching exterior-grade paint or stain for spot repairs, and apply thin coats to blend with the original finish. Ensure the paint or sealant you choose is rated for outdoor use to withstand weather.
Resealing or repainting depends on the climate and sun exposure but typically every 1 to 3 years is recommended to keep your porch sign looking fresh and protected. Signs in harsh climates with strong sun or heavy rain may require more frequent maintenance. Before resealing, lightly sand the surface to promote adhesion. Use a clear outdoor sealant like spar urethane for protection against moisture and UV rays.
Check the weight capacity of your mounting hardware before installation to avoid your sign falling and getting damaged or causing injury.
For a light wooden sign under 10 pounds, single hooks spaced about 24 inches apart usually suffice. For heavier or larger signs, consider wall anchors combined with brackets spaced evenly to distribute weight. Always use a level tool during installation for a professional look and better structural integrity.
In cold or wet climates, additional care can include applying a water-repellent wood preservative before painting or sealing the sign. This extra layer of protection helps reduce swelling and cracking from moisture. Also, bring your sign indoors during winter or storms if feasible to extend its life.
Step-by-Step Action Plan for Your Porch Sign Project
Follow this plan to create a durable and personalized porch sign that fits your style and lasts through the seasons.
- Before you start: Gather all essential materials and tools like wood, paint, brushes, and vinyl or stencil sheets. Check that all tools work properly.
- Day 1: Choose your wood and finish. Select a weather-resistant wood like cedar or redwood and pick exterior-grade paint or sealant. Apply a test coat to a scrap piece to ensure good adhesion.
- Day 2: Design your sign layout on paper or software. Pick fonts and sizes that are easy to read from a distance. Print or cut a sample stencil to check spacing on your wood surface.
- Day 3: Cut and prepare the wood to your planned size. Sand all surfaces smooth to avoid paint bleeding or rough edges.
- Day 4: Apply your first coat of primer or base paint. Let it dry and lightly sand before the next coat for a clean finish.
- Day 5: Add lettering using vinyl decals or stencils. Test adhesion on a corner to ensure crisp lines. Paint over carefully and allow the paint to dry completely.
- Day 6: Seal the finished sign with a topcoat suitable for outdoor use. Allow 24 hours to cure fully.
- After 1 week: Mount your porch sign securely using weatherproof screws or hooks. Check the installation is stable and level.
- After 2 weeks: Inspect your sign for any weathering or paint chipping. Touch up areas as needed and reapply sealant every year to maintain protection.
Frequently Asked Questions
What Is the Ideal Size for a Porch Sign?
Most vertical porch signs are between 3.5 and 6 feet tall. Choose a size that fits your porch space without overpowering it.
Can I Use a Cricut Maker 3 or Explore 3 for Making Porch Signs?
Yes, both Cricut Maker 3 and Explore 3 can cut out porch sign designs. They’re ideal for detailed vinyl lettering and stencils.
How Do I Prepare Wood Boards Before Painting a Porch Sign?
Sand the boards smooth and wipe off dust before applying paint. This ensures even paint adhesion and a cleaner finish.
What Type of Vinyl Works Best for Outdoor Porch Signs?
Outdoor adhesive vinyl is best because it resists weather and fading. Look for premium brands designed specifically for exterior use.
Can I Make Reversible Porch Signs for Different Seasons?
Reversible porch signs are a smart way to change designs with seasons without extra storage. Use double-sided painting or vinyl on both sides.
How Do I Prevent My Porch Sign Paint from Peeling Outdoors?
Use an outdoor-rated sealant after painting to protect against moisture and UV rays. This extends the life of your porch sign finish.
Before You Go
Making your own porch sign lets you add a personal touch to your home’s entrance while controlling durability. Start by gathering good materials and drawing a clear design. Once your sign is built and mounted, plan routine upkeep to keep it looking fresh through the seasons. Begin your project today by picking your wood and sketching your design.