How to Make a Wood Pallet Sign: A Complete Guide with Proven Steps
How to make a wood pallet sign starts with choosing safe pallet wood, cutting the right number of boards, then assembling them securely. Use at least five 4-inch-tall boards for a 20-inch-tall sign, glued and nailed together for strength. Preparing the wood by sanding and cleaning ensures a smooth surface for painting and lettering later.
Key Takeaways
- Select pallet wood marked as safe or untreated to avoid harmful chemicals and pests.
- Cut your boards to uniform lengths and heights; five boards usually create a nice 20-inch height.
- Sand each board thoroughly to remove splinters and rough spots before assembly.
- Spread wood glue on a small support board, place it glue-side-down across the pallet boards, and nail twice per board.
- Clamp the boards while the glue dries to keep them flat and aligned.
- Measure and plan your design layout on the wood before transferring any lettering or artwork.
Essential Materials and Tools for Pallet Signs
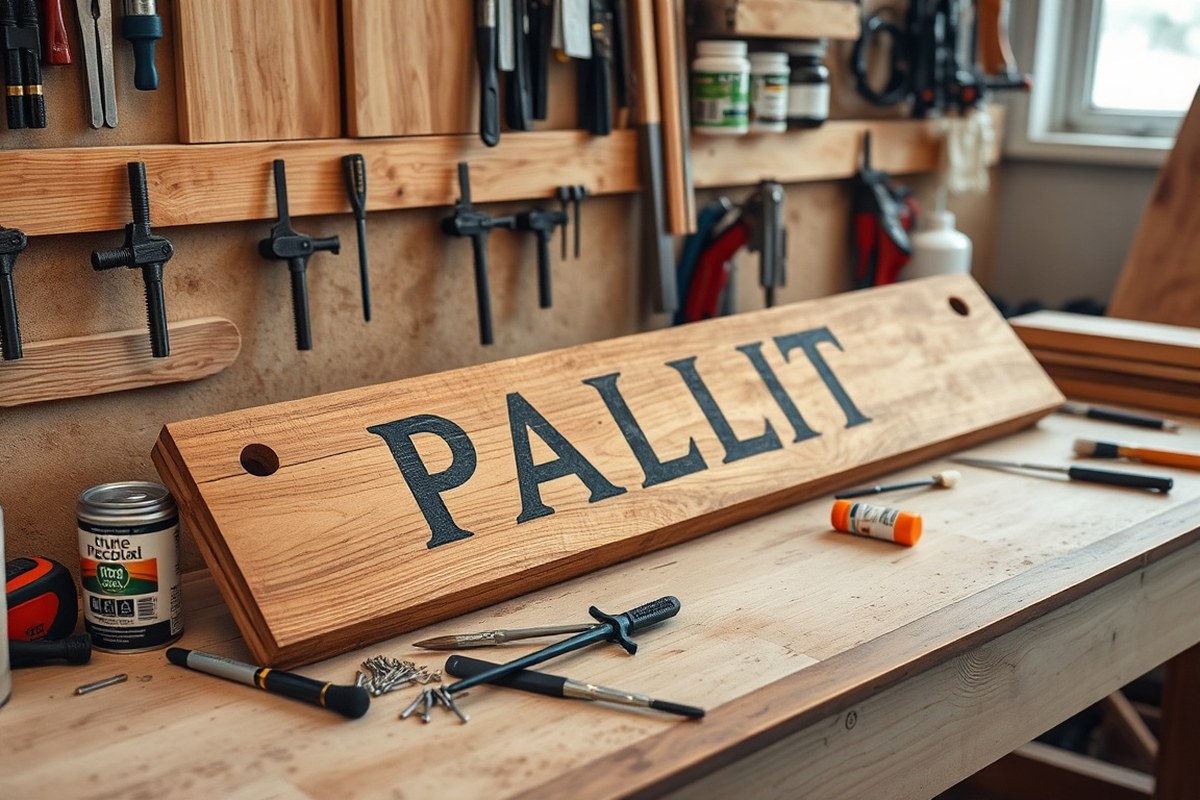
Making a wood pallet sign requires a mix of essential materials and tools that match your skill level and budget. At the core, you need safe pallet wood, nails or screws, wood glue, clamps, paint, brushes, sandpaper, a saw, and a drill. These basics let you cut, assemble, and decorate a sign that’s sturdy and visually pleasing. Beginners can skip some optional tools but shouldn’t compromise on safety or key assembly items.
Wood glue helps hold boards together securely and works well when combined with nails. For example, spread wood glue on a small cross piece placed glue-side-down across the pallet boards, then hammer in about two nails per board. This combination improves strength and keeps the sign flat.
Keep pallet wood safe by avoiding those with the “MB” stamp or any visible stains, since they might contain harmful chemicals. Instead, look for pallets with the IPPC logo, which indicate they were heat treated rather than chemically treated. Using non-toxic wood is important if your sign will be displayed indoors.
- Safe pallet wood or 2″x6″ boards from a hardware store
- Nails or screws (around 1½ to 2 inches long)
- Wood glue suitable for exterior or indoor wood projects
- Clamps to hold pieces while glue dries
- Sandpaper (medium and fine grit, such as 80 and 120 grit)
- Hand saw, circular saw, or jigsaw for cutting boards
- Drill with screwdriver bits (optional but speeds up assembly)
- Paints in your preferred colors and brushes
Basic tools like a saw and hammer are essential. If you don’t have a power saw, a hand saw will work fine but requires more effort and time. A drill isn’t mandatory but helps put together boards faster and more securely. You can replace drills with a screwdriver if needed. Clamps are extremely useful but you can also use heavy objects to hold pieces in place while glue dries; it just takes longer.
Sandpaper smooths rough wood edges to prevent splinters and help paint stick better. Start with medium grit (80) to remove big splinters, then finish with fine grit (120) for a smooth surface. Paint your sign after sanding to seal the wood and protect it from moisture. Select brushes based on your design, small angled brushes for lettering and larger flat brushes for background paint. Don’t use cheap brushes as they can leave bristles on the sign and ruin the finish.
Choosing and Preparing Safe Pallet Wood
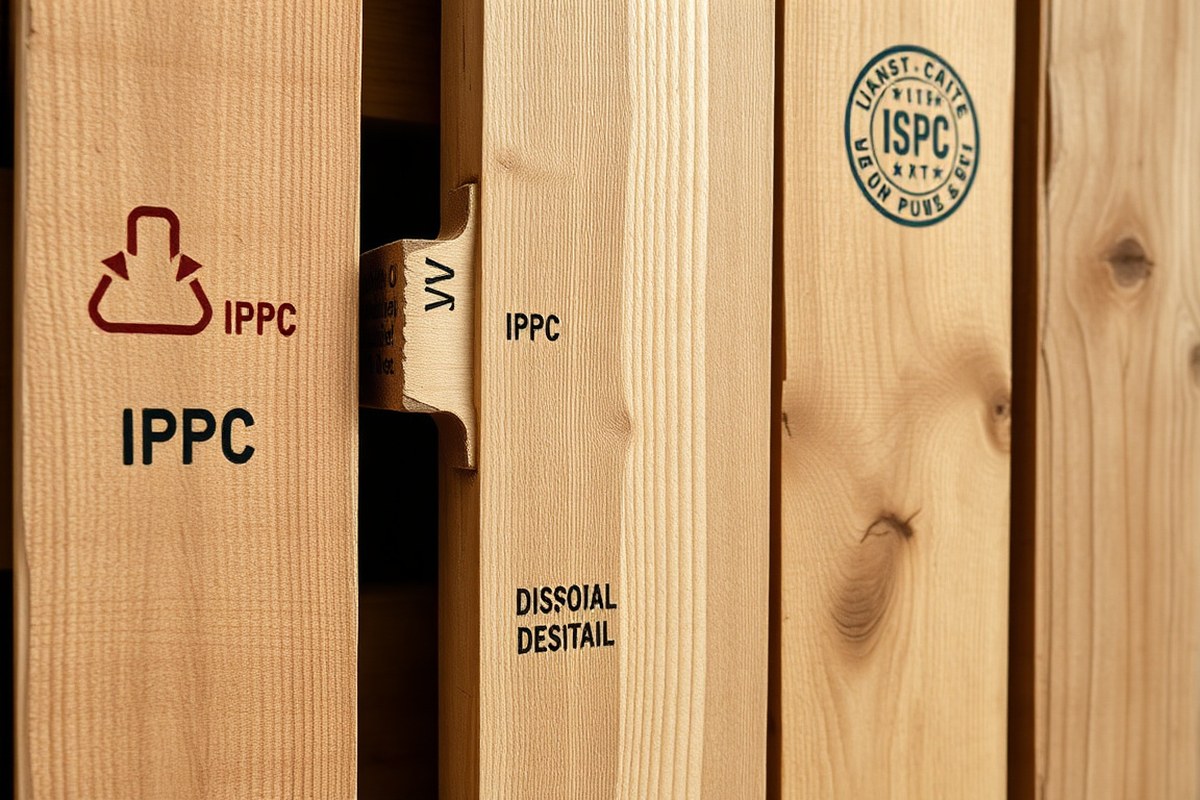
Choosing safe pallet wood is key to creating a wood pallet sign that’s both beautiful and safe for indoor use. When selecting pallet wood, look for stamps or markings that indicate heat treatment (HT), which means the wood was heated to kill pests and is generally safe for crafts. Avoid pallets marked with MB, which stands for methyl bromide, a pesticide harmful to health. Pallets marked as “EUR” or bearing the IPPC logo are often treated and internationally certified and usually safe, but always double-check any additional markings.
Before dismantling, inspect the pallet wood for damage, rot, or excessive nail holes. Good wood boards should be dry, sound, and free of chemical residues, stains, or strong odors. Avoid any pallets with visible mold or mildew. Once you pick a suitable pallet, you’ll need the right tools to dismantle the wood safely and efficiently.
| Marking | Meaning | Safety for Crafting |
|---|---|---|
| HT | Heat Treated (heated to 132°F for 30 minutes to kill pests) | Safe and recommended |
| MB | Treated with Methyl Bromide pesticide | Unsafe; avoid for indoor projects |
| EUR / IPPC Logo | Certified pallet, often heat treated | Generally safe; verify additional info |
| Unmarked | No info on treatment | Use caution; inspect condition carefully |
To dismantle pallets, try to minimize damage to the boards. The easiest method is to use a pry bar and hammer. Place a sturdy piece of scrap wood between the pallet boards and the pry bar to avoid splitting. Work slowly, prying gently along one edge at a time. Avoid cutting pallets with saws until nails are out, unless you use a metal-cutting blade designed for nails. This process usually takes 15 to 30 minutes depending on your tools, pallet size, and your experience.
Wear thick gloves and eye protection during dismantling. Splinters and flying nails are common hazards. Dispose of bent or rusted nails right away to prevent injury. Once the boards are free, use a hammer or nail puller to remove any remaining nails carefully. Sanding the boards afterward will create a smooth surface for painting or staining your sign.
Tip: Work on a stable surface and use controlled motions when prying boards apart to prevent sudden breaks or injury.
Wood pallets can vary widely in thickness and quality. After removing nails, sorting boards by thickness helps you choose the best pieces for your project. Thicker boards provide greater stability but may need more sanding. Thin boards are lighter but can be fragile. Expect to spend some extra time sanding and cleaning pallet wood to make it craft-ready. Avoid using wood with heavy stains, oily residues, or soft spots, which can ruin your paint finish and weaken the sign over time.
Cutting, Sanding, and Assembling Wood Boards
Cutting, sanding, and assembling your pallet boards carefully creates a solid base for your sign. Correct sizing, smoothing rough edges, and securing boards together keep your wood sign stable and help your design look professional. Handling uneven or shorter pallet pieces with proper trimming and joining avoids weak spots and gaps.
Measuring and Cutting Boards
Start by deciding the exact size of your pallet sign, commonly around 24 inches tall and 37 inches wide for a typical design using 5 to 7 boards. Lay out your pallet wood horizontally to visualize the final width. Measure each board length with a pencil and carpenter’s square for straight, accurate cuts. If some boards come from different pallets or have uneven ends, cut them to match the desired width evenly to avoid gaps.
Also measure and cut 2 support boards for the back of the sign; these will hold the front boards together securely. Use a circular saw or a handsaw for straight, clean cuts. Your cuts should be precise to keep the edges lined up perfectly and prevent crookedness.
Sanding and Finishing Edges
After cutting, sand each board to smooth rough edges and splinters, which helps paint or finish adhere better and makes your sign safe to handle. Use medium-grit sandpaper (80, 120 grit) to start, then finish with finer sandpaper (180, 220 grit) on all surfaces and edges. Pay special attention to ends where boards join, smoothing down any raised grain or rough spots.
Sanding before assembly is easier, and you can clean dust off the boards with a dry cloth or tack cloth afterward. This step prevents rough patches that might show through your paint or stain later on.
Gluing and Nailing Assembly
To build a strong sign base, use a combination of wood glue and nails on the back support boards. Glue fills small gaps and strengthens the bond, while nails hold everything firmly in place during drying. Start by setting your front boards face down in your planned layout, keeping edges tight but not too forceful.
Then position your two back support boards vertically across the back, spaced evenly to hold your boards together. Use wood glue along the contact surfaces, then nail through the supports into each front board using nails long enough to penetrate the support but not pop out the front. Small finishing nails or brads around 1¼ inches are usually perfect for pallet wood about ¾ inch thick.
Clamping the assembled sign while the glue dries helps keep boards flush and reduces shifting. Let the glue dry for at least 30 minutes before moving or painting. For extra stability, add thin wood edging around your sign’s front edges with glue and small nails. Wrapping picture wire on the back support boards makes hanging your sign easier later.
- Measure and mark your pallet boards and back supports to the desired size.
- Cut all boards using a circular saw or handsaw for straight edges.
- Sand each board’s surfaces and edges smooth, progressing from medium to fine grit sandpaper.
- Lay the front boards face down in your chosen layout, keeping edges aligned.
- Apply wood glue to the back supports and place them vertically across the back of the front boards.
- Use nails to secure the supports through the front boards, ensuring nails penetrate without breaking through the front surface.
- Clamp the assembled boards and allow glue to dry for at least 30 minutes to set.
- Optionally, add wood edging around the sign’s sides using glue and small nails for a clean finish.
Designing and Transferring Your Sign Lettering
Choosing the right lettering style for your wood pallet sign depends on the look you want, your skill level, and the tools you have. When aiming for a clean, professional look with a quick finish, vinyl lettering works well. It involves cutting the letters out of black vinyl, weeding out the excess, and applying transfer tape. You line up the vinyl on your prepared wood surface, rub it firmly to stick, and then carefully peel the transfer tape away. This method costs around $10 to $30 for a small roll of vinyl and transfer tape, and it produces sharp, consistent letters without messy paint strokes. It’s perfect for simple fonts and crisp edges but offers limited style variation.
For more creative freedom or rustic charm, hand-painting your letters works well if you have some brush control. You’ll want to start with a clear design by sketching it onto paper or printing it out to create a stencil. Lightly pencil your lettering onto the wood first, then use a small brush or paint marker to fill it in. Acrylic paint is usually best, drying in under an hour and providing vibrant color with minimal soak-through. Hand-painting takes more time and practice, but it suits those who want a personalized, unique look that vinyl cannot replicate. Imperfections in your brush strokes can add character if you prefer a weathered feel.
Stencils offer a middle ground by combining clean edges with style options. You can make your own by printing a design onto paper, then cutting the letters out with a craft knife. Tape the stencil down on your wood, and use a sponge or stencil brush to dab on paint without bleeding underneath. This requires patience to avoid smudging but gives you control over custom fonts and designs. Stencils typically cost less than vinyl supplies and only need paint you already have. This works well for multiple signs or repeated patterns.
Transferring your design onto the wood accurately starts with choosing the right method. For vinyl, measure and mark faint pencil guidelines on your wood to position the letters evenly before applying. For hand-painting, tracing your design with carbon or graphite paper between the printout and wood creates a clear outline to follow. Tape the papers securely to prevent shifting. After transferring, remove the paper slowly to ensure your lines stay crisp.
Better results come from steady hands and a clean workspace. Avoid pushing too hard when applying vinyl transfer tape or carbon paper, which can cause wrinkling or uneven adhesion. When lettering appears uneven or smudged, lightly sanding and repainting or carefully reapplying vinyl can correct minor mistakes. Patience in positioning and transferring your design pays off by saving time fixing mistakes later. Choose vinyl lettering for speed and accuracy, hand-painting for a personal touch, and stencils to combine both qualities. The decision comes down to your desired look, how steady your hand is, and how much time or money you want to invest.
Painting and Finishing Techniques for Pallet Signs
Choosing the right paint for your wood pallet sign is key to achieving a clean, durable finish. Acrylic or latex paints designed for both indoor and outdoor use work best because they adhere well and resist fading. A good choice is a paint and primer in one, such as Pittsburgh Paints & Stains Ultra, which saves time and ensures better coverage. Avoid oil-based paints for pallet wood since they take longer to dry and can emit strong odors, which might not suit indoor projects.
To apply paint neatly, start with a clean, sanded surface to remove rough patches or splinters that can cause uneven coverage. Use a small foam roller for broad areas to get smooth layers without brush marks. For lettering or detailed designs, use fine-tipped brushes carefully and allow each color to dry fully before adding another layer or color to prevent smudging. Plan for about 2 hours of drying time between coats at room temperature (70°F), though humidity can increase drying time.
Avoid overloading your brush or roller with paint, as thick layers can drip or crack as they dry. Thin, even coats are more resilient and look sharper. If you see paint pooling in cracks or knots, gently wipe it off with a damp cloth before it dries. Keep your work area dust-free to prevent particles from sticking to the wet paint, which can ruin a smooth finish.
Once your paint has fully dried, protecting your sign with a clear coat improves durability, especially for outdoor signs exposed to weather. Clear spray sealants, available in matte, satin, or glossy finishes, are easy to apply and dry quickly within 30 minutes. A minimum of two light coats is recommended, allowing 15 minutes between applications. This layer guards against moisture, UV rays, and fingerprints, keeping your colors vibrant and your sign looking fresh.
For indoor signs, a simple acrylic clear coat provides enough protection, while outdoor signs benefit from polyurethane sealers designed for exterior wood for extra toughness. These may cost around $10 to $25 per can, depending on coverage size. Be sure to apply them in a well-ventilated area following all label instructions to avoid health risks.
Take your time with each layer of paint and finish; rushing can cause peeling or uneven surfaces that are hard to fix later.
Adding Support and Backing for Stability
Backing boards or framing are essential for making a wood pallet sign rigid and strong. They prevent the sign from warping and provide a stable surface to attach hanging hardware. Adding support ensures the sign holds its shape over time, especially if it’s large or made of thinner pallet wood.
Selecting Backing Wood
Choose backing wood that matches the thickness and durability needed for your sign’s size. Leftover pallet wood can often be reused as backboards if it’s straight and free of major damage. Pine or other softwoods between 1/2 inch and 3/4 inch thick work well because they’re sturdy but not too heavy. Avoid very thin or warped boards, as they won’t keep the sign stable.
Backing pieces should be slightly shorter than the full width of the assembled sign, so they don’t show from the front. Two to three horizontal backboards spaced evenly provide good support for most pallet signs. For larger signs (over 24 inches wide), you might add a vertical center support as well.
Positioning and Attaching Backboards
Lay your assembled front sign boards face down on a flat surface. Arrange the backing boards across the width of the sign, about 4 to 6 inches in from each edge and evenly spaced in between. This spacing improves rigidity without adding too much weight.
Mark the positions with a pencil to guide where you’ll attach the backboards. Make sure the backs are fully flush with the sign to avoid gaps that reduce strength or cause unevenness when hanging.
Using Clamps and Screws Securely
Securing backboards requires both screws and glue for the strongest hold. Use wood glue designed for outdoor use, spread in a thin, even layer on the backboard side that touches the pallet boards. This helps prevent movement or squeaking over time.
Next, clamp the backboards firmly in place to keep them from shifting while screwing. Drill pilot holes about every 6 to 8 inches through the backboards into the front boards to avoid splitting the wood. Use 1 1/4 inch wood screws as they are long enough to penetrate both layers without poking through the front. Nails or brads can be used for smaller or decorative signs, but screws provide better long-term stability, especially if the sign will be hung vertically or outdoors.
- Lay your pallet sign face down on a flat workspace.
- Select 2-3 straight, undamaged wood boards, about 1/2 to 3/4 inch thick, for backing.
- Arrange the boards horizontally across the back of the sign, spacing them evenly and about 4-6 inches from the edges.
- Apply a thin, even layer of outdoor wood glue to the side of each backboard that will contact the pallet wood.
- Place each backboard in position and clamp tightly to prevent movement.
- Drill pilot holes every 6 to 8 inches through the backboards and into the front boards to avoid cracking.
- Secure each backboard with 1 1/4 inch wood screws, making sure screws are flush or slightly countersunk.
- Allow the glue to dry according to the manufacturer’s instructions before hanging or continuing your project.
Hanging and Displaying Your Finished Pallet Sign
Hanging your wood pallet sign securely depends on its size, weight, and the type of wall or surface you plan to mount it on. To safely support a pallet sign, you first need to estimate its weight. Typical pallet wood projects range between 10 to 25 pounds, but this varies with thickness and added materials. Matching the hanging hardware to the weight ensures your sign stays safely in place without damaging the wall or the artwork.
Most pallet signs weigh under 30 pounds. For this weight range, consider using wall anchors or picture hanging hooks rated for at least 50 pounds to include a safety margin. If your sign is heavier or wider than about 24 inches, you might want to distribute the weight using two anchors or hooks. Drywall anchors are suitable if you do not have direct access to a stud, but mounting directly into a wood stud with screws provides the strongest support. Here’s a checklist of effective mounting hardware options and their typical weight capacities:
- Heavy-duty picture hooks: support 30 to 50 pounds, good for medium-sized signs
- Toggle bolts or molly bolts (drywall anchors): handle 25 to 50 pounds, ideal for hollow walls
- Wood screws (into wall studs): usually support 50+ pounds, best for heavier or larger signs
- D-Rings or sawtooth hangers (attached to sign back): best combined with hooks or screws
- Command picture hanging strips: up to 16 pounds per set, easy removal but less durable
To mount your pallet sign, first decide whether you’ll attach hardware directly to the sign or use a mounting frame. Attach D-rings or sawtooth hangers on the back edges, evenly spaced. Locate the wall studs with a stud finder; if none are available, use proper anchors. Mark your mounting points on the wall level with each other. Drill pilot holes before inserting screws or anchors to avoid damaging your wall. Hang the sign carefully, making sure it sits level and stable.
In some cases, especially for outdoor signs or uneven walls, using mounting brackets or French cleats offers extra security. French cleats involve two interlocking wood pieces, one fixed to the wall and one on the sign’s back, making removal easy and support very strong. Expect to spend around $5 to $15 on hardware kits at home improvement stores, depending on the quality and components.
Avoid lightweight adhesives or mounting putty alone for anything over 10 pounds, as these can fail and damage the wall or sign. Also, double-check that exposed hardware does not interfere with the sign’s design or your hanging plans. Proper installation takes about 20 to 30 minutes with basic tools like a drill, level, screwdriver, and stud finder.
Creative Ideas and Troubleshooting Common Issues
Customizing your wood pallet sign style lets you match your home decor or event theme, while fixing common issues ensures a polished look despite wood’s natural quirks. You might like a rustic or clean-cut finish; changing your methods can fix gaps, uneven boards, and paint mistakes. Adapting your sign for outdoor use or special occasions expands its versatility and lifespan.
Rustic vs Polished Styles
The rustic style embraces the natural texture and imperfections of pallet wood. You can leave rough edges, visible knots, and uneven boards to highlight wood’s authentic character. Light sanding works well here, just enough to remove splinters without erasing weathered details. Applying a stain or matte finish rather than solid paint preserves the wood grain and supports the vintage look.
A polished style focuses on smooth surfaces and sharp, clean lines. Sand all boards thoroughly with fine-grit sandpaper around 220 grit, smoothing out rough spots and edges. Use crisp stencils or vinyl lettering for clear text and add a solid paint layer in your chosen color. A glossy or satin polyurethane topcoat can protect the sign and add a finished shine.
Choosing between these styles depends on your decor and skill level. Rustic signs hide minor mistakes better and require less precision, making them ideal for beginners. Polished signs need more preparation but result in a refined appearance suitable for modern or minimalist spaces.
Fixing Gaps and Alignment Issues
Gaps between boards are common with pallet wood due to shrinkage or irregular cutting. Use thin wooden strips or shims behind the boards to fill larger gaps and secure the spacing when attaching them to the frame. Small cracks can be filled with wood filler or a painter’s putty, then sanded smooth once dry. Avoid forcing boards too close, which risks cracking or bowing.
Uneven boards impact both appearance and stability. Clamp boards flat during assembly to minimize warping. Some boards may be thicker, so try planing or sanding the edges to make them even. For stubborn unevenness, add a thin back support strip that presses boards flush. Double-check alignment before nailing or screwing in place.
Paint mistakes like runs, drips, or uneven opacity happen often but can be corrected by light sanding after drying and repainting the flawed areas. Thin coats paint more evenly and dry faster, reducing the chance of smudges. When using stencils, secure them firmly to prevent bleeding and use a stencil brush or sponge for controlled application.
Test your paint on a scrap piece of pallet wood to avoid surprises and see how many coats your colors need.
Outdoor and Seasonal Customization Tips
For outdoor signs, use weather-resistant finishes such as exterior-grade paint and a clear polyurethane or spar varnish to guard against moisture and UV damage. Choose wood that is already sturdy and untreated to avoid toxic chemicals leaching outside. Seal all edges and the back to prevent water penetration, which can cause warping or mold.
Outdoor signs might require extra fastening, like screws instead of nails or reinforced brackets, to withstand wind and weather. Hanging hardware should be corrosion-resistant like stainless steel or coated metal. Check the sign’s condition annually and refresh the sealant as needed, which usually costs $10 to $20 per project in sealant materials and takes 1 to 2 hours including drying.
Seasonal signs can be adapted by changing paint colors or adding removable decorations. Use peel-and-stick vinyl decals for holiday phrases or motifs, which are easy to swap out without repainting. For colder months, consider a matte finish that reflects less light, while glossy finishes brighten spring and summer displays. Customize fonts and layouts to suit occasions such as weddings, birthdays, or seasonal celebrations.
Step-by-Step Action Plan
Follow these steps to create your wood pallet sign from start to finish with confidence and good results.
- Day 1: Gather materials and tools. Collect pallet wood, paint, brushes, sandpaper, and hardware. Check everything is ready to avoid delays.
- Day 2: Select and prepare pallet wood. Inspect wood for safety, remove nails, and sand rough spots until smooth to the touch.
- Day 3: Cut and assemble the boards. Use a saw to size the wood, then attach them securely with nails or screws. Ensure boards are flush and stable.
- Day 4: Design and transfer lettering. Sketch your design on paper, then trace it onto the sign with carbon paper or pencil. Confirm placement before painting.
- Day 5: Paint and finish your sign. Apply primer if needed, then paint your letters and background. Seal with a clear finish for protection and durability.
- Day 6: Add support and backing. Attach braces or a backing board to prevent warping and add strength. Check the sign feels sturdy.
- Day 7: Hang and display your sign. Install hanging hardware appropriate for your wall type. Test the sign’s balance and security before letting go.
Frequently Asked Questions
How to Make a Wood Pallet Sign?
Start by selecting safe pallet wood, cutting boards to size, sanding them smooth, then assemble with wood glue and nails. Paint your design and finish with a protective coat for durability.
Can I Use Pallet Wood Without Treating It First?
You should check for the IPPC logo to ensure it hasn’t been chemically treated; otherwise, sanding and sealing are recommended for safety.
What Type of Paint Works Best on a Pallet Wood Sign?
Acrylic paint is ideal as it adheres well to wood and dries quickly, allowing for vibrant colors on your sign.
How Do I Make the Pallet Sign More Durable Outdoors?
Apply a clear weatherproof sealant after painting to protect against moisture and UV damage.
What Kind of Nails Should I Use for Assembling a Pallet Sign?
Use finishing nails or small brads with wood glue for a secure hold without splitting the boards.
Can I Create a Reversible Wood Pallet Sign?
Yes, making a double-sided design is straightforward and doubles your display options for seasonal or themed signs.
Final Thoughts
Making a wood pallet sign is a rewarding craft that adds a personalized touch to your home decor. Start with a simple design and focus on proper preparation and finishing techniques to get the best results. Your next step is to choose your pallet wood and sketch a design that fits your space and style.