
How to Make a Welcome Sign with Cricut: A Complete Guide with Pro Tips
How to make a welcome sign with Cricut starts with choosing the right design and materials for a durable, attractive sign. Use Cricut Design Space to size your design precisely for your wood sign before cutting it from permanent exterior vinyl. Preparing your wood base properly ensures smooth vinyl application and a professional finish.
Key Takeaways
- Resize your design in Cricut Design Space to match the exact dimensions of your wood sign for a perfect fit.
- Use black permanent vinyl rated for outdoor use, as it can last up to 3 years when applied correctly.
- Prepare your wooden sign base by sanding and cleaning to help vinyl adhere smoothly with no air bubbles.
- Cut designs with your Cricut Maker 3 or Explore Air 2 depending on vinyl type and design complexity.
- Let vinyl set for 72 hours on the wood before applying a sealer to extend the sign’s longevity.
- Consider adding 3D embellishments to make your welcome sign stand out and look professionally crafted.
Essential Supplies and Materials Needed
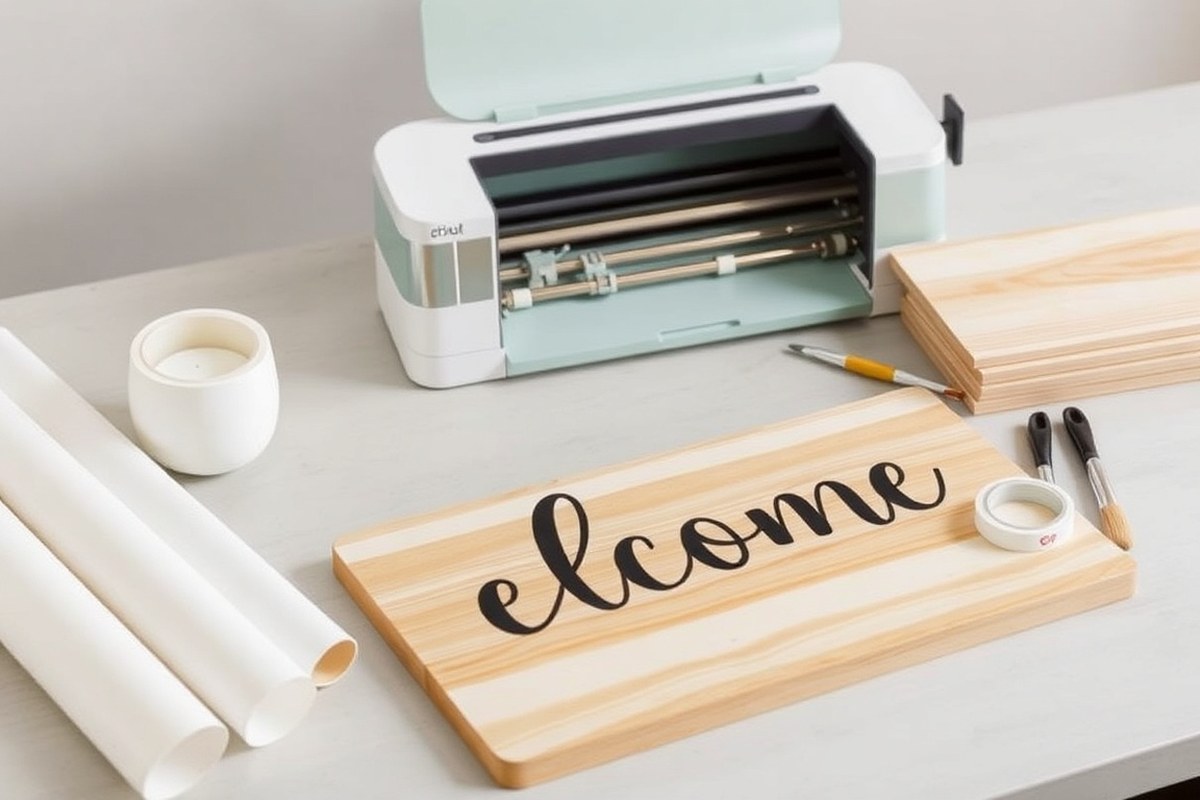
Before you start making your Cricut welcome sign, gather the essentials to avoid interruptions during your project. The core tools include a Cricut machine suited for cutting vinyl, such as the Cricut Maker 3 or the Explore Air 2, and cutting mats that fit the size of your design. For vinyl, choose between permanent and removable types depending on the sign’s intended use and location. Permanent vinyl works best for outdoor or long-lasting signs, as it resists weather and lasts up to three years outdoors, according to Cricut’s guarantees. Removable vinyl is easier to take off without residue, ideal for temporary decorations or indoor use.
Select a wood base for your sign; popular choices include smooth, untreated cutting boards or wood planks around 12″x12″ to 12″x24″. These sizes fit well on standard Cricut mats and offer enough space for clear designs. Wood without a polyurethane finish is easier to work with when adhering vinyl because the surface texture helps the vinyl stick better. If you want to add a protective layer after applying vinyl, consider polycrylic or Mod Podge for sealing, but this is optional unless your sign will be exposed to heavy wear or outdoor conditions.
- Cricut machine compatible with your vinyl (Maker 3, Explore Air 2, or similar)
- Permanent or removable vinyl sheets or Smart Vinyl rolls
- Cutting mats in 12″x12″ or larger, depending on sign size
- Wood sign base such as a cutting board or wood plank
- Transfer tape for applying vinyl smoothly
- Weeding tools for removing excess vinyl
- Optional: sealants like Mod Podge or polycrylic
For cost efficiency, vinyl sheets can range roughly from $1 to $3 each for standard sizes, while rolls of Smart Vinyl might be $10 to $20 depending on length and brand. Wood bases vary widely; a simple untreated cutting board can cost $5 to $15 at craft stores or online. You can substitute expensive precut wood with plywood scraps or repurposed boards from hardware stores, lowering the cost. High-quality transfer tape is critical to apply vinyl without air bubbles and usually costs about $8 to $12 for a 12″x12″ sheet.
Choosing permanent vinyl makes your sign durable for outdoor use, especially if you don’t want to redo it frequently. Use removable vinyl when you prefer changing signs seasonally or without leaving sticky residue on your wood. Always ensure your base is clean and dry for the best vinyl adhesion. Having weeding tools handy will help you remove small vinyl pieces precisely and avoid sloppy edges. These essentials set you up for a smooth crafting process and professional-looking results on your Cricut welcome sign project.
Designing and Sizing Your Welcome Sign in Cricut Design Space
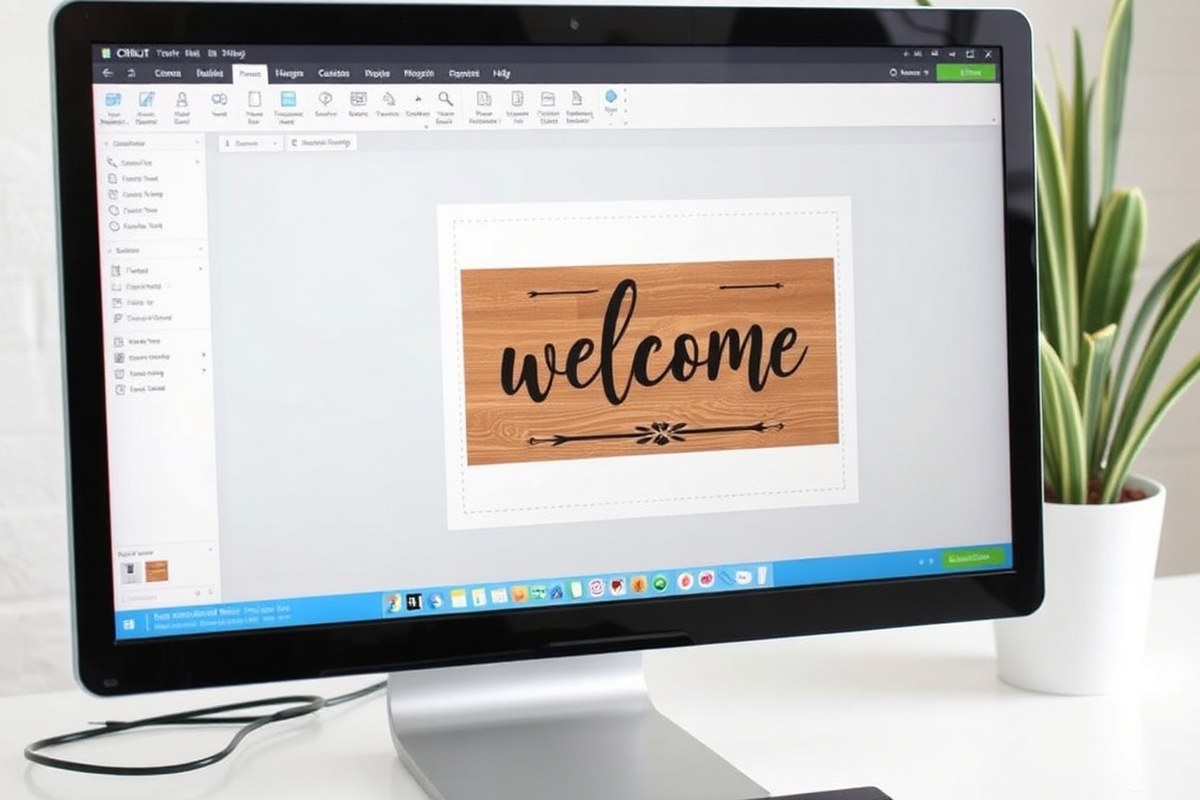
Creating or selecting a welcome sign design that fits your wood or base material is simple with Cricut Design Space. You can either start with a ready-made design or build one yourself, then resize and arrange every element precisely to your sign’s dimensions. Adding text, images, or even multiple languages helps your sign stand out and feel personal.
Finding Free and Paid Welcome Sign Designs
Cricut Design Space has a wide collection of images and fonts you can use for free or buy, making it easy to find welcome sign designs suited to your style. Many users also upload SVG files they created or found online, which give you more control. For example, some free resource libraries offer specific designs, such as a “Believe” vertical sign, which you can import directly to your project.
Searching for designs includes typing keywords like “welcome” or “wood sign” inside Design Space or looking on trusted crafting sites for SVG files. These files import smoothly and save you from starting from scratch. Choosing a design often depends on your wood size and whether you want simple text or decorative graphics.
Resizing Designs to Fit Your Wood or Board
Resize your design by first creating a rectangle in Design Space that matches your board’s exact measurements. This outline lets you see how your design will fit visually. Most welcome signs vary from 12 x 18 inches to 24 x 36 inches, but custom sizes exist. Start with your design around 45 inches, then scale down as you need to fit your wood. Text and images need adjustment to maintain legibility and balance. Follow these steps to resize and place your design:
- Measure your wood or base sign’s length and width in inches.
- Open Cricut Design Space, and create a shape (rectangle) with those exact measurements.
- Import or select your welcome sign design, placing it over the rectangle.
- Click the design and drag the corners or enter sizes in the toolbar to fit it inside the rectangle.
- Move or arrange objects within the design to avoid crowded areas or empty spaces.
- Lock or unlock aspect ratio depending on whether you want to keep proportions or stretch parts.
- Group all elements before cutting to ensure the layout stays correct.
Be careful not to resize text too small; fonts below 1 inch in height can be hard to weed and read.
Adding Personal Touches and Multi-Language Text
Customize your welcome sign by changing fonts, adding shapes, stars, or floral images directly within Cricut Design Space. Use the Text tool to type words like “Welcome to the Shenanigans” or your family name. You can also add letters vertically or horizontally based on your design style. Picking a font with enough weight ensures the vinyl cuts cleanly and transfers well.
For multi-language text, add multiple text boxes, each with the language you want. Arrange them clearly across your sign and resize each accordingly. This adds warmth and invites guests with a personal touch. Remember to preview the whole design by hiding the reference shape (rectangle) before cutting to confirm alignment.
Preparing Your Wood or Sign Base for Vinyl Application
Preparing your wood or sign base properly ensures the vinyl adheres smoothly and lasts a long time. Take time to select a suitable wood piece, sand and clean the surface, and apply paint with enough drying time before vinyl application. This preparation prevents bubbling, peeling, and uneven vinyl placement.
Choosing the Right Board Size and Type
Select wood that fits your design’s size requirements, whether a rectangular board or a wood round. A common choice is hobby wood cut to your desired dimensions or a 16×16 inch wood round for a rustic look. You can use raw or primed wood, but primed wood often requires less paint and provides a smoother base for vinyl.
Raw wood can work well but needs extra treatment. For exterior signs, pick wood suited for outdoor use or seal it properly before paint and vinyl. Avoid wood with rough bark or heavy knots that may disrupt vinyl adhesion.
Sanding and Cleaning Your Wood Surface
Sanding creates a smooth surface so vinyl sticks well. Use fine-grit sandpaper (around 220 grit) to sand both sides if the board is thin enough. Sanding removes splinters, smooths grain, and helps paint bond better, leading to longer-lasting vinyl adherence.
After sanding, clean the board with a damp cloth to remove dust and debris. Dust left on the surface reduces paint and vinyl adhesion, leading to bubbles or lifting. Let the wood dry fully before painting.
Painting and Drying Timeline Before Applying Vinyl
Paint your wood base with thin, even coats to improve vinyl adhesion and aesthetic appeal. Light coats minimize texture that could cause vinyl to bubble. Use acrylic craft paint or latex paint suitable for wood.
Let the first coat dry at room temperature for at least one hour before applying a second coat. Most sign makers recommend two coats for good coverage. After the final coat, wait a minimum of 24 hours for paint to fully cure and harden before adding vinyl. This wait time ensures vinyl sticks properly without pulling paint.
For primed wood, one thin coat of paint may suffice, reducing wait time. If working with raw wood, a primer coat before painting can block stains and wood oils from affecting paint and vinyl adhesion.
- Select a wood board or round sized for your welcome sign design.
- Sand the wood surface smooth with 220 grit sandpaper, including edges.
- Wipe off dust with a damp cloth and let dry completely.
Cutting and Weeding Vinyl with Your Cricut Machine
To cut and weed vinyl precisely for your welcome sign, start by choosing the right Cricut model and settings for your vinyl type. Organize your design to fit your cutting mat and use weeding tools carefully to remove excess vinyl without damaging your letters or shapes. Proper setup and technique ensure a clean vinyl transfer onto your sign base.
Setting Up Your Cricut for Vinyl Cutting
Select the correct cutting settings depending on your Cricut model and the type of vinyl. For example, the Cricut Maker 3 and Explore 3 can cut vinyl without a cutting mat when using Smart Vinyl, which works well for longer pieces. Older models like the original Maker or Explore require a 12×24 inch or 12×12 inch mat depending on your design size and vinyl pieces.
| Cricut Model | Vinyl Type | Cutting Surface | Recommended Cut Settings |
|---|---|---|---|
| Maker 3 / Explore 3 | Smart Vinyl | Matless cutting | Vinyl preset, pressure: default |
| Maker / Explore Air 2 | Regular Permanent &removable Vinyl | 12×24 or 12×12 mat | Vinyl preset, pressure: default |
| Joy | Smart Vinyl | Matless cutting | Vinyl preset, pressure: default |
Always select the vinyl material setting in Design Space before cutting to ensure the blade cuts through the vinyl backing but not the carrier sheet. Use a fine-point blade for most vinyl cutting tasks. Loading your mat or Smart Vinyl correctly prevents misalignment during cutting.
Cutting Large or Multi-Piece Designs on Smaller Mats
When your design is larger than your cutting mat, break it into smaller parts in Design Space to fit the available mat size. Assembly afterwards will be necessary, but this maintains precision and fits the constraints of your machine.
Load smaller vinyl pieces onto your mat with care. Start by cutting longer pieces first because they often need more precise alignment. Save all scraps, even small ones, for potential future use.
- Upload your design into Cricut Design Space and size it to fit your sign base.
- Use the “Slice” or “Duplicate” tools to break large designs into sections that fit your mat.
- Place each vinyl piece on the cutting mat, avoiding overlaps and ensuring alignment.
- Select the vinyl material setting and verify blade type is fine-point.
- Load the mat or Smart Vinyl correctly into your machine.
- Click “Make It” and confirm cut settings before starting.
- Unload the mat carefully once cutting is complete.
Best Practices for Weeding Your Vinyl Design
Weeding removes excess vinyl from around and inside your design, leaving only your welcome message or shape to transfer. Use a weeding tool with a sharp hook or fine tip to lift small pieces without damaging thin vinyl parts.
Start by removing the large areas around your design with scissors for easier handling. Next, peel away the excess vinyl carefully from edges, then weed smaller interior pieces such as holes in letters. Taking your time here prevents ripping important details.
Work on a well-lit, flat surface. Heat from a lamp can soften the vinyl slightly, making weeding easier but test first so the vinyl doesn’t become too sticky. Use a ruler or a straight edge to help press vinyl down firmly before weeding. For Smart Vinyl, handle it sheet-side down since the backing is sticky and slightly different from regular vinyl sheets.
Applying Transfer Tape and Vinyl to Your Sign Without Bubbles
Applying vinyl decals onto your welcome sign with transfer tape helps keep the design intact and precisely positioned. Transfer tape holds your vinyl pieces together and allows you to move them from the backing sheet to the sign without shifting or stretching the design. This is essential, especially for large or complicated layouts, to avoid bubbles, wrinkles, or misalignment.
Start by cutting your vinyl and weeding it carefully. Once your vinyl design is weeded, cover the entire design with a piece of transfer tape slightly larger than your vinyl. Burnish, or press down firmly, using a scraper tool or a credit card to ensure the transfer tape sticks well to the vinyl. This step is key to preventing bubbles.
Transfer tape can be reused on large projects if you handle it carefully. After applying it and removing the vinyl onto the surface, peel the tape back gently and store it on a clean, smooth surface. However, repeated use reduces stickiness, so avoid reusing it multiple times on complex designs where precise placement is critical. For perfectly aligned vinyl application and bubble-free results, follow these straightforward steps:
- Clean the sign surface thoroughly, removing dust and oils for better vinyl adhesion.
- Cut a piece of transfer tape slightly larger than your vinyl design and place it sticky side down over the entire design on its backing sheet.
- Use a scraper tool to burnish the transfer tape onto the vinyl firmly, moving from center outwards to push out air bubbles.
- Slowly peel the vinyl and transfer tape away from the backing sheet at a 45-degree angle, keeping the vinyl attached to the transfer tape.
- Position the transfer tape with vinyl onto the sign, starting at one edge and gradually laying it down to avoid air pockets.
- Burnish again over the transfer tape on the sign, pressing firmly with the scraper tool in one direction for full adhesion.
- Carefully peel back the transfer tape at a low angle, pulling slowly to leave the vinyl securely on the sign.
- If bubbles appear, use a pin or craft knife to prick the bubble and press the vinyl down, or use the scraper tool to smooth them out gently.
Always lift the transfer tape slowly and at a low angle to keep the vinyl firmly stuck to your sign and avoid lifting edges or causing bubbles.
Sealing and Finishing Your Welcome Sign for Longevity
Sealing your Cricut welcome sign after applying vinyl is a good step to protect it from weather damage and daily wear. Using a clear sealer helps guard both the vinyl and the wood base. Without sealing, the vinyl edges may lift over time, and the wood could absorb moisture or fade from sunlight.
Clear acrylic spray sealers are a popular choice for outdoor signs because they are easy to apply and dry quickly. Polyurethane sealers provide a tougher, more durable finish but need more drying time and careful application to avoid brush marks. For outdoor durability, water-based polyurethane sealers offer UV resistance and protect against moisture, while spray acrylics provide faster, more even coverage. Avoid using wax or oil finishes, as these do not seal vinyl well and leave the sign vulnerable to damage. Here is a general comparison of common sealers:
| Sealer Type | Durability | Finish | Application | Drying Time |
|---|---|---|---|---|
| Acrylic Spray | Medium (1, 2 years outdoors) | Matte or Glossy options | Spray, 2, 3 thin coats | 15, 30 minutes per coat |
| Water-Based Polyurethane | Higher (2, 3 years outdoors) | Matte, Satin, or Gloss | Brush or foam applicator, 2 coats | 2, 4 hours per coat |
| Oil-Based Polyurethane | Highest (3+ years outdoors) | Glossy | Brush, 2 coats | 6, 8 hours per coat |
Apply sealers in a well-ventilated area and avoid humid or cold conditions, as these can prolong drying and cause blotches. For spray sealers, hold the can 8 to 12 inches from the sign and use smooth sweeping motions. Apply at least two thin coats, allowing 15 to 30 minutes drying time between each. With brush-on polyurethanes, lightly sand with fine-grit sandpaper between coats once dry to ensure adhesion and smoothness.
After the final coat, wait at least 24 hours before handling or displaying the sign to allow the sealer to cure fully and provide maximum protection. In humid or cooler environments, extend this period to 48 hours for best results. When using the sign outdoors, consider positioning it under some cover to reduce exposure to direct rain and harsh sunlight, which will extend its lifespan.
Signs sealed poorly may develop bubbling or peeling vinyl edges. This usually happens when too much sealer is applied at once, or if the first coat hasn’t dried thoroughly before the next. Sealing is optional for indoor signs but recommended outdoors. Permanent outdoor vinyl combined with a quality sealer will give your welcome sign a durable finish that withstands weather for seasons. Sealing adds less than $10 in materials and about 30 minutes extra time but improves longevity noticeably.
Adding Decorative Embellishments to Personalize Your Sign
Adding decorative embellishments like bows, ribbons, and floral accents lets you customize your welcome sign to match your style or the season. Use hot glue or craft glue to attach these elements securely. For a rustic look, burlap ribbons tied in a simple bow work well and cost around $5 for a 10-yard roll. Silk flowers add color but may fade outdoors unless sealed with a UV-resistant spray. Avoid heavy decorations that could weigh down thinner wood signs.
Your Cricut machine can cut precise stencils from stencil vinyl or acetate sheets. These stencils allow you to add painted details like borders, patterns, or seasonal images. To create a stencil, design your image in Cricut Design Space and set the cut lines accordingly. Use a weeding tool to remove the cut areas and secure the stencil onto the sign surface with low-tack transfer tape or spray adhesive. Paint within the stencil using acrylics or spray paint, then peel off once dry. Expect to spend $5 to $10 on stencil material, which you can reuse for multiple projects.
For double-sided signs, attach two wooden panels back-to-back using wood glue and clamps, or use a thin hinge at the top to allow folding. This option works well for signs visible from multiple directions but adds weight and complexity. When making vertical signs, measure your lettering carefully and arrange text vertically in your design file. Vertical signs improve porch visibility and create a tall, welcoming statement. Mount sturdy brackets or stakes at the bottom to support stability outdoors.
- Use burlap or satin ribbons for texture and weather resistance
- Attach faux floral garlands with discreet glue dots for seasonal appeal
- Cut stencils with your Cricut for consistent, sharp paint edges
- Apply two-sided mounting tape for reversible signs that don’t add bulk
- Arrange letter vinyl vertically in Design Space to plan vertical signs
- Add wooden dowel supports on vertical signs for extra outdoor durability
- Seal embellishments with matte spray sealant to protect against rain
Personalizing your welcome sign with ribbons, bows, and paint gives a layered, inviting look that basic vinyl alone can’t achieve. Take care to use adhesives suited for outdoor exposure to keep decorations from peeling or fading over time. Planning placement before you start gluing will save headaches, especially for vertical and double-sided formats. The right embellishments complement your vinyl design and create a professional, complete appearance. Always allow sufficient drying time for paints and glues to ensure durability in changing weather.
Common Problems and How to Fix Them When Making Cricut Signs
Vinyl peeling or bubbling often happens when the surface isn’t properly prepared or when air gets trapped during application. Dirt, dust, or moisture on your sign base can keep the vinyl from sticking well. Always clean your wood or base with a lint-free cloth and rubbing alcohol before applying vinyl. Press the vinyl firmly with a scraper tool or credit card, moving slowly from the center outwards, to push out any air bubbles and ensure good adhesion.
When vinyl peels after application, check if you used the right vinyl type. Permanent vinyl is best for outdoor or frequently touched signs because it bonds stronger than removable vinyl. Your vinyl likely lifts after sealing with paint or acrylic sealer because the sealer reacted with the vinyl or was applied too thickly. Paint and sealer should be completely dry before applying vinyl. When painting over vinyl, use a sealer made to work with vinyl and apply it in thin, even coats to lower the risk of damage.
Troubleshooting uneven or incorrect cuts usually means settings need adjustment in Cricut Design Space. Double-check your material selection and blade sharpness before cutting. A dull blade can cause jagged edges or incomplete cuts. The cut may not have gone all the way through, so try increasing the blade pressure a bit and test cut again. For alignment problems, always use transfer tape to lift and place your design carefully. You can reposition the vinyl gently before pressing it down fully if things aren’t lining up at first.
Bubbles under vinyl occur when air is trapped during transfer. After applying transfer tape over your weeded design, burnish it well, then lift slowly at a sharp angle to make sure every part sticks to the transfer tape. When moving it to your sign, work out bubbles by smoothing outward with a scraper. Small bubbles can be pierced with a fine needle and pressed flat. Let the vinyl sit at room temperature around 70°F to improve its flexibility during application, vinyl becomes less pliable in cold or hot conditions, which can cause bubbling or tearing.
Salvage options depend on how much damage the paint or sealer caused to your vinyl. For small smudges or runs, use a small craft knife to carefully trim the damaged parts away without lifting surrounding vinyl. For peeling or lifted edges, try applying a tiny bit of clear-drying glue designed for vinyl to reattach sections. Removing a fully compromised design often requires carefully heating the vinyl with a hair dryer, cleaning the surface again, and applying a fresh cut. Precision and patience during removal prevent damaging the base finish.
Always test your paint or sealer on a scrap vinyl piece before applying it to your final sign to avoid ruining your design.
Step-by-Step Action Plan for Crafting Your Cricut Welcome Sign
Follow these clear steps to move from design to finished sign with confidence. Watch for smooth cuts, clean applications, and a durable finish as signs of success.
- Before You Start: Gather all your supplies, including your wood base, vinyl, transfer tape, and Cricut machine. Confirm your materials match your design size to avoid last-minute adjustments.
- Day 1: Open Cricut Design Space, create your welcome sign layout, and size it to fit your wood base. Preview the design to ensure spacing and fonts are correct before cutting.
- Day 2: Prepare your wood by sanding lightly and cleaning the surface to remove dust and oils. Your sign should feel smooth and clean to the touch.
- Day 3: Load your vinyl into the Cricut machine and cut your design. Check the cut lines are complete and do not pull the vinyl until you finish weeding the excess material.
- Day 4: Use transfer tape carefully to lift your vinyl design, then apply it to the wood base. Smooth the vinyl with a scraper tool to avoid air bubbles and wrinkles.
- Day 5: Seal your sign with a clear protective coat appropriate for outdoor use or indoor décor, depending on your placement. Let it dry fully according to product instructions.
- Day 6: Add any extra embellishments like ribbons or small decorative pieces using craft glue or hot glue. Make sure these additions are firmly attached and improve your design.
- After 1 Week: Inspect your sign for any vinyl lifting or damage and reapply sealant if needed. Your sign should look professionally finished and ready to display.
Frequently Asked Questions
Can I Make a Welcome Sign with Any Cricut Machine?
Yes, you can create a DIY welcome sign using any Cricut machine, including the Explore Air 2 and newer models. Choose your design and materials based on your machine’s capabilities to get the best results.
How Do I Create Vertical Letters for a Welcome Sign in Design Space?
You can make vertical letters by typing your word and then adjusting the letter placement or selecting vertical text options. This helps in designing signs like the popular vertical welcome sign on a 12″ x 12″ mat.
What Type of Vinyl Works Best for Outdoor Welcome Signs?
Permanent vinyl is best for outdoor signs because it withstands weather elements better than removable vinyl. Applying a sealant over the vinyl can further protect your sign for longer outdoor use.
Can I Add 3D Elements to a Cricut Welcome Sign?
Yes, adding 3D elements can improve your sign’s look by creating depth and interest. Use materials like foam sheets or small wooden shapes cut with your Cricut to give your sign extra dimension.
How Big Should I Make My Welcome Sign for a Front Porch?
A common size is around 12” x 24” or smaller for easy placement on a standard porch. Consider your available space and scale your design accordingly in Cricut Design Space.
Is It Possible to Make a Double-Sided Welcome Sign with a Cricut?
Yes, you can make double-sided signs by designing both sides separately and applying vinyl to each side of a wood base. This is great for signs with different greetings on each side.
Wrapping Up
Making a welcome sign with your Cricut machine is a hands-on way to create personalized décor that stands out. Start by crafting a design that fits your space, then carefully apply your vinyl and seal for lasting beauty. Try your hand at embellishing to add a unique touch that reflects your style. Grab your materials and begin your first design today to see what you can create.