How to Make a Wooden Sign: A Complete Guide with Tools, Tips & Finishing
How to make a wooden sign starts with selecting the right wood, cutting it safely, and preparing a clean surface for your design. Creating a clear layout and transferring it onto the wood ensures your lettering and images come out sharp. Finishing your sign with paint and sealant protects it while adding charm. Begin with a wood piece sized for your project, such as a 12-by-5.5-inch sign, and make sure to cut evenly using proper safety gear to avoid accidents.
Key Takeaways
- Choose hardwoods like walnut or birch plywood for durability and smooth surfaces ideal for painting.
- Use a saw with a fine-tooth blade and always wear eye protection and gloves when cutting wood.
- Create your design on paper or digitally, then transfer it with carbon paper or stencils for accuracy.
- Paint lettering using a paint pen for cleaner lines and easier application than tiny brushes.
- Seal your finished sign with outdoor polyurethane or marine varnish to protect against weather.
- Mount signs at least 8 inches off the ground with a slight 5-degree forward tilt to prevent water damage and bugs.
Step-By-Step Process to Make a Wooden Sign

Creating a wooden sign involves several clear stages to ensure your project turns out both attractive and durable. The total time can range from about 6 to 8 hours, depending on the complexity and drying times for paints and finishes. Having the right tools and materials ready for each step makes the process smoother and helps avoid delays.
- Select and prepare the wood (30-60 minutes). Choose a smooth board with minimal knots and cracks, typically pine or cedar for beginners. Use a hand plane or sander to smooth rough areas. Put on safety glasses and gloves to protect yourself. Having wood of the right size, such as 12 inches by 5.5 inches, makes the rest easier.
- Cut the board to size (30-60 minutes). Use a circular saw to trim the wood to your desired dimensions. Measure twice and cut once to avoid mistakes. Safety glasses and a dust mask are essential here. Inaccurate cuts can cause uneven edges that affect how your sign looks when hung.
- Sand the surface and edges (1-2 hours). Use a sander or sandpaper (start with 120 grit, finish with 220 grit) for a smooth finish. This step helps paint and finishes adhere better. Take your time to avoid scratches or uneven surfaces that show through the paint.
- Transfer the design onto the wood (30-60 minutes). Print your layout on paper and use transfer paper or carbon paper to trace it onto the wood. Pencil, ruler, and eraser help ensure straight, clear lines. Precise transferring prevents painting mistakes later on.
- Paint the lettering and designs (1-2 hours plus drying). Use acrylic or outdoor paint with fine brushes or stencils. Apply thin coats for even coverage and faster drying. Allow at least an hour between coats. Painting slowly and accurately avoids drips and uneven fonts.
- Apply finish to protect your sign (1-2 hours plus curing). Use a clear polyurethane or outdoor sealant sprayed or brushed on. Let the first coat dry fully, then lightly sand with 220 grit before applying a second coat. Finishing can add months to years of outdoor protection.
Tools and materials you will need include a circular saw, safety glasses, a sander, sandpaper, pencil, ruler, transfer paper, brushes, acrylic paint, and a sealant. Time estimates vary with wood size, paint types, and drying conditions, but pacing yourself prevents rushed results. Good preparation and finishing make your wooden sign a lasting decoration in your home.
Choosing the Right Wood Type for Your Sign
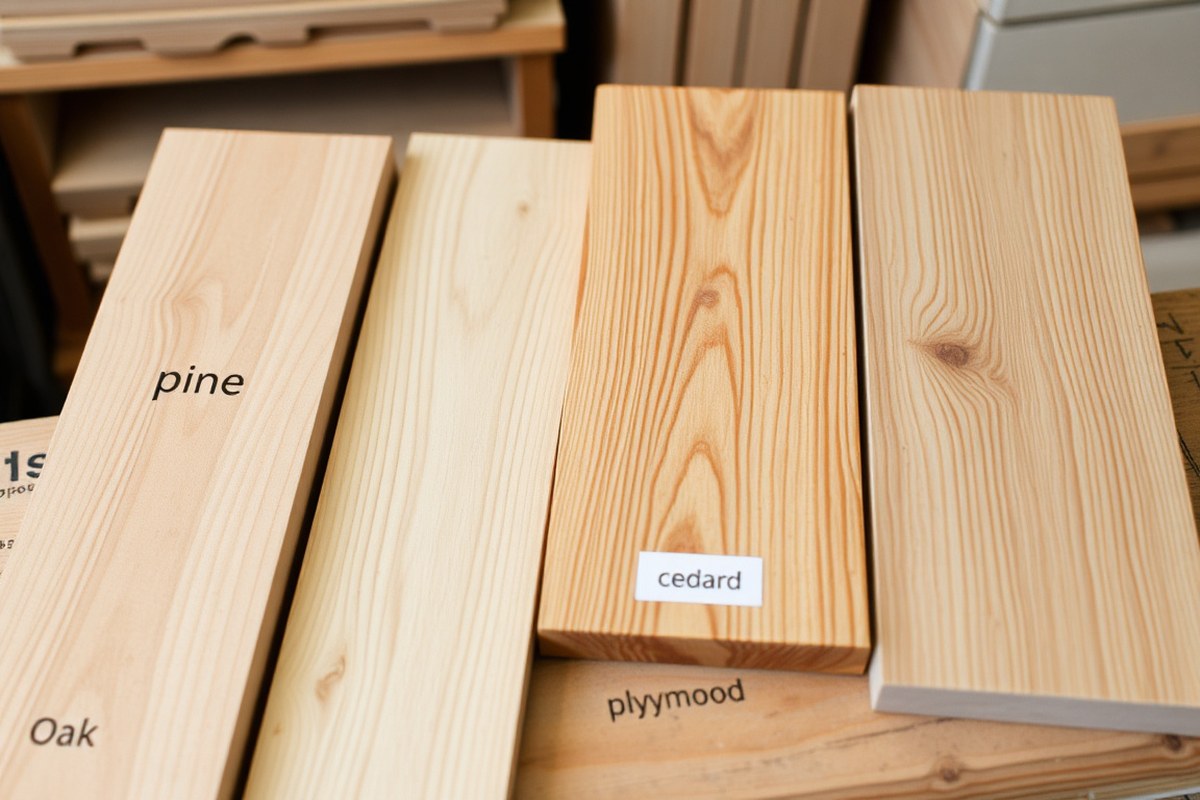
Picking the right wood for your wooden sign depends on where it’ll hang, your budget, and the look you want. Wood meant for outdoor use needs good rot resistance and should handle moisture well. Indoor woods can be softer and easier to work with. Thickness around 3/4 inch is typical, offering enough durability while keeping the sign manageable. Sizes vary by design, but keep enough extra length if you’re adding a frame, about twice the thickness of your framing wood on each end.
Reclaimed or pallet wood can work well if you’re after a rustic style, but check for nails or damage and sand thoroughly to avoid splinters or uneven surfaces. They could also require more sealing since old wood may absorb moisture differently.
| Wood Type | Rot Resistance | Stability | Cost & Notes |
|---|---|---|---|
| Cedar | Excellent | Very Good | Moderate – Lightweight and easy to work with, top pick for outdoor signs |
| Redwood | Excellent | Very Good | High – Durable softwood ideal for lasting outdoor displays |
| White Oak | Excellent | Good | High – Strong hardwood, heavier but very durable |
| Teak | Outstanding | Excellent | Very High – Excellent for outdoor use but expensive |
| Marine-Grade Plywood | Good (with sealing) | Excellent | Moderate to High – Requires sealing, very stable |
| Pine | Low | Moderate | Low – Best for indoor signs, easy for beginners |
| Cypress | Durable, moisture resistant | Attractive grain | Moderate – Great for outdoor and rustic looks |
Softwoods like pine and cedar are easier for beginners since they cut and sand well. Cedar stands out outside for its rot resistance and insect-repelling aroma and suits decorative projects outdoors. Hardwood options like white oak or teak cost more and weigh more but can last decades outside if sealed properly.
Using reclaimed or pallet wood gives a weathered look and saves money. Prepare these by removing metal pieces and sanding to a smooth finish. Seal them fully, as untreated reclaimed woods could absorb water unevenly, risking warping.
Practical tip: Always measure and cut your wood pieces with framing in mind, you’ll need two extra lengths equal to the sign length plus twice the frame thickness for a polished edge.
How to Safely Prepare and Cut Your Wood
Preparing and cutting wood safely means using the right gear, tools, and techniques to avoid injuries and achieve clean results. Accurate measuring and careful cutting, followed by progressive sanding, will make your wooden sign both attractive and durable. Taking these safety steps seriously protects you and improves the final look of your work.
Essential Safety Gear to Wear
Wearing proper safety equipment reduces the risk of injury and exposure to wood dust, which can irritate your eyes and lungs. At minimum, wear safety glasses to protect your eyes from flying wood chips and splinters. A dust mask is important to prevent inhaling fine sawdust, especially if you’re sanding or cutting for extended periods. Hearing protection like earplugs or earmuffs is recommended when using loud power tools.
Always keep your clothing snug around your wrists and avoid loose jewelry that could get caught in equipment. Long hair should be tied back securely. Setting up a well-lit, clutter-free workspace also helps you stay focused and reduces accidental trips or falls.
Best Tools for Cutting and Alternatives
The most common tool for cutting wood for signs is a circular saw, which offers fast, straight cuts. Using clamps to secure your wood to a stable surface prevents movement and improves accuracy. When operating power saws, follow the manufacturer’s instructions carefully and keep your hands clear of the blade. A tape measure and pencil let you mark precise cut lines before you start cutting.
If you don’t have a power saw, you can use a handsaw, which works well for smaller pieces or thinner wood. Handsaws require more effort and time but offer control for detailed cuts. Avoid tools like box cutters or utility knives for cutting wood, as they’re unsafe and ineffective for this material. Here is a step-by-step safety checklist and cutting guide to prepare and cut your wood properly:
- Measure the wood and mark your cut lines with a pencil and tape measure.
- Secure the wood with clamps on a stable workbench.
- Put on safety glasses, dust mask, and hearing protection.
- Check that the saw blade is sharp and appropriate for your wood thickness.
- Position the saw along the cut line and start cutting slowly to guide the blade.
- Maintain a firm grip and steady pressure; do not force the saw.
- Complete the cut and turn off the saw before releasing the clamp.
- Inspect edges and re-clamp for sanding.
Sanding Tips and Grit Progression
Sanding smooths rough edges and surfaces, preparing your wood sign for painting or sealing. Start sanding with coarse sandpaper, typically 80-grit, to quickly remove any splinters or uneven spots left from cutting. Then use medium grit, like 120 to 150, to even out scratches and blend the surface.
Finish sanding with a fine grit, 180 to 220, for a smooth finish that paint will adhere to well. Sand in the direction of the wood grain to avoid scratches. Use a sanding block or an orbital sander for uniform pressure. After sanding, wipe the wood with a damp cloth to remove dust before painting or staining.
Skipping grits or sanding too aggressively can leave noticeable scratches or rough spots that show through your paint or sealant. Taking time to progress through grits ensures a clean, professional-looking wooden sign.
Design Creation and Transfer Methods for Wood Signs
Creating and transferring your design to wood involves selecting a layout that fits your sign’s size and style, then choosing a method that matches your skill level and the design detail. To scale your design accurately, use a simple formula comparing your design’s original size to the wood’s surface, ensuring proportional balance for a polished look. Transfer techniques vary from tracing to stenciling and carbon paper, each suited for different design complexities.
Digital vs Hand-Drawn Design Options
Designs can start either as digital files or hand-drawn sketches. Digital designs offer precise control over size, fonts, and layout, allowing you to print them at exact dimensions to fit your wood sign perfectly. Use software like Canva or Microsoft Word, or apps specialized in design, to experiment with fonts and spacing. Print your design to scale by measuring the wooden surface and resizing the digital image to match those dimensions.
Hand-drawn designs bring a personal, artistic touch and work well for simple layouts or freehand lettering. Begin by sketching on paper that matches your planned sign’s proportions. Use grid lines on your paper and the wood to help scale your drawing accurately when transferring it. Hand drawing is more flexible for improvised or rustic styles but may need more practice to achieve smooth lines and balanced spacing.
Using Carbon Paper, Stencils, and Freehand Tracing
There are several proven methods to transfer your design onto wood. A table below summarizes these common techniques:
| Method | Description | Best For |
|---|---|---|
| Tracing | Using a pencil to draw the design directly onto the wood. | Simple designs, freehand artists |
| Stenciling | Creating a stencil and applying paint or ink through it. | Repetitive designs, bold letters |
| Carbon Paper | Transferring a design by placing carbon paper between the design and wood and tracing over it. | Detailed designs, precise transfers |
Carbon (or graphite) paper works well for detailed and precise designs. To use it, place the carbon paper graphite side down on your wood, then put the printed or hand-drawn design on top. Trace the design lines firmly with a pencil or stylus, transferring the graphite onto the wood surface. This method requires a smooth, somewhat porous wood surface for the graphite to adhere properly.
Stenciling involves cutting out your design or letters on cardstock or plastic sheets. Secure the stencil to the wood using tape or low-tack adhesive and apply paint with a brush or sponge. This technique is best for bold font styles and repetitive shapes because it ensures consistent shapes and clean edges. Tracing freehand is the simplest but demands a steady hand and suits only less intricate projects.
Tips for Choosing Fonts and Spacing
Clear and legible fonts improve both the look and readability of your wooden sign. Choose fonts with simple lines and avoid overly ornate or thin strokes that get lost in paint or wood grain. Sans-serif or block fonts tend to work best for outdoor or decorative signs. For spacing and layout, start by sketching a rough outline that balances text and decorative elements with even margins on all sides. Use the simple scaling formula to adjust your design:
Wood surface width ÷ Original design width = Scale factor
Multiply your original font sizes and design elements by this scale factor to maintain proportions. Keep letters evenly spaced and align all text along common baselines for a professional feel. Too tight or uneven spacing can make letters clash, while too much space can fragment the design visually. Draft your layout on paper before transferring to wood to confirm balance and spacing.
Painting Techniques for Lettering and Designs
Painting your wooden sign with sharp, lasting letters and designs means choosing the right paint and tools, then applying them carefully. Acrylic and enamel paints work well for wood, while oil-based paint pens offer precise control for lettering. Using the correct brushes, stencils, and steady technique helps ensure clean edges and professional results.
Choosing Acrylic vs Enamel Paints
Acrylic paints are water-based, dry quickly, and clean up easily with soap and water. They usually cost between $5 and $10 per 8-ounce bottle. Acrylics have good adhesion to wood and come in a wide range of colors, making them popular for DIY signs. Enamel paints are oil-based or water-based and form a harder, more durable finish. They take longer to dry, sometimes 6 to 8 hours, but hold up better outdoors and on rough surfaces.
Use acrylic paint for indoor signs or projects where quick drying and ease of use matter. Choose enamel paint for signs exposed to weather, heavy wear, or when a glossy, sturdy finish is desired. Both types usually need 2 to 3 thin coats for full coverage. Applying thin coats reduces drips and unevenness.
Using Paint Pens, Brushes, and Stencils
Oil-based paint pens are ideal for crisp lettering on wood, offering control and minimal mess. A popular option is Sharpie oil-based paint pens, which dry fairly fast and provide sharp, clear lines even on textured wood. For filling in larger letters or designs, small synthetic or nylon brushes (size 0 to 2) work best for precision. Foam brushes and small rollers suit background painting or larger areas.
Stencils make it easier to paint uniform letters and graphics, especially if your handwriting is uneven. Secure stencils firmly with painter’s tape to prevent paint bleeding. Dab paint gently with a sponge brush or stippling brush over the stencil edges instead of brushing sideways. Let paint dry fully before removing stencils to avoid smudging. Follow these steps for painting clean, professional-looking letters and designs:
- Prepare your wood surface by sanding smooth and wiping away dust.
- Apply your background coat with a foam roller or brush and let dry completely.
- Position stencils or draw your design lightly with pencil.
- Use oil-based paint pens or small brushes to paint the lettering or design slowly and carefully.
- Let each letter or section dry before painting adjacent areas to prevent smearing.
- Add 2-3 paint coats as needed for opacity, allowing drying time between coats.
- Remove stencils gently once paint is dry to the touch.
Practice on scrap wood before committing to your sign to perfect brush pressure and timing for clean lines.
Correcting and Redoing Painted Designs
Mistakes like paint bleeding or uneven lines are common. Acrylic paint can be corrected by lightly sanding the damaged area with fine-grit sandpaper (220 grit) once dry, then repainting. Removing enamel paint may require mineral spirits applied cautiously with a cloth, but follow safety guidelines and test in a small spot first.
For paint pen errors, wipe the wet paint away immediately with a cloth dampened with a little rubbing alcohol. If the paint has dried, gently scrape or sand off the mistake before repainting. Avoid rubbing too hard to prevent damaging the wood surface. Applying thin coats helps avoid thick paint spots that are harder to fix.
Sealing and Finishing Your Wooden Sign for Protection
Protecting your wooden sign with the right sealant is important to extending its lifespan, especially if it’s placed outdoors. For exterior signs, you want sealants that shield against moisture, UV rays, and temperature changes. Clear exterior polyurethane or spar varnish works well because they form a hard, durable barrier that resists cracking and peeling. These sealants usually cost $10 to $20 per quart and require at least two coats. Apply the first coat with a high-quality brush, let it dry for 4 to 6 hours (follow the product’s instructions), then lightly sand the surface with fine 220-grit sandpaper to remove any raised grain or imperfections before the second coat. Waiting until the finish is fully dry before sanding prevents clogging your sandpaper and ensures a smooth surface.
For indoor signs, water-based polyurethane or acrylic sealants are good choices because they dry faster, have lower odor, and provide a clear finish that won’t yellow over time. Two coats are still recommended, with about 2 hours of drying time between coats. A quick sanding between coats helps maintain adhesion and smoothness. Water-based products typically cost $8 to $15 per pint or quart. These finishes also come in gloss, satin, or matte sheens, allowing you to add your preferred look without additional steps.
Adding special finishes like distressing or gloss is simple after sealing. To distress your sign for a rustic effect, wait until the final coat of sealant is fully cured, usually 24 to 48 hours. Then gently sand the edges and a few spots on the surface to reveal the wood or previous paint layers underneath. This technique gives a weathered look without compromising overall protection. For a glossy finish, choose a high-gloss polyurethane or apply a clear gloss topcoat over a satin or matte base. Apply gloss coats thinly and evenly, following the same drying and sanding schedule.
Maintenance of sealed signs depends on exposure. Outdoor signs benefit from a fresh coat of sealant every 1 to 2 years to keep protection strong. Clean the surface with mild soap and water before reapplying to remove dirt and mildew. Indoor signs require less frequent resealing; every few years is usually enough. Avoid sealants labeled only for indoor use on outdoor signs, as these lack additives to protect against sun damage and moisture.
Remember, applying thin, even coats and allowing proper drying time ensures the best results. Thick coats can drip, stay tacky longer, or crack. Use natural-bristle brushes for oil-based sealants and synthetic brushes for water-based finishes to prevent brush marks. Following these steps will help protect your wooden sign, keeping your DIY project looking great for years to come.
Adding Frames and Mounting Hardware to Wooden Signs
Building a frame for your wooden sign not only adds aesthetic appeal but also protects the edges and increases durability. The frame should fit snugly around your sign, typically matching the sign’s thickness and width. Using glue and finishing nails or a brad nailer helps secure the frame firmly without splitting the wood.
To create a frame, select wood strips about 1 to 2 inches wider than the sign edges. Sand edges with 220 grit sandpaper to avoid splinters. Staining the frame with a color that complements your sign improve the look; for example, Minwax Dark Walnut is a popular choice. Proper mounting hardware depends on how and where you want to hang or display your sign.
For mounting, hooks, sawtooth hangers, or twine are common options. Sawtooth hangers are easy to install on the back of the frame, ideal for indoor wall mounting. If you prefer a rustic or casual look, attaching twine or wire can also work, but ensure it can support the sign’s weight. For outdoor signs, avoid flat mounting; instead, use spacers or mounting blocks at the back to allow airflow and drainage, preventing water damage and prolonging the sign’s life. Here is a step-by-step guide to build your frame and attach mounting hardware:
- Measure your sign’s dimensions accurately, including thickness, to cut frame pieces that fit precisely around the edges.
- Cut four wood strips for the frame: two for the top and bottom and two for the sides. Miter or square cuts both work depending on your desired style.
- Sand the frame pieces smooth with 220 grit sandpaper to eliminate rough edges and prepare for finishing.
- Apply wood glue to the back edges of the frame pieces, then position them around the sign’s edges with even spacing.
- Nail the frame pieces into place using finishing nails or a brad nailer, focusing on the top and bottom pieces first for stability.
- Stain or paint the frame after assembly to match or complement your sign’s design; allow adequate drying time based on product instructions.
- Select mounting hardware suited for your sign’s weight and location: sawtooth hangers for indoor use, hooks for heavier signs, or twine for lightweight, casual displays.
- Install the hardware by screwing or nailing it securely onto the back of the frame. For outdoor signs, add spacers behind the frame to improve drainage and reduce moisture buildup.
Common Mistakes and Troubleshooting Tips
Letters that bleed or paint that peels usually happen because the surface wasn’t properly prepared or the paint was applied too thickly. To fix bleeding letters, wait for the paint to dry completely and lightly sand the area with 220-grit sandpaper. Then repaint using a thinner layer or a paint pen for better control. For peeling paint, gently scrape off any loose paint, sand the edges smooth, apply a wood primer if necessary, and repaint to help the new paint adhere better.
Uneven sanding or rough edges show a lack of consistent grit progression or missed spots. Start by sanding the problem area with 120-grit sandpaper to remove roughness or bumps, then finish with 220-grit for a smooth surface. Use a sanding block or sponge to keep pressure even. If edges feel sharp or splintered, round them off slightly by sanding at an angle. This approach prevents splinters and creates a professional look.
Wood warping or cracking can result from moisture exposure or using wood that hasn’t fully dried. Small cracks can be filled with wood glue or wood filler. Apply the glue or filler, allow it to dry fully according to product instructions (usually 2 to 24 hours), then sand smooth. To prevent future warping, store your wooden sign in a dry, temperature-stable environment and seal all surfaces, including edges, with a protective finish.
- Fix paint bleeding by sanding lightly and repainting with thin coats or paint pens.
- Remove peeling paint by scraping, sanding, priming, and repainting.
- Correct uneven sanding by using 120- then 220-grit sandpaper with consistent pressure.
- Round rough edges by sanding at an angle to prevent splinters.
- Repair cracks with wood glue or filler, sanding smooth after drying.
- Prevent warping by sealing all wood surfaces and controlling moisture exposure.
- Use baby wipes immediately to clean small paint mistakes before drying.
Always wait for each paint layer to dry fully before applying the next to avoid peeling and bleeding.
Reworking your wooden sign after a mistake involves patience and proper materials. For painting errors, gently removing paint with a baby wipe or light sanding saves time. When sanding, keep your hand steady and avoid over-sanding to maintain shape and thickness. Repairing cracks adds strength but requires complete drying time, so plan accordingly. These fixes may cost just the price of sandpaper, wood glue, or filler, usually between $5 and $15, but they greatly improve durability and appearance.
Step-by-Step Action Plan for Your Wooden Sign
Follow this plan to create your wooden sign efficiently and confidently. Each step includes a way to check your progress.
- Day 1: Choose and prepare your wood. Pick a smooth, sturdy wood like pine or cedar, and sand the surface until it feels even and splinter-free.
- Day 2: Design your sign. Draft your layout on paper or use a computer program. Make sure the size and spacing fit your wood piece.
- Day 3: Transfer your design to the wood using carbon paper or stencils. Verify the design lines are clear and centered.
- Day 4: Paint your lettering and artwork. Use acrylic paints and fine brushes, and check that the paint covers smoothly without runs.
- Day 5: Seal your sign with a clear outdoor sealer or polyurethane. Wait until the surface is dry but not tacky before handling.
- Day 6: Attach frames or hanging hardware. Ensure the hardware is secure and can support the sign’s weight safely.
- Day 7: Inspect your finished sign for any touch-ups. Fix any paint chips or rough edges before displaying it.
Frequently Asked Questions
What Tools Do I Need Besides Wood for Making a Wooden Sign?
You’ll need basic tools like sandpaper, paintbrushes, stencils or transfer paper, and possibly a saw. Having clamps and a drill helps with assembly and mounting your wooden sign securely.
How Do I Prevent My Wooden Sign from Warping over Time?
Use kiln-dried wood and seal all sides with a protective finish. Keeping the sign indoors or in a shaded area also reduces exposure to moisture and sun damage.
Can I Reuse Scrap Wood to Make a Wooden Sign?
Yes, scrap wood can work well if it’s smooth and free of rot. Sand thoroughly and clean the surface for the best paint or stain adhesion on your sign.
How Long Does It Take for Paint to Dry on a Wooden Sign?
Paint usually dries in about 1 to 2 hours, but curing time takes longer. Allow at least 24 hours before handling or sealing for a durable finish.
What Type of Paint Lasts Best on Outdoor Wooden Signs?
Acrylic latex paint withstands outdoor conditions well and resists fading. Pair it with a weather-resistant sealer to protect your sign from rain and sunlight.
How Thick Should My Wooden Sign Be for Durability?
A thickness of ¾ inch is standard and sturdy enough for most signs. Thicker wood gives more durability but adds weight and cost to your project.
Key Points to Remember
Making a wooden sign is a rewarding project that adds a personalized touch to your space. Starting with quality materials and following careful preparation and finishing steps will result in a durable, attractive sign. Begin by selecting your wood and designing your layout today to bring your vision to life.