How to Make a Wooden Sign by Hand: A Complete Step-by-Step Guide for Beginners
Knowing how to make a wooden sign by hand means creating personalized decor that fits your style without buying expensive pieces. Start with simple materials like plywood and 1×2 boards, then cut, stain, and paint your design for a custom look. Measuring and preparing your wood carefully ensures a neat and durable finished sign.
Key Takeaways
- Choose a wood size that suits your space, such as 10×12 inches for beginner-friendly handling.
- Use plywood or walnut blanks for a smooth surface ready to paint or stain.
- Cut two 1×2 board pieces 1.5 inches longer than the sign height for sturdy framing.
- Transfer your design using carbon paper or printouts taped to the wood.
- Paint sign letters using paint pens to achieve clean, consistent lines easily.
- Allow paint 1-2 hours to dry to the touch, and 24 hours to cure completely.
How to Make a Wooden Sign by Hand Step-by-Step

Creating a wooden sign by hand involves several key stages that move smoothly from preparing your wood to finishing your painted design. Starting with clean, smooth wood ensures your paint and design apply well and last. Careful preparation and thoughtful sequencing of steps save time and avoid mistakes like paint peeling or blotchy finishes. A well-organized process also lets you enjoy the craftsmanship of each phase, making your project both rewarding and manageable.
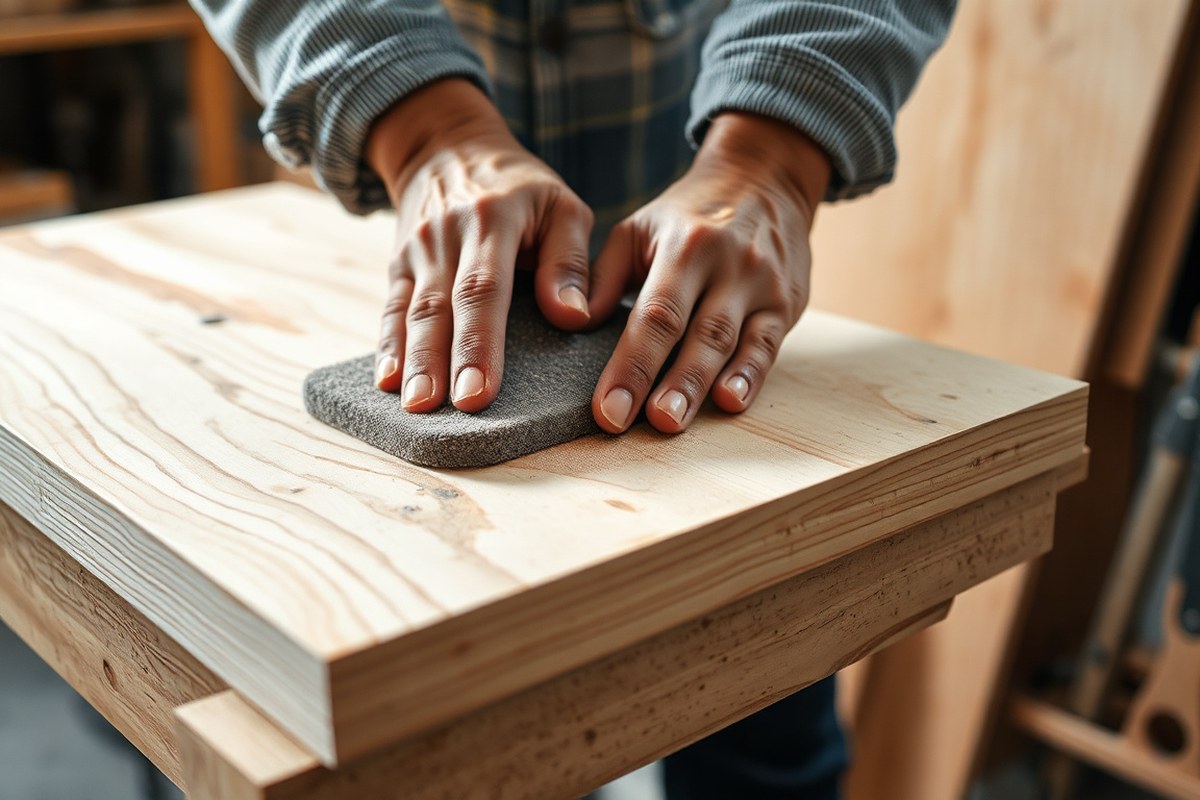
- Prepare Your Wood Surface: Begin by sanding your wooden board with medium-grit (120) sandpaper, then finish with fine-grit (220) to smooth the surface. Wipe off dust with a damp cloth and let it dry for 10-15 minutes. This step ensures the paint adheres evenly and prevents rough spots. A clean, smooth surface typically costs about $5 in sanding materials for a single sign and takes around 30 to 45 minutes depending on size (around 12×6 inches).
- Transfer Your Design: Place your chosen design on the wood using transfer paper or trace it lightly with a pencil if you prefer freehand painting. Secure the design with tape so it does not move. This precise transfer usually takes about 20-30 minutes. Clean, clear lines here reduce correction work during painting.
- Apply Base Coats or Stain: If staining the wood, apply a thin, even coat with a cloth or brush, then wipe off excess. Let it dry 2 to 4 hours depending on the stain. If using a base paint color, apply one or two thin coats, allowing 30 minutes drying time between coats. This step preps your wood with color depth or uniform paint tone for design contrast.
- Paint Your Design: Use fine brushes and acrylic paint for hand-painting. Work slowly to fill in lines and letters, allowing each color section to dry about 20-30 minutes before applying a second coat if needed. Avoid heavy paint layers which can crack or peel later. Painting generally takes 1 to 2 hours depending on detail and size.
- Correct and Touch Up: After the main paint dries, touch up edges or fill in spots using a fine brush. Use a damp cloth to wipe any stray pencil marks. This cleanup takes 15-30 minutes but improves the professional look dramatically.
- Seal Your Sign: Apply a clear protective finish like polyurethane or outdoor acrylic sealer with a brush or spray. Allow 2 to 4 hours drying time and consider a second coat for durability. Sealing protects paint from moisture and UV damage, extending your sign’s life, especially for outdoor use.
- Let the Sign Cure: After sealer application, let the sign cure at room temperature for 24 hours before handling or hanging. This final step prevents scratches or dents on the fresh finish.
Following this sequence helps you manage your time and materials efficiently and achieve a crisp, long-lasting handmade wooden sign. Materials needed include sandpaper, transfer tools (carbon paper or stencil), paint brushes, paints, stain or base paint, sealing finish, and simple cleaning supplies. Each step’s timing and tools adapt to your workshop setup and design complexity.
Choosing the Best Wood for Your Handmade Sign
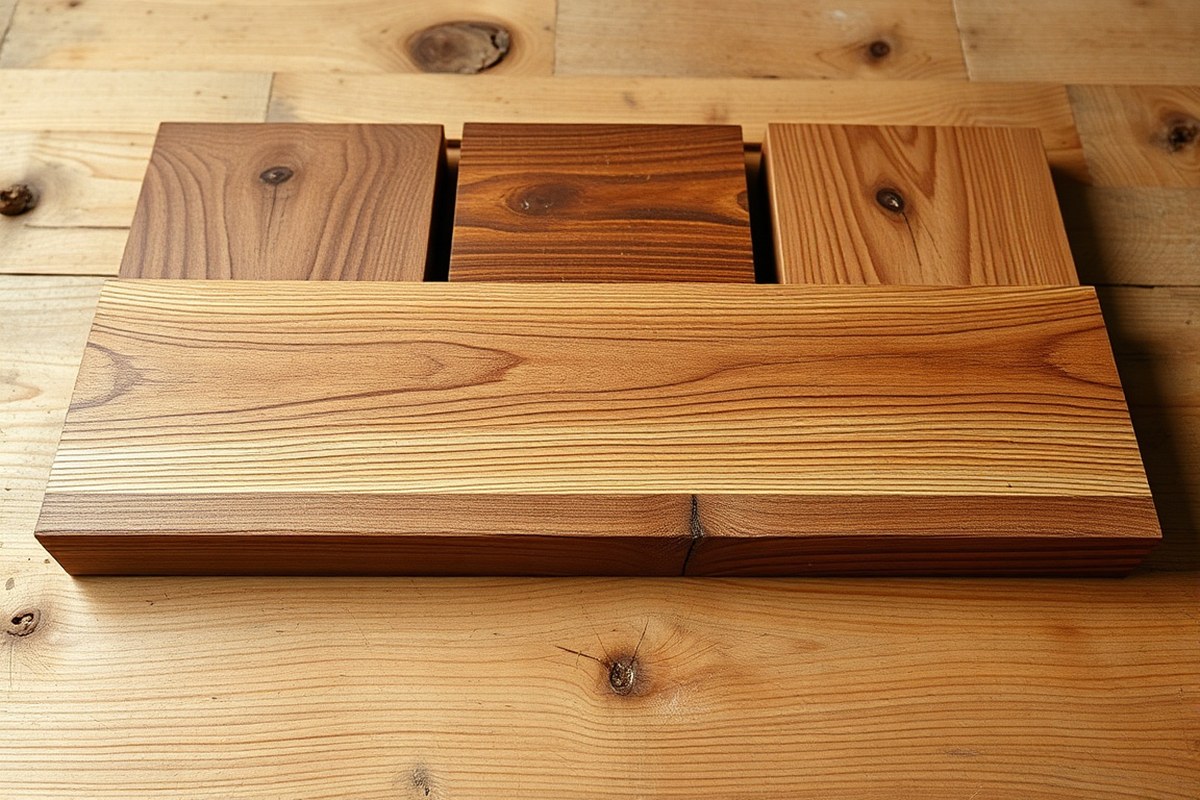
Choosing the right wood for your handmade sign has a direct impact on how it looks, lasts, and performs depending on where you plan to place it. Softwoods and hardwoods each have advantages, with options like pine and cedar commonly used by DIY crafters. Thickness and type influence the sign’s durability and ease of painting or carving.
Softwoods, such as pine, are easy to shape and affordable, making them ideal for beginners and indoor signs. Hardwoods or weather-resistant softwoods like cedar offer increased durability outdoors, resisting rot and insect damage better. Birch plywood, while smooth and paint-friendly, works well indoors but may need sealing for outdoor use. Reclaimed wood gives a rustic vibe but can vary in quality and may require extra prep.
| Wood Type | Characteristics | Best For |
|---|---|---|
| Pine | Softwood, easy to work with, affordable | Beginner projects, indoor signs |
| Cedar | Durable, resistant to rot and insects, aromatic | Outdoor signs, decorative projects |
| Birch Plywood | Smooth surface, easy to paint, moderate cost | Indoor signs, painted finishes |
| Reclaimed Wood | Rustic look, unique character, may need extra prep | Decorative indoor signs, rustic-style projects |
Wood thickness for signs usually ranges from ½ inch to ¾ inch. Thicker wood improves durability outdoors and provides a sturdy base for carving or heavy paint layers. Thin wood is lighter and easier to handle but may warp or crack faster, especially outside. Sealing or finishing your sign extends its lifespan regardless of wood type.
Tip: Use cedar or cypress for outdoor signs to prevent weather damage; otherwise, pine or birch plywood is perfect for indoor projects with smooth paint surfaces.
For outdoor signs, select woods naturally resistant to moisture and insects. Long-lasting signs need durable wood plus proper finishing. Indoor signs prioritize appearance and ease of painting, so softer woods or plywood suit those projects best. Reclaimed wood adds charm but inspect it for damage before use.
Hand Tools and Techniques for Cutting and Shaping Wood
You can safely and effectively cut, sand, and shape wood for your handmade signs using simple hand tools. A handsaw, sanding blocks, and files provide control and precision without needing power tools. Careful technique ensures clean cuts, smooth surfaces, and nicely shaped edges for a professional look.
Basic Hand Saw Techniques
Select a sharp, fine-toothed handsaw designed for woodworking to get the cleanest cuts. A backsaw or a Japanese saw works well for making straight cuts on sign boards. Hold the wood securely with clamps or on a stable surface to prevent slipping and injuries.
Grip the saw handle firmly but comfortably. Position the saw blade at about a 45-degree angle to the wood surface, starting the cut slowly to create a guiding groove. Increase your sawing speed steadily, using long, even strokes focused on the forward motion. Keep your wrist straight and avoid forcing the blade.
Sanding for a Smooth Finish
Use sanding blocks wrapped with 120-grit sandpaper to smooth rough spots after cutting. Sand along the grain of the wood to prevent scratches. Follow with 220-grit sandpaper for a finer finish, prepping the surface perfectly for painting or staining.
To achieve an even surface, apply moderate pressure and sand in a circular motion for flat areas, especially edges. Keep changing or folding the sandpaper to expose fresh abrasive material and avoid clogging. After sanding, wipe the wood clean with a dry cloth to remove dust.
Shaping Edges and Corners
Files and sanding blocks help you shape edges by rounding or beveling them, adding both safety and style to your sign. Use a half-round or flat file for removing sharp corners and smoothing edges before finishing with fine sandpaper.
To create a rounded edge, move the file or sandpaper in a curved motion around the corner. For bevels, angle the file against the edge gently at about 30 to 45 degrees. Check your progress frequently to keep edges even and avoid removing too much material. Follow these steps to cut, sand, and shape your wood by hand:
- Secure your wood piece on a stable surface using clamps.
- Mark your cut line clearly with a pencil and a straightedge.
- Hold your handsaw at a 45-degree angle and start the cut carefully.
- Use long, steady strokes focusing on the forward motion to complete the cut.
- Wrap a sanding block with 120-grit sandpaper and sand all cut edges and surfaces along the grain.
- Switch to 220-grit sandpaper for a fine finish, removing sanding marks.
- Use a file or sanding block to gently round or bevel edges as desired.
- Clean off all sanding dust with a dry cloth before painting or staining.
Best Methods to Transfer Designs Onto Wood
Design transfer onto wood is important for accuracy and appearance. Common methods include graphite or carbon paper tracing, stencil cutting and painting, and freehand drawing. Each method has unique materials and results, making some better suited for beginners or detailed designs.
Graphite or Carbon Paper Tracing
Graphite or carbon paper tracing uses a sheet coated with transferable graphite or carbon placed between your printed design and the wood surface. Pressing or tracing over the printed lines transfers the design onto the wood with precision.
To do this, first print your design on regular paper. Cut a piece of graphite or carbon paper slightly smaller than your design. Tape the carbon paper onto the wood with the graphite side down, then tape your printed design on top. Use a sharp pencil or stylus to trace over the design lines. The pressure transfers the graphite onto the wood below, creating an outline you can paint or carve.
This method costs around $5 to $10 for a pack of transfer paper and only requires a pencil. It works well for both simple and complex designs. Designs transfer clearly, allowing detailed painting, but you must trace slowly and carefully to avoid smudging. This method is great for beginners who want accuracy without complicated tools.
Stencil Cutting and Painting
Stencils create clean, repeatable lettering or shapes for signs by applying paint through cut-out areas. You can make stencils from vinyl sheets or cardstock using scissors or craft cutting machines like Cricut or Silhouette.
Create or download your design, then cut it from stencil material. Secure the stencil to the wood with painter’s tape or adhesive spray. Apply paint with a brush, sponge, or spray, making sure paint does not bleed under the edges. Carefully remove the stencil while paint is still slightly wet.
Vinyl stencils are reusable, durable, and produce crisp edges, ideal when you want consistent typography across multiple signs. Cardstock stencils are cheaper and faster for one-off projects but wear out quickly. The cost varies from a few dollars for simple paper stencils to about $20-$30 if using a cutting machine. Beginners benefit from stencils for neat results without freehand skills but must be patient while applying paint evenly.
Freehand Drawing and Sketching
Freehand drawing offers the greatest creative freedom, perfect for unique, artisanal signs with visible brush marks and personal style. This method requires only a pencil and steady hand. Lightly sketch your design directly on the sanded wood surface using pencil or chalk.
Start with simple shapes and letters, then refine outlines before filling in with paint. Mistakes can be erased or painted over. Freehand suits artistic projects or signs with rustic or imperfect charm but demands practice for clean lines and proportion.
Though it requires no extra materials or cost, freehand can take longer and may need touch-ups. Beginners should start small and avoid complex typography. This approach allows the most customization but less precision compared to tracing or stencils.
| Method | Typical Result | Best For | Speed & Repeatability |
|---|---|---|---|
| Graphite/Carbon Paper Tracing | Accurate, detailed outlines for complex designs | Detailed designs, beginners wanting precision | Moderate speed; one-off or low volume |
| Stencil Cutting and Painting | Crisp edges and consistent lettering | Batch production, repeatable typography | Medium speed; good repeatability with durable stencils |
| Freehand Drawing and Sketching | Artisanal, textured, original signs | One-off decorative signs with personal style | Slower; low repeatability |
Selecting the right method depends on your desired detail level, available tools, and sign quantity. Trace carbon paper designs for accuracy without expensive gadgets. Choose stencils for clean, repeatable visuals. Draw freehand when you want a personal, handcrafted look.
Techniques and Tips for Painting Wooden Signs by Hand
Choosing the right paint and brushes is key to neat, clear, and attractive painted letters and designs on your wooden sign. Acrylic paints are a popular choice because they dry quickly, have good coverage, and hold up well outdoors when sealed. Select brushes with fine synthetic bristles for lettering; round brushes sized 0 to 2 work well for detail, while flat brushes 1/4″ to 1/2″ wide handle filling in larger areas smoothly. Avoid cheap bristles that shed or splay easily, as they create uneven edges.
To maintain clean edges and avoid smudging, start by sanding your wood smooth with 220-grit sandpaper. This removes rough spots that can cause paint bleed. Use painter’s tape or a stencil to outline the letters or design before applying paint. When lettering freehand, keep your hand steady by resting your pinky or ring finger lightly on the wood as a guide. Apply paint in thin layers, letting each coat dry for about 20-30 minutes under room temperature before adding the next. Thicker paint tends to smudge or drip, so patience pays off.
Handling brushes properly helps create sharp lines. Use the tip of a fine brush for detail strokes rather than pressing brushes flat against the wood. When filling shapes, use straight, even strokes along the grain of the wood to prevent a blotchy finish. When you accidentally paint outside the edges, wait until the paint dries completely, then gently scrape or sand the area before repainting.
- Use acrylic paint for durability and quick drying
- Choose round brushes size 0 to 2 for fine lettering
- Sand wood smooth with 220-grit before painting
- Apply painter’s tape or use stencils for crisp outlines
- Paint in thin layers, waiting 20, 30 minutes to dry between coats
- Rest your hand for steady brush control during lettering
- Correct mistakes by sanding dry paint before repainting
Professional hand lettering techniques also include sketching your design with a light pencil first, then tracing with paint. This prevents uneven spacing and sizing. Applying a coat of clear matte finish between paint layers not only protects your work but helps subsequent layers to glide on more smoothly. Plan your order of painting from background colors to details to avoid smudging wet paint.
Don’t rush drying times or press brushes too hard; these are common causes of paint bleeding and messy edges.
Fixing common painting mistakes often takes time rather than extra paint. Edges that bleed should be allowed to dry, then carefully remove the excess using a damp fine brush or a light sanding block. Mistakes can also be covered neatly by painting over with a small brush once dry. Expect to spend about $5 to $15 on quality brushes and $10 to $20 on acrylic paints for a small sign project, which is a worthwhile investment for cleaner and longer-lasting results.
Sealing and Finishing for Durability and Style
Protecting your wooden sign with the right finishing products ensures it lasts and looks great, whether displayed indoors or outdoors. A clear polyurethane finish is a popular choice because it forms a hard, durable protective layer over paint and wood. For indoor signs, a satin or gloss water-based polyurethane works well. You can apply two or three thin coats with a synthetic brush, allowing about two hours of drying time between coats. Outdoor signs need a more strong finish; oil-based polyurethane or marine varnish offers stronger protection against moisture and UV damage. Expect longer drying times, up to 24 hours, and plan at least three coats applied with a natural bristle brush in a dust-free environment.
Varnishes attract hobbyists who want a natural wood look while still sealing the surface. Spar varnish, specifically made for outdoors, is flexible and resists cracking when wood expands. Apply three coats with light sanding between each using 220-grit sandpaper. Each coat should dry for 4 to 6 hours, followed by a curing period of several days where the finish hardens fully. Avoid high humidity during this process to prevent a cloudy finish. For interior signs, oil finishes like tung or linseed oil can be rubbed on with a cloth to penetrate and protect wood fibers while improving grain and color. Oils are less protective than polyurethane or varnish but add warm, natural tones and are easier to reapply or touch up over time.
Wax finishes suit indoor signs that do not face rough conditions. They offer a soft sheen and some moisture resistance but require more frequent maintenance. Use paste wax applied thinly with a soft cloth, buffing to a shine after drying for about 30 minutes. Be mindful not to wax over unfinished paint, as it can interfere with adhesion and cause patchiness. To preserve paintwork on any finish type, make sure the paint is completely dry, often 24 hours, before sealing. Use a light hand with brushes or foam applicators to avoid disturbing the surface design. Applying sealants in thin, even coats prevents drips or cloudiness, and lightly sanding between coats improves adhesion and smoothness.
Finishing touches can also improve your sign’s look. Satin finishes soften colors and reduce glare, while gloss finishes brighten colors and add a polished effect. You can lightly distress the edges before sealing for a rustic, weathered appearance. Finishing products vary in price, with basic water-based polyurethanes available around $10 to $15 for quart containers, and marine-grade varnishes or specialty oils ranging from $15 to $30. Labelling will provide exact drying times, ventilation recommendations, and suitable application tools, so follow those details closely for the best results. Patience during drying and curing makes a big difference in durability and finish quality, ensuring your handmade wooden sign stays beautiful for years to come.
Common Mistakes When Making Wooden Signs and How to Fix Them
Uneven lettering or paint bleeding often happens when the paint is too thin or the brush is overloaded. Using an oil-based paint pen like Sharpie’s can improve precision since it applies paint evenly without excess. To fix uneven letters, wait for the paint to dry fully, then carefully outline or fill in gaps with a fine-tipped paint pen. For bleeding edges, scrape off the excess paint gently with a craft knife once dry, and touch up with a steady hand. You can prevent these issues by tracing your design with a ballpoint pen to create slight indents, guiding your brush exactly and avoiding extra paint spill.
Color mistakes and smudges are common when paint is wet or tools slip. The best fix is to wait until the paint dries completely, then lightly sand the affected area with fine-grit sandpaper (220 grit works well) to smooth it out. Repaint the area carefully, using small brushes or paint pens for detail. Avoid using thick coats of paint; apply two or three thin layers instead to reduce smudging risks. Cleaning your brushes or pens before switching colors also prevents accidental mixing and smudging.
Cracks in wood or peeling paint signal moisture problems or improper sealing. Small cracks can be filled with wood filler or putty designed for exterior use if the sign will be outdoors. After filling, sand smooth once dry, then prime and repaint. Peeling paint suggests the surface wasn’t properly prepared or the sealer is failing. To fix peeling paint, scrape away flaking paint, sand the area, and apply a quality primer before repainting. Use sealants formulated for wood signs to protect against weather and wear, such as polyurethane or spar varnish, which cost about $10, 20 per quart and last several projects.
- Choose paint tools wisely: use foam rollers for base coats and oil-based paint pens for detail work
- Trace designs with a ballpoint pen to create indentations for cleaner paint application
- Apply multiple thin paint layers, allowing proper drying time between coats
- Sand lightly to fix paint smudges or uneven surfaces before repainting
- Fill wood cracks with wood filler and sand smooth to ensure a uniform surface
- Prime surfaces before painting to improve paint adhesion and reduce peeling
- Seal finished signs with a weather-resistant clear coat to extend durability
Dealing with these common issues requires patience and attention to detail. Taking the time to prep your wood surface well and using the right materials can prevent many mistakes before they start. Keep your workspace tidy and allow each layer of paint or finish to dry fully, which helps maintain sharp lines and strong adhesion. Repairs may take extra time but ensure your handmade wooden sign looks professional and lasts longer.
Adding Personal Touches: Frames, 3D Effects, and Rustic Styles
Adding personal touches to your wooden sign can make your project stand out with custom frames, raised details, or a timeless rustic look. Frames give your sign a polished edge, 3D elements bring texture, and aging treatments add character. Each option lets you express your style while improving the sign’s presence on your wall.
Constructing and Attaching Wooden Frames
A simple wood frame sharpens the finished look of your sign and helps protect its edges. You can build a frame by selecting wood strips, commonly about 1 to 2 inches wide and 1/2 inch thick. Pine or poplar work well and remain lightweight. The frame should fit snugly around your sign’s perimeter, requiring precise measuring and cutting.
Use wood glue and finishing nails or small screws to secure the frame to the back and sides of your sign. Clamps can hold pieces together as glue dries, ensuring tight joints. For a unified look, lightly sand the frame edges and paint or stain it to match or complement your sign’s design.
- Measure the height and width of your sign to determine frame lengths.
- Cut four frame pieces: two matching the sign height, two matching the width.
- Arrange frame pieces around the sign edges to check fit.
- Apply wood glue along each frame edge facing the sign.
- Attach the frame pieces to the sign using finishing nails or screws.
- Clamp the frame if needed and allow glue to dry for at least 30 minutes.
- Sand any rough or uneven edges and finish with paint or stain.
Be careful not to split the wood when nailing or screwing; pre-drill small pilot holes if necessary.
Creating 3D and Textured Features
Adding three-dimensional and textured accents makes your sign visually dynamic. Common materials include felt flowers, small wood slices, rope, or painted raised lettering. These elements can add charm and a handcrafted feel while emphasizing focal points.
Attach embellishments with hot glue or wood adhesive for secure hold. Felt flowers provide softness and color, while thin wood slices or shapes improve parts of your message or design. Raised paint techniques, like layering paint or using texture paste, produce tactile interest without extra materials.
- Choose embellishments that complement your sign size and style.
- Position pieces on the sign surface to test layout before attaching.
- Secure 3D elements with appropriate glue, holding in place until set.
- Allow all adhesives to dry completely, typically 15 to 30 minutes.
- Optionally, seal items with a clear finish spray for durability.
Use lightweight materials for embellishments to avoid warping or weighing down your sign.
Distressing Wood for Rustic Appearance
Creating a rustic look breathes warmth and history into your handmade sign. Aging techniques can be simple and use basic tools and finishes you likely have on hand. Sanding edges and surfaces wears down harsh lines for softer, older wood appearance.
Whitewashing thinly coats the wood with diluted white paint, letting natural grain show through. Stains in darker tones add depth and simulate age. Combine methods by sanding over whitewash or staining post-finish to improve texture and color variation.
- Sand edges, corners, and flat surfaces unevenly using medium-grit sandpaper (80, 120 grit).
- Mix white paint with water at a 1:1 ratio for whitewash; brush lightly over sign.
- Let whitewash dry for 20 to 30 minutes and wipe off excess to achieve desired effect.
- Apply wood stain with a cloth or brush; wipe off after 2 to 5 minutes for a subtle tone.
- Allow all finishes to dry completely before handling or framing your sign.
Test your distressing technique on scrap wood first, as over-sanding or staining can be hard to reverse.
Step-by-Step Action Plan for Your First Handmade Wooden Sign
Follow these steps to create your wooden sign confidently and see clear progress along the way.
- Before you start: Choose a smooth, flat piece of softwood like pine or poplar, about 1 inch thick. Make sure the surface feels even and free of large knots.
- Day 1: Sketch your design on paper and decide on your lettering style and size. Confirm your design’s readability by printing it in the size you want on the sign.
- Day 2: Transfer your design onto the wood using graphite transfer paper or stencils. Check that the outlines are clear and fully visible on the wood surface.
- Day 3: Use a coping saw or a carving knife to shape and cut your letters if you want them carved, or sand the edges smooth for a flat painting surface. Make sure edges are clean and free of splinters.
- Day 4: Paint your letters and background with acrylic paints and fine brushes. Confirm paint coverage is even and colors are crisp after drying.
- Day 5: Apply a clear outdoor polyurethane finish or varnish in thin coats with a clean brush. Let each coat dry fully; the finish should feel smooth and protect the paint.
- After 1 week: Add any personal touches like simple frames or 3D accents using wood glue or small nails. Ensure added pieces are securely attached and improve your sign’s look.
Frequently Asked Questions
How Do I Prepare the Wood Surface Before Painting My Wooden Sign?
Sand the wood surface smoothly with fine-grit sandpaper to remove rough spots and dirt. This helps paint adhere better and prevents uneven finishes on your sign.
Can I Use Plywood for Making a Durable Handmade Wooden Sign?
Yes, plywood works but choose high-quality, exterior-grade plywood for durability outdoors. It tends to be less expensive but may need more sealing.
How Do I Protect My Wooden Sign from Outdoor Weather Damage?
Apply a waterproof sealant like spar urethane to shield the wood from moisture and UV rays. Reapply every year to maintain protection.
What’s the Easiest Way to Create Consistent Lettering by Hand on a Wooden Sign?
Use stencils or transfer printed designs with graphite paper for even, repeatable letters. This keeps your text neat and professional-looking.
Are There Safer Non-Toxic Paint Options for Making Wooden Signs?
Yes, water-based acrylic paints are non-toxic and safe for indoor use. They dry fast and offer bright, durable colors for your sign.
How Long Does It Typically Take for Paint to Dry on a Wooden Sign?
Acrylic paint dries to touch in about 30 minutes and fully cures in 24 hours. Dry times vary with thickness and humidity.
Final Thoughts
Creating a wooden sign by hand combines careful planning with thoughtful execution and personal creativity. Start with a clear design, work step-by-step on your materials, and focus on neat edges and quality paint for lasting results. Your next step can be picking up your wood and design sketches, then, you’ll be ready to bring your sign to life.