How to Make an Acrylic Sign by Hand: A Complete Guide for Beginners
Learning how to make an acrylic sign by hand means choosing the right acrylic sheet, cutting it carefully, and applying your design directly. You can create custom signs using simple hand tools and basic craft supplies, making it both affordable and flexible. Start with a clear plan for your design and select acrylic that suits your sign’s size and use.
Key Takeaways
- Select acrylic sheets between 3mm and 10mm thick for easy handling and durability.
- Use acrylic cement like SCIGRIP 3 for precise bonding without mess.
- Cut acrylic without special equipment by scoring and snapping with a straightedge and utility knife.
- Apply graphics and lettering by hand using paint pens or vinyl decals for a clean look.
- Consider lightweight transparent or colorful acrylic for versatile A-frame signs.
- Finish edges with fine sandpaper for a smooth, professional touch.
How to Make an Acrylic Sign by Hand Step-by-Step
Making an acrylic sign by hand involves careful planning and a series of precise steps to ensure a clean and polished final product. This process includes designing your layout, cutting and shaping the acrylic, applying graphics or lettering manually, and assembling the pieces securely for display. Preparing your workspace and materials properly at each stage helps avoid common mistakes such as rough edges or misaligned graphics.
Designing Your Sign Layout
Start by creating a clear design for your acrylic sign on paper or using a digital tool. This step is important for visualizing dimensions, spacing, and graphic placement before cutting the acrylic. Choose fonts and graphics that suit the sign’s purpose and setting. Measure your acrylic sheet and factor its size into your design to ensure a precise fit.
Keep your design simple with readable lettering and adequate spacing between elements to prevent overcrowding. Print out a template at full scale if drawing by hand, so you can easily transfer the design onto the acrylic. This preparation reduces errors and streamlines the subsequent cutting and painting stages.
Cutting and Shaping Acrylic Sheets
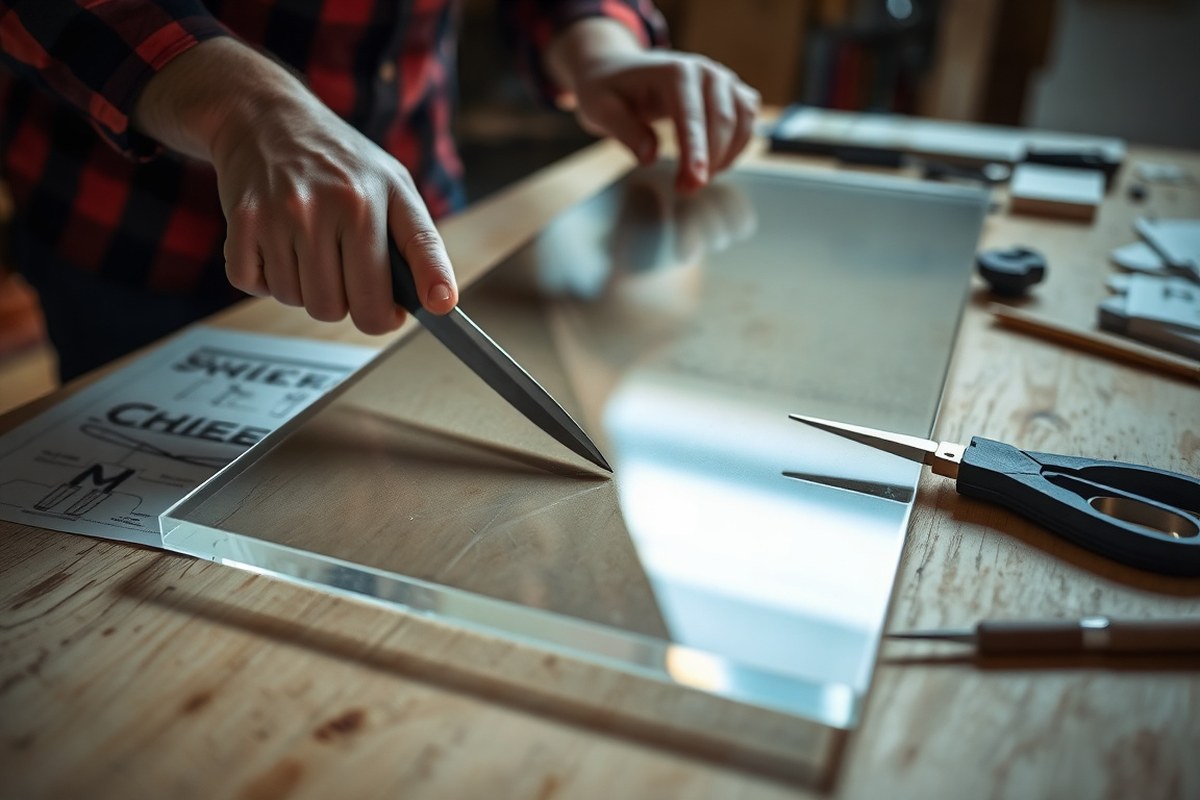
Cutting acrylic manually requires patience and the right tools. Use a scoring knife for sheets up to 3mm thick; make multiple passes along a straightedge to deepen the score line, then snap the sheet against a sturdy edge while keeping it firmly clamped. This prevents uneven breaks or cracking. Avoid forcing the cut, as that can cause chips or rough edges.
If your acrylic is thicker or your design includes curves, you may need to trim using a fine-toothed saw or sand edges smooth with progressively finer grits of sandpaper. Start sanding with 220 grit and finish with 600 grit for a polished look. Test your cutting and sanding technique on a scrap piece before applying it to the final sheet.
Common pitfalls during this step include cracking the acrylic by scoring too lightly or unevenly, and leaving rough edges that reduce the professional look of the sign. Take extra care to score accurately and sand without pressing too hard.
Adding Graphics and Lettering
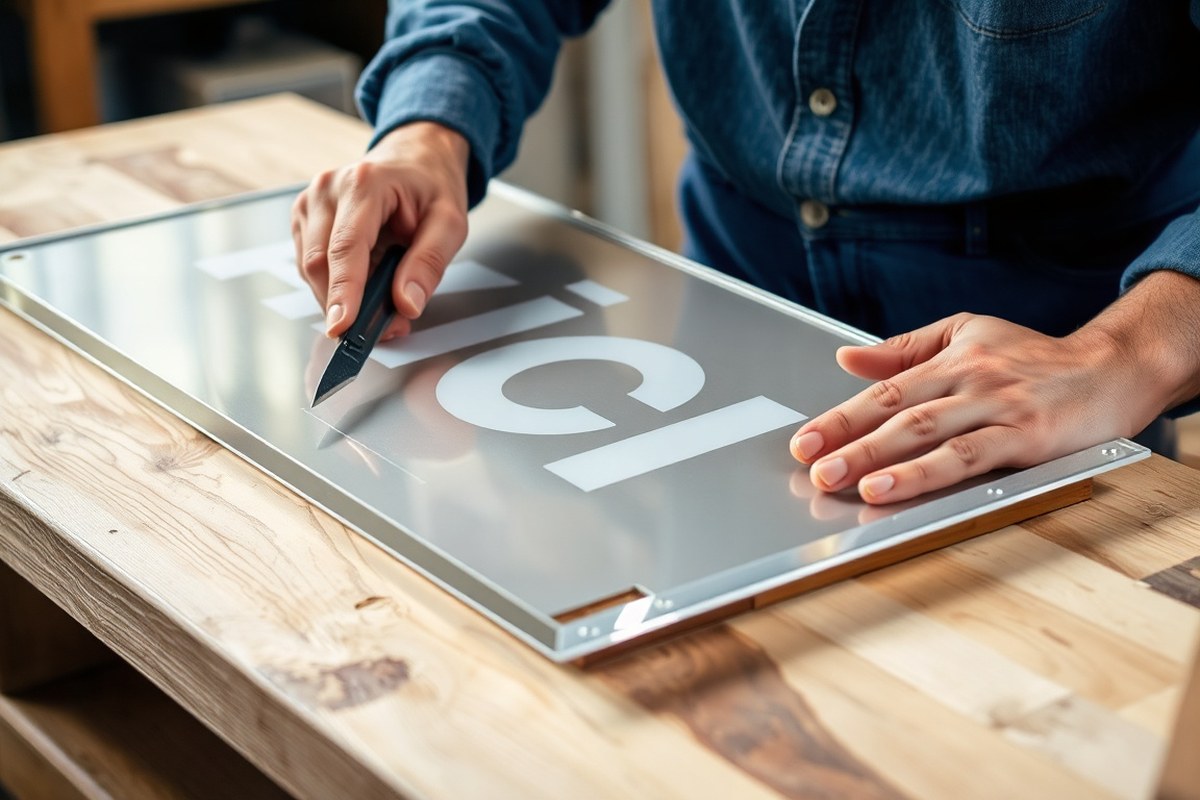
Manually applying graphics or lettering requires steady hands and suitable materials. You can use fine-tip paint pens, acrylic paints with small brushes, or adhesive vinyl cutouts for clear shapes. Sketch your design lightly with a pencil on the acrylic as a guide before applying paint or vinyl to ensure accuracy.
Allow each layer of paint to dry fully before adding detail layers to prevent smudging. When using vinyl, press firmly and smooth any air bubbles with a plastic scraper. Wait until all graphics are completely dry or set before handling the sign further. Imperfect edges or uneven paint thickness are common problems, so practice your strokes on scrap material first.
Assembling and Mounting Your Sign
Assemble your acrylic sign by joining all components and deciding how it will be displayed. For a freestanding sign, attach supports or a base with clear adhesive designed for acrylic. For wall mounting, use hardware like standoffs or brackets matching the size and weight of your sign. Measure precisely and mark drilling points before making holes to avoid misalignment.
A snug fit is important, especially in LED acrylic signs, where proper edge alignment improve light diffusion. Cut grooves or channels to match the acrylic thickness for inserts or lighting strips. Secure all parts firmly and check for stability before final installation. Loose mounts or crooked signs are frequent errors at this stage.
Final Touches and Cleaning
Finish your acrylic sign by cleaning any dust, fingerprints, or residual adhesive with a soft, lint-free cloth and a mild soap solution or acrylic cleaner. Avoid ammonia-based window cleaners as they can damage the surface. Buff gently to improve clarity and shine.
Inspect the edges and surface for any scratches or rough spots and carefully sand or polish as needed. A well-cleaned and polished sign looks professional and lasts longer. Store or display your sign away from direct sunlight or extreme temperatures to prevent warping or discoloration.
- Prepare your workspace by gathering all tools and materials, and secure your acrylic sheet on a flat, stable surface with clamps.
- Transfer your design carefully to the acrylic, using a printed template or light pencil sketch.
- Score and snap the acrylic sheet using a scoring knife for straight cuts or use fine saw blades for curves and thicker materials.
- Sand edges progressively with 220 to 600 grit sandpaper until smooth and polished.
- Add your graphics or lettering using paint pens, brushes, or vinyl, allowing drying times between layers.
- Assemble the sign components and attach mounting hardware or supports, measuring and aligning precisely.
- Clean the finished sign with appropriate cleaners and a soft cloth to improve clarity and protect the surface.
Tools and Materials Required for Acrylic Sign Making
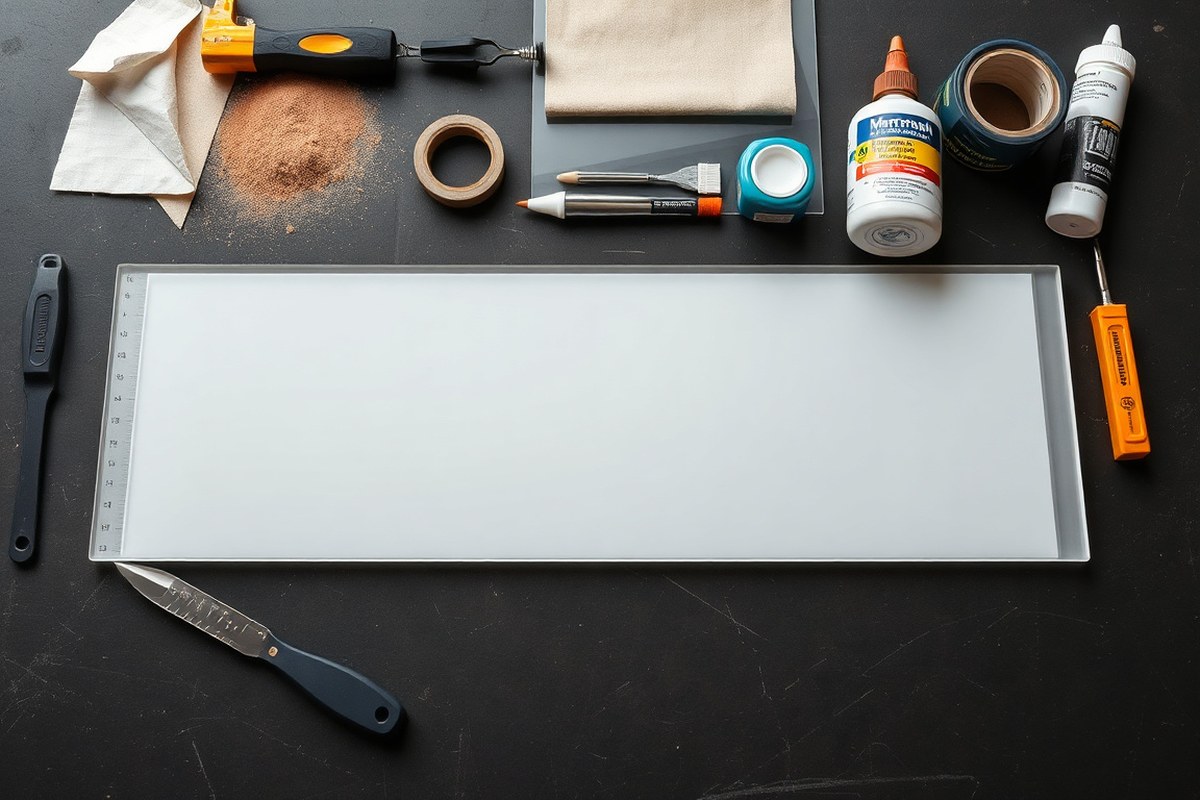
To create acrylic signs by hand, you’ll need a set of basic tools and materials suitable for beginners and those with some experience. The main cutting tool is a fine-tooth handsaw or a plastic scoring knife designed for acrylic sheets. For thicknesses up to about 1/8 inch, a scoring knife can be used by scoring and snapping the acrylic, which costs around $10 to $20. For thicker sheets or cleaner edges, a saw such as a fine-toothed jigsaw or a circular saw with a blade for plastics, priced between $30 and $70, works well. Always support the acrylic firmly to avoid cracking.
When binding acrylic pieces, solvent-based adhesives like acrylic cement (SCIGRIP 3 or similar) are the best choice. They chemically bond the acrylic, creating a clear, strong joint without visible glue lines. Apply the cement carefully along the joint with a needle-tip applicator for neat results. Avoid older glues like super glue or epoxy as they often leave cloudy or brittle joints. A bottle of acrylic cement costs about $10 to $20 and lasts for several projects.
To add graphics or lettering, paint options include acrylic-based paints made for plastics or vinyl. Applying paint to the backside preserves the front’s shine and prevents scratches. Alternatively, cut or printed vinyl letters and shapes stick smoothly to acrylic and are simple to align with a steady hand. Vinyl sheets or rolls commonly cost $10 to $25, and a vinyl cutter machine like Cricut Maker, though optional, can improve precision for those with intermediate skills.
Personal protection is essential since cutting acrylic generates sharp edges and fine dust. Wear tight-fitting work gloves to prevent cuts and safety goggles to protect your eyes from flying shards and dust. Use a dust mask or work in a well-ventilated area when sanding or applying solvent adhesives. Protective gear is inexpensive, with gloves and goggles available for under $20 total, and it helps prevent injuries and inhalation of harmful particles.
- Fine-tooth handsaw or plastic scoring knife for cutting
- Acrylic cement (such as SCIGRIP 3) with a needle-tip applicator
- Acrylic craft paints or vinyl film for decorating
- Tight-fitting work gloves and safety goggles
- Sandpaper or sanding block (for edge smoothing)
- Masking tape to hold pieces in place while bonding or painting
Always clamp or secure acrylic sheets firmly before cutting to prevent cracking and use slow, steady motions for clean edges.
Sandpaper (220 to 400 grit) helps smooth cut edges, making the sign look professional and safe to handle. Masking tape holds parts steady during gluing or painting and can also protect areas from stray paint. Gathering all these supplies before starting your project raises the chances of a crisp, durable result without interruptions.
Choosing the Right Acrylic Type and Thickness
Selecting the right acrylic type and thickness sets the foundation for a durable and attractive sign. Acrylic generally comes in a variety of thicknesses and finishes, which influence how easy it is to cut, how it holds up over time, and the final appearance. Most DIY acrylic signs use sheets between 3mm (about 1/8 inch) and 10mm (about 3/8 inch) thick. Thinner acrylic under 3mm works well if you are using tools like a Cricut Maker for engraving or cutting, as it can handle delicate work without breaking. Thicker sheets offer more durability and a premium look but usually require specialized machines like laser cutters or saws.
Different types of acrylic vary by their finish and color, affecting how the light interacts with your sign, especially if making an LED backlit sign. Clear acrylic is the most common and shows colors brightly, while frosted acrylic diffuses light for a softer glow. Mirrored acrylic can reflect surroundings and create a sleek look, often backed with wood for stability. Colored acrylic sheets come in many shades and can help your sign stand out without additional painting.
| Acrylic Type | Thickness Range | Best Use | Cutting Method | Appearance/Effect |
|---|---|---|---|---|
| Clear Acrylic | 3mm to 10mm | General-purpose signs, LED signs | By hand (up to 3mm), Laser cutter or saw (thicker) | Bright, transparent, vibrant color display |
| Frosted Acrylic | 3mm to 6mm | Backlit signs, diffused light effects | Laser cutter preferred; hand tools harder for smooth edge | Soft, diffused light with matte finish |
| Mirrored Acrylic | 5mm to 10mm | Decorative signs, premium appearance | Laser cutter or saw (not recommended for hand cutting) | Reflective, sleek, upscale look |
| Colored Acrylic | 3mm to 10mm | Accent signs, branding color matching | By hand (thin), laser or saw (thicker) | Bold, opaque colored surface |
Decide on acrylic thickness based on your sign’s size and how it will be displayed. Small signs or indoor tabletop pieces often look great and remain manageable at 3mm thick. Large outdoor signs benefit from 6mm to 10mm thickness for increased strength and wind resistance. Remember hand tools and craft cutters typically handle acrylic up to 3mm thick. Beyond that, using a laser cutter or professional saw is safer and produces cleaner edges.
For finish choices, clear acrylic is versatile and cost-effective. Frosted acrylic works well for cozy or soft-light settings like weddings or bars. Mirrored acrylic adds a modern touch to signs in shops or galleries but costs more and is delicate when cutting. Colored acrylic gives you extra creativity for party signs or brand-specific displays without needing paint or decals. These finishes affect your sign’s style and lighting, so choose one that fits your design needs and tools.
Cutting and Shaping Acrylic Without Specialized Equipment
Cutting acrylic by hand involves scoring thin sheets and snapping them safely along a straight line. Using the right tools and cutting angles helps achieve clean cuts, while slowly working through curves minimizes chipping. Avoiding uneven pressure and supporting your acrylic properly reduces cracking or rough edges during and after cutting.
Tools for Manual Cutting
A scoring knife is the top choice for straight cuts on thin acrylic sheets under 3/16 inch thick. A plastic scoring knife or the dull edge of a utility knife works well. Choose blades that are specifically designed to score rather than slice to prevent slipping and jagged cuts. A straightedge or metal ruler is essential to guide your cuts accurately.
For shaping curves, a fine jeweler’s saw or a coping saw with a fine tooth blade offers better control to follow complex outlines. Sandpaper or sanding blocks in fine grits (220-400 grit) smooth out edges after cutting. Keep your blades sharp because dull blades increase the risk of cracking and uneven cuts.
Scoring and Snapping Technique
Score and snap is the best method for straight cuts on thin acrylic. Score a clear line using firm, even pressure with a scoring knife along a straightedge. Five to ten passes along the same line typically create a deep enough groove for a clean break.
- Place the acrylic sheet on a flat, solid surface with a straightedge lined up where you want to cut.
- Hold the scoring knife at a 45-degree angle to the sheet and score along the straightedge, applying firm, steady pressure.
- Repeat scoring over the same line 5 to 10 times to deepen the groove.
- Flip the sheet so the scored line faces down on the edge of the table or workbench.
- Support most of the sheet firmly with one hand, leaving the scored edge overhanging slightly.
- Apply a quick and firm downward pressure on the overhanging section to snap along the scored line.
- Sand edges lightly if needed to smooth any rough spots.
Shaping Edges and Curves
Scoring knives do not easily cut curves or complex shapes. To cut curves by hand, use a fine-toothed jeweler’s or coping saw, moving slowly to follow the desired shape. Clamp or secure the acrylic sheet on a stable surface to prevent movement.
After cutting curves, sand the edges gently using medium to fine grit sandpaper, filing in small strokes. Start with a 220 grit to remove large imperfections, then switch to 320 or 400 grit for a smoother finish. Take your time and avoid pressing too hard to prevent cracking.
Preventing Cracks and Imperfections
Support the acrylic fully during cutting to avoid flexing, which causes cracks or uneven breaks. Apply steady pressure with balanced hand movements rather than forcing the blade or scoring knife. Avoid scoring too shallowly, or the acrylic may snap unevenly, and don’t rush the snapping step since a clean break requires controlled force.
Replace scoring blades regularly to keep them sharp; dull blades increase heat and stress on the acrylic, leading to chipping. Use lighter cuts for brittle acrylics like cast types, and consider polycarbonate instead if you need more impact resistance or easier cutting.
Adding Graphics and Lettering by Hand
You can apply designs to your acrylic sign by hand using painting, vinyl letters, or stencils. Each method has its benefits and challenges, so choose based on the look you want and your comfort level with detail work. Combining these techniques also works well for multi-color or layered effects.
Painting Your Acrylic Sign
Painting directly on acrylic works well, especially with acrylic paint designed for smooth surfaces. Brands like Liquitex and FolkArt offer acrylic paints that adhere firmly and come in vibrant colors. Use a few brush sizes: fine for details and broad for filling larger areas. Clean the acrylic surface with isopropyl alcohol before painting to ensure good adhesion.
Allow paint layers to dry for at least 30 minutes between coats. For best results, apply thin layers to avoid drips or uneven texture. Acrylic paint is water-based and dries quickly, which helps with layering but requires a steady hand. You can use paint to highlight engraved areas or to fill stencils cleanly.
Using Vinyl Letters and Decals
Applying vinyl letters creates sharp, bold graphics without the risk of brush strokes. Using a Cricut or similar cutting machine lets you produce precise designs or lettering in vinyl. The process involves cutting the vinyl, transferring it to application tape, and then applying it to the cleaned acrylic surface. A squeegee helps remove air bubbles and ensures smooth adhesion.
The vinyl method is less messy and faster than painting but offers less opportunity for blending or shading. Make sure the acrylic is dust-free to avoid bumps under the vinyl. Vinyl typically costs around $10 to $20 per sheet, depending on size and quality, and is a practical investment if you plan multiple signs.
Apply vinyl only on a perfectly clean, dry, and dust-free acrylic surface for best adhesion and appearance.
Creating and Applying Stencils
Stencils let you add consistent shapes or letters by painting through a cut-out pattern. You can create simple stencils by hand with thin plastic sheets and an X-Acto knife, or use a cutting machine to produce detailed designs. Tape the stencil securely to the acrylic to prevent paint bleeding under the edges.
Use a small sponge or stencil brush to dab paint lightly, avoiding brushing which can push paint beneath the stencil. Remove the stencil carefully before the paint dries fully to prevent peeling. Reusable stencils cost about $5 to $15 depending on complexity, or you can make your own at minimal cost.
- Cut stencils from thin plastic or cardstock
- Secure the stencil with painter’s tape
- Dab paint gently instead of brushing
- Peel stencil off while paint is tacky for crisp edges
- Clean stencils immediately for reuse
Layering Colors and Effects
Combining different methods creates eye-catching multi-color or layered signs. For example, paint a base color fully and add vinyl lettering on top for contrast. Or use stencils for background patterns, then hand-paint details over them. Each layer must dry completely before adding the next to avoid smudging.
Using transparent or translucent paints lets light pass if you plan to backlight the sign later, preserving a glowing effect. Layering also works with vinyl: you can overlap vinyl colors carefully or cut multi-layer vinyl decals for complex graphics. Layered signs take longer to make since drying and precise alignment matter most.
Assembling, Mounting, and Display Options
Choosing the right adhesive is important for bonding acrylic components securely and cleanly. Solvent-based adhesives like Weld-On 4 or IPS Weld-On 16 dissolve the acrylic surfaces slightly to fuse parts together. These cements create nearly invisible seams and strong bonds, making them ideal when you want a professional-looking sign without visible glue lines. For quick or repositionable bonding, acrylic-friendly super glues (cyanoacrylates) work well but are less durable for load-bearing joins.
| Adhesive Type | Best Use | Dry Time | Cost Range |
|---|---|---|---|
| Weld-On 4 (solvent cement) | Clear, strong, flush bonding for acrylic | 5-10 minutes to set, 24 hours to cure | $10, $20 per 4 oz bottle |
| IPS Weld-On 16 | Thicker joints or bonding thicker acrylic sheets | 10-15 minutes to set, 24-48 hours to cure | $15, $25 per 4 oz bottle |
| Cyanoacrylate (super glue) | Small repairs, temporary bonds | Seconds to 1 minute | $5, $10 per tube |
Mounting options vary by where and how you want to display your acrylic sign. For wall mounting, clear standoff screws are popular because they create a floating effect by holding the sign a half-inch or so from the wall. Alternatively, strong double-sided acrylic tape works for flat, indoor signs on smooth surfaces but may fail on rough or outdoor walls over time. On stands or A-frames, the sign needs a stable base often made of wood or metal. You can build a simple wooden base by screwing two perpendicular boards to create an L-shape. Attach the acrylic sign with clamps, adhesive, or screws through pre-drilled holes near the base edge.
Adding a frame not only protects edges but also hides LED wiring if your sign includes lighting. Flush-fitting frames made from wood or lightweight metal keep the wiring and power supply discreet. DIY bases can be as simple as a rectangular wooden box that the sign slips into vertically, or a wide flat panel with slots cut into it to hold the acrylic upright. The base should weigh around 2 to 4 pounds to prevent tipping but still be easy to move. Here’s a step-by-step process to mount and assemble your acrylic sign:
- Clean all surfaces with isopropyl alcohol to remove dust and oils for better adhesive bonding.
- Apply solvent cement with a thin needle applicator along the edge seams that will bond; hold pieces firmly together for 30 seconds.
- Let bonded parts cure in a dust-free, level area for 24 hours to reach full strength.
- Drill small holes near the edges if mounting with screws or standoffs; avoid cracking by drilling slowly with acrylic-specific bits.
- Attach standoffs or screws for wall mounting, spacing them evenly to support the sign’s weight, usually 4 to 6 are enough for signs under 24 inches wide.
- Build a base from a 1×4-inch piece of wood cut to 12 inches length and attach a perpendicular 1×2-inch strip with screws to form an L-shape.
- Secure the sign to the base using clamps or adhesive strips; check stability by gently nudging the setup on a flat surface.
- Install lighting (optional) by mounting LED light strips along the base’s inner edge, testing connections before securing everything fully.
Following these steps helps you create a solid, attractive setup for your acrylic sign that stays stable, looks clean, and can include lighting for extra effect. Proper adhesive choice and careful mounting prevent damage like cracking or uneven edges, keeping your sign professional and durable.
Tips for Finishing, Cleaning, and Maintaining Acrylic Signs
Cleaning acrylic signs without scratching requires using soft, non-abrasive materials and gentle cleaners. Use a microfiber cloth or a soft cotton cloth dampened with water or a mild dish soap solution. Avoid paper towels, brushes, or any scrubbing pads that can create tiny scratches. Spray the cleaner onto the cloth first instead of directly on the acrylic to prevent damage.
Protective finishes are essential to guard acrylic signs from UV light and yellowing. Acrylic-specific UV-resistant coatings or sprays can be applied to either the front or back surfaces. Applying the finish to the back protects the graphic underneath and prevents wear on the visible surface. These coatings are usually a clear, thin layer that cures within minutes to hours, costing around $15 to $30 for a bottle covering several signs. Look for products labeled “UV protection for acrylic” or “UV-resistant acrylic coating.”
How you store acrylic signs affects their longevity and shape. Signs should rest flat in a cool, dry area to prevent warping or bending. Avoid stacking heavy objects on top or placing them in direct sunlight or near heat sources above 100°F, which can cause distortion. Wrap signs in soft cloth or bubble wrap when storing to shield surfaces from dust and scratches.
Minor damages like small scratches or haze can often be repaired with acrylic polishing compounds. Use a polishing paste designed for acrylic, applying it gently with a microfiber cloth in circular motions. Deep cracks or breaks, however, require professional repair or replacement. Never use harsh solvents like acetone, as these dissolve acrylic instead of fixing damage.
- Do use soft microfiber cloths and mild soap for routine cleaning
- Don’t use abrasive cleaners or rough cloths on acrylic signs
- Do apply UV-resistant finishes following product instructions, ideally on the back side
- Don’t expose acrylic signs to intense heat or direct sunlight for long periods during storage
- Do store signs flat, wrapped in soft material, in a low-humidity environment
- Do repair light scratches with acrylic polish; seek professional help for cracks
- Don’t use solvents like acetone to clean or repair acrylic
Following these steps helps maintain the clarity and vibrancy of your acrylic signs over time. Cleaning every one to two months or more often in dusty settings keeps the surface looking fresh. Touch up UV coatings before signs show noticeable fading, typically every one to two years based on exposure. Correct storage immediately after making or using signs prevents permanent warping. Taking care with cleaning, protection, and storage ensures the signs maintain a smooth, glossy finish free of cloudiness or discoloration.
Common Mistakes and How to Fix Them in Acrylic Sign Making
Cracks or chips in acrylic usually happen because of pressure during cutting or using the wrong tools. Acrylic is sensitive to heating or impact, so scored edges can crack if snapped too hard. Use a sharp utility knife or acrylic scoring tool, and apply gentle, even pressure. Avoid power tools unless you’re experienced, since they can overheat and melt the edges. Cooling the acrylic with water or using slow-speed tools reduces heat buildup and stress.
Paint bubbling or peeling often results from poor surface prep or using incompatible paints. Always clean acrylic with mild soap and water, avoiding solvents like alcohol or ammonia that cause clouding or cracking. After cleaning, let the surface dry completely. Use acrylic-specific paints and apply thin layers, letting each coat dry fully before the next. When bubbles appear, gently sand the area with fine-grit sandpaper and repaint.
Vinyl letters that don’t stick or line up can be frustrating. Dust, oil, or moisture lowers adhesion, so clean the acrylic with soapy water and dry well before application. Use a ruler or masking tape to align letters evenly. For crooked vinyl, carefully lift with a plastic scraper and reposition before pressing down firmly. Warm the vinyl slightly with a hairdryer to improve stickiness if needed.
Uneven cuts or mounting misalignment may happen with hand tools and manual measuring. Prevent these by measuring twice and marking lines clearly with a fine-tip marker. Clamp acrylic to a flat surface during cutting to reduce shifting. When cuts are uneven, sand edges smooth with a sanding block or fine sandpaper. For mounting misalignment, loosen screws or fasteners and adjust before tightening again. Use spacers or templates when mounting multiple pieces.
- Score acrylic with a fresh blade and snap gently to prevent cracking.
- Clean acrylic with mild soap and avoid ammonia or solvent cleaners.
- Apply acrylic paint in thin layers; sand and repaint if bubbles form.
- Align vinyl lettering using guides and warm vinyl for better adhesion.
- Clamp acrylic sheets before cutting to keep edges even.
- Sand rough or uneven edges with 220 to 400 grit sandpaper for smoothness.
- Test mounting placement by loosely fitting hardware before final assembly.
Use only acrylic-safe cleaners and paints to avoid dulling or cracking the surface.
Minor mistakes can often be fixed with sanding and repainting, but deep cracks or severe chips might require replacing the acrylic piece. The upfront care in cleaning, cutting gently, and aligning elements accurately prevents costly errors and keeps your sign looking professional.
Step-by-Step Action Plan for Making Your Acrylic Sign
Follow these steps to create your own custom acrylic sign by hand with confidence. Each phase builds on the last to help you finish smoothly.
- Before You Start: Sketch your design on paper and gather the right acrylic sheet and tools. Ensure your acrylic thickness suits the sign size for durability.
- Day 1: Cut and shape your acrylic using a scoring tool and sand edges for smoothness. Check that edges feel even and the shape matches your design.
- Day 2: Transfer your graphics or lettering by hand with permanent markers or paint pens. Let the artwork dry fully and confirm there are no smudges.
- Day 3: Assemble sign parts using clear adhesive if layering is needed. Hold pieces steady until glue sets without fogging the acrylic.
- Day 4: Attach mounting hardware suitable for your display surface. Test stability by gently hanging or placing the sign in position.
- Day 5: Clean your sign with mild soap and water to remove dust or fingerprints. Avoid harsh cleaners that can damage the surface.
- After 1 Week: Inspect the sign for any defects or loose parts and make minor repairs if needed using the same tools and adhesive.
Frequently Asked Questions
What Is the Best Way to Create a Custom Font by Hand for Acrylic Signs?
The best way is to sketch your font on paper first, then trace onto the acrylic for precision. This allows you to personalize your sign without needing digital tools.
How Do I Prevent Bubbles or Scratches When Painting on Acrylic Signs?
Use a clean, dust-free workspace and apply acrylic paint in thin layers with a soft brush. Let each layer dry fully before adding another to avoid bubbles and scratches.
Can I Use Household LED Strip Lights for Lighting an Acrylic LED Sign?
Yes, household LED strip lights can work if they produce even and sufficient brightness. Keep the strip thickness compatible with your acrylic groove for a snug, secure fit.
What Type of Adhesive Is Best for Assembling Acrylic Signs Securely?
Clear silicone adhesive is best for bonding acrylic since it dries clear and flexible. Avoid superglue, as it can cause whitening or damage to acrylic edges.
Is It Necessary to Seal or Coat the Acrylic After Painting or Etching?
Sealing is recommended to protect your design from moisture and fading, especially with outdoor signs. Use a clear acrylic spray sealant for a durable finish.
How Can I Ensure My Acrylic Sign Base Stays Stable and Symmetrical?
Use a sturdy and flat base material that matches your sign dimensions. Attach the acrylic securely and double-check measurements before final assembly for symmetry.
Wrapping Up
Creating an acrylic sign by hand lets you personalize your design from start to finish. Start by preparing your design and tools carefully, then work steadily through cutting, decorating, and assembling for the best results. Grab a piece of acrylic today and try transferring your design by hand to begin this rewarding craft.