How to Make an Acrylic Mirror Sign: Complete Guide with Tips and Tools
How to make an acrylic mirror sign starts with choosing the right mirror acrylic and using a CO2 laser cutter for clean, precise cuts. The process involves designing your layout, cutting or engraving the acrylic, adding graphics or lettering, and drilling mounting holes if you plan to hang it. Starting with quality materials and accurate sizing ensures a professional finish that lasts.
Key Takeaways
- Select mirror acrylic sheets sized between 1″ x 1″ and 12″ x 18″ for flexible sign dimensions.
- Use a CO2 laser cutter with 40W or higher power for efficient, clean cutting of mirror acrylic.
- Design your sign layout to match your acrylic sheet size to optimize material use and precision.
- Drill holes for mounting 0.5 to 1.5 inches away from the top corners so you can hang your sign easily using standoff screws.
- Consider the Kinlink 12×12 or Adrattnay 8×8 inch mirror acrylic sheets for affordable DIY laser projects.
- Add lettering or graphics with heat press at around 355°F or laser engraving to customize your sign.
How to Make an Acrylic Mirror Sign Step by Step
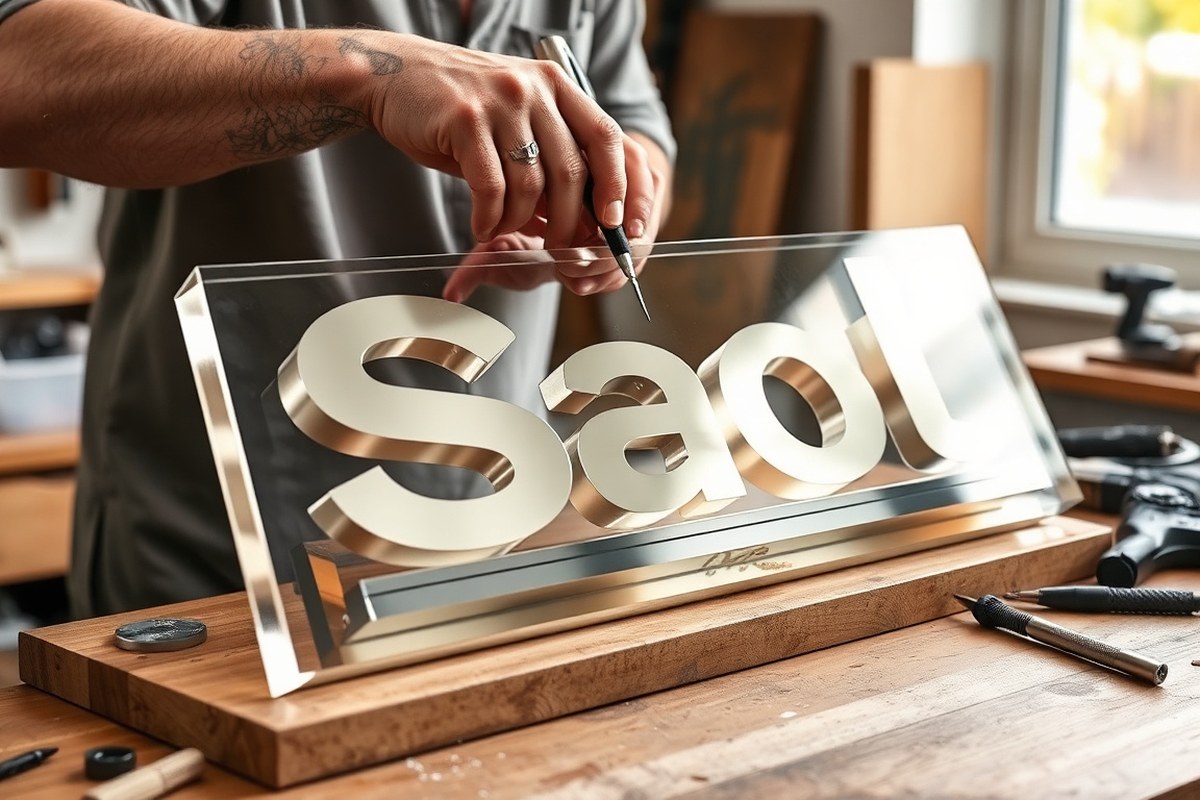
Creating an acrylic mirror sign involves a multi-step process that starts from design and ends with assembly of the finished product. The key is to reverse the design horizontally before engraving on the back side of clear acrylic. This approach protects the engraved surface, allowing the mirror finish on the front to remain clear and shiny. Using a CO2 laser with appropriate settings ensures clean cuts and bright engraving results. Protective film should stay on the mirror side during cutting to prevent scratches. Careful alignment of layers and optional hole drilling for mounting completes the project.
- Create and reverse your design. Use a template to draft your sign layout digitally, then flip it horizontally. This is critical for the reversed engraving effect, so your text and images appear correctly from the front.
- Prepare the acrylic sheet. Select mirror acrylic of your desired size and keep the protective film on the front (mirror) side. Place the sheet with the mirror side facing down on the laser bed to avoid damaging the reflective surface during cutting.
- Set up the laser cutter. A CO2 laser rated 40W or higher is recommended. Use medium to high power and speed for cutting, and low power with medium speed for engraving. Start with one pass for cutting, adjusting based on material thickness. Use 300, 500 DPI for engraving detail.
- Engrave the design on the back side. Engrave through the clear acrylic from the back while the mirror coating stays protected underneath. Apply dish soap or masking tape if engraving on the front to protect the mirror but keep engravings light to avoid damage.
- Cut out the sign shape. After engraving, complete the cut with the mirror side down, still protected by the film. Test edge quality and adjust passes if needed. Cutting the mirror acrylic cleanly prevents jagged edges.
- Plan for drilling if your sign requires mounting. Mark spots about 0.5 to 1.5 inches from each top corner where holes will go. Drill these holes precisely to accommodate standoff screws or hanging hooks. Proper hole placement helps the acrylic stay firmly mounted and reduces cracking risk.
- Clean and assemble the sign. Carefully peel away protective films without scratching the mirror. Wipe with a soft cloth to remove dust. Attach screws or standoffs if drilled, or apply mounting tape to the back for a flush install.
- Check final appearance and durability. Make sure engravings appear bright and clear when viewed from the front. The mirror side should remain reflective without damage. Proper sealing and mounting ensure your acrylic mirror sign lasts for years.
Choosing the Right Mirror Acrylic and Tools
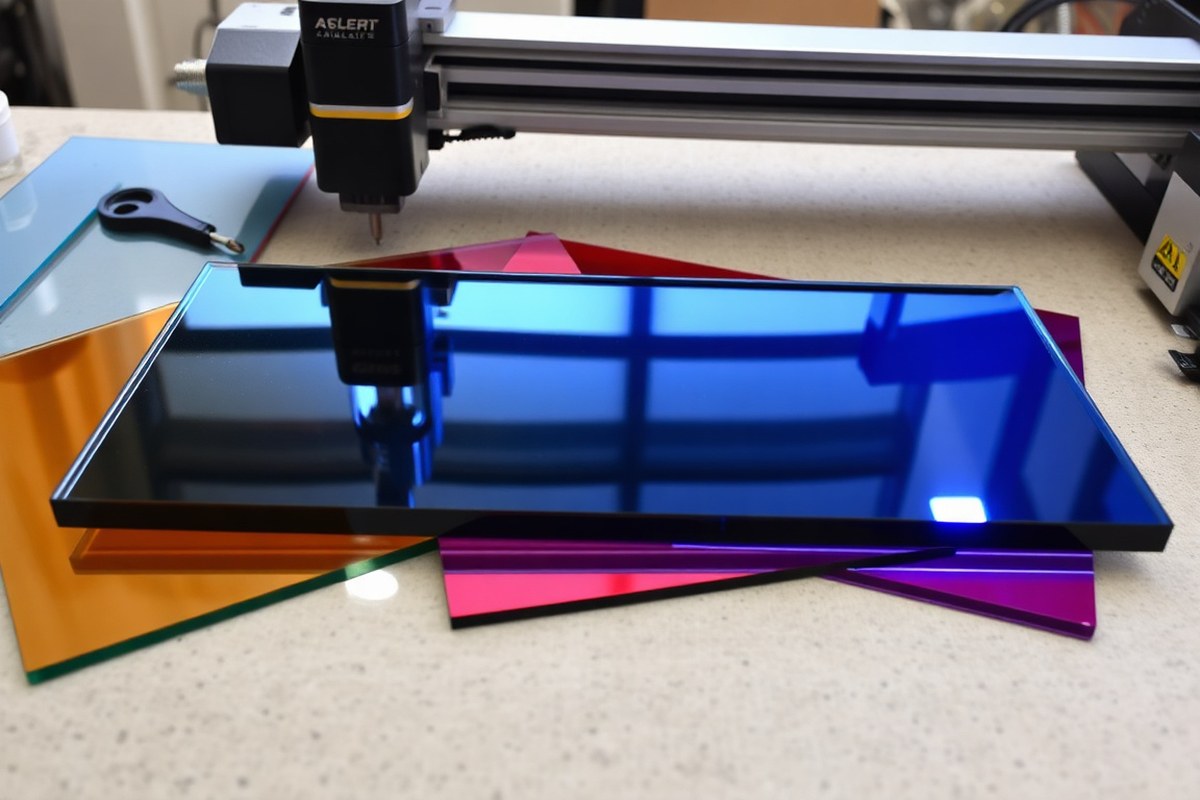
Selecting the right mirror acrylic type and thickness depends on the balance between durability and ease of cutting. For most laser cutting projects, 3mm (1/8″) thick sheets work well. They provide sturdy signs but are still thin enough for clean cuts. Color choices vary widely, including common tones like silver, gold, rose gold, and vibrant colors like sky blue or dark blue. These options help customize the look of your sign to match your brand or décor.
Laser cutter choice is important because not all lasers can handle mirror acrylic sheets effectively. A CO2 laser cutter with around 55 watts of power, like the xTool P2S CO2 Laser, is ideal. This laser type cuts through both the acrylic base and the reflective coating cleanly, producing smooth edges without cracking or excessive melting. Diode or fiber lasers generally cannot cut these sheets effectively due to their different wavelengths and power levels.
Laser settings depend on sheet thickness and acrylic color, but an empirical example for rose gold mirror acrylic is 75% power, 8% speed, and a single pass with proper air assist and focus. Using a protective film on the acrylic minimizes heat damage during cutting or engraving.
Beyond laser cutters, you’ll need some essential hand tools and adhesives. A clean microfiber cloth and isopropyl alcohol help prepare and finish the surface. For mounting, consider acrylic-compatible adhesives such as clear epoxy or specialized acrylic glues, ensuring a strong, invisible bond. Drilling tools with fine drill bits can make mounting holes if your design includes standoffs or hangers. Here is a comparison table to help you choose acrylic mirror sheets and tools:
| Aspect | Description | Typical Specs or Models |
|---|---|---|
| Acrylic Thickness | Balance of sturdiness and cutability | 3mm (1/8″) standard for DIY |
| Acrylic Colors | Variety of mirror coatings for customization | Silver, Gold, Rose Gold, Red, Blue, Green |
| Laser Type | Required for clean cuts on mirror acrylic | CO2 Laser, 55W (e.g., xTool P2S) |
| Laser Settings Example | For rose gold mirror acrylic | Power 75%, Speed 8%, 1 Pass |
| Adhesives | Specialized glues for acrylic bonding | Clear epoxy, acrylic cement |
| Hand Tools | For cleaning, drilling, mounting | Microfiber cloth, isopropyl alcohol, fine drill bits |
| Protective Film | Shields surface during cutting | Pre-applied or DIY tape layering |
Always test settings on a scrap piece of your chosen mirror acrylic to avoid costly mistakes and achieve a smooth edge before processing the final sign.
Costs vary: a pack of two 12×12 gold mirror plexiglass sheets costs around $20, while CO2 laser cutters like the xTool P2S typically start near $600. Adhesives add a few dollars per project. Investing in the correct thickness, color, and tools not only ensures your acrylic mirror sign looks professional but also reduces risks like cracking or uneven cuts. Using the proper laser settings is particularly important to maintain the mirror finish without damaging the acrylic.
Designing Your Acrylic Mirror Sign Layout
Creating a design file that works well for laser cutting and engraving acrylic mirror signs requires software capable of vector editing, precise dimension setting, and clear layer separation for cutting and engraving. This approach helps keep your design organized and avoids mistakes that could damage the reflective surface during production.
Choosing Software and Canvas Size
Pick vector graphic software like Adobe Illustrator, CorelDRAW, Inkscape (free), or the laser cutter’s native software such as XCS. These tools let you create scalable designs with clean paths essential for laser work. Start by setting your canvas or artboard to match the final desired size of your sign. For example, if your sign will be 12 by 18 inches, set the document to those exact dimensions in inches or millimeters.
Use a canvas size slightly larger than your acrylic sheet to allow for positioning and alignment. This eliminates guesswork in sizing and lets you place cut and engraved elements precisely where you want them on the material.
Preparing Vector Paths for Cutting and Engraving
Separate cut lines from engraving areas by using different layers or colors. Assign a specific stroke color for cuts (commonly red) and another for engraving (often black or blue). This distinction allows your laser software to apply the correct power and speed settings for each process.
Set stroke thickness to hairline or 0.001 inch to ensure the laser follows true paths for cutting. For engraving, fill shapes or set line weights as needed to produce the desired etch depth or detail without harming the mirror finish.
Flip your design horizontally if you plan to engrave or cut the back side of mirror acrylic. This prevents text and graphics from appearing reversed when viewed from the front. Import your vector into the laser’s control program only after finalizing layers and paths.
- Open your vector software and create a new document matching your sign size.
- Draw or import your artwork and text, using vector paths, not raster images.
- Assign cut lines to a “Cut” layer with stroke color red and hairline thickness.
- Assign engraving details like text and logos to an “Engrave” layer with stroke or fill color black or blue.
- Flip the entire design horizontally if engraving from the back of acrylic mirror.
- Save the file in a format your laser software accepts, such as SVG, DXF, AI, or PDF.
- Import the file into your laser cutter software and verify layers are recognized correctly.
Design Tips to Protect the Mirror Finish
Mirror acrylic can scratch or cloud if exposed to too much laser heat or repeated passes. Use the lowest effective laser power and fastest speed settings for cutting and engraving to avoid overheating. Test settings on a small scrap piece first.
Avoid dense fill engravings that act like heat sinks. Instead, use line engraving or dot patterns to keep the surface glossy and reflective. Leave clear space around text and intricate cutouts to prevent cracking or chipping at edges.
Design simpler shapes with smooth curves rather than sharp corners. Sharp corners concentrate heat and stress, increasing the chance of damage in mirror acrylic signs. Keep letters and graphics bold enough for high contrast against the mirror surface but not so fine that engraving blurs them.
Cutting and Engraving Mirror Acrylic Safely
Protecting the reflective coating on mirror acrylic during laser cutting and engraving is essential to avoid damage and preserve its mirror finish. Keeping the protective film in place as long as possible, choosing the right laser settings, and managing heat buildup all contribute to a clean cut and crisp engraving without surface flaws.
Protective Masking and Film Handling
Most mirror acrylic sheets come with a protective masking film on both sides. This film is your first line of defense against scratches and laser-induced heat damage. Keep the film on the reflective side during cutting and engraving whenever possible to shield the mirror coating from smoke and heat.
When engraving the mirror side, you can add painter’s tape or masking tape over the protective film for extra protection. A soap-and-water solution can also create a temporary barrier to prevent smoke residue from bonding to the surface. Remove the film only after completing all laser processes and cleaning the sheet to avoid adhesive residue.
- Keep protective film on reflective side during laser work
- Add painter’s or masking tape on top for extra surface protection
- Apply soap and water mixture to the surface for smoke adhesion control
- Peel film only after finishing engraving and cutting
- Clean any tape residue gently using isopropyl alcohol if needed
Handle the sheets carefully to avoid peeling or shifting the film prematurely. Clean work surfaces and soft gloves help reduce scratches and fingerprints that show after cutting.
Ideal Laser Settings for Mirror Acrylic
Cutting and engraving mirror acrylic involves lower power and faster speeds than standard clear acrylic, to minimize heat buildup and prevent melting or warping. Testing on scrap pieces is essential to determine the exact parameters for your laser model and acrylic thickness.
| Laser Process | Power (%) | Speed (%) | Frequency (Hz) | Notes |
|---|---|---|---|---|
| Cutting (3mm thick) | 25, 35 | 20, 30 | 500, 1000 | Single pass, low air assist recommended |
| Engraving (mirror side) | 10, 15 | 70, 90 | 1000, 1500 | Focus on controlling heat, use soap film for protection |
| Engraving (back side) | 15, 25 | 50, 70 | 800, 1200 | Can remove film from back; reflective side protected |
Reducing air assist pressure helps avoid blowing away protective masking too quickly and minimizes surface pitting. Using a honeycomb cutting bed improves airflow under the material and helps reduce heat concentration on the mirror layer.
Common Issues and How to Prevent Them
Common problems include surface charring, discoloration, melting edges, and loss of reflectivity. These often result from excessive power, slow speeds, or removing protective films too early. To avoid this, keep the film on until after laser work, choose settings that avoid overheating, and provide balanced airflow to cool the material.
Engraving the mirror side without protection can lead to smoke stains bonding permanently to the surface. Applying a soap coating or tape before starting laser work prevents this. Laser cutting too slowly or with high power causes melted or cloudy edges, reducing the sign’s clarity and professional look. Testing on fragments of the same acrylic sheet is best for dialing in the right settings.
- Do not remove protective film before laser work ends
- Test cut and engrave on scrap pieces to fine-tune settings
- Use soap or tape to prevent smoke residue on engraving area
- Keep airflow moderate to avoid overheating or surface damage
- Avoid excessive laser power and slow speeds to prevent melting
Following these steps helps ensure a sharp, reflective finish with clean cuts and engravings, making your acrylic mirror signs stand out with a professional, high-quality appearance.
Adding Graphics, Lettering, and Decorations
Choosing between engraving, vinyl, paint, or sublimation for your acrylic mirror sign depends on the look you want, your budget, and the tools available. Engraving gives a precise, professional look by etching the surface and revealing a frosted design, but it requires a laser or rotary engraver. Applying a thin layer of neutral dish soap on the engraving area helps protect the mirror finish and allows cleaner cuts. This method is more durable than vinyl or paint and costs more due to equipment needs and time, but it works well for text or detailed logos.
Vinyl is a common and affordable way to add graphics. Use high-quality permanent vinyl like Oracal 651 or 3M Graphic Film for durability. To apply vinyl without damaging the mirror side, work from the back or the non-reflective side if possible, or use a transfer tape designed for delicate surfaces to avoid lifting or scratching the mirror finish. Clean the surface with isopropyl alcohol and a lint-free cloth before application. Press firmly with a squeegee, and slowly peel off the transfer tape. Vinyl lets you add vivid colors or even complex designs, but it may peel over time, especially outdoors.
Painting offers the most creative freedom with custom colors and textures. Use multi-surface acrylic paint brands like FolkArt or Liquitex, applying thin layers with a fine brush or stencil to control details. Paint adheres best on the back side of the mirror acrylic to protect the reflective front. You can mask the front with painter’s tape to avoid stray marks. Allow each coat to dry for at least 30 minutes before applying another and cure the paint for 24 hours before handling. Painting takes more time but results in vibrant, weather-resistant signs if sealed with a clear acrylic spray.
Sublimation printing is generally not suitable for acrylic mirror sheets because it requires a polyester coating or fabric substrate to hold the dye. Mirror acrylic lacks this coating, so the image would not transfer well or fade quickly. For high-resolution, full-sign printing on acrylic mirror, consider UV printing techniques instead, which directly print durable, vibrant graphics onto the material.
Always apply vinyl and paint on the backside of the acrylic mirror sign where possible to protect the reflective finish and ensure your design lasts longer.
Drilling and Mounting Your Acrylic Mirror Sign
You can drill holes in acrylic mirror signs to hang or mount them securely without damaging the material. Proper hole placement, hardware choice, and drilling method prevent cracks or chips, giving a clean, professional look. Follow careful steps to create safe holes and pick hardware that supports the sign’s weight and style.
Recommended Hole Placement and Size
Place holes near the corners of your acrylic mirror sign, about ½ inch to 1 inch from each edge. This spacing prevents the acrylic from cracking near the hole and balances the sign when mounted. For larger signs, adding holes along the top edge helps stabilize the weight.
Use drill bits sized between ⅛ inch and ¼ inch, depending on the hanging hardware. Smaller holes reduce the risk of stress fractures around the drilled area. Mark hole locations precisely with a fine-tip marker before drilling to ensure accuracy and symmetry.
Selecting Standoff Screws and Hardware
Standoff screws are a popular choice for mounting acrylic mirror signs because they hold the sign away from the wall, creating a sleek floating effect. These screws typically come with a metal or plastic cap that tightens against the sign, protecting the edges of the drilled holes. Select standoff hardware made from stainless steel or brass to prevent rust, especially if your sign is outdoors or in humid environments.
For hanging, stainless steel D-rings or eyelets paired with wire or durable cords work well. Ensure all hardware can support your sign’s size and weight, light acrylic signs under 5 pounds use smaller ⅝-inch standoffs, while heavier signs might require 1-inch or larger options. Avoid using oversized screws or hardware that will stress or crack the acrylic.
Drilling Techniques to Prevent Damage
Drilling acrylic mirror signs requires methodical steps to avoid cracking or chipping. Use a drill bit designed for plastics, such as a high-speed steel (HSS) bit or a specially ground acrylic bit with a sharper tip angle. Drill slowly at around 500 rpm to keep heat low and avoid melting the acrylic, which leads to rough edges. Here is how to drill holes safely and cleanly:
- Secure the sign flat on a workbench with clamps or place it on a scrap piece of wood to cushion the back.
- Mark your drilling spots clearly using a fine-tip marker.
- Attach a sharp plastic-specific drill bit to a variable speed drill.
- Start drilling at low speed (around 500 rpm), applying gentle, steady pressure.
- Pause occasionally to reduce heat buildup and keep the drill straight.
- Use masking tape over the hole area to minimize surface chipping.
- After drilling, deburr the holes gently with fine sandpaper or a file for smooth edges.
Follow these steps carefully, especially when drilling near edges, where acrylic is more prone to break. Avoid using high speeds or large drill bits, as they increase heat and stress. The result should be a clean hole without cracks or sharp chips, ready for mounting hardware.
Finishing Touches and Maintenance for Mirror Acrylic Signs
Smoothing the edges of your acrylic mirror sign improves both safety and appearance. CO₂ laser cutting often leaves edges with a polished look, though you might notice slight roughness or burn marks. Gently sanding the edges with very fine sandpaper, around 600 to 800 grit, helps remove imperfections. Avoid sanding the mirror surface itself because it scratches easily. For a glossier edge, flame polishing is an option but carries a risk of damaging the mirror coating, so it’s better to reserve this for clear acrylic or test a small area first.
Cleaning mirror acrylic requires a gentle touch to maintain its reflective finish. Use a soft microfiber cloth and clean with a mix of warm water and mild dish soap. Avoid abrasive cleaners, scrubbing pads, or ammonia-based products that can dull or damage the mirror coating. Lightly dampen the cloth rather than soaking the surface to prevent moisture from seeping into any edges or mounts.
Proper storage and protection help keep your sign looking sharp over time. Display it indoors away from direct sunlight and extreme temperature swings, which can warp the acrylic or fade graphics. When storing, place the sign flat in a clean, dust-free area with a protective cover, like a soft cloth or bubble wrap, to avoid scratches. Avoid stacking heavy items on top of it to prevent cracking.
- Sand edges with 600-800 grit sandpaper, avoiding the mirror face
- Use a soft microfiber cloth with mild soap and warm water for cleaning
- Do not use ammonia-based or abrasive cleaners on mirror acrylic
- Store signs flat and covered to prevent scratches and warping
- Keep signs out of direct sunlight and away from heat sources
- Regularly dust with a dry microfiber cloth to minimize buildup
Consistency in maintenance helps preserve the sign’s clarity and brilliance. Wipe it frequently with a dry microfiber cloth to remove dust and fingerprints before they require wet cleaning. Check mounting hardware periodically to ensure the sign remains secure and unsupported areas don’t warp. With care, your acrylic mirror sign can maintain its professional look for years.
Common Problems and How to Fix Them When Making Mirror Signs
Peeling the protective film from acrylic mirror panels too early is a common mistake that often leads to surface scratches or adhesive residue remaining on the sign. It’s best to leave the protective film on during cutting, engraving, and drilling to shield the mirror surface. Remove the film only after completing all fabrication steps and cleaning the acrylic. This approach prevents damage and keeps the mirror finish pristine. Gently apply a mild soap and water solution and wipe with a soft cloth to remove any residue left after removing the film, avoiding scratches.
Dull or rough edges often result from using a dull blade or incorrect cutting speed on laser or rotary tools. Signs of this problem include cloudy or frosted edges that reduce the mirror effect. To fix it, lightly sand the edges with very fine-grit sandpaper (around 400 to 600 grit) followed by a polish with a plastic polishing compound. For laser cutting, adjusting the power and speed settings can prevent overheating, which causes burning or chipping. Lowering power slightly and increasing cutting speed usually improves edge quality.
Peeling or cracking near cut edges usually means the acrylic was stressed during cutting or handling. One way to avoid this is by scoring shallowly first and then making finish passes rather than cutting all at once. Supporting the acrylic fully during cutting and avoiding bending after shaping also lowers risk. Carefully filing the cracks and polishing can reduce visibility of cracking, but replacement may be necessary for severe damage.
Engraving problems like uneven depth, burning, or blurry details often occur from incorrect laser settings or dirty optics. To fix uneven engraving, clean the laser lens regularly and perform test engravings on scrap material to set optimal power and speed. Reducing power or increasing speed helps prevent burning, which discolors the mirror backing. For finer details, increase laser resolution but avoid overlapping passes, which can cause burn marks. Mechanical engraving requires a sharp tool bit and firm but gentle pressure to avoid gouging.
Discoloration on acrylic mirror signs can occur if the acrylic gets too hot from prolonged laser exposure or grinding. Use shorter engraving passes with cooling breaks or a fan directed at the workpiece to avoid heat buildup. Acrylic mirror films themselves can discolor if exposed to solvents or harsh cleaners. Use only mild, non-abrasive cleaners approved for acrylic to maintain clarity.
Leave the protective film on the acrylic mirror until all cutting, engraving, and assembly are complete to prevent scratches and discoloration.
Step-by-Step Action Plan for Your Acrylic Mirror Sign Project
Follow these clear steps to create your acrylic mirror sign from start to finish. Each phase tells you what to do and how to check your progress.
- Before you start: Choose the right mirror acrylic sheet and gather your tools, including a laser cutter or rotary tool and safety gear. Confirm your materials match your design needs by reviewing their thickness and reflectivity.
- Day 1: Finalize your sign design with proper dimensions and graphic placement. Verify the layout fits your acrylic sheet and matches your vision by printing a paper prototype or using design software preview.
- Day 2: Cut and engrave the mirror acrylic following safety precautions like gloves and eyewear. Check for clean edges and clear engraving by inspecting under good lighting.
- Day 3: Add graphics or lettering using vinyl decals, paint, or engraving. Confirm adhesion or paint coverage is even and secure once dry.
- Day 4: Drill mounting holes carefully using a drill bit suited for acrylic. Test hole sizes fit your mounting hardware by dry fitting screws or hooks.
- Day 5: Assemble and mount your sign using appropriate supports or hooks. Evaluate stability and alignment on the wall or display surface.
- After 1 week: Perform finishing touches like cleaning smudges and applying protective coatings. Monitor the sign for any damage or loosening and address issues promptly.
Frequently Asked Questions
What Thickness of Acrylic Mirror Is Best for a Durable Sign?
A thickness of 1/8 inch provides good durability while remaining easy to cut and engrave. Thicker sheets offer more strength but can require more powerful tools and longer cutting times.
Can I Use a Home Laser Cutter for Acrylic Mirror Signs?
Yes, a CO2 laser cutter works well for cutting and engraving acrylic mirror sheets. Use settings recommended by your machine’s manufacturer to avoid melting or burning the acrylic edges.
How Do I Prevent Scratching During Sign Assembly?
Wear clean gloves and handle the acrylic mirror by the edges to reduce fingerprints and scratches. Use a soft cloth and mild soap to clean it before final assembly.
What Type of Paint or Ink Works on Acrylic Mirror Signs?
Use UV-cured inks or specialized acrylic paints that adhere well to slick surfaces. These provide durable, vibrant finishes but require proper curing or drying times.
How Close to the Edge Should I Drill Mounting Holes?
Position drilled holes roughly 0.5 to 1.5 inches from the upper corners to prevent cracking and ensure standard standoff screws fit properly.
Is Backside Engraving Better Than Front Engraving for These Signs?
Backside engraving protects the design from scratches and creates a polished, mirror-like effect seen from the front. This method also improve durability and appearance.
Final Thoughts
Creating an acrylic mirror sign involves detailed steps that bring your design to life with a reflective, professional look. Start by carefully selecting your materials and tools to suit your design and mounting needs. Take your time through cutting, decorating, and installing to ensure a polished result. Begin your project by setting up your workspace with the right mirror acrylic and essential tools today.