How to Make Rope Hanging Signs with Easy Steps and Pro Tips
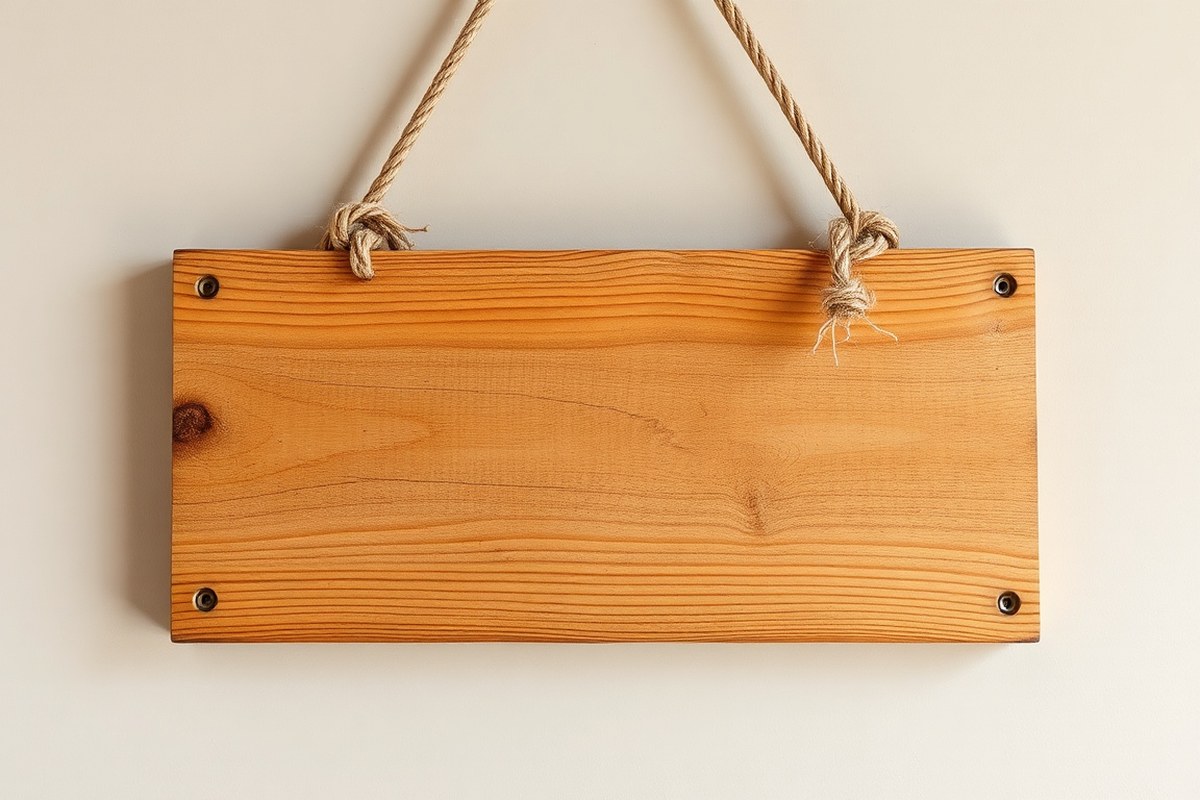
Knowing how to make rope hanging signs starts with choosing the right materials and mastering a few simple techniques. Cut wooden planks to size and prepare them by marking precise points for rope attachment. Using sisal rope with strong glue or secure knots ensures your sign can hang safely and look great.
Key Takeaways
- Cut three 14-inch wooden planks for a balanced, sturdy base for your rope sign.
- Mark 1.5 inches from each end of wood pieces to line up holes for rope threading.
- Select sisal rope for strength and easy gluing on wooden signs.
- Tie knots on both sides of the sign to securely hold the rope in place.
- Use E6000 glue to fix rope onto letters or designs for lasting adhesion.
- Allow roughly 20 inches of rope in the center zone to ensure a sturdy area for hanging.
Materials and Tools Needed for Rope Hanging Signs
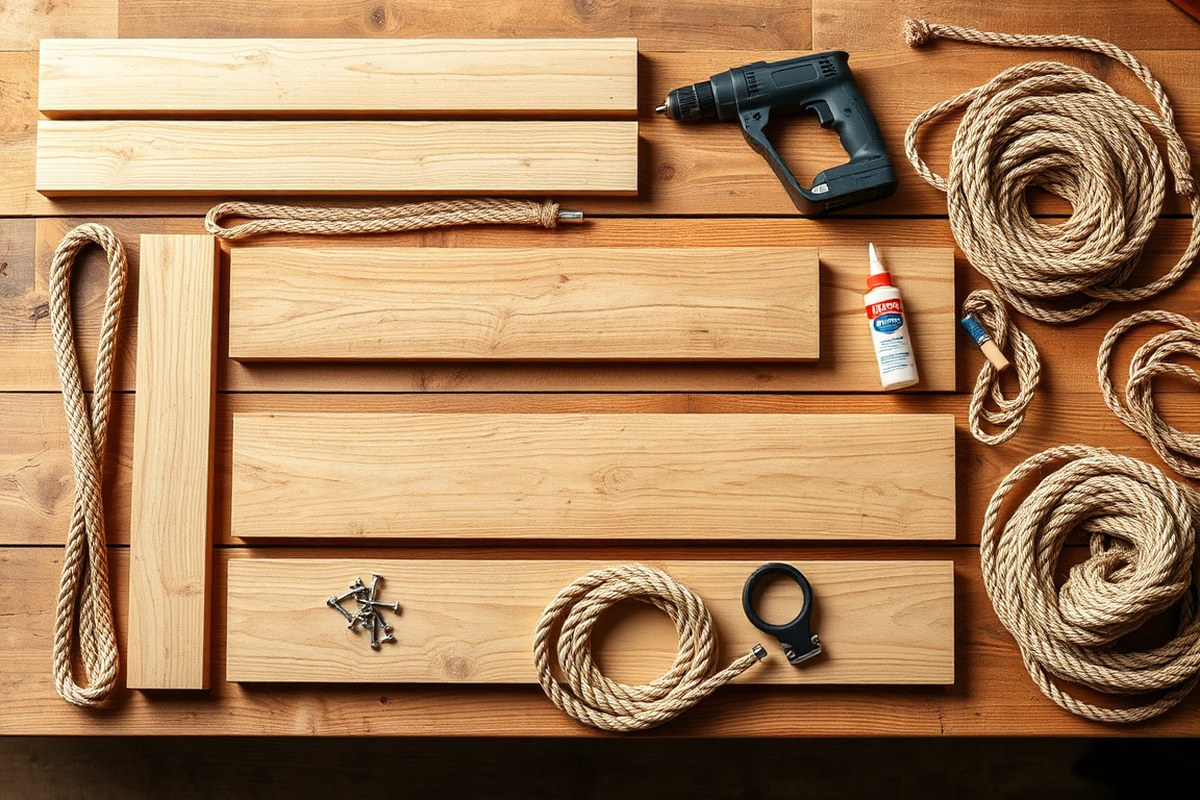
To create rope hanging signs, you’ll need a combination of wood, rope, and a few basic tools. Wood is essential, and you can use new wood or reuse old wood for a rustic look. Reclaimed wood often adds charm but check that it’s free of nails, splinters, and rot. The wood pieces should be cut to size, around 14 inches long is common, and can be stacked and glued or screwed together for stability.
Rope is your hanging material. Sisal or jute ropes work well because they’re sturdy and visually fit rustic or country styles. You’ll typically want about 20 inches of rope in length for hanging after threading it through your holes. Other types like cotton rope can also work but may stretch or wear faster outdoors.
- Wood pieces cut to desired size (around 14 inches long)
- Sisal, jute, or cotton rope, cut to length (around 20 inches extra for hanging)
- Wood screws (1/2-inch screws for attaching back hooks, 1-inch for assembling wood)
- Drill and 1/4-inch bit for making holes for rope
- Scissors or utility knife for cutting rope
- Strong adhesive or wood glue (optional, for bonding stacked wood pieces)
- Pencil and ruler for marking drill spots
For tools, a drill with appropriate bits is important to make balanced holes for threading the rope. Use the pencil and ruler to mark 1.5 inches in from the ends of each wood piece, ensuring holes line up when stacked. Scissors are needed to cut the rope cleanly to length. Wood screws secure the assembly and may hold picture wire or hooks for extra hanging options.
Adhesive like E6000 or a wood glue can replace or support screws if you prefer a no-nail look, but screws provide a more reliable long-term hold. Cost-wise, basic rope can range from $5 to $15 for a short length, wood from free (reclaimed) up to $10-$20 per board, and screws and glue are inexpensive tools you might already own or can buy for under $10 each.
Good results mean sturdy wood, evenly drilled holes, and clean rope ends. Avoid drilling off-center holes or using thin rope that might fray or snap. Also, reusing very old wood without preparation can cause weak signs prone to breaking. Proper measurements and using the right rope thickness (around 1/4 to 3/8 inch) help maintain durability and ease of hanging.
| Material | Use | Alternatives |
|---|---|---|
| Sisal or Jute Rope | Hanging and decoration | Cotton rope (less durable outdoors), synthetic rope (more durable but less rustic) |
| Wood Panels | Main sign base | Reclaimed wood, plywood, or new pine boards |
| Wood Screws | Attaching wood pieces and hanging mechanisms | Strong adhesive or picture wire (for light signs) |
| Glue | Bonding stacked wood pieces | Wood screws only, clamps to hold wood while drying |
Choosing the Right Rope Type for Hanging Signs
Choosing the right rope for your hanging sign impacts its durability, appearance, and ease of crafting. Natural fiber ropes like jute, sisal, and hemp are popular choices for DIY rope hanging signs because they offer a rustic look that pairs well with wood. Each type differs in texture, strength, and weather resistance, influencing how well your sign holds up over time and suits your crafting preference.
Jute rope is soft and pliable, making it easier to manipulate for detailed designs such as lettering or intricate shapes. It’s an excellent choice if you plan to glue the rope onto wood letters or shapes, as it bends smoothly and adheres well with common adhesives like hot glue or E6000. However, jute is less durable outdoors because it absorbs moisture and deteriorates faster under harsh weather conditions.
Sisal rope is coarser and sturdier than jute, giving signs a rough-textured finish that improve a natural aesthetic. It’s tougher and resists stretching, so it works well when draped as a simple hanger or when outlining bold letters. Because sisal is stronger, it holds up better outdoors but still requires occasional care, such as sealing or keeping the sign under a covered area to extend its life.
Hemp rope scores highest in durability and tensile strength among natural fibers. Its smooth surface and resistance to moisture make it ideal for signs that stay outdoors year-round. Hemp is a bit stiffer, which can make intricate letter shapes challenging, but it’s perfect for a minimalist design or strong hanging loops.
| Rope Type | Durability | Appearance | Ease of Use | Outdoor Suitability |
|---|---|---|---|---|
| Jute | Moderate | Soft, rustic beige | Very pliable, easy to shape | Best for indoor or covered areas |
| Sisal | Good | Coarse, natural tan | Somewhat stiff, holds shape | Suitable for shaded outdoor use |
| Hemp | High | Smooth, light brown | Less flexible, tougher to shape | Excellent for outdoor exposure |
Consider environmental factors where your sign will hang. If your sign will be outdoors exposed to sun, rain, or humidity above 60%, prioritize hemp rope for its resistance to moisture and UV light. For indoor decorative signs or those placed in a screened porch, jute or sisal can deliver inviting textures and easier crafting without sacrificing longevity.
Before attaching, make sure to cut your rope length to allow for knots at both ends and some extra slack for adjustment when hanging. Secure the rope to the wood by tying it through drilled holes or gluing it firmly with industrial adhesive. This helps prevent sagging and ensures your message stays clear.
Using a rope that’s too stiff can cause frustration when shaping letters, so test a small piece for flexibility before committing to your whole design.
Preparing Wood for Your Rope Hanging Sign
Preparing wood properly sets the foundation for a sturdy and attractive rope hanging sign. This involves measuring and cutting the wood to size, sanding to smooth rough edges, applying a finish to protect against wear, and carefully drilling holes for hanging rope. Taking safety precautions during cutting and drilling helps avoid injury and ensures clean results.
Measuring and Cutting Wood Pieces
Accurate measurements and clean cuts provide the frame and surface for your sign, making it easier to attach rope and add designs later. For typical rope hanging signs, wood pieces around 33 by 17 cm work well. Use quality wood like pine or cedar, which sands smoothly and stains nicely.
Protect your eyes and hands with safety glasses and gloves. Use a pencil and measuring tape to mark cutting lines on the wood. A hand saw or circular saw works best for straight cuts, depending on what tools you have. Keep the wood firmly clamped while cutting to avoid slips and uneven edges.
Sanding and Staining for Durability
Sanding removes splinters and preps the wood surface for finishing. Start with medium-grit sandpaper (around 80-120 grit), then follow with a finer grit (220 grit) for a smooth finish. This makes the wood safe to handle and helps stain absorb evenly.
Stains protect the wood from moisture and usually improve its appearance. Choose stains labeled for indoor or outdoor use depending on where the sign will hang. Apply stain with a clean cloth or brush, following the wood grain. Let it dry for 24 hours or as directed on the product label. Consider applying a clear polyurethane coat after staining for extra durability, especially if the sign will be outside.
Drilling Holes for Rope Attachment
Drilling precise holes ensures the rope fits well and hangs securely without splitting the wood. Use a drill with a 4mm bit for most hanging ropes. Mark hole positions evenly on the wood’s top edge, usually near the corners or edges.
Wear safety goggles and keep the wood firmly clamped on a workbench while drilling. Drill slowly to avoid splintering the wood, backing the piece with scrap wood to protect surfaces. Clean drilled holes with sandpaper or a small file to remove rough edges. Testing the rope in the holes before finishing will confirm the fit and ease of threading.
- Measure and mark your wood pieces to desired size (for example, 33 × 17 cm).
- Clamp the wood securely before cutting to maintain straight edges and prevent slips.
- Cut along your marks using a hand saw or circular saw, wearing safety glasses throughout.
- Sand all surfaces and edges, starting with medium grit and finishing with fine grit paper.
- Apply stain evenly with a cloth or brush, let dry fully, then optionally apply a clear topcoat.
- Mark hole locations where the rope will attach, keeping symmetry in mind.
- Clamp the wood on a stable surface and carefully drill holes using a 4mm bit, going slowly.
- Deburr the holes with sandpaper to remove splinters, then test rope fit before assembling.
Techniques to Attach Rope Securely to Wooden Signs
Securing rope to a wooden sign requires a balance of strong attachment and prevention of wear on the rope. Various methods like gluing, stapling, knotting, and screwing can achieve this, each fitting different project needs and aesthetics.
Using adhesive is a clean, simple way to attach rope but choosing the right glue matters. A waterproof construction adhesive such as Bostik No More Nails works well for attaching rope directly to wood. Apply it generously along the edge of the sign where the rope will sit and press firmly for about 30 seconds. Allow it to cure according to the label, usually 24 hours, for a durable hold. This method avoids hardware marks but may not withstand heavy pulling forces or outdoor exposure without additional support.
Stapling offers quick mechanical fastening. Use a heavy-duty staple gun with stainless steel staples to prevent rust. Space staples every 2 to 3 inches along the rope path. Before stapling, wrap each rope end with clear packing tape or bind tightly with thin wire to keep fibers together and prevent fraying. After stapling, cover the staples with wood filler or paint to hide them and protect from catching on clothing or skin.
Knotting is practical when you prefer a visible, rustic look with no metal or glue. Drill holes near the sign’s top edges, slightly larger than the rope diameter. Thread the rope through and tie a secure stop knot, such as a figure-eight or double overhand knot. Leaving about 4 inches of rope inside the hole improve grip and prevents slipping. Coat the knot ends with fray preventer liquid or a dab of clear nail polish to keep them neat. This method works best with natural fiber ropes and signs with predrilled holes.
Screwing rope in place combines mechanical strength with adjustability. Insert 1.5-inch long wood screws with large washers through the rope against the wood to clamp it down. Before screwing, coil the rope end tightly and fix it with hot glue or a dab of epoxy to maintain shape and prevent slippage. Tighten screws just enough to hold firmly without cutting into the rope. This approach suits thicker, harder woods and situations needing frequent rope adjustment or replacement.
Preventing the rope from slipping depends on how well the ends are secured and the rope tension. Always finish rope ends with fray prevention, such as whipping thread or liquid sealants. If the rope is smooth or synthetic, roughen it slightly with sandpaper before gluing or stapling to improve adhesion. For outdoor signs, choose UV-resistant rope and corrosion-resistant fasteners to maintain strength over time.
Each technique involves tradeoffs: adhesive keeps appearance clean but may lack strength over time; staples and screws provide solid hold with some visible hardware; knots fit a handmade style but need precise sizing and treatment to avoid slipping. Combining methods can offer extra durability, like knotting plus adhesive or stapling combined with glue. Experiment based on your sign size, rope type, and intended use to find the best method.
Customizing Rope Signs with Letters and Designs
Adding rope lettering or shapes gives your hanging sign a personal touch and a unique texture. You can form rope into letters or designs by cutting it carefully, tracing around a template, and securing it with glue or upholstery tacks. This customization makes the sign stand out and reflects your style.
Choosing Fonts and Designs
Select simple fonts for your rope letters, such as block or cursive styles, since intricate fonts can be difficult to shape with rope. Bold, straightforward letters offer clean edges and look good when formed from thick ropes. Sketch your design on paper first to preview the layout and size.
For shaping fun designs, coastal or nautical themes work well and match the rope’s texture. Letters and shapes like waves, anchors, or stars improve the marine feel. You can find printable templates online or create your own by drawing directly on paper or cardboard. Templates let you maintain consistent letter size and spacing.
Tracing and Laying Out Rope Letters
Use your paper or cardboard templates to trace the letters onto your wooden sign with a pencil. The tracing guides where you’ll place the rope. Arrange the rope loosely along the traced line before attaching to check fit and alignment.
To cut rope accurately, measure the total length needed for each letter or shape plus about 1 to 2 inches of extra rope for knotting or overlap. Thick rope usually requires sharp scissors or a utility knife. Lightly taping the cut ends prevents fraying. Knotting the ends after attaching adds a polished look and keeps the rope from unraveling.
Securing Rope Letters to Wood
Attaching rope designs requires strong adhesives or small upholstery tacks. Hot glue works well for indoor signs, while exterior wood glue or small finishing nails suit outdoor projects. Upholstery tacks provide a decorative, rustic hold and are easy to press in with a hammer. Follow these steps to attach your rope lettering:
- Cut the rope for each letter, adding extra length for knots.
- Place the rope along the traced outline and adjust the fit.
- Apply a line or dots of glue on the wood along the outline.
- Press the rope firmly into the glue, starting from one end and working along the design.
- For added security, gently hammer upholstery tacks every 3 to 4 inches along the rope’s length.
- Knot the rope ends neatly and trim any excess length.
- Allow glue to dry for at least 24 hours before handling the sign.
Use gloves when hammering upholstery tacks to avoid injury, and always test glue on a scrap piece before applying to your finished sign.
Methods to Hang Your Finished Rope Sign Safely
Hanging your finished rope sign safely means choosing the right hardware or knot method for the surface and weight of your sign. Whether using eye hooks, nails, or alternative fasteners, each option offers different levels of stability and style. Proper installation and safety precautions keep your sign secure and your walls or fences undamaged.
Using Eye Hooks and Nails
Eye hooks combined with nails or screws provide a durable way to hang rope signs, especially on wood surfaces like fences or studs behind drywall. Start by drilling pilot holes for the eye hooks to prevent wood splitting, using a drill bit slightly smaller than the screw part of the eye hook. Space the eye hooks about 6 inches apart along the top edge of your sign if it is wide, to reduce sway and wear on the rope.
Once the eye hooks are in place, thread the rope through and tie a secure knot, such as a bowline or double overhand knot, on each end of the rope to prevent slipping. Attach the eye hooks to sturdy nails or screws on your wall or fence. Nails or screws can be spaced roughly 6 inches apart to hold the hooks firmly; three points of contact under a medium-size sign usually offer good stability without making installation complicated. Using a level helps you hang the sign straight.
Knot Techniques for Hanging
Knots are essential for securing the rope ends to prevent the sign from falling. A strong and simple knot like the bowline creates a fixed loop that won’t slip. To tie a bowline, make a small loop about 6 inches from the rope end, pass the loose end through this loop, around the standing part of the rope, and back down through the loop. Pull firmly to set. This knot holds under tension but unties easily when needed.
Another option is a double overhand knot, which increases friction for a tighter hold. For extra security, you can combine a double overhand knot with a backup knot near the loop. When knotting, leave enough rope length on each end (at least 4 inches) for adjusting and retying. Test the knot by pulling firmly before hanging the sign to ensure it won’t slip or loosen.
Alternatives Like Command Strips or Wire
Non-damaging mounting options like Command Strips are popular for lightweight signs on smooth surfaces. These adhesive strips attach cleanly and remove without residue, costing about $5 to $15 for a pack depending on size and strength. For example, two small strips placed on the back corners of a sign roughly 12 by 18 inches can support up to 4 pounds safely.
Wire hangers are another alternative if you want to hang a framed sign on an existing screw or nail. Attach metal hangers or sawtooth hangers to the back of the sign, then connect a length of wire between the two points. Use wire cutters and needle nose pliers to twist and secure the wire. This method is especially useful if wall studs or fence posts are irregular or if you want to reposition the sign easily. Here’s a quick comparison of common hanging methods to help you pick the best option for your sign:
| Hanging Method | Ideal Surface | Weight Capacity | Installation Effort | Cost Range | Damage Risk to Wall |
|---|---|---|---|---|---|
| Eye Hooks + Nails/Screws | Wood walls, fences | Up to 20 lbs | Moderate (drilling required) | $3 – $10 | Low (small holes) |
| Knot on Rope (with hardware) | Varies | Depends on knot and rope strength | Low (knot-tying skill) | Minimal (just rope cost) | None |
| Command Strips | Smooth walls, drywall, glass | 1 – 4 lbs per strip | Easy (peel and stick) | $5 – $15 per pack | None (removes cleanly) |
| Wire Hangers + Sawtooth | Drywall, existing screws | Up to 15 lbs | Moderate (tools needed) | $5 – $12 | Low (small holes) |
Taking safety precautions reduces accidents and wall damage. Use a stud finder to locate sturdy spots before screwing or nailing. Avoid overloading the hooks or strips past their rated capacity. Use a level to keep your sign straight and make sure ropes or wires aren’t frayed or compromised. Wear safety glasses when drilling and keep your work area clear.
Common Mistakes and How to Fix Them in Rope Signs
Slipping rope, weak attachments, and fraying ends are the three most common problems you might encounter when making rope hanging signs. The rope can slide off or become loose if it’s not secured tightly, causing the sign to hang unevenly or fall. Weak attachments happen when the rope isn’t anchored firmly to the wood, which can lead to breakage under the sign’s weight. Fraying occurs when rope ends are left untreated and start unraveling, which not only looks messy but also weakens the hanging points.
To fix a loose rope, you need to tighten and reinforce the attachment point. Remove the rope from the current hole or hook, then rethread it while pulling firmly to remove slack. Add extra knots, such as double or figure-eight knots, at the base of the rope where it meets the wood. Applying a small amount of strong adhesive like hot glue inside the knot or where the rope touches the wood increases grip. Let the glue dry fully before hanging the sign again to ensure it holds.
Preventing fraying starts with sealing the rope ends right after cutting. Use methods like melting synthetic rope ends with a lighter or applying clear-drying craft glue or tape tightly around the cut ends for natural fiber ropes. You can also wrap the ends with thin twine or thread for a neat finish. Doing this keeps fibers from unraveling over time during handling or outdoors exposure.
- Keep rope lengths slightly longer than needed to allow easy knotting and adjustments.
- Line a few inches of traced lettering on the sign with hot glue, then quickly set the rope on top for a secure bond.
- Use quality rope with a tight weave to reduce fraying and slipping risk.
- Tape a barbecue stick to rope ends temporarily when threading through holes to prevent snagging or fraying.
- Check and tighten knots periodically after hanging to maintain security.
- Trim frayed ends and reseal with glue or heat as part of regular maintenance.
Fixing a rope hanging sign usually doesn’t require special tools or expensive materials. Most fixes can be done with craft glue, a lighter, or common household tape costing just a few dollars. Signs that hang correctly should feel stable and taut, with knots resting firmly against the wood and no visible slipping. If a sign is still loose or the rope is fraying continuously, consider switching to a thicker or synthetic rope designed for durability. Taking time to secure attachments and treat rope ends upfront saves frustration and extends the life of your DIY sign.
Durability and Care for Outdoor Rope Hanging Signs
Creating rope hanging signs for outdoor use is definitely possible, but you need to consider how weather conditions will affect both the rope and the wooden sign. Moisture, sunlight, wind, and temperature changes can cause wood to warp, crack, or rot over time. Meanwhile, natural fiber ropes like jute or sisal tend to absorb water, weaken, and break down faster when exposed to the elements. Choosing the right materials and doing regular maintenance can help your outdoor rope sign last for years.
Opt for exterior-grade wood like cedar, redwood, or pressure-treated pine, which naturally resist decay and insects better than softer woods. Seal the wood with a high-quality outdoor wood sealer or spar varnish, a few coats applied with a brush will block moisture and UV damage. Let each coat dry fully, usually 4 to 6 hours, and keep the sign in a shaded spot if you can. Synthetic ropes made from polypropylene or nylon hold up much better outdoors than natural ropes because they repel water and resist mildew. If you prefer a natural look, consider a synthetic rope coated with weatherproofing agents. Expect to spend around $15 to $30 on a good synthetic rope, and $10 to $25 on sealers at most hardware stores.
Proper maintenance extends your sign’s lifespan significantly. Clean the rope and wood every 3 to 6 months by wiping down with a damp cloth to remove dirt and mildew. For tougher grime on the wood, use a gentle soap solution and soft-bristle brush, then rinse with clear water. Avoid harsh chemicals that could damage the finish or rope fibers. Check the rope knots and attachments regularly, tighten any loose knots and replace frayed rope sections immediately. Reapply wood sealer annually or if you notice signs of wear. Take down the sign during extreme weather like heavy rain or snow if possible, especially in regions with freezing temperatures, which cause wood to crack and fibers to become brittle.
A simple care checklist would be: use weather-resistant wood and synthetic rope, seal the wood thoroughly before hanging, clean every few months, inspect and repair rope knots and wood condition on schedule, and re-seal wood yearly. These steps keep your sign looking crisp and sturdy long term. Signs exposed to direct sunlight and constant rain likely need more frequent cleaning and sealing than those under a porch or awning. Regular attention avoids costly repairs or replacements caused by water damage or UV fading.
Keep your rope hanging sign out of direct sun and heavy rain when possible to significantly slow wear and tear from UV rays and moisture.
Step-by-Step Action Plan for Making Your Rope Hanging Sign
Follow these clear steps to create and hang your custom rope sign with confidence.
- Before you start: Gather all materials including wood, rope, paint or stain, and tools. Check that your rope thickness matches the weight of your sign for secure hanging.
- Day 1: Prepare your wooden board by sanding and applying a finish. Confirm a smooth surface and fully dried finish before moving on.
- Day 2: Attach the rope using knots or eye hooks, ensuring the connection is tight and stable. Test the rope’s hold by gently pulling it before adding any decorations.
- Day 3: Customize your sign with letters or designs using paint or vinyl decals. Allow the decoration to dry completely to avoid smudging.
- Day 4: Install hardware like D-rings or hooks on the hanging surface. Double-check that everything is level and securely fastened.
- Day 5: Hang your sign on the prepared surface. Inspect the sign’s stability and rope tension once in place.
- After 1 week: Inspect your sign in different weather conditions if outdoors. Tighten or replace any parts if you notice wear or looseness.
Frequently Asked Questions
How Do I Measure the Right Length of Rope for My Hanging Sign?
Measure the distance between where you want to hang the sign and add about 20 inches extra for the hanging loop. This extra length ensures you have enough rope to tie secure knots and create a comfortable hanging height.
Can I Use Different Types of Glue to Attach Rope to Wood?
Yes, but use a strong adhesive like E6000 or Bostik No More Nails for a secure hold. These glues are designed to bond rope and wood without weakening over time or with exposure to the elements.
What’s the Best Knot to Secure the Rope on a Wooden Sign?
A simple overhand knot or a double knot works well to keep the rope tight and stable. Make sure the knots are pulled snugly against the back of the sign to prevent slipping or loosening.
Can I Add Lights to My Rope Hanging Sign?
Yes, neon rope lights can be attached around or on the sign to add illumination. Use waterproof rope lights and secure them carefully to maintain safety and avoid damaging the sign.
How Do I Maintain a Rope Hanging Sign Outdoors?
Apply a protective finish to the wood and use weather-resistant rope like jute or sisal. Also, avoid prolonged exposure to direct rain or sun to extend the life of the sign.
What’s a Quick Fix If the Rope Starts Fraying?
Wrap the frayed area with strong adhesive tape or tie a tight knot to stop further unraveling. Regular inspections prevent damage from worsening and keep the sign securely hung.
The Bottom Line
Creating a rope hanging sign lets you craft a personalized piece that suits your style and space. Start by preparing a solid wood base and secure rope attachment for a safe display. Once your sign is up, keep an eye on it and adjust as needed to maintain its look and durability.